Blooms in a Bottle: Your DIY Guide to a Charming Upcycled Centerpiece
There’s something inherently joyful about creating beauty from the overlooked and unused. In this DIY guide, we’ll take you through the enchanting process of transforming a simple wine bottle into a captivating floral centerpiece that promises to add a bespoke charm to your living space. It’s eco-friendly, wonderfully creative, and surprisingly easy. So roll up your sleeves, and let’s turn those leftover bottles into vases full of vitality and bloom!
Blooms in a Bottle: Your DIY Guide to a Charming Upcycled Centerpiece
Blooms in a Bottle: Upcycled Wine Bottle Flower Arrangement DIY
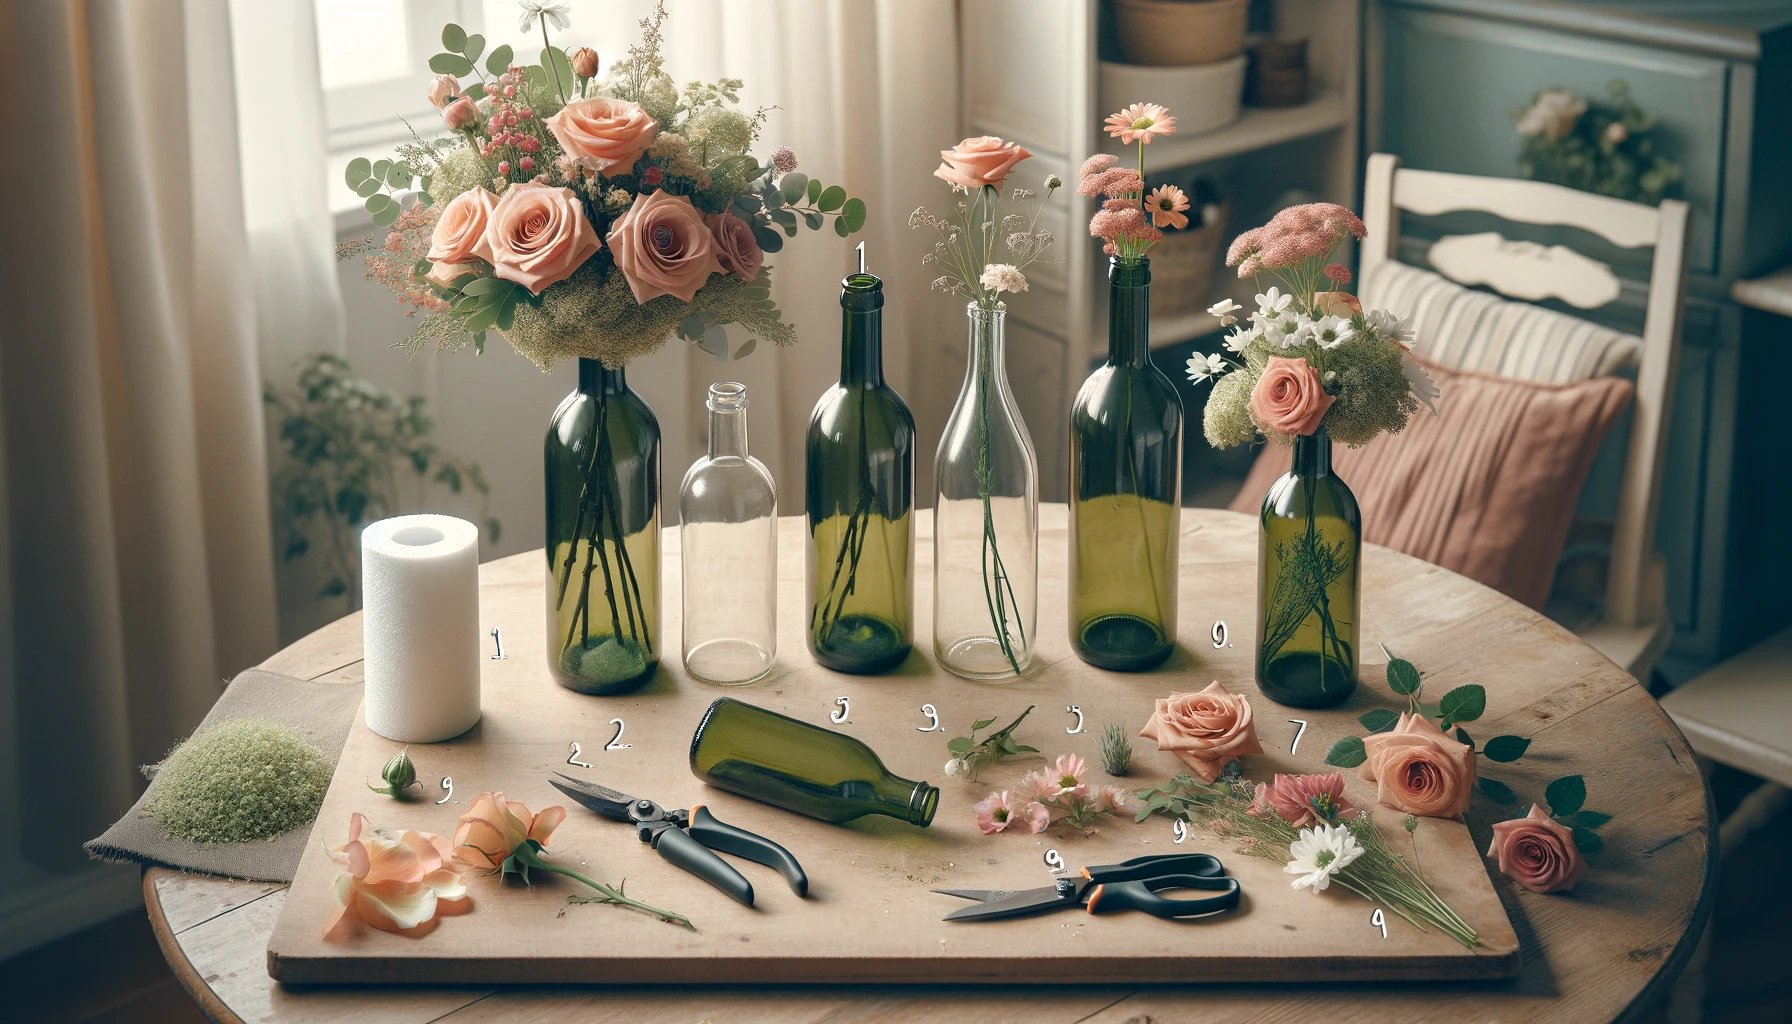
Empty wine bottles are often recycled and forgotten—but what if you could transform them into stunning floral vases? This simple and elegant DIY lets you do just that, turning an ordinary bottle into a captivating décor piece filled with fresh blooms.
Perfect for centerpieces, shelf styling, or a thoughtful handmade gift, this "Blooms in a Bottle" project invites you to upcycle with grace and bring the natural beauty of flowers into your space—without needing a florist's touch.
Materials Needed
Before you begin your floral adventure, gather the following:
Empty wine bottle(s) (cleaned and label-free)
Fresh flowers (roses, tulips, daisies, lilacs, etc.)
Pruning shears or sharp scissors
Green floral foam (optional for added stability)
Clean water
Optional: Frosted spray paint for a misty, sea-glass finish on the bottle
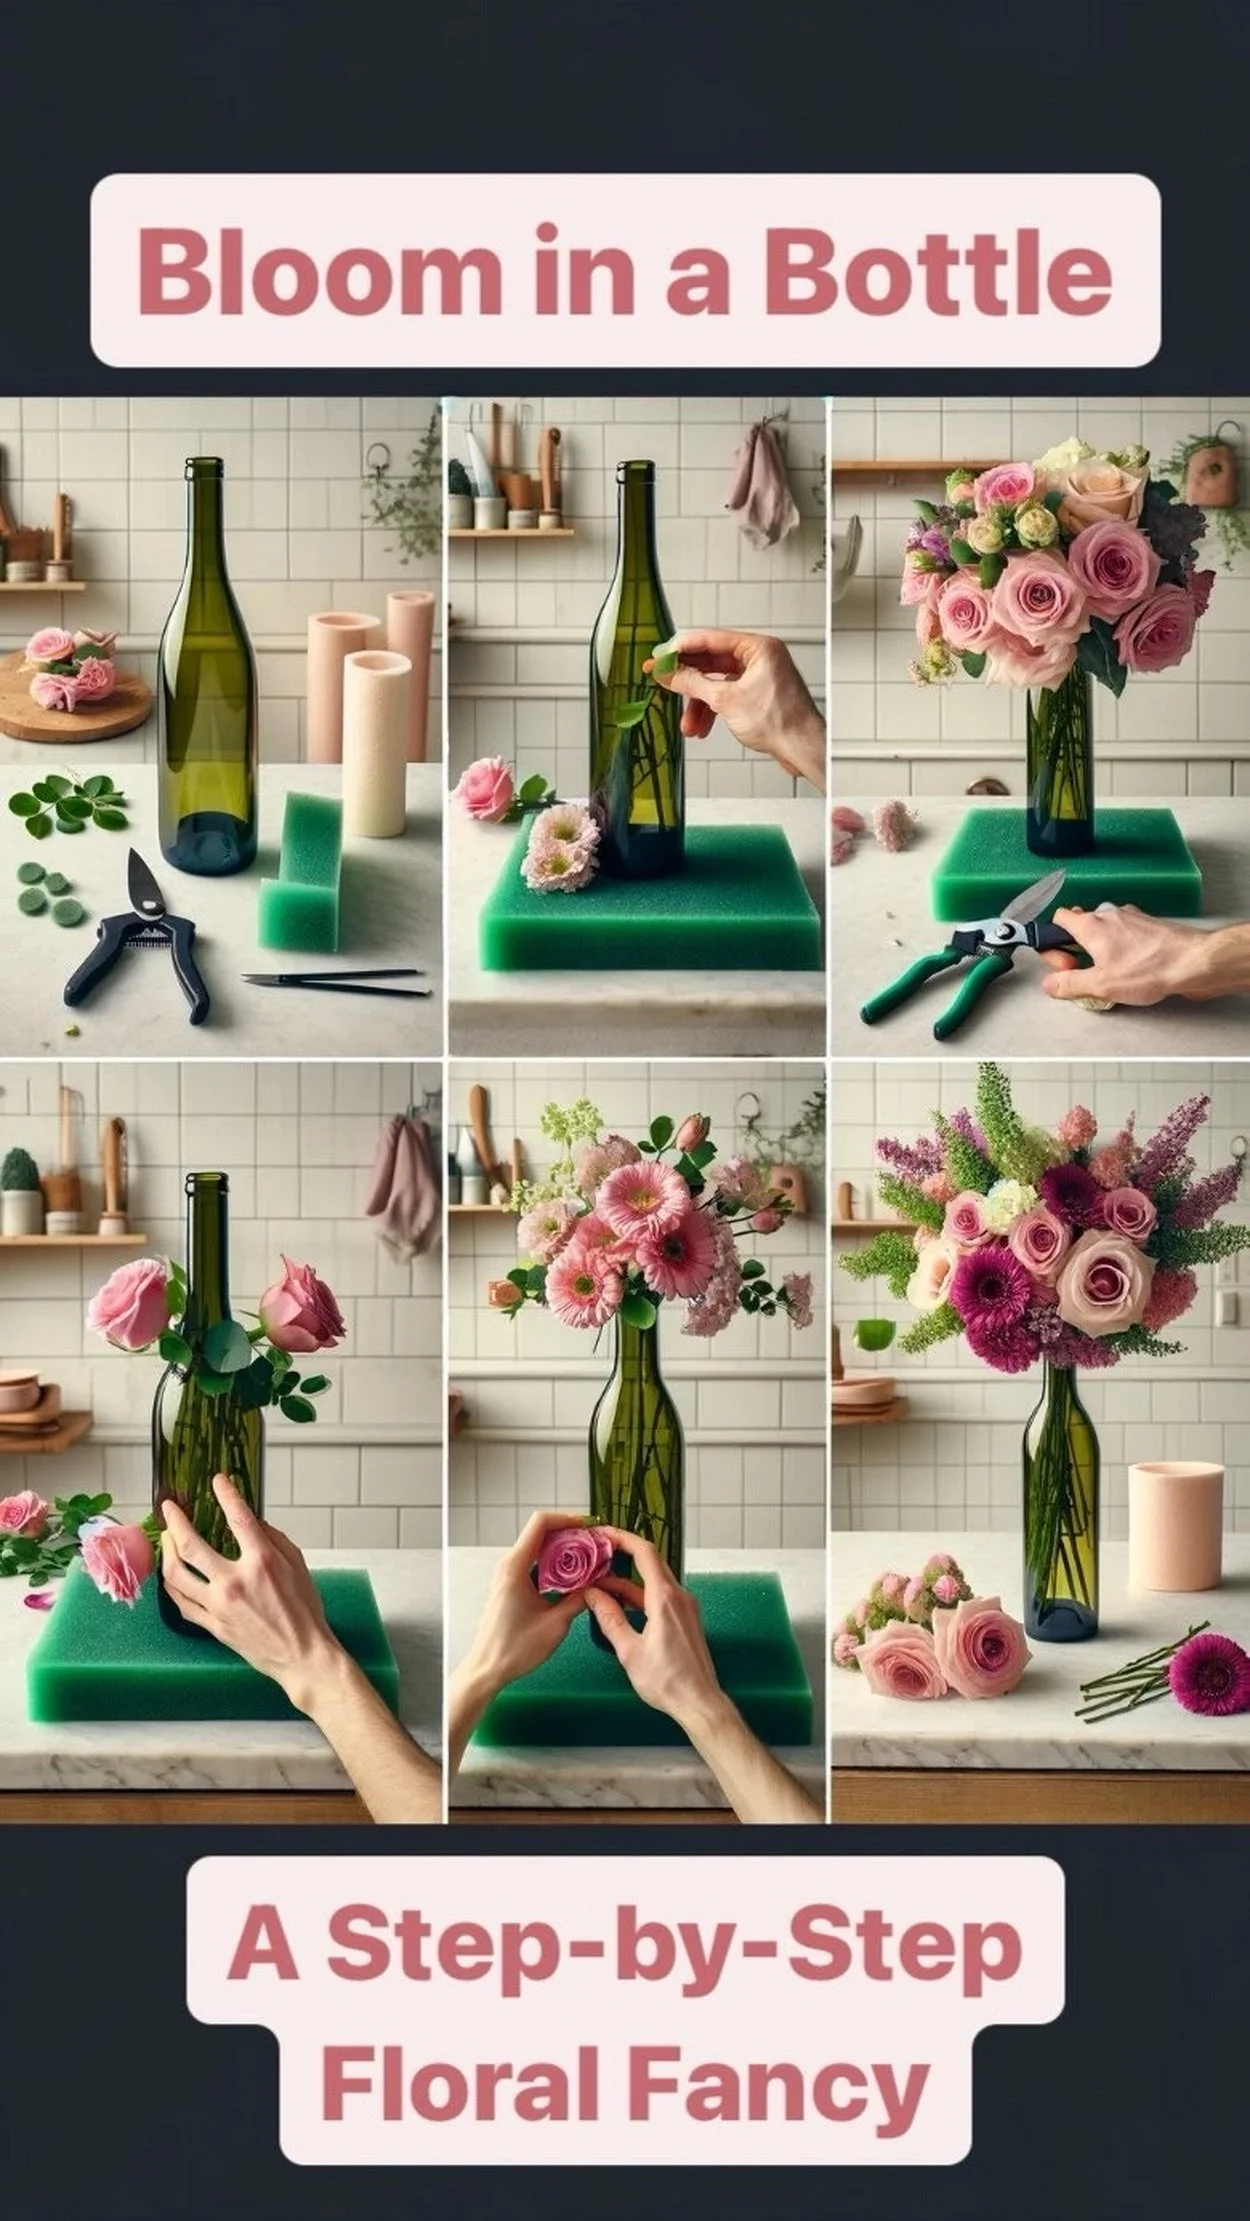
Step-by-Step: Creating Your Wine Bottle Flower Arrangement
Step 1: Select Your Bottle
Choose a wine bottle that speaks to your style—clear, colored, tall, or uniquely shaped. Clean it thoroughly with warm soapy water and remove the label using a vinegar soak or adhesive remover.
Want a frosted look? Try a light coating of sea glass spray paint for a dreamy, misty effect.
Step 2: Prep the Blooms
Let your flowers soak in water for 15–30 minutes to rehydrate.
Trim each stem at an angle using pruning shears to promote water absorption.
Remove leaves that would sit below the waterline to avoid rot and cloudiness.
Step 3: Secure the Base (Optional)
If you're using floral foam, soak it in water and place it on a dish or inside a small container beneath your bottle to help prevent tipping. This is especially helpful if you’re using tall or top-heavy stems.
Step 4: Build Your Arrangement
Start building your bouquet inside the bottle:
Begin with larger focal flowers to create your shape.
Add medium-sized blooms around them for body.
Fill in with smaller flowers, greenery, or wispy accents like baby's breath or eucalyptus.
Choose balanced symmetry or let it flow freely for a wild, natural aesthetic—there’s no wrong way to design your bouquet!
Step 5: The Final Touches
Take a step back and view your arrangement from all angles. Adjust as needed. Fill the bottle with fresh water, and place it where it can shine—on a windowsill, mantle, table, or shelf.
Change the water every 2 days to keep your blooms vibrant and healthy.
Shop the Idea
Find everything you need to recreate this fresh, upcycled look:
Style it With
Enhance your wine bottle centerpiece with these complementary touches:
Conclusion: From Empty to Elegant
With just a few fresh flowers and an empty bottle, you've created a work of art—a vase that's thoughtful, beautiful, and sustainable. This DIY project is proof that beauty often begins with what we already have.
So the next time you enjoy a glass of wine, don’t toss the bottle. Turn it into a vessel for joy, creativity, and blooming life.
Whether it’s gracing your table or being gifted to a friend, your “Blooms in a Bottle” arrangement is more than just a centerpiece—it's a celebration of repurposing, nature, and your own artistic touch.
Blooms in a Bottle: Your DIY Guide to a Charming Upcycled Centerpiece
To help you create your charming upcycled centerpiece, I’ve compiled a list of additional resources. These blogs and articles provide a wealth of information on DIY projects, upcycling techniques, and decor ideas that can complement our guide and help you achieve your desired centerpiece.
Upcycle This DIY That: Offers a comprehensive guide on 27 Easy DIY Christmas Centerpieces for a Festive Feast. It provides a step-by-step guide on how to prepare various centerpieces, including tips on how to make them gorgeous and easy to create.
A Hundred Affections: Features an Upcycled Patriotic DIY Farmhouse Centerpiece that is easy and cheap to make. It provides a detailed guide on how to transform a cardboard drink holder into a table centerpiece.
Designing Vibes: Shares a DIY Centerpiece Using Upcycled Thrift Decor. It includes detailed instructions on how to prepare the centerpiece using three cheap thrift vases of varying size and shape.
Honestly Modern: Provides an Upcycled DIY Easter Centerpiece guide. It offers a step-by-step tutorial on how to create a centerpiece using an empty cardboard wine crate with divider.
Remember, the joy of DIY lies in experimentation and personalization. Use these resources to inspire your creativity and make a centerpiece that suits your personal style. Happy crafting! 🎨