
How to Make a Twine-Wrapped Basket — Crafting Elegance from Simplicity
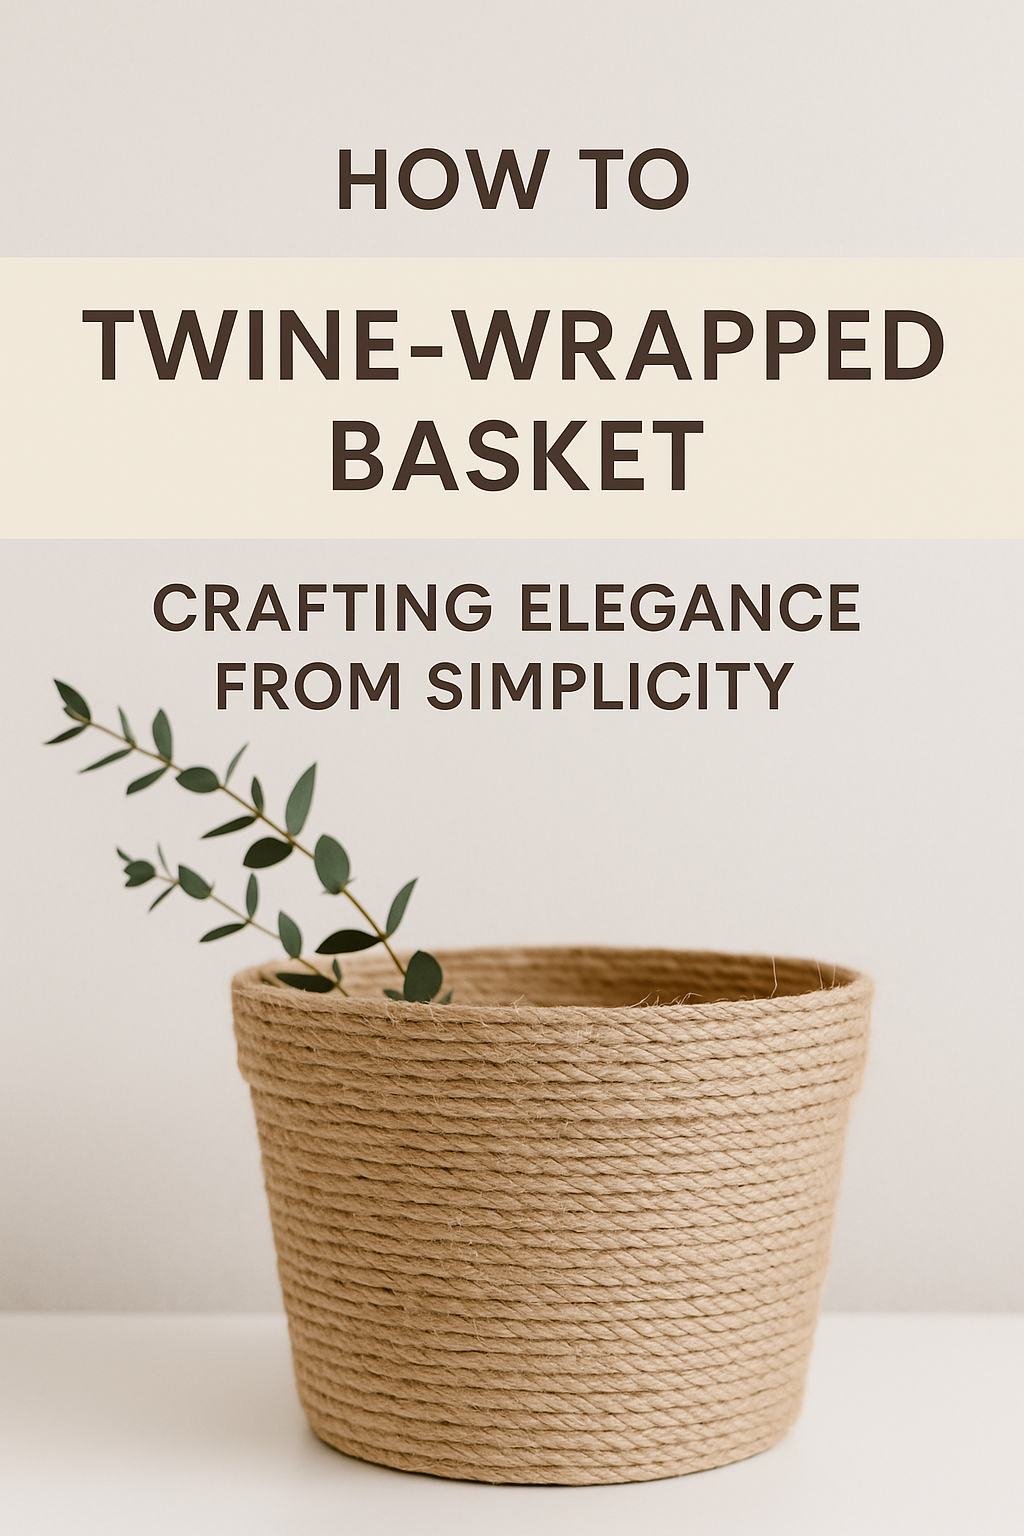
In the world of home décor, the beauty often lies in the details. It's the little handcrafted elements that infuse your space with warmth and personality. Today, we're diving into the rustic charm of twine-wrapped baskets — a DIY project that's as simple as it is versatile. Whether you're an experienced crafter or a novice looking to dabble in homemade décor, this step-by-step guide will help you weave magic with just twine, glue, and a commonplace kitchen item.
Twine-Wrapped Basket DIY: Crafting Elegance from Simplicity
Twine-Wrapped Basket DIY: Crafting Elegance from Simplicity https://t.co/HA1vDwNnby pic.twitter.com/9NL3MWt3or
— DIY Dimension (@diydimension) April 12, 2024
How to Make a Twine-Wrapped Basket Using a Cooking Pot: Rustic DIY Magic
There’s something incredibly rewarding about turning everyday items into stylish, functional home decor. If you’re a fan of rustic textures, natural fibers, and creative sustainability, this DIY twine-wrapped basket project is for you. Using a simple cooking pot as a mold and natural jute rope, you’ll create a custom storage basket that looks handcrafted and high-end—but comes straight from your craft table.
Whether you’re organizing a bathroom, dressing up a planter, or gifting something handmade, this project is equal parts soothing and satisfying.
Materials You’ll Need
Before you start crafting, gather these essentials:
A cooking pot (acts as your mold)
Thick natural jute twine or rope
Strong adhesive glue (like E6000 or Aleene’s Tacky Glue)
Scissors
Clear cellophane wrap
Optional: Clear sealant spray (for outdoor durability)
Tip: Choose a pot with a shape you love—the basket will take its exact form.
Step-by-Step Guide: The Twine Basket Crafting Process
Step 1: Prepare Your Workspace
Lay out all your materials on a clean, flat surface. Use newspaper, a plastic sheet, or parchment paper to protect your table from glue spills or twine scraps. Have everything within reach for a smooth process.
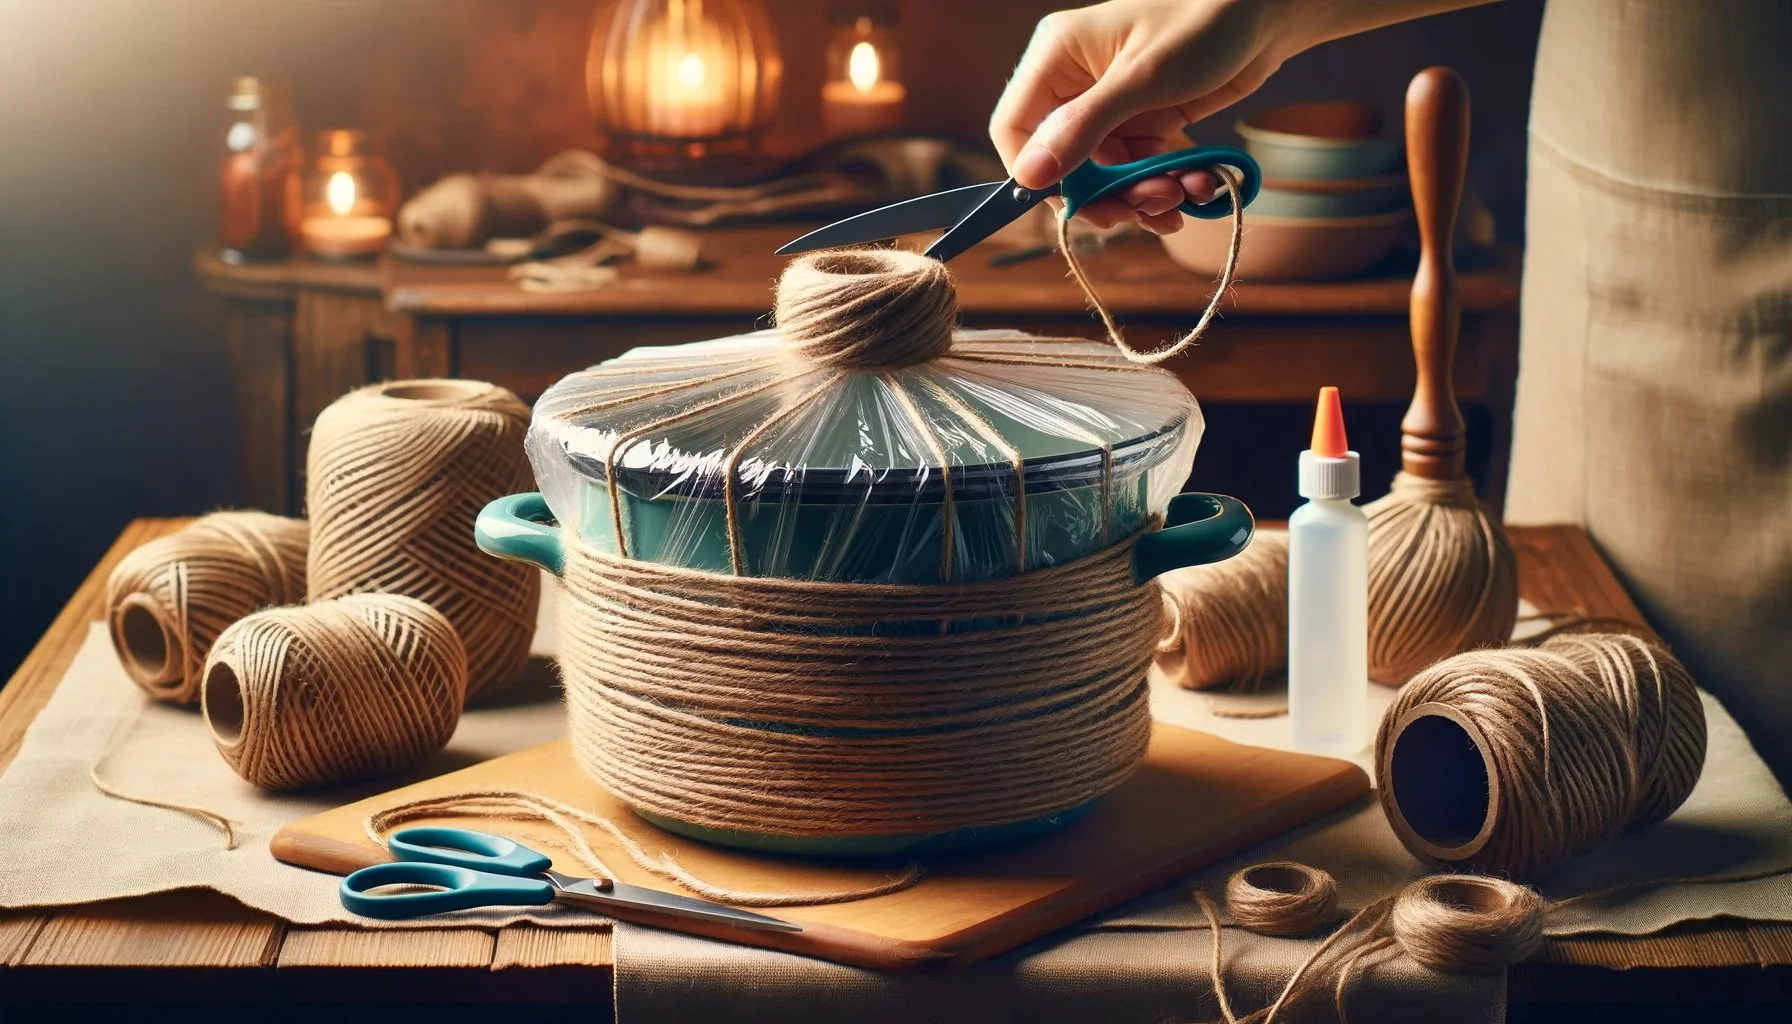
Step 2: Cover Your Mold
Wrap your cooking pot entirely with clear cellophane wrap. This acts as a protective barrier, ensuring the glue doesn’t stick to the pot and allows your basket to lift off easily once dry.
Step 3: Start the Base
Apply a ring of glue to the center bottom of the pot. Press your twine into the glue, coiling it tightly in a spiral pattern. This becomes the foundation of your basket. Continue wrapping in circles, gluing as you go.
Step 4: Build the Walls
As you reach the base’s edge, begin spiraling the twine up the sides of the pot. Work in small glue sections to prevent messiness. Press each layer firmly in place and let it partially set before adding the next. This step requires patience and consistency for a neat finish.
Step 5: Finish the Top
Once you reach the top edge of the pot, cut the twine cleanly, tuck the tail under the last coil, and glue it in place. Hold for a few seconds until it adheres securely.
Step 6: Let It Dry
Allow the entire structure to dry overnight. Don’t rush this step—the slower the dry, the stronger your basket will be.
Step 7: Remove the Mold
Once the basket feels firm, gently slide it off the pot. Peel away the cellophane wrap from the inside. You’ll be left with a lightweight, freestanding twine basket that mimics the shape of your original pot.
Step 8: Optional Sealant
If you want to reinforce your basket—especially for outdoor use or high-traffic areas—spray it with a clear matte or glossy sealant. This helps protect against moisture, fraying, and everyday wear.
Shop the Idea
Recreate this rustic-chic twine basket with these quality supplies:
Style it With
Make your new basket part of a bigger aesthetic moment:
Conclusion: From Twine to Treasure
This project proves that beautiful things often come from the simplest materials. With some twine, a bit of glue, and a kitchen pot, you've created a handcrafted piece of decor that’s both functional and full of character.
DIY projects like this aren't just about the end result—they’re about the process, the creativity, and the satisfaction of crafting something with your own two hands. Whether you're styling shelves, organizing supplies, or gifting something meaningful, your twine-wrapped basket is a story woven in loops and love.
So get crafting, and let your home reflect your hands.

Twine-Wrapped Basket DIY: Crafting Elegance from Simplicity
Welcome to a world of texture, warmth, and handmade beauty. As you embark on this Twine-Wrapped Basket DIY adventure, imagine the soft fibers of twine slipping through your fingers, the rhythmic weaving, and the satisfaction of creating something both functional and elegant. Whether you’re a seasoned crafter or a curious beginner, this project invites you to slow down, savor the process, and infuse your closet space with a touch of rustic charm.
Now, let’s explore the resources that will empower you to craft your own twine-wrapped masterpiece:
Quality Sources for Twine-Wrapped Basket Inspiration
Beginner Basket Weaving Kit - Twined Linen Dish: Dive into the world of basket weaving with Flax & Twine’s beginner kit. Create a petite Twined Linen Cord Dish using their all-natural 2.5mm linen cord. The kit includes a bowl form, darning needle, and video techniques to guide you step by step. Plus, it makes not one but two charming dishes! Perfect for jewelry, trinkets, or a tiny plant.
DIY Twine Basket: Kismet Kreations shares a simple yet decorative twine basket tutorial. Learn how to wrap twine around a base, create height, and add a braided touch for extra flair. This project is perfect for organizing small items or displaying dried flowers.
Easy Beginner Basket Weaving Coiled Basket Kit: If you’re ready to level up, try Flax & Twine’s coiled basket kit. It combines 6mm jute rope and daytime linen fingering weight yarn. The Naomi Nesting Bowls pattern and video tutorial will guide you through the process. Don’t forget your darning needle and stitch marker!
Remember, each stitch tells a story, and every imperfection adds character. As you weave, infuse your intentions into the fibers—whether it’s joy, calm, or simply the pleasure of creating. Your closet space will thank you for the handmade touch.
Happy crafting! 🌿🧵✨


