Illuminate Your Space with a DIY Milk Jug Lantern: A Brilliant Boy Scout Hack
Illuminate Your Space with a DIY Milk Jug Lantern: A Brilliant Boy Scout Hack
There’s a kind of magic in the flicker of soft light. The kind that hums against canvas walls during a camping trip, dances across a child’s bedroom during a rainy night, or gives life to a backyard patio after the sun has dipped below the trees. Light is more than just utility. It’s ambiance. It’s comfort. It’s the feeling of “home,” no matter where you are. And sometimes, it comes from the most unexpected places.
That’s the spirit behind this charming little project: a DIY milk jug lantern, born from an old-school Boy Scout hack and elevated into something you’ll find yourself making again and again. It’s budget-friendly, sustainable, and surprisingly beautiful. Whether you’re planning a weekend camping trip, looking to enchant your backyard with eco-chic lighting, or crafting an emergency light source that actually looks good on your shelf—this project delivers on all fronts.
This isn’t just a craft. It’s a small transformation. A humble milk jug becomes a warm glowing orb, gentle and powerful. You’re not just repurposing trash. You’re creating light where there was none.
Rediscovering the Glow: The Campfire Origins
If you ever spent time in a scout troop, you might remember this one. Tucked in between knot-tying and pocketknife lessons came the clever, almost laughably simple lantern made from a clean milk jug and a headlamp. Back then, it wasn’t about aesthetics. It was about surviving the night with whatever tools you had.
The idea? Strap a flashlight or headlamp around a translucent milk jug, and boom—you’ve got ambient lighting that softly fills the tent, perfect for reading a map, sorting gear, or telling ghost stories.
It was genius then, and it still is. But today, we’re giving it a glow-up.
Why This DIY Matters
We’re living in a time when people crave both beauty and function. We want our homes to be cozy sanctuaries, our adventures to feel intentional, and our materials to matter. That’s what makes this DIY project so satisfying. It checks all the boxes.
Eco-Friendly? Yes. You’re saving a plastic jug from the landfill and transforming it into something useful and stylish.
Budget-Conscious? Definitely. You can make one of these for just a few dollars with items you likely already have on hand.
Versatile? Beyond. Use it in your backyard, for power outages, as mood lighting for a dinner party, or night lights for the kids.
Beginner-Friendly? Absolutely. This craft is as simple as it gets. No hot glue burns. No messy painting. Just smart design and a sprinkle of creativity.
Aesthetic Meets Practical
What really sells this lantern is how good it looks despite how simple it is. The milky, frosted finish of the jug diffuses light into a warm, even glow. It’s softer than a bare flashlight, more inviting than a harsh LED.
You can even customize them. Wrap twine around the handle, stencil on botanical shapes, or tint the plastic with a bit of natural dye. Try glow-in-the-dark paint pens or mini dried flower bundles for decorative flair.
Shop Materials:
Search natural jute twine on Amazon
Search glow-in-the-dark paint pens on Amazon
Search mini dried flower bundles on Amazon
The Wellness Factor
We often underestimate the impact lighting has on our nervous system. Harsh overhead lights can keep us in a state of alert. Meanwhile, soft warm lighting helps cue the brain that it’s time to relax. This milk jug lantern isn’t just clever—it’s soothing.
If you want to explore other soft-lighting options that complement this project, you can also browse:
Search warm-toned LED puck lights
Search battery-powered Edison string lights
Light It Up: Uses for Your DIY Milk Jug Lantern
- Emergency Preparedness
- Outdoor Entertaining
- Children’s Sleepovers
- Cozy Reading Corners
- Camping Trips
Perfect Pairing:
Search rechargeable LED headlamp on Amazon
What You’ll Need to Get Started
All you really need is:
- A clean, translucent milk jug
- A reliable light source (like a flashlight or LED puck light)
- Optional decor (ribbon, stickers, paint, etc.)
For added glow and control:
Search LED puck lights with dimmer on Amazon
Search battery-operated fairy lights
Customization Ideas
Rustic Look: Wrap with jute and stencil a pine tree silhouette.
Kids’ Room: Use glow-in-the-dark dinosaur decals.
Garden Party: Add faux moss, ribbon, and a warm LED light.
Zen Corner: Minimalist jug with a rechargeable orb.
Crafting as a Ritual
There’s something deeply rewarding about turning everyday items into something unexpected. A jug, a light, a few minutes of your time—and suddenly you have something beautiful, useful, and uniquely yours.
Sit on your back porch, sip your tea, and watch the soft glow flicker like fireflies in a jar. These moments matter.
Before We Begin...
Now that we’ve set the tone, gathered our materials, and envisioned all the ways your milk jug lantern can bring light and intention into your space, it’s time to get hands-on.
Let’s light it up.
💡 Pro Tip: Why These Are Amazon Search Links (and Why “Add to Cart” Really Helps)
You might notice that every “Shop the Look” section uses Amazon search result links rather than one specific product. That’s not a glitch—it’s a strategy. Adding to cart during your first visit is what helps support this blog.
Thank you for being here. Thank you for shopping with intention. 💛

Illuminate Your Space with a DIY Milk Jug Lantern: A Brilliant Boy Scout Hack
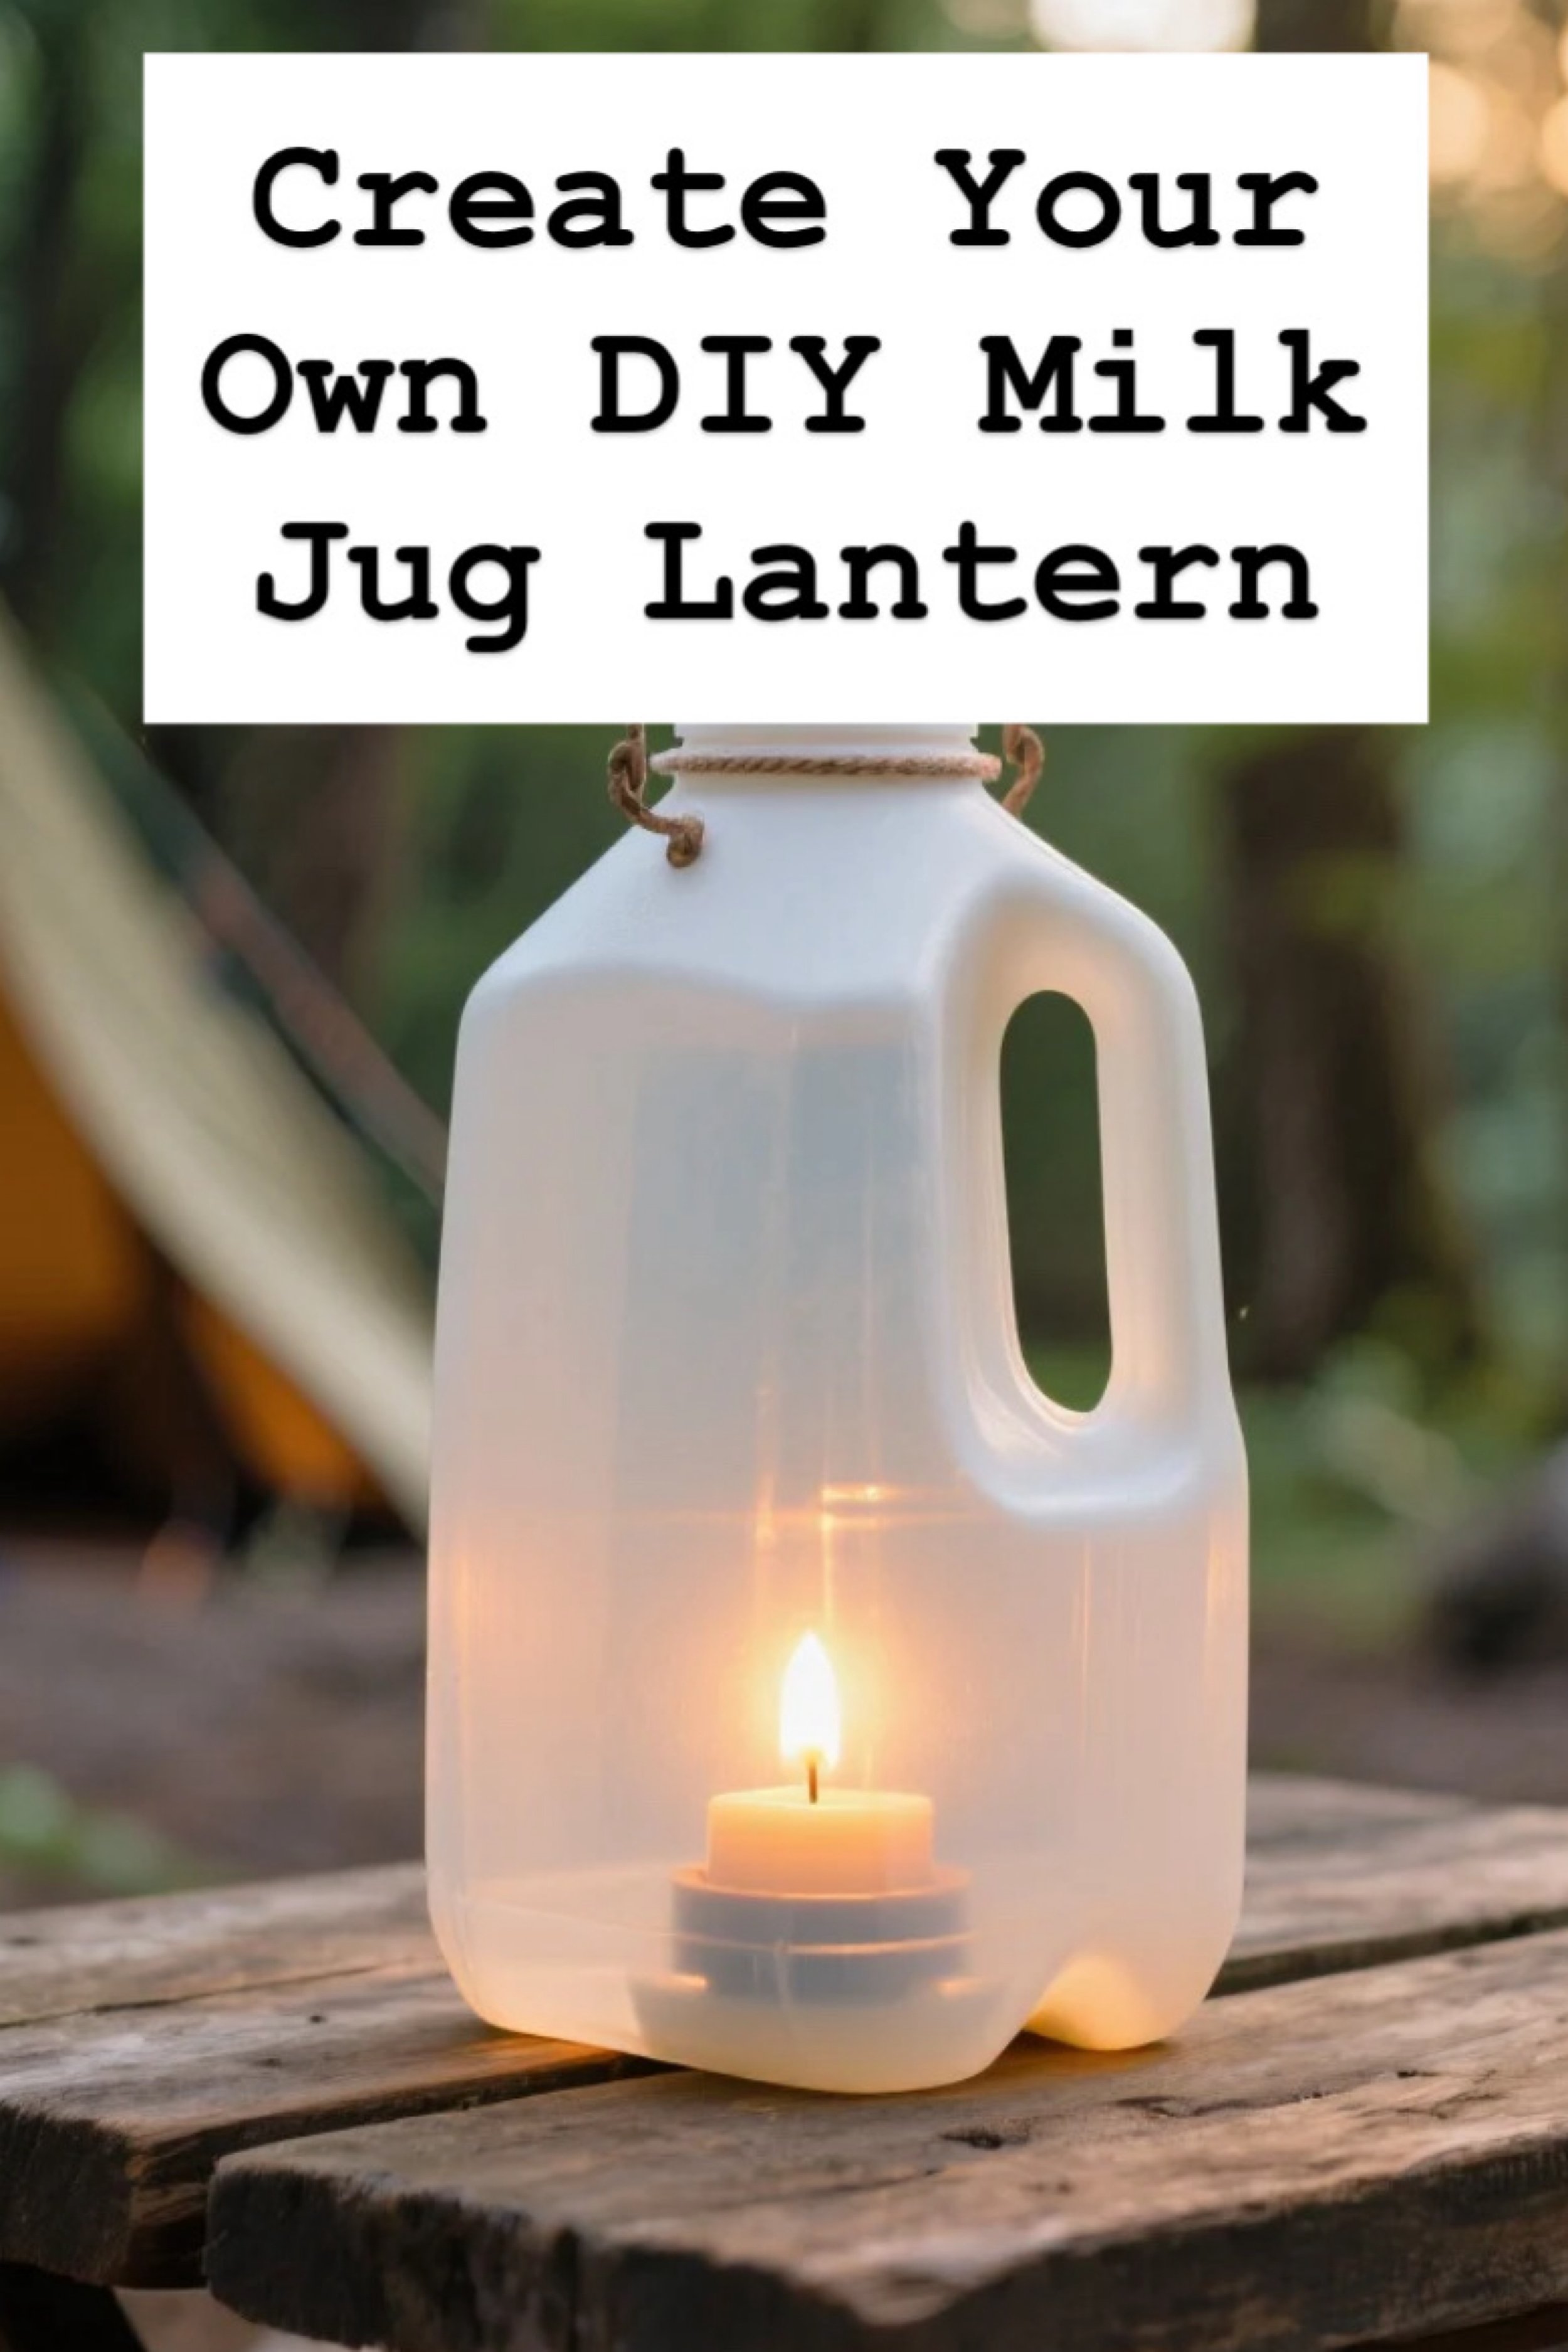
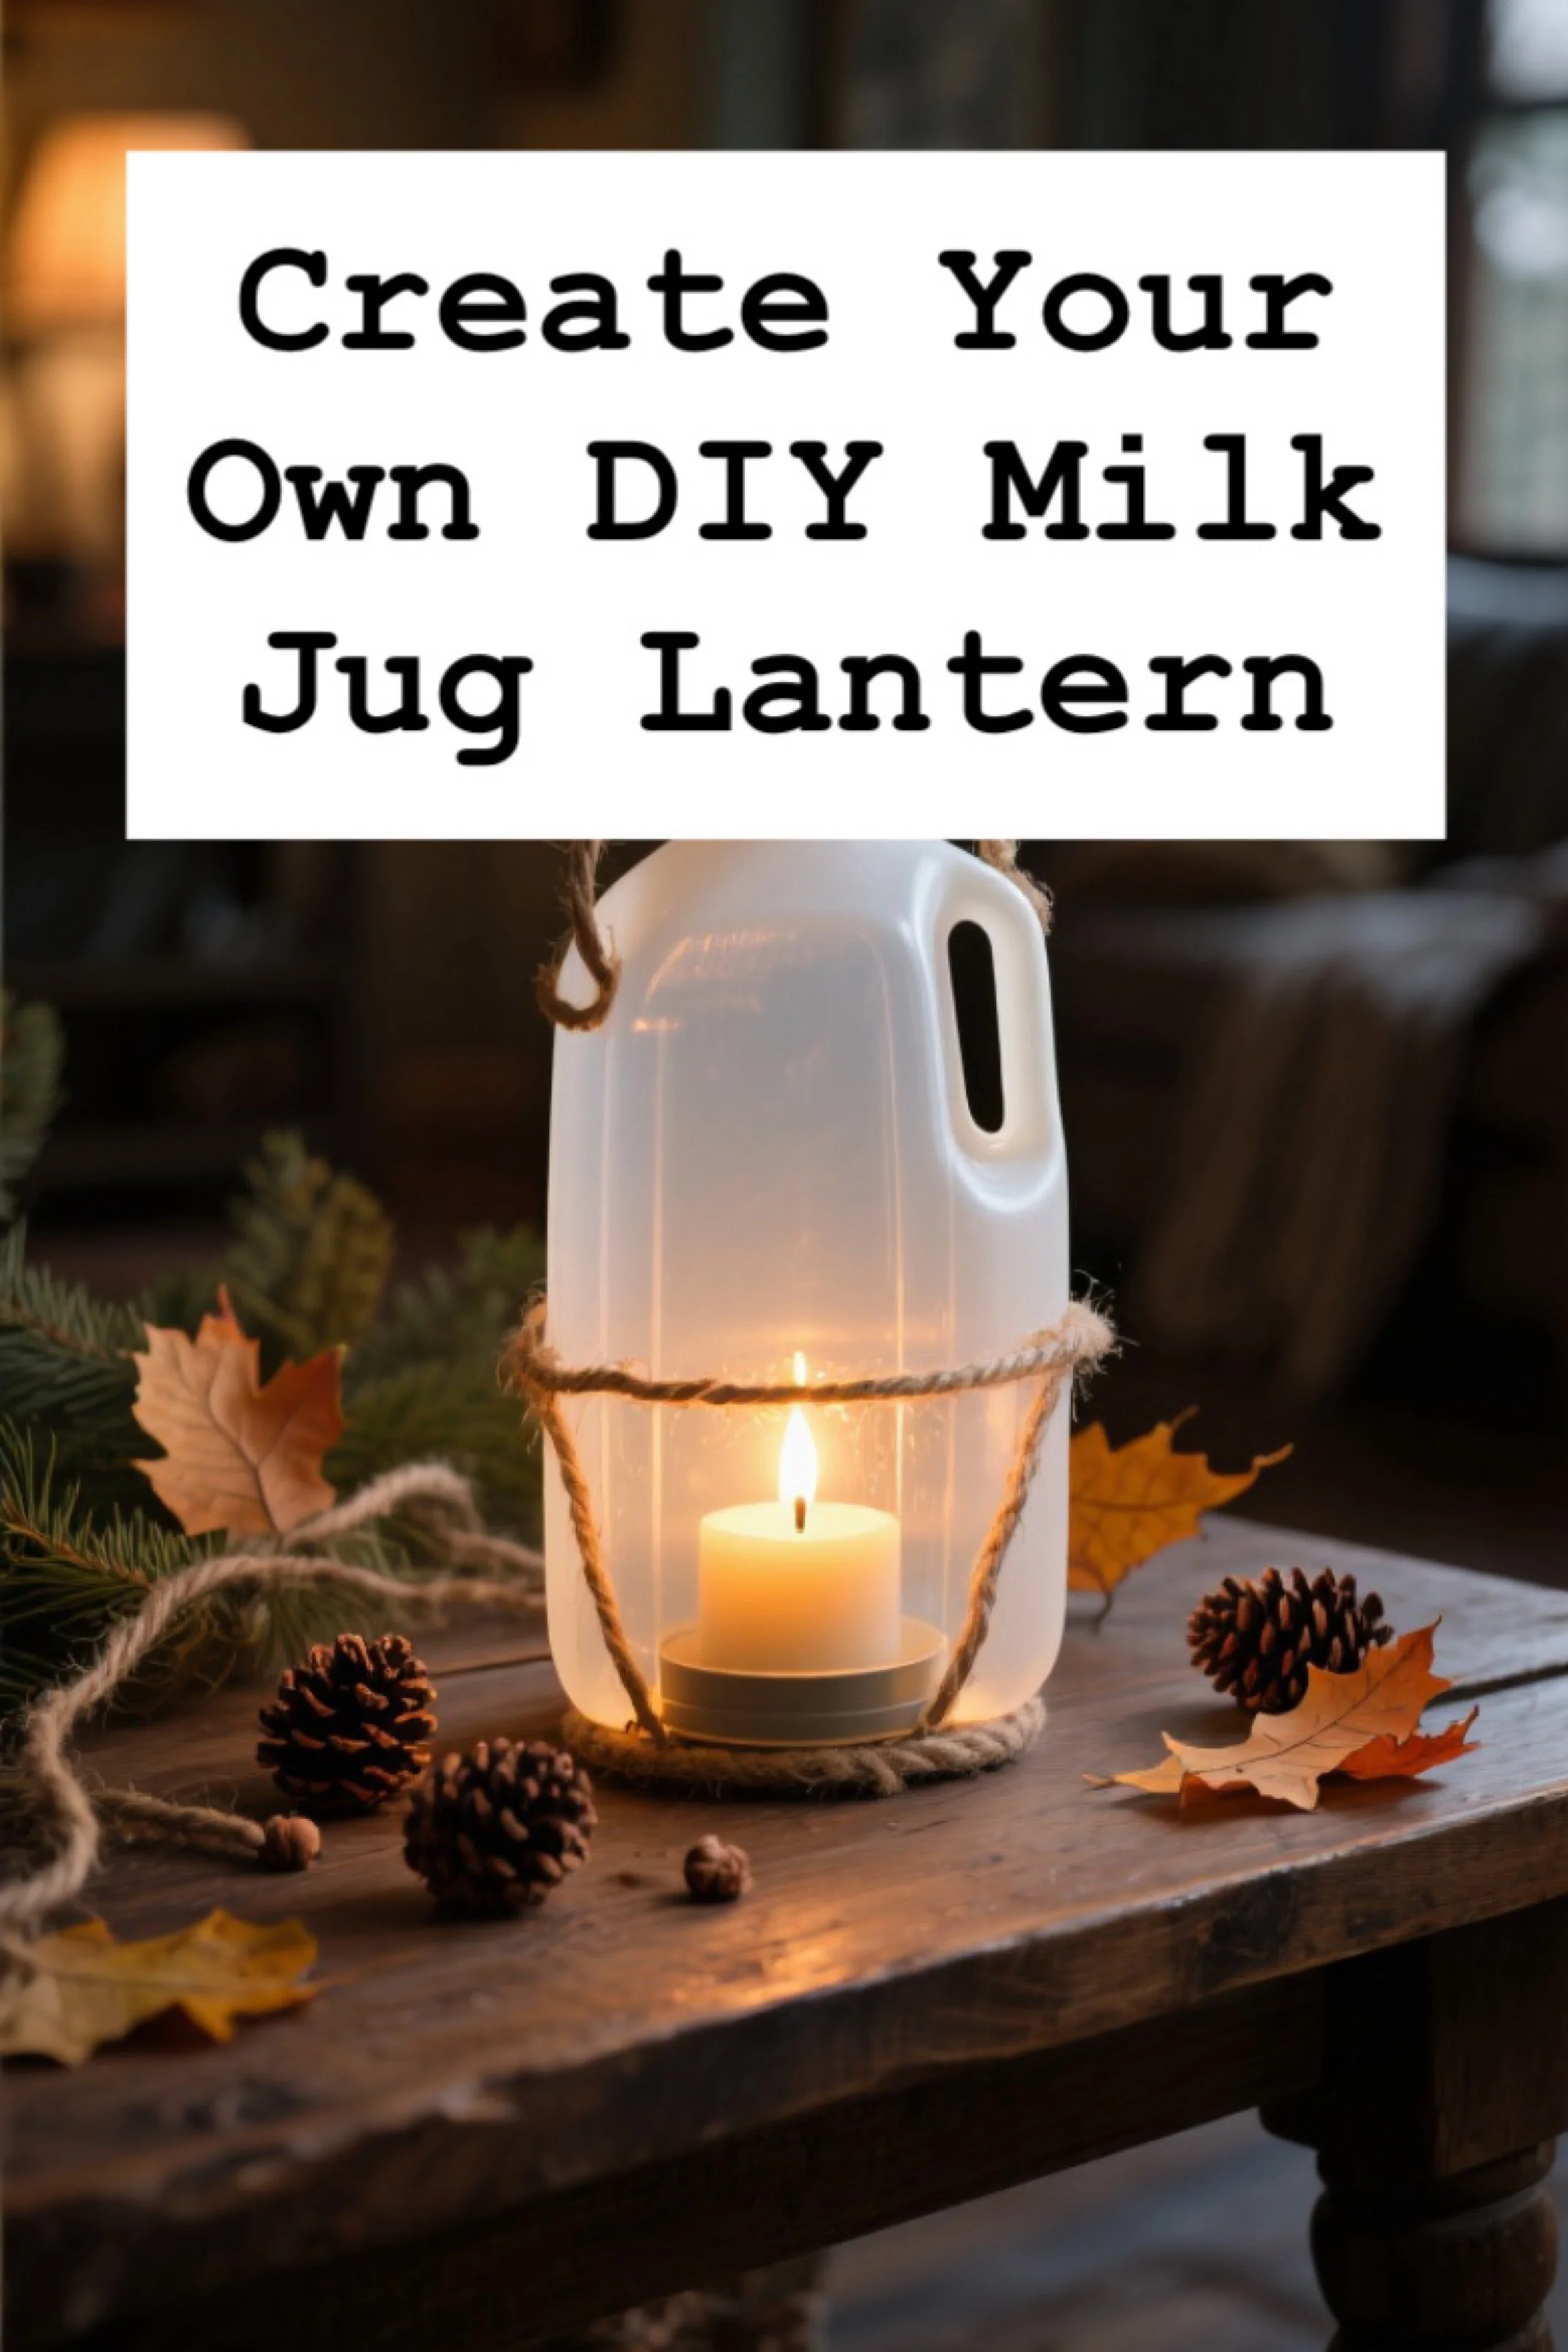
Step-by-Step Guide: Create Your Own DIY Milk Jug Lantern
So now that we’ve romanticized the glow and gathered the why, let’s ease into the how. The beauty of this DIY is that it doesn’t scream “project.” It’s casual. It’s comforting. You can do it in your kitchen while your tea steeps or right after the kids go to bed. You don’t need a workshop. Just a little intention, a clean jug, and a few curated touches to bring the magic to life.
First, let’s begin with the jug. You’ll want to use a standard translucent milk jug—the kind that holds a gallon of milk or water, typically found at any grocery store. The plastic should have that cloudy, semi-frosted quality to it. If it’s too clear, the light becomes harsh. If it’s too thick or colored, the glow gets lost. A classic milk jug hits that perfect middle—soft enough to diffuse the light but sturdy enough to hold its shape.
Start by rinsing it out thoroughly. You want it to be squeaky clean and scent-free. A few drops of dish soap and warm water go a long way, especially if you give it a little shake-shake moment to get into all the nooks. If your jug still smells faintly of dairy, drop in a splash of white vinegar, let it sit for ten minutes, then rinse again. Let it air dry upside down until there’s not a hint of moisture left inside. Trapped moisture will fog the interior when the light heats up, which dulls the glow.
Once dry, decide whether you want to keep the handle intact or slice it off for a more orb-like look. If you’re keeping the classic lantern silhouette, leave it. If you’re going for that minimal, glowing bubble vibe, you can use kitchen scissors or a craft knife to carefully remove the handle curve. Always cut slowly and securely—place the jug on a flat surface and hold it steady. If the plastic resists, a bit of heat from a hair dryer can soften it just enough to make cutting smoother.
Now comes the most crucial element: your light source. You have a few glowing options depending on the look, feel, and function you’re going for. The classic method? Strap a camping headlamp around the base of the jug so that the beam points inward. This creates a diffused, radiant glow that feels warm and functional—perfect for tents, emergencies, or rustic porch lighting. A great option here is a rechargeable LED headlamp on Amazon that lasts for hours and won’t leave you digging around for AA batteries in the dark.
But if you’re leaning into aesthetic and want a more decor-forward version, try nestling a remote-controlled LED puck light into the base. Many puck lights come with adhesive backs so you can secure them inside the jug opening or even to the inside base. The glow feels clean and ambient, and with a remote, you can adjust brightness or even set a timer.
Still not sold? For a whimsical feel, especially in boho, fairycore, or garden settings, go with a warm battery-operated fairy light coil. Just coil it up and slide it in through the mouth of the jug. When turned on, it creates a firefly-in-a-bottle effect that’s pure enchantment.
Before closing up your jug, test the light inside and take note of the brightness. If it feels too sharp or bright, you can mute the glow further by stuffing a bit of natural cotton batting or loose muslin fabric inside—think of it as a diffuser. Just be sure whatever you add doesn’t overheat. Most LED lights run cool, but it's always smart to keep safety top of mind.
Let’s talk about styling for a second. Your lantern is already charming and functional, but if you’re using it as a decorative piece, a little styling goes a long way. Begin with the handle or neck of the jug. Wrap it in natural jute twine or cotton rope for a rustic farmhouse touch. Tuck in a sprig of dried lavender, eucalyptus, or even faux olive branch stems for a European countryside vibe.
Prefer something more feminine or romantic? Tie a strip of sheer organza ribbon around the top, letting the tails flutter like candle smoke. For a child’s lantern, go wild with puffy paint outlines, glow-in-the-dark stickers, or even personalized name tags.
If you're gifting this lantern or prepping for a backyard event, consider placing it in a small basket bedded with straw or moss. Nestling it this way gives it an artisanal, curated feel. It becomes not just a light, but a styled object that brings emotion to your space.
Here’s a little tip for those looking to create a series of lanterns for outdoor use. Place them along your walkway, under a porch swing, or at each table corner during an evening event. But don’t scatter them evenly. Create clusters of two or three at varying heights to mimic natural light rhythm. You can even fill the base of your jug with decorative pebbles or polished glass beads before adding the light. This adds weight and a more anchored look—especially helpful if you’re outdoors on breezy nights.
Now let’s solve for a few common hiccups. If your jug gets foggy once the light is on, it usually means there’s residual moisture trapped inside. Just unscrew the cap and leave it open for a few minutes to let the humidity escape. If your light seems too dim, check your batteries or reposition the light. Sometimes tilting it slightly toward the jug wall helps bounce the glow back into the space more effectively.
If your jug doesn’t sit perfectly flat or is prone to tipping over, try hot-gluing a small wood slice to the bottom as a base. It grounds the jug and adds a rustic layer of style. Bonus: It’s the kind of touch that looks purposeful and Pinterest-ready.
Another beautiful trick is to tint the jug itself. If you're feeling crafty, mix a small amount of alcohol ink with a few drops of rubbing alcohol and swirl it inside the jug, then pour it out and let it dry fully. This creates a subtle stained glass effect. Choose warm golds, ambers, or sunset pinks for a cozy hue. Once dry, insert your light and enjoy the transformation.
And let’s not forget the wellness tie-in. This isn’t just a fun project. The lighting you create with your hands adds warmth to your routines. Whether it becomes part of your nighttime meditation, a soft beacon during bath time, or the last light left on when you’re drifting off, it’s there. Your light. Your way.
Imagine setting this glowing jug beside a bubble bath, candles flickering nearby, soft music playing. You lean back, soak deep, and the warm milk-glass glow dances on the tile walls. Or maybe it's tucked under your reading nook blanket fort—book in one hand, tea in the other, and that amber glow making you feel like you’re wrapped in dusk itself.
Every time you flick it on, you’ll feel that little whisper: I made this.
And maybe that’s the real magic of it. The milk jug lantern becomes more than light. It becomes a ritual. A symbol. Something comforting and handmade that turns your ordinary space into a little cocoon of peace.
If you're ready to scale this project up or host a crafting night, order a pack of LED puck lights, gather your old jugs, and lay out a crafting station with ribbons, twine, washi tape, and maybe even pressed dried flowers. Invite your friends. Sip something warm. Craft in candlelight. It’s these gentle projects that invite conversation, creativity, and connection.
And finally, once your lantern is complete, let it sit in a place that matters. Don’t hide it away. Let it live where you’ll use it, where the soft glow reminds you to slow down, breathe deeply, and enjoy the small, lovely moments you create.
From one jug to one glow, to one night that just feels a little warmer. That’s the beauty of this project.
You’re ready now. Let’s go light the night.

Illuminate Your Space with a DIY Milk Jug Lantern: A Brilliant Boy Scout Hack
Final Thoughts: Light You Can Feel
There’s something undeniably poetic about taking an object once bound for the recycling bin and transforming it into a beacon of warmth. In a world that constantly tells us to buy more, do more, and be more, there’s deep beauty in pausing long enough to craft something simple, functional, and meaningful with your own hands. The DIY milk jug lantern isn’t just clever—it’s a little act of self-care. It’s the kind of project that brings you back to the tactile world, away from screens, and into your senses.
Whether you made this lantern to cozy up your backyard, brighten your next camping trip, comfort a little one at night, or prepare your home for the unexpected, you’ve now created something that glows with more than just light. It glows with intention. With care. With story. And that matters more than we realize.
So place your lantern where you’ll see it often. Let it be a reminder that beauty doesn’t have to be bought, that sustainability can be stylish, and that you’re allowed to slow down and make space for soft, glowing moments in the middle of life’s rush.
You’ve lit something more than a room—you’ve lit a little bit of peace.
Now, go enjoy your glow.
To empower your lantern-crafting journey, I’ve curated a list of high-quality blogs and websites where you can explore this ingenious project:
DIY Thrill: Dive into their tutorial on creating a DIY Milk Jug Lantern. This recycled camping lamp hack is perfect for illuminating your tent, campsite, or backyard. All you need is an empty, clean gallon milk jug, a strong flashlight, and some duct tape. Fill the jug with water, secure the flashlight inside, and voilà—an eco-friendly lantern! 🌿🥛
Facebook Video: Watch a quick video demonstration of how to turn a milk jug into a lantern. Fill the clean jug with water, secure a flashlight inside using duct tape, and let the water diffuse the light. It’s a brilliant Boy Scout hack that’s both practical and fun! 🌟🔦
Hello Wonderful: Explore their spooktacular twist on milk jug lanterns. While not specifically Boy Scout-related, these DIY lanterns are perfect for Halloween or any outdoor adventure. Clean recycled milk jugs, black permanent markers, and glow sticks come together to create whimsical jack-o’-lanterns. Let your creativity shine! 🎃🥛
May your milk jug lanterns light up your nights and spark your imagination. Happy crafting! 🌟🏕️