
The Ultimate Guide to Roasted Shallot and Garlic Bread with Honey (Step-by-Step Guide)
The Ritual of Slow Flavor: A Love Letter to Roasted Shallot and Garlic Bread with Honey
There are some recipes that do more than just fill the house with mouthwatering aromas. They shift the energy. They soften the sharp edges of a long day. They call people to the kitchen not with shouts, but with the quiet magnetism of something truly soulful. This roasted shallot and garlic bread with honey is one of those rare rituals—a sensory lullaby wrapped in caramelized edges and the perfume of golden-baked cloves.
In a world that runs fast and eats faster, this is your permission to slow down.
Because this recipe is not just about making bread. It’s about creating an atmosphere. The kind that makes someone stop mid-sentence to say, “What is that smell?” as if the scent itself could be a story. It’s about layering flavor in time. Letting things roast low and slow until they collapse into themselves. Shallots that sweeten like jam. Garlic that loses its sharp armor and turns soft and nutty, almost spreadable. And honey—not drizzled but whispered—glazing the edges in a sticky golden hum.
This is bread that wants you to touch it. Knead it with care. Savor the flour under your nails and the dough warming beneath your palms. Bread that begs to be torn, not sliced. Dipped, not daintily plated. Eaten while still steaming from the oven with butter that melts like candlewax into the warm crevices.
And you don’t need to be a baker. You only need to be someone who believes that flavor is a form of affection.
Let’s make a little kitchen magic.
Aromatherapy for the Soul
There’s something primal and utterly grounding about roasting shallots and garlic. It has the power to make your entire kitchen feel like a cottage in the hills of Umbria. The shallots soften into ribbons with a mellow sweetness that plays beautifully off the garlic’s slow-roasted depth. The scent alone is therapeutic—like someone lit an edible candle. Open a bottle of wine, play something instrumental, and let the ritual of roasting become its own reward.
If you’ve never used a ceramic garlic roaster, now’s the time to invest. This terracotta garlic roaster keeps the cloves tender while bringing out their sweetest notes. You can roast them right alongside the shallots on a cast iron pan or a sheet lined with parchment. A drizzle of olive oil, a dusting of sea salt, and the patience to let the oven work its low-heat magic—that’s all it takes.
The fragrance that builds in your kitchen is nothing short of sacred.
From Pantry to Pleasure: Choosing Ingredients With Intention
One of the greatest joys of this bread is how humble its ingredients are. You probably already have everything you need, and yet when they come together, the effect is utterly indulgent.
Start with fresh garlic bulbs, plump and tight-skinned. Avoid anything sprouting green, which signals bitterness. Shallots should feel heavy for their size, with taut, glossy skins—like little copper jewels.
Your flour matters too. If you’re going for that chewy, golden artisan crumb, opt for King Arthur Bread Flour which has a higher protein content and gives better structure. The yeast can be active dry or instant, but if you really want that deep, developed flavor, give the dough a long cold fermentation in the fridge overnight.
And then there’s the honey. It’s the final touch but never an afterthought. Look for something raw and floral like Nature Nate’s Raw Honey or a local wildflower variety. Its golden sheen over the roasted shallots is the difference between a rustic bread and an unforgettable one.
Wellness, But Make It Toasted
Let’s talk about wellness for a moment—because good food is wellness. And this recipe honors that philosophy.
Roasted garlic is celebrated in holistic health circles for its anti-inflammatory and immune-boosting properties. It’s gentler on digestion and doesn’t carry the aggressive afterbite of raw garlic. Shallots are rich in antioxidants, flavonoids, and subtle prebiotics, supporting both your gut and your glow.
More than that, there’s something nourishing in the act of making this bread. The tactile therapy of mixing and kneading, the quiet patience of letting something rise, the deep satisfaction of pulling a golden loaf from the oven—it taps into something ancient and restorative.
So yes, this is comfort food. But it’s also body kindness. It’s soul care. It’s mindfulness in motion. And that alone makes every bite feel better than any store-bought loaf could dream of.
Turning Your Kitchen Into a Sanctuary
If you’re going to roast shallots and garlic, you might as well make the entire moment a vibe. Light a candle. Open a window. Let in the golden afternoon light or the quiet of a misty morning.
Pull out a wooden bread board to serve your finished masterpiece. Style it with a ramekin of French sea salt, a little pot of whipped butter or herbed cream cheese, and a honey dipper resting in its own jar like it was born for the moment.
You don’t need a special occasion for this bread to feel like one.
Ways to Serve and Savor
This isn’t a loaf that needs much dressing up. It stands boldly on its own. But if you want to turn your rustic shallot and garlic bread into a full culinary experience, here are a few of my favorite ways to enjoy it:
With eggs and greens: Toast slices and top with poached eggs and wilted spinach or arugula for a brunch that rivals any café.
As a base for crostini: Slather with ricotta and add roasted grapes or cherry tomatoes for a layered bite.
For soup nights: This bread transforms even the humblest bowl of lentil soup into something worthy of guests.
With a glass of wine: Pour something earthy and round like a Viognier or a Pinot Noir and let the honey and roasted notes dance.
And of course, nothing beats eating it warm, fresh from the oven, with a generous spread of salted butter and an extra swirl of golden honey over top. If you're feeling extra decadent, sprinkle it with pink Himalayan salt just before serving for that perfect hit of minerality.
For the Love of Slow
In our culture of instant everything, there is real power in the pause. Roasting shallots and garlic. Waiting for dough to rise. Brushing the top with honey and watching it glisten under oven light. These small rituals anchor us. They bring us back to the body, to the senses, to the present moment.
This bread is an invitation to slow down and savor.
It asks you to consider each step, not as a chore but as a gift. A way to create something that nourishes on every level. A way to fill your home with beauty and your table with intention. A way to say “I care”—to yourself, to someone you love, or even just to the day.
So take your time. Let the shallots roast slowly. Let the garlic caramelize deep. Let the bread rise until it sighs under your fingertips. This is not the kind of recipe that likes to be rushed.
And when it’s finally ready, tear into it with gratitude. Because sometimes, the simplest food is the one that reminds us of everything we really need.
A Note on Storage and Leftovers
Should you have any left over (though I promise, it rarely happens), this bread keeps beautifully wrapped in parchment and tucked into a linen bag or bread box on the counter for up to two days. For longer storage, slice and freeze it. Toasting frozen slices actually brings back that warm, just-baked feel. A quick pass under the broiler, a smear of butter, and it’s heaven all over again.
You can also cube it into croutons, blend it into garlic breadcrumbs, or make a savory bread pudding if you’re feeling adventurous.
And Now… Let’s Bake
The scent of roasted garlic is filling your mind already, isn’t it?
You’ve got your flour. Your shallots are glistening on the counter, waiting to be transformed. There’s a little jar of honey nearby that’s practically glowing. You know that when you start, you’re not just making food. You’re making a moment.
Let’s step into the ritual together.
The full how-to is just below.
💡 Pro Tip: Why These Are Amazon Search Links (and Why “Add to Cart” Really Helps)
You might notice that every “Shop the Look” section uses Amazon search result links rather than one specific product. That’s not a glitch—it’s a strategy.
Items in fashion, beauty, and home sell out fast. Colors change. Styles get discontinued. Linking to a single item might leave you staring at a “Currently Unavailable” page—and nobody wants that.
With search result links, you’ll get:
• A fresh rotation of similar, in-stock finds
• Options that match your budget, size, and style
• Fewer dead ends and more discoveries
✨ Here’s how you can support this blog with zero extra cost:
If something speaks to you—even if you're still deciding—add it to your cart while you’re browsing. Amazon only credits creators like me if the item is added to your cart during that first visit.
It doesn’t cost you anything extra, but it makes a big difference in helping me keep this blog alive, ad-free, and full of hand-picked inspiration for your next obsession.
Thank you for being here. Thank you for shopping with intention. 💛

The Ultimate Guide to Roasted Shallot and Garlic Bread with Honey
Ingredients and Kitchen Tools
First, gather your cast of characters:
1 artisanal loaf of crusty bread
1/2 cup of high-quality unsalted butter
6 cloves of organic garlic
4-6 small shallots
1 cup of freshly shredded mozzarella cheese
1/4 cup of aged Parmesan cheese
2-3 tablespoons of pure, raw honey
Coarse sea salt and fresh black pepper
A drizzle of extra-virgin olive oil
For kitchen tools, you'll need:
A sharp bread knife
A sturdy baking sheet
Aluminum foil
Mixing bowls
A garlic press (optional)
A cheese grater
Step-by-Step: Crafting the Perfect Roasted Shallot and Garlic Bread with Honey
Let’s begin with the heart of this ritual—the aromatic base that sets everything in motion. You’ll want to roast your shallots and garlic before you even think about the dough. This step not only enhances the depth of flavor but creates a sensory foundation that transforms your entire kitchen into something magical.
Start by preheating your oven to a gentle 375 degrees Fahrenheit. While it warms, peel your garlic bulbs just enough to expose the tops of the cloves, keeping them mostly intact. This allows the heat to penetrate while the skins act like a little jacket, holding all the moisture and flavor inside. Use firm bulbs with no green shoots. Those green bits might look innocent but bring an unwanted bitterness. For the shallots, peel and slice them in half lengthwise, giving you more surface area for caramelization. Nestle the garlic and shallots into a small cast iron pan or a shallow baking dish. If you’re feeling elevated, use a ceramic garlic roaster to cradle each bulb like a little crown. Try this ceramic garlic roaster that delivers the perfect slow-roasted flavor.
Drizzle with a generous glug of olive oil, making sure every crevice is kissed by it. Add a sprinkle of flaky salt, and slide the whole tray into the oven. As the heat works its slow magic, the shallots will collapse into soft, glossy curls, and the garlic will darken at the edges while turning molten inside. Your space will soon smell like a country bakery wrapped in a Provence market. Let them roast for about 40 to 45 minutes, checking once at the halfway mark to baste with the sizzling oil. When they are done, the shallots should be soft and golden, and the garlic should be deeply fragrant and caramel-colored. Set the tray aside to cool. The aroma alone will ground you in the moment—savory, warm, almost meditative.
While the shallots and garlic rest, shift your focus to the dough. In a large mixing bowl, combine warm water and a bit of honey. The water should feel like a warm bath, around 105 degrees Fahrenheit. Not hot enough to scald your skin, but definitely warm enough to coax life out of your yeast. Stir the honey into the water until dissolved. This gentle sweetness not only activates the yeast but creates a foundation for the flavor pairing we’ll build on later.
Sprinkle your active dry yeast over the surface and walk away for about five minutes. Let it bloom. The mixture will slowly turn cloudy and foamy, signaling that the yeast is alive and ready to rise. If it sits silently, your yeast may be too old. In that case, start over with a fresh jar or packet. Keep your yeast fresh with this instant yeast storage jar that lasts for months in the fridge.
Now it’s time to add the flour. Begin with a high-quality bread flour, which has enough protein to give you a beautifully structured loaf. King Arthur Bread Flour is a personal favorite for this kind of rustic bake. Slowly stir in the flour, a little at a time, along with a generous pinch of sea salt. Use a wooden spoon at first to bring it all together, but then get your hands in there. Feel the dough come to life beneath your fingers—sticky, elastic, and full of potential.
Once it begins to form a cohesive mass, turn it out onto a floured surface. Kneading is where the real magic happens. Fold, press, rotate. Use the heels of your hands to push the dough forward, then pull it back and repeat. The rhythm becomes meditative. Do this for ten full minutes. If the dough starts sticking stubbornly, dust your hands and the surface lightly with more flour, but don’t overdo it. Too much and you’ll throw off the moisture balance.
After kneading, shape your dough into a smooth ball and place it into a lightly oiled bowl. Cover it with a damp linen towel or a piece of beeswax wrap. Set the bowl somewhere warm and draft-free. A proofing box is ideal, but even the top of your fridge can work in a pinch. Let it rise until doubled in size, which can take 60 to 90 minutes depending on the room temperature. During this time, do something relaxing. Let the bread rise while you sip a cup of tea, diffuse some essential oils, or take a walk around your garden.
Once the dough has puffed beautifully, turn it back out onto your counter and gently press it down to deflate. This isn’t a hard slap—it’s more of a thank-you pat. Fold in the roasted shallots and cloves of garlic. You don’t need to chop the garlic too small—it should melt into the dough in roasted ribbons. The shallots should be soft enough to blend in almost like butter. Gently knead the flavor into the dough, tucking and folding so the roasted elements distribute evenly without tearing the gluten structure.
At this point, shape your loaf. A round boule works beautifully for this rustic bake. Place the shaped dough onto a piece of parchment paper and transfer it to a baking sheet or, better yet, a preheated Dutch oven. Cover again loosely and let it rest for about 30 minutes for its final rise. If you have a banneton basket, now’s a great time to use it. Dust the inside with rice flour, nestle your dough inside, and let it proof while taking on a beautiful pattern. Try this complete banneton proofing basket kit for professional results at home.
While the dough does its final rise, preheat your oven to 450 degrees Fahrenheit. If you're using a Dutch oven, place it in the oven while it heats to get it ripping hot. This helps create steam during baking, which contributes to a gorgeous crust.
Right before baking, use a razor blade or a sharp bread lame to score the top of the loaf. This gives the dough space to expand as it bakes and also adds a beautiful artisan touch. You can go simple with a cross-cut, or get creative with curved leaf-like designs. If the dough feels sticky, dust the top lightly with flour to make your scoring easier.
Now, let’s bake. If using a Dutch oven, carefully remove it from the oven and lift your parchment-wrapped dough inside. Cover with the lid and place it back in. Bake covered for 25 minutes. Then, remove the lid and bake for another 15 to 20 minutes until the crust is deep golden brown and the loaf sounds hollow when tapped on the bottom.
During that final uncovered stretch, brush the top with a little more olive oil or melted butter and drizzle with honey. You’ll want the honey to caramelize just slightly, catching in the crevices and adding a glossy amber finish. For a soft, stylish drizzle, try this wooden honey dipper that feels like it belongs in a cottagecore cookbook.
Once baked, remove your loaf from the oven and let it cool on a wire rack. This part is harder than it seems. The scent will be divine, and every instinct will tell you to tear into it immediately. But give it 20 to 30 minutes so the crumb finishes setting. Cutting too soon can turn the interior gummy. Patience here pays off.
When you’re finally ready to slice in, use a serrated bread knife and go slow. The crust should crackle under the blade, revealing a soft interior threaded with sweet shallot, mellow garlic, and the golden shimmer of roasted honey glaze. Each bite is layered, complex, and deeply comforting.
Pair your fresh slices with salted butter, creamy brie, or even just another swirl of honey. For serving, place the loaf on a wooden bread board and scatter around a few thyme sprigs or edible flowers for a relaxed, intentional presentation. This wood grain cutting board set elevates every meal it touches.
You can store the bread wrapped in a clean tea towel or parchment for up to two days at room temperature. If you'd like it to last longer, slice and freeze it. Then simply pop slices in the toaster or warm in a skillet to bring back that just-baked sensation. It also makes stunning croutons and toasted sandwich bases, especially if you spread the bread with whipped goat cheese and pile it high with roasted vegetables.
This bread doesn’t just belong to dinner. It transforms breakfast. It adds warmth to lunch. It’s welcome at picnics and perfect for gifting. Imagine wrapping it in brown parchment with a handwritten note. A loaf like this says “I made this for you” in a way words can’t.
Let yourself fall in love with every part of the process. From the scent of roasting garlic to the soft dough rising under your hands, to the quiet satisfaction of slicing into something you created from scratch. That is the soul of this recipe. It’s not about perfection. It’s about presence. About making something delicious, yes—but also about returning to yourself in the process.
And that’s where the true wellness lives. In the steps. In the slowness. In the way you fold in flavor like a kind of love.
Now that you know the way, this roasted shallot and garlic bread with honey will become your signature. A go-to for gatherings, quiet weekends, and self-care Sundays. Make it once and you’ll crave it forever.

The Ultimate Guide to Roasted Shallot and Garlic Bread with Honey
The Art of Slow-Baked Satisfaction
There’s something almost ceremonial about baking bread. Not the store-bought kind, not even the quick, no-knead varieties—but the kind that takes time, intention, and the quiet rhythm of your own hands to create. This roasted shallot and garlic bread with honey is more than just a recipe. It’s an experience, a sensory journey that begins with the hum of your oven and ends with the satisfying crackle of crust under your knife.
You’ve coaxed sweetness from fire. You’ve taken humble ingredients—flour, water, garlic, and shallots—and elevated them into something both nourishing and poetic. That’s the power of food made slowly. The kind that demands your presence. The kind that makes your home smell like comfort and your table feel like a celebration, even if it’s just you and a single slice eaten barefoot in the kitchen.
This bread is the embodiment of balance—sweet and savory, rustic and elegant, soothing and indulgent. It’s as fitting for a wellness weekend as it is for a candlelit dinner. You can dress it up with artisanal cheeses and microgreens, or dress it down with salted butter and a side of solitude. Either way, it delivers. Every. Time.
And that’s the magic, isn’t it?
We live in a world that moves fast, skips steps, and often forgets the beauty of waiting. But here, in the warm folds of this golden loaf, is your reminder that good things don’t just come to those who wait—they rise for them. Slowly, beautifully, and with purpose.
So the next time your soul craves a reset, or your kitchen feels too quiet, or you just want to treat yourself to something earthy and elemental, return to this ritual. Roast the shallots. Caramelize the garlic. Let the dough rise like breath. Drizzle it with honey like a soft punctuation mark at the end of your day.
Because you deserve a bread that’s not just delicious—but unforgettable.
And this? This is that bread.
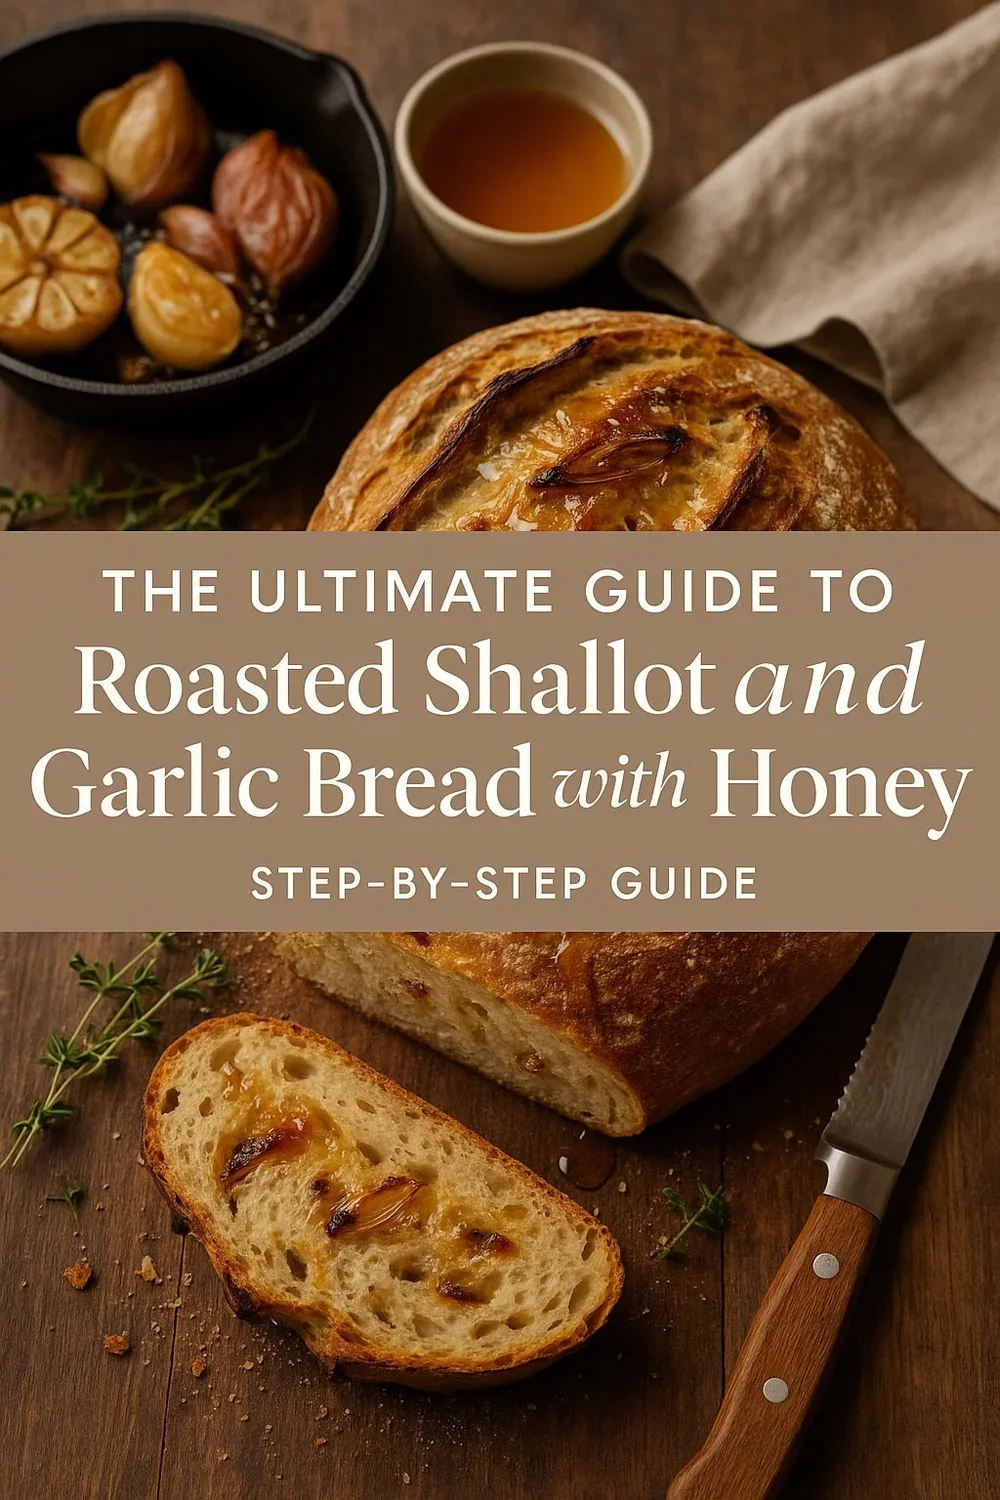
Dear bread enthusiasts, as you step into the aromatic world of baking, prepare to elevate your taste buds with The Ultimate Guide to Roasted Shallot and Garlic Bread with Honey. Imagine warm, crusty slices adorned with caramelized shallots, roasted garlic, and a drizzle of golden honey. 🍞🧄🍯✨
To enhance your baking adventure, I’ve curated a list of high-quality blogs and websites where you can find inspiration, tips, and variations on this flavor-packed bread:
butt.erhand: Dive into their Shallot & Garlic Bread recipe, where roasted garlic and shallots meet miso and honey. The pungent flavors of garlic and shallots transform into sweet and mild notes when slow-roasted in olive oil. Spread the buttery mixture generously on Italian bread, top with a blend of mozzarella and Parmesan, and grill until golden brown. Finish with parsley and a drizzle of honey for an unforgettable bite!
Taste of Home: This viral Garlic Bread Recipe with Shallots, Miso, and Honey takes the classic cheesy garlic bread to new heights. The addition of shallots, miso, and honey creates a symphony of flavors. Slice, serve, and let your taste buds dance!
Lavender and Lovage: Explore their Garlic and Shallot Country Style Bread (Breadmaker). This rustic loaf combines the earthiness of shallots with the rich aroma of garlic. Whether you’re using a breadmaker or baking by hand, this recipe promises warmth and comfort
Remember, bread is more than sustenance—it’s an expression of love and creativity. May your kitchen be filled with the fragrance of roasted shallots, garlic, and the sweet touch of honey. Happy baking! 🌟🥖


