Straight Stitch Guide: Using a Cardboard Hack for Precision
The Whisper Thread: Finding Peace and Precision Through the Art of the Straight Stitch
There’s a rhythm to stitching that mirrors the heartbeat. Slow. Measured. Intentional. In a world that demands speed, there’s something deeply nourishing about slowing down with a thread and needle, lining up each pass with care, watching the fabric grow in coherence. It is not just a craft. It is a return to self.
At Style Estate, we often speak of beauty not as something bought, but as something built with your own hands. It lives in the quiet repetition of effort. The patient pleasure of getting it right. Whether you’re hand-stitching a linen sachet or running a hem through your sewing machine, the pursuit of the perfect straight line becomes a small, elegant meditation.
But here’s the catch—perfection is elusive. And for those of us who have spent hours wrangling wandering seams and uneven edges, we know the frustration that builds when precision seems just out of reach. That’s where today’s clever little guide comes in. Because sometimes, it’s the simplest hack—a piece of cardboard, repurposed with intention—that unlocks the entire flow. It becomes your anchor, your straight edge, your peace of mind.
From Cardboard to Clarity: Why This Hack Works
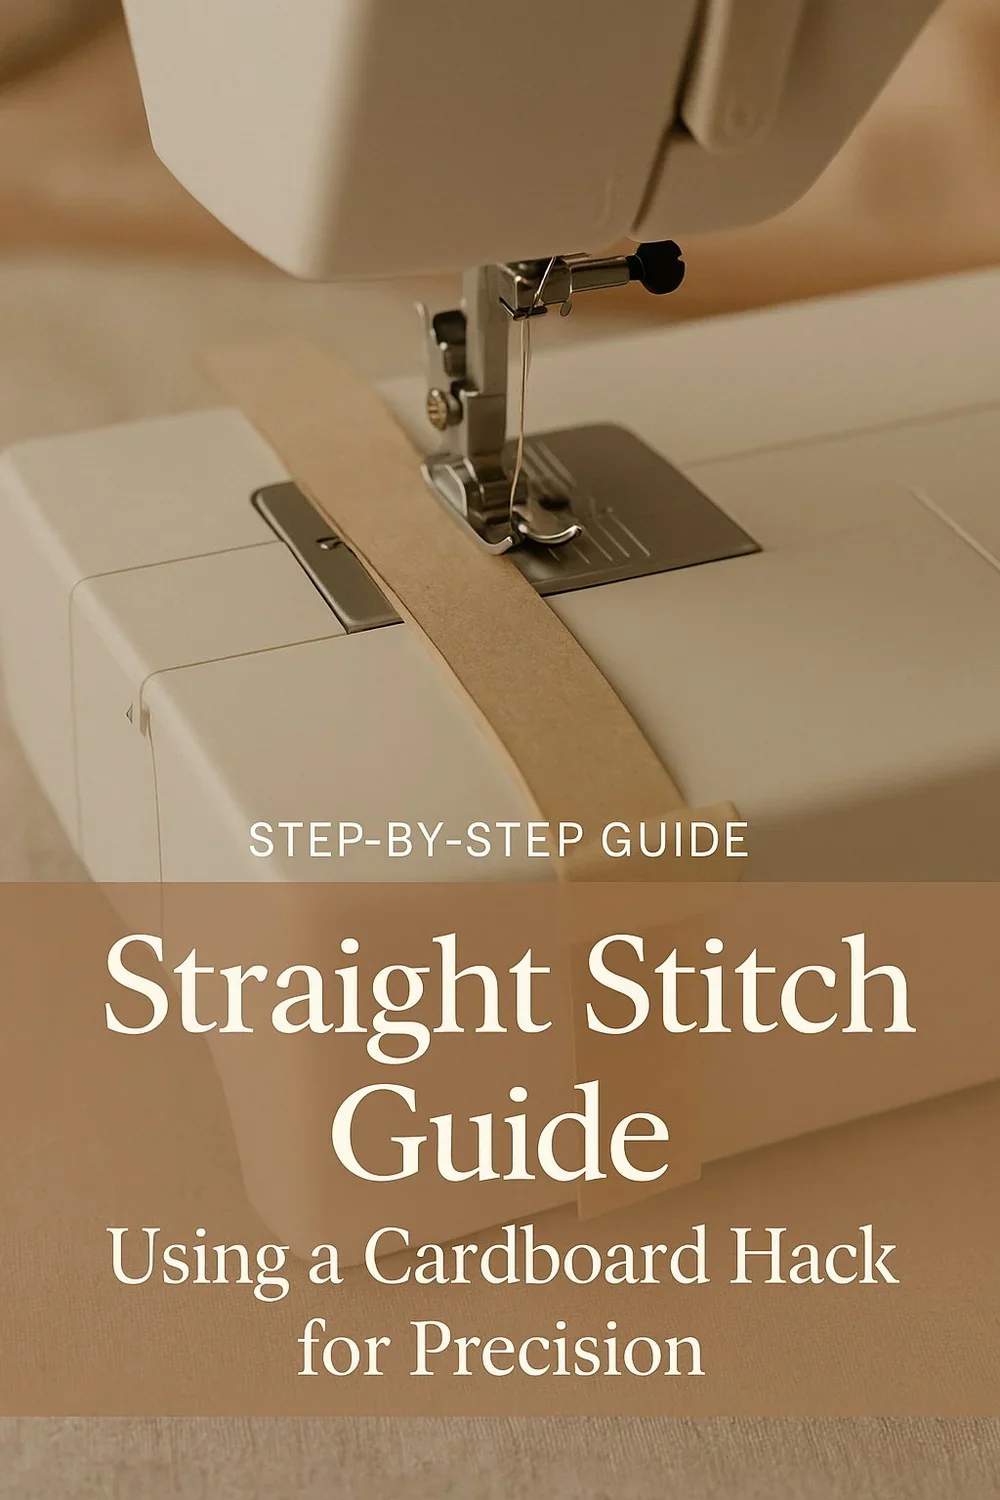
What you’re creating is a physical guide to help follow a straight edge as you sew. If your machine plate’s markings are worn or not enough of a visual cue, this trick can change everything.
Use any sturdy cardboard—an old Amazon delivery box, a cereal box, even a cosmetic kit insert. Fold it cleanly and cut to your seam width. Then tape it securely onto your machine as a fence that your fabric glides along.
That tactile barrier offers moment-to-moment feedback that frees your brain from micromanaging every stitch. You relax. Your sewing flows. And you feel grounded in the rhythm of creation.
The Wellness of Making: Stitching as Self-Care
Creating with your hands engages your parasympathetic nervous system—your body’s rest and repair mode. A repetitive, focused act like stitching calms the mind and eases the heart.
To turn it into ritual, set the mood. Light a candle. Brew some calming loose-leaf tea. Create a workspace with intention, not clutter.
Create Your Corner: Setting Up a Mindful Sewing Space
Use a quilted sewing machine mat to reduce vibration. Add a clip-on LED craft light for clean lighting. Organize tools in a clear storage caddy. Add a folded wool blanket over your chair for warmth and texture.
These small details turn sewing time into a retreat.
Perfect for Beginners, Beloved by Experts
For beginners, this guide is like bumpers on a bowling lane. It helps eliminate guesswork. For experts working with delicate materials or detailed topstitching, it’s a control tool that adds polish.
Want a ⅜-inch seam? Cut your cardboard to size. Want a 1-inch channel? Fold accordingly. It’s fully customizable and costs nothing.
Pair It With: Products That Enhance Your Stitching Ritual
Each item either supports your cardboard hack or evolves with you as your skills grow.
From Hack to Habit: Making It Part of Your Practice
The cardboard guide becomes second nature. Setting it in place feels like a ritual cue. It signals the start of creativity. It ensures your seams line up, your panels match, your work flows with ease.
Over time, it becomes a muscle memory—part of your rhythm. A partner in your practice.
The Last Stitch: Where Practical Meets Personal
This isn’t just a hack. It’s a metaphor. A handmade solution that’s both simple and soulful. It meets you where you are, supports your precision, and anchors you in presence.
So grab a scrap of cardboard. Cut it with care. Tape it in place. And stitch.
Pro Tip: Why These Are Amazon Search Links (and Why “Add to Cart” Really Helps)
Every “Shop the Look” link leads to a search result—not a single item. Why? Because products change, sell out, and vary by color or stock. This gives you:
- Fresh in-stock options
- Flexible styles and price points
- A better browsing experience
💛 Adding to cart helps support this blog—at no extra cost to you.

Straight Stitch Guide: Using a Cardboard Hack for Precision
Sewing tools and tutorial New hemming techniques ⭐️📽️🎞️ https://t.co/DGxURKrZw3 pic.twitter.com/wX7sqHgAH6
— DIY Dimension (@diydimension) April 21, 2024
Creating the Cardboard Stitch Guide: A Step-by-Step Journey to Beautiful, Balanced Seams
Let’s begin this mindful sewing ritual together. Whether you're stitching as part of your wellness routine or simply want cleaner lines in your handmade creations, this cardboard hack is about to become your new favorite trick. We’re not rushing. We’re not overthinking. Just one smooth, grounded step at a time toward control, ease, and elegance.
Start by setting the mood of your sewing corner. Choose a time of day with natural light, or use a focused LED craft lamp to softly illuminate your workspace. Light a fresh floral candle, breathe deeply, and center yourself.
Step 1: Select and Prepare Your Cardboard
Choose a firm but flexible piece of cardboard—an Amazon package panel, cereal box, or cosmetic insert. It should hold shape without resisting your machine.
Lay it flat and feel its texture. Use a ruler and pencil to measure your desired seam allowance—¼", ⅜", or ½". Draw a line and cut with precision craft scissors.
Step 2: Fold and Form Your Guide
Gently fold the strip lengthwise to create a soft ridge. This will serve as a barrier to guide your fabric. No harsh creases—just a subtle bend.
Wipe your sewing machine plate with a cloth. Use low-tack painter’s tape or decorative washi tape to secure the guide in place, aligned to your seam allowance.
Step 3: Test with Scrap Fabric
Feed a piece of scrap fabric through your machine. Adjust the cardboard until the fabric glides smoothly beside it, like a ballerina against a barre.
Thread your machine with a high-quality polyester thread in a joyful color. Check bobbin tension and needle sharpness—swap in a universal 80/12 needle if needed.
Step 4: Sew with Intention
Hold your fabric gently. Let the feed dogs guide it. Use the cardboard for alignment, not pressure.
Use a stitch length around 2.5. Pause if the fabric ripples or drifts. Realign, breathe, and begin again.
Step 5: Refine and Customize
Once comfortable, make multiple guides for various seam widths. Label them with a fine-point marker and store them in a drawer. Use chipboard or clear tape for reinforcement.
Step 6: Support Your Body and Space
Take breaks. Sip a peppermint cacao blend or turmeric milk mix. Use a wrist support cushion for long sessions.
Always press your seams with a medium heat iron. Use a pressing cloth for delicate fabrics.
Step 7: Expand to Curves and Custom Work
Trim the guide to assist with curves for collars or quilt arcs. Rotate or reshape as needed. Make the tool fit your style.
Step 8: Capture and Store
Photograph your finished seams with the guide in action. Style your flat lay with sewing tools, fabric scraps, and a warm drink.
Store your guide in a drawer or attach with a small magnet to your machine.
Let this little piece of cardboard be your anchor. Let it mark the difference between guesswork and grace.
You're ready now—one flawless straight stitch at a time.

Straight Stitch Guide: Using a Cardboard Hack for Precision
When we slow down enough to care about the details—a single stitch, a steady line, the feel of fabric against cardboard—we do more than just craft a cleaner seam. We reclaim intention in a world that often rushes past it. This humble cardboard guide reminds us that beauty starts with alignment, and precision can be a form of self-care. So whether you're a seasoned sewist or just learning to thread your first machine, let this simple hack bring ease to your hands and calm to your space. The straight stitch may be the most basic, but with the right guide, it becomes your quiet masterpiece.
Now, let’s enhance your knowledge with some valuable resources from trusted blogs and websites:
Threads Magazine: In their article titled “Make a Stitching Template for Precision Sewing,” Irene Mischkinis shares how to create stitching templates from basic file folders or heavy card stock. These templates ensure your stitching lines are spot-on, whether straight, angled, or curved. Plus, they stabilize your work as you sew. Check it out here.
Threads Monthly: For more sewing wisdom, explore their guide on “How to Sew Straight (Seams, Hems, Topstitch) – 8 Proven Tips.” Nisan Aktürk offers practical advice to help you sew perfectly straight lines. Dive into the details here.
Sewing Society: If you’re an absolute beginner, fear not! Their article on “How to Do a Straight Stitch: A Guide for the Absolute Beginner” breaks it down step by step. Practice on scraps or use their free sewing practice sheets to build confidence. Discover it here.
Remember, precision in sewing is like a well-executed dance—graceful, intentional, and utterly satisfying. Happy stitching! 🧵✨