Better Than Store-Bought: The Complete Guide to Homemade Freezer Pops You’ll Crave All Summer
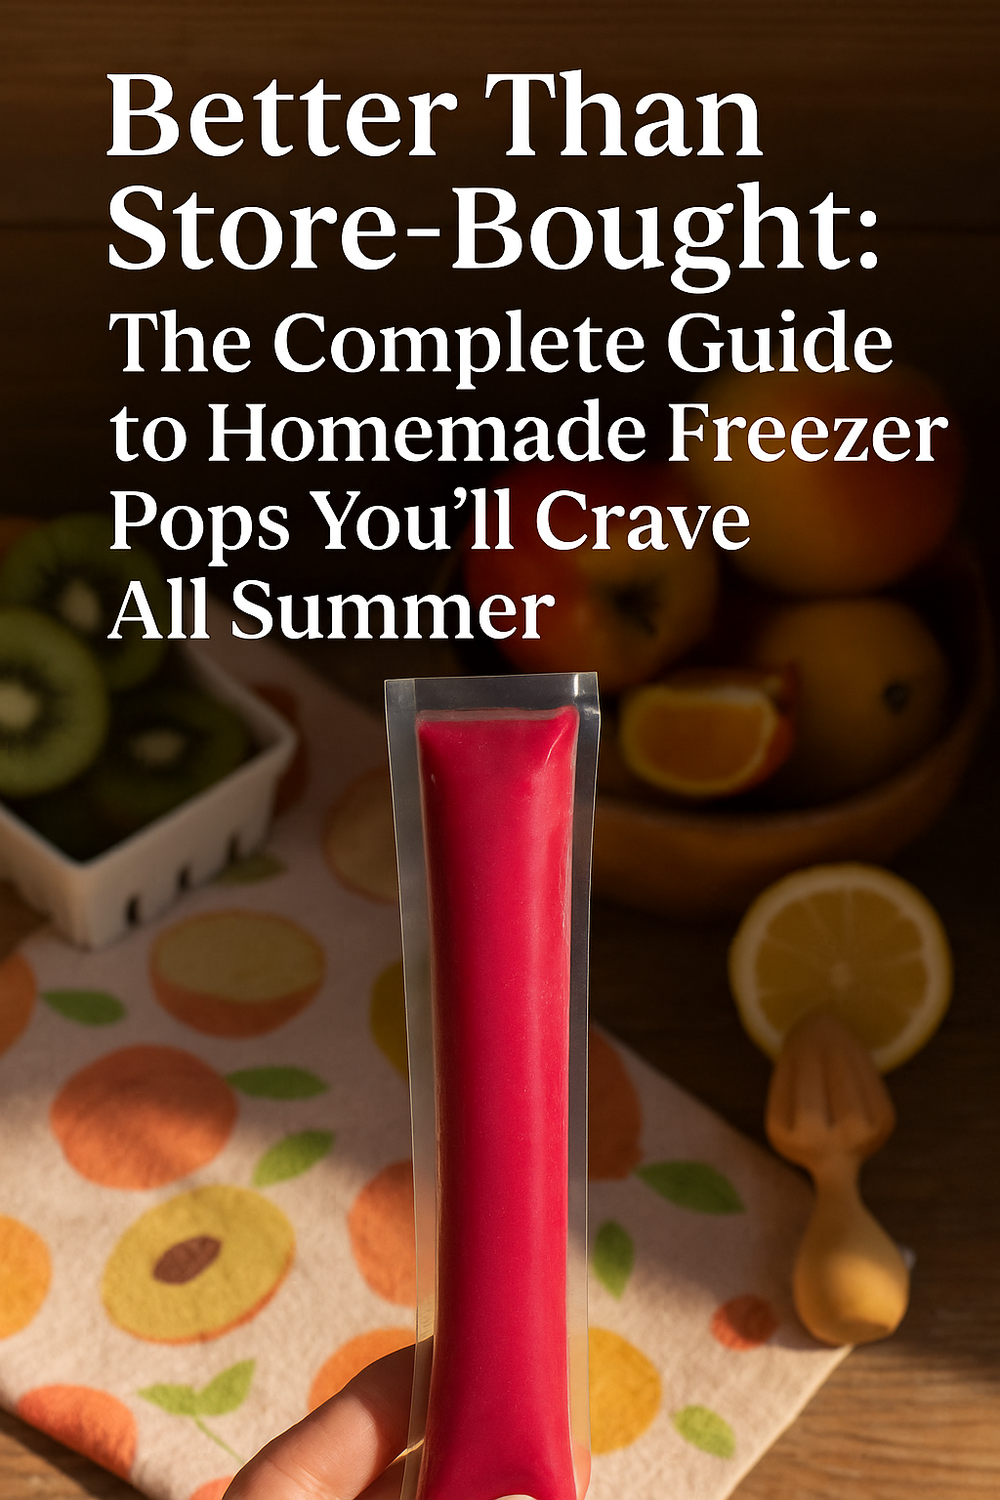
The Ultimate Guide to Homemade Freezer Pops: Fresh, Flavorful, and Better Than Store-Bought
There is something deeply nostalgic about tearing open an ice-cold freezer pop on a hot summer day. The first icy slurp sends a sweet, refreshing chill straight down your throat, and suddenly, you’re transported back to childhood—bare feet on warm pavement, hair damp from the pool, and nothing on the to-do list except finding the next adventure. But here’s the thing: store-bought freezer pops often come with a less-than-delicious side of additives, artificial colors, and more sugar than fruit.
If you’ve ever wished you could hold onto that childhood joy while upgrading the ingredients to match your grown-up standards, homemade freezer pops are your answer. This guide will take you far beyond the basic “blend and freeze” approach, showing you how to unlock bold, natural flavors, create impressive visual effects, and even incorporate nutrition into your frozen treats.
Whether you’re looking for a fun family activity, a way to impress guests at a summer gathering, or a healthier snack option, you’ll leave here with all the tips, tricks, and flavor ideas you need.
Why Homemade Freezer Pops Are Worth the Effort
When you make freezer pops yourself, you control everything—the sweetness, the texture, the intensity of flavor, and of course, the ingredients. This means you can:
- Ditch the artificial stuff: No neon dyes, no high-fructose corn syrup, no mystery flavoring.
- Highlight real fruit: Use fresh or frozen fruit at peak ripeness for the most vibrant color and taste.
- Customize endlessly: Mix and match fruits, layer flavors, and add herbs or spices.
- Make them healthier: Control sugar content and add nutrient-rich ingredients like chia seeds, yogurt, or even vegetables.
Plus, homemade freezer pops often have a richer, fresher taste. The difference between biting into a strawberry-flavored ice pop from a store-bought box and tasting one made from actual fresh strawberries is like night and day.
The Art and Science of Perfect Freezer Pops
1. The Base
Every freezer pop starts with a liquid base, but not all bases are created equal. Here are some options:
- Pure fruit purée: The most straightforward option—just blend fruit with a splash of water or juice.
- Coconut water: Naturally hydrating and subtly sweet.
- Juices: Freshly squeezed juice (like orange, pineapple, or watermelon) creates bright flavors.
- Creamy bases: Use yogurt, coconut milk, or almond milk for creamy pops.
Pro tip: Avoid using plain water as the majority of your base unless you’re going for a light, icy texture. For richer flavor, stick to fruit juice or purée.
2. The Sweetener
Natural fruit often provides enough sweetness, especially if it’s ripe, but sometimes you’ll want to enhance the flavor.
- Honey: Adds floral notes.
- Maple syrup: Offers a deeper, caramel-like sweetness.
- Agave nectar: Neutral and blends easily.
- Dates: Blend into the purée for natural sweetness with fiber.
Tip: Sweeten your mix slightly more than you think you need—freezing dulls sweetness.
3. The Flavor Boosters
Small additions can transform a good freezer pop into something unforgettable.
- Fresh herbs: Mint, basil, or thyme add unexpected freshness.
- Citrus zest: Lemon, lime, or orange zest brightens flavor.
- Spices: Cinnamon, ginger, cardamom, or nutmeg can deepen complexity.
- Extracts: Vanilla or almond extract for warm undertones.
Think of these like the seasoning in a dish—subtle but essential for elevating the end result.
4. Texture Elements
Not all freezer pops have to be perfectly smooth. Small pieces of fruit or other mix-ins can make each bite more exciting.
- Whole berries: Blueberries or raspberries freeze beautifully inside pops.
- Chia seeds: Add nutrition and a fun texture.
- Shredded coconut: Adds chewiness and tropical flair.
When adding chunks, make sure they’re small enough to bite into comfortably.
5. Color and Presentation
One of the joys of making freezer pops at home is that they can look as good as they taste. Natural fruit provides stunning colors without synthetic dyes.
- Layering: Freeze one flavor halfway before adding another for multi-color stripes.
- Marbling: Swirl two flavors together before freezing.
- Clear pops with suspended fruit: Use coconut water or lightly sweetened lemonade and drop in whole berries or kiwi slices.
A visually beautiful pop feels extra special and is guaranteed to impress guests—or your Instagram followers.
Techniques for the Best Homemade Freezer Pops
Use a High-Powered Blender
A smooth purée makes the pops easier to pour and creates a consistent texture. If your blender leaves large bits of fruit, strain the mixture through a fine mesh sieve.
Don’t Overfill
Liquid expands as it freezes. Leave about ½ inch of space at the top of your pop sleeves.
Lay Flat to Freeze
If your freezer pops freeze standing up, the fruit might settle unevenly. Laying them flat helps create a consistent look and texture.
Freeze Overnight for Best Results
While some pops will freeze solid in about 5 hours, an overnight freeze ensures they’re completely set.
Flavor Combinations to Try
If you’re feeling adventurous, here are some inspired ideas that go beyond the standard strawberry or mango pop:
Tropical Sunrise
- Mango
- Pineapple
- Coconut water
- A squeeze of lime
Berry Basil Bliss
- Strawberries
- Blueberries
- Fresh basil leaves
- A touch of honey
Kiwi Dragonfruit Cooler
- Kiwi
- White dragonfruit
- Coconut water
- Agave syrup
Peach Ginger Glow
- Ripe peaches
- Fresh ginger
- Honey
- Lemon juice
Citrus Mint Refresher
- Orange
- Lemon
- Fresh mint
- Maple syrup
Watermelon Chili Lime
- Watermelon
- Lime juice
- Tajín or chili powder for a spicy kick
Nutrient-Boosted Freezer Pops
For those looking to add health benefits, freezer pops can double as functional snacks.
- Smoothie pops: Blend spinach or kale into a tropical fruit mix—flavor stays sweet, but you sneak in greens.
- Protein pops: Add a scoop of protein powder to a banana-based purée for post-workout refreshment.
- Electrolyte pops: Use coconut water and a pinch of sea salt for rehydration.
Kid-Friendly Tips
Homemade freezer pops are a hit with kids—and a clever way to encourage fruit intake. Get them involved in the process:
- Let them choose fruit combinations.
- Have them help pour purée into sleeves (with supervision).
- Turn it into a taste-test challenge where they try to guess flavors.
The sense of ownership makes them more excited to eat the finished pops.
Hosting with Freezer Pops
Freezer pops aren’t just for kids’ snacks—they can be the highlight of a summer gathering.
- Freezer Pop Bar: Offer a variety of pre-made pops in different flavors and colors. Guests pick their favorite.
- Cocktail Pops: Add a splash of rum, vodka, or prosecco for an adults-only version (freeze times may vary).
- Dessert Pops: Dip frozen pops halfway in chocolate and sprinkle with crushed nuts or coconut.
Storing and Shelf Life
Homemade freezer pops keep well for up to 3 months in the freezer, though flavor and color are best within the first month. Store them flat in a freezer-safe container or basket to prevent bending or tearing.
Troubleshooting Common Problems
Pops are icy or hard:
You may have too much water and not enough fruit sugar. Increase the fruit-to-water ratio or add a bit more sweetener.
Pops are too soft:
This can happen if alcohol is added in excess or if fat content (like from coconut milk) is too high. Adjust proportions.
Fruit pieces float to the top:
Pour slowly and occasionally tap the sleeve on the counter to settle contents evenly.
Why These Are “Better Than Store-Bought”
The biggest difference is freshness. Store-bought pops are made for long shelf life, which often means pasteurizing the juice (dulling the flavor) and adding preservatives, stabilizers, and colorants. Your homemade version will be brighter, juicier, and more authentic in flavor.
You also gain the joy of creativity. No brand offers a kiwi-basil-lime pop or a watermelon-chili creation. You’re not just making freezer pops—you’re crafting flavor experiences.
A Sustainable Choice
Making freezer pops at home can also be eco-friendly. By using reusable silicone molds or compostable pop sleeves, you reduce packaging waste. Choosing local or seasonal fruit cuts down on transportation emissions while supporting local farmers.
Final Thoughts
Homemade freezer pops are one of those rare kitchen projects that combine ease, creativity, and payoff in every bite. In less than ten minutes of prep (plus freezing time), you can make a treat that’s healthier, more flavorful, and more visually stunning than anything you could buy in a box.
Once you master the basics, the possibilities are endless—layered tropical creations, creamy swirls, hydrating electrolyte pops, and even elegant herb-infused options for summer dinner parties.
So grab your blender, pick your fruit, and get ready to fill your freezer with pops that will make you smile from the first slurp to the last. In the next section, you’ll find a simple, foolproof recipe to get started—but don’t stop there. Let your freezer become a gallery of your most delicious ideas.
🍓 HOMEMADE FREEZER POPS 🍍 Better Than Store-Bought Hack 🍇
Skip the store-bought additives and make your own fresh, fruity freezer pops with 3 simple ingredients. These are juicy, vibrant, and endlessly customizable. Perfect for hot summer days ☀️
🧊 YOU’LL NEED:
- 2 cups chopped fresh fruit (any kind: strawberry, mango, blueberry, kiwi, dragonfruit, etc.)
- 1 tbsp honey or maple syrup (optional)
- ¼ cup water or coconut water
- Ice pop pouches (Amazon search: “freezer pop bags”)
🌀 STEP-BY-STEP:
1️⃣ Choose Your Fruit Combo
Pick your favorites or mix it up—mango + pineapple, blueberry + acai, kiwi + dragonfruit. Frozen fruit works just as well.
2️⃣ Blend
In a high-speed blender, combine the fruit, water, and honey until completely smooth.
3️⃣ Strain (optional)
For a silky texture (especially with berries), strain the mixture through a fine mesh sieve.
4️⃣ Pour Into Bags
Using a funnel, pour the purée into freezer pop sleeves, leaving a little space at the top for expansion.
5️⃣ Freeze
Seal and lay flat in the freezer for at least 5 hours or overnight.
6️⃣ Enjoy!
Cut the top, squeeze, and slurp your way to refreshment. Tag us with your flavor combos! 🍧✨
💡 Pro Tips
- Add fresh mint or basil for a grown-up twist.
- Use coconut water for extra hydration.
- Freeze in layers to make two-tone pops for extra fun!
The Only Step by Step Freezer Pop Guide You Need
Homemade freezer pops are the fastest way to turn fresh fruit into a colorful snack that feels like a tiny vacation. This guide walks you through the complete process from shopping and prep to pouring and freezing. You will learn how to build flavor, choose the best equipment, fix common problems, and store a full drawer of pops like a pro. I will also point you to smart product picks with Amazon search links so you can stock up in minutes.
What You Need Before You Start
You can make great freezer pops with nothing more than fruit and a blender. A few well chosen tools make the job tidier and faster, especially if you plan to batch prep and keep a steady supply ready for hot days.
Blender: A powerful motor makes smoother purée which means silkier pops.
Shop high speed blenderFreezer pop sleeves or molds: Sleeves give you the classic long ice pop. Silicone molds give you shapes and are reusable.
Shop freezer pop bags
Shop silicone popsicle moldsFunnel or batter bottle: Prevents drips when filling sleeves.
Shop small kitchen funnel set
Shop batter dispenser bottleFine mesh sieve: Optional, but ideal for berry skins and seeds.
Shop fine mesh strainerCitrus juicer: For fresh lemon or lime to brighten flavor.
Shop handheld citrus juicerMeasuring cups and pitcher with spout: A spouted pitcher turns purée into a clean pour.
Shop glass measuring cup with spout
Shop one quart mixing pitcherSheet pan and zip bags or storage bin: Keeps filled sleeves flat and organized while freezing.
Shop rimmed sheet pan
Shop freezer organizer binOptional flavor boosters and liquids: Honey or maple syrup, coconut water, vanilla extract, fresh herbs.
Shop coconut water variety pack
Shop raw honey
Shop pure maple syrup
Shop vanilla extract
Shop fresh herb starter pack
Step 1 Choose your fruit strategy
Start with ripe fruit since freezing mutes sweetness. Fresh is fantastic, and frozen works beautifully because it is picked at peak ripeness. Think in families of flavor. Tropical blends like mango and pineapple taste rich and sunny. Berry blends are bright and jewel toned. Citrus and melon blends are crisp and thirst quenching. Plan on two packed cups of chopped fruit per batch which makes three to four long freezer pops depending on sleeve size.
If your budget loves frozen fruit, grab big bags and mix your own blends all season. For market fresh fruit, buy what looks vivid and fragrant. Avoid fruit that is bruised or dull since that often means bland pops.
Quick shop links
Shop frozen mango
Shop frozen mixed berries
Shop fresh kiwi
Step 2 Rinse chop and measure
Rinse fresh fruit in cool water and pat dry. Remove peels, pits, and tough cores. Chop into blender friendly pieces. Measure two packed cups into your pitcher so you can see what you have at a glance. If using berries, measure loosely to avoid packing too tight which can lead to an extra thick purée.
Tip
If you are prepping multiple flavors, label small bowls with sticky notes so you can keep blends organized. A little mise en place turns a messy project into a smooth flow.
Step 3 Balance with liquid
You need a little liquid to help the blender catch and to balance texture. Water works, but a better choice is coconut water, orange juice, or apple juice which adds flavor without overwhelming the fruit. Start with a quarter cup per two cups of fruit. For high water fruits such as watermelon or ripe peaches, you may need only a splash.
If you want a creamy vibe, use a third cup of yogurt or coconut milk for the liquid component. This gives a soft bite and a mellow finish.
Quick shop links
Shop orange juice no pulp
Shop unsweetened coconut milk
Shop plain Greek yogurt
Step 4 Sweeten just enough
Taste your fruit. If it is peak season you may not need any sweetener. If it tastes flat, add one tablespoon honey or maple syrup. Remember that cold dulls sweetness. A purée that tastes perfectly sweet at room temperature will taste quieter when frozen. Add sweetness a little at a time and blend again before you decide.
Quick shop links
Shop honey squeeze bottle
Shop organic agave nectar
Step 5 Brighten with acid
A small hit of acidity wakes up fruit the way a squeeze of lemon brings life to a salad. Add one to two teaspoons fresh lemon or lime juice to berry and melon blends. Pineapple and mango often need only a tiny squeeze. For creamy blends, a quarter teaspoon of vanilla extract rounds the edges and adds a bakery note that feels luxe.
Quick shop links
Shop fresh lemons
Shop limes
Step 6 Add a signature note
This is where homemade pops become memorable. A few mint leaves in watermelon purée taste like a spa day. A pinch of grated ginger in peach makes the flavor glow. Blueberries with a whisper of basil feel both classic and new. Start with a light hand. You can always add more.
Quick shop links
Shop fresh mint
Shop fresh basil
Shop fresh ginger
Step 7 Blend until silky
Load fruit, liquid, sweetener, and boosters into your blender. Start low and quickly increase to high. Blend until the purée looks glossy and the whirlpool is smooth. If the blades cavitate and spin without pulling fruit down, stop and add one to two tablespoons more liquid. For a smoothie style pop, leave a few tiny fruit flecks. For a gelato smooth pop, run the blender an extra minute.
Quick shop link
Shop high speed blender
Step 8 Strain for a smooth finish optional but lovely
Pour the purée through a fine mesh sieve set over a bowl or pitcher. Use a silicone spatula to nudge liquid through. This step removes seeds and skins and gives a satin texture that tastes pure and bright. It is optional for mango and peach blends, and very helpful for blackberry and blueberry blends.
Quick shop links
Shop fine mesh strainer
Shop silicone spatula set
Step 9 Transfer to an easy pour vessel
Move the purée into a pitcher with a spout or a batter bottle. This turns the next step into a neat operation instead of a sticky counter situation. If you like to layer flavors, divide the purée into small measuring cups so you can pour with precision.
Quick shop links
Shop spouted glass pitcher
Shop kitchen batter dispenser bottle
Step 10 Prep sleeves or molds
Set clean sleeves in a tall cup so they stand open, or lay silicone molds on a sheet pan. If your sleeves seal with a zip, unseal them and fold the top edge over once so the zipper stays clean. If you use hard molds with sticks, have the sticks ready.
Quick shop links
Shop freezer pop bags
Shop popsicle sticks
Step 11 Fill with a funnel
Place a small funnel in the mouth of each sleeve. Pour slowly and stop just below the fill line. If your sleeves do not have a line, leave one finger of headspace. Ice expands as it freezes. Wipe any drips so the seal holds. For molds, pour to the guide line and insert sticks straight up.
Quick shop links
Shop mini funnel set
Step 12 Seal and lay flat
Seal sleeves firmly. Lay them flat on a sheet pan so they freeze with an even thickness. Slide the pan into your freezer and arrange in a single layer. If you are making a large batch, stack a second pan on top and rotate the stack after one hour so everything freezes at the same rate.
Quick shop link
Shop rimmed sheet pan
Step 13 Freeze time and patience
Expect five to eight hours for a firm set depending on freezer temp and thickness. Overnight is foolproof. If you want to create layers, freeze the first layer for forty five to sixty minutes until it is slushy and set, then pour the second layer and continue freezing.
Step 14 Serve like a pro
When the moment arrives, flex each sleeve gently to loosen the pop inside. Snip the top with clean scissors. If you used molds, run warm water over the outside for ten to fifteen seconds and then pull the stick straight out. Serve immediately. Repeat until smiles appear.
Quick shop link
Shop kitchen shears
Flavor blueprints you can trust
Use these as written or as a starting point for your own blends. Each formula makes about three to four long pops.
Berry basil
Two cups strawberries plus a half cup blueberries
One quarter cup coconut water
One tablespoon honey
Two teaspoons lemon juice
Four small basil leaves torn
Peach ginger glow
Two cups peeled ripe peaches
Three tablespoons orange juice
One teaspoon grated fresh ginger
One tablespoon maple syrup
One teaspoon lemon juice
Kiwi lime refresher
Two cups peeled kiwi
Three tablespoons apple juice
One teaspoon lime zest plus two teaspoons juice
One tablespoon agave nectar if needed
Mango pineapple sunrise
One cup mango plus one cup pineapple
One quarter cup coconut water
One teaspoon lime juice
Splash of vanilla extract
Watermelon mint spa pop
Two cups cubed seedless watermelon
Two tablespoons lime juice
Four to six mint leaves
A small pinch of salt to sharpen sweetness
Make two tone and swirled pops
For two tone pops, freeze the first layer until it holds its shape then add a second flavor. For a swirl, pour two colors at once from small pitchers and wiggle your wrists as you pour. Another option is to fill sleeves with a lighter base like coconut water, then drop small fruit pieces in so they hang suspended once frozen.
Quick shop link
Shop small pouring beakers
Boost nutrition without losing joy
Freezer pops can be a sneaky good snack with the right additions.
Add a tablespoon chia seeds to mango or strawberry purée. Let sit five minutes before pouring so the seeds hydrate.
Shop chia seedsBlend a handful of baby spinach into pineapple and mango. The flavor stays tropical and the color turns bright spring green.
Shop baby spinachUse coconut water with a pinch of sea salt for a hydrating pop after workouts.
Shop sea salt fineStir in two tablespoons plain yogurt for a creamy pop that still tastes fruity.
Shop plain Greek yogurt
Batch prep like a freezer boss
If you want a drawer full of color, work in sets. Choose three fruit blends that share a few ingredients to save time. For example use one pineapple bag for mango pineapple, strawberry pineapple, and pineapple coconut. Wash the blender between blends with a quick half cup warm water rinse, then a drop of dish soap and a pulse, then rinse again.
Label each flavor with painter tape and a fine marker. Keep a simple log on your phone with flavor name and date so you can track hits and rotate stock.
Quick shop links
Shop painter tape
Shop fine point permanent marker
Storage that keeps pops neat and reachable
Once frozen solid, move sleeves into a freezer bin or zip bag and stand them upright. Group by color or flavor so you can grab what you want without digging. If you used silicone molds, pop the treats out and store in a lidded container with parchment sheets between layers to prevent sticking.
Quick shop links
Shop gallon freezer bags
Shop parchment paper sheets
Shop stackable freezer bins
Troubleshooting common issues
The pop is icy and hard
This usually means too much water or not enough natural sugar. Next time increase fruit or use juice instead of water. A spoon of honey helps. For melon rich blends add a pinch of salt which sharpens sweetness.
Fruit pieces float to the top
Pour slowly and tap the sleeve on the counter to settle. For more even distribution, let purée rest a few minutes to thicken, then fill.
The mixture will not blend
Add one tablespoon liquid and pulse. Scrape down sides and repeat. Frozen fruit can seize in the jar if there is not enough liquid to catch the blades.
Pops are soft and do not set
Too much alcohol or fat will keep pops from freezing firmly. Limit booze to a tiny splash for adult versions and keep coconut milk or yogurt to about one third cup per batch.
The flavor tastes dull after freezing
Increase acid or sweetener slightly. Freezing temp can mute both. A small squeeze of lemon and a half tablespoon honey work wonders.
Fun variations for parties and weekends
Chocolate dipped edges
Melt a little dark chocolate with a teaspoon coconut oil. Dip the frozen pop one inch deep, then sprinkle crushed nuts or coconut. Lay on parchment to set.
Shop dark chocolate melting wafers
Shop shredded coconut
Mocktail pops
Combine strawberry purée with lemonade for a pink spritzer vibe. Mix pineapple with ginger ale concentrate for a playful fizz flavor.
Shop lemonade concentrate
Shop ginger ale syrup
Breakfast pops
Blend mango with yogurt and oats, then fold in a few blueberries. They taste like a chilled parfait.
Shop quick oats
Kids art pops
Layer small bands of color. Pour two tablespoons of one purée, freeze ten minutes, then add the next color. Repeat until you have a rainbow. Kids love to choose the order. Keep layers thin so the pop still eats easily.
Sanitation and food safety
Always start with clean hands, a clean blender, and fresh produce. Wash the blender jar and utensils with warm soapy water as soon as you finish before fruit residue dries. If you prep dairy based pops, keep your purée refrigerated if you need to step away before filling sleeves. Label the date and enjoy within one month for best taste and color.
Quick shop links
Shop eco dish soap
Shop bottle brush set
Cost smart tips
Store bought boxes can look cheap per pop but often contain very little fruit. When you buy frozen fruit in value bags and use sleeves that come in bulk, your cost per pop drops while quality rises. Watch for sales on pineapple, mango, and berries, then freeze extra portions in recipe size bags so you can blend quickly later.
Quick shop links
Shop bulk freezer pop sleeves
Shop quart freezer bags
A simple production schedule you can repeat
Here is an easy plan to fill a drawer in one relaxed afternoon.
One Choose three flavors. For example mango pineapple sunrise, berry basil, and kiwi lime refresher.
Two Prep fruit for all three blends at once and line up your add ins.
Three Blend the first flavor, strain if needed, pour into sleeves, and lay on a sheet pan.
Four Rinse the blender, then repeat with the second and third flavors.
Five After two hours rotate the pans so everything freezes evenly.
Six Once frozen move sleeves to a labeled bin. Put your sheet pans back in the cabinet. Smile at your colorful drawer.
The best part taste and moments
Your first homemade freezer pop will tell you everything you need to know. The color is brighter. The taste is truer. The texture is just right. That little pocket of joy happens because you used real fruit and your own judgment. Eating one on a porch at sunset feels like a tiny celebration. Sharing a basket with friends at the pool feels like a victory. Watching kids pick their favorite color and then run back for a second one tells you the recipe is a keeper.
Ready to make a batch
Gather your fruit. Pick a blender. Grab sleeves and a small funnel. Choose one flavor blueprint and start there. In the space of ten minutes you can have a pan of future happiness headed into the freezer. Come back tomorrow for the payoff and do not forget to tell me your favorite blends so we can swap ideas and keep the freezer full.
Quick recap of core tools
High speed blender
Freezer pop bags
Silicone popsicle molds
Mini funnel set
Fine mesh strainer
Spouted pitcher
Freezer organizer bin
Next up is the recipe section with exact amounts and tidy steps. Once you try the base formula, come back to this guide anytime you want to expand with layers, swirls, creamy variations, or nutrition boosts. Your freezer is about to become the most joyful place in the kitchen.
Closing Thoughts
Homemade freezer pops are proof that the best summer pleasures are often the simplest. With just a blender, a few sleeves, and the fruit you already love, you can create snacks that are fresher, healthier, and far more exciting than anything in the store-bought aisle. They are a blank canvas for creativity—whether that means layering tropical purées into edible sunsets, swirling berries into yogurt for a creamy surprise, or adding herbs and spices for a gourmet twist.
More than a recipe, they are an invitation to slow down and savor small joys. They turn a hot afternoon into a moment of refreshment. They make kids giggle. They spark conversation at gatherings. And every time you open your freezer to a drawer full of colorful creations, you will be reminded that you took a little extra care to make something wonderful.
So blend boldly, pour with care, and freeze with intention. Your next favorite flavor combination is waiting to be discovered—and your freezer is ready to hold it.