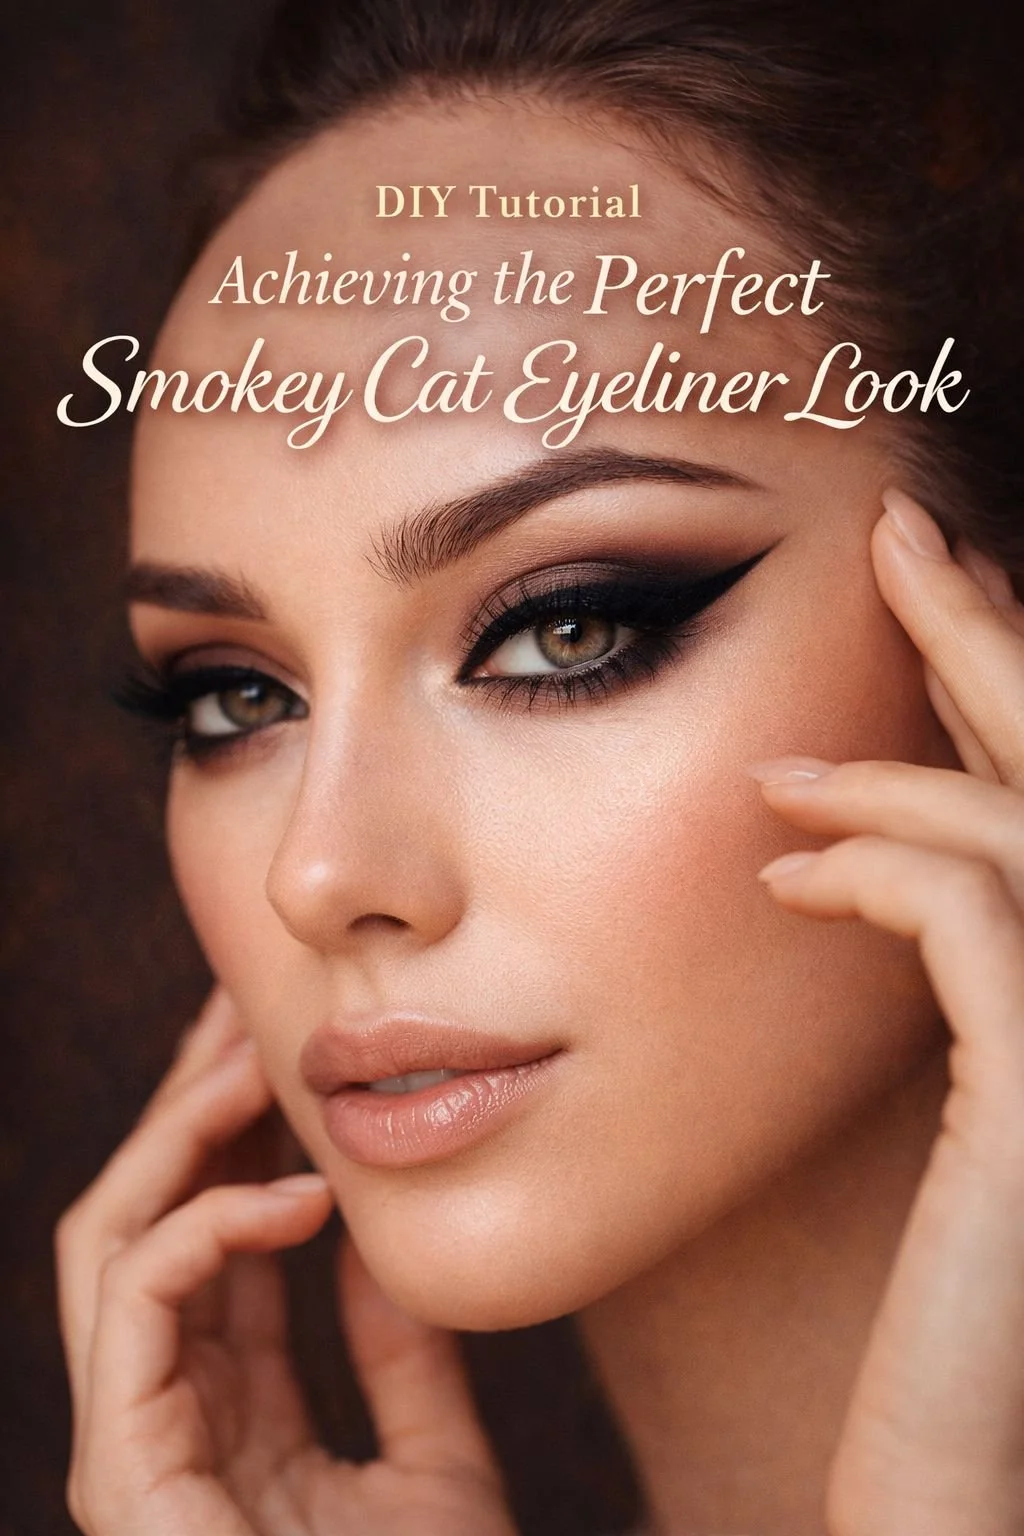
DIY Tutorial: Achieving the Perfect Smokey Cat Eyeliner Look

The Smokey Cat Eye Renaissance: A Masterclass in Seduction, Style, and Skill
There’s something eternal about the allure of the cat eye. It’s a shape that speaks in whispers and stares in daggers. It’s Cleopatra and Audrey. It’s punk and it’s couture. It’s late nights in leather and early mornings in silk robes. It doesn’t just accentuate your gaze—it defines it. And when you lace that feline flick with the drama of a smokey finish, you’re not just wearing eyeliner. You’re casting a spell.
The smokey cat eye is not new, but it is freshly powerful every time it appears. It has the grace of vintage glamor and the bite of modern rebellion. It can be soft and diffused, or sharp and villainous. One moment it’s giving Bond girl, the next it’s giving femme fatale CEO. And let’s be honest—no matter how many palettes we hoard, how many brushes we own, we always come back to that sultry wing paired with shadowed mystery.
But for all its popularity, the smokey cat eye still manages to intimidate. Ask any beauty lover what makeup technique they still struggle with, and odds are, you’ll hear about uneven wings, patchy blending, or raccoon-like results. The truth? This look is as much about control as it is chaos. It requires a steady hand, but also a fearless spirit. It’s technical, yes—but once you master it, it becomes second nature.
So this isn’t just a tutorial. This is your invitation to master a beauty archetype. We’re diving deep. Whether you’re doing your liner in a car mirror with one hand or carving it like a sculptor in your vanity nook, this guide is designed to arm you with every trick, angle, and insight you need.
Welcome to the smokey cat eye renaissance. Your eyes are about to become the main event.
Why the Smokey Cat Eye Remains Unrivaled
Let’s break it down. The cat eye’s enduring relevance is rooted in three key powers: illusion, emotion, and precision.
Illusion: The cat eye elongates. It gives a lifted, angled silhouette to the face, which plays beautifully with cheekbones and jawlines. Add in smoke, and you get a soft haze that blurs imperfections and draws attention to the whites of your eyes.
Emotion: This isn’t just makeup—it’s mood. A straight wing says confidence. A smoked-out liner says danger. A pointed flick paired with shimmer on the lids says come closer, then maybe don’t.
Precision: The smokey cat eye demands control. You’re sculpting with pigment. You’re blending shadows like whispers and striking lines like declarations. The payoff is a look that’s not just applied, but designed.
Skin, Texture, and Eye Shape: The Prep Work That Matters
Before diving into brushes and pigment, let’s address the canvas.
Skin Texture: Oily lids? Go for a matte primer. Dry lids? Use a hydrating eye base but avoid anything too emollient. The smokey cat eye needs a grip to hold shape.
Eye Shape: Hooded eyes benefit from a higher wing placement. Almond eyes can rock nearly any style. Downturned eyes? Angle that flick slightly upward to lift the outer corners. The shape of your eye doesn’t limit you—it guides the angle and intensity.
Brow Balance: Your brows frame your liner. Make sure they’re defined and balanced. A dramatic cat eye can overpower soft brows, so aim for structure with a light hand.
Building the Look: Layers, Not Lines
Here’s where most people go wrong—they treat the smokey cat eye as a single act when it’s really a three-act play.
Act I: The Sketch
Start with a pencil liner or matte eyeshadow and a small angled brush. Sketch the basic wing shape lightly. Think of it like drawing in pencil before committing to ink. This is where you map your symmetry, shape, and softness.
Act II: The Smoke
Now comes the layering. Using a smudger brush, add depth with a soft dark shadow. Blend outward and slightly upward. Your goal isn’t perfection—it’s haze. A touch of deep brown or charcoal adds depth without overwhelming the shape.
Act III: The Sharp
Time to lock it in. Use gel or liquid liner to define the wing. Don’t trace the entire lash line—just emphasize the outer third. This preserves the smokiness but sharpens the intent. Finish with a bit of black shadow along the lower lash line and soften it with a smudge.
The Tools That Make a Difference
Let’s talk brushes, because they’re the secret weapons behind the artistry.
Angled Brush: For mapping and detail work.
Smudger Brush: For softening pencil and adding smoke.
Flat Shader: For packing pigment along the lash line.
Precision Liner Brush: For gel liner definition.
Tapered Blender: For diffusing the edges upward and outward.
If you’re working with limited tools, fingers can be powerful—especially for final blends. Just keep Q-tips and micellar water nearby for cleanups.
The Smokey Spectrum: Black, Brown, Bronze, and Beyond
While black is the classic, don’t underestimate the power of variation:
Brown Smokey Cat Eye: Soft and earthy, ideal for daytime or paired with a bold lip.
Bronze or Copper: Adds warmth and shimmer, especially flattering on green or hazel eyes.
Charcoal or Slate: A modern alternative to black with less starkness.
Burgundy or Plum: Stunning with deeper complexions and green eyes.
Whatever your shade, consistency matters. Use matte tones for structure and shimmer sparingly—usually just on the center lid or inner corner.
Pairing with the Perfect Lip and Complexion
The smokey cat eye is versatile—it can be the star or play second to another bold element.
Nude Lips: Keep the focus on the eyes. Choose creamy textures or satin finishes.
Red Lips: Old Hollywood drama. Go for a velvet matte red with minimal blush.
Glossy Lips: For a modern editorial finish, especially with a bronzed base.
Complexion Tip: Keep foundation matte and set under the eyes to avoid transfer. Add a hint of highlighter on cheekbones to balance the matte drama.
Longevity Secrets: Make It Stay
Primer: Always start with an eye primer or concealer set with translucent powder.
Layer Cream and Powder: This sandwich technique locks in pigment.
Setting Spray: Mist your face after makeup, then tap over the liner gently with your ring finger to lock it in.
Tightline: Line the upper waterline to deepen the lash effect and avoid visible gaps.
Common Mistakes and How to Fix Them
Uneven Wings: Use a dot or dashes technique to map them before filling in.
Overblending: If your smoke looks muddy, use a skin-toned shadow or clean brush to redefine edges.
Panda Eyes: Set under the eyes with powder and use waterproof products.
Too Harsh: Smudge out lines with a tiny detail brush dipped in a medium-toned matte shadow.
The Vibe Factor: Day to Night Transitions
One of the best parts about the smokey cat eye is its adaptability.
Day: Stick to browns or taupes, and keep the liner soft and diffused.
Evening: Go bold with jet black, defined wings, and even a pop of shimmer on the lid.
Glam: Add lashes and a swipe of inner corner highlight.
Grunge: Smudge everything slightly downward and pair with a blurred berry lip.
Switching it up is as simple as layering or removing one or two elements.
Final Thoughts Before the Brush Touches Skin
Mastering the smokey cat eye is not about copying a look. It’s about evolving it to fit your mood, your face, your vibe. With every flick and blend, you are shaping not just a feature, but a message. The eyes speak before you do. This look lets them shout, whisper, or tease as you please.
And now, with that mindset and method, you’re ready to take on the step-by-step tutorial below.

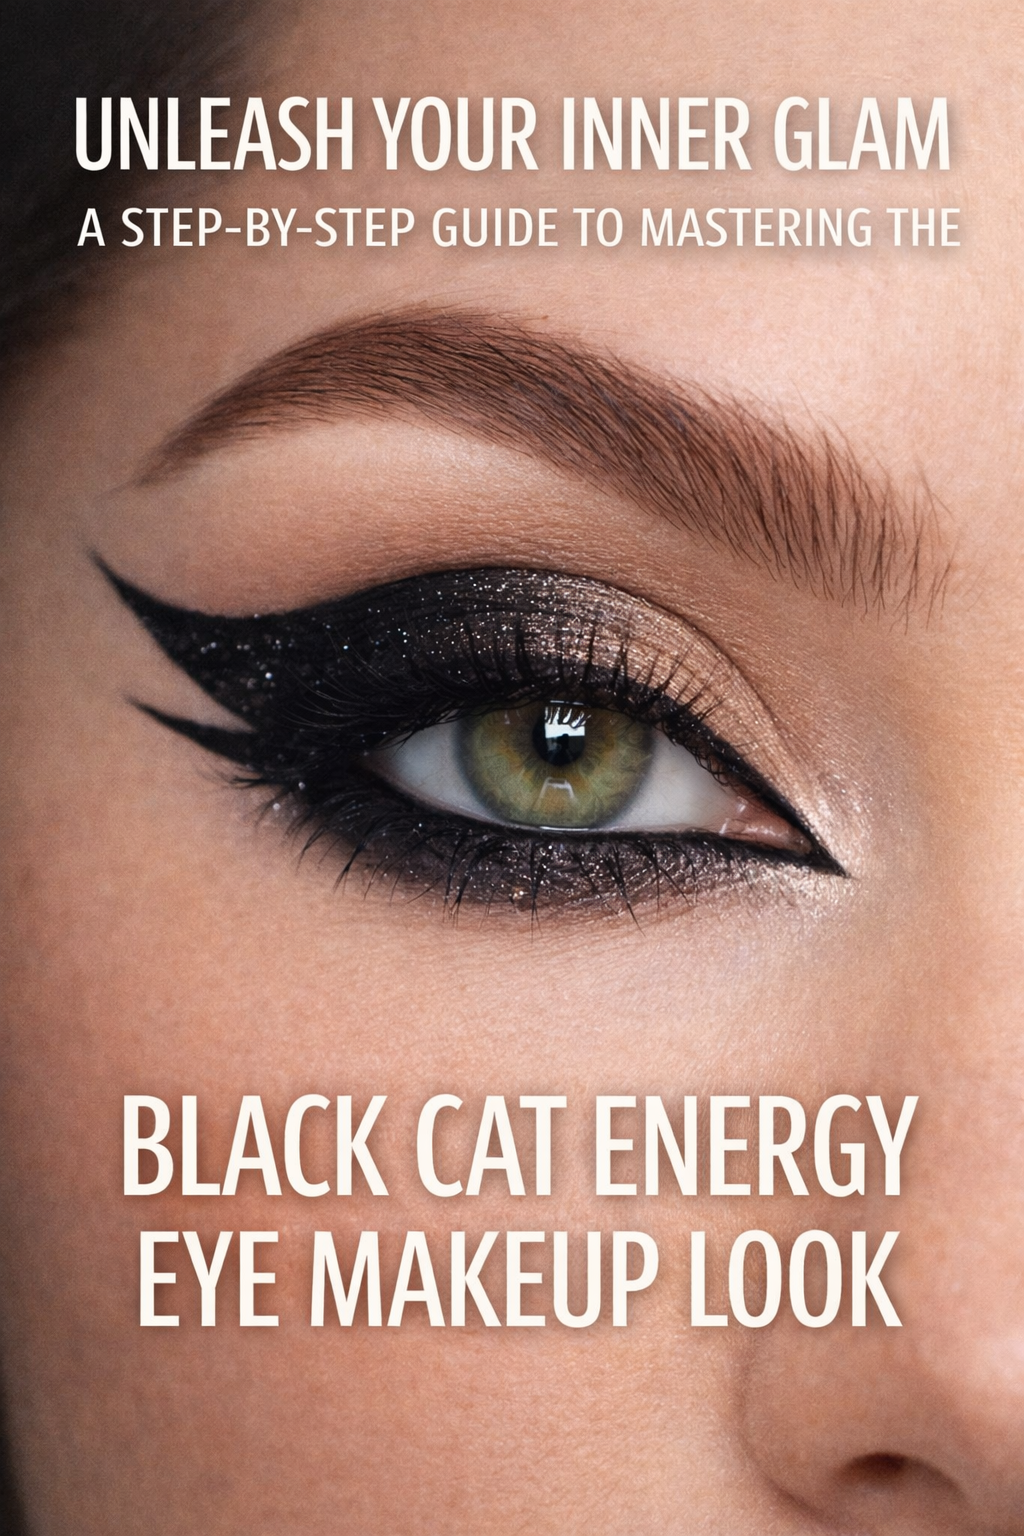
DIY Tutorial: Achieving the Perfect Smokey Cat Eyeliner Look
‘Black cat energy’ eye makeup look 🐈⬛
— Glam Artistry Hub (@glamartistryhub) March 30, 2024
How to do Smokey cat winged eyeliner 🖤
Should I do golden retriever next?!
EYES @maybelline pot gel eyeliner @nyxcosmetics_uk ultimate eyeshadow palette
@benefitcosmeticsuk fan fest mascara pic.twitter.com/nAiHL3B0zT

DIY Tutorial: Achieving the Perfect Smokey Cat Eyeliner Look
Step-by-Step Guide: Mastering the Smokey Cat Eyeliner Look
Creating the smokey cat eye is not just an act of application—it’s a ritual of transformation. Each layer you apply reshapes your gaze into something sharper, sexier, more cinematic. Below, you’ll find the complete breakdown from prep to precision. This tutorial respects the artistry and gives you a method you can tweak, personalize, and perfect.
Step 1: Prepare the Canvas
Before you touch a brush or pencil, set the stage with a flawless base.
Cleanse and moisturize your face, focusing on the undereye area. Follow with an eye cream or cooling gel to reduce puffiness and prime the skin. Apply your face base—foundation, concealer, and powder—after you finish the eye look to avoid fallout messing up the complexion.
For the lids, start with an eyeshadow primer or a thin layer of concealer. Blend it from the lash line to just above the crease and pat with translucent powder. This gives your shadow and liner something to grip while keeping creasing at bay.
Step 2: Outline the Wing
This is the most critical architectural moment. Get this right, and everything else flows.
Take a black or dark brown kohl pencil and gently draw a small angled line starting from your outer corner, pointing toward the tail of your brow. This is your lower guide line.
Then, draw the upper edge of the wing, connecting it back toward your upper lash line to form a triangle. Keep your gaze forward in the mirror to balance both sides. You are sketching, not perfecting.
Pro Tip: If you’re new to this, use a small angled brush and black powder shadow for the outline—it’s softer and easier to clean up. Once satisfied, trace over with a pencil or gel liner.
Step 3: Fill in the Wing with Depth
Now that your wing shape is established, it’s time to create that sultry smokiness.
With a small smudge brush, pick up a matte charcoal or espresso shadow and begin filling in the outer wing. Work inward along the lash line, building intensity at the outer third of the eye and tapering inward softly. Focus on blending into the lash line so no harsh gaps remain.
Don’t drag the pigment up into the crease yet—this layer should hug the lash line and serve as a shadow base.
If you're using pencil, smudge it quickly with your brush before it sets. This creates a blurred line instead of a stark one.
Step 4: Smoke the Crease and Outer V
This is where the look begins to live up to its name.
Switch to a tapered blending brush and dip into a warm or neutral transition shade—think taupe, soft brown, or mauve depending on your undertone. Blend this color into the crease, starting at the outer corner and sweeping inward. Use windshield wiper motions and small circles to diffuse the color upward toward the brow bone.
To intensify the look, layer a deeper tone like a matte black, eggplant, or ash brown into the outer V. Blend it over the wing and slightly into the crease, maintaining that elongated cat eye shape.
Use a clean brush to soften any edges without adding more pigment. Keep the inner third of your eyelid light for contrast.
Step 5: Define the Lash Line
Time to bring definition and boldness to your gaze.
With a gel or liquid liner, go back in to trace the upper lash line, starting from the center and extending outward to sharpen the top edge of the wing. You don’t need to line the entire lash line. A tight, minimal line on the outer third creates lift without closing off the eye.
For a more dramatic look, extend the liner inward using a thinner brush or fine-tipped pen, hugging the natural shape of your eye. Keep the inner line thin and controlled.
Step 6: Smoke the Lower Lash Line
Balance is essential. If you’ve smoked out the top, you need to give the lower lash line a hint of depth too.
Using a pencil brush or tiny smudger, apply a soft wash of your mid-tone shade (taupe, brown, or gray) along the lower lash line, focusing on the outer half.
Layer a darker tone (black or espresso) over the outer third only. Then blend with a clean brush to avoid harshness.
Optional: Use a nude or off-white pencil on the lower waterline to open the eyes, or a black liner for a more intense, night-out effect.
Step 7: Highlight the Inner Corner and Brow Bone
To keep the look sultry but not muddy, you need contrast.
Apply a small amount of champagne, pearl, or gold shimmer to the inner corner of the eyes using your pinky finger or a pencil brush. This brightens the area and offsets the darkness of the outer wing.
Then, dust a soft matte or satin highlighter just under the arch of the brow to lift the shape without clashing with the drama below.
Step 8: Clean and Sharpen the Edges
Take a flat angled brush dipped in concealer and clean up the underside of the wing. This makes your flick sharp, clean, and precise—even if it started a little messy.
You can also use a makeup wipe or Q-tip dipped in micellar water to refine the shape. Pat it out with your finger so no harsh concealer lines remain.
Step 9: Curl Lashes and Apply Mascara
Use a lash curler to give your lashes structure. Hold at the base of the lashes for 5–10 seconds.
Apply a volumizing and lengthening mascara, starting at the root and wiggling upward. Two coats on the top lashes. One coat on the bottom if desired.
Pro Tip: Use a fan brush to coat the top of the upper lashes with mascara for added definition. This technique is especially helpful if you're wearing falsies.
Step 10: Apply False Lashes (Optional)
If you want the full effect, now’s the time to add faux lashes—choose a pair that fans outward to amplify the cat shape.
Trim the band to fit your eye. Apply a thin layer of glue, wait for it to become tacky, then press the band into the lash line starting from the center, then outer, then inner corner.
Press your natural lashes and falsies together with tweezers for a seamless look. If needed, touch up your liner to hide the band.
Step 11: Final Touches and Set the Look
Once the eyes are finished, go back and complete your face. Apply foundation and concealer as needed, being gentle near the eyes. Powder lightly to avoid disturbing your masterpiece.
Add bronzer or contour to complement the lifted eye shape. A soft rose or peach blush pairs beautifully with the smokey drama. Finish with a highlighter at the high points of your face—tops of cheeks, nose bridge, cupid’s bow.
Finish your look with a lip color that matches the mood. Nude for timeless elegance. Deep berry or red for a vampy vibe. Gloss if you want modern freshness.
Set the entire face with setting spray, and let it dry naturally.
Bonus Layer: Personalizing the Vibe
Once you’ve mastered the technique, the smokey cat eye becomes a playground for self-expression.
Try variations like:
Metallic lids under the wing for a glam feel
Glossy lids for an editorial sheen
Double wings for runway impact
Colored liner layered under the smoke for a hidden flash
You can adapt this look to a 5-minute version with just pencil and blending, or build it out in layers for editorial drama. Either way, the structure remains the same—it’s all about shape, contrast, and flow.

The Final Swipe
The smokey cat eye is not just a look—it’s a language. It says bold without shouting. It seduces without begging. It elevates your features and unleashes your mood. Whether you wear it razor sharp for power moves or blend it into velvet softness for late-night mystery, it always delivers that undeniable edge.
This is the kind of makeup that leaves a trail. People remember your eyes when you wear this. They remember how you looked at them, how your stare lingered just long enough. It’s the kind of detail that transforms selfies, stops scrolls, and makes even a casual coffee run feel cinematic.
Mastering this technique arms you with a skill that goes beyond beauty—it’s a ritual of self-expression. You don’t need a red carpet to wear it. You don’t need permission. You just need the right tools, the right energy, and a little practice.
So bookmark this guide. Try it messy. Try it dramatic. Try it soft and lived-in. The smokey cat eye has no single identity—it’s a chameleon. And once it’s yours, it becomes part of your signature.
Now that you’ve got the method down, scroll down for curated looks and visual takes that bring the smokey cat eyeliner into your everyday moments and night-out moods. Let your eyes do the talking. Let your liner write the script.
Ask ChatGPT
To further enrich your experience and provide you with a wealth of knowledge, we’ve curated a list of top beauty blogs. These sources are brimming with makeup tutorials, product reviews, and the latest trends to keep you at the forefront of beauty and style. Explore these blogs to discover new tips, tricks, and inspiration for your makeup journey.
Top Beauty Blogs for Makeup Tutorials:
Makeup.com: A comprehensive resource for makeup enthusiasts of all skill levels.
Glamour: The online face of the popular, long-running fashion magazine.
Allure: A long-trusted source for beauty enthusiasts around the world.
Byrdie: Beauty tips and product reviews from insiders and industry professionals.
Sephora: Online storefront for the widely known beauty supplier.
Makeup and Beauty Blog: A health and beauty blog focused on lifestyle advice as well as product reviews.
jane iredale: Makeup and skincare advice from seasoned experts in the beauty field.
New Beauty: Covers breaking news in the world of health and beauty.
Barbie’s Beauty Bits: Updates on the latest in the fashion industry.
The Beauty Look Book: Fashion and beauty tips with a focus on high-end makeup and skincare brands.
Really Ree: Weekly product reviews and webisodes show the best available deals on health and beauty products.
Feel free to dive into these blogs for a treasure trove of beauty knowledge that will surely add value to your makeup routine. Enjoy exploring and experimenting with new looks!
Warm regards, Your Beauty Guide