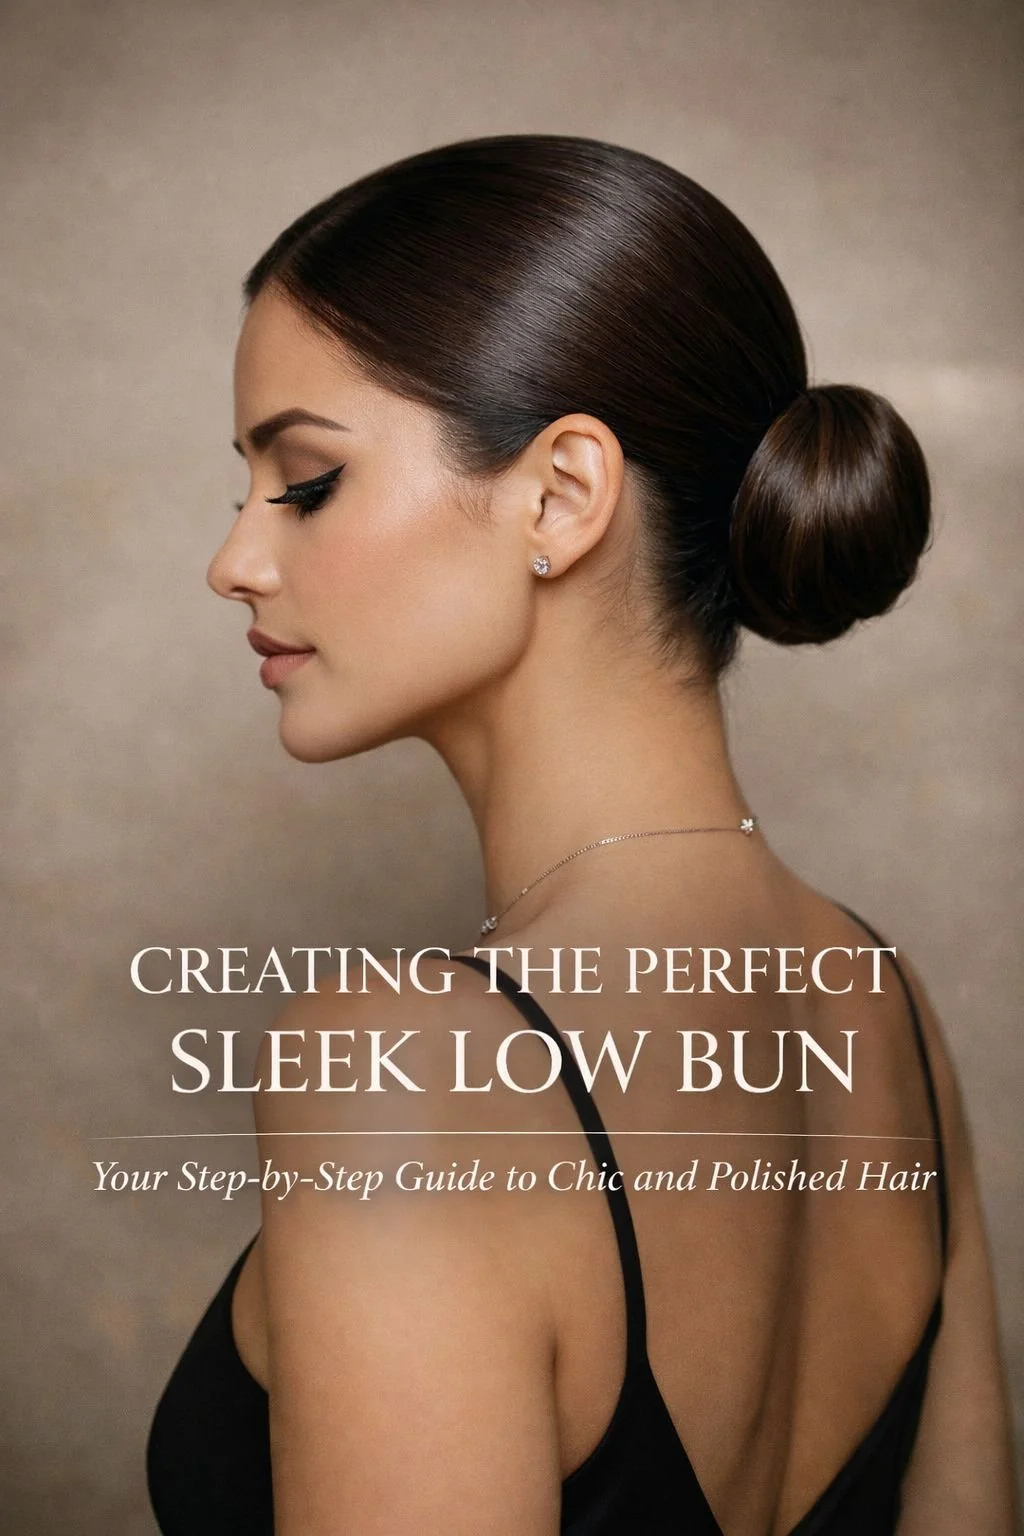
Creating the Perfect Sleek Low Bun: A Step-by-Step Guide

The Power of Sleek: Why the Low Bun Will Never Go Out of Style
There’s something eternally magnetic about a woman with her hair pulled back into a sleek low bun. It’s a style that commands attention, not because it screams for it, but because it doesn’t have to. Smooth, refined, deliberate. It’s the quiet luxury of hair—reminiscent of runways, red carpets, and those iconic paparazzi shots where less is more, and everything about the woman radiates poise. In this blog post, we’ll explore why the sleek low bun deserves a permanent place in your styling rotation, how it aligns with modern fashion and culture, and the exact steps to mastering the look in your own bathroom mirror.
A Minimalist’s Crown
The sleek low bun is minimalist, yes—but it’s anything but simple. Its strength lies in precision. A perfectly sculpted low bun is the beauty equivalent of a tailored tuxedo or a fitted cashmere coat. You wear it when you want to look sharp, put-together, and in control. Unlike high ponies or elaborate braids that pull the eye upward or outward, the low bun anchors your presence. It draws focus to the cheekbones, jawline, and neck. It sculpts the face like contouring, only using tension and shine instead of pigment.
And let’s be honest—it’s seductive. Not in a messy bedroom-hair kind of way, but in a modern Mona Lisa way. It’s the mystery of clean lines, the confidence of a woman who doesn’t fidget, and the timelessness of a look that never dates.
The Bun in Fashion Culture
From Audrey Hepburn’s elegant chignons to the modern-day supermodel off-duty aesthetic, the low bun has been reinterpreted across decades and industries. In corporate boardrooms, it says “I came to lead.” In bridal beauty, it whispers grace and restraint. On fashion week runways, it offsets maximalist clothing with minimalist polish. The sleek low bun has been worn by dancers, diplomats, duchesses, and Dior muses alike. It’s versatile not just in form, but in its ability to translate across moments. No one ever regrets a low bun.
It works whether your vibe is clean girl aesthetic, downtown grunge with edge, or high-glam with dripping crystals. It transitions from gym to gala with a simple pin tuck or accessory switch. And it’s become the unsung hero of beauty on-the-go. Hair feeling unruly? No time to wash or curl? Slick it down, pull it back, lock it in, and suddenly you’ve gone from chaotic to composed.
Who Wears It Well
There’s a reason celebrities like Zendaya, Bella Hadid, Hailey Bieber, and Kim Kardashian rotate through versions of the sleek low bun so often. They know its power. Whether they’re heading to a Met Gala or running errands for paparazzi shots, the look photographs beautifully from every angle. It gleams under camera flashes and maintains its structure through interviews, red carpets, and late-night appearances. Stylists favor it not only for its reliability but because it gives them a canvas to play with accessories—ear cuffs, veils, neck pieces, embellished clips.
And on TikTok and Pinterest, the sleek bun has made a major comeback. The “clean girl” movement, driven by Gen Z’s obsession with skincare-first beauty and off-duty glam, has elevated this classic into an everyday go-to. It’s paired with glowy skin, gold hoops, and barely-there makeup. Suddenly, it’s not just a red carpet look. It’s your new Monday morning look.
The Psychology of Pulled-Back Hair
A sleek low bun sends subconscious signals. There’s science and social nuance to it. Studies have shown that hairstyles that expose the face are perceived as more trustworthy and authoritative. They also draw more attention to the eyes and expression. That’s why women often opt for updos in interviews, meetings, or formal events. It conveys discipline, but not rigidity. It says you have control over yourself, and therefore, likely your life.
But here’s where it gets layered: a slick bun can also be disarmingly soft. When paired with romantic makeup, glossy lips, or bare shoulders, it becomes sensual in a way that loose waves rarely are. It says, “I’m not trying to be perfect—I just happen to be polished.” That paradox is what gives it power.
The Hair Health Angle
Beyond aesthetics, there’s a practical win here too. The sleek low bun is gentle on the hair when done right. It prevents friction against clothing or bedsheets. It locks in moisture when styled with oils or leave-in products. And it’s protective—shielding ends from breakage and reducing daily manipulation. For textured, curly, or color-treated hair, this style can be a major ally in length retention and overall health.
And unlike high buns or tight ponytails, the low placement reduces tension on the crown and hairline. With the right products and elastic, it can become your everyday protective style without the damage that other slicked-back looks sometimes cause.
Versatility Meets Intentionality
One of the most beautiful things about this hairstyle is how deeply customizable it is. Want something ultra-sleek? Use gel and a fine-tooth comb for that mirror shine. Want a dewy, soft-focus finish? Stick with a lightweight serum and use your hands to shape it. You can add braids, twists, ribbons, or barrettes. You can part your hair down the middle, sweep it to the side, or comb everything straight back for a sculptural crown effect.
You can make it severe, romantic, soft, edgy, sporty, or bridal. You can take one technique and reframe it five different ways depending on your outfit and energy that day. And that’s what makes the sleek low bun endlessly useful. It’s not just a style. It’s a strategy.
The Social Media Effect
Instagram and Pinterest have given the sleek low bun a thousand faces. There’s the viral “scoop and wrap” method with a claw clip underneath. There’s the “clean bun with baby hairs” version that’s rooted in Afro-Latina beauty culture. There’s the wedding variation with pearled pins scattered like stardust. And then there’s the runway wet bun—shiny, severe, high fashion. Social media has not only revived this look but recontextualized it for every audience.
Tutorials abound. Search “sleek bun tutorial” on TikTok and you’ll find millions of views, thousands of hacks, and dozens of cultures putting their own spin on it. From protective styles to ultra-glam, this is one of the few beauty staples that crosses boundaries while still feeling personal.
Must-Have Products
To nail this look, product choice is everything. You need hold, shine, and glide. A few cult favorites:
Edge control gel (for flyaways and clean hairlines)
Boar bristle brush (to smooth every strand without tugging)
Hair oil or glossing serum (to finish with polish)
Non-damaging hair ties (to secure without snapping strands)
Strong hold hairspray (for humidity control and durability)
Rat-tail comb (for clean parting and edge work)
Satin scarf or wrap (to set the style while you do makeup or get dressed)
You don’t need all of these at once—but having a good brush, a styling product that works with your hair type, and a clean tie is the minimum to execute this look well.
Common Mistakes to Avoid
There’s a fine line between sleek and greasy. Between polished and plastered. Between elegant and tight-to-the-point-of-a-headache. Here’s what to avoid:
Over-applying product: It should enhance the hair, not drown it.
Using harsh elastics: These cause breakage and indentations.
Skipping the brush: Hands alone can’t smooth the scalp the same way.
Forgetting to set: A satin scarf or hairspray can be the difference between sleek and straggly.
Ignoring your part: The part line is everything. Even if it’s subtle, make it intentional.
A Ritual, Not a Rush
What makes the sleek low bun more than just a hairstyle is the ritual of it. The deliberate brushing, the shaping, the smoothing. It slows you down. It forces you to be precise. In a world where everything is about rush and noise, it’s five minutes of quiet craftsmanship. You sculpt your hair like a sculptor with marble. And when you’re done, you don’t just look ready—you feel ready.
It’s a ritual of control, of care, of choosing elegance on purpose.
Ready to Get the Look?
Now that you know why the sleek low bun has become a non-negotiable beauty staple, it’s time to put it into practice. Whether you’re heading to work, date night, brunch, or a black-tie event, this tutorial will walk you through every single step of creating the perfect version of this timeless look.
Let’s dive in.

Creating the Perfect Sleek Low Bun: A Step-by-Step Guide
@hairflairaffair Sleek Low Bun Tutorial 1. Brush hair to remove any tangles. 2. Gather your hair as if you’re creating a half-up, half-down hairstyle; ensure smoothness on top. 3. With the top half, twist and pin it at the crown to create a mini-bun—this adds volume. 4. Collect the rest of your hair and combine it with the mini-bun into a low ponytail just above the nape. 5. Twist the ponytail around the base, creating a bun. Secure with bobby pins. 6. Adjust to hide any pins and ensure the bun sits just above your occipital bone for a lifted look. 7. Finish with hairspray to tame flyaways and add hold. Time to rock this chic bun with confidence! #hairstyle #hairtutorial #lowbun #chicbun #beauty #style #hairgoals #fashion #easyhairstyle #eleganthair #dailyhair #tutorial #TikTokHair #hairstyles #styletips #hairinspo #bunstyle #sleekhair #hairhacks #quickstyles #DIYhair #trendyhair #hairdo #hairtransformation @Jamie Vandenberg ♬ original sound - Hair Flair Affair
How to Master the Sleek Low Bun: A Step-by-Step Breakdown of Precision and Polish
There’s a reason the sleek low bun has become the signature move of so many confident women. It’s timeless. It’s clean. It gives structure to your day and drama to your look. And the best part? You don’t need a glam team or celebrity stylist to achieve it. You just need the right tools, the right products, and a little bit of intention.
Here’s your complete breakdown of how to achieve a flawless sleek low bun—whether you’re styling damp strands after the shower or refreshing day-old hair into something sharp and chic. Every detail matters, from the part to the pin. Let’s begin.
Step 1: Choose Your Moment
Start with a clean intention. Are you going for office elegance, date night polish, or red carpet drama? Your vibe will influence whether you part your hair down the center, slick it straight back, or sweep it off to the side. It also helps to decide whether you want that ultra-glossy mirror finish or a more diffused, barely-there sheen.
You can create a sleek low bun on freshly washed hair, but slightly dirty hair tends to hold better. If you’re working with clean strands, add in a bit of dry shampoo for grip at the roots or a lightweight mousse for control. Avoid heavy conditioners at the crown if you know you’ll be slicking it back later.
Step 2: Prep the Hair Like a Pro
Before styling, brush through your hair completely to eliminate knots. Use a paddle brush or wide-tooth comb depending on your hair texture. Then apply your base product:
For thick or coarse hair: Use a smoothing serum or cream from mid-length to ends. Follow with a dab of styling gel at the roots to start the hold.
For fine or straight hair: A volumizing mousse or light styling lotion will help provide shape without weighing the hair down. Add oil only at the ends if needed.
For curls and textured hair: Define your curl pattern with leave-in conditioner or curl cream, then layer with a strong-hold edge control near the scalp.
Distribute the product evenly and begin shaping the hair with your hands into a low ponytail at the nape of the neck. We’ll refine this later, but this is your base map.
Step 3: Create the Part with Precision
Now it’s time to part with purpose. This is where you decide what kind of statement you’re making.
Middle part: Classic, symmetrical, chic. Works best for most face shapes.
Side part: Adds a touch of softness and works well with round or heart-shaped faces.
Slicked straight back: Bold, runway-ready, no-nonsense.
Use the handle of a rat-tail comb to draw your part with surgical precision. Then press the hair down flat on either side of the part using your hands or a brush. Don’t worry if it’s not fully sleek yet—we’re just framing the structure.
Step 4: Sculpt the Foundation Ponytail
Once your part is placed, gather the hair into a low ponytail positioned just above the base of your neck. Use a boar bristle brush to smooth the hair as you gather it. This is what gives the polished, taut appearance of the sleek bun. Take your time here.
Brush and shape until all bumps are flattened and the hair glides back with uniform tension. Then, secure the ponytail tightly with a strong, snag-free elastic that won’t pull or tear. Avoid using a scrunchie unless you’re going for a looser, less sleek vibe.
At this stage, apply a smoothing gel or edge control over the crown and sides, brushing through once more to reinforce the hold and shine. Tie a silk scarf around the base for a few minutes to help lock in the sleekness if needed.
Step 5: Wrap the Bun With Intent
Now it’s time to transform that ponytail into the bun itself. This step can be executed in several ways depending on your hair length and desired finish.
Classic Twist Method:
Twist the ponytail tightly in one direction until it coils naturally around the base.
Continue coiling into a bun shape, keeping it flat against your head.
Tuck the ends under and secure with bobby pins in an X-pattern to lock it in place.
Rope Braid Method (for more grip and texture):
Divide the ponytail into two equal sections.
Twist each section clockwise, then wrap them around each other counterclockwise.
Wrap the rope braid into a bun and pin it securely.
Knot Method (for shorter or layered hair):
Create a single loose knot with the ponytail, then wrap the ends around the base.
Pin into place, letting a few strands peek out for a softer finish.
The goal is a secure, sculpted bun that feels balanced. Use extra pins as needed and make sure they’re hidden beneath the bun or hair folds.
Step 6: Refine the Edges
Now it’s time to zoom in and perfect every detail. Dip a clean toothbrush, edge brush, or spoolie into your styling gel or edge control and work it along the hairline. Smooth baby hairs into place, clean up the nape of the neck, and blend the gel into the hair so it looks seamless, not shellacked.
This is where your bun begins to look editorial. Pay close attention to the shape of your hairline and sweep any flyaways upward or downward in a way that follows the natural curve of your head.
If you want a more romantic finish, you can leave a few face-framing strands loose around the ears or temples. Just make sure they’re intentional—not accidental.
Step 7: Lock It In
To make your sleek low bun truly last, finish with a light mist of strong hold hairspray. Spray from a distance to avoid clumping or wet spots. If you’re going for a “wet” look, you can mist with a glossing spray or layer on a serum for added shine.
Wrap your head with a silk scarf for five to ten minutes if you want the ultimate molded finish. This is especially helpful if you’re prepping for a long event, a humid day, or a high-pressure moment when you need your hair to stay perfect.
This set time helps bond the style into place so it looks freshly done for hours.
Step 8: Accessorize with Intention
While the low bun can stand beautifully on its own, the right accessory can shift the energy of the whole look. Here are a few ways to level it up:
Statement earrings: Especially with middle-part buns, large hoops or drop earrings elevate the sophistication.
Pearl pins or combs: Tuck them into the bun or slide them along one side for bridal or editorial looks.
Gold cuffs or minimalist clips: Add one at the base of the ponytail before wrapping the bun to create a built-in focal point.
Decorative elastics: Replace the basic hair tie with something elegant if you’re leaving the bun slightly looser.
Accessories aren’t just decorative—they reinforce the energy you want to embody.
Step 9: Daily Refresh Tips
The sleek low bun can be worn multiple days in a row if you prep right. To refresh:
Use a toothbrush or brush to smooth out flyaways at the crown.
Add a few drops of oil to your hands and press over the surface to revive shine.
If needed, redo the bun portion only and secure with fresh pins.
Apply edge control only where needed to avoid build-up.
For day-two or day-three hair, dry shampoo at the roots and light misting around the part line will restore volume and freshness without disturbing the structure.
Step 10: Own the Energy
A sleek low bun is more than hair—it’s a statement. It says you care about how you show up in the world, that you command presence, and that you’re not afraid of simplicity that stuns. Whether paired with a bare face and lip gloss or full glam and lashes, the look never competes. It elevates.
As you master this technique, you’ll find your own rhythm—your own version of how the brush sweeps, how the twist wraps, how the bun tucks. Eventually, it won’t feel like a tutorial anymore. It’ll feel like a ritual. And that’s when the real magic begins.

Creating the Perfect Sleek Low Bun: A Step-by-Step Guide
The Final Polish
The sleek low bun is never just about hair. It’s about intention. It’s about walking into a room and letting your presence announce itself before you say a word. When your strands are smoothed into place, when your bun is coiled just right, and when not a single flyaway dares to rebel, something shifts—not just in your appearance, but in your posture, your mindset, your mood.
This look isn't reserved for high fashion runways or exclusive events. It’s for you, right now, wherever you are. Whether you're heading to a boardroom, a brunch date, a rooftop party, or simply working from your kitchen table, the sleek low bun is a decision to show up with purpose. It’s power tied with a pin. A reminder that elegance isn’t loud—it’s deliberate.
As you master each step, from the parting to the polish, you’re not just learning a hairstyle. You’re learning how to wield calm, control, and confidence with your own hands. You’re curating your silhouette with precision. And the more you do it, the more second-nature it becomes—until it’s no longer a tutorial, but a signature.
So go ahead. Part it, smooth it, sculpt it, shine it. Make it yours. Let it become the style you reach for when you need to feel centered. Let it whisper strength when you’d rather not shout. And most importantly, let it remind you that looking put-together isn’t about effort—it’s about artistry.
Now that you’ve mastered the look, scroll on for your product checklist, inspiration gallery, and styling variations to elevate your sleek low bun for every mood and moment.
As you embark on the journey to perfecting the sleek low bun, I’ve curated a list of additional resources that will complement the step-by-step guide provided in my blog post. These sources are brimming with inspiration, tips, and the latest trends in hair styling. Whether you’re a novice or a seasoned stylist, these blogs offer a wealth of knowledge to enhance your hair styling repertoire.
Comprehensive List of Blog Sources:
Men’s Hairstyle Trends - Showcasing the coolest men’s haircuts and modern hairstyles.
Latest Hairstyles - Fresh hairstyle ideas, color trends, hair care tips, and product recommendations.
Hair Romance - Tutorials, tips, and daily style updates from Sydney, Australia1.
Glamour Hair - A variety of hair-related articles and tips to keep you updated.
These blogs are just a starting point to inspire and guide you in creating that perfect hairstyle. Remember, the key to a great hairstyle is not just following trends but finding what works best for you and your hair type. Happy styling!