The Elegant Sleek Bun: A Step-by-Step Tutorial
The Art of Sculpting Elegance: Mastering the Sleek Bun
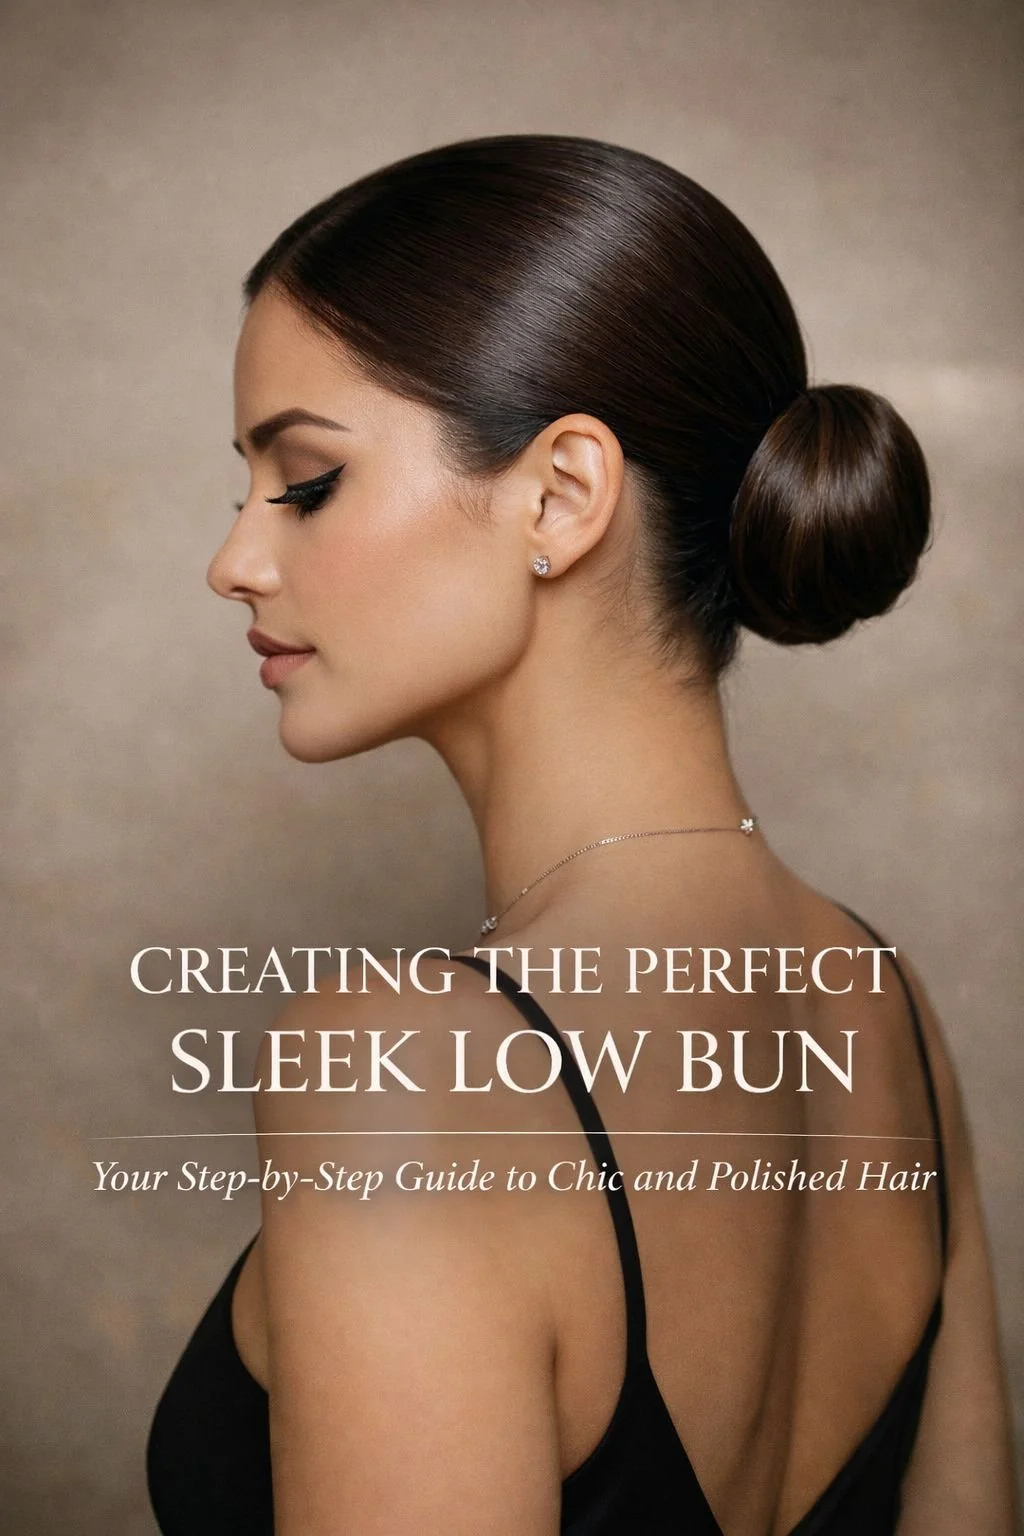
There are few hairstyles that rival the sleek bun when it comes to its commanding blend of precision, elegance, and power. This is not a style that whispers. It speaks. Whether you wear it at the nape of the neck in quiet sophistication or high and tight like a crown of confidence, the sleek bun is a deliberate choice—a studied look that suggests poise, clarity, and an eye for polish.
It has long been the go-to for ballerinas, CEOs, red carpet icons, and fashion week minimalists. The style appears simple, almost austere, at first glance. But its power lies in the perfection. Every hair has intention. Every contour is carved with care. When executed with finesse, it becomes a quiet form of dominance—a hair sculpture that doesn’t beg for attention but commands it nonetheless.
But don’t mistake its elegance for inaccessibility. This guide is here to reveal the inner workings of the sleek bun, breaking it down step by step. From product selection to brush techniques, from parting methods to finishing spray rituals, you’ll learn the secret language of sleek.
Before we get into the full breakdown, let’s spend a moment with its origin, its cultural momentum, and why this style is having a full-circle revival in the modern beauty space.
The Sleek Bun's Reign Across Time
The sleek bun is not new. Its roots trace back through centuries of coiffed hair culture—from classical Greco-Roman profiles to Chinese imperial hairstyles, from Victorian restraint to modern minimalist couture. It’s one of the few updos that transcends both time and trend.
In the 1990s, it surged back to popularity with the rise of supermodel glamour and editorial hair. Calvin Klein campaigns, Tom Ford-era Gucci shows, and Vogue spreads embraced this sculpted look as part of a broader movement toward controlled sensuality. By the 2000s, it became a power style in its own right. Think Kimora Lee Simmons, Victoria Beckham, or a young Beyoncé in her Destiny’s Child years—all embracing that taut, glistening bun with authority.
Today, it's having another cultural resurgence. TikTok beauty creators have rediscovered its clean-girl aesthetic, often pairing it with glowy skin, gold hoops, and minimalist fashion. Meanwhile, the runway continues to rotate sleek buns in every form—from the wet and glassy versions seen at Alexander McQueen to matte, brushed-out iterations on Celine’s Parisian catwalks.
In every instance, it gives the same message: refined, modern, deliberate.
Why the Sleek Bun Works on Everyone
The brilliance of the sleek bun is its adaptability. Whether your face shape is round, oval, square, or heart-shaped, the bun sculpts your features by elongating the neckline and drawing attention upward or inward, depending on placement.
It works for curly, coily, straight, or relaxed textures. It can be done with natural volume or enhanced with gel and a boar bristle brush. You can part it center or side, swoop your edges, or keep them crisp and clean. The bun can sit low at the nape for elegance or perch high for attitude.
It’s not just about aesthetics either—it’s practical. It keeps your hair protected, your style low-maintenance, and your overall look crisp through any climate. Weddings. Job interviews. Fashion week. First dates. Gym workouts. The sleek bun thrives across them all.
The Psychology Behind a Sleek Look
Hair carries emotional weight. It’s a symbol of identity, control, rebellion, or submission. When we choose a sleek style, especially one like the bun, we’re often stepping into a mode of command. The act of pulling the hair away from the face is both revealing and empowering.
There’s no hiding behind waves or volume. No strands to fidget with or adjust. The sleek bun is a declaration of intentionality. And sometimes, when everything else feels out of control, that simple act of smoothing down every strand and securing it in place is a quiet reclaiming of power.
Tools of the Sleek Trade
Before diving into the method, let’s talk about what makes the perfect sleek bun possible.
1. The Brush
You need something that grips and smooths without damaging. A boar bristle brush is ideal—it pulls the hair taut while creating that flat polished finish. Paddle brushes or edge smoothing brushes also work well for detailing.
2. The Gel or Cream
Your product choice shapes the entire aesthetic. For a glassy high-shine finish, go for a clear or black gel with strong hold. If you want a soft matte bun, opt for a styling cream or pomade. Products like Eco Styler, Got2B Ultra Glued, or Ouai’s Matte Pomade can each create a different version of sleek.
3. The Elastic and Pins
Your elastic needs to be snag-free, no metal—something that won’t pull or break the hair. For added control, large bobby pins or French pins help secure the bun, especially for thicker hair types.
4. The Finishing Spray
This is where the drama lives. A firm hold hairspray like L’Oréal Elnett or a shine spray like IGK’s Good Behavior gives the final layer of polish. Some pros even use a toothbrush or spoolie with edge control gel to detail baby hairs or clean up fuzz along the hairline.
Common Mistakes to Avoid
Brushing dry hair without product: Always apply some moisture or product before slicking. Dry brushing can lead to frizz or breakage.
Choosing the wrong part: Not all partings suit every face shape. Play around to see if center or deep side gives you more symmetry or softness.
Rushing the wrap: A bun that’s not carefully coiled can look bulky or off-center. Slow down and smooth as you coil.
Skipping the final set: A mist of hairspray and shine gives that editorial finish. Without it, you risk fuzzing or flyaways within an hour.
Sleek Bun Variations Worth Mastering
Before we move into the how-to, keep these sleek bun styles in your repertoire. You may find your signature in one of them:
The Low Chignon: Worn at the nape, often paired with a side part or no part at all. Best for formal events or understated power dressing.
The Mid Bun: Sits in line with the ears and jaw. Balanced and symmetrical, it works well for work or social settings.
The High Sleek Knot: A statement bun that sits at the crown. It elongates the neck and gives immediate visual lift.
The Sculpted Double Buns: A fashion-forward version perfect for festivals, edgy streetwear, or creative styling.
The Braided Sleek Bun: Incorporates a long braid that wraps around the base of the bun—adds texture and depth.
The Vibe That Pairs with Sleek
Makeup and outfit choices will elevate your sleek bun into a full aesthetic. Think about:
Clean Skin and Bold Brows: A no-makeup-makeup look lets the bun lead, while groomed brows anchor the expression.
A Statement Lip: Crimson, deep plum, or a velvety nude turns up the impact.
Gold Hoops or Ear Cuffs: Minimalism with edge.
Tailored Layers or Silk Blouses: Your wardrobe should echo the sleekness—refined fabrics, confident cuts.
The bun is not just hair. It is intention styled into place.
Closing Thoughts Before the Tutorial
There’s an elegance in simplicity, but achieving it is rarely simple. The sleek bun is a style that rewards patience and precision. It asks you to slow down. To smooth. To center. It reminds you that you’re allowed to take up space not by volume, but by presence.
This tutorial is here to guide you through each part of that ritual. Whether you're preparing for a formal affair, needing a clean canvas for bold makeup, or just looking to show up with crisp energy on a random Tuesday—this style can be your anchor.
Now, let’s move into the step-by-step breakdown of creating the perfect sleek bun. All you’ll need are a few tools, a bit of time, and a mirror that reflects the poised, polished version of you ready to step forward.

The Elegant Sleek Bun: A Step-by-Step Tutorial
@hairflairaffair 🌟 Sleek Bun Tutorial! 🌟 #StyleTok #HairGoals #BunTutorial #ElegantUpdo Transform your hair into a chic, polished bun with this simple step-by-step guide! 💁♀️✨ 1️⃣ Start with a smooth low ponytail. 2️⃣ Use a roller at the base for volume. 3️⃣ Smooth with wax for a flawless finish. 4️⃣ Roll, tuck, and secure with studs! 5️⃣ A dash of nail polish for extra shine. 6️⃣ Snap a pic of your glam look! 📸 Perfect for weddings, work, or a classy night out! Save this recipe and turn heads with your stunning style! #ChicHair #WeddingHair #DIYUpdo #FashionForward ♬ original sound - Hair Flair Affair
Step-by-Step Guide: Achieving the Elegant Sleek Bun
A sleek bun is more than just a hairstyle—it’s a signature. Crisp lines, flawless control, and elegant contouring come together to create one of the most powerful and versatile looks in beauty. Whether you're aiming for red carpet polish or everyday minimalism, this guide will walk you through the complete process to sculpt the perfect sleek bun—tailored to your unique features and hair type.
Let’s begin with the foundation: preparation.
Step 1: Start with Smooth, Clean Hair
Your canvas matters. Start with freshly washed or second-day hair that’s free from excessive product build-up. A sleek bun requires your strands to lie flat and fluid, so hair that’s too oily or too dry will resist styling.
If your hair is naturally textured, blow-dry it straight or stretch it with heatless methods like banding or wrapping. For those with straight or wavy hair, a quick pass with a flat iron adds refinement, especially around the crown and edges. Do not skip heat protectant—it will preserve the health and sheen of your strands.
Use a light serum or leave-in conditioner to nourish the ends without weighing down the roots.
Step 2: Create the Part That Frames Your Face
The part defines the character of your bun. It’s the subtle but essential step that tailors the look to your face shape and mood.
A center part gives structure, symmetry, and high-fashion appeal.
A deep side part adds softness and drama.
A no part or slicked-back crown brings full attention to the eyes and cheekbones.
Use a fine-tooth comb to carve the part, and use clips or light tension to keep hair separated on either side while you work through the rest of the style. Spritz a little water or leave-in to help the hair lay neatly along the scalp.
Step 3: Apply Product Strategically
This is where the shine, hold, and longevity are born. Your product selection can dramatically shift the aesthetic of the final bun.
For a glass-finish, use a strong hold gel or edge control like Eco Styler, Got2B Glued, or Style Factor Edge Booster.
For a matte-finish, opt for a soft styling cream or flexible pomade that tames without stiffening.
Apply the product evenly starting from the hairline, moving backward toward the nape or bun base. Use your palms first to coat the strands, then follow with your brush to smooth and distribute the product through every layer.
Avoid oversaturating the roots with product early on. Start light and build as you brush and shape.
Step 4: Brush Into Position
With your part in place and product distributed, begin smoothing the hair into its sleek shape. Use a boar bristle brush or a strong paddle brush to coax the strands toward the bun zone.
Use firm, downward strokes that follow the shape of your scalp, working from the crown toward the bun base. Brush sections from all angles—sides, crown, and back—guiding the hair into one cohesive direction. You want to eliminate all bumps and ridges while maintaining the structure of your part.
For tighter or natural textures, working in sections may help ensure even tension and smoothness.
Step 5: Secure the Ponytail
Gather all your hair into a ponytail where you want the bun to sit. This could be:
Low at the nape for a graceful, timeless look.
Mid-height for a casual chic vibe.
High and tight for a bold, ballerina-like profile.
Use a snag-free elastic to tie the ponytail securely. It should feel tight enough to hold all day, but not so tight that it strains your scalp or causes tension headaches.
At this point, use your mirror to double-check symmetry. The ponytail should sit centered, and all sides should be evenly brushed with no ripples or bubbles.
If needed, go back in with a bit more product and brush to fine-tune the smoothness before proceeding to the bun.
Step 6: Twist, Wrap, and Sculpt the Bun
Take your ponytail and begin twisting it in one direction—either clockwise or counterclockwise. The tighter you twist, the smaller and firmer the bun will appear. For a fuller, more sculptural bun, twist loosely and let it wrap wide.
Coil the twisted ponytail around the base, guiding it with one hand while pinning with the other.
For thick hair, use heavy-duty pins or U-shaped hairpins spaced evenly around the base.
For fine hair, small bobby pins are often enough to anchor the bun securely.
Tuck in the end of the twist under the coil and pin it firmly. If your hair is layered, use a bit of edge control to press flyaways into place before wrapping.
Once wrapped and pinned, press the bun gently with your palm to flatten and shape it. Think of this moment like molding a sculpture—perfecting every angle.
Step 7: Refine the Perimeter and Hairline
Now shift focus to the finer details. Examine the area around your ears, temple, and nape. Smooth any strays with a toothbrush or edge brush dipped lightly in styling product.
For a more defined look, you can style edges or baby hairs using a small amount of edge control. Swoop and curve with purpose, or keep the perimeter crisp and brushed straight back for a more editorial finish.
This is also a good time to clean up the neckline. Use a damp cloth or cotton swab to remove any visible product along the skin for a sharp, clean appearance.
Step 8: Lock It In
Finish with a firm hold hairspray to set everything in place. For a high-gloss look, layer in a shine mist or serum spray over the top of the bun and crown.
If you live in a humid climate or plan to wear the style all day, use a silk or satin wrap for five to ten minutes to press everything down. This compresses the product into the hair for a long-lasting, smoothed effect.
Once the wrap is removed, the sleek bun should gleam with a polished, camera-ready glow.
Step 9: Add Accessories (Optional)
While the beauty of the sleek bun often lies in its simplicity, adding the right accessory can elevate it into something special.
Pearl pins tucked along the side add vintage glamor.
Gold or silver cuffs at the base bring a futuristic edge.
Velvet bows or silk scrunchies soften the look into something romantic.
Statement earrings become more visible with the bun—take advantage.
The sleek bun gives you a perfect blank canvas to accessorize based on mood, event, or outfit.
Step 10: Make It Last
With the bun perfectly sculpted, you want it to hold its shape all day—or even overnight. Here are a few longevity tips:
Avoid touching your hair throughout the day. Oil from your fingers can loosen the hold or cause frizz.
Re-wrap it at night with a silk scarf or bonnet if you plan to wear it again the next day.
Refresh the edges in the morning with a bit of water and product rather than taking the entire style down.
Most sleek buns can last up to three days if secured and maintained properly. When you do take it down, treat your scalp to a soothing oil or scalp massage to restore circulation and relax any tension.
Final Words
The elegant sleek bun is an act of transformation. It takes hair that might otherwise be unremarkable and sculpts it into a statement. Whether you wear it to dominate a boardroom, light up a wedding aisle, or stroll a Sunday market with minimalist flair, this bun offers quiet power.
It whispers refinement. It demands presence. And when done well, it becomes not just a hairstyle but a calling card.
If you’ve followed these steps from start to finish, what you have now is not just a look—but a ritual you can return to anytime you need a little armor and elegance.

The Elegant Sleek Bun: A Step-by-Step Tutorial
The Power of Precision
There’s something deeply transformative about mastering a style that asks for control without chaos. The sleek bun isn’t just about looking put together—it’s about becoming the kind of woman who chooses clarity over clutter, intention over impulse, elegance over excess. It is the crown of the unbothered. The finishing move of the girl who walks into a room and doesn’t need to say a word.
It sharpens your profile. It softens your chaos. It holds your power right at the base of your skull like a secret weapon.
Whether you’re wearing it with bare skin and bold brows or pairing it with a velvet dress and a knowing smile, this style becomes your anchor. A signature. A silhouette.
And the best part? You don’t need a salon. You don’t need a glam squad. You need a brush, a mirror, and the will to refine your ritual.
So take the time. Mold every curve. Smooth every edge. And when it’s done, step back—not just to admire the look, but to acknowledge the woman inside it.
Ready to make it your own?
Here’s exactly how to bring this elegant staple to life.
Welcome to “The Elegant Sleek Bun: A Step-by-Step Tutorial,” a blog post that will guide you through the graceful art of creating a sleek bun. This hairstyle exudes sophistication and is a timeless choice for any occasion. To support your styling journey, we’ve curated a list of sources, each linked by a keyword, to provide you with expert techniques and tips. Let these resources be your guide as you master the elegant sleek bun.
Elegant Sleek Bun Inspirational Sources:
May these sources inspire you to create a hairstyle that’s as sleek as it is stylish. Enjoy the elegance of your new look!