DIY Chic Glitter Accent Nail Tutorial: Add Sparkle to Your Style!

The Power of a Sparkle: Why Glitter Accent Nails Deserve a Spotlight
There’s something magnetic about a well-placed shimmer. Whether it’s the glint of sunlight off a highlighter-slick cheekbone, the subtle sheen of satin under evening lights, or the glimmer of a single nail dressed in glitter, sparkle has a language all its own. It’s playful. It’s polished. It’s bold without ever being loud. And when you add it as an accent to a freshly manicured hand? That’s where magic meets minimalism.
In the ever-shifting world of nail art, trends come and go faster than you can book your next appointment. But one thing remains timeless: the accent nail. It’s the beauty world’s quiet rebellion against uniformity. Now add glitter to that rebellion, and you get something unforgettable. Something that catches the light and attention.
Glitter accent nails are not about being flashy for the sake of it. They’re about intention. A single gleaming finger tip framed by a creamy neutral or a deep moody polish says you understand restraint. You know how to direct the eye without overwhelming the viewer. In many ways, the glitter accent nail is the signature of a modern muse—part femme fatale, part editorial minimalist.
Glitter as a Language
Color psychology and sparkle science may sound like abstract concepts, but the effect is real. Metallics evoke power and luxury. Silver feels icy and sophisticated. Gold hints at warmth, opulence, and strength. Rose gold flirts with femininity and charm. Holographic finishes play with dimension and movement. And the glitters? They speak in texture, light, and emotion.
What you choose to accent says everything. A clear base with iridescent flakes whispers subtle enchantment. Dense chrome glitter roars with party-girl confidence. Multicolored confetti sparkles flirt with youth and nostalgia. And when set against creamy beiges, matte blacks, or even jelly pastels? It’s an aesthetic conversation, and you’re the author.
Where Chic Meets Easy
Glitter accent nails aren’t just elegant—they’re accessible. You don’t need an appointment at a boutique salon in Beverly Hills to achieve the look. You can do it at your kitchen table with a basic polish kit, a little patience, and a glitter pot or two. That’s what makes them perfect. You can match them to your outfit, your mood, or the season without a complete overhaul. No design degrees required.
There’s no single rulebook either. You can place the glitter on your ring finger and call it a day, or you can accent both hands symmetrically. You can mix fine and chunky glitter, add it over a nude polish, sandwich it between layers of jelly gloss, or let it trail up from the cuticle for a reverse French that sparkles like a sunrise.
If you’ve ever stared at Pinterest and wondered how those clean, glitzy looks are achieved, you’re in the right place.
A Canvas for Every Occasion
What’s brilliant about the glitter accent nail is how versatile it is across all life’s moments.
For the office: A single glitter nail paired with a soft mauve or pale taupe reads as confident and fashion-aware without stepping outside professional lines.
For the weekend: Try a foil-flecked glitter over sheer pink, or mix in a micro-glitter fade at the tip for subtle sparkle that turns dazzling in the sunlight.
For date night: Pair a glossy jet-black manicure with a rose gold glitter ring finger for a touch of glam that says, I’m polished and provocative.
For holidays or events: Dial it up. Dense multicolor glitter, mirror-like silver, or even a crushed-diamond finish turns your hands into instant accessories. Let your nails replace your jewelry.
For everyday glam: There are no rules. Even a casual jeans-and-t-shirt outfit is instantly elevated by nails that gleam. It’s one of the most affordable ways to feel luxurious on demand.
Why the Accent Nail Still Reigns
There’s an art to subtlety, and glitter accent nails have mastered it. Unlike a full set of glittery nails—which can sometimes tip into costume territory—the single accent gives you balance. It’s the beauty version of the “naked dress with one dramatic accessory” philosophy. It’s the pop in a monochrome outfit. The spike heel on an otherwise modest silhouette. Just enough to turn heads, never enough to try too hard.
It’s also a nod to control. You’re showing the world you know when to hold back and when to let go—and you’ve chosen just one finger to let loose. That restraint is seductive.
The Emotional Impact
Nail polish is not just about appearance—it’s about ritual. The brush strokes. The drying time. The scent. The transformation. In a world that moves too fast, the act of painting your nails, especially adding glitter, becomes meditative. Therapeutic. Empowering.
Glitter, specifically, carries emotional resonance. It reminds us of celebrations, sparkly dresses, birthday candles, confetti-filled surprises, and late-night dances. Adding a glitter accent nail isn’t just a style move—it’s a mood lift. A tiny, glimmering form of self-love.
How to Do It Right (and Not Regret It)
Let’s talk logistics. Glitter polish is notorious for being a diva. It can be thick. It can clump. It can make removal a nightmare. But with the right technique, you avoid the mess and achieve a finish that rivals pro salons.
You’ll want to:
Use a good base coat to prevent glitter from sticking directly to the nail
Choose whether you want full glitter coverage, a fade, or a glitter overlay
Layer smartly: sponge it on for intensity or brush it lightly for transparency
Cap the edge of your nail to lock in the sparkle and extend wear time
Finish with a topcoat (or two) to smooth the texture and amp the shine
Want to get creative? Try clear polish mixed with loose glitter to make your own blend. Or use nail striping tape, decals, or matte polish on surrounding nails to create contrast. The glitter doesn’t have to be loud—it can whisper. That’s the magic.
Seasonless, Style-Less, Timeless
One of the best things about glitter accent nails is that they work for everyone. All ages, all styles, all skin tones. They’re not bound by trends or seasons. They’re always in, always flattering, always fun.
For spring, think fresh pastels with a touch of holographic sparkle. In summer, bring on bright corals with chunky gold flecks. In fall, lean into burgundy and copper tones with subtle shimmer. For winter? Classic icy silvers, rich jewel tones, and festive glitters reign supreme.
You don’t have to change your whole look to indulge in glitter. That’s what makes it such a powerful detail—it adapts. It enhances. It never demands too much.
Beyond the Nail: A Mindset
Wearing glitter accent nails is a small act, but its impact is real. It says you care. You pay attention to detail. You’re not afraid of a little light-catching drama.
And in a world where perfection often feels exhausting, a tiny glittered nail reminds us that beauty can be fun. It can be easy. It can shimmer unapologetically.
So when you swipe that final coat across your accent finger and watch it catch the light, know that it’s more than just polish. It’s intention. It’s delight. It’s a wearable form of joy.
Now, Let’s Make It Happen
Ready to try it for yourself? Below, I’m walking you through a detailed step-by-step tutorial to create your own DIY glitter accent nail look at home—no salon visit required. Whether you’re going for full sparkle, a soft fade, or a custom blend, this guide has everything you need.
Let’s dive in.

DIY Chic Glitter Accent Nail Tutorial: Add Sparkle to Your Style!
#nails #nailart #nails #naildesign #springnails pic.twitter.com/pGzKroozVA
— Glam Artistry Hub (@glamartistryhub) March 28, 2024
DIY Glitter Accent Nails: A Luxe-At-Home Step-by-Step Guide
Creating glitter accent nails at home is easier than most people think—but the real magic lies in doing it beautifully. This guide isn’t just about painting a sparkly nail. It’s about crafting an eye-catching, polished look that feels intentional, chic, and wearable anywhere. Whether you're adding a touch of glam to your workweek or prepping your hands for a night out, this step-by-step will help you get it right every time.
Let’s get your hands glowing.
Step 1: Gather Your Nail Arsenal
Before you dip a brush into anything, set the stage. A little preparation makes everything easier and way more satisfying. Here's what you'll need:
Essential Tools:
Nail polish remover
Cotton pads or reusable rounds
Nail clippers
Nail file and buffer
Cuticle pusher
Small clean-up brush or angled eyeliner brush (for polish precision)
Polishes and Add-ons:
A base coat
Your chosen base color polish (creme, sheer, or jelly—your call)
A glitter polish or loose cosmetic-grade glitter
Clear polish if using loose glitter
A top coat (preferably fast-dry and high-gloss)
Optional Enhancers:
Nail art sponge (for glitter gradients)
Nail tape or guides (for crisp geometric glitter lines)
Latex barrier or tape for easier clean-up around your fingers
Pro tip: Line everything up on a flat surface with good lighting. A desk lamp angled slightly across your hands will help you see every stroke.
Step 2: Nail Prep Is Non-Negotiable
Great polish sits best on a clean, shaped canvas. If you rush this part, the finished look will never quite live up to your mood board dreams.
Remove any old polish completely.
Clip and file your nails to your desired shape—square, almond, rounded—whatever flatters your fingers.
Buff gently to smooth the surface and remove any shine or ridges. Don’t go overboard; just enough for the base coat to grip.
Push back your cuticles with an orangewood stick or metal tool. Be gentle.
Wash your hands and dry thoroughly before proceeding. Any oil, lotion, or dust can mess with your polish adherence.
Optional but satisfying: Rub a little cuticle oil in and let it soak before washing. Hydrated nail beds always look more luxe.
Step 3: Apply a Base Coat
This isn’t just an optional step—it’s your invisible insurance. A good base coat protects your nail plate from stains and makes your polish last longer.
Apply one thin, even layer to every nail
Let it dry fully before applying color
Clear ridge-filling base coats work well if you have slightly uneven nail surfaces, especially when using fine glitter that can highlight imperfections.
Step 4: Lay Down Your Base Color
Choose a polish that complements or contrasts your glitter. Here are some timeless combos:
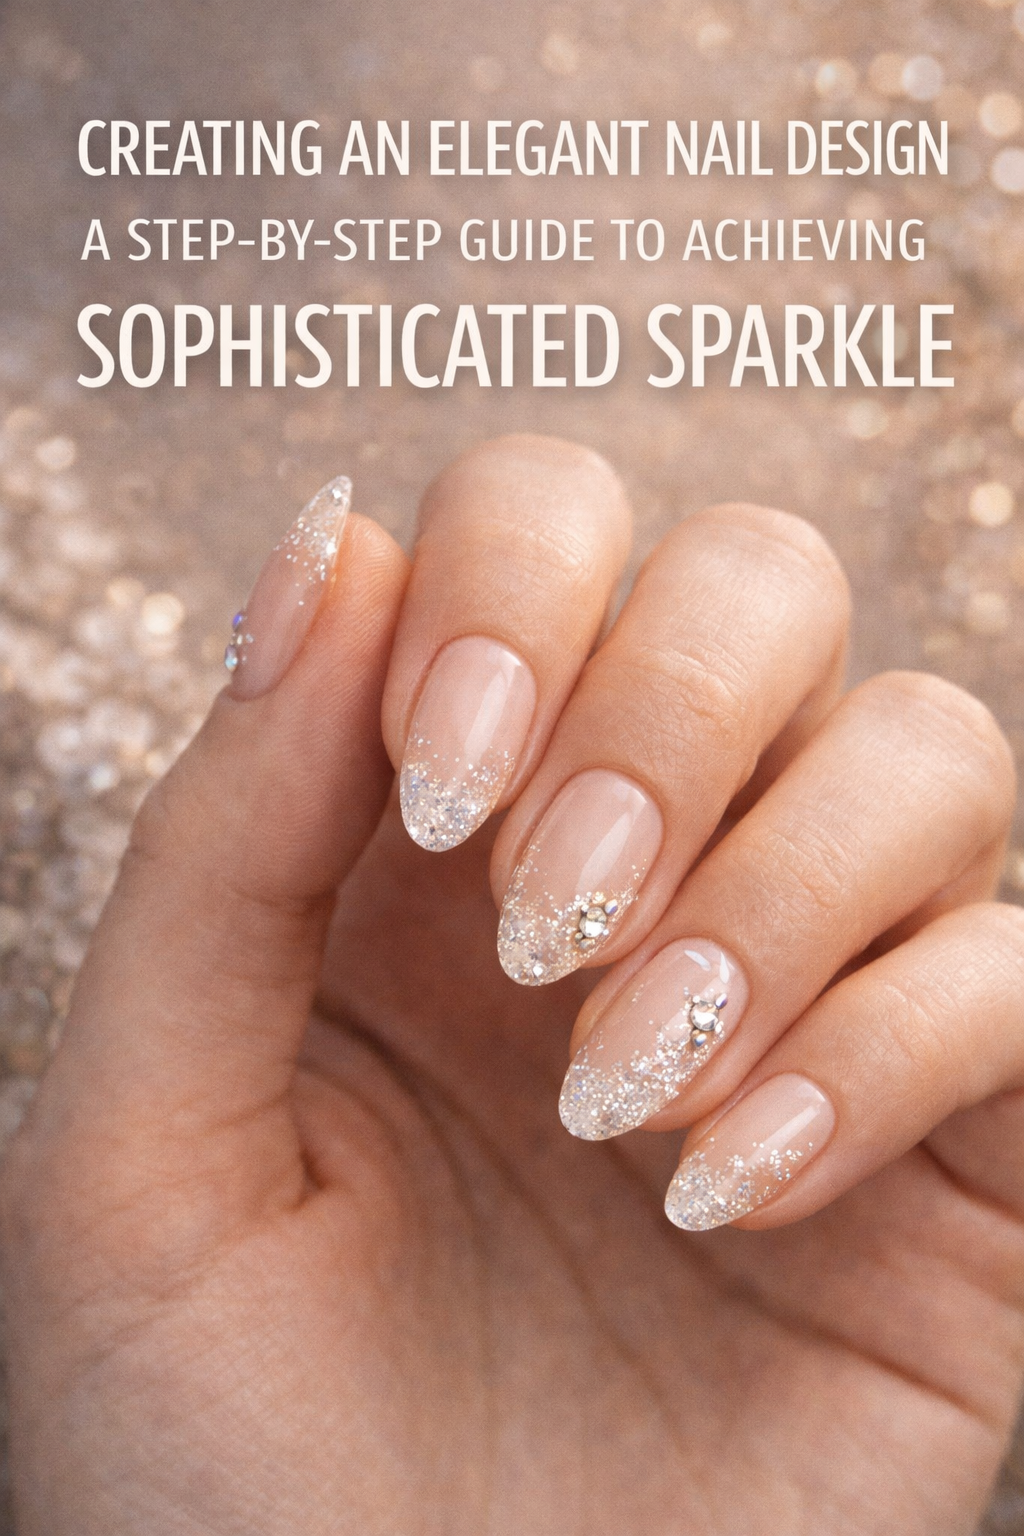
Nude + silver glitter (effortless and clean)
Jet black + rose gold glitter (seductive and bold)
Milky pink + opal glitter (romantic and fresh)
Deep wine + copper glitter (rich and autumnal)
Apply your first thin coat of base color to all nails
Let it dry completely
Apply a second coat for opacity and even finish
Don’t forget to wrap the tips—this means brushing lightly across the free edge of your nail to seal the polish
If you’re planning to do a glitter fade or gradient, stop at one coat for a slightly translucent base—it helps the glitter melt in more naturally.
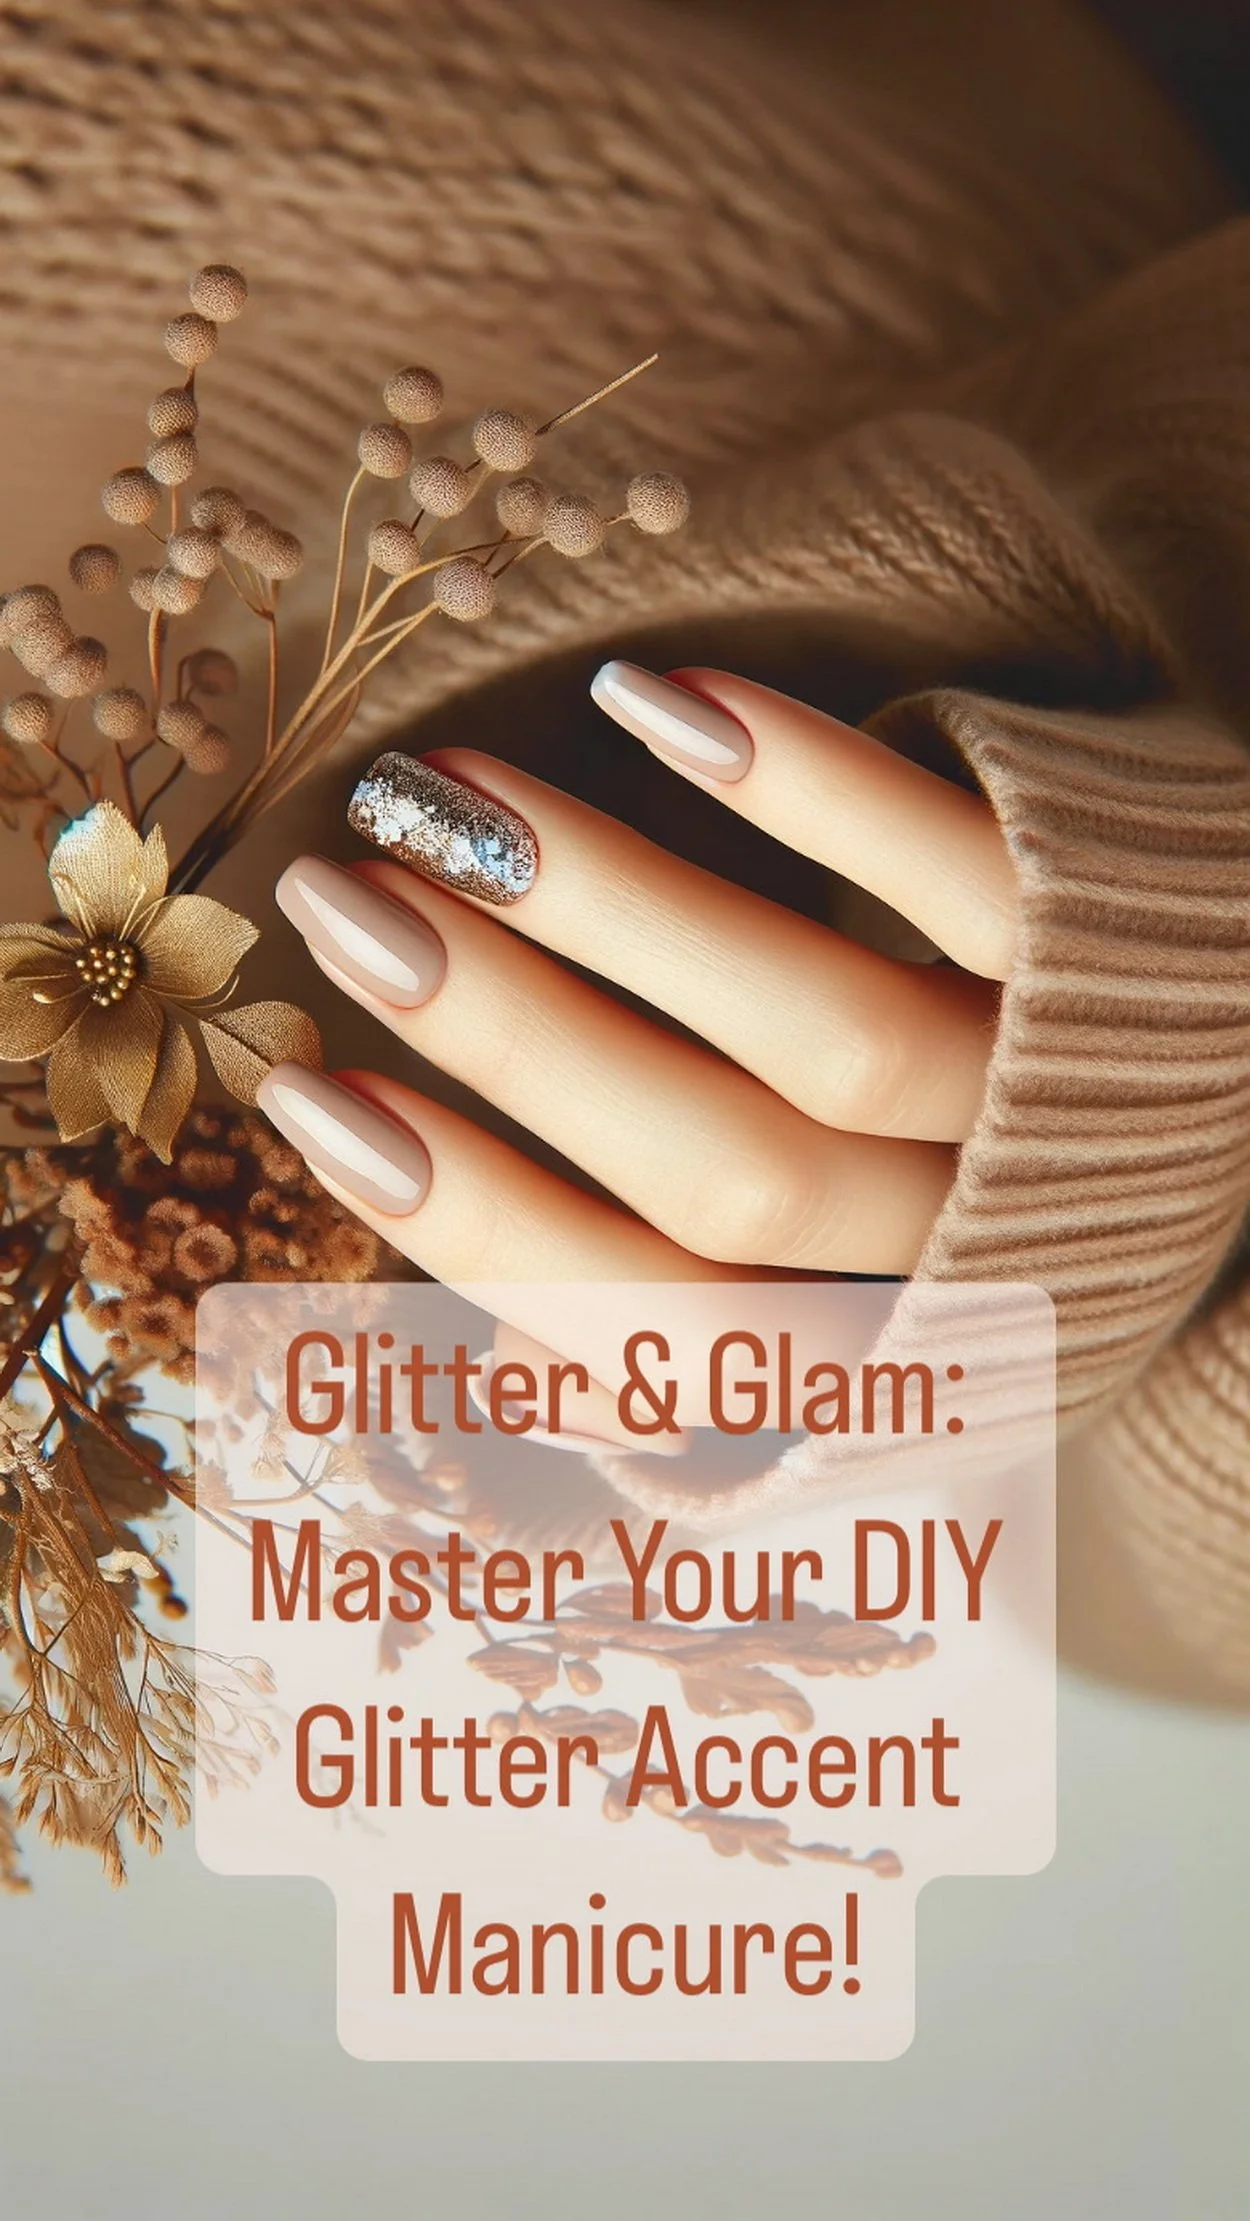
Step 5: Select Your Accent Nail(s)
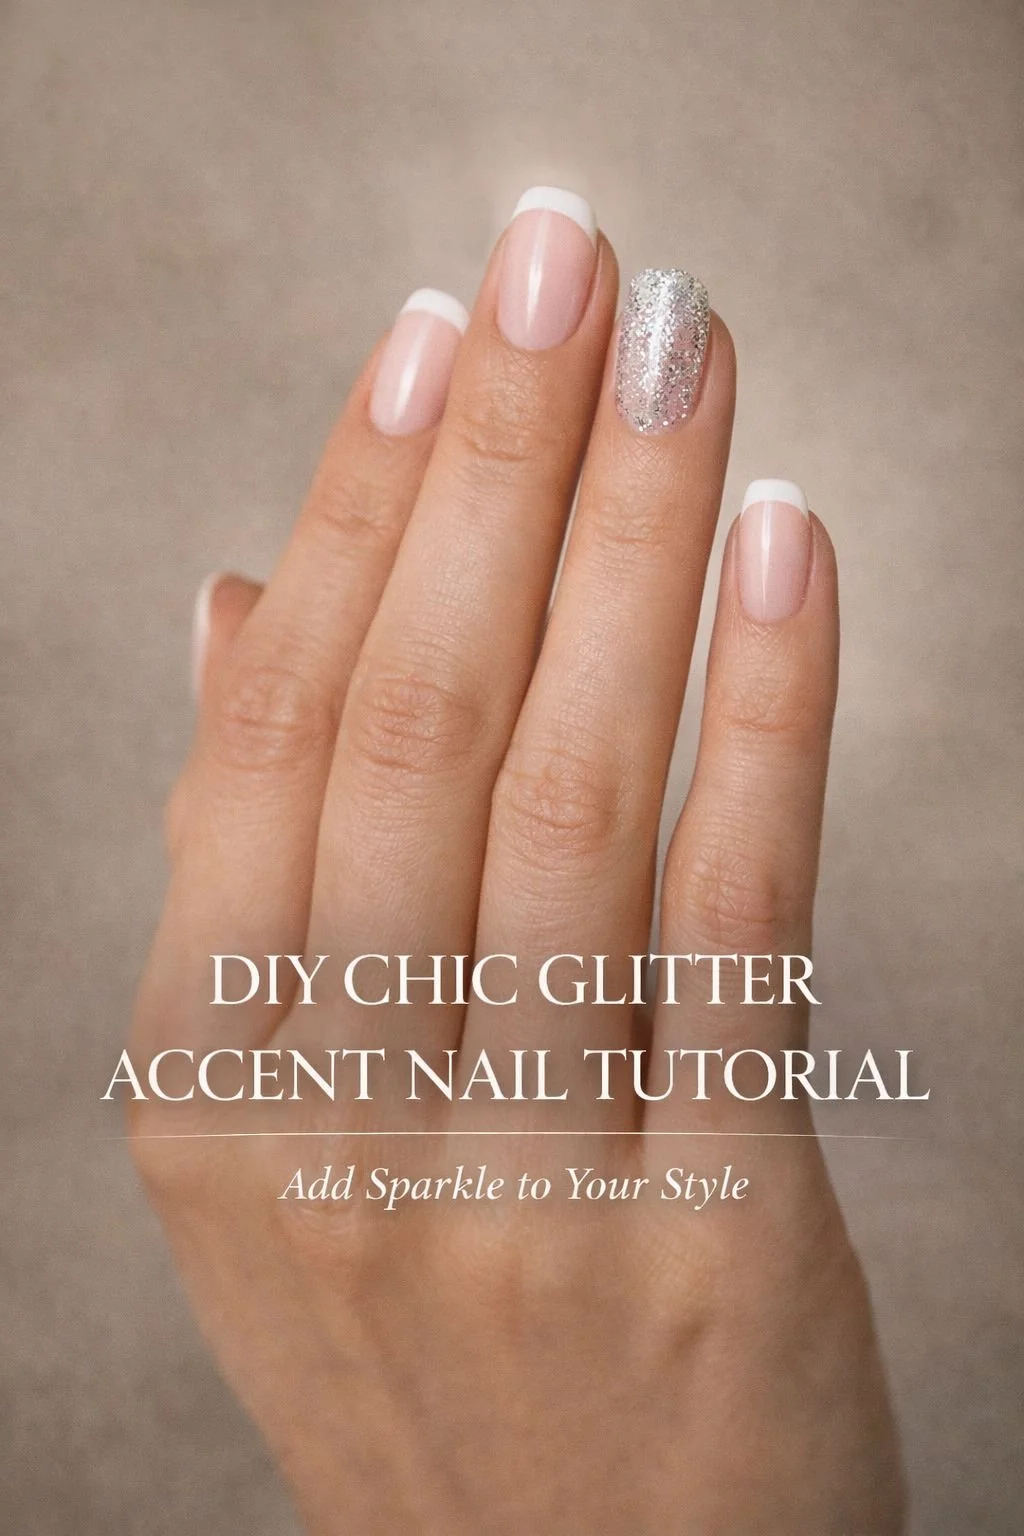
Traditionally, the ring finger is the go-to accent nail, but feel free to get creative. You can glitter:
One ring finger on each hand (classic)
Both thumbs (unexpected and bold)
Your pinkies (subtle and quirky)
All nails but the index finger (a flipped statement)
Just one nail total for true minimalist glam
Once you’ve decided which nails will get the sparkle treatment, it’s time to bring out the glitter.
Step 6: Choose Your Glitter Method
Here are three go-to techniques to apply glitter with control and style:
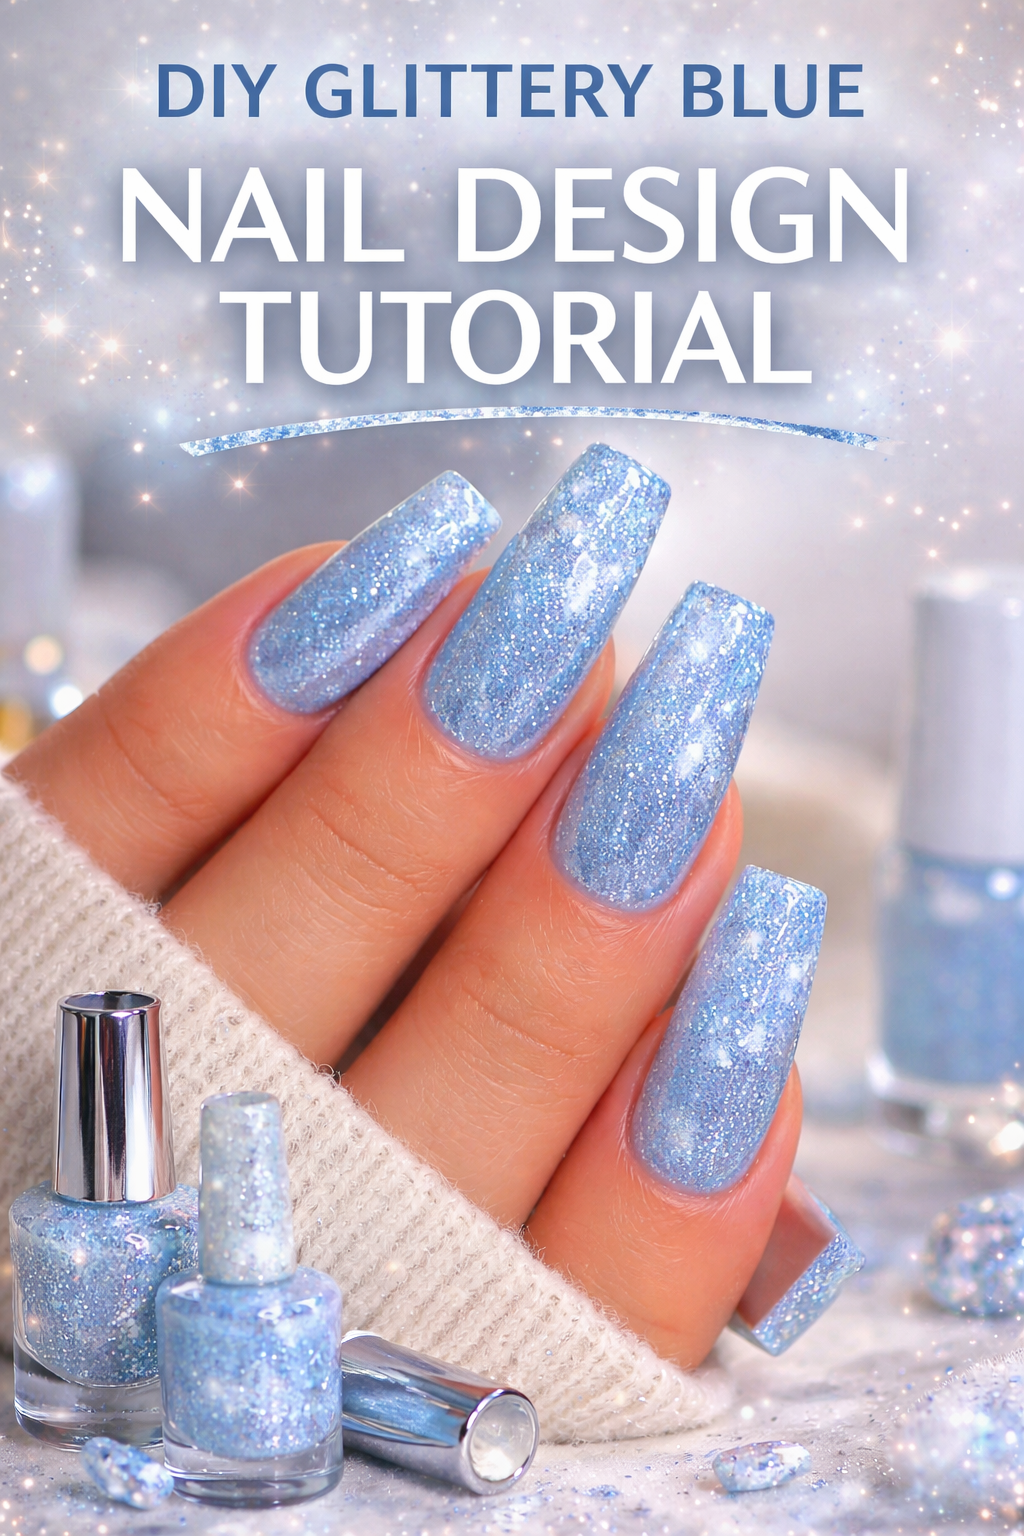
✦ Full Coverage Glitter
If your glitter polish is opaque enough, apply it like any other polish:
Apply one thin coat of glitter polish to the accent nail.
Let it dry.
Apply a second coat, concentrating on full coverage and opacity.
Use a clean-up brush dipped in remover to perfect the edges.
For even more dazzle: Use a makeup sponge to dab glitter onto the nail. The sponge absorbs the clear polish base and deposits just the glitter, giving you a rich, dense sparkle with less bulk.
✦ Glitter Gradient (Fade from Tip or Cuticle)
To create a glitter fade, you need control and layering.
Apply a small amount of glitter polish to a sponge or directly to the nail tip.
Dab gently at the edge of your accent nail (either at the tip for a French-inspired look or near the cuticle for a reverse fade).
Repeat 2–3 layers, pulling the glitter gently into a fade.
Allow each layer to dry before applying the next.
Pro tip: Use micro-glitter for a smoother gradient and large chunky glitter as a top detail for dimension.
✦ Loose Glitter Application
This works best with loose cosmetic glitter and gives you maximum sparkle impact.
Apply a clear polish to the accent nail (one at a time).
While the polish is still wet, sprinkle or dip the nail into glitter.
Tap to remove excess and press lightly with a clean finger or silicone tool to flatten.
Clean the edges and let dry completely.
Optional: Apply a second coat of clear polish and more glitter for extra density.
Step 7: Seal It Like a Pro
This step locks in the glitter and makes your nails look glossy, finished, and refined—not bumpy or textured.
Use a generous top coat to smooth and protect the glittered nail
Apply one coat to start, wait two minutes, and add a second layer for maximum shine and longevity
For loose glitter or chunky styles, you may want to use a thicker gel-like top coat
A smooth finish makes all the difference. Glitter looks best when encased in a glossy dome that catches the light with every flick of your fingers.
Step 8: Clean the Edges
Even the steadiest hands make minor mistakes. Take a moment to refine.
Dip a small angled brush or cotton swab in polish remover
Swipe gently around the nail edge and cuticle to remove any smudges or overflow
This crispens the look and gives it a salon finish
If you used a latex barrier during polish, now’s the time to peel it off for that ahhh moment of satisfaction.
Step 9: Let It Cure
Resist the urge to do anything with your hands for at least 20 minutes. Yes, that includes scrolling on your phone.
Sit back. Sip a drink. Catch up on your favorite podcast.
Let every layer fully harden. Glitter polishes tend to hold more moisture, so be patient.
Once everything is dry, run your fingers over your accent nails. If they feel bumpy, add one more thin layer of top coat.
Step 10: Flaunt It
You’ve just created a stunning set of nails that straddle both restraint and extravagance. Show them off.
Snap a pic in natural sunlight to capture the sparkle
Post it with a caption that matches your vibe
Style your rings, adjust your sleeves, and let your hands speak in shimmer
Whether you're typing on a laptop, reaching for your latte, or brushing your hair behind your ear, that tiny gleam will catch the eye—and maybe spark a conversation.
Bonus: Refresh Tips for Long-Lasting Glitter
Reapply top coat every 2–3 days to preserve shine and prevent chips
If using gel polish, cure each layer under a UV lamp and enjoy 2+ weeks of wear
For removal, soak a cotton pad in acetone, press to the nail, and wrap with foil for 10–15 minutes. Then gently scrape off
Your Glitter, Your Rules
The beauty of a glitter accent nail is that it’s endlessly customizable. You can switch the placement, experiment with finishes, and layer textures to your heart’s content. The sparkle doesn’t have to scream. Sometimes it just needs to whisper with style.
What matters most is that it feels like you—whether your version of glamour is soft and elegant or bold and head-turning.
DIY Chic Glitter Accent Nail Tutorial: Add Sparkle to Your Style!
The Final Touch: More Than Just Sparkle
Nails are not just an accessory. They are intimate little canvases that reflect how we carry ourselves—how we show up in the world. And a glitter accent nail? That’s a micro-declaration. It says you’re not afraid to shine, not afraid to play, and not afraid to create moments of beauty just for yourself.
There’s power in the details. In a world that often demands everything at once—efficiency, perfection, presence—taking time to sit down and layer a little shimmer onto your fingertips is a quiet act of rebellion. It’s feminine. It’s grounded. It’s creative therapy that doesn’t need to explain itself.
Whether you’re painting your nails at 2 AM in your kitchen, prepping for a date, adding flair to a Monday, or giving your hands the love they deserve after a long week—you’re choosing beauty on your terms. That single glittered finger? It’s not just cute. It’s a signature.
And that’s the thing about sparkle—it’s always been more than decoration. It’s a state of mind.
So go ahead. Pick your polish. Shake up the glitter. And leave a little trail of stardust everywhere you point.
You’re not just doing your nails.
You’re making a moment.
And babe, you’re the main event.
As you embark on the sparkling journey of creating your own chic glitter accent nails, I’ve curated a list of inspirational sources to guide and enrich your DIY experience. These blogs are a treasure trove of glitter nail designs, tips, and tutorials that will help you add that perfect touch of sparkle to your style!
Comprehensive List of Blog Sources:
May these sources inspire your creativity and elevate your nail art game. Happy DIY-ing!