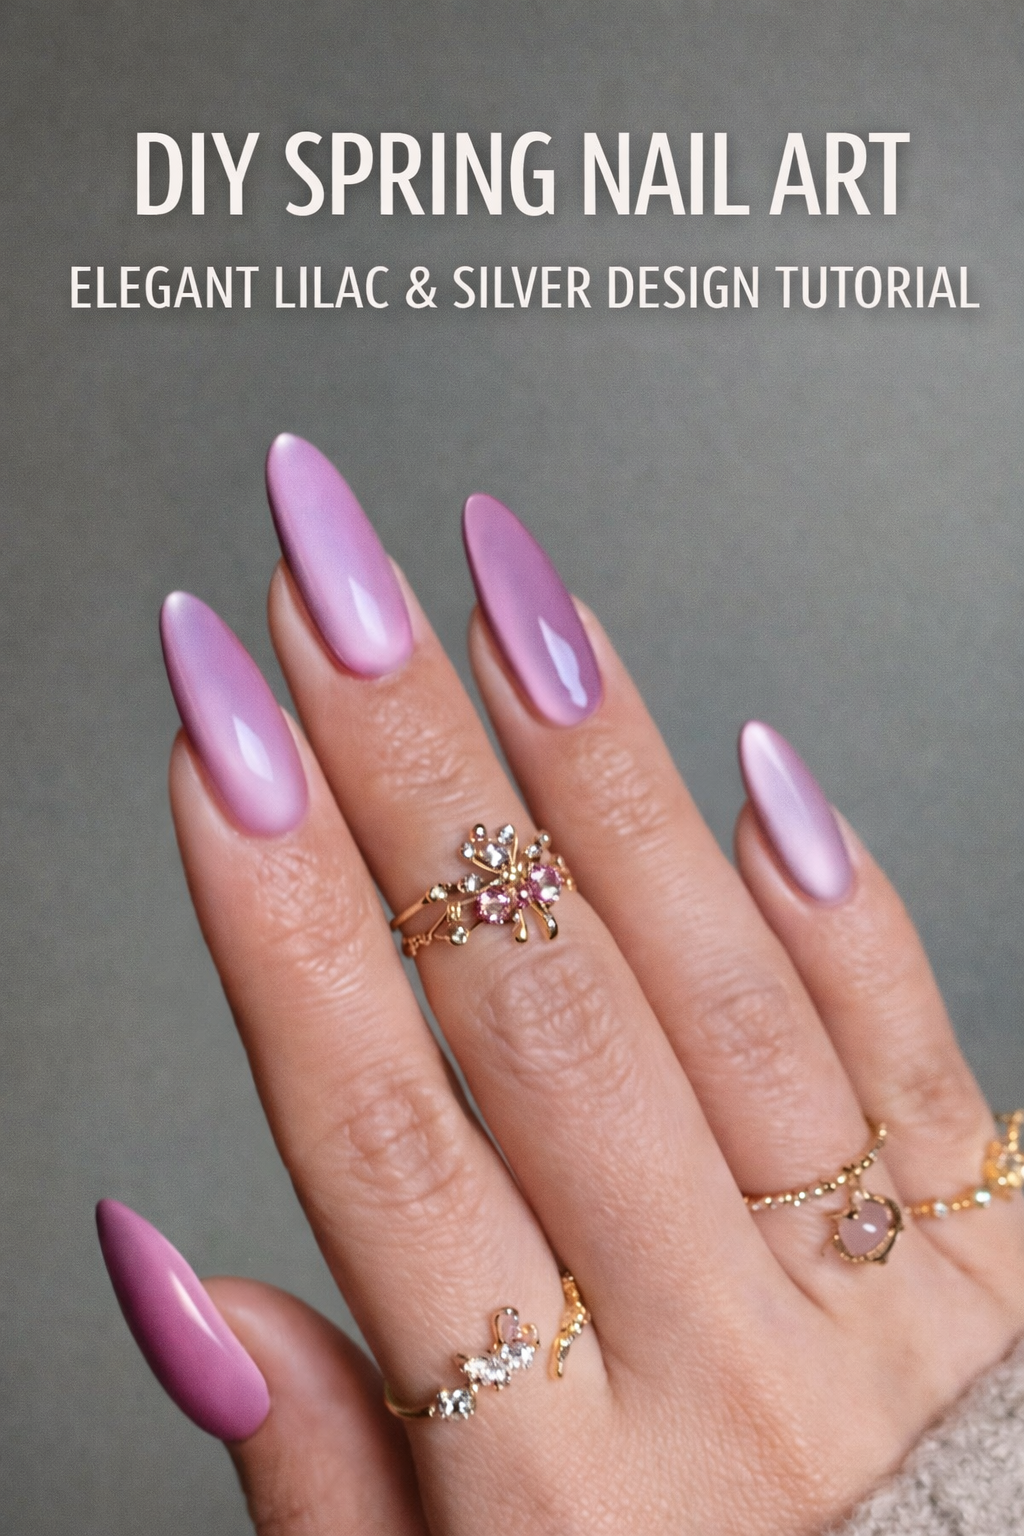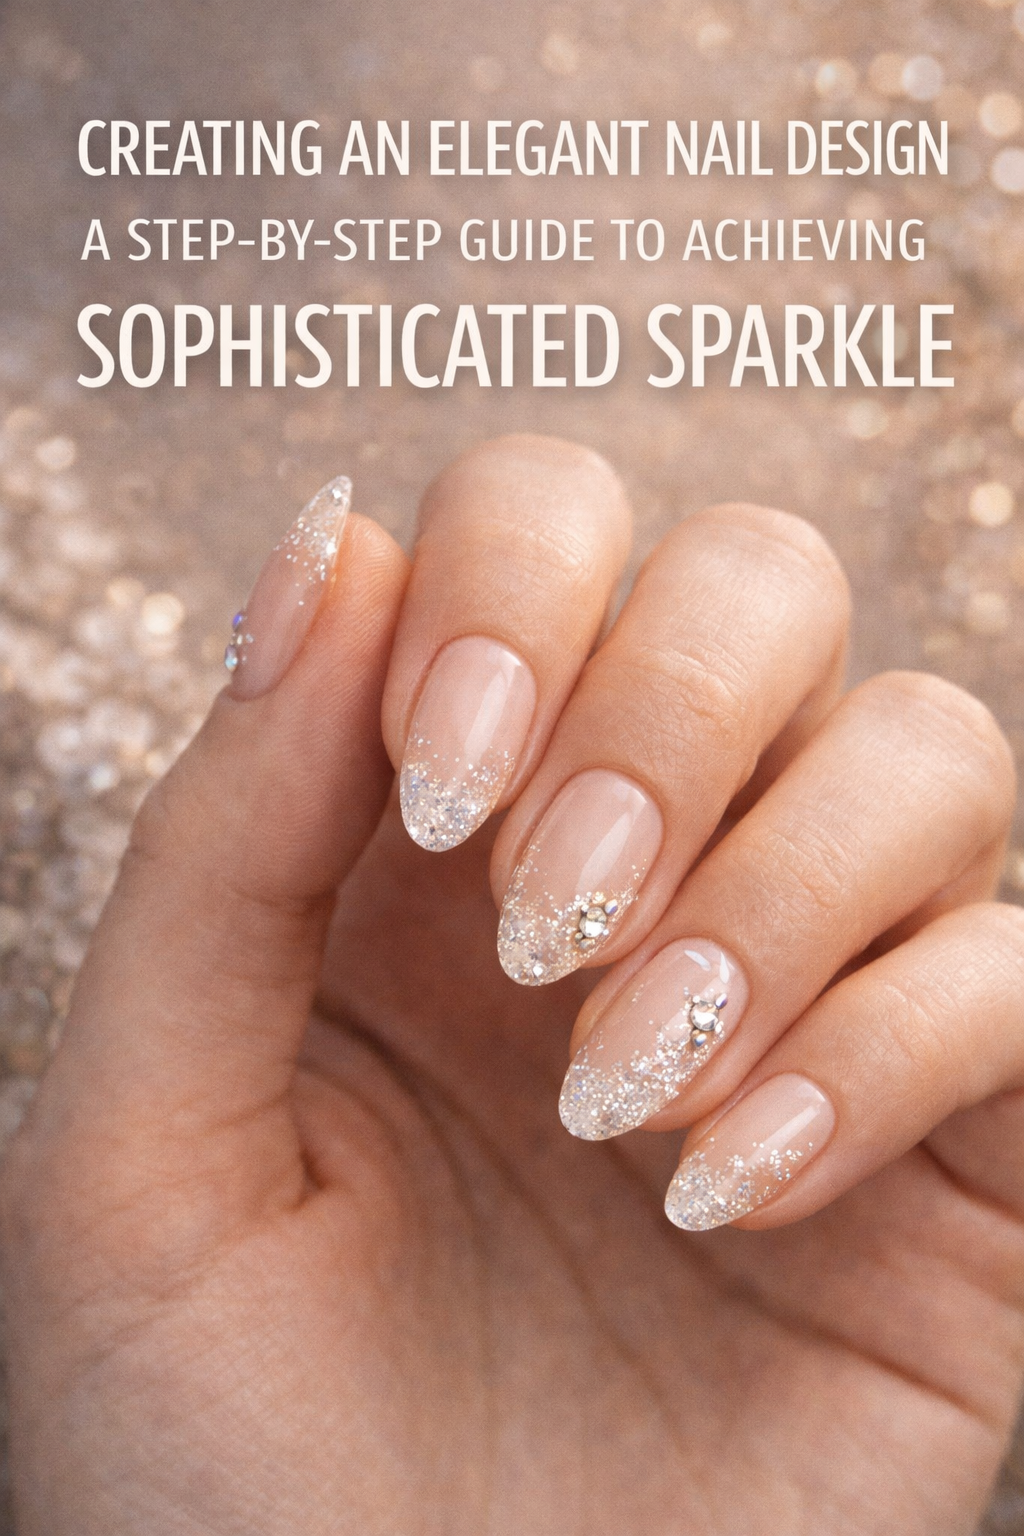
Creating an Elegant Nail Design: A Step-by-Step Guide to Achieving Sophisticated Sparkle

Creating an Elegant Nail Design: The Art and Power of Sophisticated Sparkle
Elegance is not a trend. It’s a state of mind, a personal signature, and a whisper of luxury that lives in the smallest details. In a world saturated with noise and bold statements, there’s something infinitely more powerful about quiet confidence—about a woman whose hands tell a story not with rhinestones and drama, but with gleaming restraint, deliberate shape, and a sparkle that’s intentional rather than loud.
This is the world of sophisticated nail design.
There is a common misconception that elegance in nail art must equal plainness. That neutral shades or minimalist finishes are somehow boring. But true elegance isn’t about holding back. It’s about control, curation, and taste. A sophisticated nail look can be dazzling. It can shine. It can incorporate shimmer, sparkle, gradients, or subtle embellishments—but what defines it is harmony. Every element feels considered. Nothing is out of place. Nothing is chasing attention.
In this long-form guide, we’re going to dive deep into the principles, methods, and stylistic decisions that elevate a basic manicure into something iconic and luxurious. Whether you’re doing your own nails for a special event, building a signature everyday look, or refreshing your salon vocabulary to communicate with more precision—this post will give you everything you need to master elegant nail design from the ground up.
Let’s begin.
The Anatomy of Sophistication: What Makes a Nail Design Elegant?
Elegance is about cohesion and refinement. In nails, that often shows up through:
Color harmony: Think rich neutrals, sheer blushes, warm pearls, icy champagnes, or deep, expensive-looking shades like merlot or navy. Sparkle is welcome—but controlled.
Shape consistency: The clean lines of an almond or soft square tip lend natural grace to the hand. Even bolder shapes can look polished if the execution is precise and length balanced.
Detail restraint: Instead of stacking trends (like matte, foil, chrome, stickers, glitter), choose a single statement and build the rest of the design to frame or echo that moment.
What you avoid is just as telling as what you include. Sophistication is a quiet form of rebellion. You’re saying, “I know who I am,” without shouting it.
Choosing the Right Palette for Your Mood
When curating a color story, consider your skin tone, outfit coordination, and seasonal energy. Here are a few timeless combinations that never fail:
Sheer pink with micro-glitter tips for bridal polish or feminine softness
Soft taupe with a matte finish and gloss edge line for modern minimalism
Champagne base with silver foil flecks for evening glamor without excess
Creamy white with fine gold striping for structured elegance
Always test your base shade against natural lighting before committing. What looks warm under indoor light may appear ashy outdoors, and vice versa.
Nail Length and Shape: Structure Before Style
Elegant design begins with a strong silhouette. If the structure of the nail is off, no amount of polish will save it. Start by asking yourself:
What length complements my fingers without interfering with daily life?
What shape softens my hand without appearing trendy or dated?
The almond nail reigns supreme in the world of chic femininity. It elongates the finger, creates a graceful taper, and pairs beautifully with minimalist or detailed designs. For a modern twist, consider an oval-square hybrid—something soft, neat, and wearable with a high-fashion edge.
Remember, elegance is not only visual. It’s also functional. Your nails should look like they belong on you.
Texture as a Tool: Mixing Finishes with Intention
Texture is where your design can whisper rather than scream. One of the most understatedly luxurious techniques is mixing gloss and matte in the same manicure. Try:
A full matte nail with a gloss French tip
Glossy base with a single matte accent stripe
Glitter gradient that fades into a velvet-matte finish
Metallic leaf, iridescent shimmer, or soft chrome can be used as well—but should feel like accents, not the foundation of the design. One technique per nail (or one statement per hand) keeps the look grounded.
The Power of Negative Space
Negative space allows the nail to breathe. It keeps the design light, fresh, and expensive-looking. Whether it’s a clear stripe down the center, a small bare crescent at the cuticle, or a floating dot design—leaving some space untouched adds sophistication.
Think of it like a luxury perfume. The silence between notes is what gives the scent depth. A little skin peeking through your polish can feel like silk peeking from beneath a structured coat.
Tools of the Trade: Elevating Your Application
It’s not just what you use, but how you use it. Clean application is everything. If your edges are jagged, your lines uneven, or your top coat pooled at the cuticle, even the most expensive design will look amateur.
Here are some tools and techniques worth investing in:
Fine-tipped brushes for detailed lines, glitter placement, and edge refining
Glass files for a smoother, cleaner edge that minimizes peeling
Silicone cleanup pens for sharpening the edges of your polish after application
High-shine top coats that stay glossy for days without dulling
Good tools won’t make you a good artist overnight—but they will eliminate the friction that holds back your precision.
Mindful Sparkle: How to Use Glitter with Class
Glitter can absolutely be elegant when it’s placed with intent. Think shimmer—not slather. Here’s how to keep it refined:
Concentrate it: Use a sponge to place glitter only at the tip or base and blend upward.
Pair it with neutrals: A dusty rose base with soft holographic sparkle feels bridal. A nude beige base with silver sparkle feels icy and high fashion.
Balance with matte: Surrounding your sparkle with matte nails gives contrast and modern restraint.
One of the most polished combinations? A sheer milky base with ultra-fine silver glitter suspended like snow.
Design Layouts that Work Every Time
If you’re unsure how to balance your design, start with these foolproof layouts:
Two Accent Rule: Choose two nails per hand to carry the embellishment, keeping the rest simple and cohesive.
French Redux: Play with modern interpretations of the French tip using shimmer gradients, metallic lines, or reverse placement.
Ombré Sparkle: Create a faded look by applying shimmer more densely near the cuticle or tip and blending outward.
Asymmetrical Chic: One fully designed hand, one minimalist hand. This is popular with runway nail stylists and editorial shoots.
Layout is less about symmetry and more about balance. If your eye can rest between focal points, you’ve done it right.
Elevating a DIY Manicure to Editorial Quality
If you’re doing your own nails at home, here are three tips to upgrade your results instantly:
Work in layers: Thin, multiple coats create depth and reduce streaking.
Use finger spacers: Even spacing keeps polish lines consistent across all fingers.
Photograph your hand under natural light: It reveals flaws you didn’t notice, like uneven coverage or tip pooling.
It’s in the editing that refinement emerges.
When to Use Rhinestones, Foil, or Art Details
Elegance doesn’t mean avoiding embellishment altogether. It means knowing when less is more. Use decorative elements with a sense of ceremony:
A single crystal at the base of each ring finger
A small foil triangle at the corner of one nail
A delicate line art flower over a nude background
Avoid stacking. If you’re doing rhinestones, skip the glitter. If you’re doing foil, let it shine solo. Always think of design elements like accessories—just enough to elevate, never enough to overwhelm.
Staying on Trend Without Losing Your Signature
The nail world moves fast—chrome one month, aura gradients the next. But sophistication lives outside the cycle. If you want to engage with trends while staying grounded in your personal elegance, try this:
Adapt trends into your color story: Use seasonal trends like lilac, sage, or chocolate brown within your own palette.
Borrow finish, not form: If chrome is trending, try a chrome tip on a neutral nail rather than full chrome coverage.
Echo trends in placement: Instead of going full aura, create a small diffused shimmer at the center of a nude nail.
You can nod to the moment without letting it take over.
The Secret Ingredient: Confidence in the Finish
The real mark of a sophisticated manicure isn’t in the polish bottle. It’s in how you carry your hands afterward. When your nails are elegant, your gestures slow down. You use your hands more intentionally. You start to notice how you hold a glass, how you brush your hair aside, how you open your phone.
Elegance rewires behavior. That’s why it’s powerful.
Now Let’s Create It Together…
Now that you understand the philosophy behind sophisticated sparkle, let’s bring it to life with a guided tutorial that walks you through a timeless, elegant nail design you can recreate at home. Whether you’re heading to an event or simply want your hands to feel luxurious day to day, this next section will show you every step in exquisite detail.
Let’s begin your transformation.

Creating an Elegant Nail Design: A Step-by-Step Guide to Achieving Sophisticated Sparkle
Repost from @napaznokciach
— Glam Artistry Hub (@glamartistryhub) March 30, 2024
•
✨🩷 HOT or NOT? 🩷✨
Migotek
Arte Brillante White@indigonails pic.twitter.com/T0KNIndJ9k
Step-by-Step: Creating an Elegant Nail Design with Sophisticated Sparkle
This tutorial brings together the essence of restraint, polish, and timeless shimmer. With each step, you’ll layer precision, shape, and a whisper of glamour into a final look that’s worthy of your most refined outfits and moments. Whether you’re preparing for a wedding, a gala, or a quiet moment of self-adornment, this design pairs beautifully with any elevated occasion.
Let’s walk through it in full, from shaping to topcoat, with every thoughtful detail in between.
Step 1: Prepare Your Nail Canvas
The foundation of any elegant manicure is a clean, smooth canvas.
What You’ll Need:
Nail polish remover or acetone
Cotton pads
Fine-grit nail file
Cuticle pusher
Nail buffer
Optional: Nail dehydrator
Instructions:
Remove all old polish completely, ensuring no residue is left behind.
Gently push back your cuticles with a metal or rubber-tipped pusher.
Shape each nail with a fine-grit file. For this look, a rounded almond or soft oval is ideal.
Lightly buff the surface of each nail to smooth out ridges and increase polish adhesion.
Wipe the nail surface with remover or dehydrator to eliminate any remaining oils.
Pro Tip: A clean base ensures better polish grip and a longer-lasting finish. Never skip this step, even when short on time.
Step 2: Apply a High-Quality Base Coat
Your base coat not only protects your nails but also anchors the entire design.
What You’ll Need:
A smoothing or ridge-filling base coat
Instructions:
Apply a thin layer to each nail, starting from the cuticle and sweeping to the tip.
Allow it to dry completely before moving forward. This prevents bubbling and streaking in the next layer.
Pro Tip: A ridge-filling formula enhances that ultra-smooth, glassy finish elegant manicures are known for.
Step 3: Choose Your Base Color Wisely
For this tutorial, we’re using a neutral blush-pink or sheer mauve as the base. These tones flatter all skin shades and create that barely-there elegance that feels polished but effortless.
What You’ll Need:
A creamy blush-pink polish or sheer cool-toned nude
Instructions:
Apply your first coat in even, thin strokes. Avoid pooling near the cuticles.
Let it dry fully, then apply a second coat for opacity or soft build-up.
If your polish is streaky, consider a third ultra-thin layer.
Pro Tip: To create a clean edge near the cuticle, hold the brush flat and float the color just above the skin rather than pressing it down.
Step 4: Add Sparkle—With Sophistication
Now comes the signature element: controlled, radiant sparkle. We’re going for a fine glitter fade concentrated at the base or tip, depending on your mood.
Option 1: Reverse Glitter Fade (Cuticle Sparkle)
Dip a sponge or fine brush into a micro-glitter silver polish.
Dab gently around the cuticle area and fade upward. The goal is a dispersed sparkle that loses density as it travels.
Repeat once the first layer sets for more impact.
Option 2: Classic Glitter Tip Fade
Dab the same glitter polish at the free edge of the nail and feather downward.
Use a clean sponge to absorb excess polish and create a smoother gradient.
Pro Tip: Use glitter polish sparingly. You’re aiming for a “dusting,” not full glitter nails. Think of it as starlight across silk, not fireworks.
Step 5: Refine the Design with a Detailing Brush
If the fade isn’t as precise as you want, dip a fine detailing brush in acetone and lightly clean the edges of the sparkle to sharpen the curve or taper.
What You’ll Need:
Small angled nail art brush
Acetone
Patience
This step makes all the difference in achieving a salon-grade result. A messy glitter line can make the whole look feel rushed or juvenile. Cleaning with intent makes it editorial.
Step 6: Optional — Add a Gloss Line or Floating Accent
Want to elevate it even further? Use a clear gloss or gold striping tape to outline a crescent moon at the cuticle or place a small metallic dot in the center of one accent nail.
Ideas:
A gold foil ring at the cuticle for luxury flair
A single pearl or gem on the ring finger to mimic jewelry
A clear gloss swoop over a matte base for textural contrast
Just one of these is enough—don’t stack.
Step 7: Seal Everything with a Luminous Top Coat
The right top coat is what makes the whole thing gleam with elegance. You want shine, but not plasticky thickness.
What You’ll Need:
Fast-drying, gel-like top coat
Instructions:
Float the brush over the entire nail to avoid dragging the glitter.
Cap the free edge of the nail to prevent chipping.
Let it dry fully. If needed, use a quick-dry spray or drying drops.
Pro Tip: Use two layers of top coat if you used chunky glitter. The extra coat smooths the texture and makes the finish feel glassy and luxe.
Step 8: Clean Up the Edges
After your top coat sets, dip a cleanup brush or cotton swab in acetone and run it along the skin to remove any stray polish or glitter specks.
This is the invisible polish that separates DIY from professional.
Step 9: Hydrate and Illuminate
Now that the polish is perfect, restore moisture and add a finishing glow to your hands.
What You’ll Need:
Cuticle oil (preferably jojoba or vitamin E-based)
Hand cream with light-reflecting particles or nourishing shea butter
Instructions:
Massage cuticle oil into each finger, focusing on dry skin.
Apply a small amount of hand cream and rub in gentle, circular motions.
Let your hands absorb the products for a few minutes before photographing or showcasing the look.
Pro Tip: For a soft, editorial hand shot, brush highlighter on your knuckles and collarbones to catch the light in photos.
Step 10: Maintenance and Wear
An elegant manicure should last more than a day—it’s meant to feel luxurious, not disposable. Here’s how to stretch your wear:
Avoid soaking hands in hot water during the first 24 hours
Reapply top coat on day 3 to refresh shine and prevent tip wear
Use gloves while cleaning or doing dishes
Keep a travel-sized hand cream with you to hydrate regularly
Final Look and Feel
Once you’re done, your nails should feel like an extension of your style, not just a trend you tried. They should shimmer without screaming. Glow without glitterbombing. Move through the day with an understated kind of power—the kind that people notice without knowing exactly why.
This manicure photographs beautifully under soft light and looks equally at home paired with a cashmere sweater or a silk gown. It’s timeless. It’s elevated. It’s you.

Creating an Elegant Nail Design: A Step-by-Step Guide to Achieving Sophisticated Sparkle
Closing Thoughts: Your Hands Tell a Story
There is something intimate and profound about the ritual of doing your nails. It’s more than polish. It’s more than shimmer. It’s the quiet decision to shape how the world receives you—through grace, through subtle power, through intention.
An elegant nail design doesn’t ask for permission to be noticed. It simply is. It rests confidently between strength and softness, between minimalism and expression. It tells people you know yourself. That you take care. That you hold standards—right down to your fingertips.
So whether you followed this tutorial for a wedding, a meeting, a celebration, or no reason at all, what you’ve created is more than a manicure. You’ve crafted a feeling. A mood. A mirror of the woman you are or the one you’re becoming.
Let it speak for you.
Let it linger as a final impression.
Let it remind you that sophistication doesn’t shout—it sparkles softly and stays.
Ask ChatGPT
As you delve into the world of elegant nail design, we present to you a step-by-step guide that will lead you to achieve that sophisticated sparkle. The journey to perfecting your nails is an art form, and we’ve gathered a list of sources that will serve as your palette and brushes. Each source is linked by a keyword, providing you with a seamless path to explore and enhance your nail art skills. Let’s begin this journey together, and may your nails reflect the elegance and grace you possess.
Elegant Nail Design Sources:
Sophistication: We Heart This offers a variety of elegant nail designs for timeless sophistication.
Classy: Maniology shares 12 classy nail designs that will always be in style.
Creativity: Unlock your creativity with easy nail art designs on Medium.
Fabulous: AllNailArt.com provides a guide to creating fabulous nail art.
Simple: Find a guide to creating simple nail art designs at home on Medium.
May these sources inspire you to create nail designs that are as unique and sophisticated as you are. Enjoy the process and the beautiful results!