Flutter in Turquoise: Crafting Butterfly Wings on Pink Nails

Whispers of Wings: The Art and Alchemy of Butterfly Nails on Blush Pink
There’s something spellbinding about the moment a butterfly takes flight. It is delicate, fleeting, full of promise and motion. Now imagine if that same poetry could land softly on your fingertips. The allure of butterfly nail art isn’t just about its beauty—it’s about transformation, storytelling, and wearing a little slice of magic with you as you go about your day. Especially when paired with the soft elegance of pink polish, a butterfly wing becomes more than a motif. It becomes a signature.
This blog post is a celebration of that signature. Not just an aesthetic tutorial, but an immersive experience that blends technique with tone, glam with grace. Whether you're new to nail art or already addicted to your dotting tools and fine brushes, the turquoise butterfly wing over blush pink is one of the most breathtaking looks you can master—and make your own.
Let’s begin with what makes this look so emotionally resonant. Butterflies have long symbolized rebirth, freedom, femininity, and the soul. In cultures from the Aztec to the Japanese, they are seen as messengers or protectors. On nails, they become expressions of both fragility and boldness, structure and flight. That juxtaposition is exactly why this trend keeps soaring.
But why pink?
Pink brings softness, a warmth that complements the geometric precision of the wings. It evokes innocence, confidence, flirtation, and serenity—all depending on the shade and context. Pale pinks can feel angelic or bridal. Dusty pinks lean editorial. Bright bubblegum pink offers a playful contrast to the meticulous detail of the wings, while a matte mauve lets turquoise shimmer with even more electricity. Layered together, pink and butterfly motifs form an editorial-worthy nail concept that moves with your personality.
So what exactly goes into crafting this look? It starts with understanding how to balance shape, pigment, and proportion. Butterfly wing nails are not just abstract shapes—they need structure and rhythm. You want symmetry without rigidity, elegance without over-design. And that’s where the artistry begins.
Step 1: The Perfect Base—Laying Down the Pink
Your foundation sets the tone, both literally and visually. Choose a pink that plays well with turquoise. Here are a few pairings that feel especially luxe:
Sheer baby pink + iridescent turquoise: ethereal and barely-there, like morning dew
Neutral blush + robin's egg turquoise: romantic and wearable with a touch of spring
Bright rose pink + jewel-toned teal: confident, fashion-forward, and visually arresting
Apply two even coats of your chosen pink. If it’s a jelly finish, let it dry between layers. Avoid streaking by loading the brush fully and starting at the center of the nail before sweeping outward. Once both coats are on, seal with a thin layer of glossy top coat to create a polished surface for the artwork to come.
Optional: Add a subtle shimmer top coat for extra dimension. Think of it like a butterfly’s wing catching the light.
Step 2: Map Out the Wing
Now for the most important part—the wing architecture.
Using a fine detail brush or a nail art pen, begin sketching the outer shape of the butterfly wing near the tip of the nail. Think of this shape like the top corner of a teardrop or the edge of a scallop shell. You’re not drawing the entire butterfly—just the portion that would look like it’s fluttering in from the side.
If you’re right-handed, it’s often easier to draw the wing facing leftward and upward. Lefties can try a mirrored orientation. Either way, the base of the wing should nestle near the cuticle and sweep outward to the free edge.
Use a rich black gel or acrylic paint for this outline to give your design that classic contrast. Precision matters here, but don’t let perfectionism paralyze you. A little irregularity gives it that authentic, natural energy.
Step 3: Fill with Turquoise
Choose your turquoise shade wisely. A rich peacock blue, a soft mint with depth, or a holographic foil can all work depending on the mood you’re after. Using a fine brush, fill in the main body of the wing between the black outlines. This is where your personality comes through.
You can go opaque for boldness or blend two shades for a gradient effect. For an ombré wing, start with a deeper turquoise near the outer tip of the wing and blend into a pastel tone as you move inward. Sponge blending works here, but a dry brush technique creates feathered texture that mimics real butterfly wings.
If using gel polish, cure each layer before adding more detail.
Step 4: Detailing the Wing Veins
This is where the magic happens. With a micro detail brush, create the delicate “veins” within the wing. Think of how stained glass looks—sections separated by thin black lines that curve with the shape of the panel. Follow your wing’s form and divide it into 3–4 segments that taper off at the tips.
Keep the strokes light. These lines should not overwhelm the turquoise but rather frame it. The goal is to enhance movement and realism.
Optional: Use a silvery-white liner for the veins instead of black if you want a more fairycore or pastel dream finish.
Step 5: Add the Signature Dots
All butterfly wing designs share a common feature—those iconic little dots along the edge.
Using a dotting tool or the back end of a bobby pin, place small white dots along the black outer line of the wing. Start larger near the edge and taper smaller as you move inward. This is the step that brings your butterfly to life.
If you’re feeling bold, swap white for gold, champagne, or even iridescent crystal gel. Think moonlight catching the curve of a wing.
Step 6: Seal the Design
Seal everything with a thick, glossy top coat. This not only protects your work but enhances the depth and saturation of the colors. Two coats of top coat may be needed, especially if you’ve layered gels or added rhinestones or foil accents.
Let it cure fully or air dry depending on your formula. Once set, apply cuticle oil to finish the look with healthy, hydrated skin around the nails. The softness of the oil against the shimmer of your butterfly design is a perfect contrast.
Optional Embellishments
For even more impact, you can add 3D elements like:
A small iridescent butterfly charm at the base of an accent nail
Crystals or pearls along the wing’s edge
A full-glitter fade over the pink base before painting the wing
Transfer foil or chrome powder in sections of the wing for a stained-glass effect
Mix and match these add-ons sparingly to avoid overwhelming the look. The star of this show is still the butterfly wing.
Styling Butterfly Wing Nails
Now that your hands look like they belong to a forest enchantress or a haute couture runway model, how do you make sure your outfit and accessories elevate them further?
Wear rings with aquamarine, moonstone, or opal to mirror the shimmer
Pair with blush satin or dusty pink cashmere to echo the base tone
Coordinate your makeup with a soft turquoise liner or pink shimmer highlight
Choose shoes with delicate straps or butterfly accents for harmony
These nails are more than just decoration. They are statement pieces, conversation starters, and personal armor. They draw the eye, ignite wonder, and whisper confidence in every gesture.
Why Butterfly Nails Will Never Go Out of Style
This look taps into something primal. The butterfly is always evolving. Always catching the light from a different angle. Just like you.
As trends come and go—chrome, jelly, squoval, almond, jellyfish glow in the dark—there’s something eternal about a painted wing. And when done right, it doesn’t just feel trendy. It feels eternal.
More importantly, this design is surprisingly versatile. You can shift the mood from spring picnic to summer siren to bridal romance depending on your base color and wing detailing. You can wear it with a swimsuit or a slip dress. At a garden wedding or your everyday Target run. Butterfly nails don’t shout. They sing.
And if you’re ready to transform that whisper into a full-on flutter, keep scrolling.
What follows is a curated collection of stunning nail looks featuring turquoise butterfly wings on pink polish, each with its own twist—whether it's a gradient shimmer, minimalist outline, or glam embellishment. Every photo includes notes on design details and the tools you’ll need to recreate the look yourself or bring it with you to the salon.
Because no matter how you wear them, butterfly nails are a little act of beauty that says one thing with absolute clarity:
You’ve arrived. And you’re about to take flight.
Let’s explore the looks.

Flutter in Turquoise: Crafting Butterfly Wings on Pink Nails
https://t.co/gu8CC8ispv pic.twitter.com/wLDvDxNPdR
— Glam Artistry Hub (@glamartistryhub) April 12, 2024
How to Create Turquoise Butterfly Wing Nail Art on Pink: A Luxe Step-by-Step Tutorial
Butterfly wing nail art is more than a trend—it’s an expression of grace, movement, and mastery. This technique combines graphic artistry with soft glamour, and when done over a pink base with turquoise accents, the effect is luminous. Here’s how to bring this vision to life, whether you’re painting it on yourself or guiding your nail technician through your dream manicure.
TOOLS YOU'LL NEED
Before diving in, gather your tools. You can elevate or simplify depending on your comfort level, but a well-stocked kit makes a world of difference.
Essentials:
Nail file and buffer
Base coat and top coat
Pink nail polish (cream, sheer, or shimmer)
Turquoise polish or gel (opaque or glittery)
Fine nail art brush
Dotting tool (or bobby pin end)
Ultra-fine detail liner brush
Black nail polish or gel liner
White polish or gel paint
Acetone or nail polish remover
Palette or foil sheet for mixing
Optional:
Nail decals or butterfly stickers (for beginners)
Chrome powder or foils
Glitter topcoat
Nail gems, iridescent flakes, or butterfly charms
STEP ONE: SHAPE AND PREP THE CANVAS
Your nail shape plays a vital role in how the butterfly wing flows. Almond and oval nails create the most organic “wing tip” shape, but square or coffin nails can create a striking editorial contrast.
Trim and file your nails to your preferred length and shape.
Buff the surface gently to remove oil and smooth ridges.
Push back your cuticles and clean around the edges.
Wipe nails with acetone or alcohol to remove residue.
Apply a base coat to all nails and let it dry completely. This not only protects your nail bed but provides the smooth, clean surface your polish needs to shine.
STEP TWO: CREATE THE BLUSH BASE
The background pink can completely shift the mood of your manicure, so select your polish thoughtfully. You can work with:
Soft nude pinks for a bridal, angelic vibe
Rosy blushes for a romantic and universally flattering look
Warm bubblegum pinks to add vibrant contrast to the cool turquoise
Dusty mauves or pink beige for a more editorial, moody twist
Apply two coats of your chosen pink polish. Allow each coat to dry before applying the next to prevent streaking or pooling. If using gel, cure each layer fully under an LED lamp. Make sure your polish dries smoothly because any surface texture will affect your detail work later.
Optional enhancement: Add a whisper-thin coat of shimmer or pearlescent topcoat before painting the wing. This gives the base a soft reflective quality like butterfly dust.
STEP THREE: OUTLINE THE WING DESIGN
Once your pink base is dry, it’s time to sketch the butterfly wing.
Use a fine liner brush and black polish or gel to draw a curved shape on one or two accent nails per hand. This could be just the upper third of a wing curving from the corner of your nail, or a half-wing that stretches across the nail bed.
Visualize the wing like a windowpane or a scalloped petal with layers. The outer line should arc gently to suggest movement.
Try angling the wing slightly upward or outward—it adds life to the design.
If you’re not confident with freehanding yet, lightly sketch the design in white first and go over it with black. Or try using a stamping plate, stencil, or tracing over a printed guide through transfer paper.
Let the black outline dry completely before moving forward.
STEP FOUR: FILL THE WING WITH TURQUOISE
Here’s where the magic begins. This pop of color is your focal point, so choose your turquoise wisely. It can be:
A creamy teal with strong pigment for high visibility
A metallic turquoise for a mermaid glow
A holographic or glittery version to mimic the refracted light of butterfly wings
Using a small flat brush or dotting tool, carefully fill in the spaces between the black outlines. Think of it like painting in stained glass. Don’t go over the black lines—keep your edges crisp.
For a gradient or ombré effect:
Start by painting the outer edge of the wing with a darker turquoise
Add a lighter turquoise or mint shade toward the inner corners
Blend where they meet using a sponge, dry brush, or dotting tool
Advanced twist: Add tiny foil flakes or chrome powder in select wing segments for a multidimensional glow.
STEP FIVE: ADD THE WING VEINS
This step creates the delicate internal structure of the butterfly wing.
Using an ultra-fine liner brush, return to your black or dark gel and paint tiny curved lines branching inward from the wing’s outer edge.
These veins should be irregular but elegant, like branches or ribs. Each line should taper as it moves inward.
For extra realism, follow the natural symmetry you’d see in monarch or morpho butterfly wings.
Keep the touch featherlight. Think: less zebra stripes, more feather filigree.
Soft variation: Swap black for white or champagne gold to give a more ethereal feel.
STEP SIX: ADD THE ICONIC DOTS
This step is quick but critical—it gives your wing its recognizable form.
Using a dotting tool, place 4 to 6 small dots along the outer edge of the wing. Use white polish for a bold effect or shimmer polish for a glint of magic.
Make the outermost dot slightly larger
Space the others evenly but irregularly—real wings aren’t perfectly measured
For a luxe finish, use gel polish and cure each dot before top coating to prevent smudging
Extra option: Use small rhinestones or pearl accents in place of one or two dots to give your design jewelry-level glamour.
STEP SEVEN: REINFORCE SHINE OR ADD DIMENSION
Once your wing is fully painted and dry (or cured), it’s time to give your work the finish it deserves.
Apply a generous layer of glossy top coat over each nail.
Cap the edges to seal in your design.
If using gems, charms, or 3D pieces, apply a thicker builder gel over them to hold them in place.
Allow everything to fully dry or cure completely.
You’ll be amazed how the turquoise glows once the top coat hits. It will deepen and sharpen your lines, intensify your base color, and give the wing a lifelike gleam.
Optional second coat: If your design has texture from layering, use a second coat to smooth the surface and increase durability.
STEP EIGHT: CLEAN THE DETAILS
No luxury nail art is complete without clean edges and a nourished finish.
Use a detail brush dipped in acetone to clean up any polish that crept into cuticles or onto skin.
Apply cuticle oil generously to each fingertip.
Massage in a rich hand cream to restore softness, especially if you’ve used acetone or gel cleanser.
At this point, your nails should look like tiny masterpieces—like wings caught mid-flight. Whether you're posing for photos, holding a coffee cup, or tapping your phone, every gesture will feel elevated.
PRO TIPS FOR PERFECTION
Practice on press-ons before committing to your own nails. It’s a great way to test color combos.
Customize each wing slightly. Change the curve or size for variety while keeping the aesthetic consistent.
Don’t overload your brush with polish—it will spill into the lines and blur the design.
Experiment with placement. A butterfly wing doesn’t have to sit on the same corner each time. Vary placement between the tips, cuticles, or sides for motion.
Use matte top coat on the pink base but keep the butterfly wing glossy for striking contrast.
BEYOND THE NAIL: HOW TO STYLE THE LOOK
These nails are wearable art, so let them shine.
Jewelry: Rings in turquoise, opal, moonstone, or gold with butterfly motifs
Outfits: Pastel pink dresses, boho tops, sheer sleeves, or even edgy black with iridescent accents
Makeup: Soft pink lids with a turquoise liner flick or glossy nude lips with shimmer highlight
Hair: Romantic half-up styles or a high ponytail to keep the attention on your hands
They also pair beautifully with summer events—garden weddings, brunches, festivals, or beach getaways. These nails are seasonless, timeless, and unapologetically magical.
Now that you’ve mastered the full technique, what follows is a refined set of individual step-by-step entries, each offering its own variation, nuance, or elevation of the turquoise butterfly wing on pink nails. These rewrites build on the foundation we've just laid, providing fresh ways to explore this look with improved detail, cleaner methods, or bolder flourishes. Whether you’re revisiting the design with new products or adapting it to seasonal moods, these enhanced tutorials are designed to help you evolve your execution and keep the artistry alive every time you sit down to paint.

Flutter in Turquoise: Crafting Butterfly Wings on Pink Nails
Butterfly wing nails on a blush-pink canvas are not just a trend to try—they're a ritual in self-expression. They require patience, precision, and a touch of poetry. And that’s the magic: what begins as a brushstroke becomes a message. What starts as polish becomes performance. With every layer, you aren’t just decorating your hands—you’re crafting an identity, telling a story that flutters between strength and softness, delicacy and defiance.
These nails are not for hiding. They are for sipping iced coffee with confidence, for catching compliments across the table, for reminding you—quietly but persistently—that transformation is always at your fingertips. In a world rushing toward automation and minimalism, butterfly nails ask you to pause, breathe, and create something intricate for the simple reason that it brings joy.
So take what you’ve learned here and make it yours. Whether you're sketching your first wing or refining your tenth, the technique will continue to evolve—just like you. And as you explore the rewritten guides ahead, know that each one is built to help you go deeper, push further, and create something that doesn’t just look beautiful but feels unforgettable.
Your wings are ready. Let’s paint them.
Ask ChatGPT
For those seeking to flutter in turquoise and adorn their nails with delicate butterfly wings on a canvas of pink, let’s embark on a whimsical journey. Imagine your fingertips as the wings of these enchanting creatures, ready to take flight:
Subtle Shimmering Purple Nails with Black Wing Accents: Channel elegance with a soft shimmering purple nail polish adorned by delicate black wing details. This minimal yet playful design adds a touch of magic to your everyday looks. Perfect for those who appreciate understated beauty.
Ombre + Nude Butterfly Wing Ombre: If you crave a bolder statement, opt for a full manicure featuring butterfly wing art. The light orange and nude ombre underneath the wings creates a modern and captivating look. Orange hues evoke warmth and vibrancy, making this choice perfect for expressing your unique style.
Classic French Tips + Pink Butterflies: Elevate a classic nail design by adding delicate pink butterflies to French tips. The pastel pink shade keeps the design subtle while infusing femininity. This timeless combination strikes a balance between sophistication and playfulness.
Gold Nails & Blue Butterflies: For those seeking allure, pair gold nail polish with blue butterfly nail art. The contrast is eye-catching and perfect for formal events or ringing in the New Year with bold elegance .
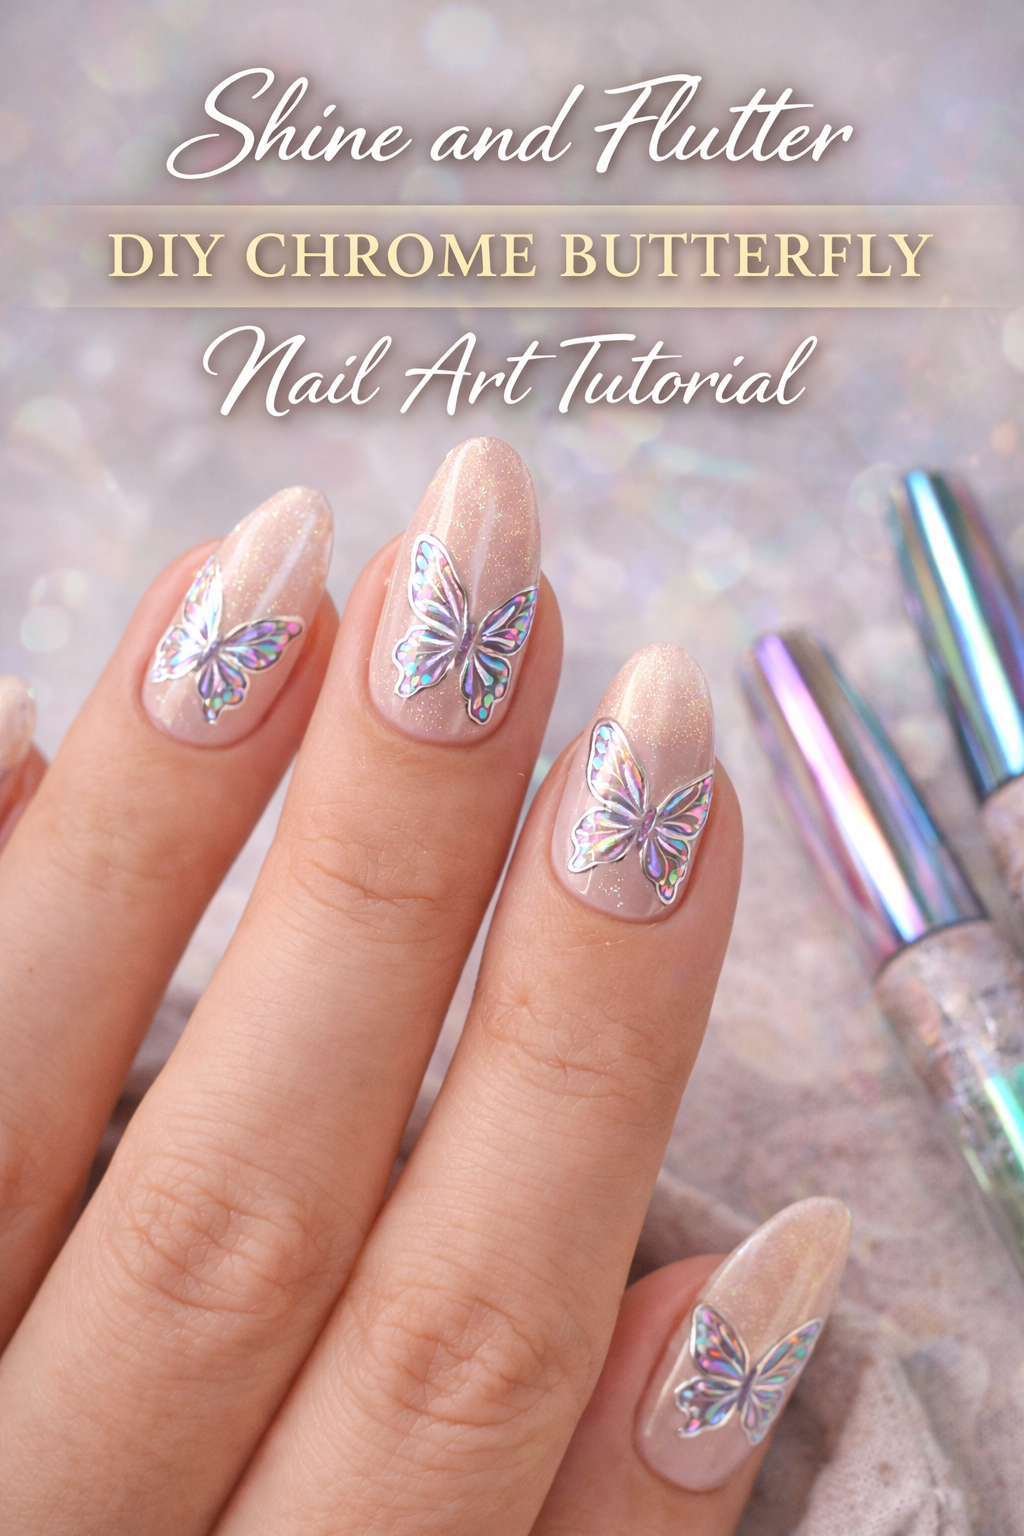
Chrome Nails + Pink Butterfly Wings: Imagine Barbie vibes translated to your nails. Chrome nails adorned with pink butterfly wing art create a cute, girly, and attention-grabbing manicure. Ideal for girls’ trips or any occasion where you want to stand out .
Remember, your nails are a canvas—express your inner butterfly and let your creativity take flight! 🌸🦋