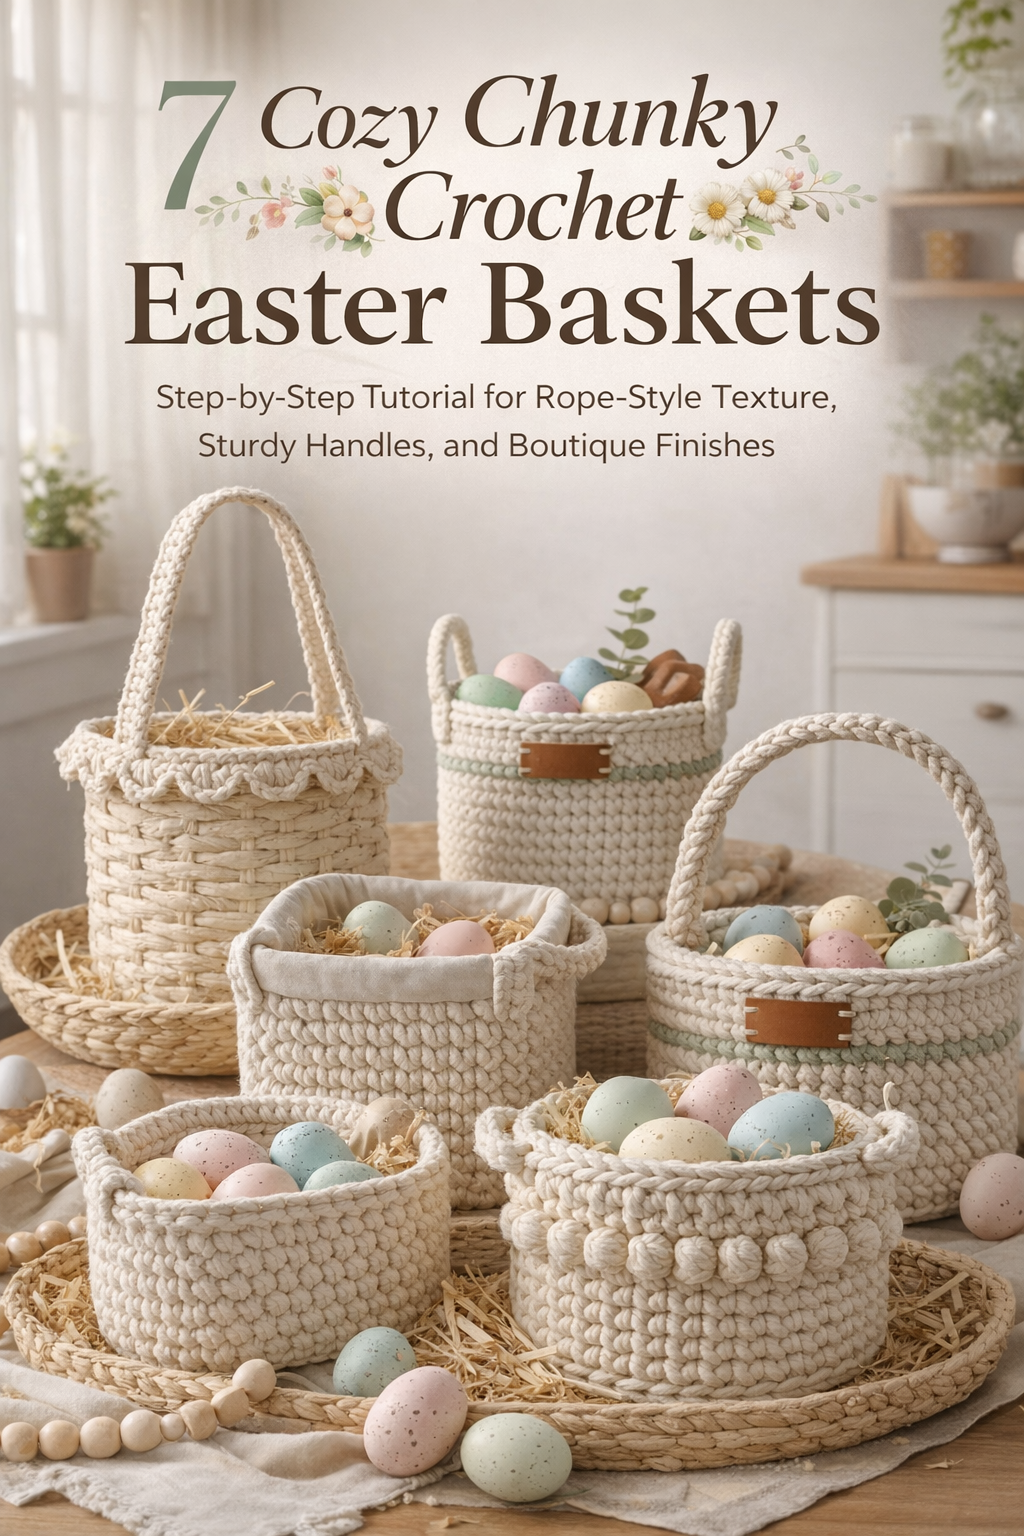
5 Heirloom-Cute Baby & Toddler Crochet Easter Dresses — Make-It-Yourself Tutorial

More like this
Easter has a way of sneaking up on us—not just on the calendar, but in the tiny details that end up lasting longer than the day itself. The soft thump of little shoes on the porch. The sunlight turning everything pastel. That moment when a child spins just to see if the skirt will follow. And somehow, without planning it, the dress becomes part of the story. Not because it’s expensive or perfect, but because it was chosen (or made) with intention.
That’s what crochet does best: it turns “cute” into meaningful. Each stitch is a quiet vote for slowing down, for making something with your hands that didn’t exist before. A crochet Easter dress isn’t just an outfit—it’s texture and time and patience woven into something wearable. It photographs beautifully, yes. But more importantly, it feels like care. Like a keepsake that happens to fit right now.
In this post, we’re recreating five irresistible crochet Easter dress looks—from candy-striped rainbow yokes to puff-sleeve garden greens, from petal-textured lavender skirts to sunshine-yellow sundresses with strawberry buttons, and a storybook-blue dress topped with the kind of scalloped collar that makes everyone say “oh my goodness.” Pick one to make, or save them all—because spring always returns, and handmade never goes out of season.
💡 Pro Tip: Why I Link to Amazon Search Results and Not One Product
In the Shop the Look and Style it With sections under each bikini, I link to Amazon search results, not single products. Here’s why this matters:
Hot bikinis sell out fast. I don’t want you clicking on a dead link to a sold-out item. Search pages stay updated.
You get more options. Love the vibe but want a different color, cut, or price point? The search results give you everything that matches the look and energy.
I curate each search carefully. These aren’t generic. I spend hours crafting keywords that bring up exactly the kind of bikinis I’d wear—or recommend to my hottest friends.
Support with no pressure. If you click a link, browse, and buy something later, I may earn a small commission at no extra cost to you. That helps me keep bringing you curated collections like this one—powerful, seductive, and always fresh.
So dive in. Click through. Try something risky. These aren’t just bikinis—they’re commands, statements, and maybe even your new favorite weapon of choice.
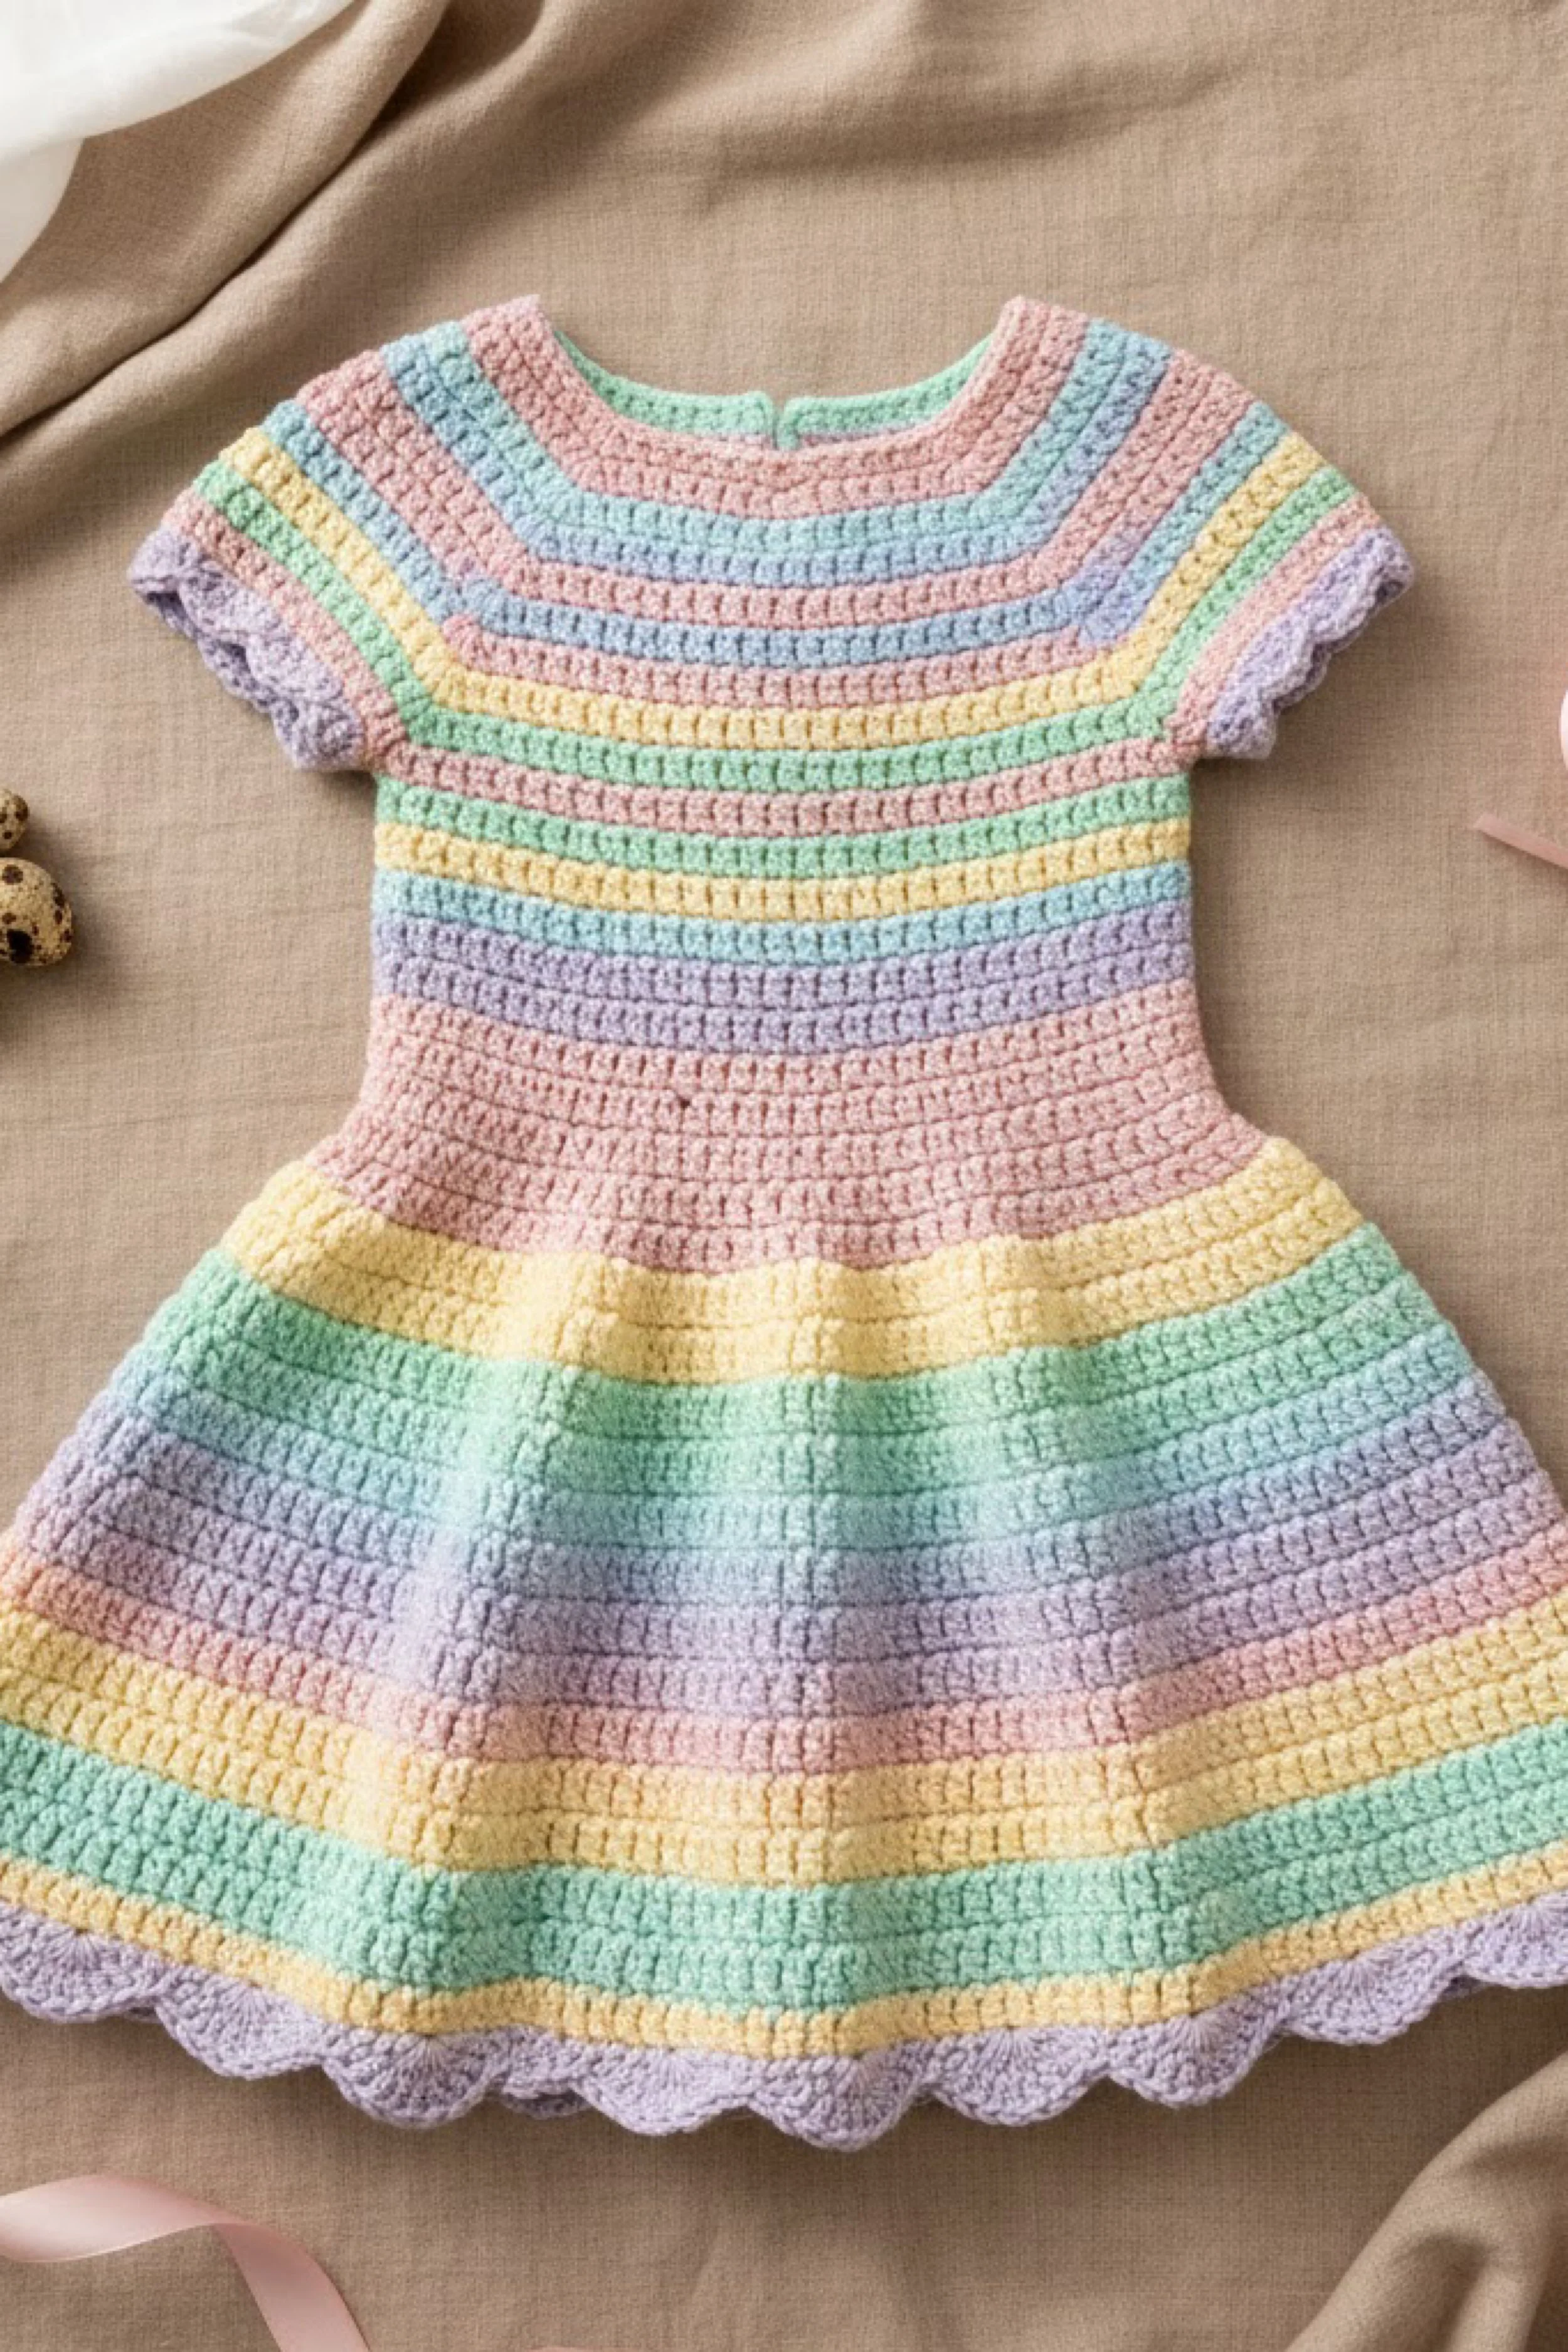
Pastel Rainbow Yoke Crochet Easter Dress — Step-by-Step Tutorial
What you’re making
This is a soft, springy baby/toddler crochet dress with a wide striped yoke, short sleeves, a gently fitted waist, and a twirly skirt finished with a scalloped hem. The “Easter look” comes from the candy-pastel striping (pink, mint, butter yellow, sky blue, lavender) and the clean, modern stitch texture that photographs like a dream. You’ll crochet from the neckline down, separate sleeves, then build the skirt in easy rounds.
Materials + tools
- Worsted weight (Category 4) yarn in 5–6 pastel shades (or one pastel variegated + a solid for trim)
- Crochet hook: 4.0–5.0 mm (choose for a soft but structured fabric; 4.5 mm is a great starting point)
- Stitch markers (at least 6)
- Yarn needle (weaving in ends)
- Small scissors
- Measuring tape
- Optional: 2–3 small buttons + needle/thread (for back neck closure), or a small zipper
- Optional: thin elastic (¼ in) for waist casing (for a “stays put” fit)
Finished size + customization notes
- This style is easiest in baby/toddler sizes (6–12M, 12–24M, 2T, 3T, 4T), but you can scale it by measuring a favorite dress.
- Key measurements to match the photo’s “look”:
- Neck opening: comfortable, slightly wide (not tight like a t-shirt).
- Yoke depth: reaches upper chest/front and across the shoulder line.
- Waist: lightly fitted (not cinched) before the skirt flares.
- Skirt: wide, swingy, with a scalloped lavender edge.
- If you’re unsure on yarn weight: worsted makes a plush, dimensional stitch like the photo; DK will be lighter and drapier (go down a hook size and add rounds for length).
Step-by-step instructions
Abbreviations: ch (chain), sl st (slip stitch), sc (single crochet), hdc (half double crochet), dc (double crochet), inc (increase = 2 sts in same st), dec (decrease), BLO (back loop only). Fabric note: The dress in the photo looks like mostly hdc worked in rounds, which gives that tidy “brick” texture. If you prefer a slightly airier dress, use dc instead.
1) Choose your size by measuring (fast + accurate)
- Lay a well-fitting child’s dress flat.
- Measure:
- Neck width (inside edge to inside edge)
- Yoke depth (top shoulder to underarm)
- Chest width (armpit to armpit)
- Waist width
- Desired skirt length (waist seam to hem)
- Your crochet yoke should match the chest width when laid flat before you start the skirt.
Visual checkpoint: Your yoke should look like a wide striped “bib” with crisp corners at the raglan lines, similar to the photo’s stacked pastel rings.
2) Start the neckline (top-down yoke)
- With Color A (pink in the photo), chain a multiple that fits around the neckline comfortably.
- Baby/toddler often lands around 52–72 ch depending on size and hook.
- Join to form a ring (don’t twist).
- Round 1: ch 1, hdc in each ch around, sl st to join.
- Place 4 stitch markers evenly to create raglan points:
- Front, left sleeve, back, right sleeve.
- A common split is: front ¼, sleeve ⅛, back ¼, sleeve ⅛, plus stitches for raglan “seams.”
- Round 2 (raglan increase round): ch 1, hdc to marker, (hdc, ch 1, hdc) in marked stitch (or in the stitch before marker) to create the corner, move marker to ch-1 space. Repeat at all 4 corners, hdc to end, join.
Tip: Using a ch-1 space at each raglan makes the corners clean and helps the yoke lay flat like the photo’s crisp stripes.
3) Build the striped yoke (the “Easter rainbow”)
- Continue raglan increase rounds every round (or every other round for a less angular yoke) until yoke depth matches your target.
- Change colors every 2 rounds to mimic the photo:
- Pink → Blue → Pink → Blue → Yellow → Mint → Pink → Lavender accents, etc.
- For the neatest stripes:
- Change color on the last yarn-over of the final stitch of the round.
- Immediately sl st to join with the new color and ch 1.
Visual checkpoint: When folded, the yoke should sit across the shoulders and look like evenly spaced pastel bands. If yours is ruffling, reduce increases (do increase rounds every other round). If it’s pulling, increase more often or go up a hook size.
4) Separate sleeves and body
- When yoke depth reaches underarm:
- Lay flat and ensure front + back width matches chest measurement.
- Round to separate:
- hdc across front to first corner space,
- chain to create underarm (typically 4–10 ch depending on size),
- skip sleeve stitches to next corner space,
- hdc across back, chain for second underarm, skip other sleeve, join.
- Place markers at each side seam (underarm join) to track shaping.
Visual checkpoint: You should now have a tube (the body) with two sleeve holes and clean underarm chain bridges.
5) Crochet the body to the waist (smooth + slightly fitted)
- Work even rounds of hdc for 4–10 rounds (depending on size).
- To lightly shape:
- Every 3rd round, do 2–4 decreases total (1 near each side seam, optionally 1 near front/back center).
- Keep stripes aligned with the photo’s playful bands:
- Alternate colors every 2–4 rounds.
- For the pictured look, keep the waist section mostly pink before the skirt changes.
Tip: If your stitches look too “gappy,” switch to hdc and a slightly smaller hook. The photo’s fabric is plush and dense.
6) Create the skirt flare (the twirl happens here)
- Skirt increase round: ch 1, hdc in next 3 sts, inc repeat around (or inc every 4th stitch for moderate flare).
- Work 2–3 even rounds.
- Repeat an increase round every 4–6 rounds to keep a gentle A-line that widens like the photo.
- Maintain the color banding:
- The pictured skirt has broad pastel stripes and a lavender scalloped edge.
Visual checkpoint: When laid flat, the skirt should curve outward smoothly. If it’s sticking out like a lampshade, decrease increase frequency. If it’s too straight, add increases sooner.
7) Add short sleeves (simple cuff like the photo)
- Join yarn at a sleeve hole.
- Round 1: ch 1, hdc evenly around sleeve opening (work into underarm chains too).
- Work 2–5 rounds for sleeve length.
- Optional sleeve edging:
- A subtle scallop or picot in lavender gives the “Easter candy” finish.
8) Back neck closure (to match the photo’s little opening)
Option A (button loop):
- Before yoke rounds get too deep, stop and work back-and-forth for 2–3 rows to create a small slit.
- Add a chain loop on one side and sew on a button. Option B (no closure):
- If neckline is wide enough, skip this—many toddler dresses pull on easily.
9) Scalloped hem (lavender edge like the photo)
- Switch to lavender.
- Round 1: sc around evenly to “set” the edge.
- Round 2 (scallops): sl st in next st, (5 dc) in next st, sl st in next st repeat around.
- If scallops are too tight, add a skip: sl st, skip 1, (5 dc), skip 1, sl st.
Visual checkpoint: You should see rounded, even shells that sit flat—not cupping or flipping.
Troubleshooting (common mistakes + fixes)
- Yoke ruffles: Too many increase rounds. Fix by increasing every other round for 2–4 rounds, or go down a hook size.
- Yoke pulls tight at shoulders: Not enough increases or hook too small. Add one extra increase round and/or go up 0.5 mm.
- Stripes look jagged at the join: Use a “mock invisible join” or join with sl st + ch 1 consistently; keep tension even.
- Skirt flares too much: Reduce increase frequency (increase every 6–8 rounds).
- Skirt is too narrow / not twirly: Increase more often or use dc for skirt rounds.
- Scallops curl: Base edge stitch count isn’t compatible. Add a sc round first, then try a skip-1 scallop repeat.
Finishing details
- Weave in ends as you go (pastel stripes create lots of ends—don’t save them all for last).
- Light blocking: Mist with water and pat into shape on a towel; let dry flat so the scallops relax.
- Optional lining: For a super polished dress, hand tack a lightweight cotton slip inside the skirt (especially if using dc).
- Waist stability upgrade: Crochet a casing round (BLO hdc) at the waist and thread ¼" elastic through for a gentle gathered waist.
- Label/keepsake tag: Sew a small “handmade” tag at the back neck for boutique vibes.
Shop Similar
- Pastel worsted yarn bundle (pink, mint, yellow, blue, lavender)
- Ergonomic crochet hook set (4.0–6.0 mm)
- Stitch markers for crochet (locking, assorted colors)
- Small pearl-style buttons for baby garments
- Soft elastic 1/4 inch for waist casing
Style It With
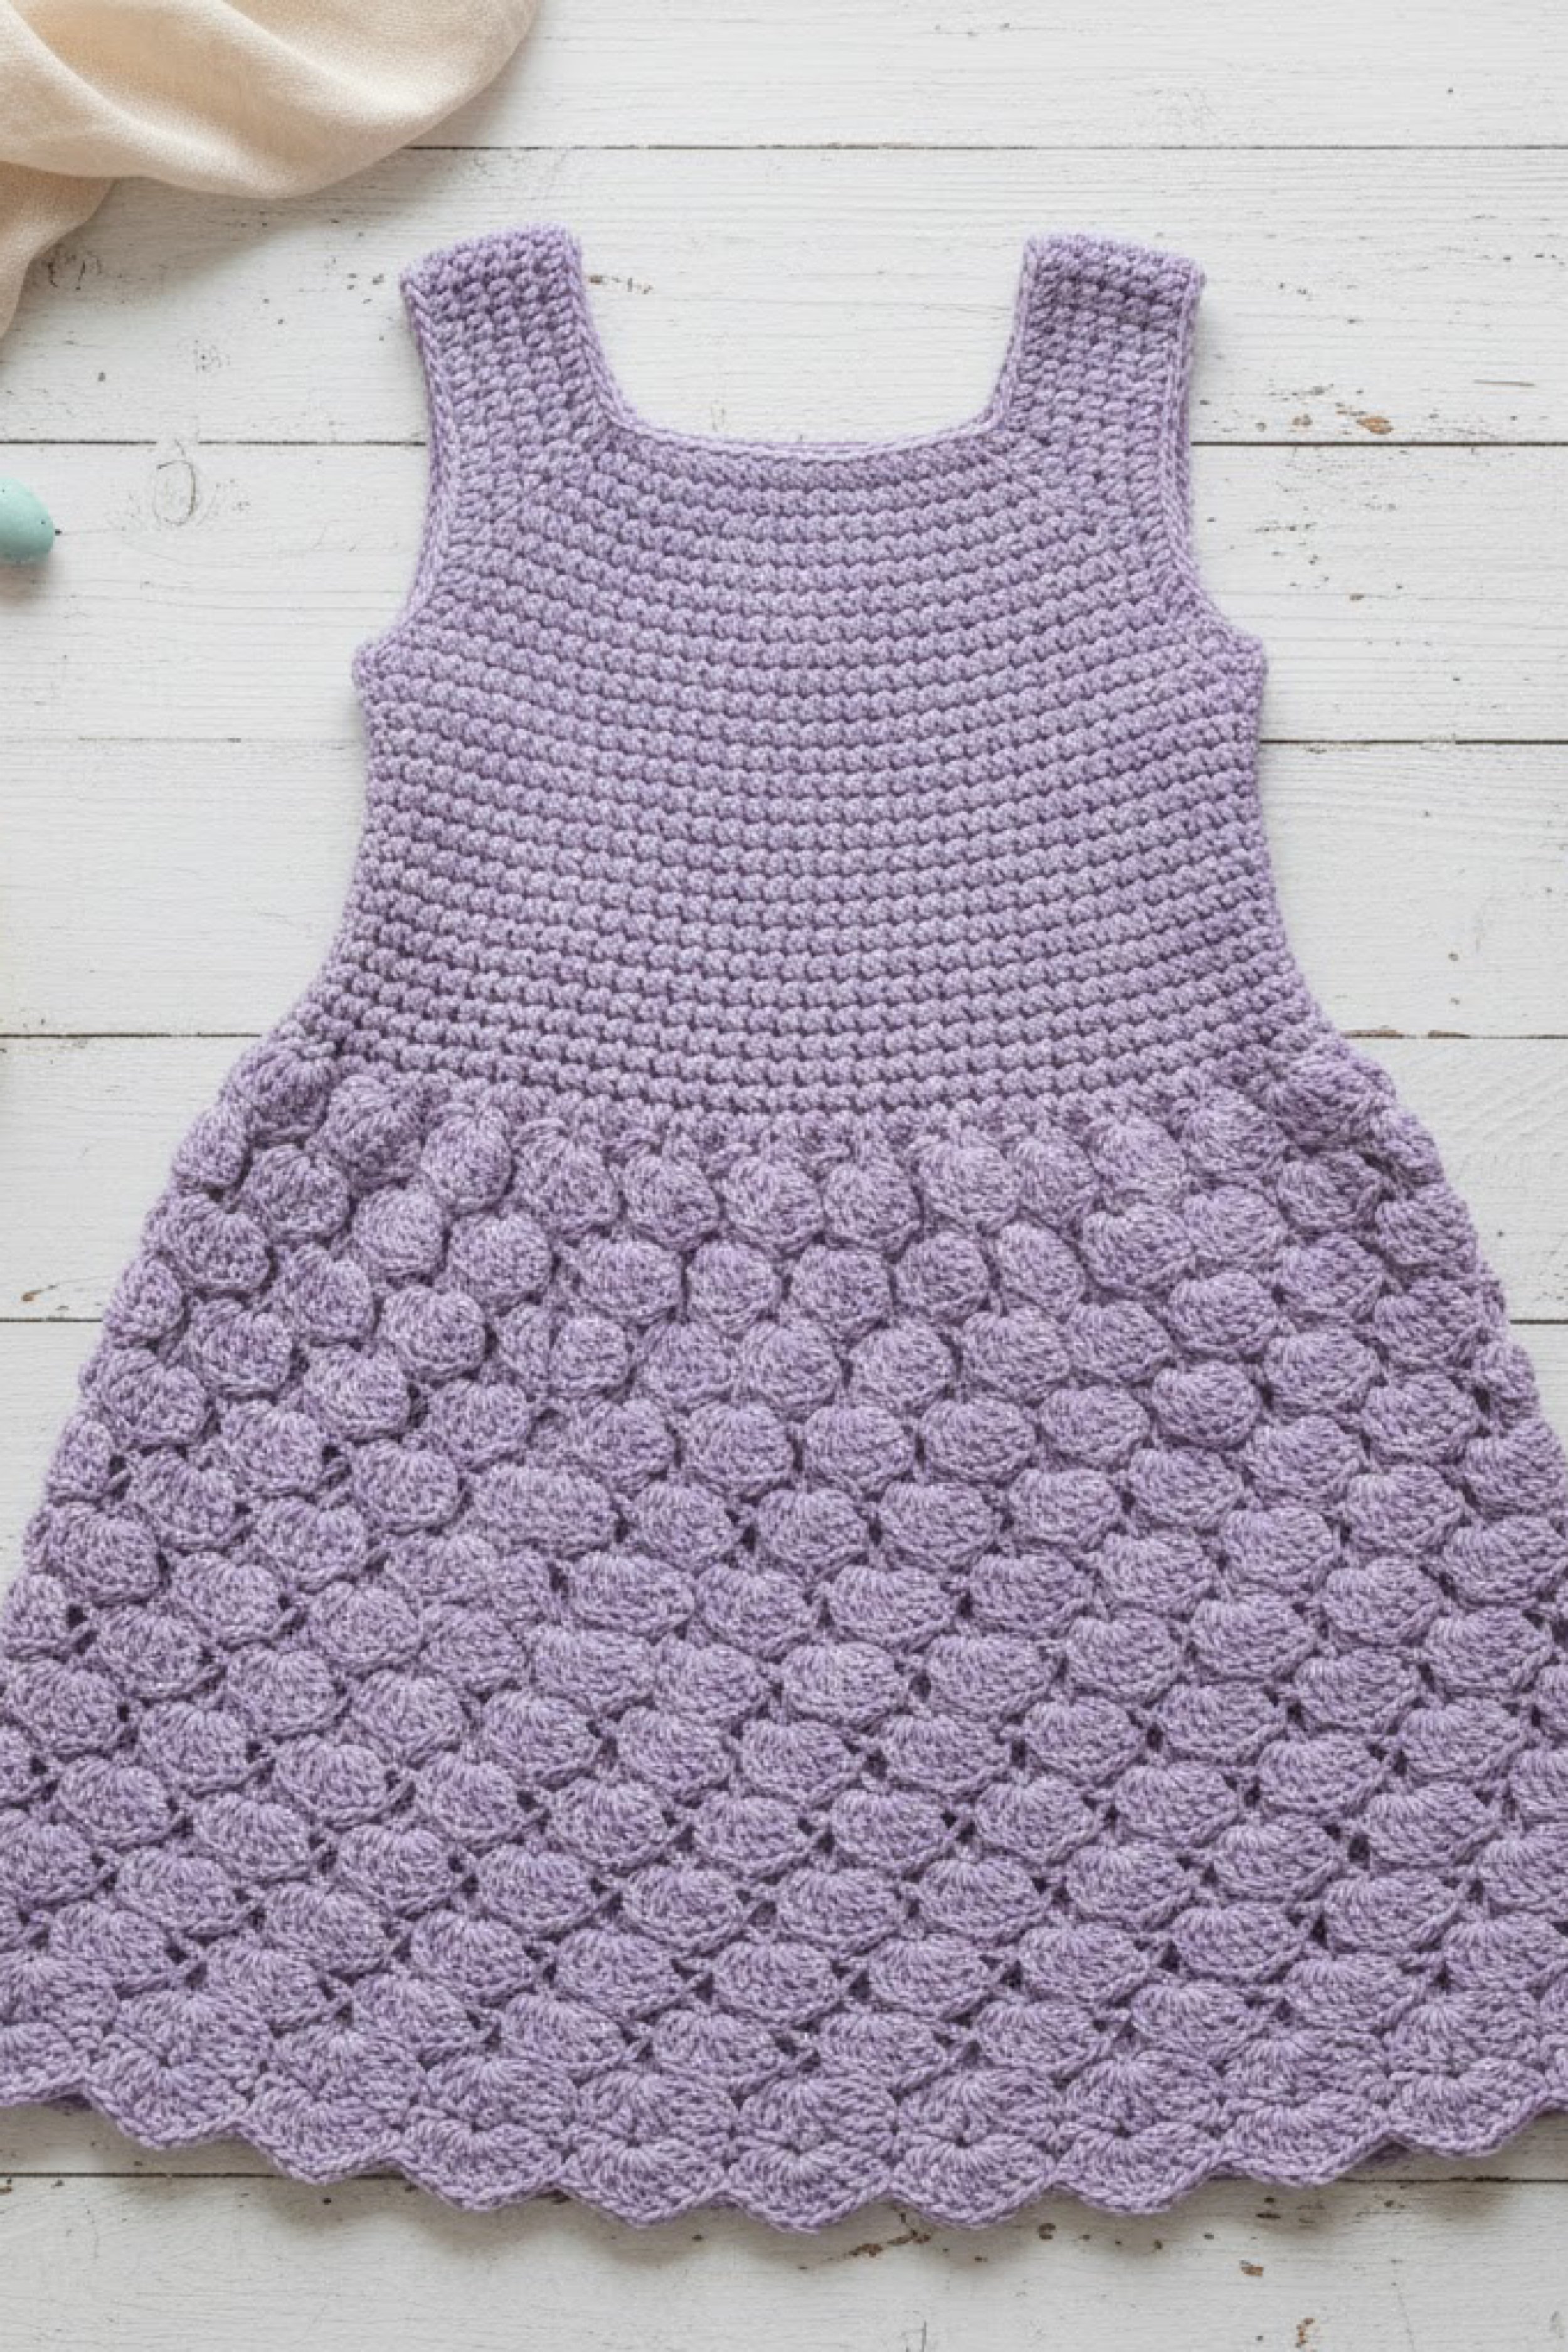
Lavender Popcorn Skirt Crochet Easter Dress — How-To Guide
What you’re making
This is a sweet, sleeveless lavender crochet dress with a smooth bodice and a statement skirt made from puff/popcorn “petals” that read like clustered spring blossoms. The silhouette is simple and wearable—wide straps, a clean scoop neckline, and a skirt that flares into a scalloped hem. It’s a perfect Easter dress because it’s one color (super giftable), but still feels special thanks to that dimensional texture.
Materials + tools
- Worsted weight yarn (Category 4) in lavender (or DK for a lighter dress)
- Crochet hook: 4.0–5.0 mm (4.5 mm recommended for the plush texture shown)
- Stitch markers
- Yarn needle + scissors
- Measuring tape
- Optional: lining fabric (light cotton) if you want zero peek-through
- Optional: small button + loop for back neck opening (if needed)
Finished size + customization notes
- Works beautifully in baby/toddler sizes through kids’ sizes—just keep the construction the same and scale by measurement.
- The photo’s “look” is defined by:
- Smooth upper bodice (mostly hdc in rounds)
- A transition round at the high waist
- A textured skirt panel (puffs/popcorns arranged in neat rows)
- Scalloped hem with a tidy finish
- If you want more drape and less “plush,” use DK yarn + 4.0 mm hook and add skirt length.
Step-by-step instructions
Abbreviations: ch, sl st, sc, hdc, dc, inc, dec. Puff stitch options: The photo’s texture can be made with either popcorn stitches (dc popcorn) or puff stitches (yarn-over puffs). Popcorns look more “pebbly”; puffs look softer. Pick one and stay consistent.
1) Crochet the bodice as a top-down yoke (strap-friendly)
- Start at the neckline with a chain that fits comfortably around the head/neck.
- Join to form a ring.
- Round 1: ch 1, hdc around, join.
- Mark 4 raglan points (front/strap area, side, back/strap area, side). For sleeveless, your “sleeves” become armholes, so the increases build strap width and chest width.
- Raglan increase round: hdc to marker, (hdc, ch 1, hdc) in ch-1 corner, repeat 4 times, join.
- Continue increasing until the yoke reaches underarm depth.
Visual checkpoint: You should see a smooth, slightly squared yoke that will become straps. It should lay flat with no rippling.
2) Separate for armholes (sleeveless shaping)
- When yoke is deep enough:
- Work across front.
- At first corner, chain an underarm bridge (4–10 ch).
- Skip stitches for the first armhole section.
- Continue across back, chain second underarm bridge, skip second armhole, join.
- Now you have a body tube with two armholes.
Tip: If armholes feel tight, add 2–4 more chains at each underarm. If they gape, reduce chains.
3) Work the smooth bodice down to high waist
- Work even rounds of hdc until you reach high waist (usually just below the ribcage on little ones).
- Optional gentle shaping:
- Add 2–4 decreases in one round (near side seams) to keep the bodice neat.
Visual checkpoint: The top should look like a clean crocheted tank with wide straps—no texture yet, just tidy rows.
4) Create a “skirt set-up” round (so puffs align perfectly)
- Work 1 round in sc to firm the join between bodice and skirt.
- Next round (mesh foundation): ch 1, skip 1, dc in next st repeat.
- This creates evenly spaced anchor points and little gaps that help the puff clusters sit in a grid.
- If you prefer no gaps, skip mesh and work puffs directly into the hdc base—but mesh tends to make the texture more “petal-like,” as in the photo.
5) Texture panel: puff/popcorn “petals”
Choose ONE method:
Option A: Popcorn grid (chunky, defined)
- Popcorn = 5 dc in same space, drop loop, insert hook in first dc, pull dropped loop through.
- Round 1 of texture:
- Work popcorns into every other dc space from the mesh round, with sc or ch-1 between to separate.
- Round 2:
- Offset popcorn placement so they land between the previous round’s popcorns (this makes the clustered look).
- Repeat for desired skirt height.
Option B: Puff stitch petals (soft + floral)
- Puff = (yo, insert, pull up) repeat 4–6 times, yo and pull through all loops, ch 1 to lock.
- Work puffs into mesh dc spaces, separated by ch-1 or sc.
- Next round, offset puffs into the spaces between previous puffs.
Visual checkpoint: You should now see a repeating field of raised ovals that look like little lavender petals clustered in rows, exactly like the photo’s skirt.
6) Build flare while you build texture
- To keep the skirt twirly, you need increases.
- Easy increase method with texture:
- Every 3rd texture round, add one extra chain space between some motifs (spread evenly).
- Or add a full extra motif every 8–12 motifs around (evenly).
- Keep the increases subtle—this dress flares, but it’s still neat and wearable.
7) Finish the lower skirt with a calmer band (optional but photo-accurate)
- After your texture panel reaches near hem length, work 2–4 rounds of hdc or dc (no texture).
- This creates that “settled” lower edge that helps the hem scallops show cleanly.
8) Scalloped hem
- Round 1: sc around evenly.
- Round 2: (sl st in next st, 5 dc in next st, sl st in next st) repeat around.
- If your scallops don’t sit flat, try (sl st, skip 1, 5 dc, skip 1, sl st).
9) Armhole and neckline finish
- Join yarn at armhole edge.
- sc evenly around, join. Add 1 more sc round if needed.
- Optional picot trim: (sc, ch 3, sl st in first ch) every 4th stitch for a dainty finish.
Troubleshooting (common mistakes + fixes)
- Armholes too tight: Add more underarm chains and/or increase strap width with 1–2 extra yoke rounds.
- Bodice flares out: Too many stitches—add a decrease round at high waist.
- Texture looks messy: Your puff/popcorn spacing is inconsistent. Use stitch markers every 10 motifs and count.
- Skirt is stiff: Hook too small or yarn too bulky. Go up 0.5 mm or choose a softer yarn.
- Hem scallops flip: Add a sc foundation round before scallops and keep tension relaxed.
Finishing details
- Weave in ends securely behind puff clusters (they hide ends beautifully).
- Steam-block lightly (hover steam) or mist and shape flat so the skirt opens evenly.
- Optional lining: Hand tack a lightweight cotton skirt lining inside so the texture is comfortable against skin.
- Optional bow: Add a small satin ribbon at the waist for extra Easter sweetness.
Shop Similar
- Lavender worsted yarn (soft acrylic or cotton blend)
- Cotton lining fabric for children’s dresses
- Locking stitch markers (bulk set)
- Crochet hook set with 4.5 mm included
Style It With
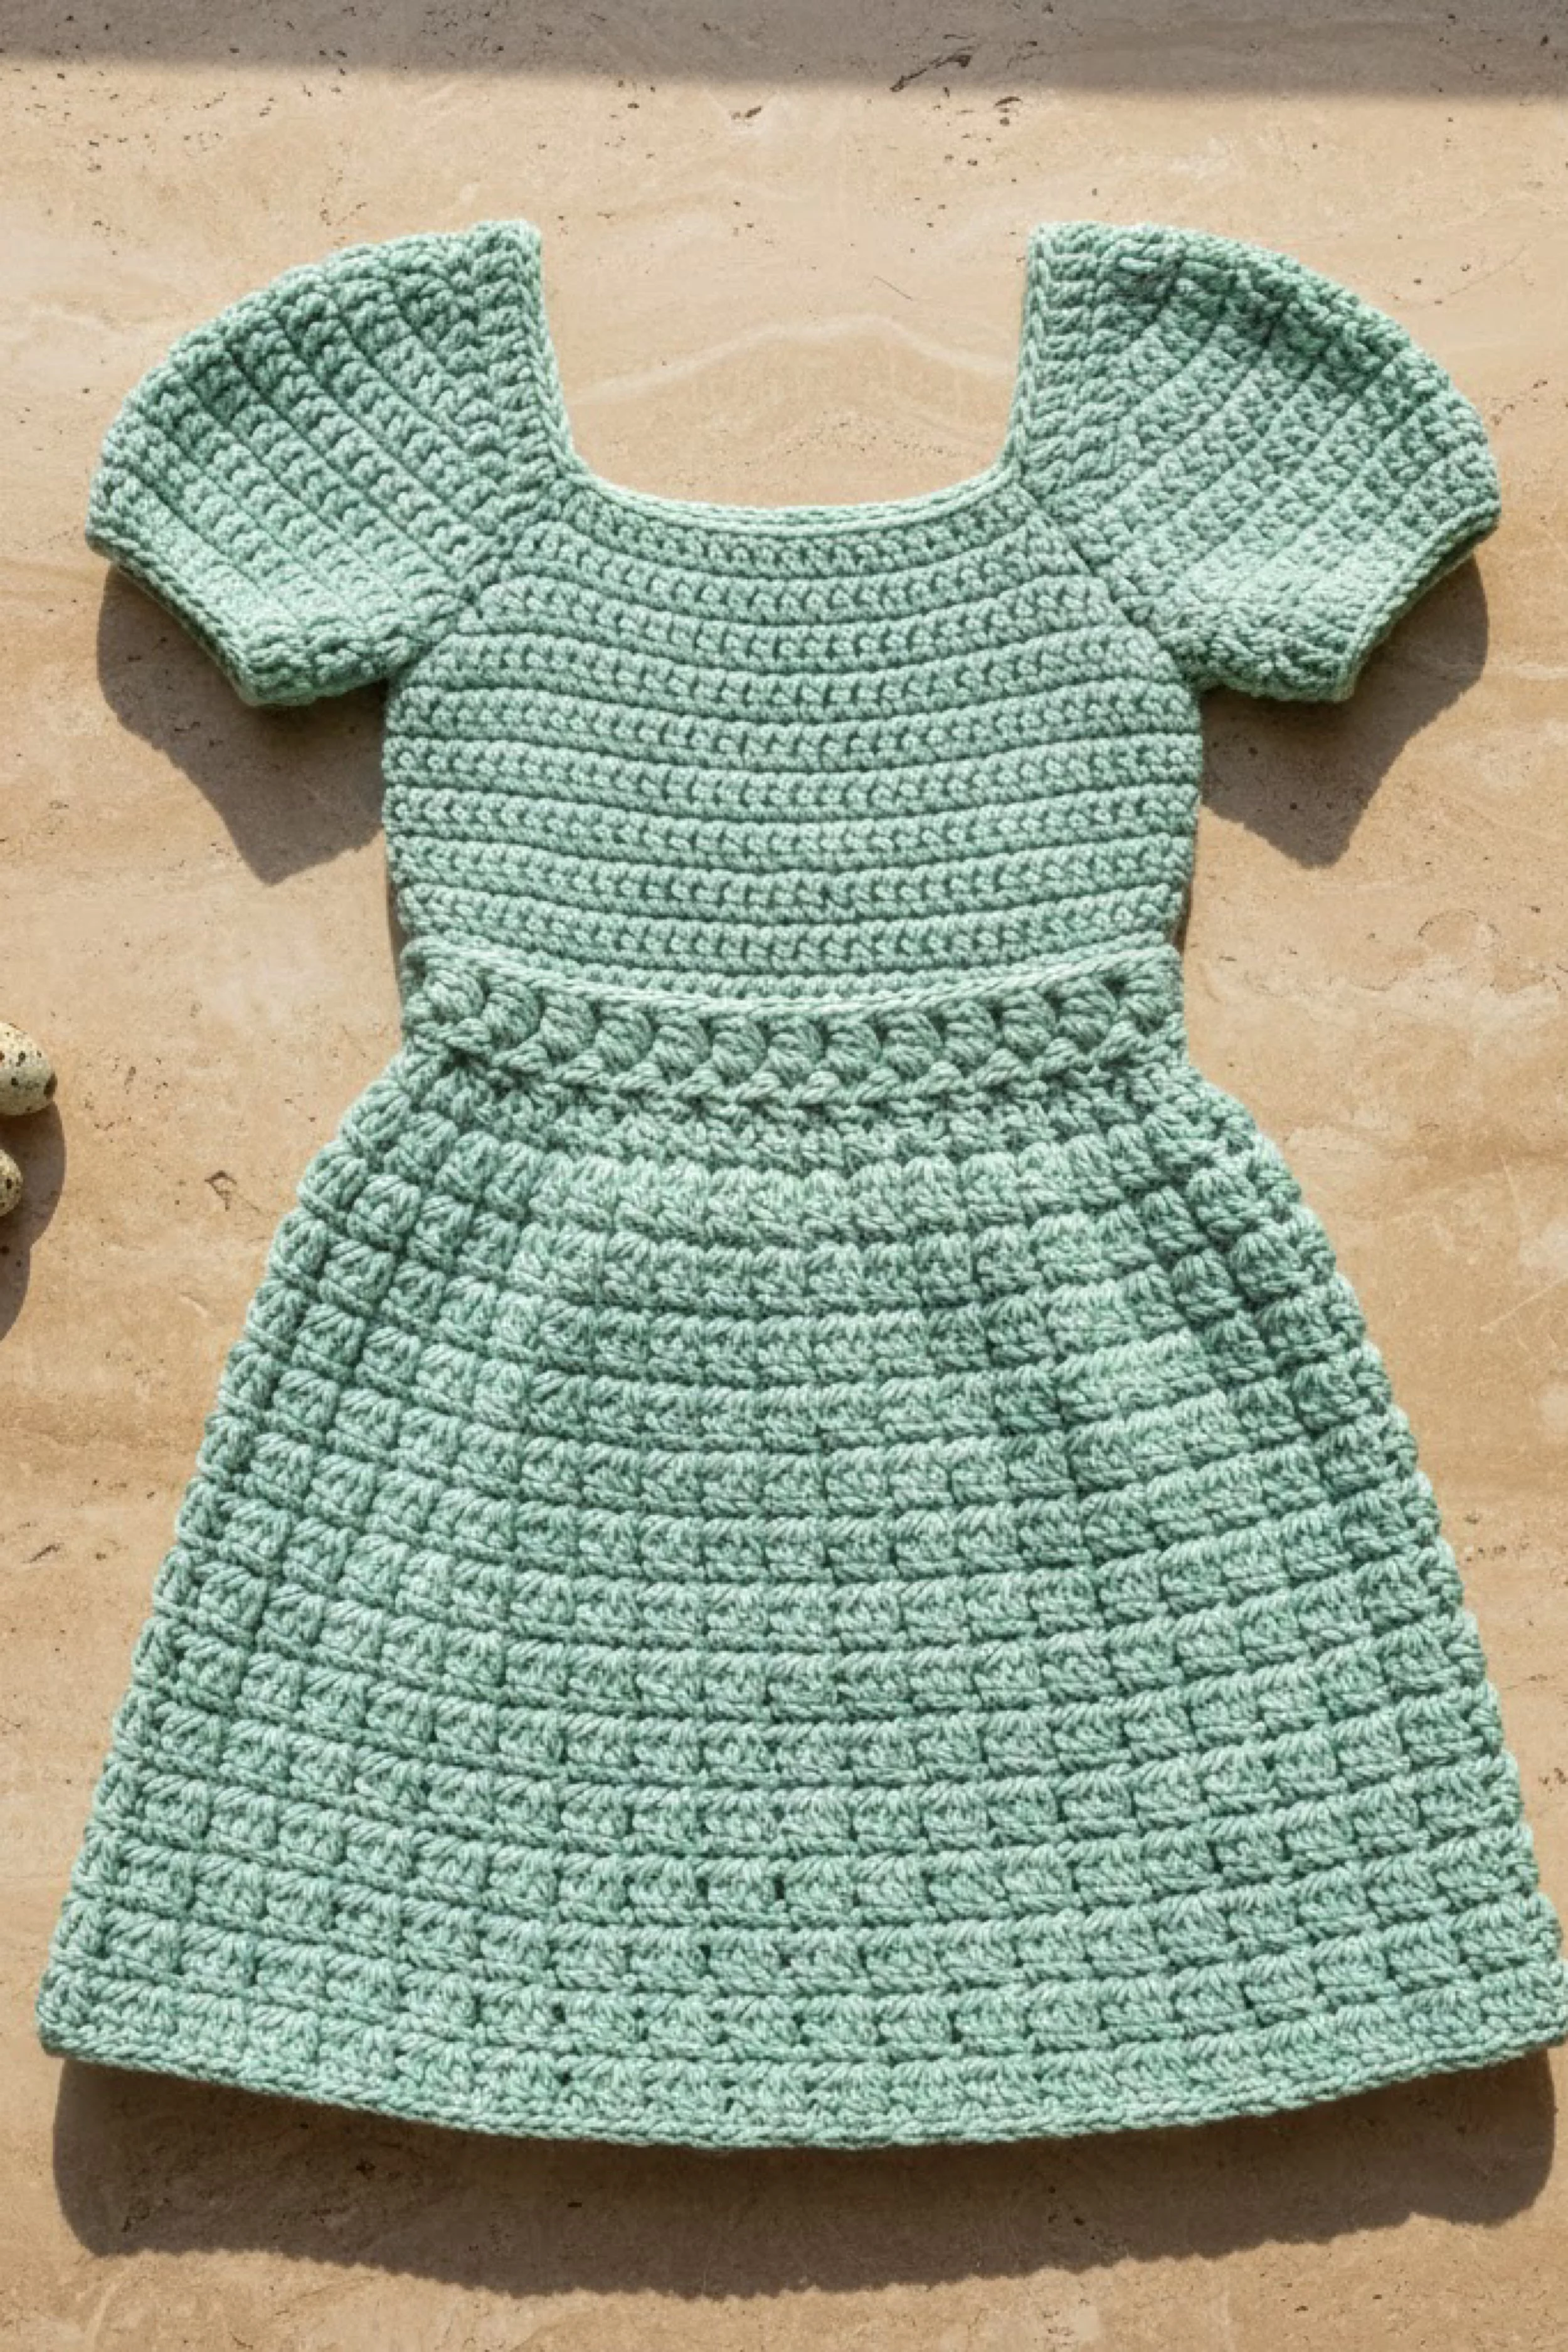
Sage Puff-Sleeve Crochet Easter Dress — Make-It-Yourself Tutorial
What you’re making
This is a dreamy sage-green crochet dress with short puff sleeves, a rounded neckline, a softly defined waist (with a braided/corded detail), and a textured A-line skirt. The whole vibe is “garden Easter morning”—simple color, elevated texture, and a silhouette that looks handmade in the best possible way. You’ll crochet top-down for an easy fit, then add sleeves and waist detail before building the skirt.
Materials + tools
- Worsted weight yarn (Category 4) in sage green (cotton blend gives the crisp look shown)
- Crochet hook: 4.0–5.0 mm (4.5 mm recommended)
- Stitch markers
- Yarn needle + scissors
- Measuring tape
- Optional: ¼" elastic for waist (or a crocheted cord)
- Optional: snap/button for a tiny back-neck opening
Finished size + customization notes
- The photo reads like a toddler/young child dress with generous sleeve volume.
- To match the look:
- Keep bodice stitches dense and tidy (hdc or dc with consistent tension).
- Puff sleeves are created by increasing at sleeve edges and then tapering.
- Waist detail looks like a crocheted cord or braided chain stitched on.
- Skirt texture can be done with alternating front-post stitches or a simple cluster stitch to get that raised patterning.
Step-by-step instructions
Abbreviations: ch, sl st, sc, hdc, dc, fpdc (front post dc), bpdc (back post dc), inc, dec, BLO.
1) Start at the neckline (top-down yoke)
- Chain a comfortable neckline (not tight), join into a ring.
- Round 1: ch 1, hdc around, join.
- Mark 4 raglan points (front, sleeve, back, sleeve).
- Round 2: raglan increases at each marker: (hdc, ch 1, hdc) in each corner.
- Continue until yoke depth reaches underarm.
Visual checkpoint: The yoke should lay flat and look like neat horizontal ridges. If it cups, add increases; if it ruffles, reduce increase frequency.
2) Separate sleeves and body
- Work across front to first corner.
- Chain underarm (6–12 ch depending on size).
- Skip sleeve stitches to next corner; continue across back.
- Chain second underarm, skip second sleeve, join.
3) Crochet the bodice (smooth + slightly fitted)
- Work 4–10 rounds even in hdc (or dc for a taller bodice).
- Add subtle shaping:
- One decrease round: dec 4 stitches total (near side seams + front/back).
- Keep checking length against your reference dress.
Tip: Place markers at side seams (underarm joins). They help you keep shaping symmetrical.
4) Add the waist detail (the “braided band” look)
Option A: Crocheted cord (most photo-accurate)
- Make a long chain cord: chain until it wraps around the waist + extra for overlap.
- Work sl st back down the chain for a thicker cord (cording makes it look “rope-like”).
- Stitch the cord onto the dress at the waistline in a gentle curve (like the photo’s band).
Option B: Textured waist round
- Work one round of fpdc around (post stitches create a raised band).
- Follow with one round of bpdc for a subtle ridge.
Visual checkpoint: You should see a distinct waist line that visually separates bodice and skirt.
5) Build the skirt with textured rows
To mimic the raised horizontal texture, use this simple repeat:
- Skirt setup round: increase evenly for flare (inc every 4th stitch).
- Texture Repeat (2 rounds):
- Round A: fpdc in next st, dc in next st repeat around.
- Round B: dc in each stitch around (or bpdc alternation if you want deeper texture).
- Repeat these 2 rounds until desired skirt length.
If you want the photo’s more “motif-like” texture: swap Round A for a small cluster:
- (dc2tog, ch 1) repeat, then next round dc in each stitch + dc in each ch-1 space.
Visual checkpoint: The skirt should form an A-line with visible raised rows that catch light—clean, not lacy.
6) Puff sleeves (short, rounded, slightly structured)
- Join yarn at sleeve opening.
- Round 1: sc or hdc evenly around the armhole.
- Round 2: increase to add puff:
- inc every 3rd stitch for a fuller sleeve.
- Work 2 rounds even.
- Taper slightly:
- One round with decreases every 6–8 stitches.
- Finish sleeve edge:
- 1 round sc, then optional tiny scallop: (sl st, 3 dc, sl st) around.
Visual checkpoint: Sleeves should lift outward slightly like small “petals,” not droop like a long sleeve.
7) Hem finish
- Work 1 round sc around the hem to stabilize.
- Add a subtle scallop or keep it clean:
- Clean edge: 1 more sc round.
- Scallop: (sl st, 5 dc, sl st) repeat.
8) Neck finish (clean + soft)
- sc evenly around neckline.
- Optional: add one more round in BLO sc for a slightly rolled edge.
Troubleshooting (common mistakes + fixes)
- Puff sleeves look floppy: Use a cotton blend yarn and/or go down a hook size for sleeves.
- Skirt is too stiff: Increase hook size 0.5 mm or switch to dc rounds for more drape.
- Waist band won’t lay flat: Stitch it down in small increments; don’t pull tight.
- Dress twists at join: Ensure you joined the neckline chain without twisting and keep joins consistent.
Finishing details
- Weave in ends along the inside of the waist band and sleeve seams.
- Light blocking: pin sleeves to a gentle curve and let dry flat.
- Comfort upgrade: add a soft lining slip if the child is sensitive to texture.
- Keepsake upgrade: embroider initials on the inside back neck with matching yarn.
Shop Similar
- Sage green worsted cotton blend yarn
- Crochet hook 4.5 mm ergonomic handle
- Measuring tape + stitch marker set for crochet
- Soft elastic 1/4 inch for waist
Style It With
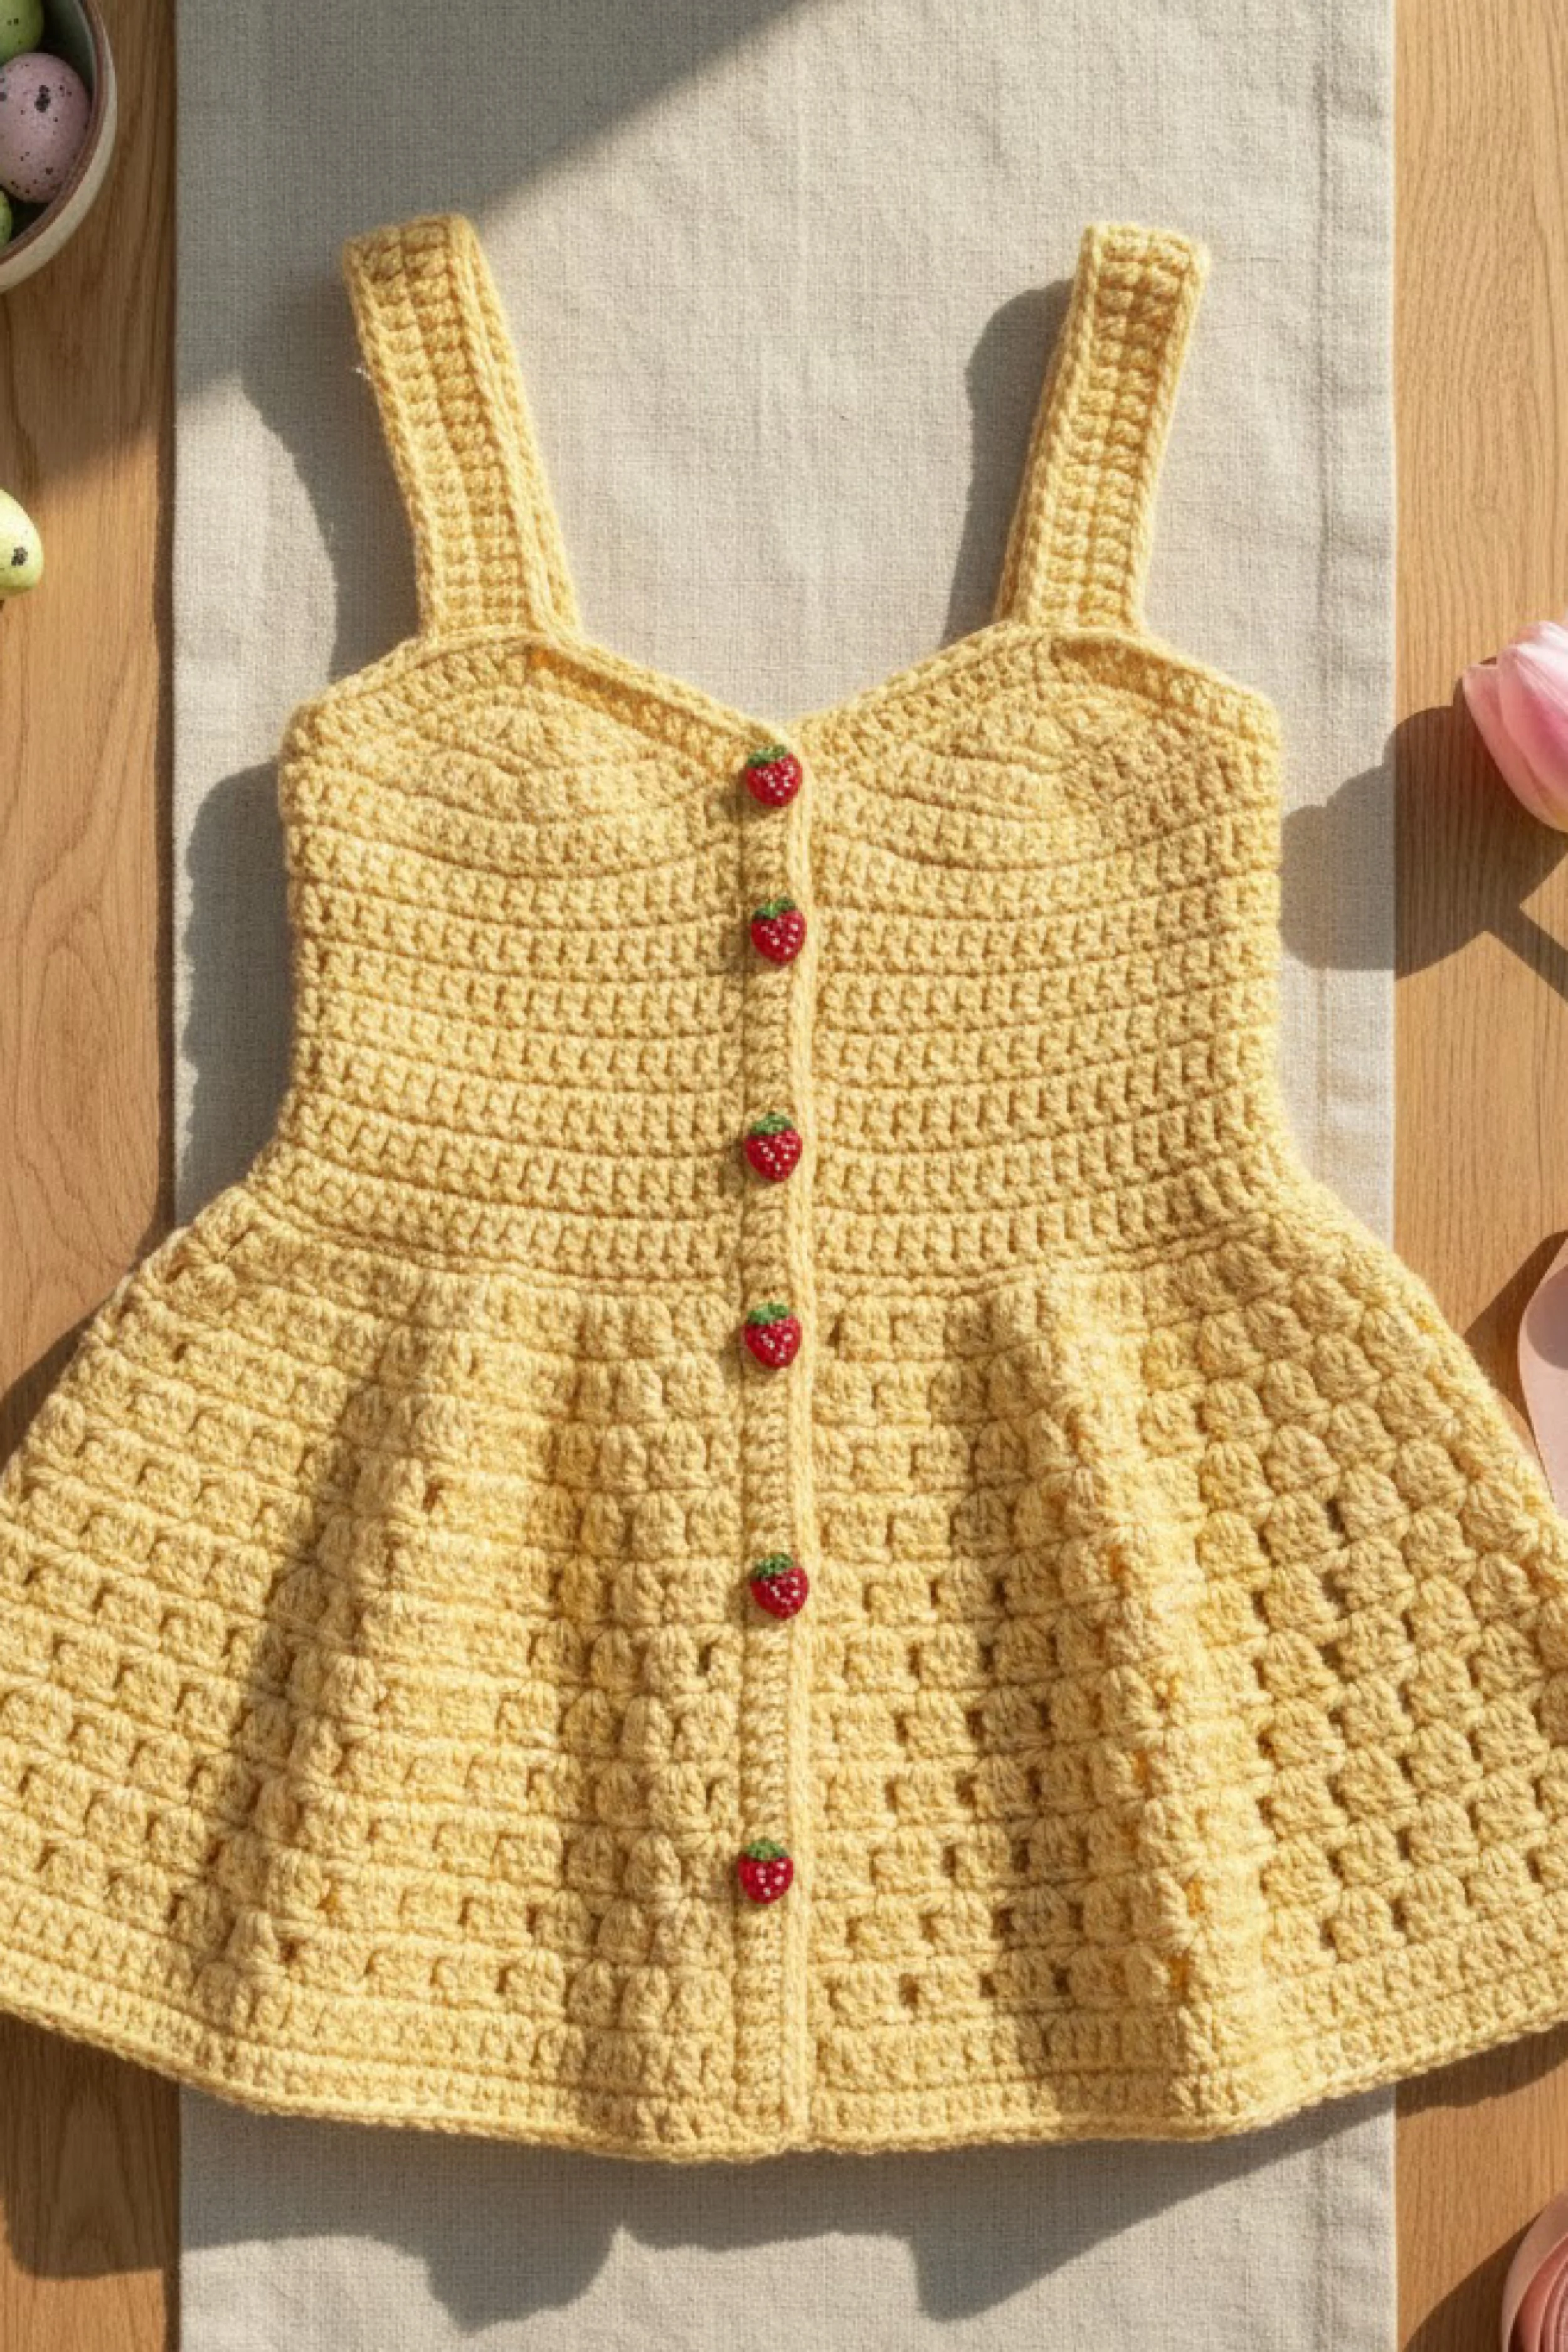
Sunshine Strawberry-Button Crochet Easter Sundress — DIY Guide
What you’re making
This is a golden-yellow crochet sundress with wide straps, a fitted bodice, and a flared textured skirt—finished with the cutest detail: a front button band accented with tiny strawberry buttons. The fabric looks like mostly hdc/dc rows for a clean “handmade boutique” feel, with a skirt texture that reads like little puff squares. It’s bright, photo-ready, and perfect for Easter brunch or an egg hunt (especially layered over a short-sleeve tee).
Materials + tools
- Worsted weight yarn (Category 4) in sunshine yellow
- Crochet hook: 4.0–5.0 mm (4.5 mm suggested)
- Stitch markers
- Yarn needle + scissors
- Measuring tape
- 5–7 small novelty buttons (strawberry style to match the photo)
- Needle + thread (button sewing)
- Optional: thin snap at top of button band (for extra security)
- Optional: lightweight lining fabric (for comfort)
Finished size + customization notes
- This style works best with a slightly structured yarn (cotton blend) so the straps hold shape.
- To match the photo’s proportions:
- Straps are wide and straight.
- Bodice is fitted but not tight.
- Skirt flares quickly from the waist and holds a gentle A-line.
- Button band is a visible vertical “ridge” down center front.
Step-by-step instructions
Abbreviations: ch, sl st, sc, hdc, dc, inc, dec, BLO. Construction note: This dress is easiest made bottom-up in two panels (front + back), then seamed, then straps added—because the button band is cleanest on a flat front panel. If you prefer seamless, you can still add a faux button band, but the flat-panel method matches the photo best.
1) Make a gauge swatch (so the bodice fits)
- With your chosen hook, crochet a 4" x 4" swatch in hdc.
- If it feels stiff, go up a hook size. If it’s too loose, go down.
- Your goal: a fabric that’s soft but not holey (the photo is dense and tidy).
2) Crochet the front bodice panel (with button band)
- Chain to the desired front bodice width (measured underarm-to-underarm divided by 2, minus a little for snug fit).
- Row 1: hdc across, ch 1, turn.
- Work even rows until bodice height reaches from waist to top of chest.
- Create the center-front button band:
- On the last 6–10 stitches of each row (center front area), work BLO hdc for a raised rib OR work sc for a denser ridge.
- Keep this band consistent—this becomes the vertical line where buttons sit.
- Shape the top edge (sweetheart-ish curve like the photo):
- Over the final 6–10 rows, decrease 1 stitch at each top outer edge every other row to gently curve inward.
Visual checkpoint: The top of the front panel should look slightly curved at the neckline, with a straight vertical band down the middle.
3) Crochet the back bodice panel
- Make a matching rectangle for the back (same width and height).
- Keep the top edge slightly higher/straighter than the front for a secure fit.
4) Seam sides and leave arm openings
- Place front and back panels right sides together.
- Seam side edges from waist up, leaving space at top for armholes.
- Turn right side out.
Tip: Mattress stitch gives a clean seam that disappears into the stitches.
5) Add the skirt in the round (attach at waist)
- Join yarn at the waist edge.
- Round 1: hdc evenly around the waist opening.
- Increase round for flare:
- inc every 3rd or 4th stitch (depending on how twirly you want it).
- Work 2 rounds even.
6) Textured skirt (the “puffy squares” look)
Use a simple block texture that reads like the photo:
- Texture Round A: (dc in next st, ch 1, skip 1) repeat around.
- Texture Round B: (2 dc in dc, 1 dc in ch-1 space) repeat around.
- Texture Round C: dc around evenly (settles the texture).
- Repeat A–C until skirt length is reached.
Alternative (more plush): Replace Texture Round B with a puff stitch in each ch-1 space for bigger “bumps.”
Visual checkpoint: You should see a repeating grid of raised blocks that catch light, not open lace.
7) Hem finish
- Work 1 round sc to stabilize.
- Add a gentle scallop if desired:
- (sl st, 5 dc, sl st) repeat.
8) Straps (wide, structured)
- Decide strap placement: the photo’s straps sit fairly wide, near the arm edges.
- Attach yarn at front top corner.
- Chain to back top corner length (try on a child or measure a dress).
- Work hdc back along the chain, then add 2–4 rows for strap width.
- Sew strap to back panel securely.
- Repeat for second strap.
Tip: For straps that don’t stretch out, work 1 sc edge around straps or add a slip-stitch reinforcement row.
9) Button band details (strawberry cuteness)
- Mark button spacing down the center front band (evenly spaced).
- Sew on strawberry buttons.
- Optional functional closure:
- Create matching buttonholes by chaining and skipping stitches on one side of band (only if you built the panel with an opening).
- Otherwise, keep buttons decorative like the photo.
Troubleshooting (common mistakes + fixes)
- Bodice too wide: Add a vertical seam allowance by re-seaming slightly deeper, or add one decrease row at each side.
- Bodice too tight: Add a narrow side panel (a strip of hdc) before attaching skirt.
- Skirt ruffles wildly: Too many increases—reduce to inc every 5th stitch.
- Skirt is too straight: Add an extra increase round earlier.
- Straps stretch: Reinforce with sc edging or stitch ribbon to the inside of straps.
Finishing details
- Weave in ends along the inside of the button band and waist seam.
- Light blocking helps the skirt hang evenly.
- Comfort upgrade: add a lightweight lining slip or wear over a cotton onesie/tee.
- Boutique upgrade: add a tiny bow at the waist or a stitched-on label at the back.
Shop Similar
- Sunshine yellow worsted cotton blend yarn
- Strawberry novelty buttons (small, sewing)
- Yarn needle set for weaving ends
- Soft cotton lining fabric (white)
Style It With
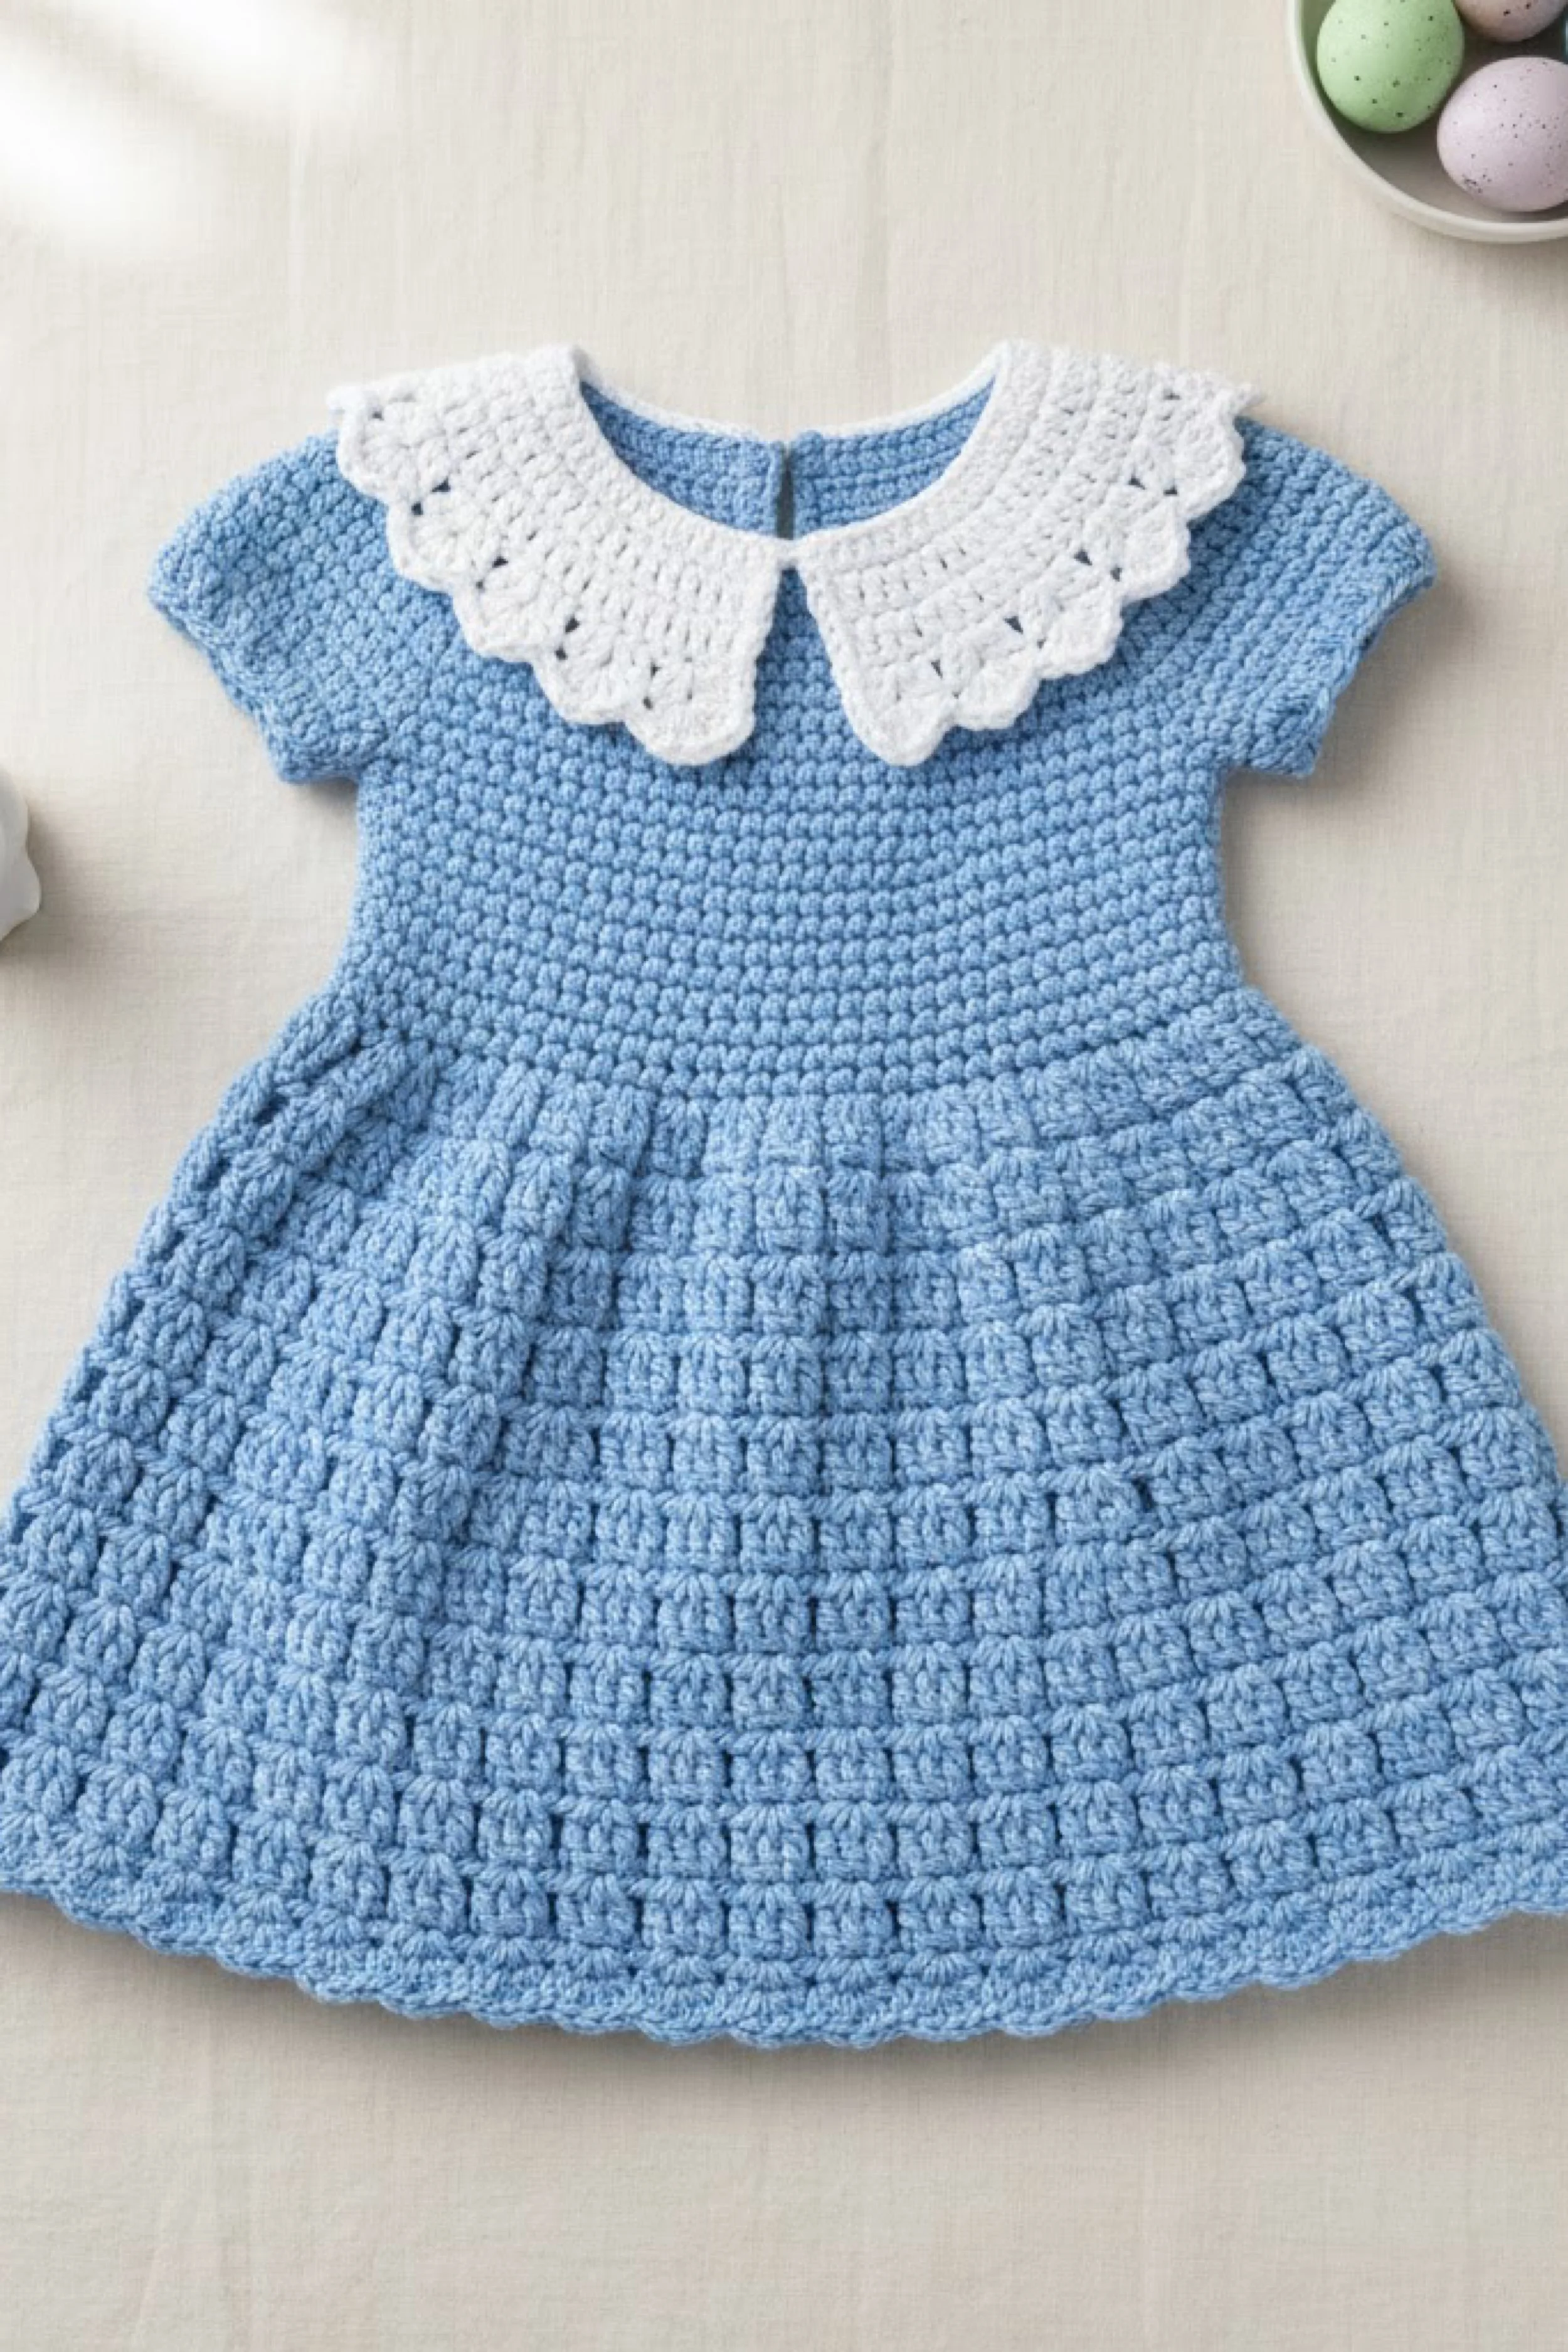
Blue Dress with White Scalloped Collar — Step-by-Step Tutorial
What you’re making
This is a storybook-pretty blue crochet dress with a bold white scalloped collar, short sleeves, a softly fitted bodice, and a textured skirt that looks like tidy stacked blocks. The collar is the star—crisp, vintage-inspired, and super “Easter portrait” friendly—while the dress body stays simple, plush, and wearable. You’ll crochet the dress mostly top-down, then add a separate collar piece and stitch it on for that perfect contrast.
Materials + tools
- Worsted weight yarn (Category 4) in sky blue + white
- Crochet hook: 4.0–5.0 mm (4.5 mm recommended)
- Stitch markers
- Yarn needle + scissors
- Measuring tape
- Optional: small zipper or 2 buttons for back closure (the photo shows a neat back opening)
- Optional: lightweight fusible interfacing (for collar stiffness if you choose to line it with fabric)
Finished size + customization notes
- The photo reads as baby/toddler sizing with a generous collar.
- To match the look:
- Keep the blue fabric dense (hdc in rounds is ideal).
- Build the skirt with a repeating texture (block/cluster) that shows dimension without holes.
- Make the collar in white with pronounced scallops and a clean inner edge.
- If you want a softer, drapier dress, use DK yarn and a slightly smaller hook.
Step-by-step instructions
Abbreviations: ch, sl st, sc, hdc, dc, inc, dec, BLO.
1) Crochet the neckline and yoke (top-down)
- With blue yarn, chain for neckline, join into a ring.
- Round 1: ch 1, hdc around, join.
- Mark raglan points (front, sleeve, back, sleeve).
- Increase round: (hdc, ch 1, hdc) at each raglan corner.
- Continue until yoke depth reaches underarm.
Visual checkpoint: The yoke should be smooth and evenly shaped. If it ripples, you’re increasing too often—switch to increasing every other round temporarily.
2) Separate sleeves and body
- Work across front to corner.
- Chain underarm (6–10 ch).
- Skip sleeve stitches; continue across back; chain second underarm; skip other sleeve; join.
- Mark side seams at underarm joins.
3) Bodice rounds (keep it neat)
- Work even rounds of hdc for 4–8 rounds.
- Add subtle waist shaping (optional):
- One decrease round: dec 4 stitches total (near sides + front/back).
- Continue until bodice reaches high waist.
4) Skirt texture (blocky, photo-like)
Try this 3-round repeat that creates a “stacked block” look:
- Round A (setup): dc around evenly.
- Round B (blocks): (dc in next 2 sts, ch 1, skip 1) repeat.
- Round C (fill): (2 dc in next dc, 1 dc in ch-1 space) repeat.
Repeat A–C until desired skirt length, adding an increase round every 4–6 rounds:
- Increase evenly by adding an extra dc in every 6th–8th stitch.
Visual checkpoint: The skirt should show a subtle grid texture and flare gently. If it looks too holey, replace ch-1 with sc (so: dc2, sc in next) and adjust counts.
5) Short sleeves
- Join blue yarn at sleeve opening.
- Round 1: hdc evenly around.
- Work 2–5 rounds for sleeve length.
- Finish with one sc round.
6) Back neck opening (clean closure)
Option A: Simple slit + button
- Instead of joining the neckline ring at the start, work the first few yoke rows back-and-forth to create a small opening.
- Add a chain loop and sew on a small button. Option B: Zipper
- Crochet dress seamless, then add a small zipper at center back with hand stitches.
7) Make the white scalloped collar (separate piece)
This collar is easiest as two mirrored halves.
With white yarn, chain a length that matches half the neckline circumference minus a little (so it hugs).
Row 1: sc across, ch 1, turn.
Row 2: hdc across, ch 1, turn.
Row 3 (scallop edge): work scallops along the OUTER edge:
- (sl st, 5 dc in next st, sl st) repeat.
Shape the inner collar curve:
- Along the neckline edge (inner edge), keep it smooth with sc rows.
- If you need more curve, add a short-row: stop early, turn, and work back to build a rounded shape.
Make a second matching collar half.
Visual checkpoint: Each collar half should look like a fan of scallops with a clean inner edge that will sit against the neckline.
8) Attach collar
- Pin collar halves evenly around neckline, leaving a small gap at center front (photo shows a split collar).
- Stitch in place with a yarn needle using whip stitch along the inner edge only (so scallops remain free).
- Add a small hidden tack at the center front points so they sit symmetrically.
9) Hem finish
- Work 1 sc round.
- Optional gentle scallop hem in blue (small shells).
Troubleshooting (common mistakes + fixes)
- Collar flops: Use a smaller hook for the collar, add an extra sc row at inner edge, or lightly starch the collar.
- Collar won’t sit flat: Your inner edge is too long—remove a few stitches by skipping evenly when sewing on.
- Skirt texture too holey: Swap ch-1 spaces for sc, or use hdc clusters instead of dc.
- Dress twists: Ensure joins are consistent and don’t accidentally add stitches at joins.
Finishing details
- Weave ends into the densest parts (bodice rows + collar inner edge).
- Light block the collar separately so scallops open evenly.
- Optional lining: Add a thin cotton slip if desired.
- Photo-ready upgrade: Stitch a tiny bow at the collar split or add pearl-like buttons at back.
Shop Similar
- Sky blue worsted yarn (soft, baby-friendly)
- White cotton yarn for crochet collars
- Small baby garment buttons (classic)
- Mini zipper for baby dress back closure
- Blocking mats and pins for crochet
Style It With
If you take one thing from these crochet Easter dresses, let it be this: the “perfect” stitch isn’t the point—the feeling is. The way pastel stripes look softer in morning light. The way a scalloped hem turns a simple shape into something magical. The way a little collar can make a dress feel like a storybook. These are the kinds of projects that remind us why we craft in the first place: not to chase perfection, but to create something real.
And the best part? Every one of these dresses is endlessly adaptable. Make it longer, make it shorter, swap colors to match a basket or a bouquet, add lining, add ribbon, add tiny buttons that make you smile. Your version doesn’t have to match the photo stitch-for-stitch to capture the look—it just has to capture the spirit: springtime sweetness, a bit of heirloom charm, and the unmistakable warmth of something handmade.
So whether you’re crocheting for a first Easter, a toddler who never stops twirling, or a little one who’s growing faster than your yarn stash can keep up—save these patterns, make them yours, and don’t be surprised if this dress ends up folded carefully in a memory box someday. Because the holidays pass, the photos fade, and the candy disappears… but a handmade dress? That’s the kind of magic that sticks around.