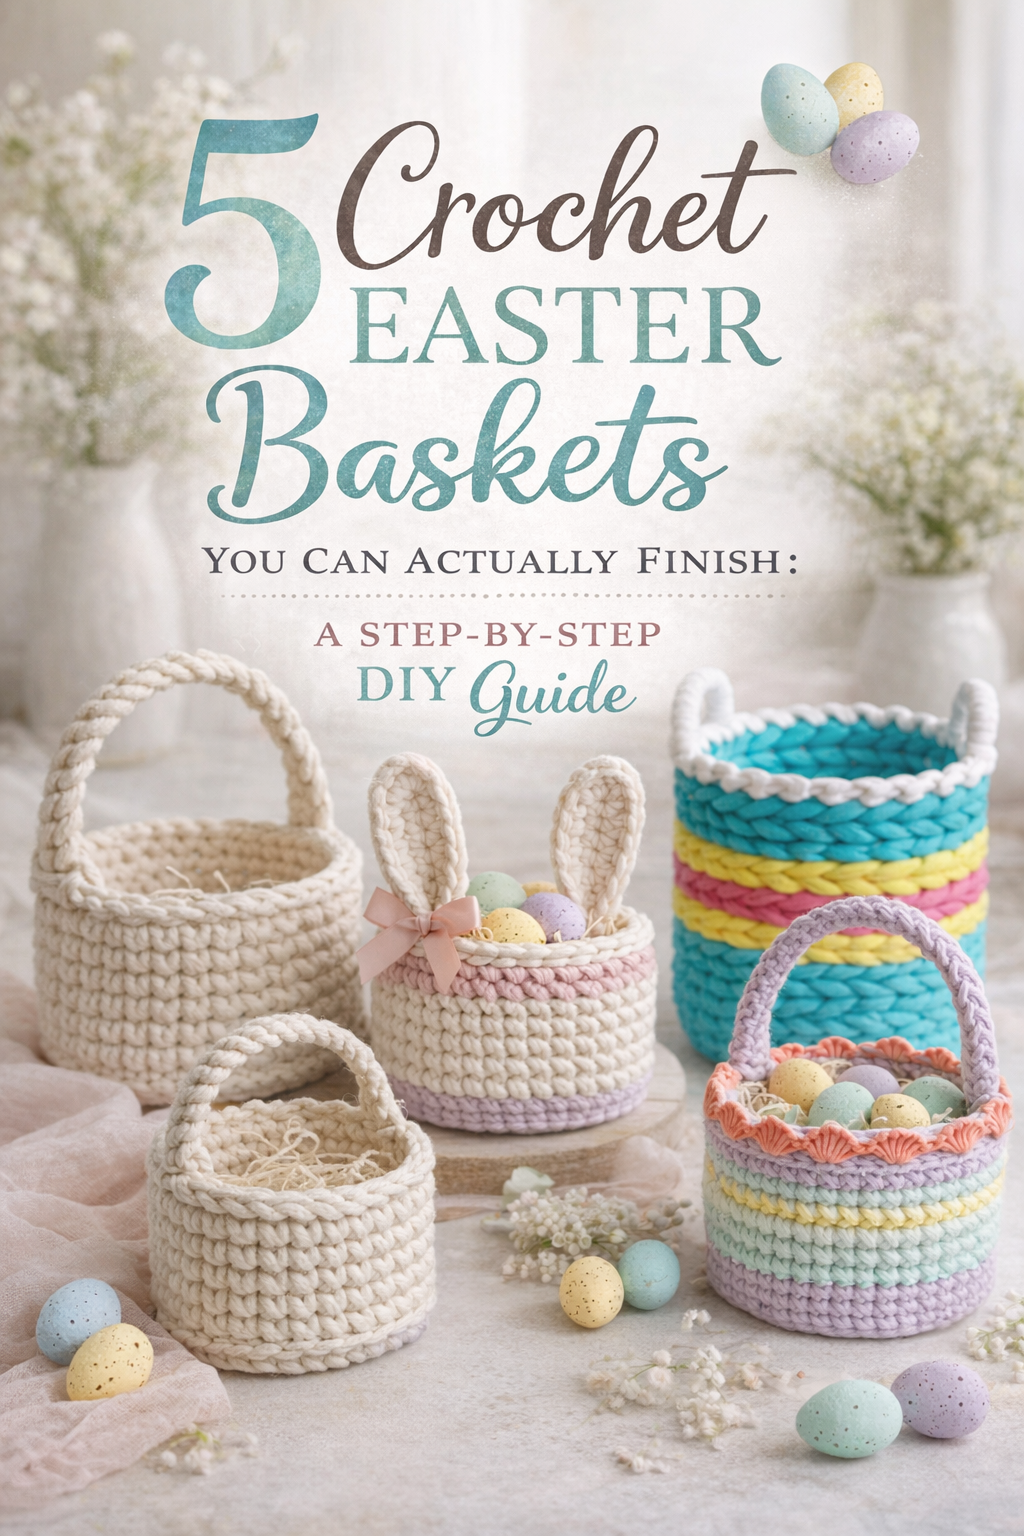
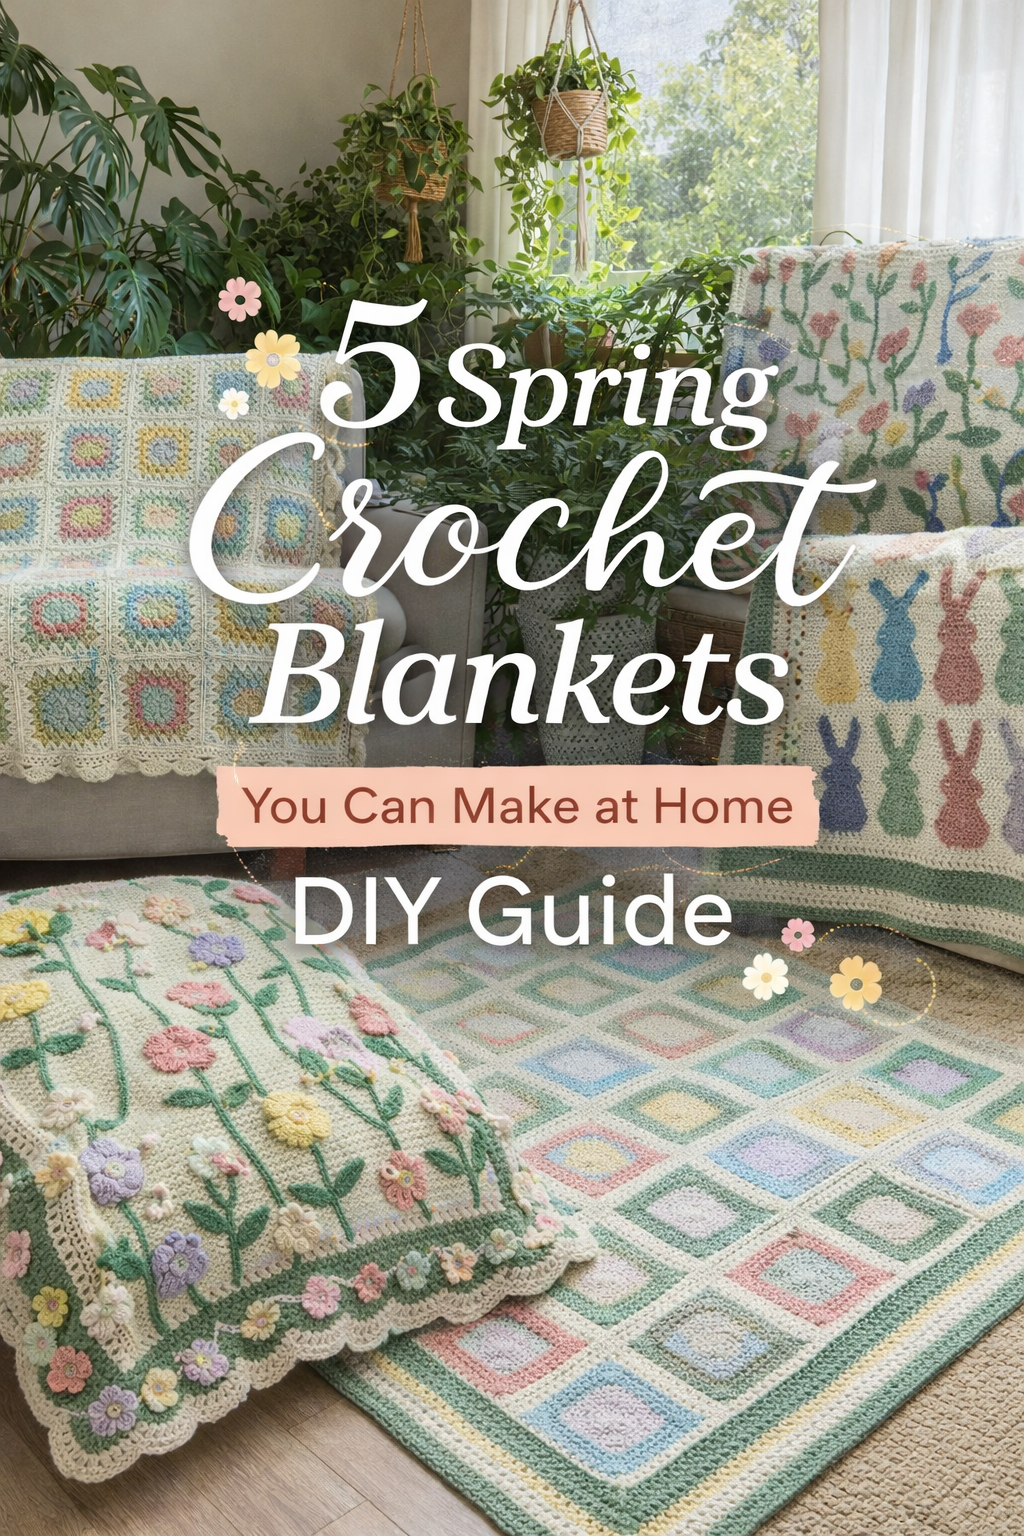
5 Spring Crochet Blankets You Can Make at Home DIY Guide
More like this
There is something instantly comforting about a handmade blanket. It is color, texture, and memory stitched into one cozy rectangle, then casually draped over a sofa or folded at the foot of the bed like it has always belonged there. This collection is all about that feeling, but with a fresh spring twist. Think soft pastels, clean neutrals, and playful motifs that feel right at home in a plant filled room full of warm light.
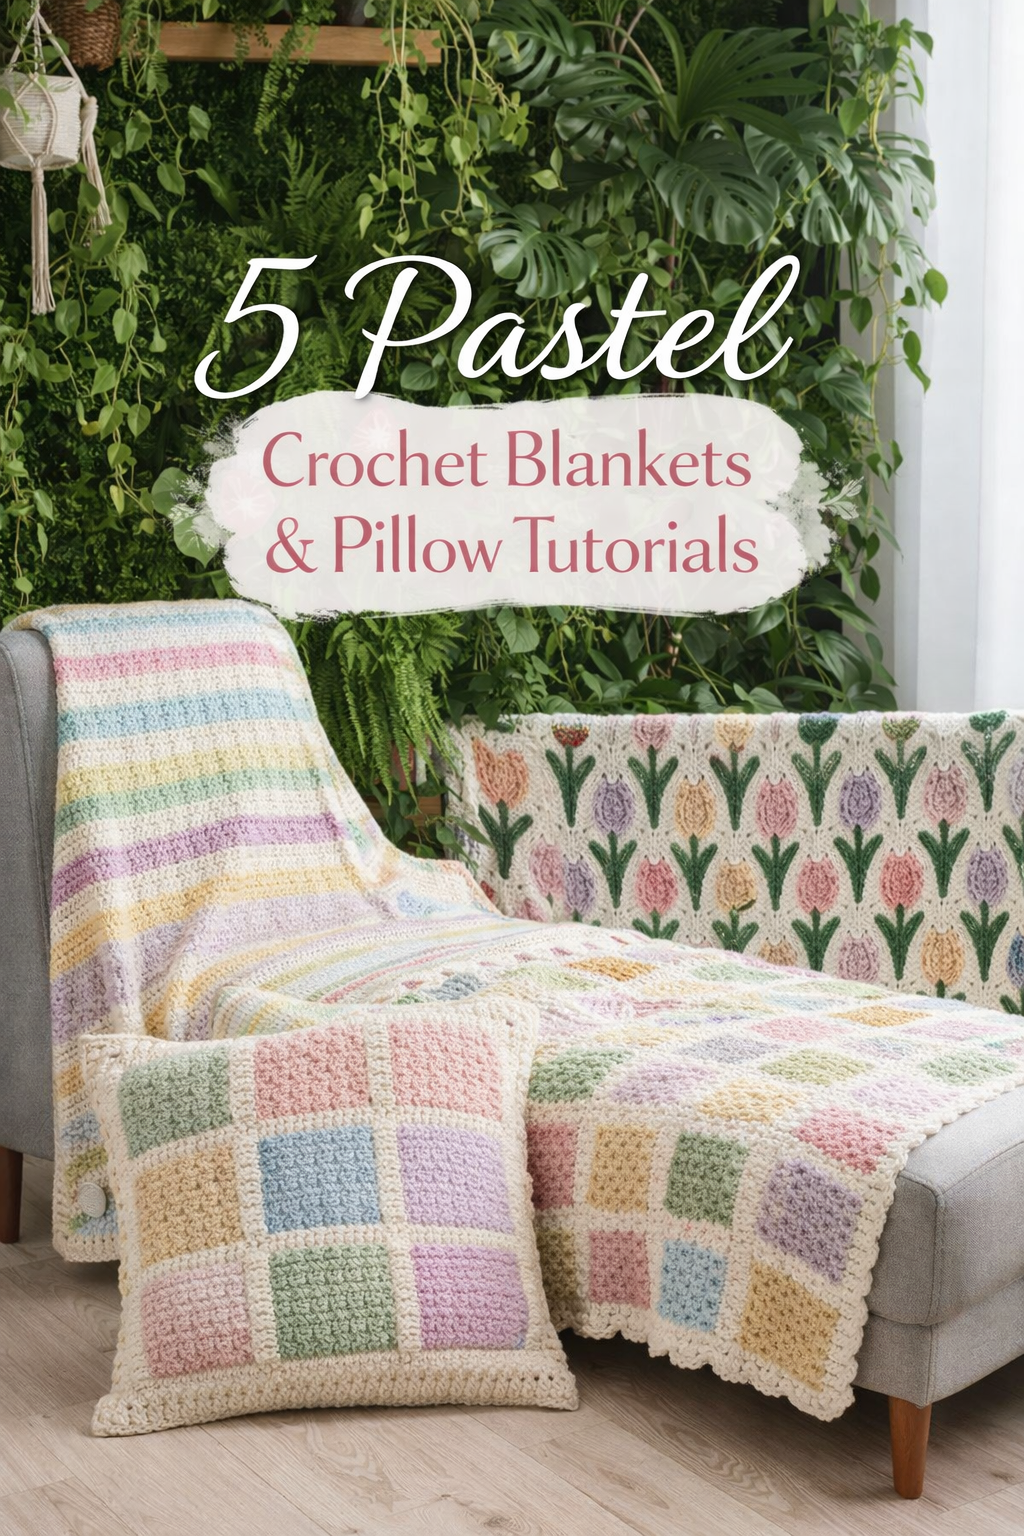
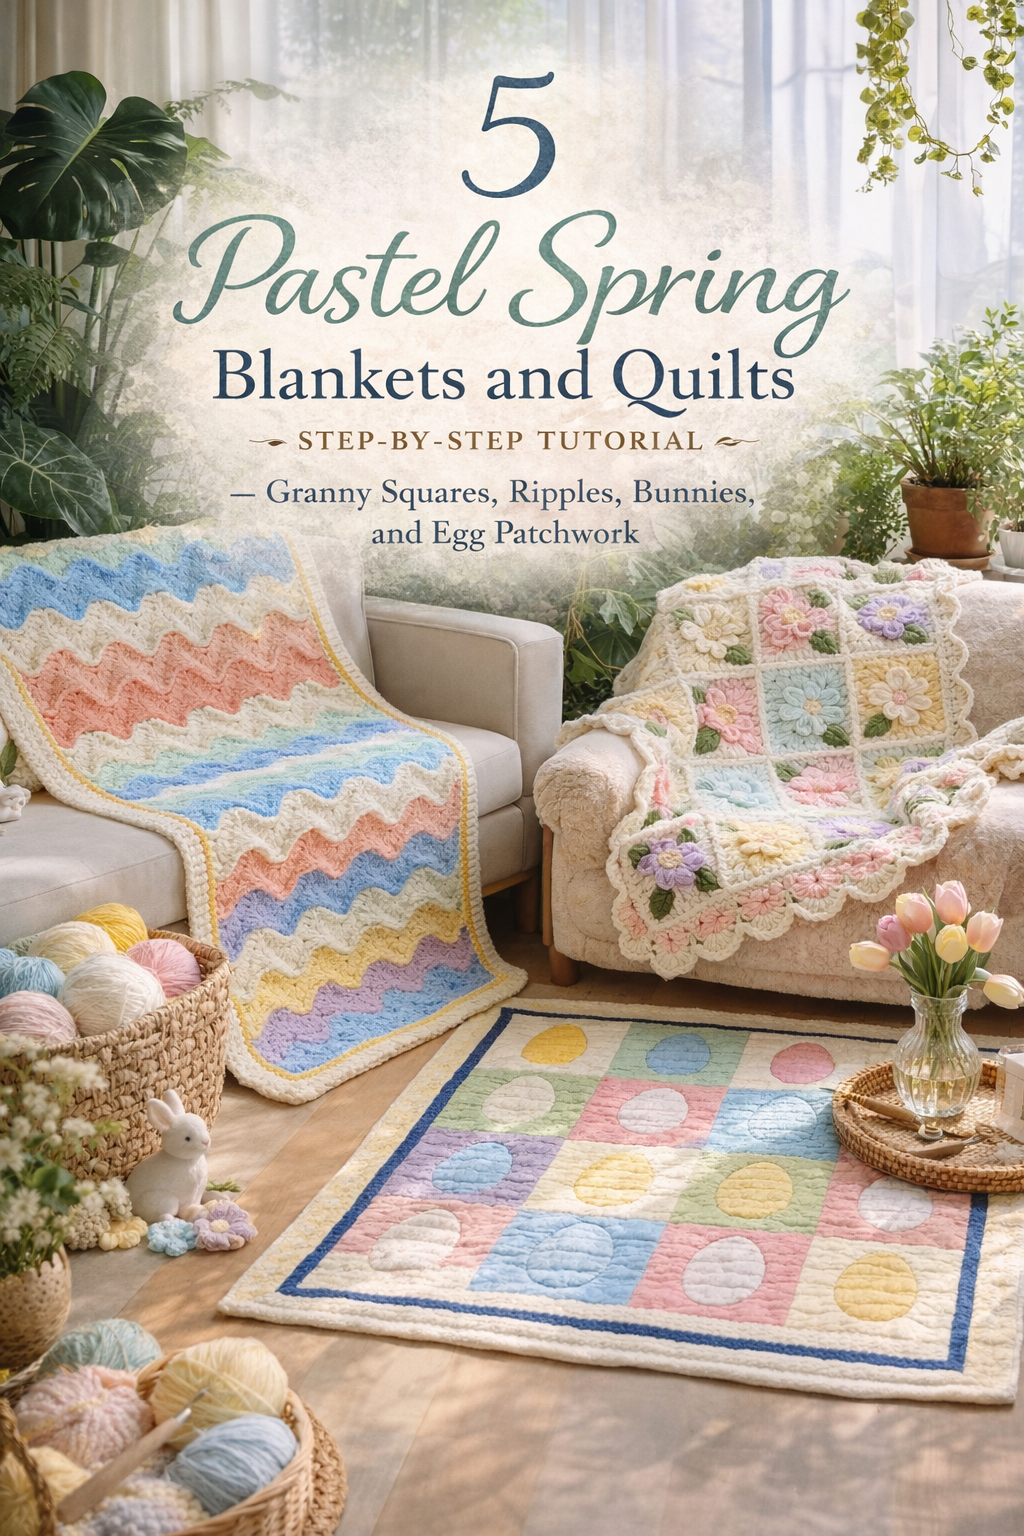
Inside this series you will find five distinct crochet looks, each with its own personality. A pastel heart granny square throw that feels like vintage Easter candy. A sunset ripple chevron blanket that reads retro calm and effortless. A bold bunny parade design that turns a simple throw into a seasonal statement. A raised floral applique masterpiece that looks like a garden you can curl up under. And a framed patchwork granny rug style piece that works as a cozy floor mat or an heirloom play blanket.
Each tutorial is written so you can recreate the exact vibe in the photos while still making it your own. Swap colors, resize with confidence, and use the visual checkpoints to keep your work on track. Gather your yarn, clear a little space, and let this be your sign to make something soft, beautiful, and actually usable.
💡 Pro Tip: Why I Link to Amazon Search Results and Not One Product
In the Shop the Look and Style it With sections under each bikini, I link to Amazon search results, not single products. Here’s why this matters:
Hot bikinis sell out fast. I don’t want you clicking on a dead link to a sold-out item. Search pages stay updated.
You get more options. Love the vibe but want a different color, cut, or price point? The search results give you everything that matches the look and energy.
I curate each search carefully. These aren’t generic. I spend hours crafting keywords that bring up exactly the kind of bikinis I’d wear—or recommend to my hottest friends.
Support with no pressure. If you click a link, browse, and buy something later, I may earn a small commission at no extra cost to you. That helps me keep bringing you curated collections like this one—powerful, seductive, and always fresh.
So dive in. Click through. Try something risky. These aren’t just bikinis—they’re commands, statements, and maybe even your new favorite weapon of choice.
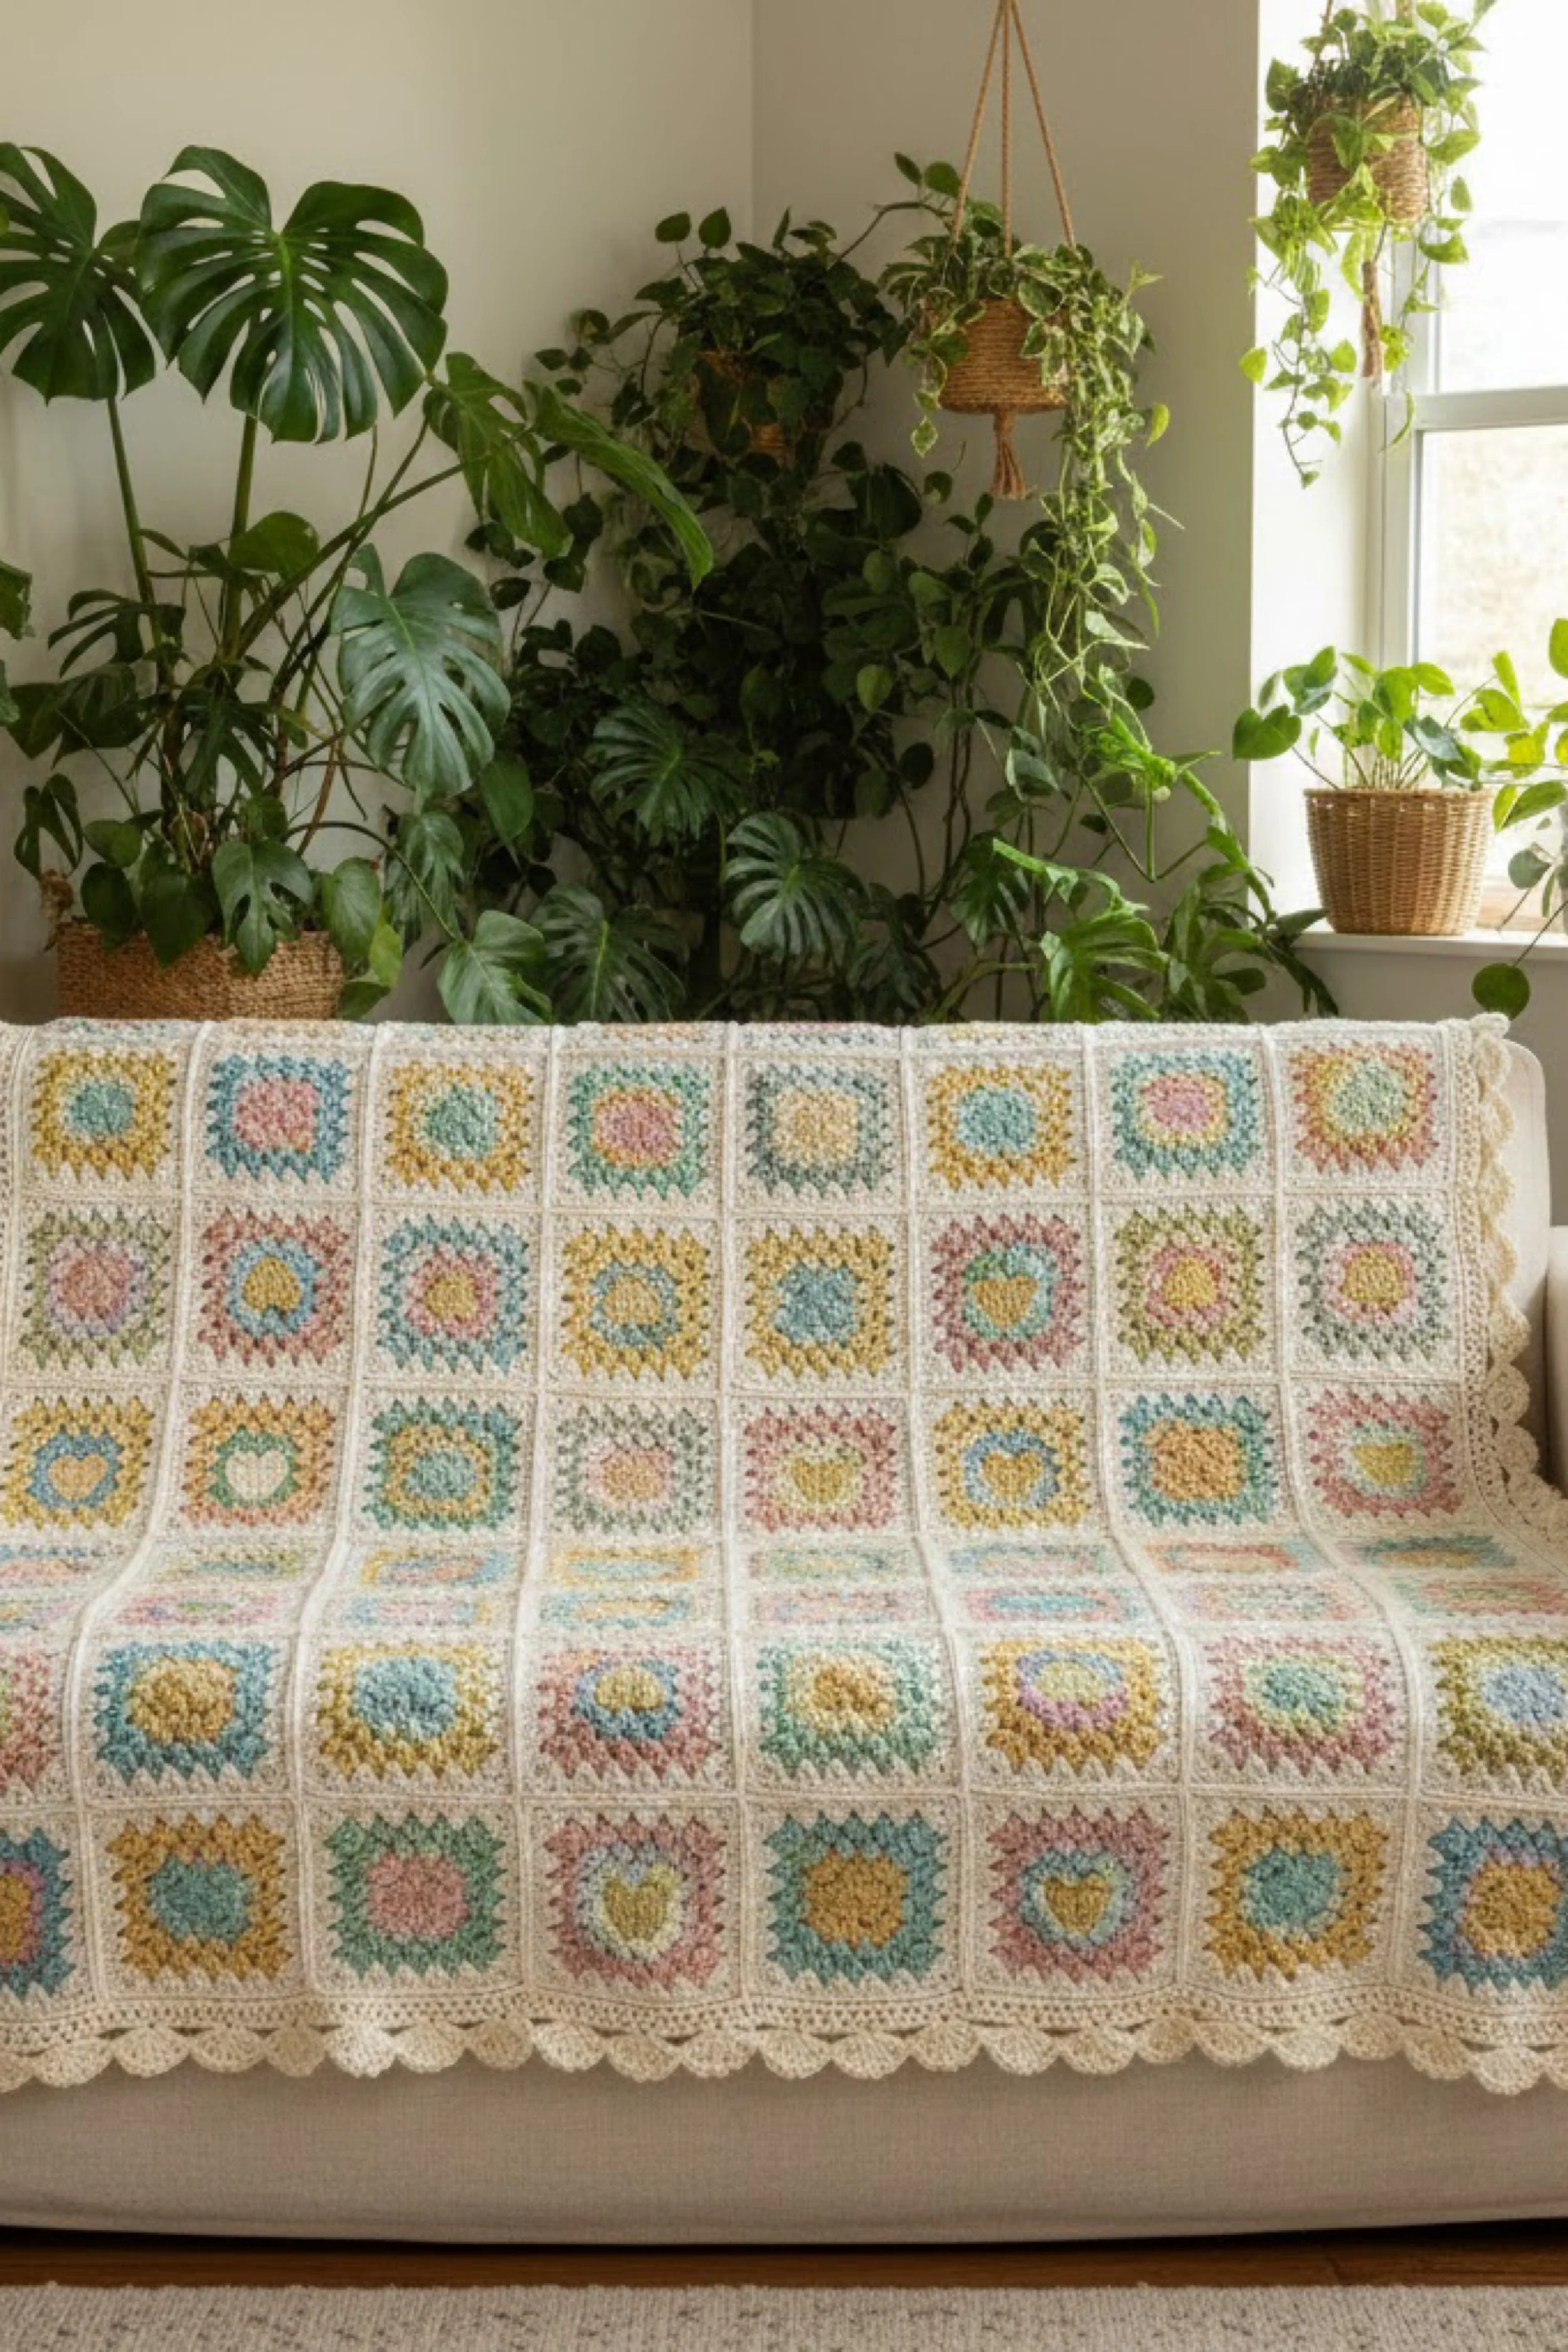
Pastel Heart Granny Square Blanket Step-by-Step Tutorial
What you’re making
This is a cozy pastel granny square blanket made from repeating “sunburst heart” squares joined in clean rows, then finished with a soft, lacy scallop edging. The look is cottage sweet but still modern because the background stays creamy and consistent while the centers rotate through gentle Easter pastels. The finished throw drapes beautifully over a sofa and the squares stay crisp and graphic after blocking.
Materials and tools
- Worsted weight yarn in 1 cream or off white for the square frames, joining, and border
- Worsted weight yarn in 5 to 8 pastel shades for centers (aqua, blush, butter yellow, mint, lavender, soft peach)
- Optional accent shade for the heart outline if you want extra contrast
- Crochet hook size 5.0 mm or 5.5 mm (choose based on your tension)
- Stitch markers (helpful for corner tracking)
- Yarn needle for weaving ends
- Scissors
- Measuring tape or ruler
- Blocking tools (foam mats, rust proof pins, spray bottle)
- Optional fabric backing or flannel for lining
- Optional washable fabric glue for securing backing edges
Finished size and customization notes
- Each square in the photo looks about 6 to 7 inches finished after blocking, joined with minimal visible seams.
- A throw size similar to the photo is often 6 squares across by 5 squares down (about 36 to 42 inches wide, 30 to 35 inches tall before border), but you can scale easily.
- To make it larger, add squares in the same grid. To make it a bed blanket, plan 8 by 10 squares or more depending on mattress size.
- If you crochet loosely, use a smaller hook to keep squares neat and reduce gaps. If your fabric feels stiff, size up the hook.
Step-by-step instructions
Square recipe overview
Each square is built in three visual zones.
- A soft center circle or puff cluster center
- A “sunburst” ring that forms the heart silhouette and a lightly jagged halo
- A cream frame that squares it up for easy joining
You can follow this as a written recipe. If you prefer a simpler option, you can replace the heart ring with a classic granny square ring, then add a heart applique later, but the integrated heart looks most like the photo.
Abbreviations
- ch: chain
- sl st: slip stitch
- sc: single crochet
- hdc: half double crochet
- dc: double crochet
- tr: treble crochet
- sp: space
- st: stitch
- rnd: round
Round 1, pastel center
- With pastel color A, make a magic ring.
- Ch 3 (counts as first dc), work 11 dc into the ring for 12 dc total.
- Pull ring tight, sl st to top of starting ch 3 to join. Visual checkpoint: You should see a flat little coin with 12 posts.
Tip: If you want a more textured center like the photo, substitute puff stitches. Work 12 puffs into the ring, separated by ch 1, then join into the top of the first puff.
Round 2, soft transition ring
- Ch 2, work 1 hdc in the same stitch.
- Work 2 hdc in each stitch around (24 hdc total).
- Sl st to join. Visual checkpoint: The circle should grow but stay flat. If it begins to ruffle, switch to 1 hdc in each stitch for this round.
Round 3, start shaping the heart
This round forms the heart top curves and the point at the bottom.
- Switch to pastel color B (or keep A for a calmer center).
- Identify your “top” and “bottom” positions. Place a stitch marker in any stitch as the top center. Count 12 stitches forward for the bottom center and mark that too.
- At the top marker stitch, create a top curve cluster:
- Work (2 dc, ch 1, 2 dc) into that stitch.
- Work 1 dc in each stitch until you reach the next marker.
- At the bottom marker stitch, form the heart point:
- Work (dc, tr, dc) in that stitch.
- Continue 1 dc in each stitch until you return to the top marker area.
- Sl st to join. Visual checkpoint: You should now see a subtle heart direction. The top has a small dip and the bottom has a slightly longer point.
Option if yours does not look heart like yet: In the top marker stitch, work (3 dc, ch 1, 3 dc) for rounder lobes. In the bottom marker stitch, work (dc, tr, tr, dc) for a sharper point.
Round 4, sunburst halo and squaring setup
- Switch to pastel color C.
- Ch 3. Work 1 dc in each stitch until you reach a top curve cluster area.
- In the ch 1 space of the top curve, work (2 dc, ch 2, 2 dc). This creates the dip and gives space for the halo points.
- Continue dc around. When you reach the bottom point cluster, work 2 dc into each tr to keep it smooth.
- Add four corner anchors for squaring by placing (2 dc, ch 2, 2 dc) evenly spaced around the round, approximately every quarter of the circle. If you used stitch counts, aim near the sides and near the top and bottom areas, but keep symmetry.
- Sl st to join. Visual checkpoint: It should now look like a circle trying to become a square with four small ch 2 corner spaces.
Tip: The photo has a softly jagged ring around the center. You can mimic that by adding a picot texture in this round, such as ch 3 and sl st into the first ch at a few points between dc groups.
Round 5, cream frame and true square corners
- Switch to cream.
- In any corner ch 2 space, work (3 dc, ch 2, 3 dc).
- Work 3 dc in each side section, separated by ch 1 spaces if you want a lighter look, or work dc across if you want denser fabric.
- In each corner ch 2 space, repeat (3 dc, ch 2, 3 dc).
- Join with sl st. Visual checkpoint: You should now see a defined square with cream edges and the heart centered.
Round 6, tighten and finish the square
- Still in cream, work 1 sc in each dc and 1 sc in each ch 1 space across, and in each corner ch 2 space work (sc, ch 1, sc).
- Join and fasten off, leaving a tail for weaving. Visual checkpoint: The square edges should look clean and ready for joining.
Make enough squares
- For a throw like the photo, make 30 squares (6 across by 5 down).
- Rotate your pastel center colors so each row feels varied but balanced. A simple method is to pick 5 pastel shades and cycle them, shifting by one color each new square.
Blocking the squares
- Soak or steam block each square.
- Pin corners to match a consistent measurement, such as 6.5 inches square.
- Let fully dry. Visual checkpoint: All squares should match in size and the edges should look straight.
Joining the squares
The photo looks like a clean join with minimal texture. Two good options:
- Mattress stitch seam for the flattest finish
- Slip stitch join through back loops for a subtle ridge
Flat seam method, mattress stitch:
- Lay two squares right side up.
- Thread cream yarn on a needle.
- Whip through the back loop of each square edge stitch, alternating sides, pulling snug but not puckered.
- Join into strips first, then sew strips together.
Visual checkpoint: From the front you should mostly see the cream frames meet with a neat line, not a bulky braid.
Add the border
- With cream, join yarn at any corner.
- Work a foundation border round: sc evenly around the blanket, working (sc, ch 1, sc) in each corner.
- Work a second round: hdc around, corners (hdc, ch 1, hdc).
- Work a third round to create the scallops:
- Skip 2 stitches, work 5 dc in next stitch, skip 2 stitches, sc in next stitch repeat around.
- At corners, adjust by skipping fewer stitches so the scallop lands centered, and place a sc in the corner ch 1 space.
Visual checkpoint: The edge should ripple in a soft lace, similar to the photo, not overly wavy. If it waves too much, reduce each shell to 4 dc. If it pulls tight, skip only 1 stitch between shells.
Troubleshooting
- Squares are different sizes: Your hook size or tension changed. Block aggressively, and if one batch is consistently larger, redo with a smaller hook.
- Heart looks like a blob: Increase the contrast between center and halo, and sharpen the bottom point by adding an extra tr in the point stitch.
- Blanket is rippling at joins: You may be pulling seam yarn too tight. Re join with gentle tension or switch to mattress stitch.
- Border scallops wave: Too many stitches in each shell or not enough skipped stitches. Reduce dc count per shell or skip one more stitch between shells.
- Corners curling: Add an extra chain in corner spaces on the border foundation rounds.
Finishing details
- Weave in ends using a zigzag path through the cream frame so tails disappear and do not loosen with washing.
- Give the full blanket a final steam block, especially the scallop edge, pinning each shell curve if you want perfect lace arcs.
- Optional lining upgrade: Add a lightweight cotton sheet or flannel backing to stabilize and add warmth. Hand sew around the inner edge of the last border round so stitches remain invisible from the front.
- Optional label upgrade: Stitch a small fabric tag into one corner, tucked into the scallop curve.
Shop Similar
- Pastel worsted weight yarn bundle
- Cream cotton blend yarn for borders
- Crochet hook set 5.0 mm 5.5 mm
- Blocking mats and rust proof pins
- Yarn needle set for weaving ends
Style It With
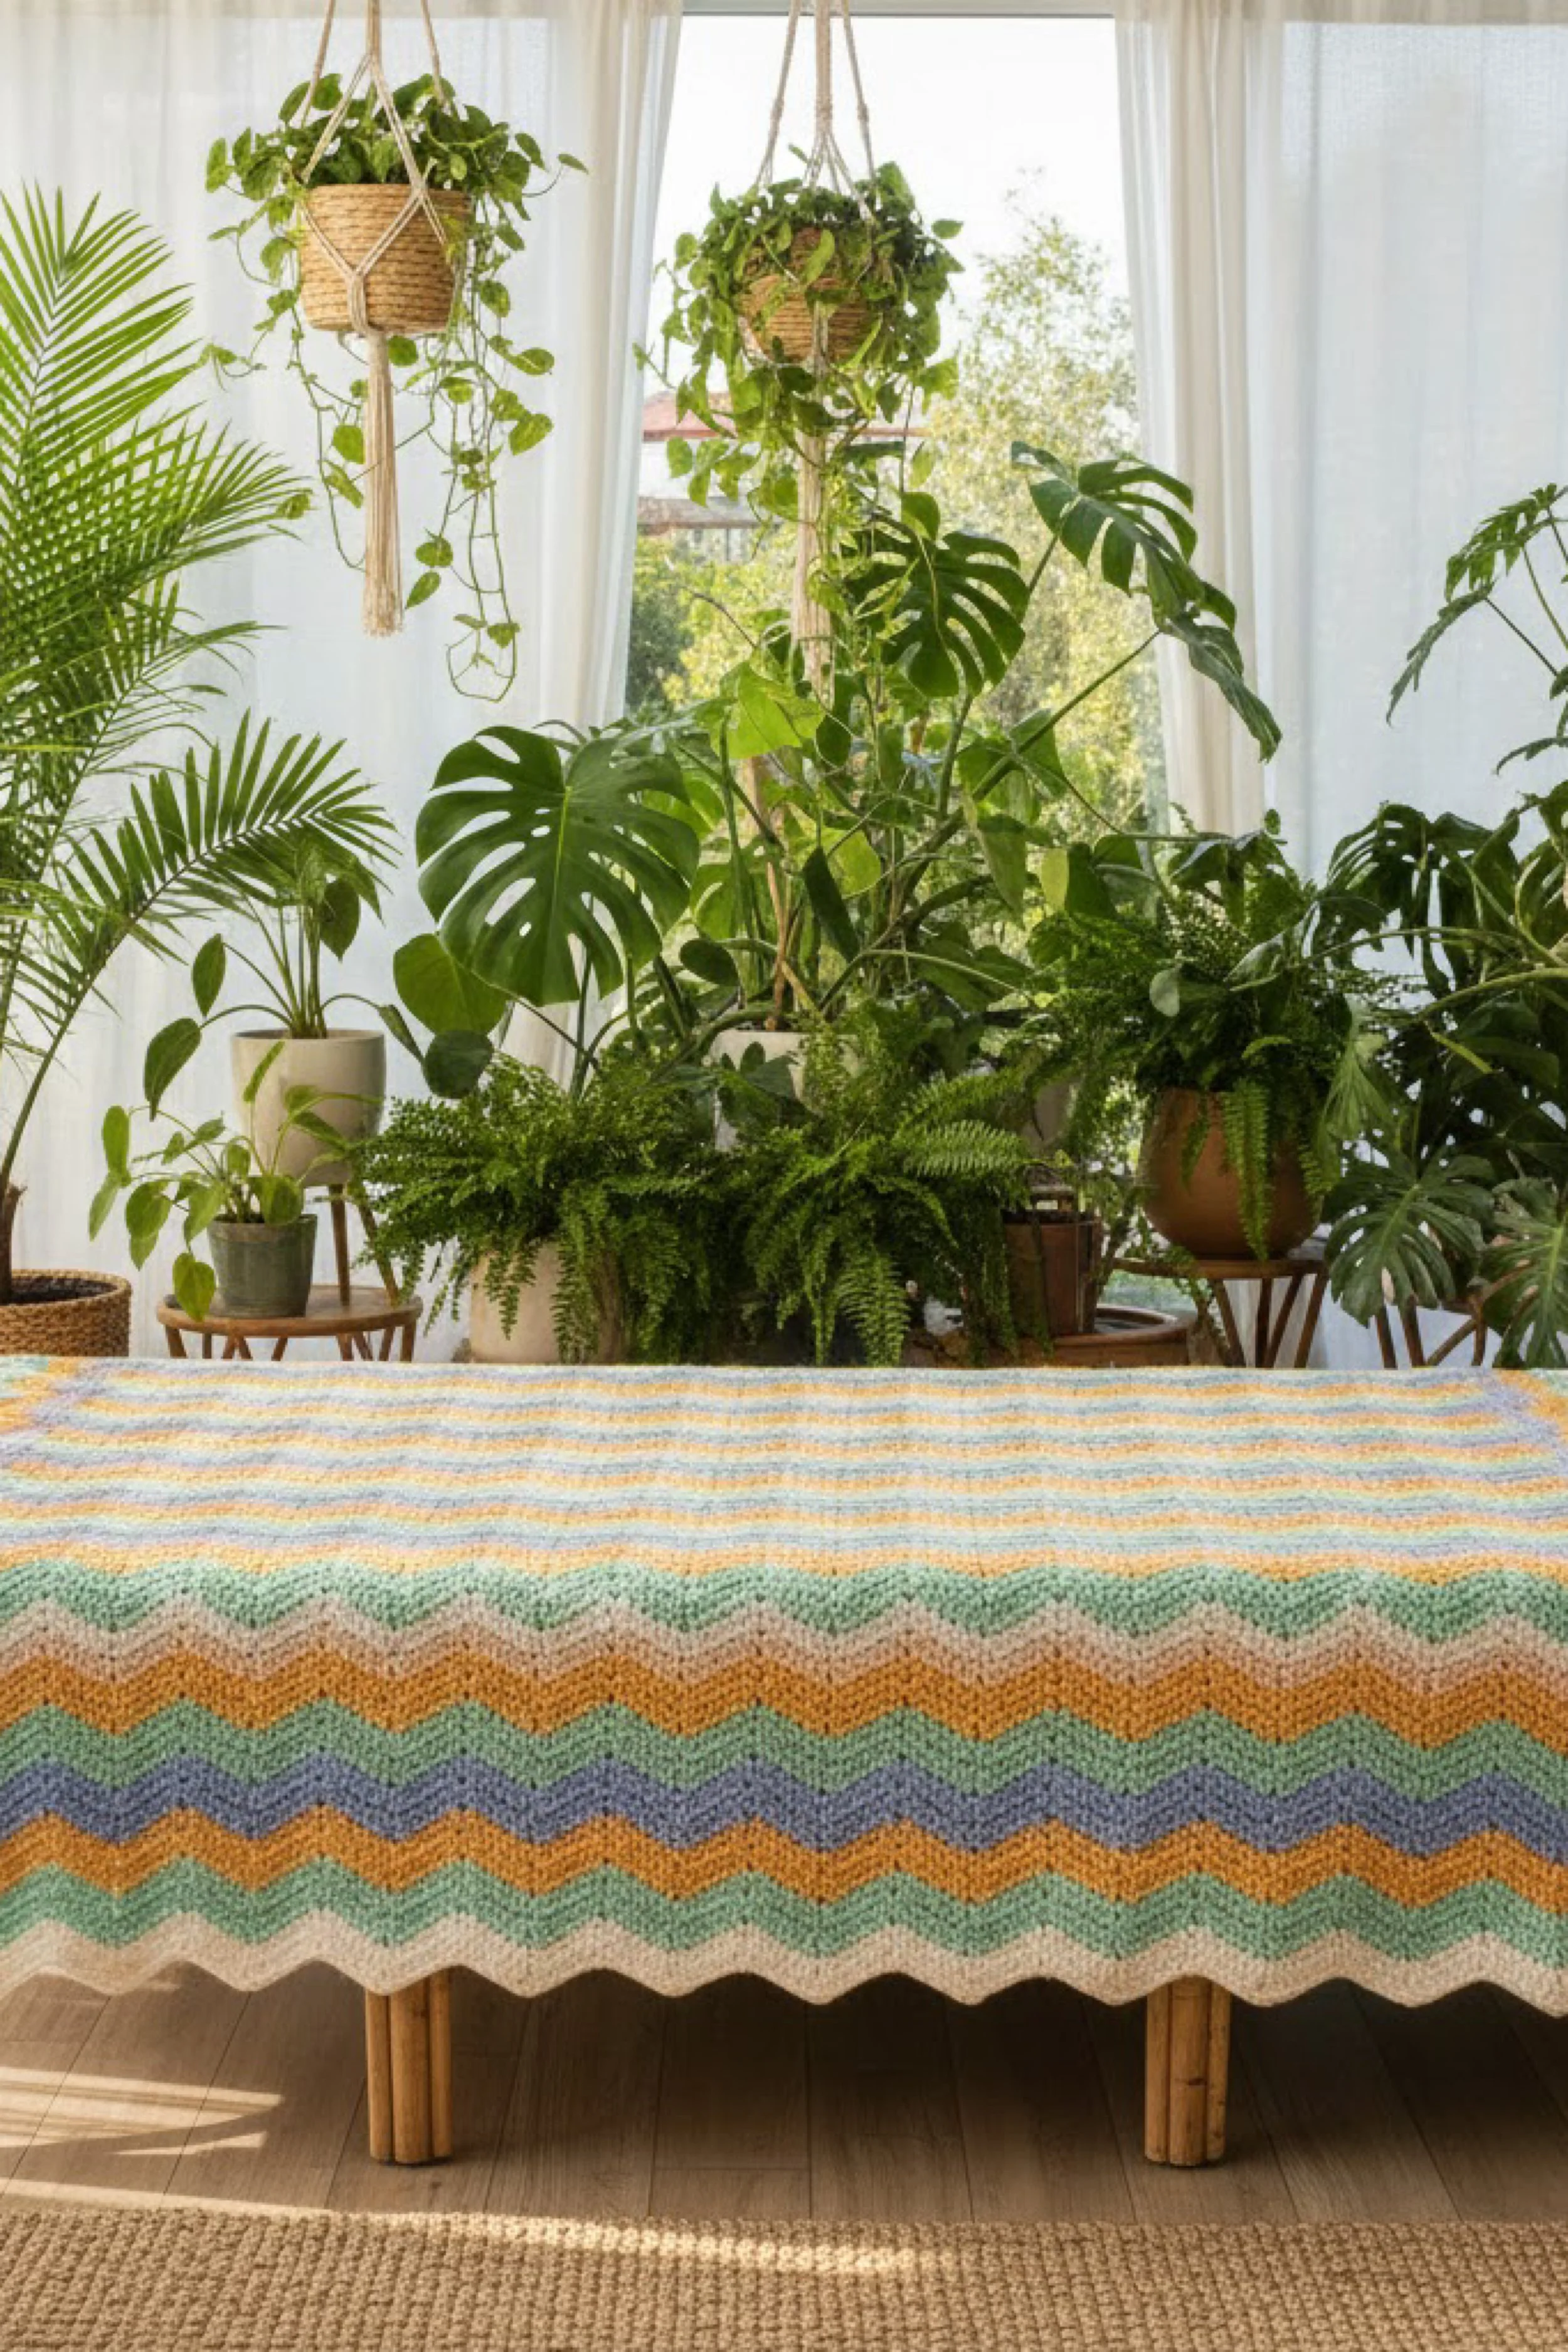
Sunset Ripple Chevron Blanket DIY Guide
What you’re making
This is a classic ripple chevron blanket with wide, soothing color bands and a gently scalloped edge created by the chevron points themselves. The palette in the photo reads like a soft retro sunset, buttery yellow, warm tan, dusty orange, sage mint, and a muted denim blue, all anchored by a calm neutral base. It is the kind of blanket that looks intentional even when casually tossed at the end of a bed.
Materials and tools
- Worsted weight yarn in 5 to 7 colors (cream, pale yellow, tan, muted orange, mint, dusty blue, optional soft gray)
- Crochet hook 5.5 mm (or 6.0 mm if you crochet tightly)
- Stitch markers (to mark peaks and valleys)
- Yarn needle
- Scissors
- Measuring tape
- Optional blocking supplies (helpful but not mandatory for ripples)
Finished size and customization notes
- A cozy throw is often 48 inches wide by 60 inches long.
- Ripple blankets are easy to resize: you change the starting chain in multiples that match your ripple repeat.
- If you want a bed runner like the photo, aim a little narrower, about 40 to 45 inches wide.
- If your ripples look too shallow, increase the height of stitches or add more stitches between peaks and valleys.
Step-by-step instructions
The ripple pattern concept
A ripple row is built from repeating sets of increases at the peak and decreases at the valley. The photo shows a smooth chevron rather than a sharp zigzag, which usually means there are a few regular stitches between shaping points.
This is a beginner friendly ripple that looks like the photo:
- Use double crochet for height and drape
- At each peak: work 3 dc into one stitch
- At each valley: dc3tog over three stitches (a three stitch decrease)
Abbreviations
- ch: chain
- dc: double crochet
- dc3tog: double crochet three together
- st: stitch
- sk: skip
Step 1, choose your width and make the starting chain
A reliable repeat for this ripple is 14 stitches per wave, plus 3 for turning.
- Chain a multiple of 14 plus 3. Examples:
- 45 inch throw: ch 197 (14 times 14 is 196, plus 1 extra if needed, plus 3 turning, adjust based on your gauge)
- Smaller throw: ch 169 (14 times 12 is 168, plus 1, plus 3 turning)
If you do not want to calculate, crochet a chain to your target width, then count and adjust to the nearest multiple of 14 plus 3.
Visual checkpoint: Your chain should reach your intended blanket width without stretching.
Step 2, foundation row in dc
- Dc in the 4th ch from hook (this counts as the first dc).
- Dc in next 4 chains.
- Peak: 3 dc in next chain.
- Dc in next 5 chains.
- Valley: dc3tog over next 3 chains.
- Dc in next 5 chains. Repeat steps 3 to 6 across the row, finishing with dc in the last chain.
Visual checkpoint: You should see your first row already forming gentle waves. If it looks jagged, you may be pulling the chain too tight.
Tip: If your foundation chain is tight, use a hook one size larger for the chain only, then switch back for row 1.
Step 3, row 2 and onward
- Ch 3 and turn (counts as first dc).
- Dc in the first stitch.
- Dc in next 4 stitches.
- Peak: 3 dc in next stitch (this should land at the center peak of the row below).
- Dc in next 5 stitches.
- Valley: dc3tog over next 3 stitches (centered over the valley of the row below).
- Dc in next 5 stitches. Repeat to end. Work 2 dc into the last stitch if needed to keep edges straight.
Visual checkpoint: Peaks should stack over peaks, valleys over valleys. If your ripple is drifting sideways, you missed a stitch count between shaping points.
Step 4, color changes for the banded look
To match the photo’s calm banding, use thicker stripes, around 6 to 10 rows per color. A sample stripe plan:
- Cream: 6 rows
- Pale yellow: 8 rows
- Tan: 6 rows
- Muted orange: 8 rows
- Mint: 6 rows
- Dusty blue: 8 rows Repeat the sequence until the blanket reaches your target length, then finish with cream for a framed look.
How to change color cleanly:
- On the last dc of the row, yarn over and pull through the last two loops with the new color.
- Ch 3 with the new color and turn.
- Crochet the next row as usual.
Visual checkpoint: Your color lines should look crisp and even across the ripples, not stepped.
Step 5, optional edge refinement
The ripple naturally forms a scalloped edge. The photo shows a neat, finished perimeter that is not bulky. Option A, single crochet tidy round:
- With cream, join yarn at a corner.
- Sc evenly along the side, placing 2 sc into the side of each dc row.
- At peaks and valleys, add or skip a stitch as needed so the edge lies flat.
- Repeat around and join.
Option B, small shell accent: After the sc tidy round, add a tiny shell for softness:
- Skip 1 st, 5 dc in next st, skip 1 st, sc in next st repeat If it waves, reduce to 4 dc shells.
Visual checkpoint: The edge should gently frame the ripples, not flare outward.
Step 6, finish and block lightly
- Weave in ends along the same color stripe so they disappear.
- Lightly steam block to relax the stitches. Pin the peaks and valleys if you want sharper chevrons.
Troubleshooting
- Ripples are too pointy: You may have too few stitches between peak and valley. Add one extra dc between shaping points.
- Blanket is ruffling: Too many increases. Make sure peaks are only 3 dc in one stitch and valleys are a real decrease.
- Blanket is cupping inward: Too many decreases or too few stitches in the repeat. Confirm you are doing dc3tog over exactly three stitches at valleys.
- Color changes look messy: Always change color on the last stitch of the previous row, not at the start of the next row.
- Edges look wavy: Your stitch count at the ends may be inconsistent. Add an extra dc at the last stitch or reduce one stitch near the end.
Finishing details
- For a polished look, weave in tails with a duplicate stitch style path, moving in three directions so tails stay locked in place.
- If you want extra softness, wash gently and tumble on low, then reshape while damp.
- Optional upgrade: Add a fabric label or a small corner tassel in one matching stripe color.
- Optional upgrade: Add a simple border in cream only, two rounds of sc, to visually frame the color bands.
Shop Similar
- Worsted yarn set in muted retro colors
- Cream neutral yarn for crochet blankets
- 6.0 mm crochet hook ergonomic
- Stitch marker set for crochet
- Large yarn needle set
Style It With
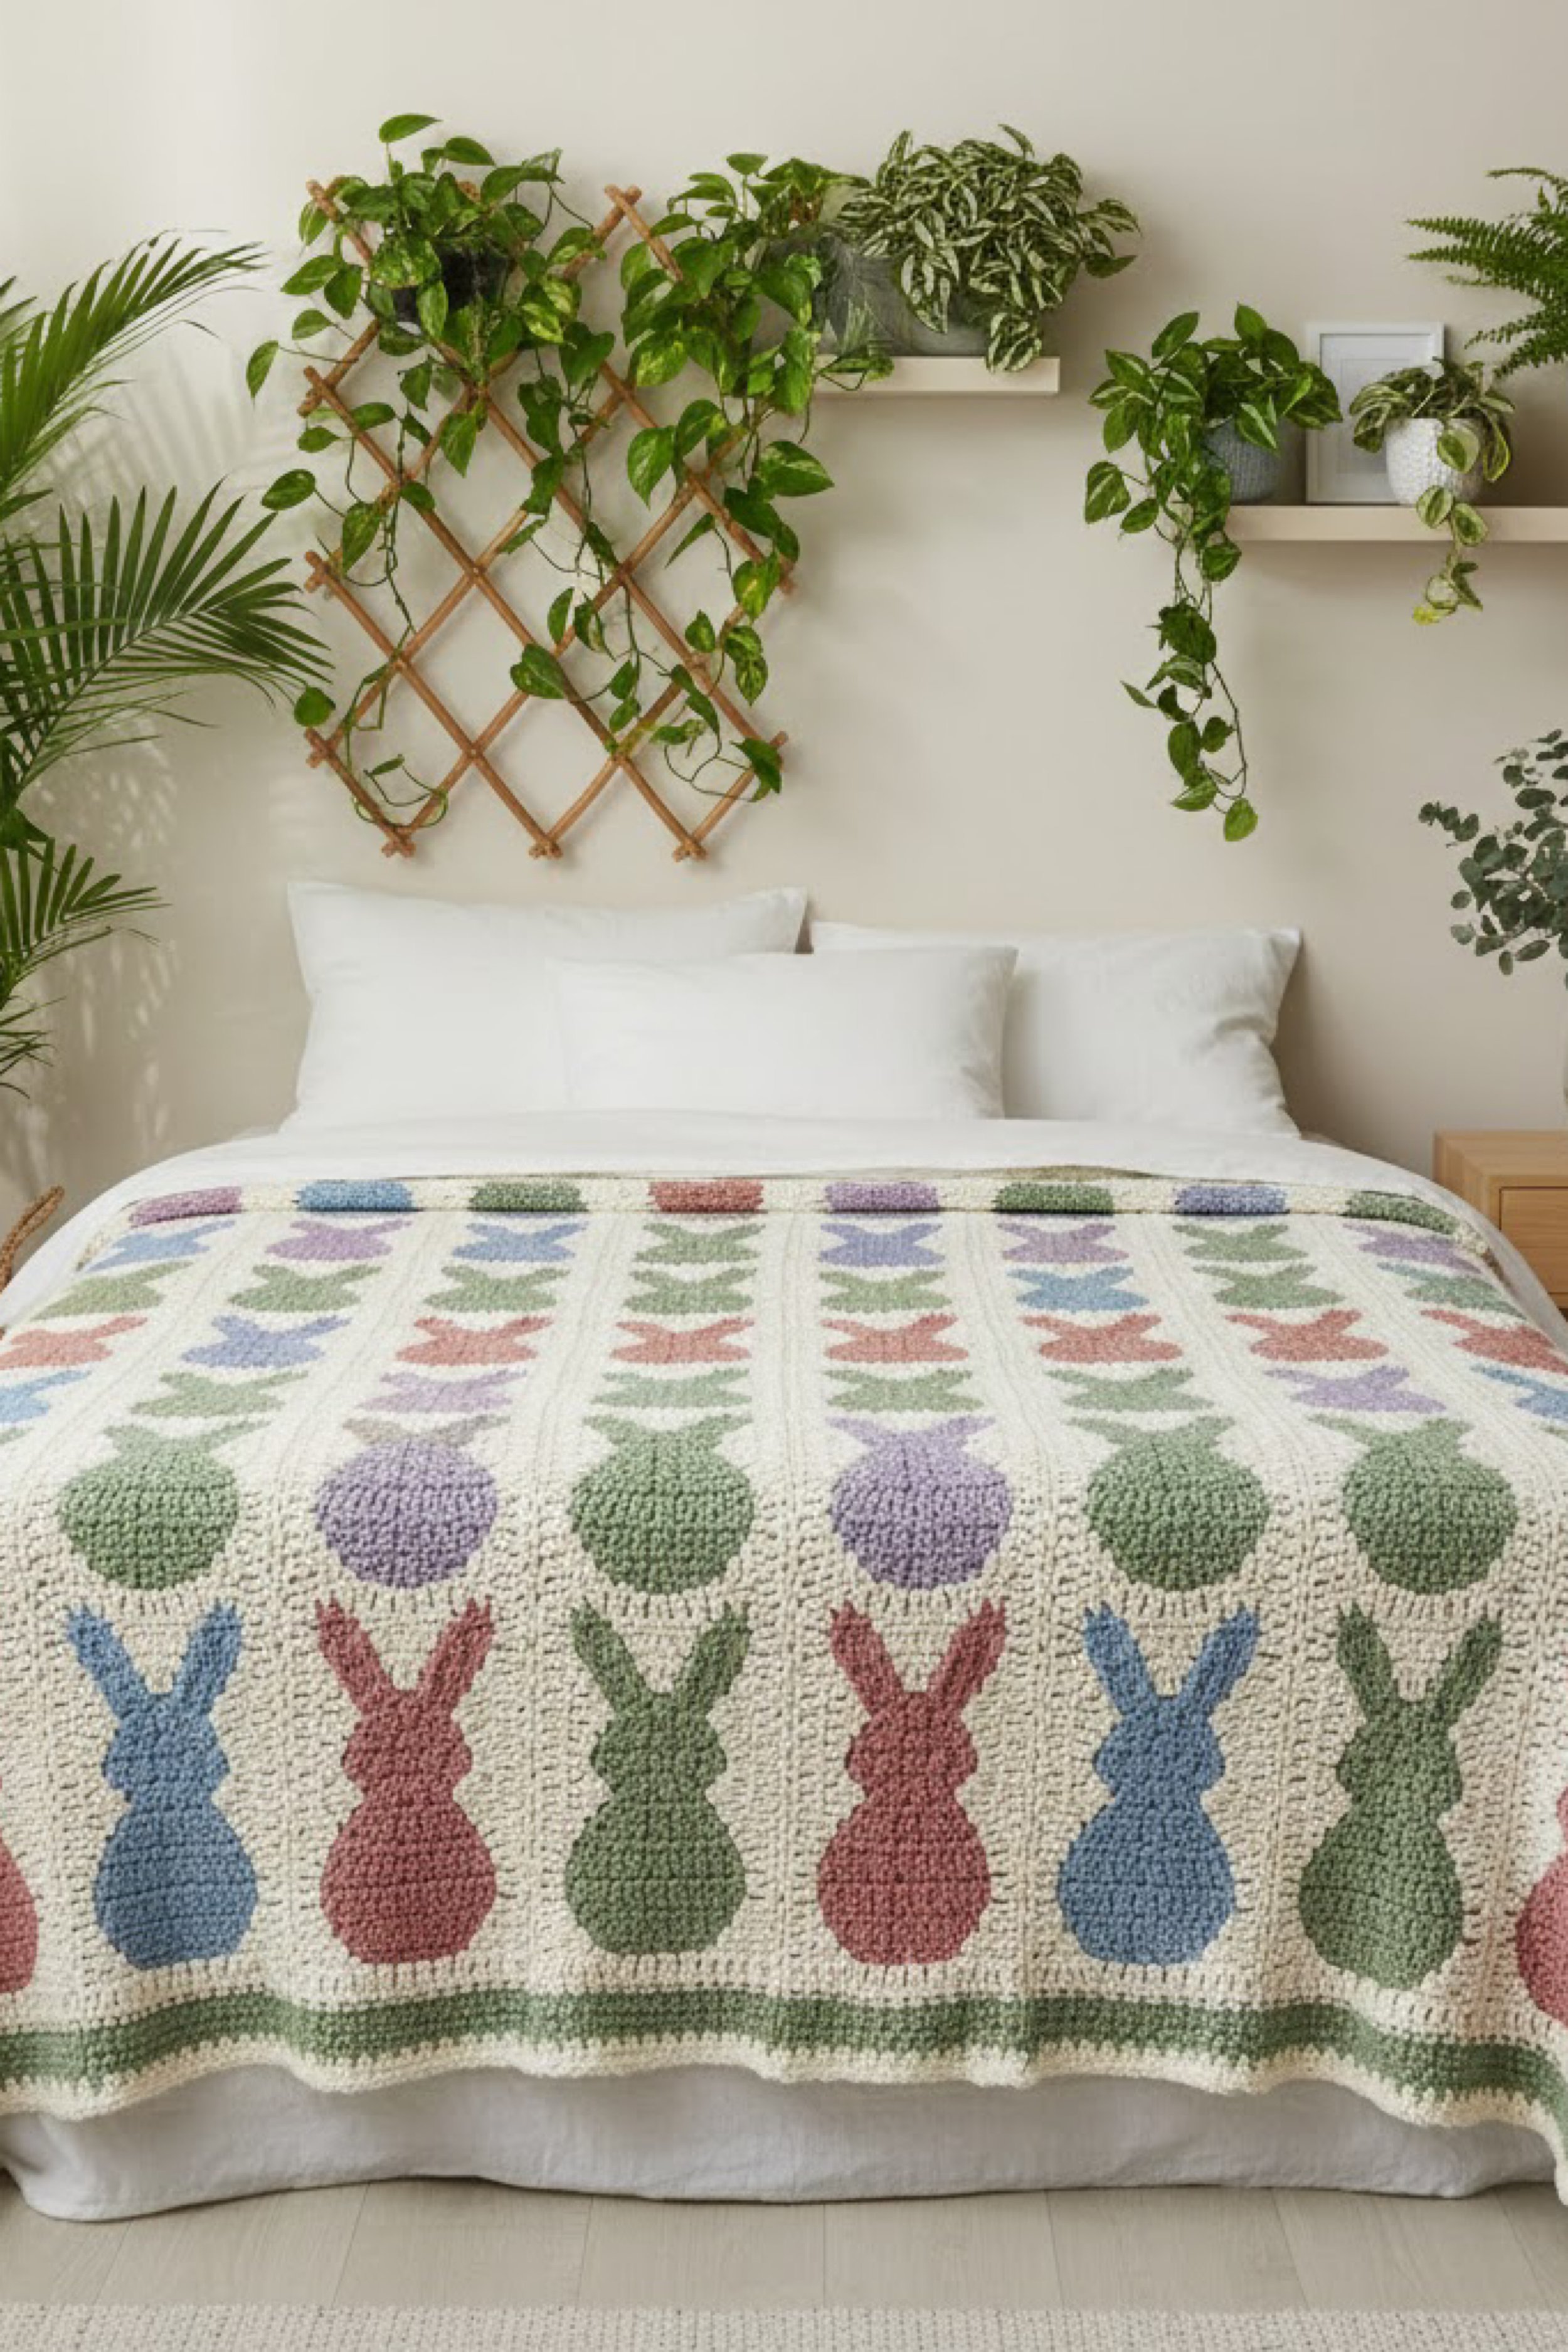
Bunny Parade Crochet Blanket How-To Guide
What you’re making
This is a playful Easter blanket with a bold bottom border of bunny silhouettes in alternating colors, topped with rows of soft geometric motifs that feel like candy stripes and spring confetti. The base fabric looks dense and cozy, with the bunnies standing out in strong contrast against a creamy background. The overall look reads clean and graphic, perfect for a kids room, nursery, or an Easter season throw that still feels stylish.
Materials and tools
- Worsted weight yarn in cream or off white for the main body
- Worsted weight yarn in 4 to 6 accent colors (dusty blue, muted red or rose, sage, lavender, soft teal, optional gray)
- Crochet hook 5.0 mm or 5.5 mm
- Stitch markers
- Yarn needle
- Scissors
- Measuring tape
- Optional graph paper or a digital chart app for the bunny band
- Optional blocking supplies
Finished size and customization notes
- This style works well as a throw or toddler bed blanket. A common size is 40 inches by 55 inches.
- The bunny band height in the photo is roughly 10 to 12 inches tall, depending on your stitch height.
- You can widen by adding more bunny repeats and continuing the same body pattern above.
- You can shorten by reducing the number of motif rows above the bunnies.
Step-by-step instructions
Construction plan
This blanket is easiest in two parts:
- Crochet the bunny silhouette band using a tapestry crochet method (color carried inside stitches) or intarsia (separate bobbins).
- Crochet the upper body in cream with colorful motif rows, then finish with a simple border.
The photo’s bunnies look clean with minimal color bleeding. Intarsia gives the crispest silhouettes, while tapestry is faster. I will give both options so you can choose what fits your comfort level.
Abbreviations
- ch: chain
- sc: single crochet
- hdc: half double crochet
- dc: double crochet
- st: stitch
- RS: right side
- WS: wrong side
Step 1, decide stitch style for the fabric
The blanket fabric looks pebbly and dense, similar to a single crochet or half double crochet texture.
- For maximum graphic clarity: use sc for the bunny band.
- For faster progress and still crisp bunnies: use hdc.
I will write the bunny band in sc, because it keeps edges sharp.
Step 2, make a bunny chart
Each bunny is a simple silhouette: ears, head, shoulders, body, and feet. A practical chart size:
- Bunny width: 14 stitches
- Bunny height: 18 rows
- Space between bunnies: 4 stitches of cream
One repeat would be 18 stitches wide (14 bunny plus 4 background). In the photo, there are many bunnies across, so plan repeats until you reach your width.
If you do not want to draw a full chart, you can follow this simplified bunny recipe per bunny, built as a blocky shape. It will still read like the photo once repeated.
Step 3, foundation chain
Chain a multiple of 18 for the repeats, plus 2 turning chains if using sc. Example:
- 8 bunnies across: 18 times 8 is 144. Chain 146.
- 10 bunnies across: chain 182.
Visual checkpoint: The chain should span the width of your bed or sofa throw area.
Step 4, crochet a base in cream before bunnies
- Row 1: sc in second ch from hook, sc across.
- Rows 2 to 6: ch 1, turn, sc across.
This creates a calm base hem under the bunny silhouettes.
Step 5, bunny band with intarsia option
Intarsia means each bunny color uses its own small yarn ball. You change colors only when needed, twisting yarns at color changes so there are no holes.
How to work each row:
- Follow your chart from right to left on RS rows and left to right on WS rows.
- When you reach a color change, work the last yarn over of the sc with the new color.
- Twist the two yarns once at the back to lock the change.
- Keep yarn tails tidy and do not pull too tight.
Visual checkpoint: The bunny edges should look smooth, not jagged with gaps between colors.
Step 6, bunny band with tapestry option
Tapestry means you carry the unused color inside the stitches.
- Work sc stitches over the carried yarn so it stays hidden.
- Keep carried yarn relaxed. If it is tight, it will pucker the blanket.
- If carrying over long distances, catch the yarn every 3 to 5 stitches so it does not float loose.
Visual checkpoint: Flip the work and make sure carried yarn is not creating tight horizontal lines.
Step 7, bunny silhouette shape guidance
Use this silhouette logic for each bunny across the band:
- Start with feet and lower body wider
- Narrow slightly at waist
- Wider at shoulders
- Narrow for head
- Two ear columns at the top
A row by row shaping suggestion (per bunny area, 14 stitches wide):
- Rows 1 to 3 of bunny: 10 stitches wide centered (body base)
- Rows 4 to 8: 12 stitches wide (body and hips)
- Rows 9 to 12: 10 stitches wide (torso)
- Rows 13 to 15: 8 stitches wide (head)
- Rows 16 to 18: 6 stitches wide split into two ears (2 stitches ear, 2 background gap, 2 stitches ear)
You will place these within the repeat, keeping 2 background stitches on each side of the bunny so it does not touch the next bunny.
Visual checkpoint: From a distance, each bunny should read clearly. If yours looks like a chunky pillar, increase the contrast and make the ears taller by adding 1 or 2 more rows.
Step 8, finish bunny band and transition to upper body
After the bunny rows:
- Work 2 rows of cream sc across to lock in the band.
- Switch to hdc for the upper body if you want faster progress and a slightly softer drape.
Step 9, upper body motif rows
The upper area in the photo shows repeating colored shapes aligned in vertical columns, like simplified tulip petals or stacked chevrons. You can mimic this with a simple textured colorwork row repeated in sections.
Motif method, easy and photo friendly:
- Work 6 to 10 rows of cream between motif rows.
- Motif row: use a color and make small clusters every few stitches.
Motif row recipe:
- With color, ch 1 and sc across, but every 6 stitches work a puff or bobble:
- Puff: yarn over, insert, pull up loop, yarn over, insert, pull up loop, yarn over, pull through all loops, ch 1 to close.
- Continue across, spacing evenly.
- Next row in cream: sc across, working into the top of puffs as normal.
Repeat motif rows, changing color each time. This creates the confetti band look.
Visual checkpoint: You should see tidy rows of raised dots or petals that form soft columns.
If you want sharper graphic shapes like the photo, use a simple V stitch motif:
- In motif row, skip 2 stitches, (dc, ch 1, dc) in next stitch, skip 2 stitches, sc in next stitch repeat. This creates little stacked Vs if you align repeats.
Step 10, border
To match the clean finish:
- Work 1 round of sc in cream around the whole blanket.
- Work a second round of hdc for a slightly thicker frame.
- Optional: Add a tiny picot every 6 stitches for a gentle scallop:
- sc, ch 3, sl st into first ch, then continue.
Visual checkpoint: Border should lie flat with no curling. Add corner increases as needed, such as (sc, ch 1, sc) at each corner.
Troubleshooting
- Bunny edges look fuzzy: Use intarsia instead of tapestry, or tighten your sc stitches slightly. Also make sure you are not splitting yarn plies.
- Fabric puckers at color changes: Your carried yarn is too tight. Relax it or cut and rejoin more often.
- Bunnies lean or drift: You may be reading the chart in the same direction on both RS and WS. Remember WS rows reverse direction.
- Upper motifs do not align: Use stitch markers every 6 stitches to keep spacing consistent across rows.
- Border ruffles: Too many stitches around. Skip a stitch occasionally along the sides or reduce corner increases.
Finishing details
- Weave ends on the WS in the same color sections. For bunny colors, weave into the bunny body area so tails do not show on cream.
- Light steam block to smooth the band edges and relax the upper motifs.
- Optional lining: If this is for a baby or toddler, a soft cotton flannel backing can make it extra cozy and hide colorwork floats. Hand sew along the inside of the border.
- Optional personalization: Add an initial patch in one corner using surface crochet in a matching bunny color.
Shop Similar
- Worsted yarn cream base
- Muted spring color yarn set
- Crochet bobbin holders for intarsia
- Ergonomic crochet hook 5.0 mm
- Blocking mats for crochet blankets
Style It With
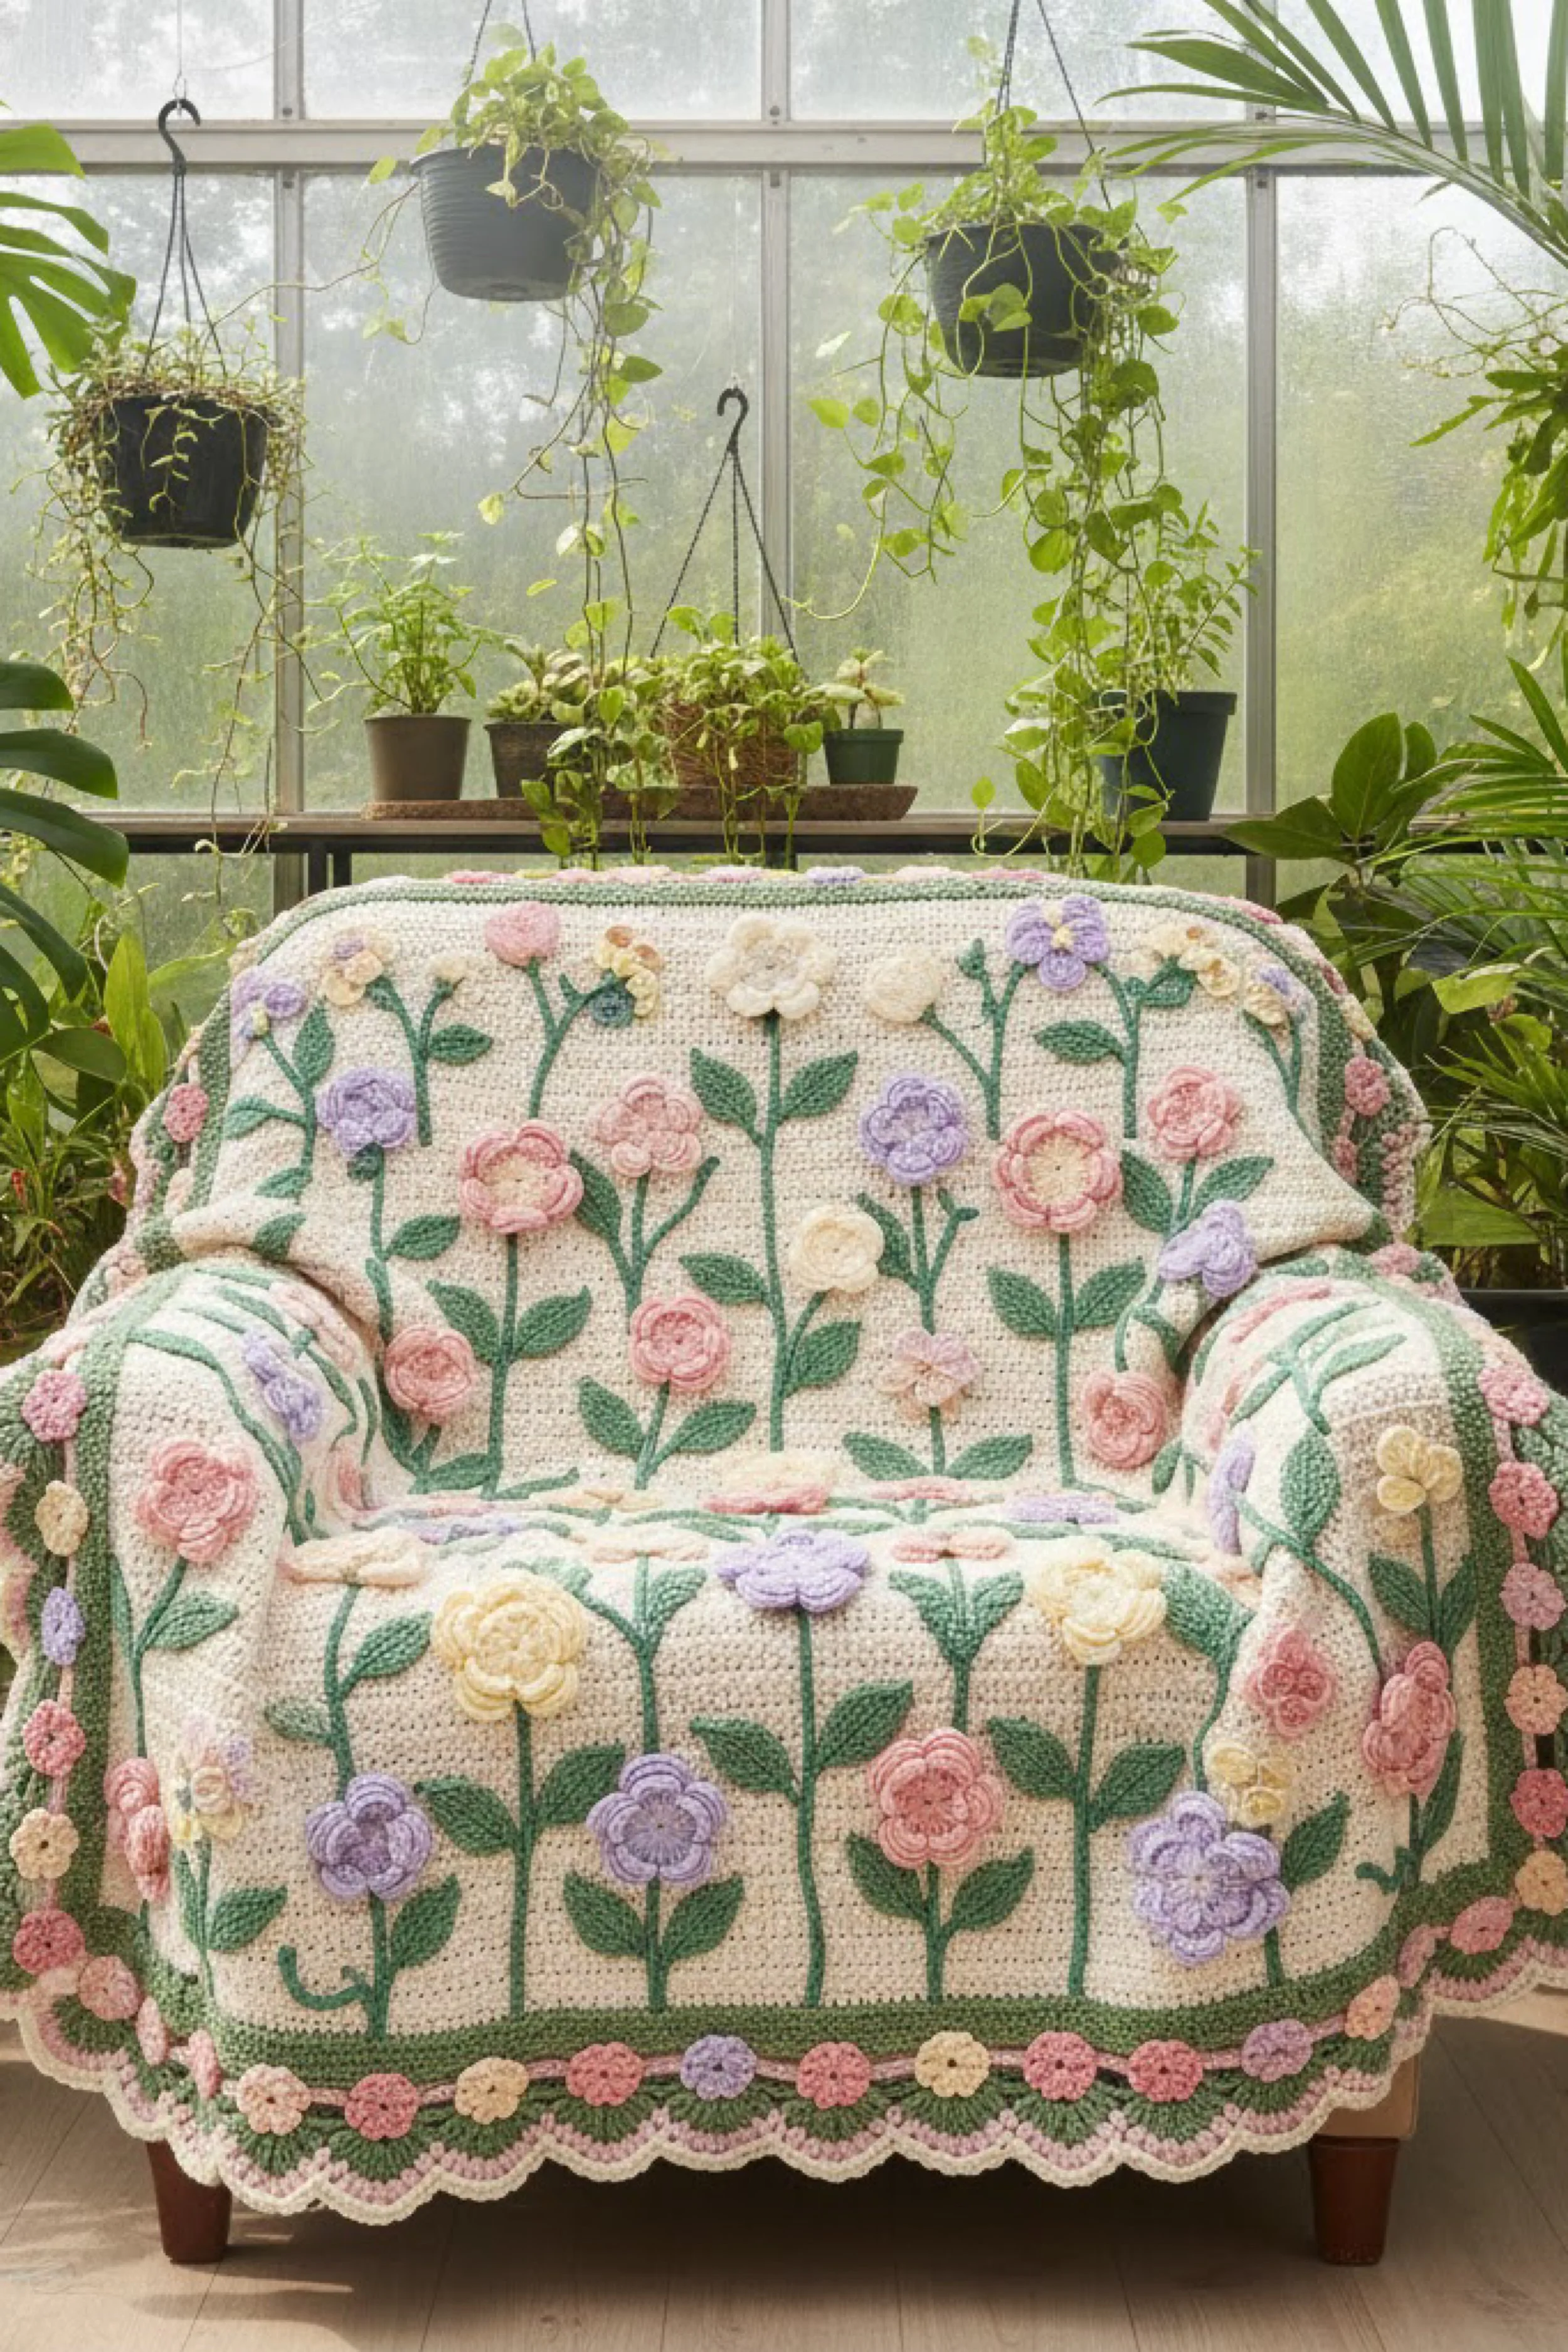
3D Garden Applique Couch Throw Make-It-Yourself Tutorial
What you’re making
This is a statement crochet throw that looks like a garden stitched onto a soft, creamy base. The flowers are raised and sculptural, with layered petals in pastel pink, lavender, butter yellow, and soft white, plus trailing green stems and leaves that climb across the fabric. The edges are finished with a scalloped border and a cute mini flower trim, giving it a whimsical, heirloom vibe while still feeling clean and modern when styled with plants and natural light.
Materials and tools
- Worsted weight yarn in cream or off white for the base throw
- Worsted weight yarn in green for stems and leaves (choose one medium green)
- Worsted weight yarn in pastel flower colors (pink, lavender, pale yellow, soft peach, white)
- Optional: one darker accent green for leaf depth
- Crochet hook 5.0 mm for base fabric
- Crochet hook 4.0 mm or 4.5 mm for flowers (helps petals look crisp)
- Yarn needle
- Scissors
- Stitch markers
- Measuring tape
- Optional: fabric backing for extra stability
- Optional: safety pins for placement planning
Finished size and customization notes
- The photo looks like a couch throw, around 45 inches by 55 inches.
- You can make this as a loveseat throw by going 40 by 50 inches, or as an armchair throw at 36 by 48 inches.
- The key to the look is spacing: let the cream base breathe, then place flowers in a balanced grid with stems connecting them.
- If you want fewer ends, make fewer flower colors and repeat them more.
Step-by-step instructions
Part 1, crochet the base throw
The base in the photo looks like a textured stitch with small bumps, similar to moss stitch or a simple linen stitch. That texture is perfect because it hides sewing stitches when you attach appliques.
Base stitch option A, moss stitch (very photo friendly):
- Row pattern: sc, ch 1, skip 1, repeat across
- Next row: sc into ch 1 spaces
- Chain to desired width. For moss stitch, chain an even number.
- Row 1: sc in second chain from hook, ch 1, skip 1 chain, sc in next chain. Repeat to end.
- Row 2: ch 1, turn. Sc into each ch 1 space, ch 1 between each sc.
- Repeat Row 2 until desired length.
Visual checkpoint: The fabric should look like tiny woven specks, with no large holes.
Base stitch option B, half double crochet for speed:
- Hdc across each row, with a turning chain of 2. This will be smoother but still works if you secure appliques well.
Part 2, plan your flower layout
Before making all flowers, sketch placement:
- Big flowers spaced about a hand width apart
- Stems running upward in gentle lines
- Smaller flowers sprinkled as fillers
- Leaf clusters near stem bends
Use safety pins to mark rough positions. Even a simple plan prevents clustering all your favorite colors in one corner.
Visual checkpoint: Step back and make sure the arrangement feels balanced, not heavy on one side.
Part 3, crochet the 3D flowers
These flowers are layered, typically two or three rounds of petals.
Flower center:
- With flower color, make a magic ring.
- Work 8 sc into ring, join.
Petal foundation round:
- Ch 1. Sc in next stitch, ch 3, sl st into same stitch repeat around. This makes 8 small loops for petals.
Petal round 1:
- In each loop, work (sc, hdc, dc, hdc, sc).
- Join and fasten off or continue for a second layer.
Petal round 2, larger petals behind:
- Join yarn at the back of the flower, working behind the first petal layer.
- Between petals, slip stitch into the base stitch and ch 4 to create a larger loop.
- In each larger loop, work (sc, hdc, dc, tr, dc, hdc, sc).
Visual checkpoint: The flower should look puffy and dimensional, with a clear layered look.
Optional upgrade, textured center:
- Add a small bobble or popcorn stitch in the center using a contrasting shade.
Make a mix:
- 8 to 12 large layered flowers
- 10 to 16 medium single layer flowers
- 12 to 20 tiny filler flowers (simple 5 petal style)
Tiny filler flower:
- Magic ring, ch 1.
- Ch 2, dc, ch 2, sl st into ring repeat 5 times.
- Tighten and fasten off.
Part 4, crochet leaves
Simple leaf that looks like the photo:
- Ch 8.
- Sc in second ch from hook, hdc, dc, dc, hdc, sc, sl st.
- Work the other side of chain: sc, hdc, dc, dc, hdc, sc, sl st at end. Fasten off leaving a long tail.
Make leaves in batches, about 30 to 50 depending on how lush you want it.
Visual checkpoint: Leaves should have a clear point and a central vein created by the foundation chain.
Part 5, crochet stems and vines
You can do stems with surface crochet for the most realistic look.
- With green, use slip stitch surface crochet along the base fabric, following your planned vine path.
- Keep stitches loose so the fabric does not pucker.
- Add occasional short branches by branching off and returning.
Alternative if you prefer to sew:
- Crochet long chains and whip stitch them down as stems.
Visual checkpoint: Stems should look like gentle trailing lines, not stiff straight ladders.
Part 6, attach flowers and leaves
Attachment method:
- Place a flower at its planned spot.
- Use a yarn needle and matching yarn to stitch through the flower base and into the blanket, catching multiple stitches so it will not wobble.
- For layered flowers, stitch around the center base and a few points under petals.
- Attach leaves by stitching down the center vein line so leaf edges can lift slightly for dimension.
- Add small filler flowers near stem intersections and along borders.
Visual checkpoint: Tug gently on each applique. It should feel secure without pulling the fabric.
Part 7, add the scalloped border
The photo has a scallop with a small flower trim feel. You can achieve this with two steps.
Border foundation:
- Join cream in any corner.
- Work sc evenly around. On sides, aim for 2 sc per row if you used moss stitch, or 1 sc per row if you used hdc but check for flatness.
- Corners: (sc, ch 1, sc).
Scallop round:
- Skip 2 stitches, work 5 dc in next stitch, skip 2 stitches, sc in next stitch repeat.
- At corners, place a sc in the corner space and adjust skip counts so scallops stay centered.
Mini flower trim option: After scallops, attach pastel yarn and add tiny flowers spaced every 3 scallops, sewing them down lightly so they do not snag.
Visual checkpoint: Border should frame the blanket like a lace hem, not wave outward.
Troubleshooting
- Appliques make the blanket sag: Use fewer heavy layered flowers, or add a simple fabric backing to support weight.
- Stems pucker the fabric: Your surface crochet is too tight. Redo with looser slip stitches, or use a chained stem sewn down instead.
- Flowers flop over: Stitch at more anchor points under the petals, especially at the base of each large petal.
- Border ruffles: Too many stitches around. Reduce sc counts on the foundation round or use 4 dc scallops instead of 5.
- Edges curl: Add one extra border foundation round before scallops to stabilize.
Finishing details
- Weave in all ends thoroughly, especially in green vines, because they are high touch areas.
- Steam block the base gently, then pin scallops to set the curves.
- Optional lining: Add a lightweight cotton backing. This helps it look more finished and keeps applique stitches from showing on the back.
- Optional upgrade: Add a few embroidered French knot dots in yellow for flower pollen, using embroidery floss.
Shop Similar
- Cream worsted yarn for textured throws
- Pastel yarn assortment for crochet flowers
- Green yarn for crochet vines
- Crochet hook set with 4.0 mm and 5.0 mm
- Large tapestry needle set
Style It With
Pastel Patchwork Granny Rug Step-by-Step Tutorial
What you’re making
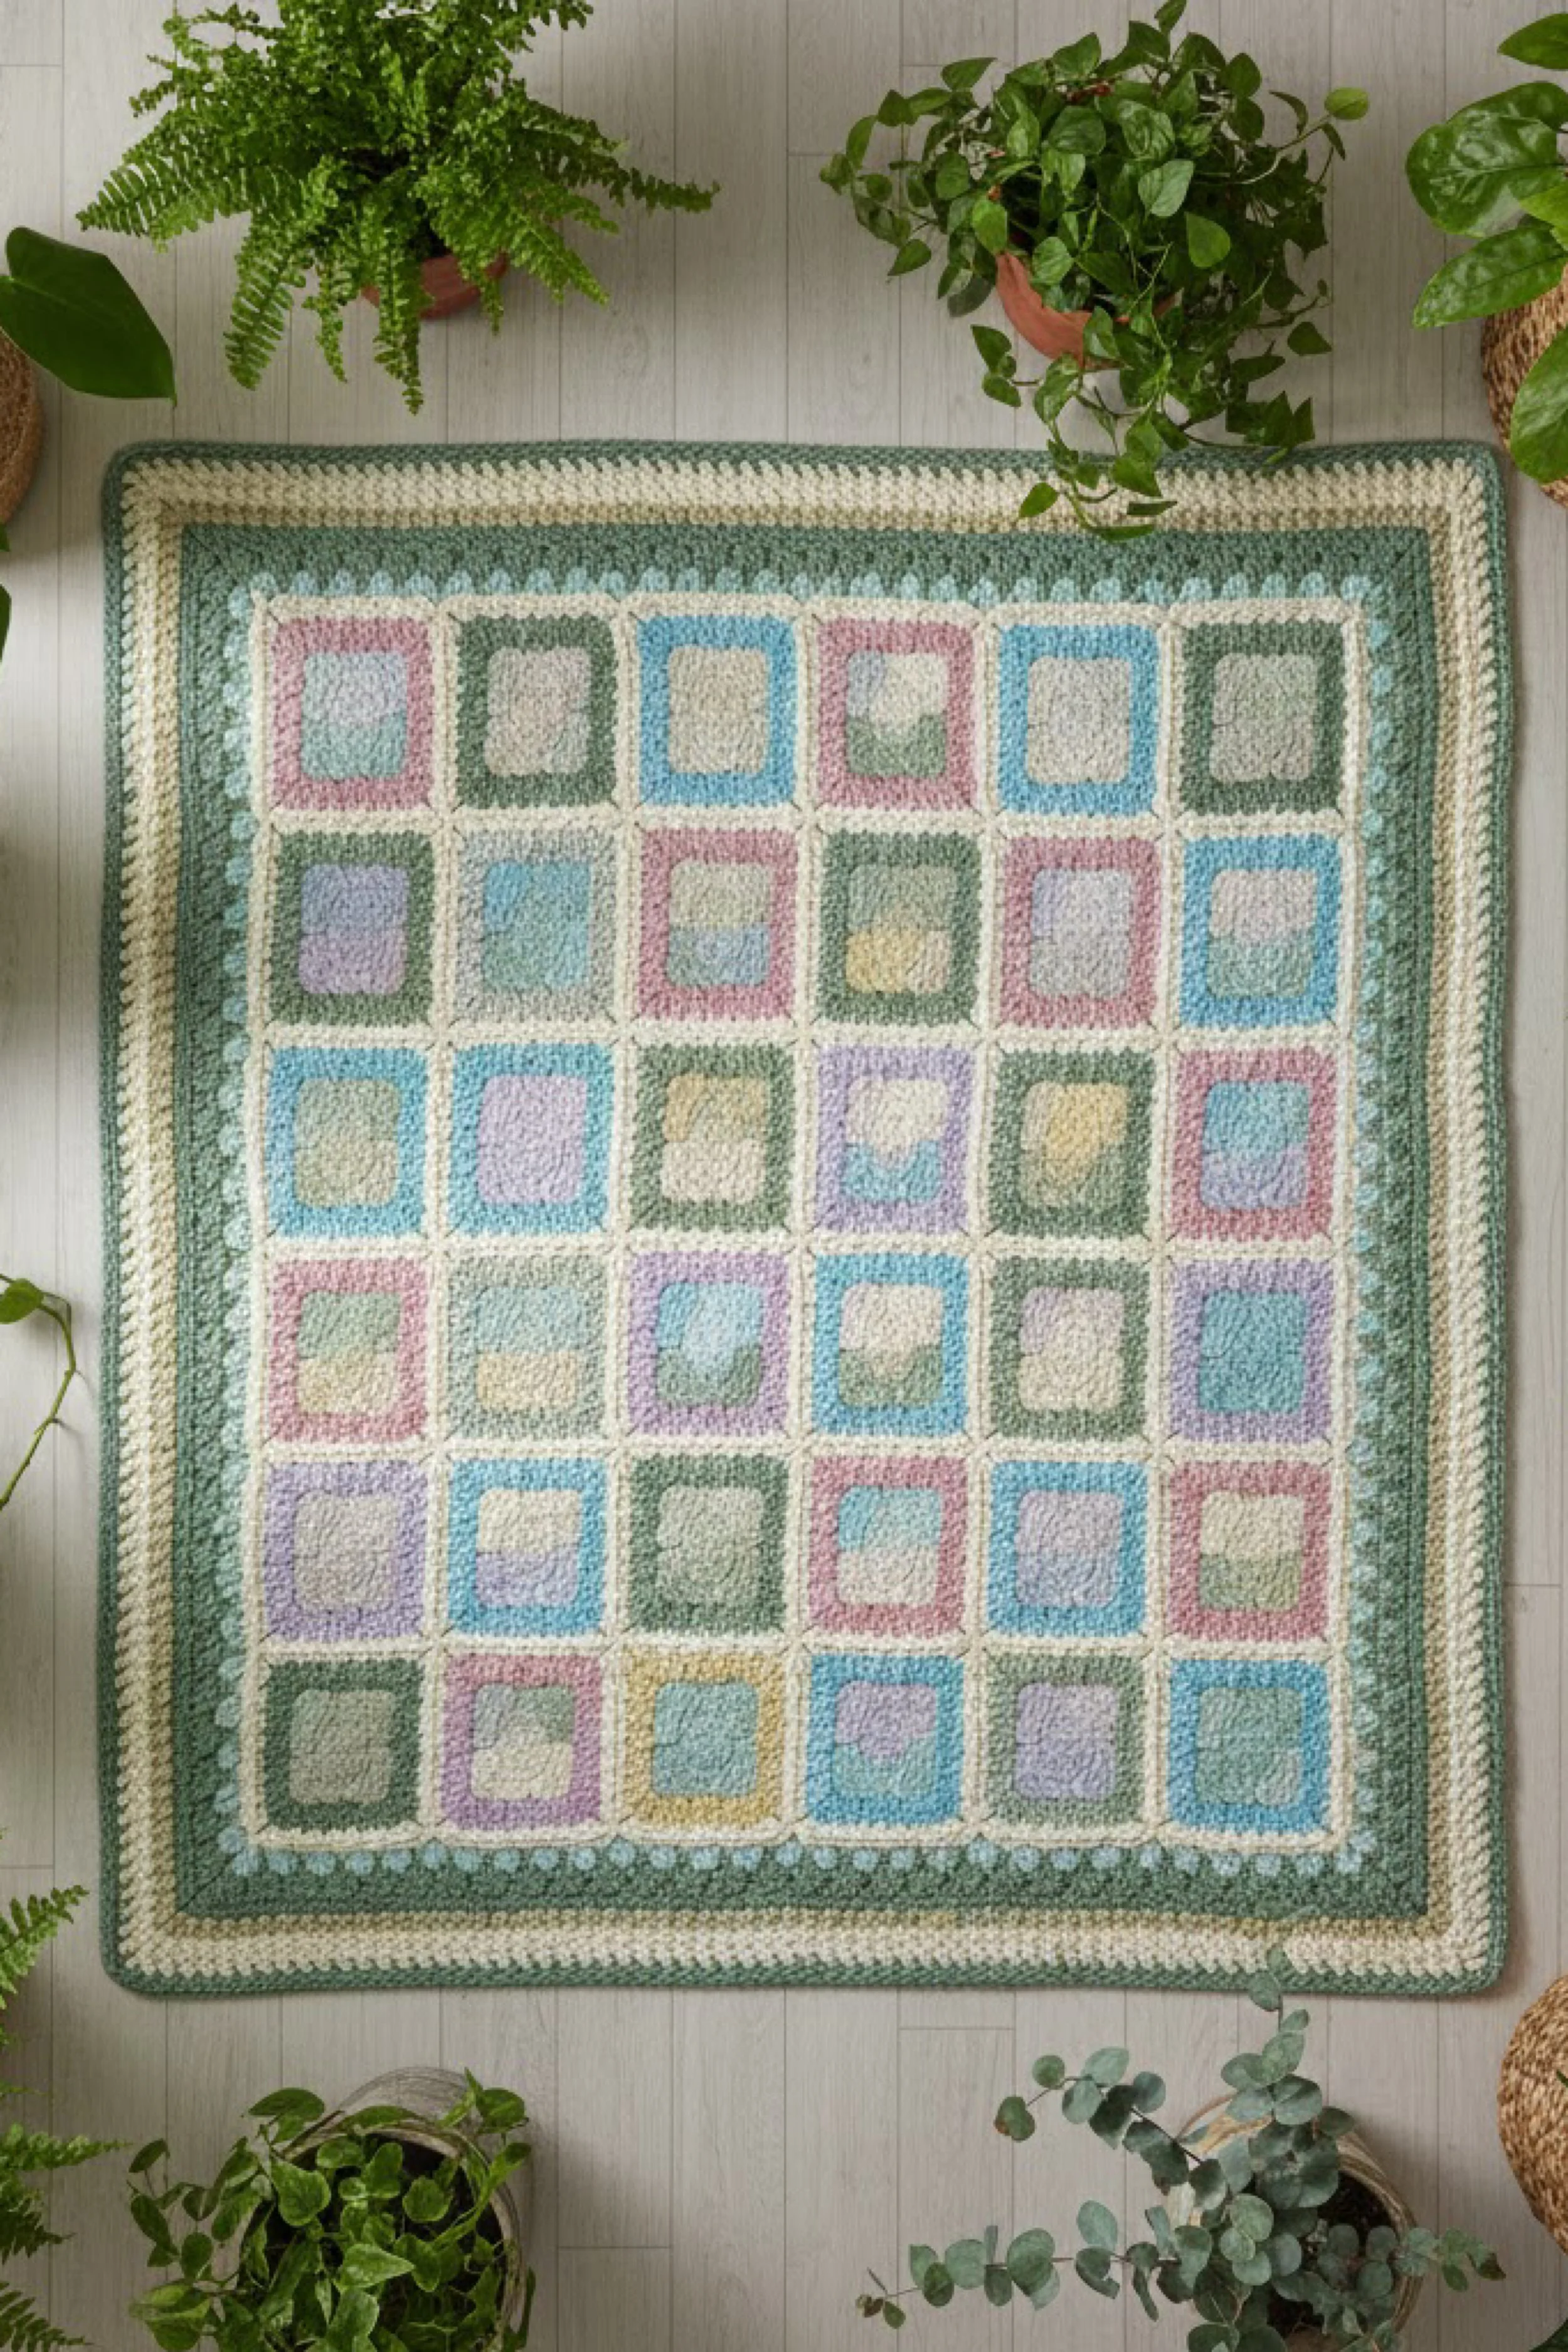
This is a pastel patchwork granny square rug or floor blanket, built from soft, rounded center squares in alternating spring shades, then framed with a wide, structured border in sage green and cream. The squares look plush and slightly textured, giving the finished piece a cozy, cushiony vibe that works perfectly in a plant filled room. The large border makes it feel finished and intentional, like a handmade statement rug.
Materials and tools
- Worsted weight yarn in cream or off white for joining and inner borders
- Worsted weight yarn in sage green for the outer border
- Worsted weight yarn in pastel shades (sky blue, mint, lavender, blush, butter yellow, pale aqua)
- Crochet hook 5.0 mm or 5.5 mm
- Yarn needle
- Scissors
- Measuring tape
- Blocking mats and pins (highly recommended for square alignment)
- Optional non slip rug pad if using as a floor rug
- Optional rug backing fabric or latex rug backing spray (choose a non toxic option)
Finished size and customization notes
- The photo shows a large square piece, likely around 48 inches to 60 inches wide depending on square size and border depth.
- The grid looks like 6 squares across by 6 squares down, with a generous border.
- If each square is 6 inches, a 6 by 6 grid is 36 inches, plus a 6 to 10 inch border on each side creates the finished look.
- You can make this as a baby play mat by using softer yarn and adding a fabric backing.
Step-by-step instructions
Square style choice
The squares in the photo look like a “solid granny” or a modified granny with fewer holes, likely to keep it rug friendly. I will give you a solid granny square that stays dense and plush.
Abbreviations
- ch: chain
- sl st: slip stitch
- sc: single crochet
- hdc: half double crochet
- dc: double crochet
- st: stitch
- sp: space
- rnd: round
Step 1, crochet one solid granny square
Round 1:
- With pastel color A, make a magic ring.
- Ch 3, work 11 dc into ring, join.
Round 2:
- Ch 2, work 2 hdc into each stitch around, join.
Round 3, squaring round:
- Ch 3, dc in same stitch.
- Work dc in next 2 stitches.
- Corner: (2 dc, ch 2, 2 dc) in next stitch.
- Work dc in next 5 stitches.
- Corner: (2 dc, ch 2, 2 dc).
- Continue this pattern around so you have 4 corners total.
- Join.
Visual checkpoint: You should now see a square emerging with a soft rounded center and four clear corner spaces.
Round 4, grow the square:
- Ch 3, dc in each stitch until corner space.
- In each corner ch 2 space, work (2 dc, ch 2, 2 dc).
- Continue around and join.
Round 5, cream framing round:
- Switch to cream.
- Work a sc round for firmness:
- Sc in each dc and in each corner space work (sc, ch 1, sc).
- Join and fasten off.
Visual checkpoint: The square should have a crisp cream outline and a solid, slightly textured center.
Step 2, make a full set of squares
For a 6 by 6 grid, make 36 squares. Color planning that matches the photo’s balanced feel:
- Make 6 squares each in 6 pastel shades.
- Keep cream the same for every square border so the grid looks clean.
Visual checkpoint: Lay them out on the floor. You should see a soft checkerboard with no single color clumping too heavily.
Step 3, block all squares
Blocking is what makes patchwork look professional.
- Pin each square to the same measurement.
- Steam or mist, then let dry fully.
Visual checkpoint: Stack squares on top of each other. They should match nearly perfectly.
Step 4, join squares into rows
Use a flat join for rug friendliness. Option A, mattress stitch (flattest):
- Put squares right side up.
- Sew through the back loop of each edge sc stitch, pulling snug.
Option B, slip stitch join through back loops:
- Hold two squares together with wrong sides touching.
- Insert hook through both back loops, slip stitch across.
Visual checkpoint: The join should look like a thin cream line, not a bulky braid.
Join into 6 long rows first, then join rows together.
Step 5, stabilize the full panel with a joining round
Once the grid is joined:
- Join cream at any corner.
- Sc evenly around the entire perimeter.
- Corners: (sc, ch 1, sc).
This round locks seams and gives a clean base for the wide border.
Step 6, add the wide sage border
The photo’s border looks layered: cream, sage, then cream, then sage, with a subtle texture band.
Border plan that matches the look:
- Round 1 cream: hdc around, corners (hdc, ch 1, hdc)
- Round 2 sage: dc around, corners (dc, ch 2, dc)
- Round 3 sage texture: alternate fpdc and dc to create a ribbed band, corners stay as normal dc corners
- Round 4 cream: sc around to crisp the frame
- Round 5 sage: hdc around for final thickness
- Optional final round cream: crab stitch (reverse sc) for a clean rope edge
How to do a front post double crochet (fpdc):
- Yarn over, insert hook from front to back around the post of the dc below, yarn over and pull up, complete dc. This creates a raised ridge that looks like the subtle border texture in the photo.
Visual checkpoint: The border should look like a wide mat frame, with the patchwork sitting like artwork in the center.
Step 7, make it rug ready
If using on the floor, you have two easy upgrades:
- Add a non slip rug pad underneath
- Add a backing
Backing option A, fabric backing:
- Cut canvas or non slip fabric slightly smaller than the rug.
- Hand stitch around the inside edge of the final border round.
Backing option B, non toxic rug backing spray:
- Follow product instructions carefully.
- Apply evenly on the back, let dry fully.
Visual checkpoint: The piece should stay flat and not scoot when you step on it.
Troubleshooting
- Squares are wavy: They were not blocked evenly. Re block and pin corners square.
- Joins feel bulky: Use mattress stitch instead of slip stitch, or switch to a thinner joining yarn.
- Border ripples: Too many stitches along the perimeter. Reduce by skipping one stitch every 10 to 12 stitches on long sides.
- Border pulls tight and cups: Too few stitches. Add an extra increase at corners, or work 2 stitches in some spots along the sides.
- Rug feels too stretchy: Use a smaller hook for the border and consider a cotton blend yarn.
Finishing details
- Weave in ends deeply, especially at joins, because rugs get more friction than blankets.
- Steam block the full piece, pinning the corners of the border so the frame sits perfectly square.
- Optional label upgrade: Add a stitched label at the back corner.
- Optional puff upgrade: If you want more plushness like the photo, work the square center round as puff stitches instead of dc.
Shop Similar
- Pastel worsted yarn assortment
- Sage green yarn for crochet border
- Blocking mats and pins set
- Non slip rug pad for living room
- Heavy duty yarn needle set
Style It With
If there is one secret to getting a magazine worthy finish, it is consistency. Choose a calm palette, keep your tension steady, and take the extra step to block your work so edges turn crisp and motifs read clean from across the room. Even the most playful designs look elevated when the joins are neat and the border lies perfectly flat.
As you work through these five looks, give yourself permission to customize. Make the granny squares larger for a bolder graphic. Stretch the chevron into a longer bed runner. Turn the bunny band into a pillow front or a wall hanging. Add fewer flowers for a minimal garden vibe, or go full maximalist with extra leaves and tiny blossoms. And if you are making these as gifts, a simple fabric tag or a soft backing turns handmade into heirloom fast.
When you are done, style your finished piece where you will actually see it every day. Over the arm of a chair. At the end of the bed. Under a sunny window near your plants. Because the best part of crochet is not just the making. It is living with what you made, and watching it warm up your space in the prettiest way.