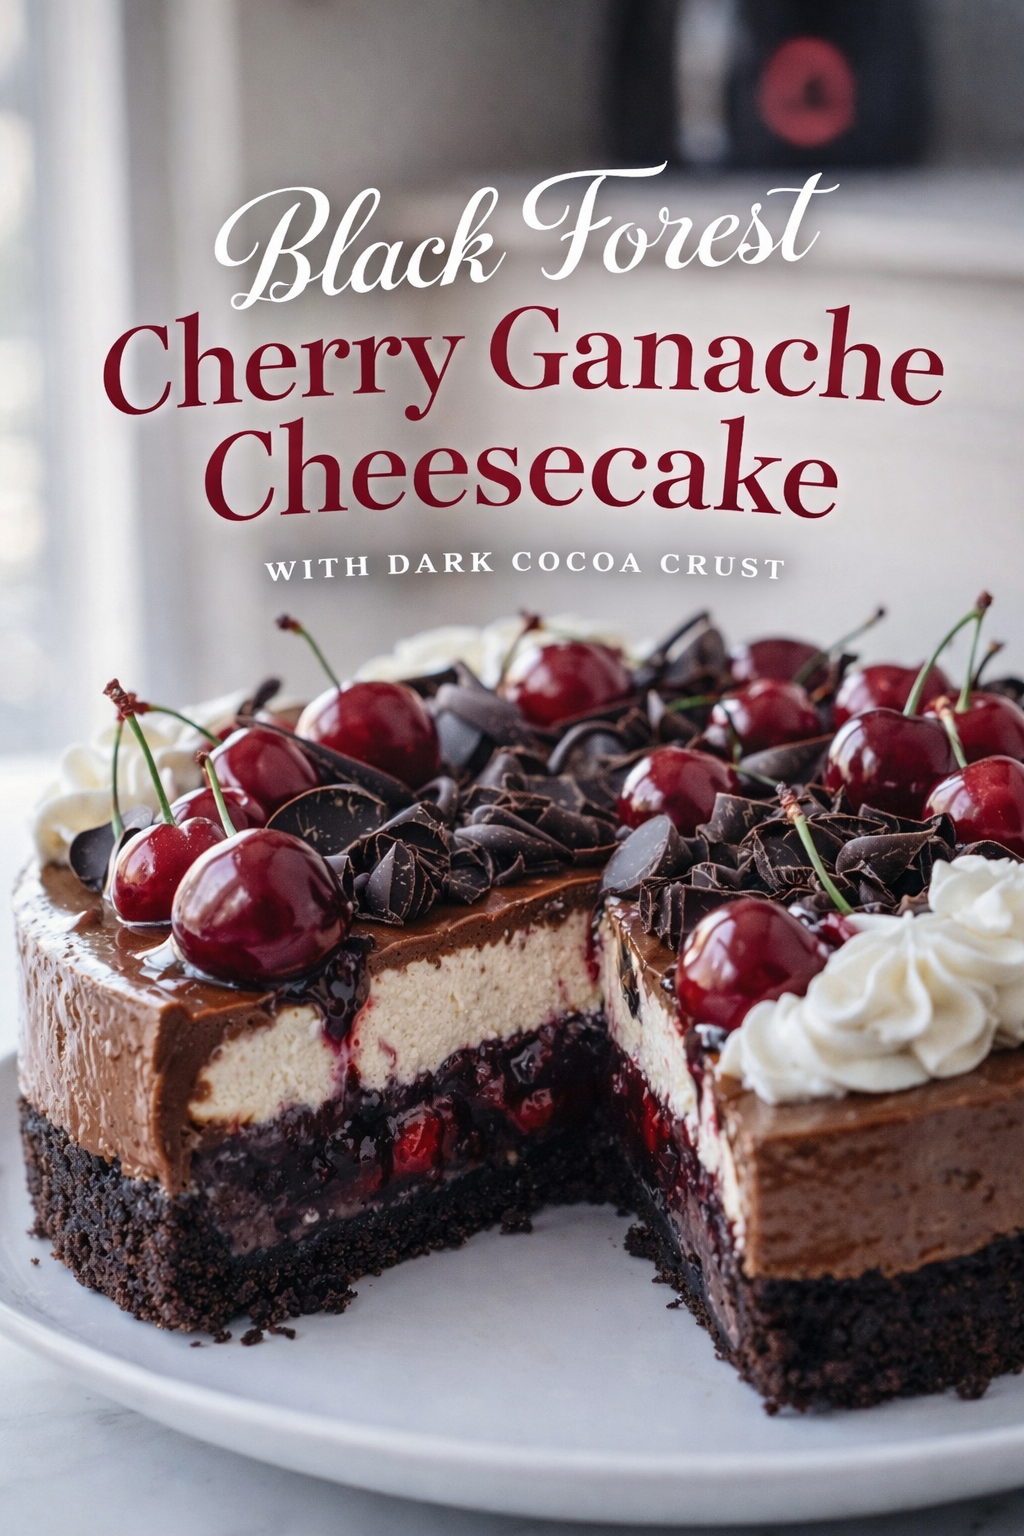
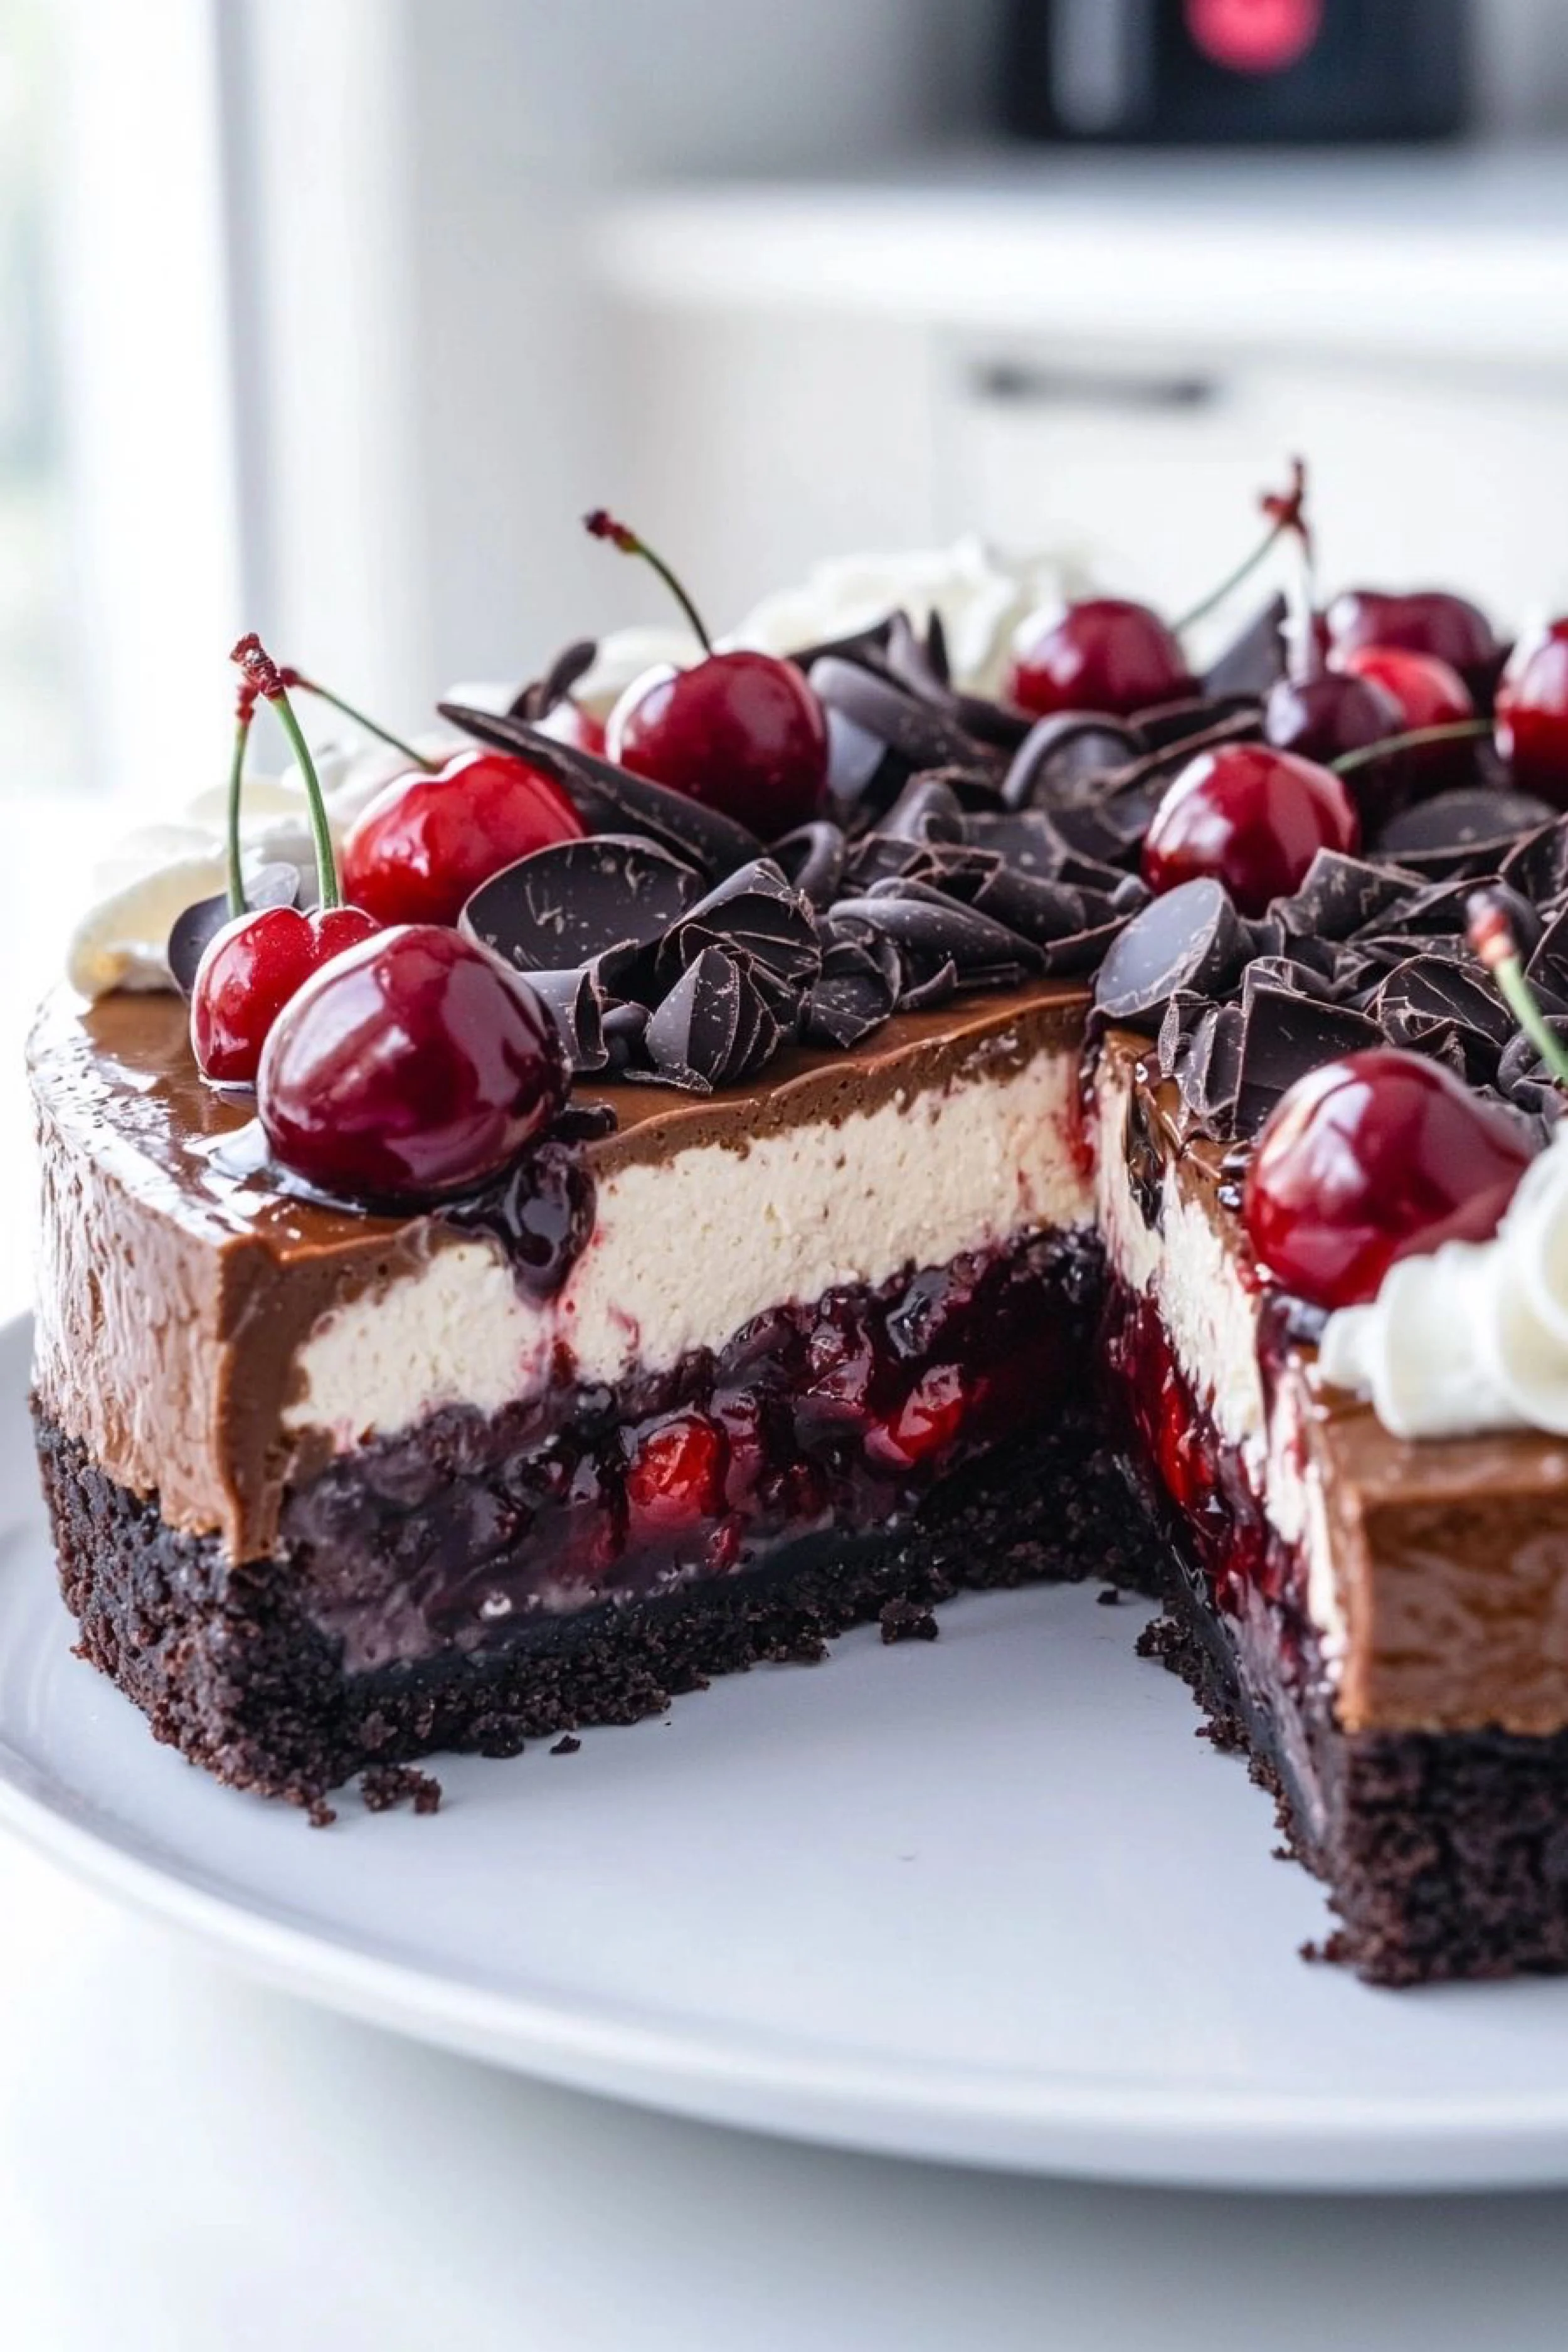
Black Forest Cherry Ganache Cheesecake with Dark Cocoa Crust

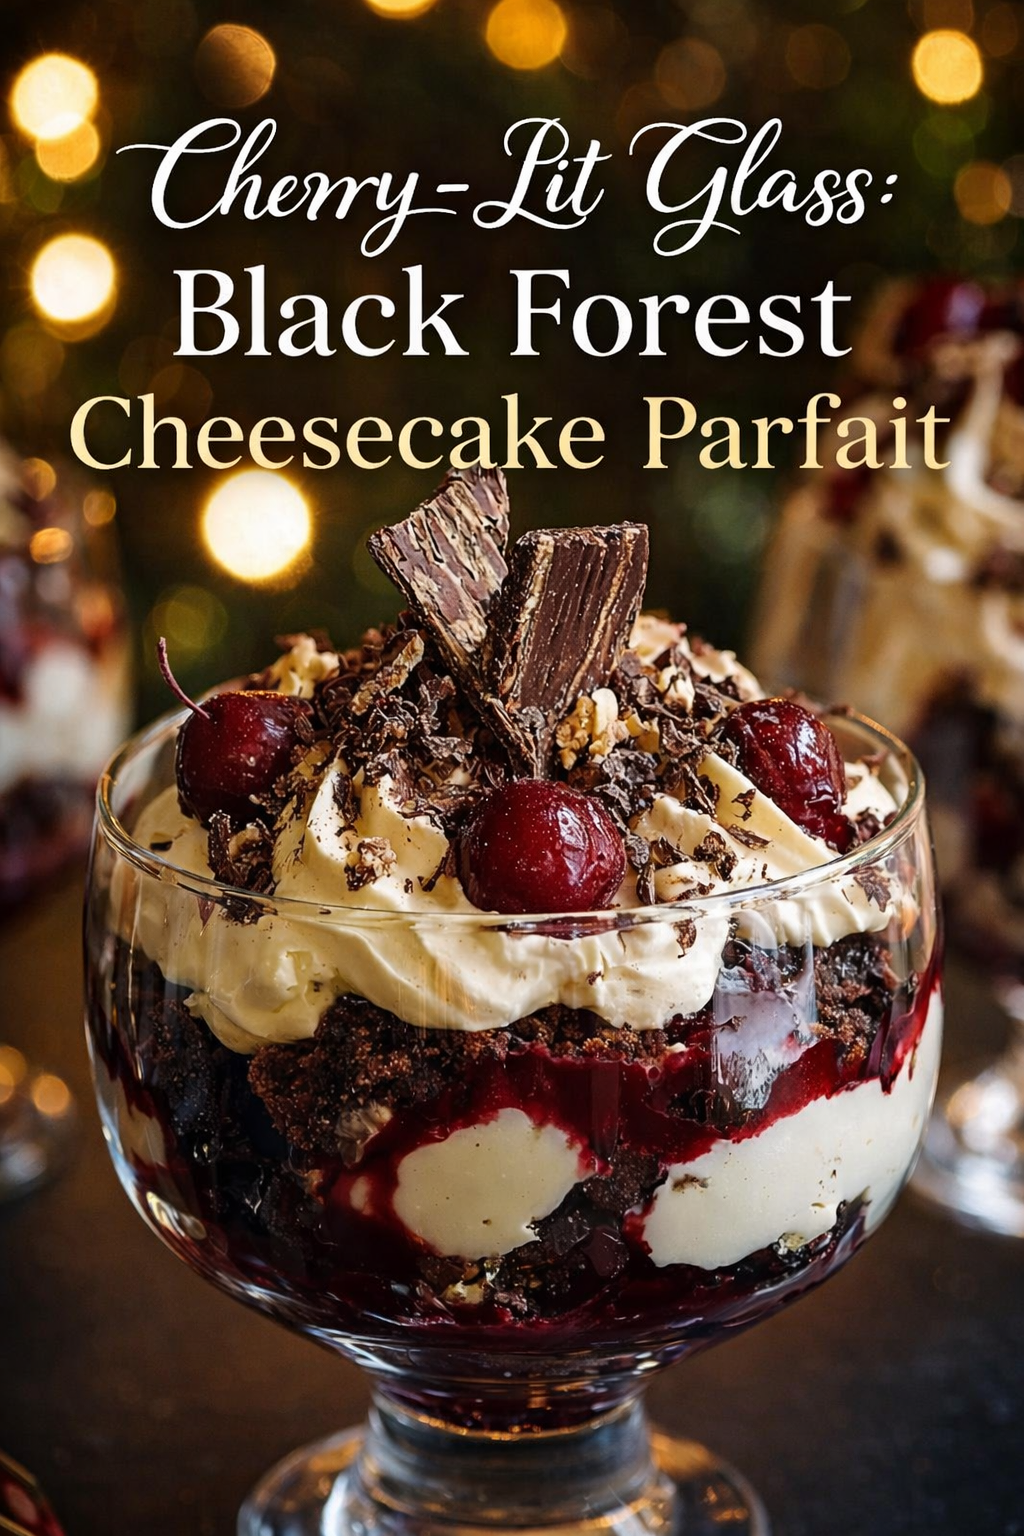
The first thing you notice is the shine—an inky, mirror-smooth blanket of chocolate ganache catching the window light like lacquer on a grand piano. It pools softly at the edges, draping over the sides with a slow, decadent confidence, as if gravity itself has decided to linger. Then the cherries: glossy, ruby-dark, perched like jeweled ornaments along the top, their stems curling upward in tiny flourishes. A snowfall of chocolate curls scatters between them—shaved, broken, irregular—like midnight confetti. Around the rim, clouds of whipped cream hold their shape in soft peaks, bright against the deep cocoa and cherry tones.
A slice has been lifted, and the interior tells the real story. Beneath the ganache lies a pale, creamy cheesecake layer—thick, clean, and smooth—like porcelain. Below that, the center turns wild: a seam of cherry filling, dark and jammy, threaded with whole fruit that looks almost black until it catches the light and flashes red. It’s the kind of filling that promises a tart snap, the one thing that can cut through chocolate’s velvet insistence. At the base, a dark crumb crust anchors everything, nearly espresso in color, dense and decisive. Even the crumbs on the plate look intentional—proof of a crust that holds, then gives way with the most satisfying crack.
This dessert belongs to a certain mood: late-afternoon quiet, curtains glowing, the kitchen clean except for the evidence you don’t mind leaving out—the smudge of cocoa on a towel, the faint scent of vanilla in the air. There’s a ritual to it that feels calming rather than complicated. The soft thrum of a mixer, the patient pause while cream cheese warms, the moment chocolate meets hot cream and turns glossy. You set out tools like you’re laying down a map: a sturdy springform pan that won’t leak, parchment paper rounds, and a heavy-duty silicone spatula for scraping every last ribbon of batter. It’s not about fuss. It’s about control—small choices that add up to a slice that looks like a bakery’s best day.
Cherry and chocolate can be loud together, but here they’re balanced, almost elegant. The ganache is dark enough to feel grown-up, the cherries bright enough to keep it playful, and the cheesecake layer calm enough to make it all feel intentional. Even the crust has a bitterness that keeps the sweetness honest—especially when you build it with deep, rich cocoa powder made for baking and a cookie crumb that leans chocolate instead of sugary. The result is dramatic without being messy, indulgent without being heavy, and bold without losing its composure.
There’s a moment—right after the bake—when the cheesecake is still warm and the kitchen smells faintly toasted, like vanilla and chocolate met in the air and decided to stay. That’s when patience becomes the secret ingredient. Cheesecake is a slow dessert. It asks for cooling, then chilling, then one final set of finishing touches that turn it from good to unforgettable. The payoff is texture: a filling that slices clean, a cherry layer that stays where it belongs, and a ganache top that glides under the knife without cracking. If you’ve ever chased that perfect cut, the kind that shows every layer like a photograph, you’ll appreciate the quiet power of a few simple supports: an instant-read thermometer for doneness confidence, a roasting pan for an easy water bath, and extra-wide heavy-duty foil to protect the pan.
And then, the finishing—those little luxury moves that make a homemade dessert feel editorial. Chocolate curls don’t have to be perfect; they just have to look plentiful. A quality dark chocolate bar for shaving gives you curls that snap and scatter, making the top look generous instead of staged. Cherries shine best when they’re fresh, firm, and pitted neatly—especially with a simple cherry pitter that keeps your hands clean. Even whipped cream becomes more reliable with the right approach: very cold cream, a steady whip, and a tool that holds air without overworking it, like a hand mixer with multiple speeds if you don’t want to pull out the big machine.
When you finally bring it to the table, it doesn’t just taste like dessert—it tastes like effort that paid off. The fork goes through ganache first, then the creamy layer, then the cherry seam that clings in glossy strands, then the crust that breaks with a muted crunch. The flavors rise in waves: dark chocolate, vanilla cream, tart cherry, cocoa crumb. It’s the kind of slice that makes people go quiet for a second, not because they’re being polite, but because their brains are recalibrating—sweet, bitter, fruity, creamy, all at once. And when they look up, there’s usually a smile that says the same thing: this is the one you remember.
Black Forest Cherry Ganache Cheesecake with Dark Cocoa Crust
A bold, bakery-style cheesecake with a dark chocolate crumb crust, a jammy cherry center, and a glossy chocolate ganache finish—topped with whipped cream, cherries, and chocolate curls.
Ingredients
Crust
- 24 chocolate sandwich cookies (or chocolate wafers), finely crushed
- 5 tbsp unsalted butter, melted
- 1 tbsp Dutch-process cocoa powder
- Pinch of salt
Cheesecake
- 24 oz cream cheese, room temperature
- 1 cup granulated sugar
- 1 cup sour cream, room temperature
- 1 tbsp vanilla extract
- 3 large eggs, room temperature
- 2 tbsp all-purpose flour (optional, for extra stability)
- Pinch of salt
Cherry Layer
- 2 cups cherries (fresh or frozen), pitted
- 1/2 cup sugar
- 1 tbsp lemon juice
- 2 tbsp cornstarch + 2 tbsp water (slurry)
- 1/2 tsp almond extract (optional)
Chocolate Ganache
- 8 oz dark chocolate, chopped
- 1 cup heavy cream
- Pinch of salt
Topping
- Whipped cream
- Whole cherries
- Chocolate curls/shavings
Method
- Prep pan: Line the bottom of a 9-inch springform pan with parchment; lightly grease sides.
- Crust: Mix cookie crumbs, cocoa, salt, and butter. Press firmly into bottom. Bake at 350°F for 10 minutes. Cool.
- Cherry layer: Simmer cherries, sugar, and lemon juice until bubbling. Stir in slurry; cook until thick and glossy. Cool completely.
- Filling: Beat cream cheese and sugar until smooth. Mix in sour cream, vanilla, salt, and flour (if using). Add eggs one at a time on low just until combined.
- Assemble: Pour half the batter over crust. Spoon cooled cherry filling into center, leaving a 1-inch border. Cover with remaining batter.
- Bake: Bake in a water bath at 325°F for 60–75 minutes, until edges are set and center has a gentle wobble.
- Cool + chill: Cool in oven with door cracked 1 hour. Cool to room temp, then chill at least 8 hours (overnight best).
- Ganache: Heat cream until steaming, pour over chopped chocolate, rest 2 minutes, stir smooth. Cool slightly, then pour over chilled cheesecake.
- Finish: Pipe whipped cream, add cherries, scatter chocolate curls. Slice cleanly with a warm, dry knife.
The magic of this cheesecake is that it looks dramatic while relying on a few repeatable techniques: temperature control, gentle mixing, and patient chilling. If you treat it like a layered build instead of a single bake, every slice comes out crisp-edged and photogenic—ganache glossy, cherry seam centered, crust intact.
1) Set yourself up for clean release and a crisp crust
Start with a reliable 9-inch springform pan. Line the base with parchment paper so the crust doesn’t cling, and lightly grease the sides to prevent the cheesecake from tearing as it settles.
For the crust, crushing matters. A fine, even crumb presses into a sturdier base and slices without crumbling. A food processor for quick cookie crumbs makes this effortless, but a zip bag and rolling pin works too—just keep going until the texture looks like damp sand. Add melted butter and a spoonful of Dutch-process cocoa powder to deepen that near-black color you see in the photo. Bake the crust briefly so it sets and stays crisp beneath the filling.
Tip: Press the crust firmly with a flat-bottomed glass. The tighter the press, the cleaner the slice.
2) Build a cherry layer that stays put
The center looks luscious because it’s thick—not runny. Whether you use fresh or frozen cherries, you want a filling that bubbles, then tightens into a glossy, spoonable jam. Simmer the fruit with sugar and lemon for brightness, then add a cornstarch slurry. Keep cooking until it coats the back of a spoon.
If you’re working with fresh cherries, pitting can get messy fast. A simple cherry pitter saves time and keeps the fruit intact so the layer has those jewel-like bites instead of mush. Let the cherry filling cool completely before it goes anywhere near the cheesecake batter—warm filling encourages sinking and bleeding.
Troubleshooting: If your cherry layer seems loose, you didn’t cook it long enough after adding the slurry. Put it back on heat and simmer until thickened.
3) Mix the batter for silk, not air
Cheesecake cracks when it gets too much air and then expands and collapses. The goal is smooth and dense, not fluffy. Let cream cheese, sour cream, and eggs come to room temperature first—cold ingredients force overmixing. Use a stand mixer with a paddle attachment or a hand mixer, but keep the speed low once you start adding eggs.
Beat cream cheese and sugar until creamy, scraping often with a flexible silicone spatula. Add sour cream, vanilla, and salt. Then add eggs one at a time, mixing just until each disappears. If you want extra stability for picture-perfect slices, a small amount of flour helps bind moisture and reduce weeping—optional, but useful.
Tip: Tap the bowl on the counter a few times to release hidden air bubbles before you pour.
4) Assemble so the cherry seam lands in the middle
Pour half the batter onto the cooled crust. Then spoon the cooled cherry filling into the center, leaving a clear border around the edges. That border matters: it keeps the cherry layer from touching the pan wall, where it can burn or leak. Pour the remaining batter over top, and smooth gently with an offset tool like a small icing spatula.
If you want the sharpest layers, chill the assembled cheesecake (unbaked) for 10–15 minutes while the oven finishes heating. This quick rest slightly thickens the batter and helps the cherry layer stay suspended.
5) Bake low and humid for a level top
A water bath is the quiet hero here. Wrap the outside of the springform pan in extra-wide heavy-duty foil (two layers), set it in a larger pan, and pour hot water into the outer pan. The steam keeps the bake gentle and reduces cracking, while the lower temperature encourages an even set.
Bake at 325°F until the edges are set and the center still wobbles like soft gelatin when you nudge the pan. If you like precision, use an instant-read thermometer: around 150–155°F in the center is a great target for a creamy set without overbaking.
Troubleshooting: If the center looks soupy after the recommended bake time, your oven may run cool. Keep baking in 5–8 minute increments, watching for that gentle wobble, not a firm center.
6) Cool slowly to prevent cracks
Turn the oven off, crack the door, and let the cheesecake sit for an hour. This gradual cooldown prevents the sudden temperature drop that causes dramatic cracking. Then move it to the counter to reach room temp before chilling.
Chill at least 8 hours, ideally overnight. Cheesecake is at its best after a long rest; the texture tightens, the layers settle, and the flavors deepen.
Tip: For clean slices, freeze the cheesecake for 20–30 minutes before cutting (after it’s fully chilled).
7) Ganache that shines instead of streaks
For that mirror-like top, use good chocolate and the right ratio. Chop dark chocolate finely—a quality dark baking chocolate melts more evenly and tastes cleaner. Heat cream until steaming (not boiling), pour over the chocolate, let it sit two minutes, then stir from the center outward until glossy.
Let ganache cool slightly before pouring so it thickens enough to drape without running off completely. Pour in the center and coax it toward the edges with a gentle tilt. If you want controlled drips, use the back of a spoon to nudge small amounts over the rim.
Troubleshooting: If ganache looks grainy, the cream may have been too hot or the chocolate overheated. Add a tablespoon of warm cream and stir gently until it smooths.
8) The finishing touches that make it look boutique
Whipped cream gives contrast and height. Chill your bowl if you can, then whip cold cream to medium-stiff peaks. Pipe or spoon dollops around the edge. For the top, add cherries (fresh or well-drained) and shower chocolate curls.
Chocolate curls are easiest when you shave a room-temp bar with a vegetable peeler. Keep a classic peeler on hand, and choose a firm chocolate bar that holds shape. Scatter curls generously—imperfection reads as abundance.
9) Slice like a pastry chef
Use a long, sharp knife. Dip it in hot water, wipe dry, and cut. Repeat between slices. That single habit is what keeps the ganache edge clean and the cherry layer crisp in the cut. A good chef’s knife with a long blade makes this easier, especially when you’re cutting through a chilled, dense filling.
Easy variations
- Extra-dark: Add espresso powder to the crust (1–2 tsp) for deeper cocoa notes.
- No bake vibe (without sacrificing structure): Keep the bake, but make the ganache slightly thicker and chill longer for a firmer top.
- Different fruit: Swap cherries for raspberries or blackberries; keep the same thickening method.
- Flavor lift: A touch of almond extract in the cherry layer intensifies that classic Black Forest profile.
Treat the steps like a sequence of sets—crust set, cherry set, cheesecake set, ganache set—and you’ll end up with that exact kind of slice: dramatic, clean, and unmistakably decadent.