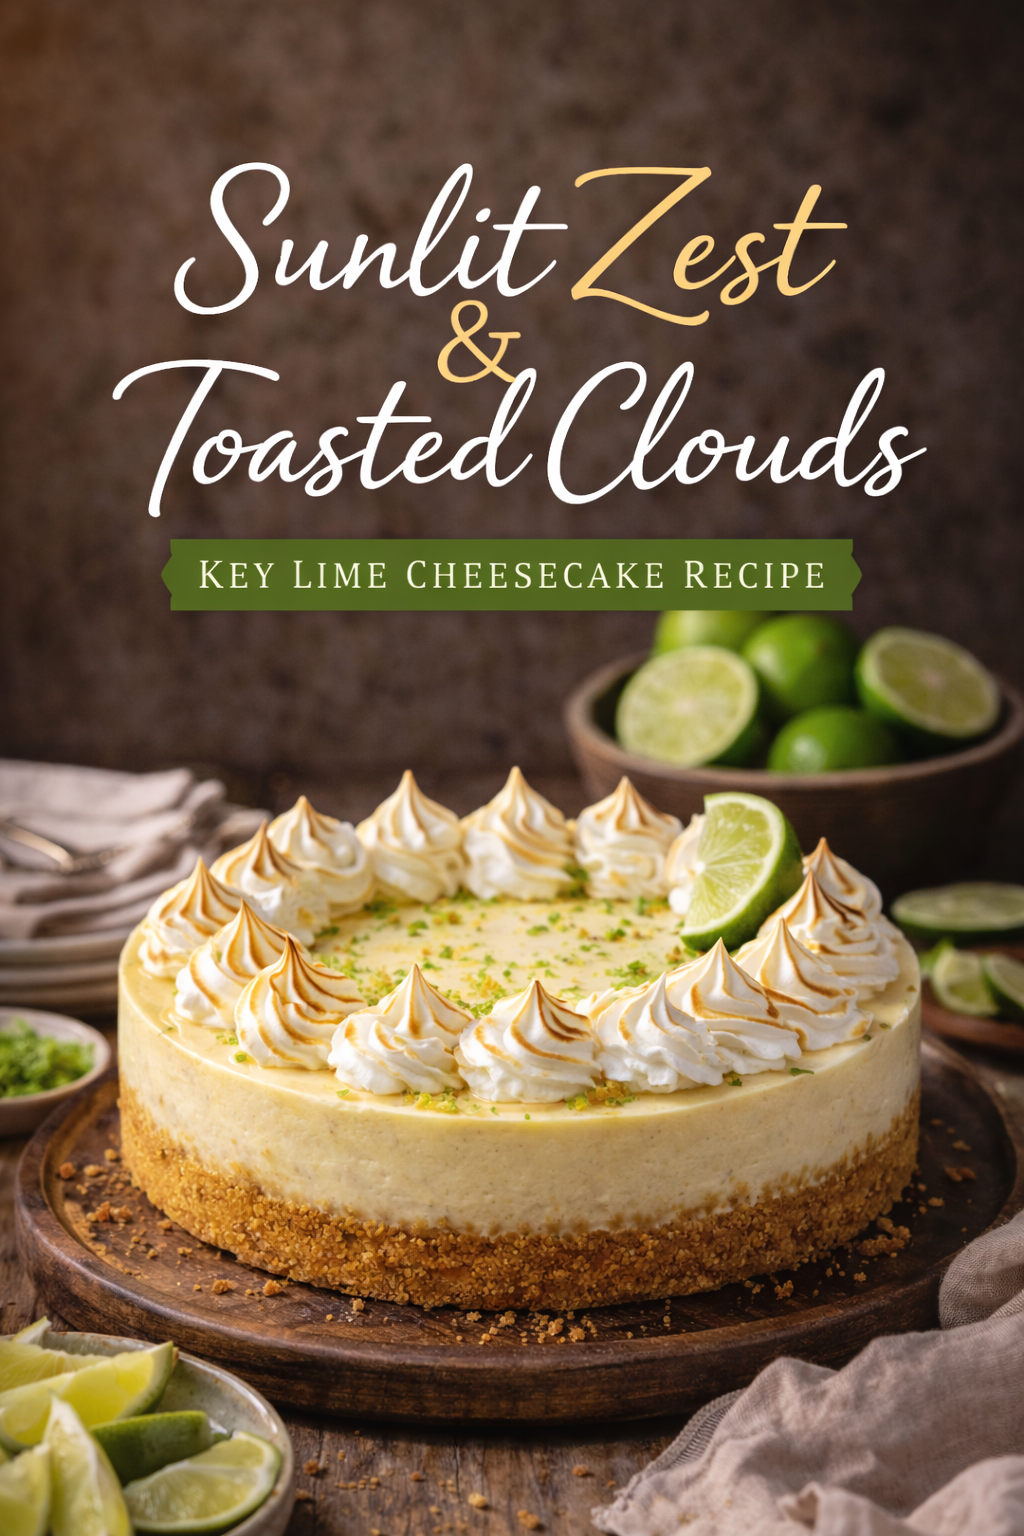
Sunlit Zest & Toasted Clouds: Key Lime Cheesecake Recipe

The first thing that hits is the glow—soft, warm, almost candlelit—spilling across a cheesecake that looks like it was made for slow afternoons and good company. The crust sits like a bronzed foundation, crumbly and confident, hugging the base with a sandy, toasted-graham richness that promises crunch before the cream. Above it, the filling is pale and luminous, the color of vanilla silk kissed by citrus, perfectly level like it was smoothed with care and patience. Around the rim, piped peaks of meringue rise in tidy swirls, each one lightly torched to a caramelized tan—sweet smoke and sugar warmth captured in a single finish.
The scene is rustic in the most elegant way: weathered wood, linen folded like a quiet invitation, stacks of plates waiting to be used, and limes everywhere—whole, halved, and wedged—like green punctuation marks against the brown backdrop. A lime wedge rests right on top, glossy and bright, while tiny flecks of zest scatter across the surface like confetti that decided to stay refined. It’s the kind of dessert that feels celebratory without trying too hard, the kind that makes a table look dressed even before anyone sits down.
There’s a certain luxury in citrus desserts when they’re done this way—sharp and clean but softened into something creamy, the tang turned into a velvet ribbon. Key lime has a particular attitude: it’s brighter than lemon, more playful than plain lime, and it cuts through richness like a perfectly timed joke. Here, that zing is balanced by the dense calm of cheesecake—cool, thick, and smooth—so every bite lands in that sweet spot between refreshing and decadent. It tastes like summer dressed up for evening, like sunlight filtered through linen curtains.
A cheesecake like this always feels like a promise kept. It’s not rushed. It’s chilled and settled, allowed to become itself. The crust is pressed and toasted until it smells nutty and golden; the filling is mixed until it turns glossy, then baked until it’s just set—no drama, no cracks, only that gentle jiggle in the center that says it’s done. The finishing touch is the toasted meringue crown, a ring of “just one more slice” energy, brûléed at the tips for a hint of campfire sweetness. Using a kitchen torch for quick, controlled toasting turns the final step into a small performance—one that smells like caramel and feels oddly satisfying.
The atmosphere around it is the kind you want to step into. You can almost hear the soft clink of forks against plates, the hush before the first bite, the immediate little “wow” that happens when tart citrus meets creamy richness. The limes in the bowl look freshly washed and heavy with juice, the halved ones showing their pale, glistening interiors. Nearby, a small dish of zest sits ready—because whoever made this understands that fragrance matters as much as flavor. A fine mist of green across the top doesn’t just decorate; it wakes everything up. If you’ve ever used a microplane zester that makes citrus come alive, you know that first aromatic burst can set the whole mood before you even taste.
This is a dessert that plays with contrast: cool filling against warm toast, crisp crust against satin cream, bright lime against sweet sugar. It’s also a dessert that photographs like a dream—simple shapes, clean lines, and those toasted peaks that give texture without clutter. On a wooden board, it looks grounded and artisanal; on a white platter, it looks like a boutique bakery centerpiece. Either way, it’s the kind of thing you bring out when you want the room to feel a little more alive.
And yet, it’s approachable—more “doable luxury” than fussy pastry. The tools are familiar: a springform pan, a mixer, a baking dish for a gentle water bath if you want extra insurance. Having a reliable springform pan that releases cleanly can make the difference between a confident unmold and a nervous moment at the counter. The filling comes together in a smooth rhythm: cream cheese, sugar, eggs, and citrus—mixed just until unified, never whipped into air. The secret isn’t complexity; it’s restraint.
Even the meringue, which sounds like a pastry-chef flex, is really just egg whites and sugar treated with respect. A steady bowl, clean whisk, and a slow drizzle of sweetness until it turns glossy and holds peaks like sculpted satin. A stand mixer helps, of course; but so does a hand mixer with enough power for stiff peaks if that’s what fits your kitchen. When it’s piped on, it transforms the cheesecake from “beautiful” to “memorable”—a crown that signals celebration.
This is the kind of recipe that fits more than one story. It can be a weekend project that makes the fridge feel fancy for days. It can be the dessert that ends a dinner with a clean, bright finish. It can be the thing you slice when you want a quiet reward, the forkful that tastes like a pause button. Even the garnish is a mood—fresh wedges, extra zest, maybe a whisper of flaky salt if you like your sweetness sharp-edged. A clean slice reveals the layers: crumb, cream, cloud. And once you’ve tasted it, you understand why the whole table looks ready before anyone even arrives.
When the knife goes in, you want that perfect cut—smooth and defined, crust holding its line. A warm blade helps; so does a sharp chef’s knife that glides through chilled cheesecake. And then there it is on the plate: pale yellow-green cream, toasted swirls, a wedge of lime like a signature. It doesn’t need extra decoration. It already feels like a moment.

This Key Lime Cheesecake is creamy, bright, and finished with toasted meringue for a sweet, lightly caramelized crown.
Ingredients
Crust
- 2 cups graham cracker crumbs
- 1/3 cup granulated sugar
- 1/2 cup unsalted butter, melted
- Pinch of salt
Filling
- 24 oz cream cheese, room temperature
- 1 cup granulated sugar
- 1 cup sour cream, room temperature
- 3 large eggs, room temperature
- 2/3 cup key lime juice (or fresh lime juice)
- 1 tbsp key lime zest (plus extra for garnish)
- 1 tsp vanilla extract
- 2 tbsp all-purpose flour (optional, for stability)
- Pinch of salt
Meringue Topping
- 4 large egg whites, room temperature
- 1 cup granulated sugar
- 1/4 tsp cream of tartar (optional)
- 1/2 tsp vanilla extract
Method / Instructions
- Prep: Heat oven to 325°F. Grease a 9-inch springform pan and line the bottom with parchment.
- Crust: Mix crumbs, sugar, salt, and melted butter. Press firmly into the pan bottom (and slightly up the sides). Bake 10 minutes. Cool.
- Filling: Beat cream cheese and sugar until smooth. Mix in sour cream, zest, vanilla, salt (and flour if using). Add eggs one at a time on low, just until combined. Stir in lime juice.
- Bake: Pour filling into crust. Bake 55–70 minutes until edges are set and center jiggles slightly. Turn oven off, crack the door, rest 45 minutes. Cool to room temp, then chill at least 6 hours (overnight best).
- Meringue: Whip egg whites (and cream of tartar) to soft peaks. Gradually add sugar and whip to glossy stiff peaks; beat in vanilla.
- Finish: Pipe or spread meringue around the edge. Toast with a torch or under a broiler briefly. Garnish with extra zest and lime slices. Slice chilled.
Step 1: Set the stage for a clean, crack-free bake
Start by bringing the key ingredients to room temperature—cream cheese, sour cream, and eggs. This matters because cold dairy tends to mix lumpy, and overmixing to “fix” lumps adds air that can rise, puff, and later sink into cracks. A smooth batter begins with soft cream cheese and a patient hand. If you like a truly seamless release, line the base with parchment and use a 9-inch springform pan that locks tightly.
Step 2: Build a crust that holds its line
Combine graham crumbs, sugar, salt, and melted butter until the texture feels like damp sand. Press firmly—really firmly—into the pan. The tighter the pack, the cleaner the slice. Use the bottom of a measuring cup to compress it flat and even. Bake the crust briefly so it sets and smells toasted; that quick bake keeps it from going soggy under citrus filling. If you want extra depth, swap in crushed vanilla wafers or add a tablespoon of finely shredded coconut.
Troubleshooting:
- Crust crumbles when sliced: it wasn’t packed tightly enough or needs a touch more butter.
- Crust tastes bland: add a pinch more salt; it sharpens sweetness beautifully.
Step 3: Mix the filling without whipping in air
Beat cream cheese and sugar until smooth, then add sour cream. Keep the mixer on low to medium—speed isn’t your friend here. Add zest, vanilla, salt, and (optionally) a little flour for stability. The flour can help reduce surface cracking and make the cheesecake easier to slice neatly, especially if the bake runs a touch hot.
Add eggs one at a time, mixing just until each disappears. Overbeating eggs is a classic crack-maker. Finally, stir in the key lime juice. The batter should look glossy and cohesive, not fluffy. For maximum citrus perfume, zest the limes right before mixing using a microplane zester that produces fine, fragrant zest.
Variation:
- For a more “Key Lime Pie” vibe, replace 1/3 cup of the sugar with sweetened condensed milk (and slightly reduce sour cream). The texture becomes silkier and the tang leans dessert-bar bright.
Step 4: Bake gently and read the jiggle
Pour the filling over the cooled crust. Bake at 325°F until the edges are set and the center has a controlled wobble—think: a few inches in the middle still jiggles like soft custard, not like liquid. That center will finish setting as it cools.
If you want extra insurance, use a water bath (wrap the pan in foil, set in a roasting pan, add hot water halfway up). It buffers heat and reduces cracks. A simple option is to place a pan of hot water on the rack below instead—less fuss, still adds humidity.
Troubleshooting:
- Top browns too fast: oven runs hot; tent lightly with foil.
- Cracks appear: usually from overmixing, overbaking, or cooling too quickly. Don’t panic—meringue makes it disappear.
Step 5: Cool slowly to protect texture
When it’s close to done, turn the oven off, crack the door, and let the cheesecake rest inside for 30–60 minutes. This gradual temperature shift prevents the surface from contracting too fast. Then cool to room temperature before chilling.
Chill at least 6 hours, ideally overnight. Cheesecake is at its best when it’s fully set—denser, cleaner, and more flavorful. For the sharpest slices, warm the blade under hot water, wipe dry, and cut in confident strokes with a sharp chef’s knife that stays steady through chilled desserts.
Step 6: Make glossy meringue that holds peaks
Use a clean, grease-free bowl. Even a small smear of fat can sabotage egg whites. Start whipping egg whites (and cream of tartar if using) to soft peaks, then add sugar gradually. Keep whipping until stiff peaks form and the meringue looks glossy, not grainy. Rub a tiny pinch between fingers—if it feels sandy, whip a bit longer.
Options:
- Classic French meringue: easiest, what you’re making here—great for torching.
- Swiss meringue: sugar dissolved over gentle heat before whipping—extra stable if you want a more polished finish.
A stand mixer makes this feel effortless, but a strong hand mixer works too—especially an electric hand mixer with solid peak-building power.
Step 7: Pipe, toast, and make it look like a bakery centerpiece
Once the cheesecake is fully chilled, pipe the meringue around the edge using a star tip, or spoon it on in dramatic swirls. Toasting is where the magic happens: the peaks turn golden, the aroma shifts to caramel, and the whole dessert feels elevated.
Use a torch for precision and control—short passes, keep the flame moving. A torch is also the safest way to toast without warming the cheesecake too much; a culinary torch designed for desserts gives you that crisp, brûléed edge without a broiler’s intensity.
If using a broiler:
Place the cheesecake on a cold sheet pan, broil briefly, and watch constantly. Seconds matter.
Step 8: Garnish for brightness and balance
Finish with extra lime zest and a few wedges. Zest adds aroma right at the surface, so it reads instantly when sliced. For a slightly more grown-up edge, add the tiniest pinch of flaky salt over the meringue—just enough to sharpen the sweet.
Step 9: Storage and make-ahead strategy
- Make-ahead win: bake the cheesecake a day early, chill overnight, then meringue and toast right before serving.
- Storage: keep covered in the fridge up to 4 days. The meringue holds well, though it’s best within 24–48 hours for peak texture.
- Freezing (without meringue): freeze the plain cheesecake (well wrapped) up to 2 months; thaw overnight in the fridge, then top and toast.
Step 10: Flavor swaps that keep the vibe
- Coconut-lime: add 1/2 tsp coconut extract and use toasted coconut in the crust.
- Ginger-lime: replace part of the graham crumbs with crushed ginger snaps.
- Vanilla-bean lime: fold in vanilla bean paste for a richer, rounder base.
The end result should slice cleanly: crisp crust, creamy citrus center, and toasted peaks that melt into marshmallow softness at the edges. Bright, calm, and just dramatic enough to feel like an occasion—no matter what day it is.