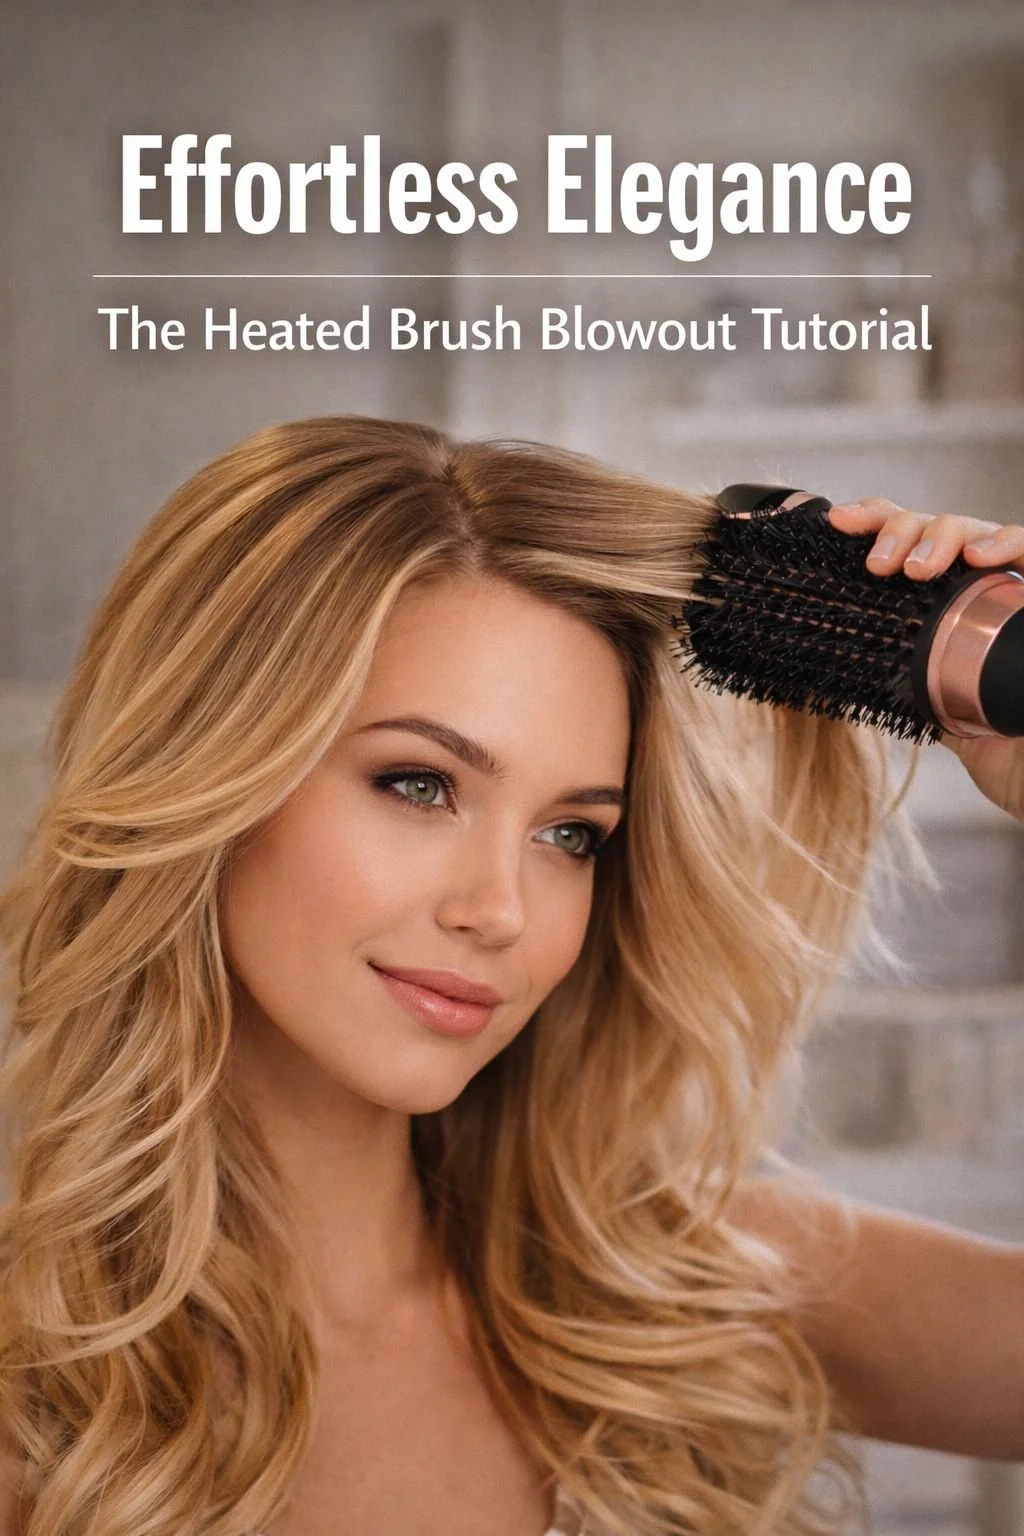
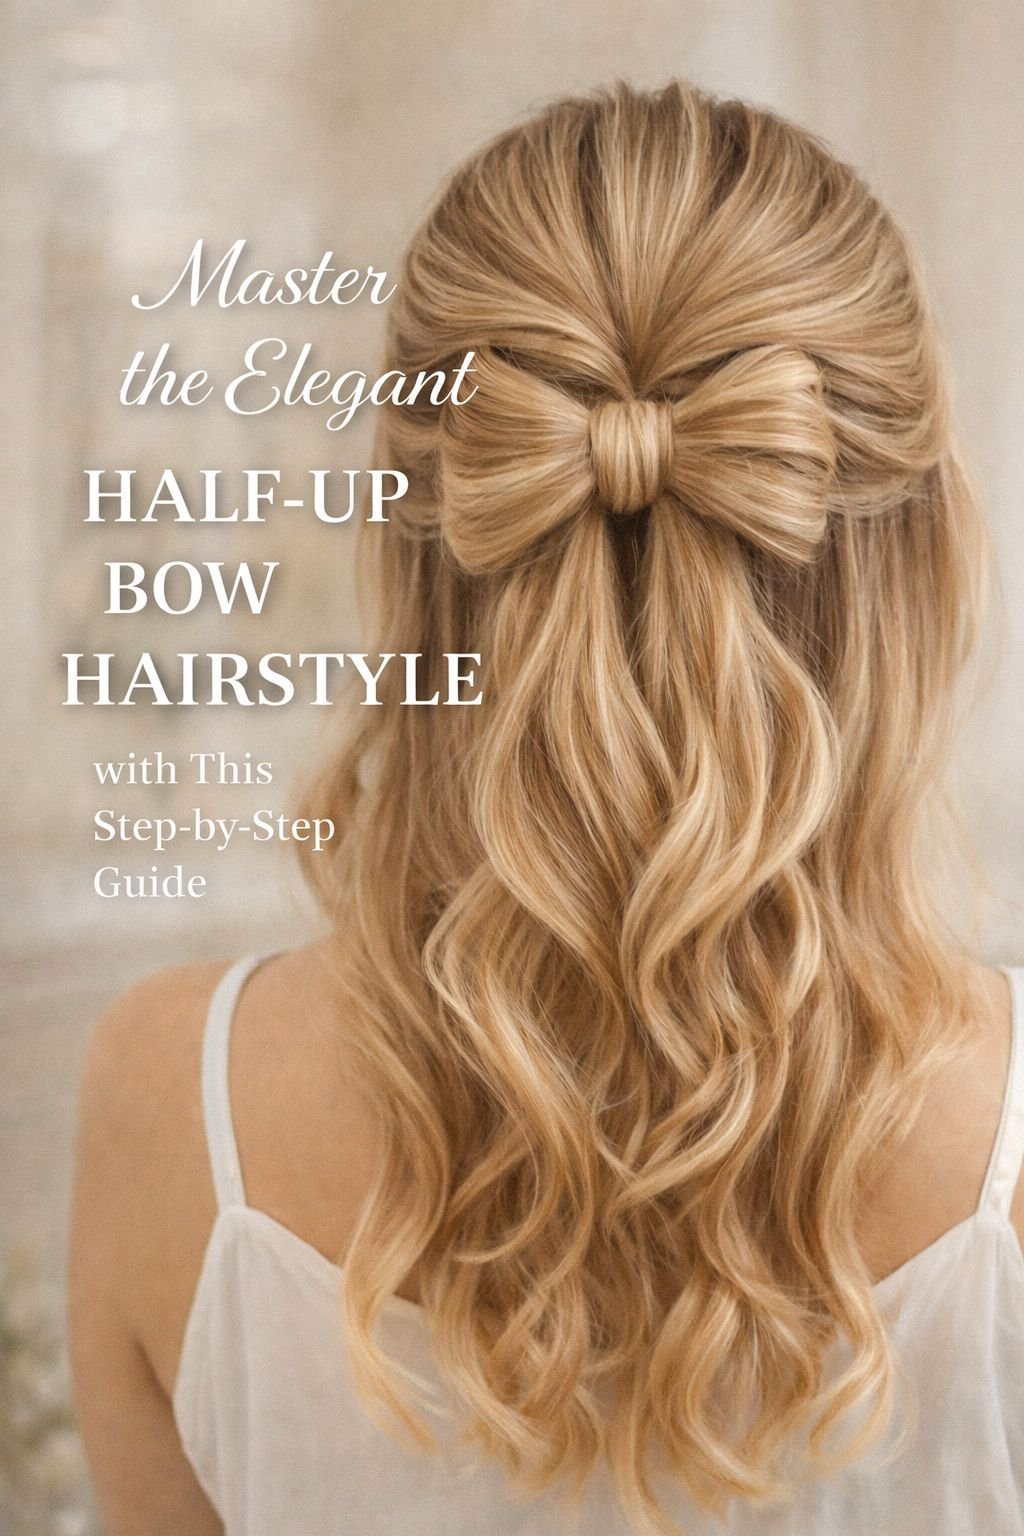
Master the Elegant Half-Up Bow Hairstyle with This Step-by-Step Guide
The Art of the Elegant Half-Up Bow: Why This Whimsical Hairstyle Is Having a Moment
There’s something inherently charming about the bow. From velvet ribbons tied around ponytails to oversized bows atop runway-ready blowouts, this detail has always flirted with the boundary between girlishness and grown-woman polish. But today’s beauty world has reimagined the bow into something far more intricate and modern—something that doesn’t just adorn your hair but is created from your hair. Enter the elegant half-up bow hairstyle.
This isn’t your little sister’s hairdo. This is structured softness. Feminine sophistication. The kind of style that turns heads at weddings, garden parties, brunches, and even on the casual coffee run—when done with intention. If you’ve seen this look taking over Pinterest boards, Instagram reels, and viral TikToks, you’re not alone. The half-up bow is having a major moment, and it deserves a place in your hairstyle rotation.
But why now? And what makes this particular look so captivating?
A Symbol of Playful Elegance
Bows have always carried a message. In childhood, they symbolized innocence and sweetness. In fashion, they’re icons of femininity and flirtation. In haute couture, bows have become structural statements, nodding to opulence and form. The half-up bow hairstyle captures all of these meanings in a form that’s wearable, elegant, and just a little bit cheeky.
Unlike a ribbon or clip, the bow here is made entirely of your own hair. That subtle sculptural detail communicates a level of care and polish that says you take pride in your look, but you’re not trying too hard. It’s the kind of style that makes people stop and ask, How did you do that? Which makes it perfect for special events, photo shoots, first dates, and anywhere you want to feel a little enchanted.
The Rise of “Ribboncore” and Hair as Art
We’re in the era of romantic styling. Cottagecore, balletcore, and the newly coined ribboncore aesthetic have flooded the fashion and beauty space. Think pearl barrettes, pastel eye shadow, blushing cheeks, and hair that flows, coils, or loops with a storybook softness.
What’s different now is the emphasis on natural materials. Instead of attaching bows to your hair, we’re shaping them from your hair. Instead of spraying on shine, we’re coaxing it out through nourishing care and finishing techniques. The half-up bow fits this moment perfectly. It’s detailed, elegant, and entirely yours.
It also suits nearly every hair texture and color. On platinum blondes, the loops of the bow catch the light like silk. On rich brunettes, it adds a dimensional silhouette. On curls, it takes on a sculptural beauty that’s impossible to fake. And for those with balayage or ombré tones, the folded layers of the bow showcase color transitions in the most flattering way.
Who Can Wear the Half-Up Bow?
The short answer: anyone with enough length to loop. But let’s break it down a bit more.
Ideal Length: Medium to long hair works best, ideally past the collarbone. You need enough to pull up, loop into a bow, and still have volume below.
Texture: Straight, wavy, and loosely curled hair show off the structure of the bow most clearly, but textured or coiled hair can look stunning with a little prep. A smoothing blowout or light curl can help shape and control the sections before styling.
Occasions: This is where the half-up bow shines. It’s versatile enough for daytime and romantic enough for evening. Bridesmaids and wedding guests love it. Teens and twenty-somethings wear it to brunch or festivals. Style professionals wear it with tailored blazers and minimal makeup for that French-girl contrast.
If you’re attending an event and want something more imaginative than a ponytail and more approachable than an updo, this is your golden middle ground.
Styling Secrets from the Pros
The beauty of this look is in the detail. To elevate your half-up bow from a casual twist to a stunning sculptural finish, keep these pro tips in mind:
1. Shine is your secret weapon. Whether you add a touch of argan oil or finish with a high-gloss hairspray, shine makes this look feel expensive. It highlights the loops, polishes the flyaways, and makes your hair bow pop in photos.
2. Clean parts matter. Sectioning is everything here. Use a tail comb to make sure your half-up section is symmetrical, and consider parting the hair where it flatters your face best. A center part gives classic balance, while a deep side part adds drama.
3. Don’t rush the loops. When creating the bow, take your time with each loop. It should be even, full, and gently curved—not flat or stiff. If needed, tease each loop slightly at the base before securing.
4. Secure it smart. Use strong bobby pins that match your hair color and anchor the loops close to the scalp. Then, use a small section of hair to wrap around the middle of the bow for that seamless finish.
5. Lock it in. Once the shape is set, mist lightly with a strong-hold setting spray to freeze the structure without crunch.
Variations That Keep It Fresh
Once you master the classic version, it opens the door to playful tweaks and upgrades. Here are a few ways to style it for different vibes:
The Boho Bow: Pull a few face-framing tendrils out and give them a soft curl. Add texture spray at the roots for a more lived-in, carefree vibe.
The Sleek Bow: Use a flat iron to straighten your hair before styling. Smooth flyaways with a fine-toothed comb and shine serum. Perfect with a minimalist outfit.
The Romantic Bow: Start with loose waves from a curling wand or heatless curl set. Add a pearl or crystal pin beneath the bow for a bridal or formal look.
The Statement Bow: Want your bow to stand out? Try it with voluminous backcombing at the crown or extend the bow tails with curled sections that cascade down the back.
The Bubble Bow Pony: Create a bubble ponytail under your half-up bow by tying sections with clear elastics and gently tugging each segment into shape.
Each variation brings a slightly different mood while still staying true to the soft, sculptural core of the look.
Tools You’ll Need for the Perfect Half-Up Bow
Before you dive into the steps, gather your essentials so the process is seamless:
Paddle brush and tail comb
Heat protectant spray
Curling iron or straightener (optional)
Elastic bands (preferably clear or in your hair color)
Bobby pins (strong and color-matched)
Shine serum or lightweight oil
Medium to strong hold hairspray
Optional extras: texture spray for volume, teasing brush, pearl pins or clips for embellishment
Why This Hairstyle Works Across Seasons
One of the most beautiful parts of the half-up bow is how adaptable it is. In spring, it pairs effortlessly with floral dresses and fresh-faced makeup. In summer, it keeps your hair out of your face with a touch of flirt. In fall, it brings romance to rich colors and cozy knits. And in winter, it balances out high-neck sweaters or elegant holiday dresses.
It’s not just a seasonal trend. It’s a year-round go-to.
Ready to Try It?
Now that you understand the magic of this look—from its cultural comeback to the insider tips—it’s time to walk you through it step by step. Whether you’re aiming for a dreamy bridal look or adding a playful touch to your next outing, the half-up bow is a statement in softness, structure, and sheer feminine energy.
Let’s get into the full tutorial...
Master the Elegant Half-Up Bow Hairstyle with This Step-by-Step Guide
@hairflairaffair @Jamie Vandenberg To achieve this chic half-up bow hairstyle, perfect for any formal event, follow these steps: 1. Start with brushed, smooth hair for easy handling. 2. Select a top section of hair from the crown to the back of your head. 3. Tie this section into a ponytail, ensuring it's tight and secure. 4. On the last loop of your hair tie, don’t pull the ponytail all the way through, creating a loop with ends sticking out at the top. 5. Split the loop in half to form two smaller loops – these will be the bow's sides. 6. Flip the ends of your ponytail forward and tuck them between the two loops, pulling them back to create the center of the bow. 7. Secure the bow's shape and the tucked hair with bobby pins, hiding them beneath the loops. 8. Adjust the bow for symmetry and spread the loops for a fuller effect. 9. Finish with hairspray to hold the style in place. This hairstyle is not only eye-catching but also versatile, suitable for weddings, proms, or any occasion that calls for a touch of elegance. • #HairstyleTutorial • #HairTutorial • #EasyHairstyles • #FormalHair • #BowHairstyle • #DIYHair • #StyleInspo • #BeautyTips • #PromHair • #WeddingHairstyle • #GlamLook • #TrendyHair • #HairGoals • #FashionForward • #ChicHairstyles • #StylishUpdo • #HairHacks • #TikTokBeauty • #HairTrend ♬ original sound - Hair Flair Affair
Step-by-Step: Mastering the Elegant Half-Up Bow Hairstyle
The bow hairstyle is the perfect intersection of sculptural creativity and classic charm, and learning to craft it from your own hair is easier than you might expect. This step-by-step guide walks you through the entire process—from prep to polish—so you can achieve a look that feels delicate yet impactful, whimsical yet grown.
Step 1: Prepare Your Hair Like a Pro
Great styling starts long before the first pin. Begin by washing your hair and conditioning with a lightweight formula to maintain volume. Blow dry with a round brush to create smoothness and body through the mid-lengths and ends. If your hair is naturally straight, a volumizing mousse or root lift spray will prevent the top from falling flat. If you have curls or waves, define them lightly before continuing.
Once your hair is dry, apply a dime-sized amount of shine serum or oil from the ears down. This will help with manageability and add gloss, especially important for making the loops of the bow stand out. Gently detangle with a wide-tooth comb or soft paddle brush to avoid frizz.
Stylist’s Tip: Don’t use heavy creams or leave-ins, as they may weigh your hair down. You want it soft but responsive, not limp.
Step 2: Create the Half-Up Section
Next, you’ll section off the top half of your hair. Using a tail comb, draw a horizontal part from just above your left ear to just above your right ear, keeping the line as clean as possible. This forms the canvas for the bow.
Gather the top section of hair as if you were making a half-up ponytail, but do not tie it yet. Instead, assess where you want the bow to sit—usually at the center of the back of the head or slightly higher for a more playful look. Once the placement feels right, tie the section with a clear elastic.
On the final pull-through of the elastic, do not pull the hair all the way through. Instead, stop halfway to form a loop. You’ll now have a loop (your future bow) and a tail hanging out beneath it.
Step 3: Divide the Loop into Bow “Wings”
Separate the loop into two equal halves. These will become the two sides of your bow. Use your fingers to gently fan each loop out to the side, adjusting the width and evenness. You want them to mirror each other in size and shape for balance.
Pin each side down by inserting a bobby pin into the base of the loop and pushing inward toward the center. Do this from underneath so the pins are invisible. If your hair is thick or heavy, crisscross two pins for added security.
Stylist’s Tip: Don’t worry if the loops don’t look perfect yet. You’ll finesse the shape after anchoring everything.
Step 4: Wrap the Center of the Bow
Now take the tail you left hanging under the loop and pull it upward between the two bow wings. This will serve as the center of the bow, hiding the elastic and completing the silhouette.
Once pulled through, flatten the strand across the center and secure it underneath the bow with one or two discreet pins. You can tuck any excess into the base or wrap it around once more for a double band effect.
This small touch brings cohesion to the shape, and transforms the loop into a recognizable bow with polish and presence.
Step 5: Refine the Shape and Volume
Gently tug the outer edges of each bow wing to plump them up and even out any asymmetry. Use a teasing comb or your fingers to fluff the inner part of the loops if needed. A bit of light teasing inside the loops can give them structure that holds.
Smooth the surface of each loop with a soft brush and apply a light mist of flexible hold hairspray. Avoid over-spraying, which can weigh the bow down or make it look stiff.
Check the back with a hand mirror. You’re looking for symmetry, clean edges, and a center wrap that looks natural and tidy.
Step 6: Style the Bottom Half of Your Hair
The beauty of a half-up bow is in the contrast between structure and softness. Now turn your attention to the remaining hair that falls beneath the bow.
For a romantic finish, use a curling wand to create loose waves. Wrap sections away from the face to keep the overall look light and open. For a modern sleek version, run a straightener through the lengths for a silky drop.
Finish the ends with a shine gloss spray or smoothing oil. If you want extra volume, tease the roots underneath the bottom section gently before brushing over.
Optional Add-On: For events or nights out, weave in a few accent pieces—delicate pearls, a sparkly pin beneath the bow, or a soft ribbon tucked behind one loop. These small additions transform the style into a true statement.
Step 7: Lock It in Place
Once your style is perfected, finish with a long-lasting hairspray that offers hold without stiffness. Mist from 10 inches away, making sure to catch both the bow and the loose hair below.
Double-check your pins and loops. Use your fingers to gently coax out any unevenness or tension points. The final look should feel effortless but intentional, as if the bow naturally bloomed from your hair.
Step 8: Capture the Look
If you're doing this style for content, it photographs beautifully from every angle. Make sure the lighting hits your hair in a way that reveals the shine and contour of the loops.
Angle your head slightly down and to the side to show off the bow shape. If you're posting to social, try a soft filter and a blurred background to let the hairstyle take center stage.
Quick Recap: Elegant Half-Up Bow Styling Checklist
Wash and prep with volume and shine products
Section the top half from above each ear
Create a looped ponytail, stopping halfway on the final tie
Split the loop in two, pinning each half as bow wings
Wrap the tail around the center to form the bow knot
Adjust and fluff the bow for symmetry
Style the loose hair in waves or straight
Finish with spray, shine, and optional accessories
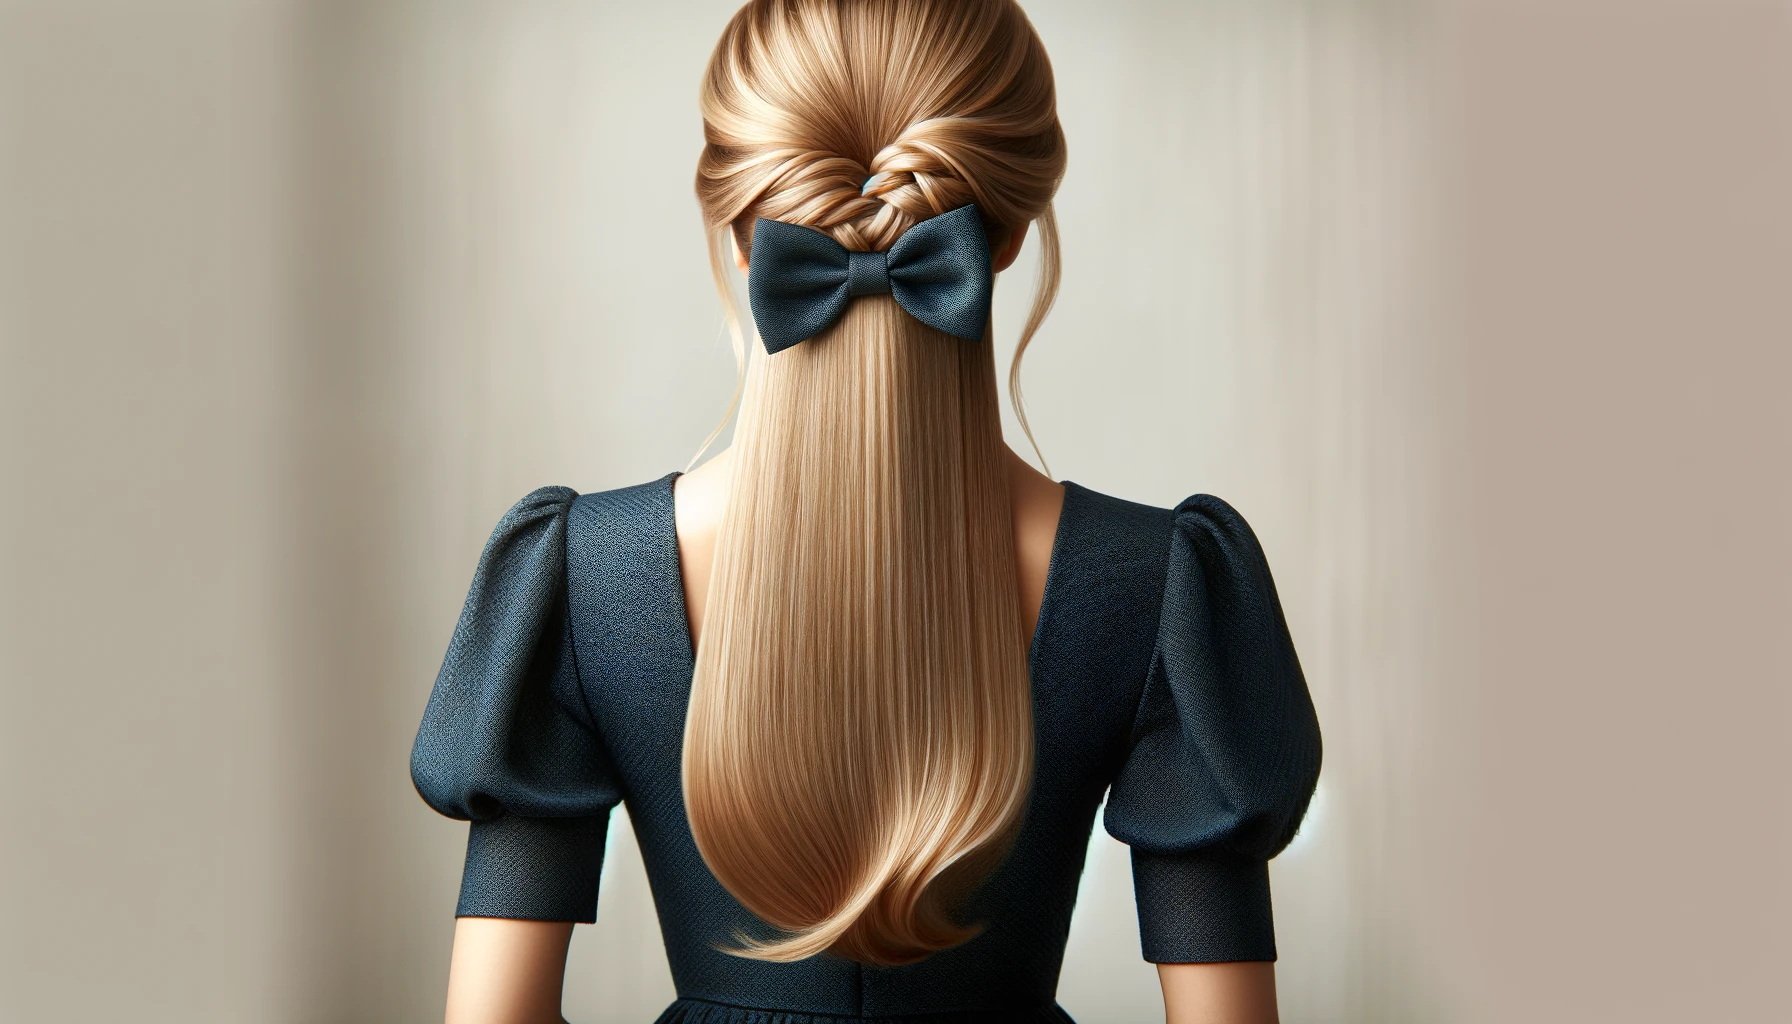
Variations to Try Once You’ve Mastered the Basics
This bow can be just the beginning. Once you’ve nailed the shape and structure, play with versions that match your vibe:
Soft and Romantic: Add microbraids on either side of the head leading into the bow
Edgy and Sleek: Style with a deep side part and flat-ironed ends
Festival-Ready: Dust with hair glitter or place gems just above each loop
Bridal: Add pearl pins beneath each loop and pair with soft veil placement
Holiday Party: Add a velvet or satin ribbon beneath the bow to drape down with your curls
Final Styling Advice
Your first bow may not be perfect—and that’s part of the charm. Each time you recreate it, you’ll develop a better sense for symmetry, tension, and flow. The elegant half-up bow hairstyle is not just about following steps—it’s about shaping something expressive with your hands, using your hair as both canvas and sculpture.
With each attempt, you’ll learn how to tailor the bow to your face shape, your outfit, and your event. That’s the secret behind its timeless appeal. Whether you’re aiming for dreamy, editorial, sweet, or seductive, the bow adapts to your mood.
And once you master this version, don’t be surprised if people start asking if they can book you for weddings, showers, or photo shoots. Because nothing says elegant effortlessness quite like a hairstyle that looks like a gift—and you’re the whole present.

Master the Elegant Half-Up Bow Hairstyle with This Step-by-Step Guide
The Final Bow
There’s something incredibly satisfying about turning your own hair into art. The half-up bow is more than a hairstyle—it’s a love letter to personal beauty, a gentle nod to vintage femininity reimagined through a modern lens. It’s the kind of look that doesn’t beg for attention, but earns it through quiet craftsmanship and a dash of whimsy.
What makes it powerful is its duality. Soft, yet sculpted. Playful, yet poised. Simple to create, yet endlessly customizable. Whether you’re headed to a brunch in linen and pearls or slipping into something slinky for a rooftop night out, this bow bends to fit your energy. And in a world full of complicated trends and fleeting hacks, there’s something timeless about a style that loops back to your roots—literally.
So go ahead. Give yourself a mirror moment. Let the bow remind you that elegance can be easy. That beauty can be personal. And that sometimes, the most captivating details are the ones tied with care.
This is your signature now.
To help you master the elegant half-up bow hairstyle, I’ve put together a list of additional resources. These blogs and articles provide a wealth of information on hairstyles, hair care, and styling techniques that can complement our guide and help you achieve your desired look.
Haiirology: Offers a comprehensive guide on 15+ easy and cute bow hairstyles that are trending on TikTok. It also provides a step-by-step guide on how to do a bow hairstyle.
Who What Wear: Shares 19 trending bow hairstyles to try next. It also features images and descriptions of various bow hairstyles, including half-up, half-down styles.
Pinterest: Provides a tutorial on how to create a beautiful hair bow for a half-up hairstyle.
Luxy Hair: Features a cute and easy half-up hair bow tutorial.
Remember, the joy of hairstyling lies in experimentation and personalization. Use these resources to inspire your creativity and make a hairstyle that suits your personal style. Happy styling!