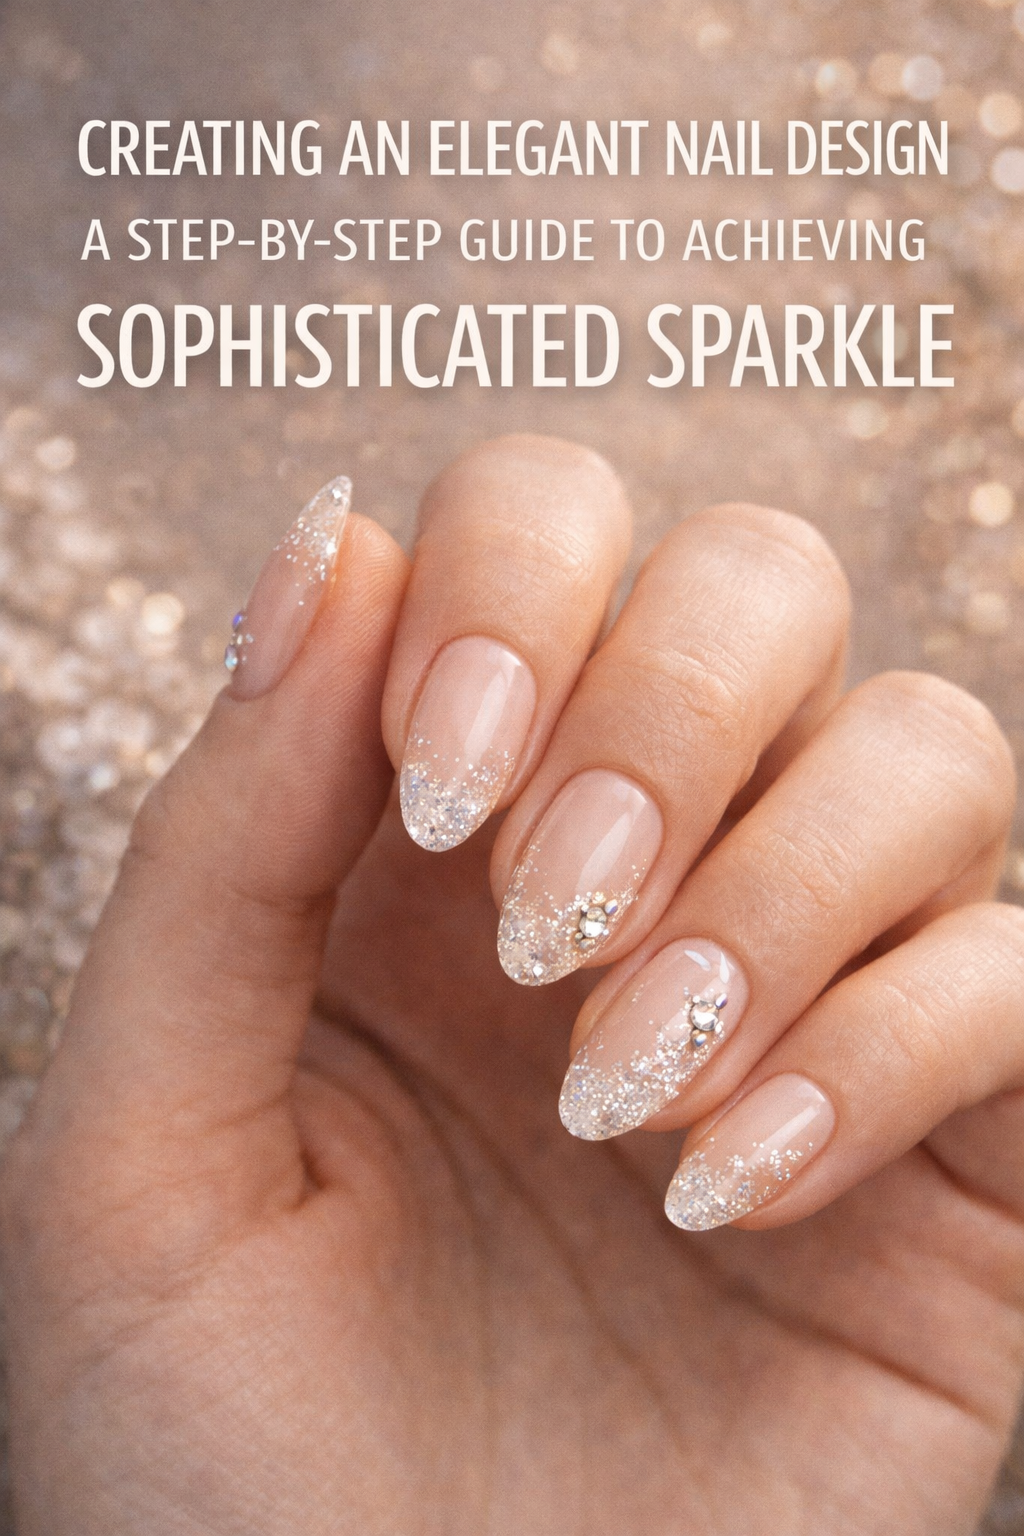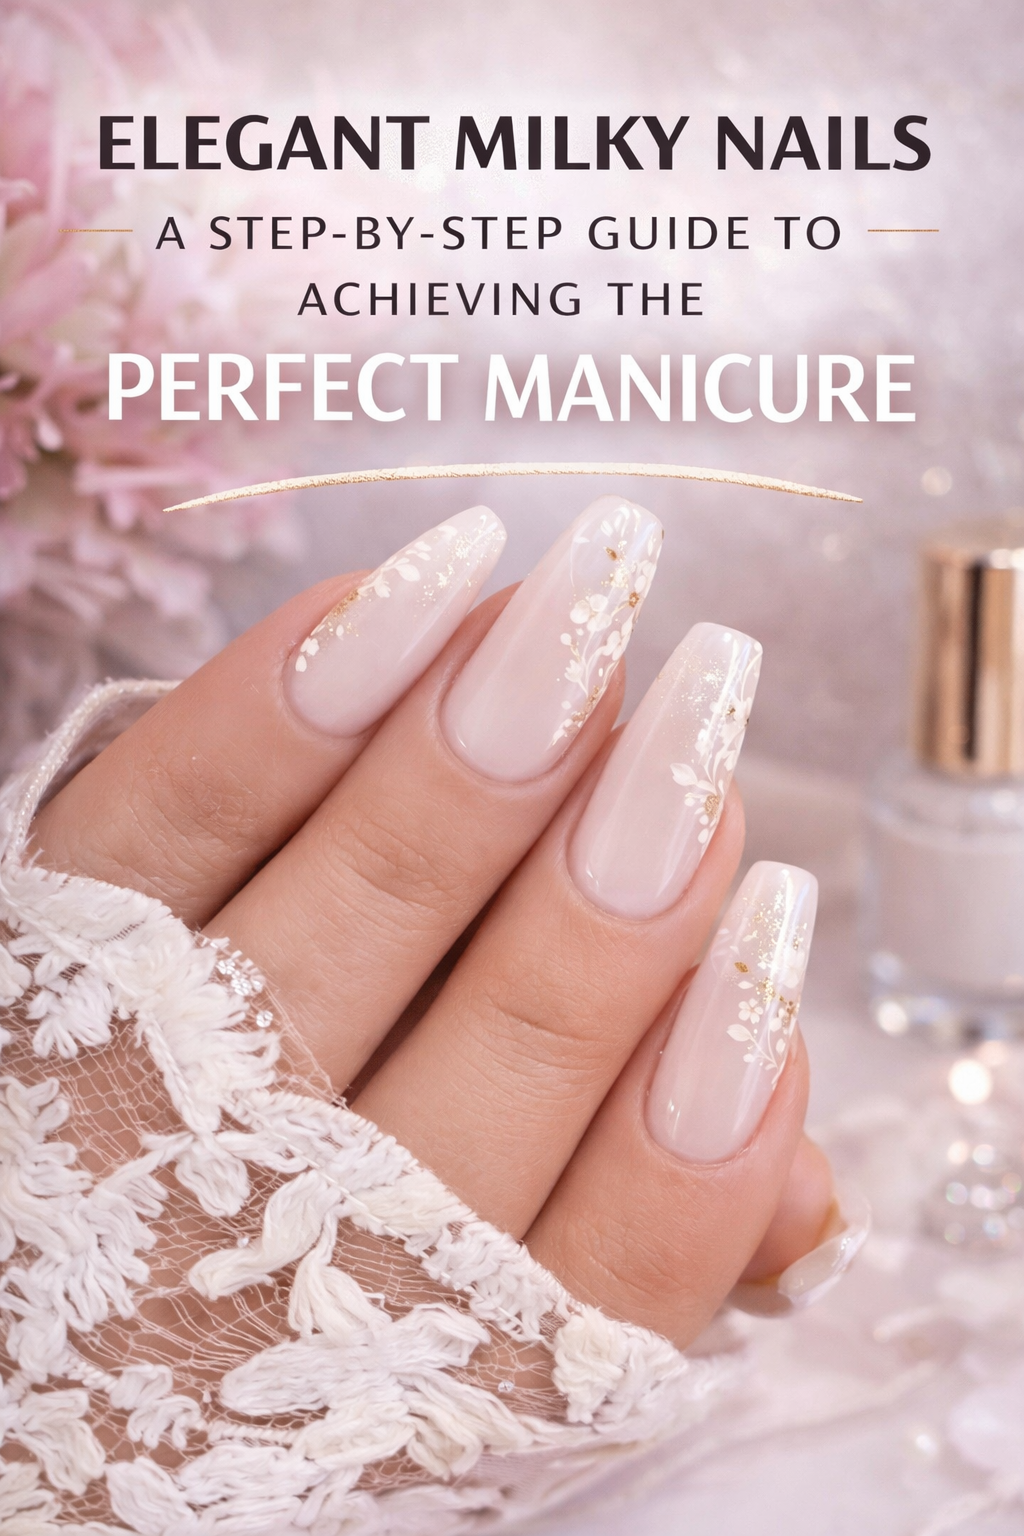
Elegant Milky Nails: A Step-by-Step Guide to Achieving the Perfect Manicure

The Allure of Milky Nails: A Soft, Elegant Obsession That’s Here to Stay
There is something about milky nails that speaks in whispers instead of shouts. In a world filled with bold chromes, fiery reds, and jeweled embellishments, the subtle beauty of a milky manicure feels like a sigh of relief. This sheer, cloudy aesthetic has quietly climbed the ranks of modern nail trends and carved out a cult following, especially among fashion minimalists, skincare obsessives, and those who swear by a clean-girl polish. The look is timeless, versatile, and entirely enchanting.
Milky nails are not quite pink, not fully nude, and never opaque. They mimic the soft translucence of almond milk or diluted porcelain. The effect? Nails that look healthy, glowing, and polished in the most effortless way. They don’t demand attention—they attract it. Whether you are running errands, holding a champagne flute at a garden party, or curled under cashmere by candlelight, milky nails match the moment. They are the quiet luxury of the manicure world.
So what’s behind their appeal? Why have celebrities, beauty editors, and nail enthusiasts worldwide fallen under the spell of milky nails? Let’s sink into the creamy depths of this trend and unpack why this sheer white manicure has become the go-to choice for so many.
Minimalist Chic Meets High-End Elegance
In an era when capsule wardrobes, skinimalism, and no-makeup makeup reign, it’s no surprise that milky nails are thriving. They align perfectly with the ethos of refined simplicity. A milky manicure doesn’t need to be adorned with rhinestones or gold foil to feel special. It is special because of its restraint. This polish look makes your hands look clean, neat, and soft, without competing with the rest of your beauty routine.
What makes it particularly compelling is its ability to feel both high-maintenance and low-effort. There’s an unmistakable polish to milky nails—they feel intentional. And yet, they don’t shout for validation. They whisper, “I take care of myself.”
A Color That Flatters Every Skin Tone
Milky nail shades come in a range of sheer whites and soft neutrals, each designed to melt into your natural nail and elevate it. From the faintest off-white to the softest blush-beige, there’s a version for every undertone. The beauty of milky nails lies in their ability to harmonize rather than contrast. On fair skin, they look ethereal. On deeper tones, they radiate like moonlight.
This versatility is part of the reason why so many brides, models, and editors choose this style. It doesn’t compete with the outfit. It complements everything.
Clean, Sheer, and Unapologetically Feminine
The sheer finish of a milky manicure is what sets it apart from opaque white polish. The layers allow just enough of your nail’s natural pink to peek through, offering a clean and healthy look that mimics the effect of flawless skin. When applied skillfully, the result resembles a glossy milk-glass surface—gentle, creamy, and elegant.
And then there’s the femininity of it all. Milky nails are delicate without being dainty, romantic without being too sweet. They are as appropriate in a boardroom as they are in a bridal suite.
A Staple for the ‘Soft Life’ Aesthetic
Social media has popularized the idea of the soft life—a lifestyle defined by self-care, feminine energy, luxury, and ease. Milky nails embody this perfectly. They are often paired with dewy makeup, silk robes, and airy dresses in sunlit apartments. They complement pearl earrings and glossy lips. They whisper of fresh flowers, clean sheets, and weekends spent journaling with lavender tea.
For content creators and everyday aesthetes alike, milky nails are a finishing touch that completes the picture of an intentional, luxurious lifestyle.
Endlessly Adaptable
While milky nails shine in their simplicity, they also serve as the perfect base for delicate nail art. Think miniature pearls, subtle chrome finishes, dainty hearts, and negative-space details. This versatility makes them ideal for both everyday wear and special occasions.
A milky base also allows for soft gradients, French fades, or barely-there glitter. It’s a perfect blank canvas that feels curated, not plain.
Salon or At-Home: Both Are Options
One of the most appealing parts of the milky nail trend is its accessibility. While salon-grade gel applications can give you a glassy, high-gloss effect, you can also achieve a beautiful milky manicure at home with the right polish and a few simple techniques. It doesn’t take professional-level tools or years of experience. With a good base coat, the right milky polish, and a glossy top coat, you can pull it off in under 30 minutes.
You don’t have to rely on builder gels or acrylics unless you want to. The look is achievable with sheer polishes that layer well and dry to a smooth finish. And once you find your favorite shade, you’ll find yourself reaching for it again and again.
Celebrities and the Milky Nail Obsession
Milky nails have graced the fingertips of A-list stars across the red carpet. From Hailey Bieber’s now-iconic glazed donut nails to the classic wedding-day nails of Meghan Markle, this sheer manicure has earned its place in the beauty canon. Fashion influencers often pair the look with beige tailoring, fresh blowouts, and designer bags slung casually over one arm. It’s the kind of detail that doesn’t demand the spotlight but always manages to catch it.
And that’s exactly the magic of milky nails. They give the impression that you are put together without trying too hard. They speak to an aesthetic that values subtlety, softness, and restraint—qualities that feel increasingly luxurious in a noisy, overstimulated world.
The Power of Sheer White Nails in Everyday Life
Beyond beauty trends and fashion weeks, milky nails offer something more intimate—a sense of quiet confidence. There’s a comfort in looking down at your hands and seeing something soft, clean, and lovely. Whether you’re answering emails, sipping espresso, or brushing hair out of your face, your nails reflect a quiet attention to self. They’re like a sigh you didn’t realize you needed.
Milky nails are especially loved by those who value elegance in the details. Maybe you don’t want statement claws or themed decals. Maybe you just want to look like the best version of yourself—gently polished, freshly moisturized, and glowing from the inside out.
Ready to Embrace the Look?
Whether you are going for a glassy milk bath manicure or a semi-sheer buildable polish, the magic of milky nails is in the layering, the gloss, and the gentleness. This manicure look is achievable at home with patience and the right products. From choosing the right base to perfecting your final topcoat, we’ve broken it all down into a foolproof method that makes milky nails easy and irresistible.
What follows is a complete step-by-step guide to achieving your perfect milky manicure, whether you’re doing it yourself or instructing your favorite nail tech. This tutorial walks you through each stage, from prep to polish to topcoat, ensuring your final result is soft, dreamy, and radiant.
Let’s begin.

Elegant Milky Nails: A Step-by-Step Guide to Achieving the Perfect Manicure
@glamartistryhub Top Milky Effect Creamy.Bialy Stamping Gel. Złota hybryda Sparkling Kiss. Wszystkie produkty marki NEONAIL. #nails #nailsartvideos #nailsvideotutorial ♬ original sound - glamartistryhub
Step-by-Step Guide: Achieving the Perfect Milky Nail Manicure
The elegance of milky nails lies in their sheer simplicity. This look doesn’t rely on rhinestones or complex nail art to stand out. Instead, it’s about pristine preparation, thoughtful layering, and a finish that feels smooth, dewy, and nearly translucent. Whether you're going full DIY or just want to understand what to request from your nail tech, mastering the milky manicure starts with technique.
Here’s your complete guide to achieving that creamy, cloudlike finish at home.
Step 1: Prepare Your Tools and Workspace
A good manicure begins with an organized setup. Gather the following essentials:
Non-acetone polish remover
Cotton rounds or reusable remover pads
A fine-grit nail file
Cuticle remover or softener
Orange stick or cuticle pusher
Nail buffer block
Gentle hand scrub (optional but recommended)
A bowl of warm water
Nail brush
Base coat
Sheer white or translucent milky nail polish
Top coat (preferably high-gloss gel-like finish)
Nail polish corrector pen or small angled brush for clean-up
Quick-dry drops or spray (optional)
Lightweight cuticle oil or vitamin E oil
Create a clutter-free, well-lit environment where you can focus without distractions. If you tend to rush, consider playing calming music to slow the tempo of your movements.
Step 2: Remove Old Polish and Cleanse the Nail Bed
Start with a clean slate. Use a non-acetone remover to take off any previous polish. This is less drying than acetone and better for maintaining healthy nails. Press a saturated cotton round over each nail for a few seconds before gently swiping to lift off color.
Once your nails are bare, take a nail brush and warm, soapy water to scrub under the free edge. Remove dirt and debris that can impact polish adhesion. Dry your hands completely with a soft towel before moving on.
Step 3: Shape and Gently File Your Nails
Choose your desired nail shape—short oval, squoval, or almond tend to look best with the soft aesthetic of milky nails. Use a fine-grit nail file and work in one direction only. Sawing back and forth creates microscopic splits that lead to peeling.
Once you have a clean shape, use a buffer block to lightly smooth the surface of the nails. Don’t over-buff or thin out the plate. You’re looking to eliminate ridges and give your polish a soft, even canvas to cling to.
Step 4: Tend to Your Cuticles
Healthy cuticles make a world of difference. Apply a drop of cuticle remover or softener at the base of each nail. Let it sit for a minute, then gently push back with an orange stick. Avoid trimming unless absolutely necessary. Overcut cuticles tend to heal poorly and are more susceptible to infection.
Once your cuticles are pushed back and neat, rinse off the remover and dry thoroughly. Apply a drop of oil and massage it in. Let your skin absorb the moisture before wiping off any excess with a lint-free pad.
Step 5: Prime With a High-Quality Base Coat
Never skip the base coat. It not only protects your natural nail from staining but also allows the polish to adhere better and last longer. A good base coat should dry quickly and have a slightly tacky finish. This helps the sheer milky polish grip the surface for streak-free application.
Apply a thin layer to each nail, ensuring full coverage, especially around the edges and free tip. Let it dry completely before moving on.
Step 6: Select the Perfect Milky Polish
Choosing the right milky shade is everything. You want a sheer or semi-sheer polish with a white or cream base. Look for shades labeled as "milk bath," "milky white," "cloud polish," or "sheer white jelly." The formula should build softly with each layer without going chalky or streaky.
A few favorites in the beauty world include:
A barely-there milky pink with a jelly finish
A sheer cool white with a whisper of lavender or gray
A soft cream beige with slight peach undertones
What you’re after is translucency, not opacity. The polish should enhance your natural nail, not cover it.
Step 7: Master the First Coat
The key to a beautiful milky nail is restraint. Start with a super thin first coat. Don’t overload the brush. Wipe off excess on the neck of the bottle, then glide the polish in one fluid motion down the center of the nail, followed by each side.
This layer will likely look streaky or barely there. That’s fine. It’s a base to build on. Let it dry for at least two full minutes before adding a second layer. If you rush, you risk bubbling or smudging.
Step 8: Layer the Second Coat for Coverage
The second coat brings the magic. Apply with the same soft, feather-light motion as before, focusing on keeping strokes even and centered. If needed, rotate your brush slightly to avoid buildup on the edges. This is when you’ll begin to see the creamy effect bloom.
If you like a more opaque look, you can stop here or proceed to a third coat. If you prefer a lighter, milk-glass finish, stick to two.
Let this layer dry completely. This may take longer than expected—be patient. Every minute of waiting results in a smoother, glossier outcome.
Step 9: Add a Third Coat (Optional for Depth)
If you desire that dreamy, almond-milk thickness with soft glow and dimension, apply a third ultra-thin layer. This coat should be whisper-light, barely kissing the nail. Overloading can lead to patchiness, so resist the urge to go heavy.
This final coat brings the polish to life. Your nails should now have that luminous, pearly depth—still sheer, but with enough softness to blur imperfections and light up the nail bed.
Step 10: Seal With a Glossy Top Coat
To lock in your dreamy milky finish, use a high-shine top coat that delivers glass-like brilliance. Look for formulas that offer plumping effects or gel-mimicking finishes. A top coat is what gives your nails their glow and ensures your hard work lasts more than a few days.
Apply generously but precisely, making sure to cap the free edge to prevent chips. Let it set for at least five minutes. You can use quick-dry drops or sprays to speed things up, but avoid using your hands for a good 10–15 minutes afterward if you can.
Step 11: Clean Up the Edges
Once everything has dried a bit, take a corrector pen or a fine-tipped angled brush dipped in remover and clean around the cuticle line or sidewalls. This gives your manicure that professional crispness. Even a slight smear outside the nail can take away from the glassy effect of milky polish.
Do not rush this part. Take your time to trace a clean frame around each nail. The difference is night and day.
Step 12: Hydrate and Finish
When everything is completely dry, apply a small drop of cuticle oil around the base of each nail and massage it in with gentle circular motions. Follow up with a lightweight hand cream, focusing on the knuckles, palms, and fingertips.
Not only does this restore moisture, but it also enhances the final look. There’s nothing more beautiful than glossy milky nails paired with supple, glowing hands.
Bonus Tips for Perfection
Chill your polish: Slightly cooled polish glides on more smoothly. Store yours upright in a cool, dark place.
Work in natural light: This helps you see streaks and coverage better during application.
Avoid heavy lifting: For the first hour after your manicure, avoid tasks that might stress the nail or cause dents.
Touch-ups: You can reapply a thin layer of top coat every three days to keep the finish fresh.
Practice makes polished: Don’t be discouraged if your first attempt isn’t flawless. Each round of practice builds confidence and control.
The Ritual of Softness
Doing your nails isn’t just about aesthetics. It’s an act of care, of slowing down, of indulging in a small moment of luxury just for you. Milky nails are the perfect expression of that ritual—a look that’s soft, creamy, and endlessly elegant. They match every mood, every outfit, and every season.
This manicure has become a signature for those who love softness over showiness, grace over glam. Whether it’s your everyday look or your bridal manicure, the milky nail is here to stay. And now that you’ve mastered the technique, you can return to it anytime you want that clean, serene beauty at your fingertips.
Below, you’ll find variations, product picks, and milky nail ideas to spark your next polish session.
Let’s explore the looks.

Elegant Milky Nails: A Step-by-Step Guide to Achieving the Perfect Manicure
Why Milky Nails Deserve a Place in Your Beauty Ritual
Milky nails are more than just a passing trend. They are a mindset—a soft rebellion against noise, clutter, and overcomplication. This look speaks to the quiet power of polish that doesn't need to shout. It gives your hands a look of freshness, a sense of refinement, and a breathability that’s almost therapeutic to wear. Whether you are chasing the clean girl aesthetic or simply craving something gentle and timeless, this manicure delivers a finish that works with your energy, not against it.
In a world where bold often wins the spotlight, there’s something beautifully subversive about choosing subtlety. Milky nails are the kind of understated detail that signals elegance to anyone paying close enough attention. They are sensual without being flashy. Polished without being performative. And once you experience their magic—once you see the way they elevate your hands in even the simplest outfit—you’ll understand why this has become a signature style for brides, influencers, professionals, and everyday beauty lovers alike.
Now that you know the technique, it’s time to find the version that suits your tone, your wardrobe, and your mood. What follows are handpicked looks and product variations to help you craft the perfect milky manicure—whether you lean toward sheer pinks, soft creams, or glassy whites.
Let your nails become a soft-spoken statement of care, confidence, and clarity.
Let’s begin.
Step into the world of chic and minimalist beauty with our blog post, “Elegant Milky Nails: A Step-by-Step Guide to Achieving the Perfect Manicure.” This guide is your pathway to mastering the art of the milky nail trend, a look that’s both timeless and effortlessly stylish. To support your journey to perfecting this subtle yet stunning manicure, we’ve curated a list of sources, each linked by a keyword, to provide you with expert advice and detailed tutorials. Let these resources be your guide as you embrace the understated elegance of milky nails.
Milky Nails Inspirational Sources:
May these sources inspire you to create a manicure that’s as elegant as it is expressive. Enjoy the journey to achieving your perfect set of milky nails!