Dazzling Lavender Glitter Nails: A Sparkling DIY Guide
The Allure of Lavender Sparkle: A 2000-Word Immersion into the Magic of Glitter Nails
There’s something undeniably enchanting about lavender. It exists at the crossroads of serenity and statement. It whispers femininity with a confident twist. And when paired with glitter, lavender becomes an absolute vision—soft, dazzling, and impossible to ignore. Whether you’re channeling goddess energy or just craving something that catches the light with every gesture, lavender glitter nails offer an instant hit of radiance.
But behind every shimmering manicure is a story. A ritual. A choice to celebrate yourself, to dress your hands in light, to carry beauty into even the smallest of moments. This guide isn’t just about painting your nails—it’s about understanding the energy you’re curating with your fingertips. It’s about tapping into glamour that doesn’t apologize. This is beauty that lingers and lifts.
Lavender as a Modern Beauty Power Color
Lavender isn’t just soft. It’s commanding in a quiet way. This hue is no longer reserved for florals or bridal showers—it’s become a central player in fashion, beauty, and even luxury packaging. In color psychology, lavender combines the stability of blue with the energy of red, bringing emotional balance and calm creativity. It’s the color of transformation, feminine rebellion, and intuitive power.
When you add glitter to the mix, the mood shifts from gentle to gleaming. The reflective flecks transform lavender into a starlit sky or the shimmer of tulle under a dance floor spotlight. It’s that visual texture that gives lavender glitter nails their edge. They are ethereal without being weak. Delicate without fading into the background.
This is not your dainty polish from middle school. This is grown woman glamour.
Why Glitter Nails Still Reign
Glitter nails have been around for decades, and they show no sign of falling out of favor. Why? Because they do what no flat polish ever can—interact with light. Glitter catches every flicker, every movement. It transforms your nails into jewelry. Into little mirrors of your personality.
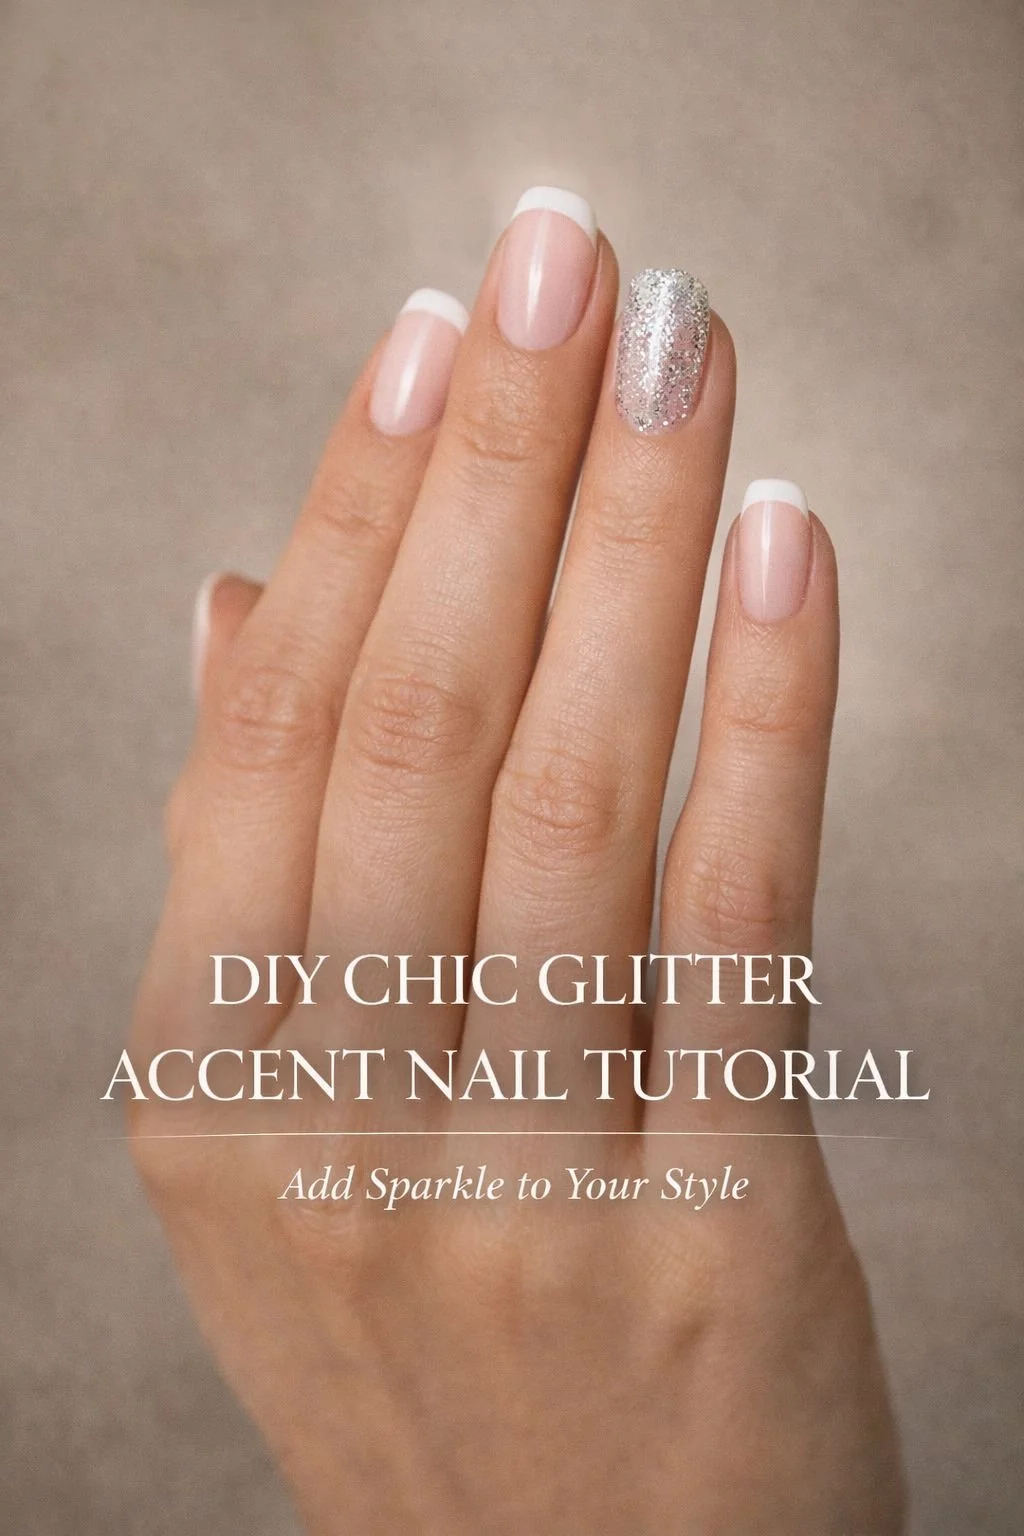
And while nail trends may cycle through minimalist nudes, edgy matte finishes, or eccentric prints, glitter continues to hold court because it adapts. You can go full sparkle or just an accent nail. You can dip a French tip in shimmer or coat your entire hand in crushed-glass drama. Lavender glitter nails are the middle ground—playful enough to feel fresh, yet elevated enough to wear anywhere.
Glitter is joy. And joy never goes out of style.
The Ritual of DIY Nails: Glamour in Your Own Hands
For many, doing nails is more than maintenance. It’s therapy. It’s a moment of pause where you focus on yourself. DIY glitter nails give you that luxury without the salon price tag. But it’s not just about saving money—it’s about gaining creative control.
Lavender glitter nails invite experimentation. Will you go for a sheer lavender base with floating flecks of chunky glitter? A solid glitter bomb? A minimalist ombré that glows from cuticle to tip? The combinations are endless, and they all start with your intention.
The act of choosing your polish, prepping your hands, layering each coat—it’s an art. It’s also a way to turn off the world and tune into something joyful. If you’re like most women, you rarely take time to create beauty just for the sake of it. Doing your own glitter nails reclaims that space.
Tools and Textures: What You Need to Begin
Before you jump into polish, let’s get your toolkit in place. To master this look, you’ll want to gather:
A lavender polish (sheer or opaque, depending on your aesthetic)
A glitter topcoat or loose glitter pigment
A clear base coat and a high-gloss topcoat
Nail tape, if you’re aiming for geometric shapes or crisp lines
A sponge for layering glitter (great for opacity)
Cleanup brush or Q-tips
Cuticle oil to nourish the finished look
There are so many variations on the lavender glitter trend, and the tools you choose will determine the finish. Want something scattered and airy? Use a sheer lavender with a light dusting of fine glitter. Craving density and depth? Layer chunky hexagonal glitter into wet polish and sandwich it in with topcoat layers.
Texture is the hidden star here. Mixing smooth polish with multidimensional glitter gives your nails that jeweled effect. Think sparkle that dances—not just sticks.
The Mood of a Lavender Glitter Moment
What are you really saying when you wear lavender glitter nails? You’re expressing freedom. You’re embracing the feminine in a way that doesn’t feel forced. You’re choosing softness without surrendering strength.
This look doesn’t scream for attention—but it definitely gets it. Lavender glitter nails are for the romantic realists. The dreamers with deadlines. The ones who know that power can be graceful. That elegance can glitter.
It’s a small but mighty aesthetic decision that shifts how you feel when you hold a pen, tap a keyboard, clutch a coffee, or reach out to touch someone. Suddenly your hands feel like part of the outfit. They become an accessory in motion.
And once you start noticing the sparkle, so does everyone else.
Trends That Pair Perfectly
Want to take your lavender glitter nails to the next level? Pair them with complementary beauty trends that heighten the impact:
Monochrome Lavender Looks: Think lavender eyeshadow, mauve-toned blush, lilac gloss. The coordination creates a dreamy pastel aura.
Sheer Outfits or Lace Accents: Soft fabrics and gentle silhouettes emphasize the romantic vibe of your nails.
Silver Jewelry: Cool-toned metals bounce light around your nails and pull the whole look together.
Pearlescent Eyes or Glitter Tearliner: Match your fingertips to your eyes and let the sparkle carry through your entire face.
Glossy Nude Lips: Let your hands shine and keep your lips soft and understated.
You don’t need to be in full glam to pull this off. Lavender glitter nails actually stand out beautifully with neutral or athleisure wear, because the contrast highlights their radiance.
Situations That Call for Lavender Sparkle
If you’re wondering where you might wear these dreamy nails, the answer is anywhere. But here are a few situations where lavender glitter truly thrives:
Spring and Summer Events: Garden parties, baby showers, and rooftop brunches. Lavender looks stunning in daylight.
Vacation Mode: Glitter nails always photograph well. Lavender pops against poolside scenery and golden hour light.
First Dates: There’s something unforgettable about someone reaching across a table and catching a little glint from their manicure.
Self-Love Weekends: No plans needed. A sparkling set of nails is a present you give yourself, no matter what’s on the calendar.
Creative Professions: For stylists, designers, or creatives, glitter nails double as a conversation starter and confidence booster.
This color and style isn’t about fitting in. It’s about standing out in a quietly hypnotic way.
Common Mistakes and How to Avoid Them
The glitter game can go sideways fast without the right steps. So here’s what to keep in mind:
Skipping the Base Coat: Glitter sticks better and removes cleaner when you start with a solid base.
Overapplying Glitter: It’s tempting, but layering too thick leads to clumps and uneven texture.
Not Letting Layers Dry: Patience is key. Rushing between coats makes smudges and dulls the sparkle.
Using Matte Topcoat: This kills the shine. Always go for a high-gloss finish when working with glitter.
No Cleanup: A few stray sparkles around your cuticles can ruin the effect. Use a detail brush dipped in remover for a sharp edge.
These details matter. A clean, balanced manicure brings out the best in the polish and the person wearing it.
What Lavender Glitter Nails Say About You
Style always speaks before you do. When you show up with lavender glitter nails, you’re broadcasting a message without uttering a word. You’re signaling creativity, warmth, whimsy, and poise. You’re comfortable making soft bold choices. You’re radiant—but on your own terms.
These nails are for someone who celebrates herself. Who knows that beauty isn’t just something you put on—it’s something you activate. Lavender glitter nails are not loud. They’re magnetic. They draw the eye, not demand it.
This is polish with personality.
Ready to Create Your Own?
The best part about lavender glitter nails is how easy they are to customize. Whether you’re new to DIY manicures or a seasoned nail art lover, the look is entirely yours to interpret. The next section will walk you through each step, from prepping your nails to sealing in that irresistible sparkle.
Your glow-up starts now.

Dazzling Lavender Glitter Nails: A Sparkling DIY Guide
💜✨ YES or NO?✨💜@indigonails : Rita Favorita , Black Poison 💜🖤#purplenails #flashnails #reflective #reflectivenails #nailvideos #nailvibes #violetnails #trendynails #naildesign #naildesigns pic.twitter.com/MES5Cx0sNX
— Glam Artistry Hub (@glamartistryhub) April 3, 2024
DIY Lavender Glitter Nails: A Step-by-Step Masterclass in Sparkle and Self-Expression
Creating a shimmering lavender glitter manicure at home isn't just a beauty ritual—it's a declaration. It’s choosing a look that softens while it dazzles, that feels celestial but grounded in craft. This tutorial is designed to walk you through every step with intention, transforming the process into something meditative and visually stunning. Whether you’re aiming for delicate glam or a high-impact shimmer, this comprehensive guide ensures each flick of your brush feels like part of something luxurious.
Step 1: Prepare Your Canvas
Clean, well-shaped nails are the foundation of any polished look—especially one involving glitter, where every reflection draws the eye.
Remove old polish using an acetone-based remover if working with previous gel or glitter residue. If your nails are bare, wipe them with rubbing alcohol to strip away oils.
Trim and shape using a quality file or glass nail shaper. A soft almond, squoval, or classic rounded tip works beautifully with glitter styles.
Buff the surface lightly with a nail buffer to even the nail plate. Avoid over-buffing, as this can weaken your nails.
Push back cuticles gently with a wooden or silicone cuticle pusher. Never trim unless professionally trained, since this can lead to irritation.
Wash and dry your hands thoroughly, using a nail brush to remove all dust and debris. Skip lotion at this stage—it will interfere with adhesion.
This prep phase may seem tedious, but it sets the tone. Glitter reflects light best on a flawless base, so a smooth start makes a world of difference.
Step 2: Lay the Foundation with a Base Coat
A base coat isn’t optional with glitter—it’s essential. It provides grip for polish and a barrier against staining or damage.
Choose a quality base coat with strengthener properties if you have weak or peeling nails.
Apply one thin coat from cuticle to tip, sealing the edge. Let it dry completely before moving on.
For frequent polish wearers, consider a peel-off base coat to make glitter removal easier later. This works especially well if you plan to wear the look for only a few days.
Step 3: Paint the Lavender Base
This is where the personality of your manicure begins to bloom. Lavender shades come in a range of tones—dusty lilac, cool periwinkle, soft orchid. Choose one that matches your skin tone and desired mood.
Shake the polish bottle well to evenly distribute pigment.
Apply the first coat using three strokes: center, side, side. Keep the layer thin and even.
Allow full drying time, then apply a second coat for richer opacity.
If your polish is sheer or translucent by design, this creates a dreamy base for layered glitter. If you prefer a solid lavender look beneath the sparkle, a third coat might be needed—but only after the second layer sets fully.
Step 4: Select Your Glitter Strategy
There’s more than one way to add shimmer. Decide which glitter style speaks to your aesthetic and occasion:
Full-coverage glitter polish: Pre-mixed glitter in a clear or tinted base
Loose cosmetic glitter: Applied manually over wet polish or a sticky base
Chunky flakes or foil pieces: For a dimensional, galactic finish
Micro-glitter topcoats: Subtle shimmer with a refined, elegant glow
Choose one or blend styles for a multi-layered effect. Just be sure to keep proportions balanced so the final look doesn’t overwhelm the nail.
Step 5: Apply Glitter to Your Nails
There are two main techniques depending on the type of glitter product you’re using.
Option 1: Glitter Polish
Apply a thin coat directly over your lavender base once it’s dry.
Build in layers for increased sparkle, letting each coat set before applying the next.
Use a sponge technique for higher glitter density: apply glitter polish to a makeup sponge, press it gently onto the nail to deposit particles without excess base.
Option 2: Loose or Chunky Glitter
Apply a thin coat of clear polish or topcoat over one nail at a time.
Sprinkle or press glitter onto the wet nail using a brush or silicone tool.
Tap off excess, then use a fan brush to remove strays.
Press lightly with your fingertip or silicone tool to embed pieces into the polish.
Repeat for each nail, working quickly to avoid drying between glitter placement.
This phase is tactile and expressive—play with opacity and density until you find your perfect shimmer balance.
Step 6: Seal the Look with Topcoat
Topcoat is more than just gloss—it locks in glitter, smooths texture, and protects against chips.
Use a thick, glossy topcoat for best results. Gel-style topcoats work beautifully on glitter to create a glassy, domed finish.
Apply generously and float the brush over the nail rather than dragging it. This prevents glitter from shifting or lifting.
Cap the tip of each nail to prevent peeling or edge wear.
Let it cure fully—either under UV light if using gel or air-dry for traditional formulas.
Some glitter looks benefit from a second topcoat layer after 15 minutes. This creates a smoother finish and enhances shine.
Step 7: Clean Up the Edges
A neat border takes the look from DIY to salon-level. Even if you’ve been careful, glitter has a sneaky way of wandering.
Dip a cleanup brush (or angled eyeliner brush) into acetone or non-acetone remover.
Trace around the cuticle line and nail sides to clean up any overflow or mess.
Wipe gently and avoid touching the nail surface to maintain your glossy finish.
A crisp cuticle line makes the sparkle pop even more. Take your time—this small detail elevates the entire look.
Step 8: Nourish and Revive
Once your topcoat is fully dry and your cleanup is done, return some love to your hands and nails.
Apply cuticle oil and massage into the nail bed and surrounding skin. This promotes growth and keeps nails flexible.
Use hand cream to hydrate your fingers and palms, but keep it away from the nails until the polish is rock solid.
Avoid water exposure for at least an hour to prevent lifting or bubbling.
Well-nourished skin frames your glitter nails in softness, giving the final touch of elegance.
Step 9: Customize with Accents (Optional)
If you want to push your manicure into even bolder territory, consider layering in accent details.
Rhinestones or nail gems for one or two statement nails
Lavender chrome powder for a metallic flash
Negative space designs using nail tape or stencils
Ombré fade with darker purples or silver glitter blending up from the cuticle
These additions give your manicure a couture edge and are perfect for events or editorial-style looks.
Step 10: Maintain and Prolong the Sparkle
To keep your manicure flawless longer:
Apply an extra topcoat every 2–3 days to refresh shine and seal any glitter migration
Wear gloves when doing dishes or household chores
Avoid soaking nails in water for extended periods
Use a soft nail brush to clean under your nails instead of harsh scrubbing
Be gentle with your hands, especially during the first 24 hours
Glitter has excellent longevity when sealed properly, and touchups are easy if chips do happen. A glitter manicure is more forgiving than a solid color when it comes to wear and tear.
Step 11: Removal Without the Nightmare
Glitter polish is infamous for being tough to remove—but it doesn’t have to be. Use one of the following techniques for a fuss-free cleanup when you're ready for a new look.
Foil Method
Soak a cotton pad in acetone and place it over the nail
Wrap with foil and let sit for 10–15 minutes
Twist and pull the foil off—most glitter should slide right off
Soak-Off Bowl
Pour acetone into a soak bowl and submerge nails for 5–10 minutes
Gently rub with a cuticle pusher to remove remaining polish
Peel-Off Base Coat
If you used one, simply lift and peel starting from the edge—no remover needed
Always moisturize thoroughly after removal, as acetone can be drying.

Dazzling Lavender Glitter Nails: A Sparkling DIY Guide
When you craft a lavender glitter manicure from scratch, you’re doing far more than layering polish. You’re curating a mood. You’re building radiance into the quietest parts of your day. These nails don’t just shimmer—they carry a kind of confidence that feels earned. Every brush stroke, every flake of glitter placed with care, becomes an act of presence. An act of beauty not for anyone else, but for you.
There’s something powerful about creating your own sparkle. In a world that often rushes and reduces, this is a reminder to slow down and elevate. To let your hands reflect something magical. To show up polished even when no one’s watching.
Lavender glitter nails aren’t just trendy. They’re transformative. They carry a softness that refuses to disappear. They hold light, mirror mood, and give you that extra edge of beauty when you need it most. So whether you're new to DIY nails or a seasoned polish devotee, don’t underestimate what happens when creativity meets care in the form of sparkle.
It’s more than a look. It’s a ritual. And it’s one you deserve.
Your hands are ready. Your polish is waiting. Go shine.
Step into the world of glitz and glamour with “Dazzling Lavender Glitter Nails: A Sparkling DIY Guide,” a blog post that will guide you through creating a stunning manicure that’s sure to turn heads. This guide is your ticket to mastering the art of glitter nails, combining the soothing tones of lavender with the sparkle of glitter for a truly enchanting look. To support your nail art journey, we’ve curated a list of sources, each linked by a keyword, to provide you with inspiration and expert advice. Let these resources be your guide as you create a manicure that’s as dazzling as it is stylish.
Lavender Glitter Nails Inspirational Sources:
May these sources inspire you to create a manicure that’s as radiant as a field of blooming lavender. Enjoy the sparkle and shine of your new nail art!