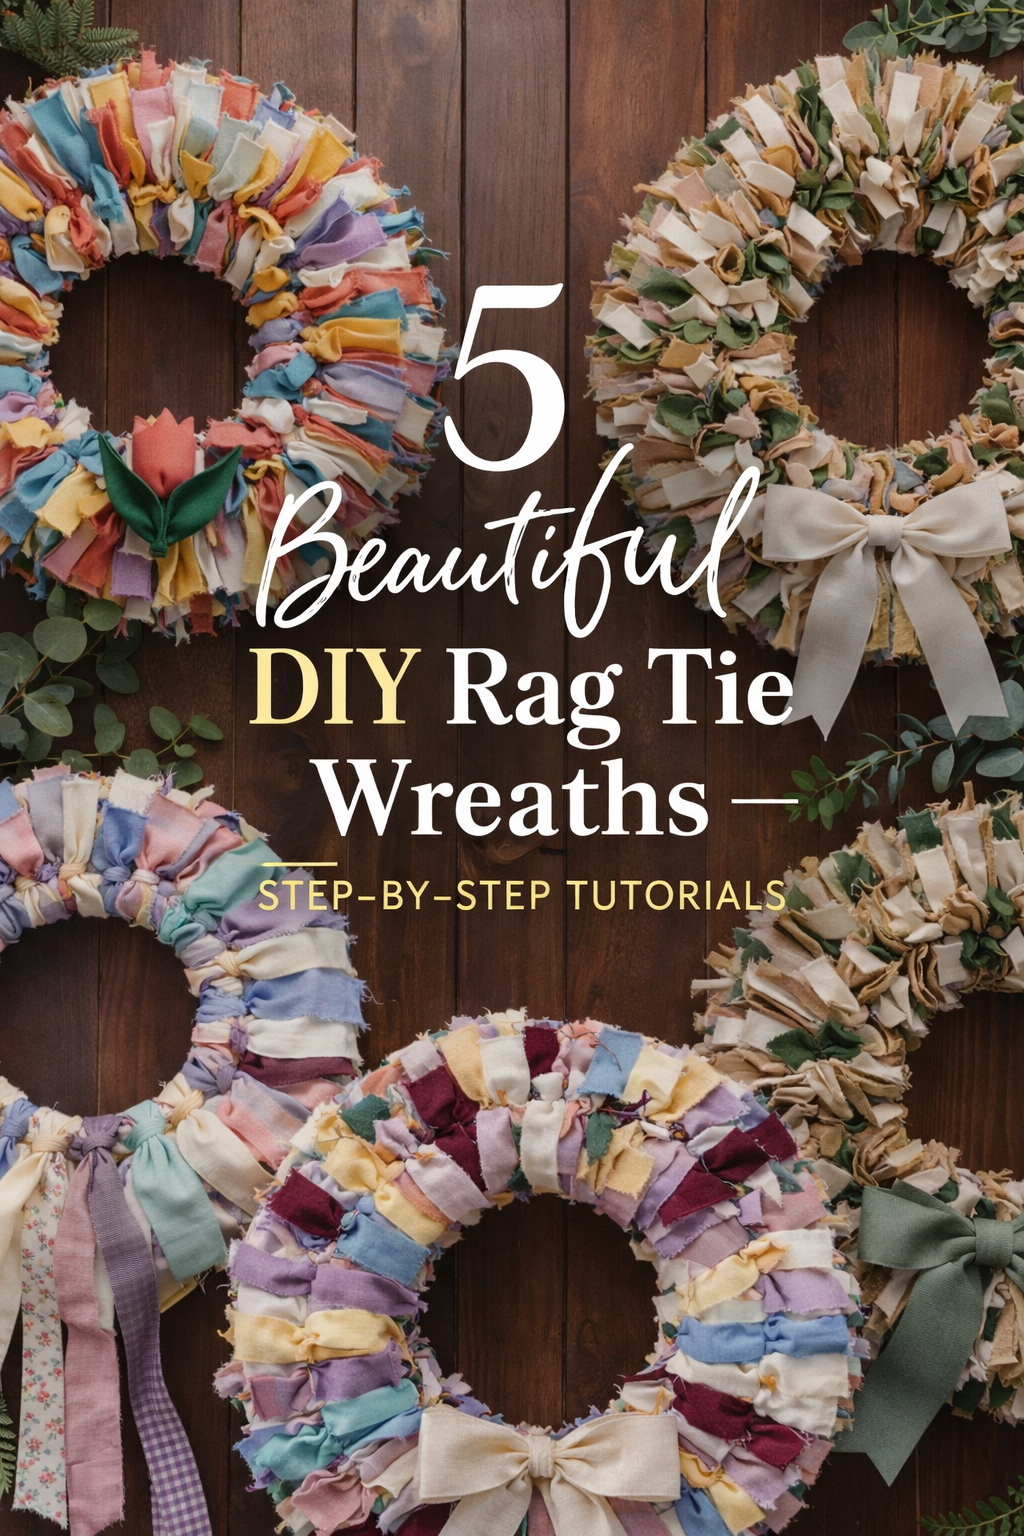
Five Beautiful DIY Rag Tie Wreaths — Step-by-Step Tutorials to Transform Your Front Door
More like this
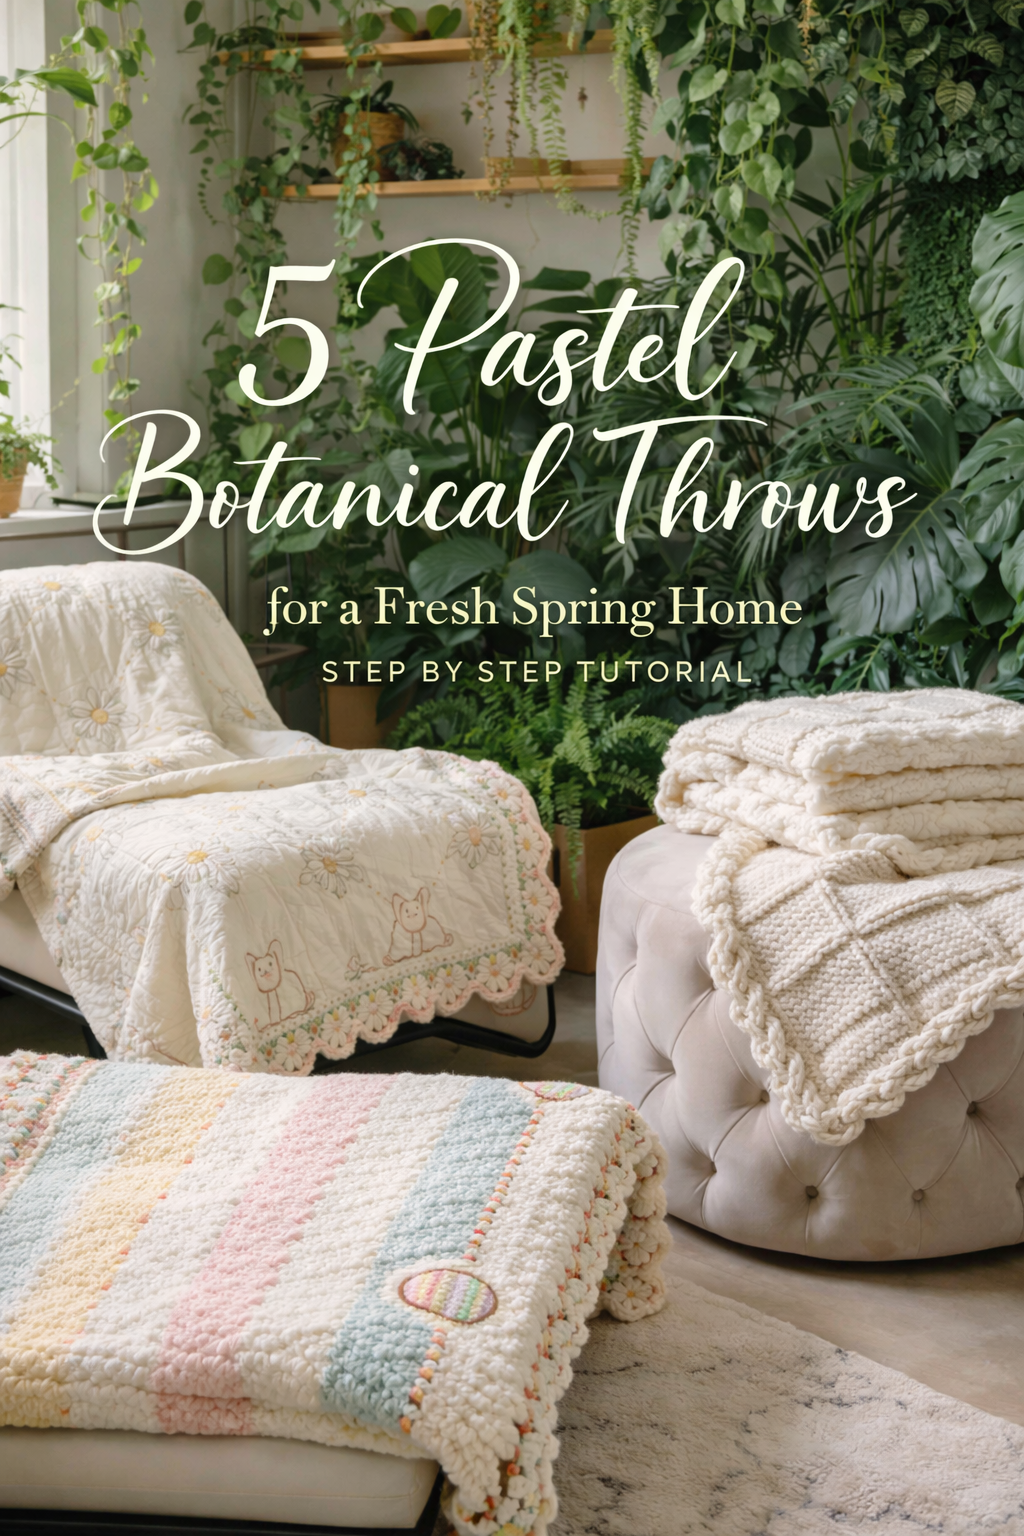
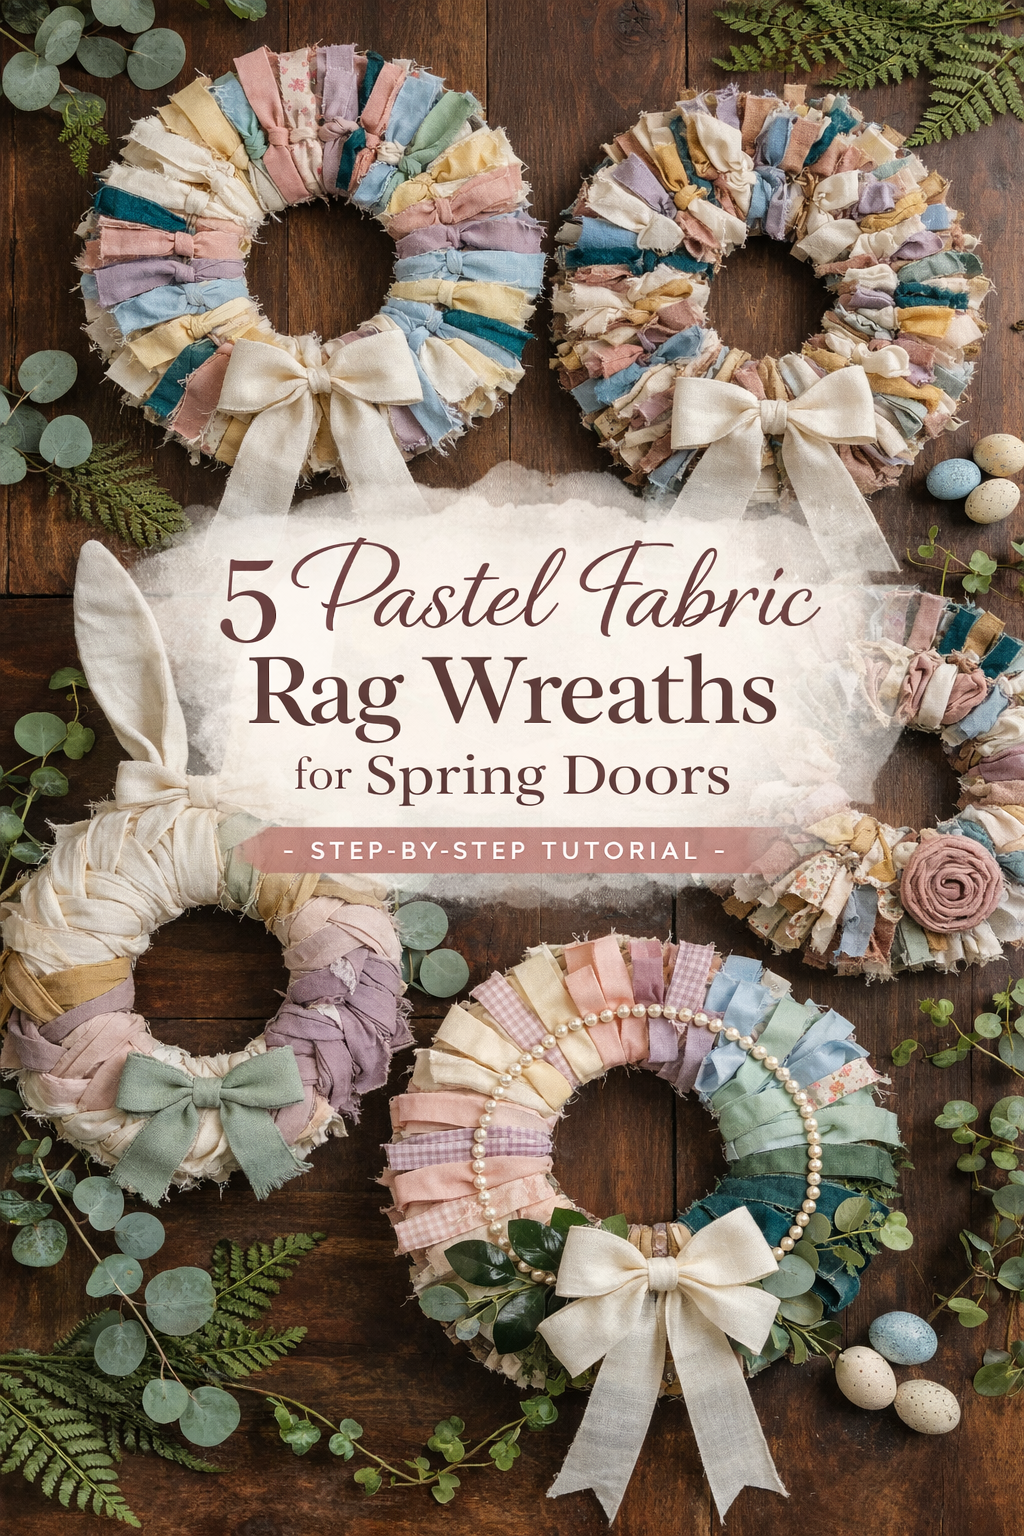
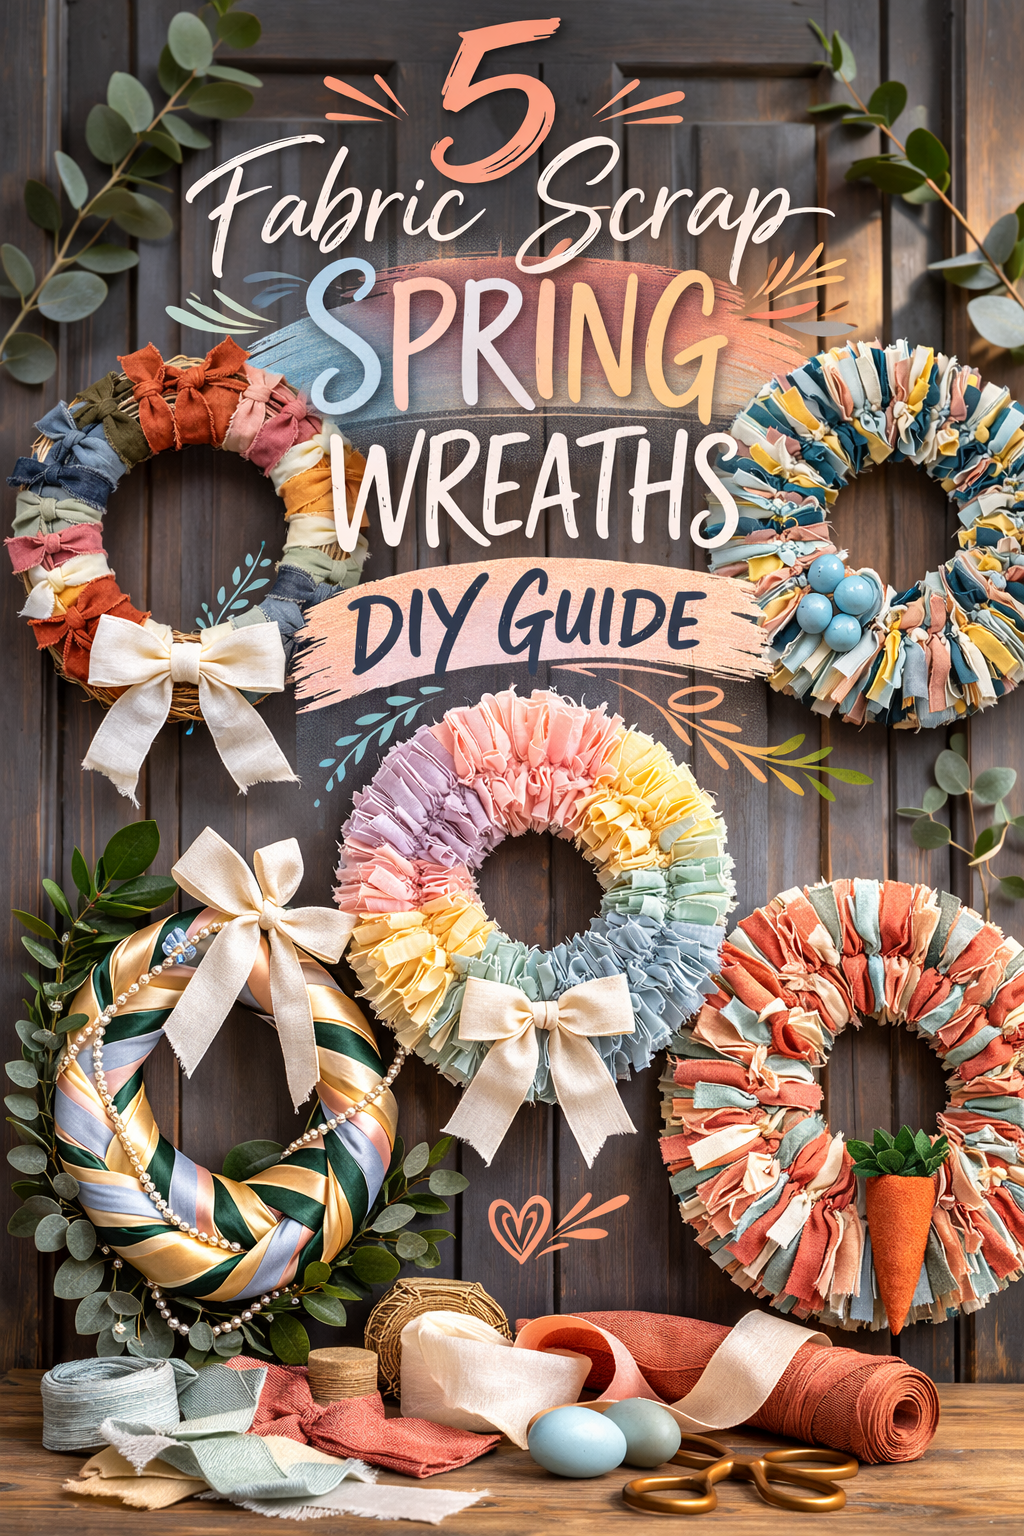
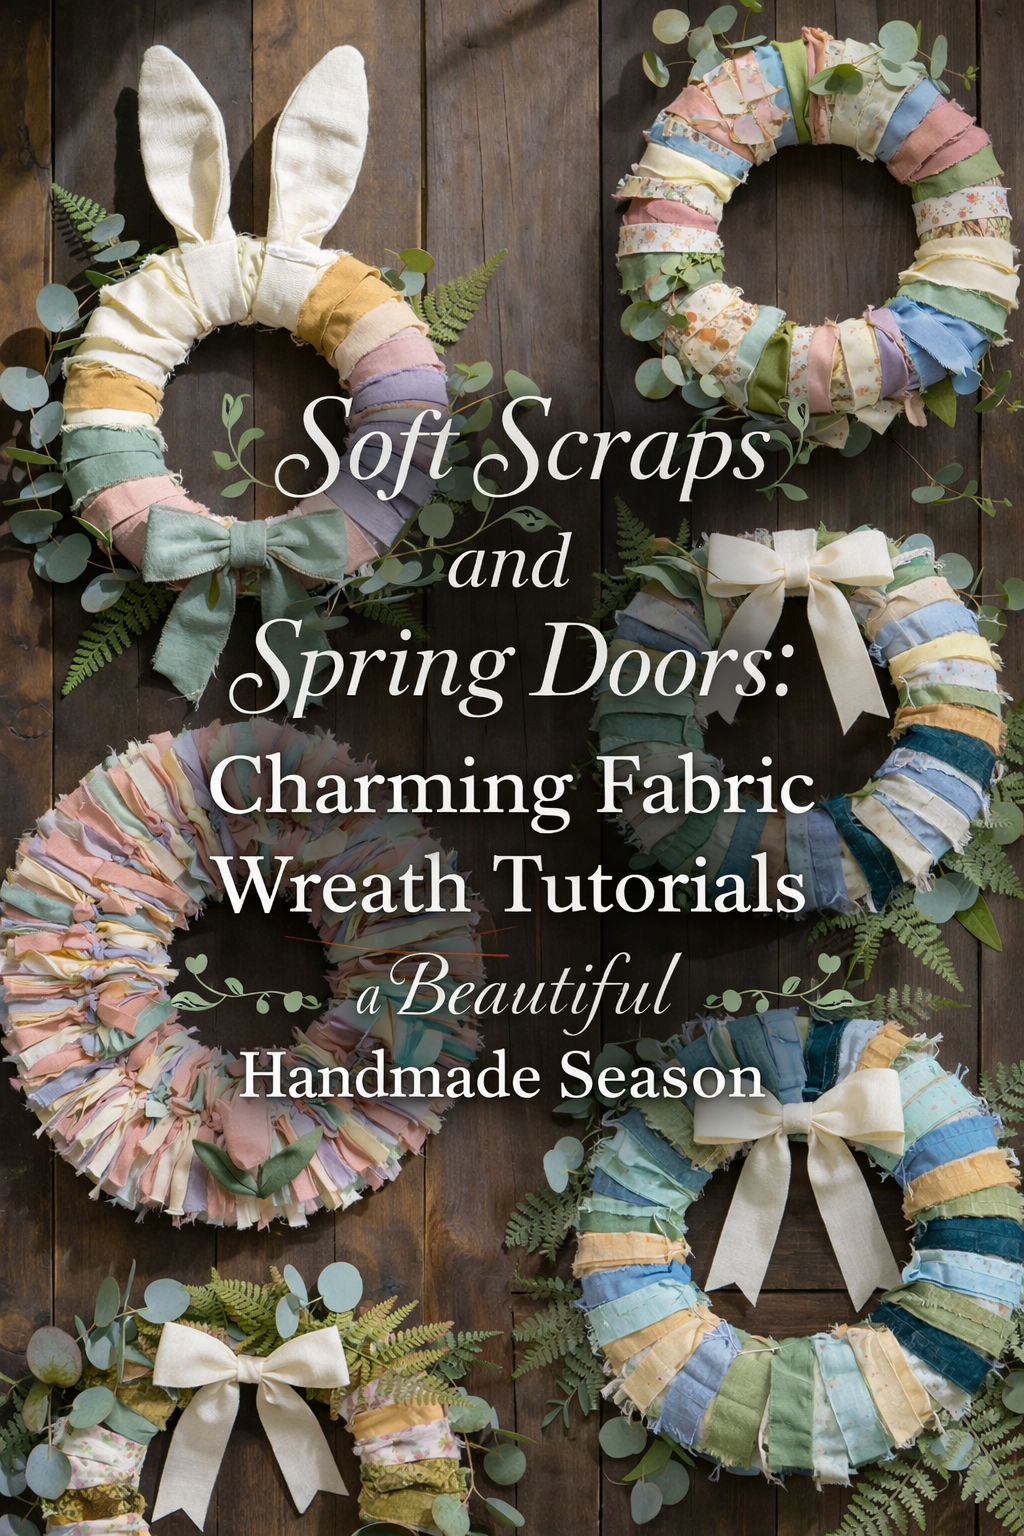
Spring wreaths do not have to be perfectly symmetrical or professionally sewn to look polished on a front door. The projects in this post are all built around the same satisfying idea: short fabric strips tied into a plush ring that reads full, textured, and boutique from the curb. What changes from wreath to wreath is the color story and the finishing accent, whether that is a tulip detail, a cascade of ribbon tails, or a statement bow that makes the whole thing feel styled on purpose.
As you scroll, notice how each look uses the same simple construction but creates a totally different mood. Bright rainbow scraps feel playful and bold. Soft pastels feel romantic and cottage sweet. Muted botanicals feel modern and calm. Neutrals with sage feel timeless and farmhouse clean. Pick the palette that matches your entryway and your season, then use the step by step guides to recreate the exact vibe without overthinking it. This is one of those crafts where a little imperfection actually makes it prettier, because it adds movement and softness.
💡 Pro Tip: Why I Link to Amazon Search Results and Not One Product
In the Shop the Look and Style it With sections under each bikini, I link to Amazon search results, not single products. Here’s why this matters:
Hot bikinis sell out fast. I don’t want you clicking on a dead link to a sold-out item. Search pages stay updated.
You get more options. Love the vibe but want a different color, cut, or price point? The search results give you everything that matches the look and energy.
I curate each search carefully. These aren’t generic. I spend hours crafting keywords that bring up exactly the kind of bikinis I’d wear—or recommend to my hottest friends.
Support with no pressure. If you click a link, browse, and buy something later, I may earn a small commission at no extra cost to you. That helps me keep bringing you curated collections like this one—powerful, seductive, and always fresh.
So dive in. Click through. Try something risky. These aren’t just bikinis—they’re commands, statements, and maybe even your new favorite weapon of choice.
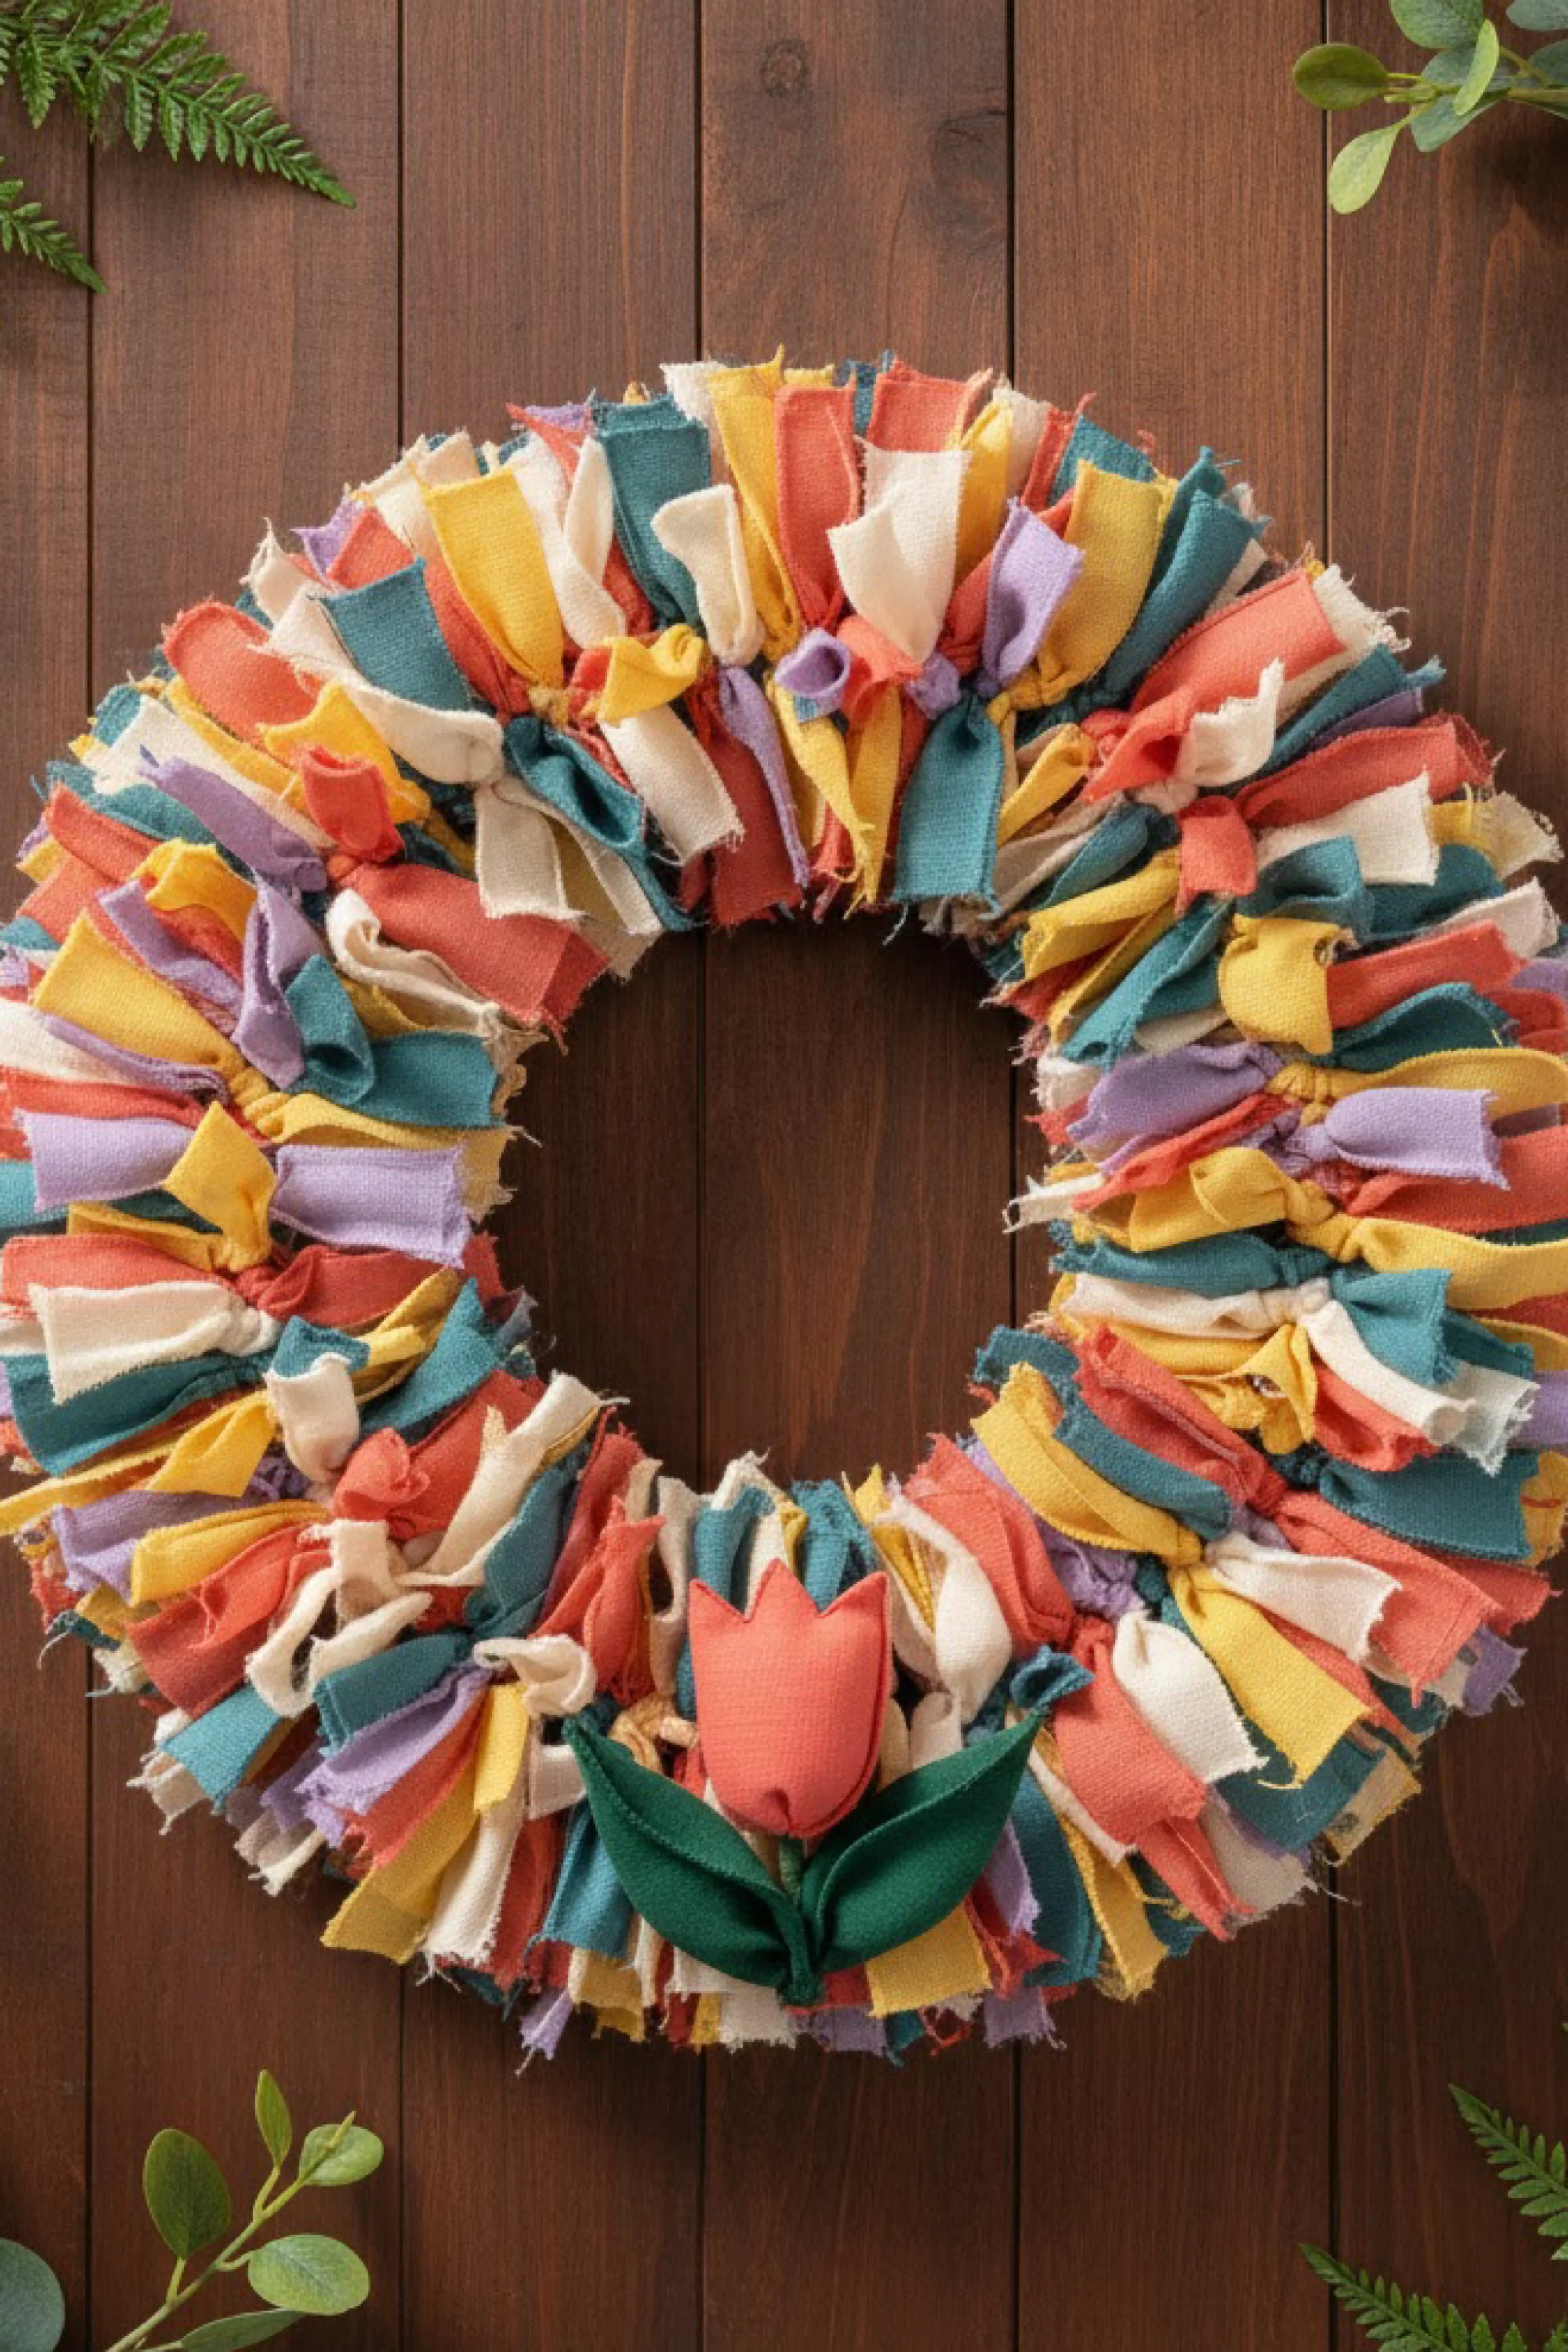
Rainbow Rag Tie Wreath with Tulip Accent How To Guide
What you’re making
This project recreates the bold, happy rag tie wreath look in the photo: a plush ring packed with short fabric knots in a bright rainbow palette, finished with a simple tulip accent at the bottom. It feels playful, textured, and a little farmhouse at the same time because the frayed fabric edges soften everything. The best part is it is forgiving, fast, and looks full even if your knots are not perfectly identical.
Materials + tools
- 12 to 14 inch wreath form, wire or foam both work
- Fabric scraps in bright tones like coral, teal, butter yellow, lavender, and cream
- Optional coordinating felt for the tulip and leaves
- Sharp fabric scissors or rotary cutter and mat
- Ruler or quilting ruler
- Pencil or fabric chalk
- Hot glue gun and glue sticks
- Floral wire or pipe cleaner for reinforcing the tulip
- Optional pinking shears for quick fray control
- Optional fabric stiffener spray if you want extra crisp tufts
- Hanging ribbon or wreath hanger
Finished size + customization notes
A 12 inch form typically finishes around 16 to 18 inches wide once you add the fabric volume. If you want the extra fluffy look from the photo, keep your strips on the shorter side and tie them very densely. For a lighter, airier wreath, space knots farther apart and use longer strips so the ends drape. You can also swap the tulip for a felt bunny, a mini banner, or a simple bow.
Step by step instructions
Choose your base and plan your fullness
Wire forms make it easy to tie and pack knots tightly, and they hold a rounded shape naturally. Foam rings work too, but you will usually wrap or pin fabric rather than tie. If you want the exact photo look, a wire form is the easiest match because you can tie directly onto the ring.Prep your fabric palette
Pull fabrics that read bright but still coordinated: one or two warm shades like coral and golden yellow, one or two cool shades like teal and lavender, and a neutral like cream. Aim for at least five colors so it feels intentionally mixed. If you have patterned fabric, use it sparingly so the wreath still reads as color blocks.Cut your rag strips
For the short, tufted, fluffy look in the photo, cut strips about 1 inch wide and 6 to 7 inches long. Cotton, linen, quilting cotton, and light canvas all work. If your fabric is thick, cut slightly longer so the knot does not eat too much length. You want ends that stick out like little flags after tying.Decide how you want the edges to look
The photo shows softly frayed edges, which happens naturally if you pull a few threads from the cut sides. For an easy version, cut normally and let handling fray it as you work. For a cleaner version, use pinking shears. For a purposely rustic version, tug the edges with your fingers after cutting a handful.Start tying on the inner ring first
If you are using a wire wreath form with multiple rings, begin on the inner ring to build thickness from the center outward. Fold a strip in half, slip the loop under the wire, then pull the tails through the loop to create a lark’s head knot. Tighten firmly. This keeps knots consistent and fast.Pack knots tightly and rotate colors
Tie three to five strips in one color, then switch to the next color. The photo has a lively scatter, not a perfect pattern. A simple way to mimic that is to keep a small pile of each color and grab without overthinking. Visual checkpoint: after one quarter of the wreath, you should already see dense coverage with very little wire showing.Add knots to the outer ring for extra puff
Once the inner ring looks full, move to the outer ring. Continue tying with the same knot. This second layer is what creates the plush, rounded wreath body. If your wreath form only has one ring, simply keep adding knots around and around until it becomes thick.Fill gaps by flipping and inspecting
Hold the wreath at arm’s length and turn it slowly. Any spot that looks thin will show up as a darker hollow. Add extra strips directly into those gaps. Visual checkpoint: from straight on, the wreath should look like a continuous, fluffy donut with no obvious base peeking through.Shape the tufts
Use your fingers to fluff and separate the fabric ends so they stand out evenly. If some ends are too long, trim a tiny amount. If some are too short, do not panic, just add one or two more strips nearby to blend. A little unevenness is part of the handmade charm.Create the tulip accent
Cut a simple tulip shape from felt or sturdy fabric in coral or pink. Cut two leaf shapes in green. If you want a slightly raised tulip like the photo, cut two tulip pieces, glue around the edges, and lightly stuff with scrap felt before sealing. Add a small strip at the base to suggest a stem wrap.Attach the tulip to the wreath bottom
Find the bottom center and press the wreath flat against your surface so it does not roll. Add hot glue to the back of the tulip and press into the fabric knots, aiming to glue onto multiple strips so it grips. Reinforce by slipping a short piece of floral wire through the felt and twisting it around the wreath form if you have a wire base. Visual checkpoint: the tulip should sit nestled, not floating, with leaves spreading slightly outward.Final tidy and hanging loop
Add a hanging ribbon to the top back. For a wire form, tie a ribbon directly to the metal. For foam, glue a loop of ribbon and add a small felt patch over it for strength. Trim any glue strings and give the wreath one last fluff.
Troubleshooting
- My wreath looks flat instead of plush
You likely need a second layer. Add knots to an outer ring, or add another full pass of knots around the same ring, focusing on building height not just coverage. - I can still see the base in spots
Turn the wreath and find the thin areas. Add extra strips right there. Dense filling beats perfect spacing. - My knots slip or loosen
Tighten each knot firmly as you go. If the fabric is very slick, like satin, switch to cotton or add a second half knot on top. - The colors look messy, not cheerful
Add more of your neutral color to calm it, and repeat your two strongest colors more often so the palette feels intentional. - The tulip keeps popping off
Glue onto several fabric knots, not just one strip. If possible, wire it through the base for a mechanical hold.
Finishing details
For maximum fluff, gently fray the ends by tugging a few threads from each strip edge, then shake the wreath outside. If you want the tufts to stay perky, mist lightly with fabric stiffener and let dry flat. To protect the door, add small felt pads on the back at three points so it sits softly and does not scratch.
Shop Similar
- Wire wreath forms for rag tie wreaths
- Assorted bright fabric fat quarters bundle
- Craft felt sheets for tulip accents
- Hot glue gun kit with glue sticks
- Fabric stiffener spray for crafts
Style It With
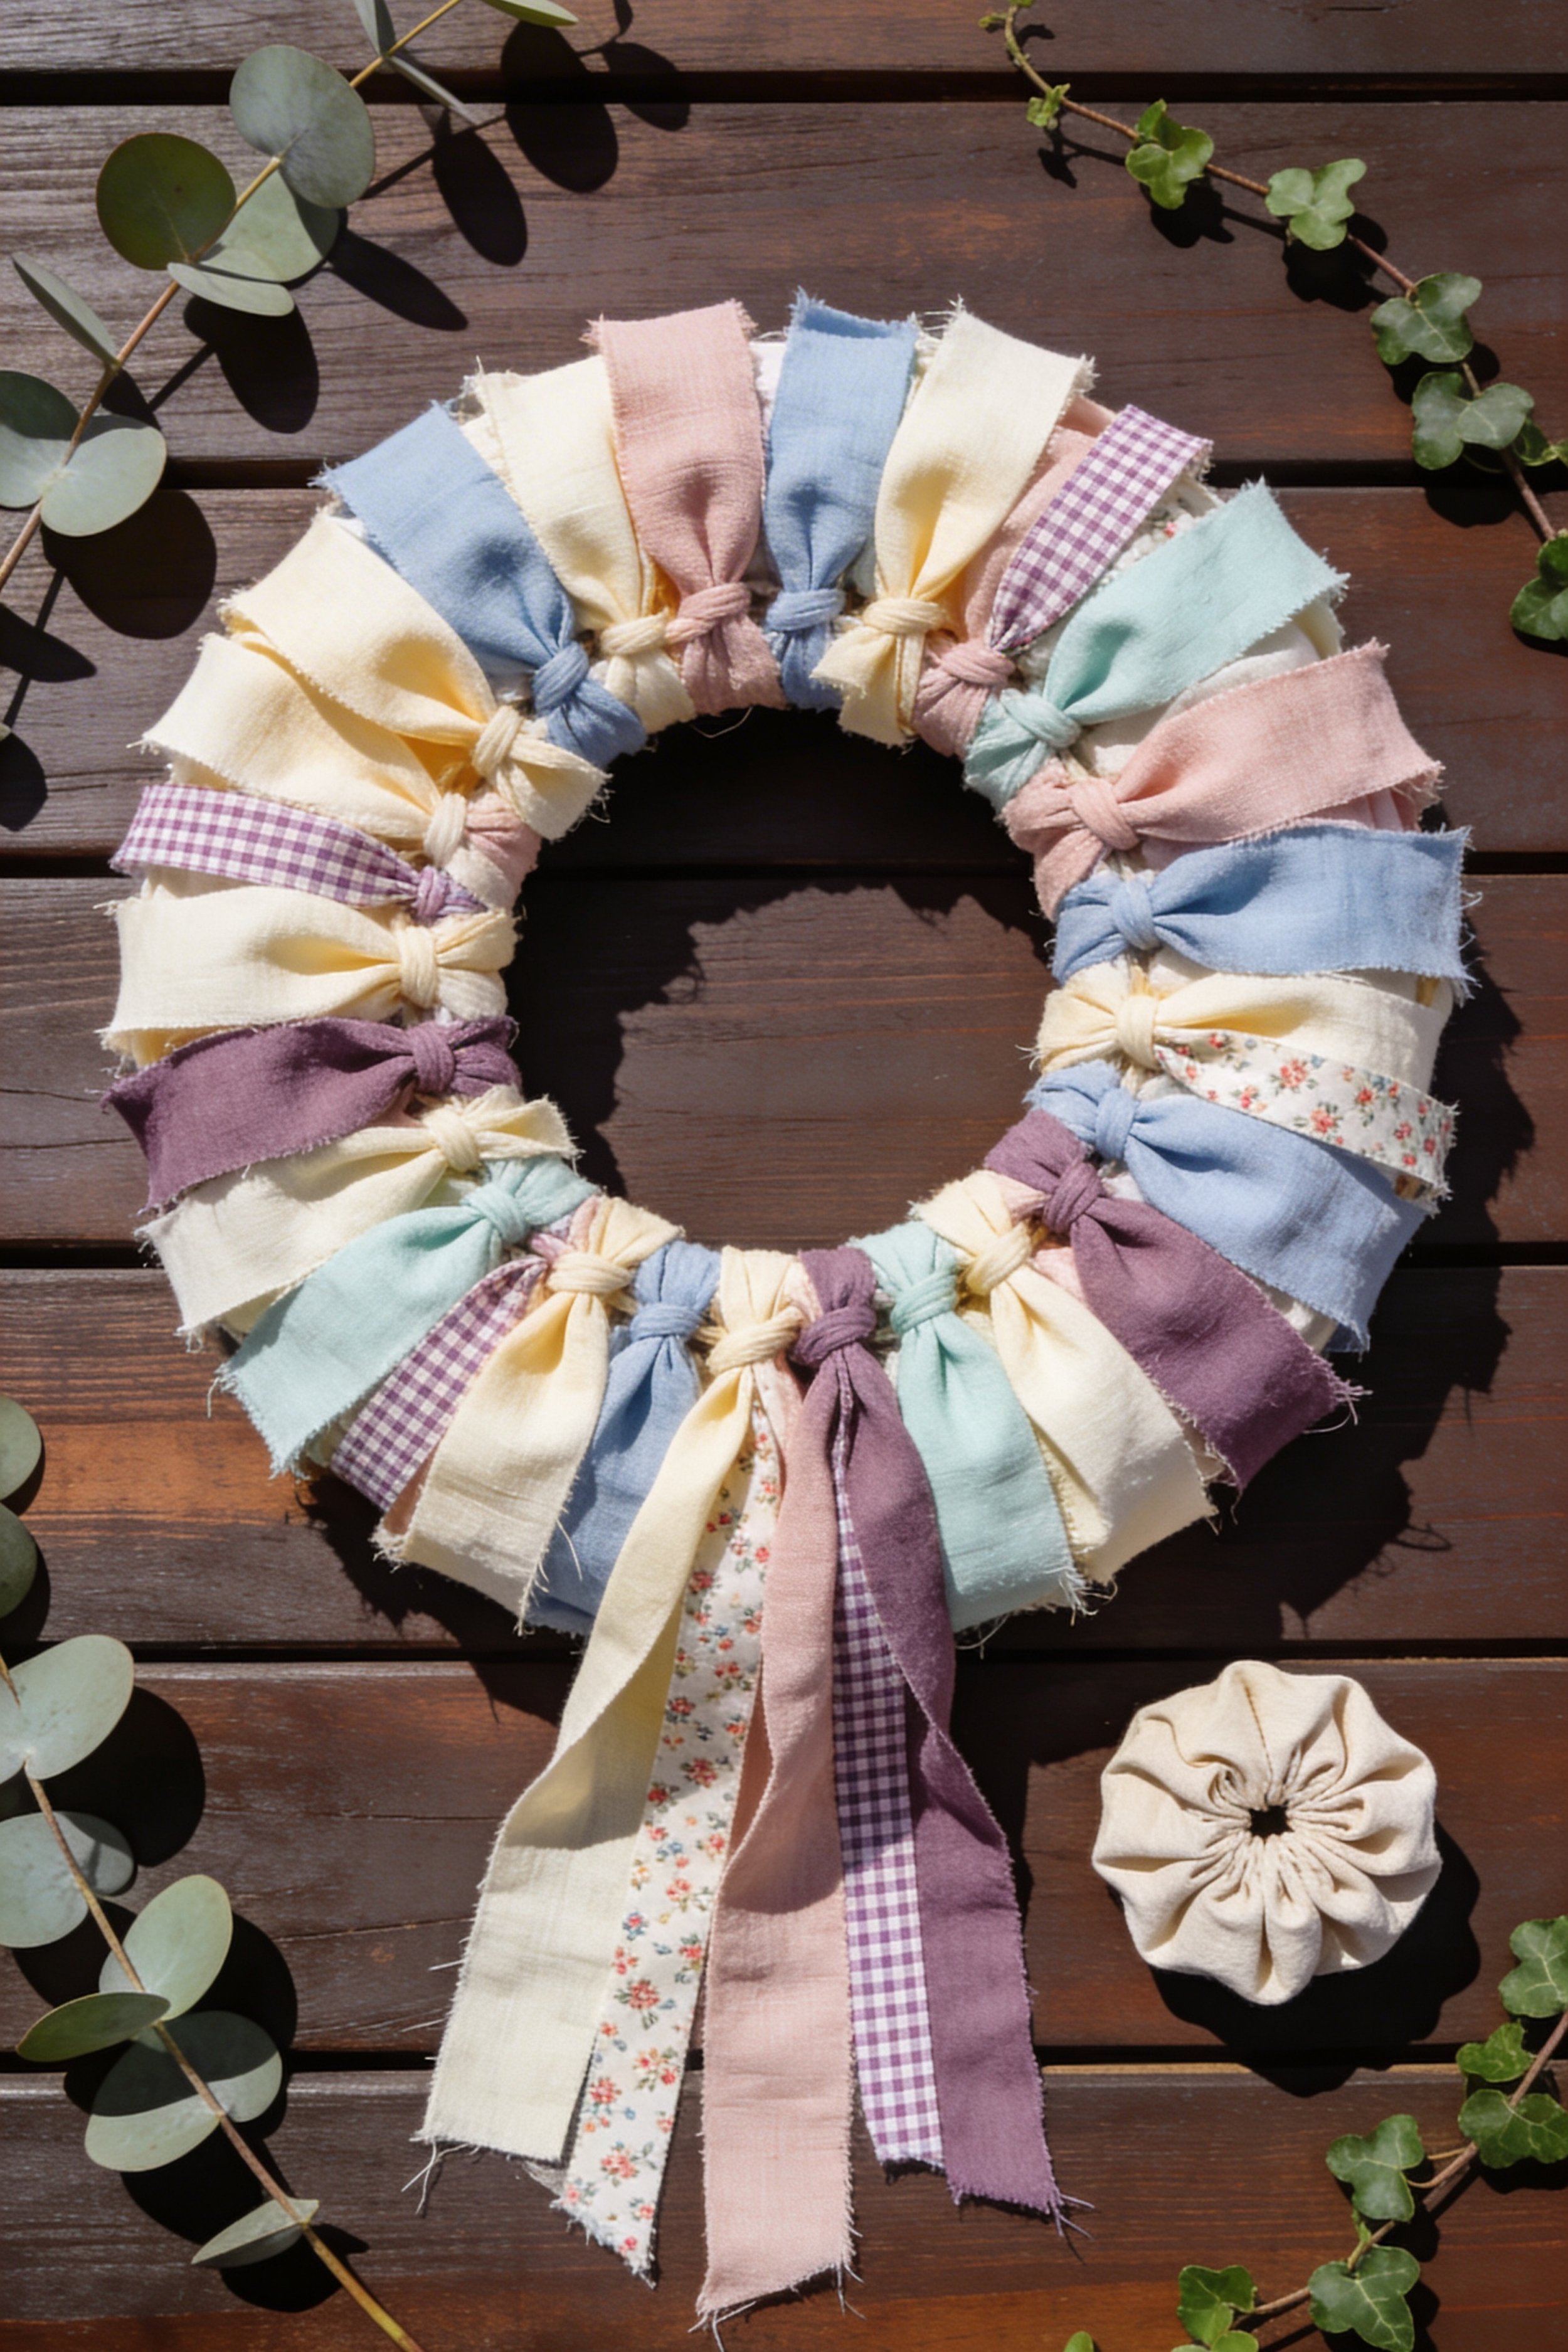
Pastel Bow Rag Wreath with Ribbon Tails Step by Step Tutorial
What you’re making
This tutorial recreates the soft pastel wreath in the photo: chunky fabric bows tied all around a ring, with a few longer ribbon tails cascading from the bottom for an extra sweet, cottage vibe. It looks like a wreath made of bows, but it is actually simple fabric strips tied into neat knots that read like little bow bundles. The result is clean, airy, and very spring friendly.
Materials + tools
- 12 to 14 inch wire wreath form or foam ring
- Fabric strips in blush pink, powder blue, mint, buttercream, and soft cream
- Optional accent strips in gingham and tiny floral prints
- Scissors or rotary cutter and mat
- Ruler
- Hot glue gun
- Needle and thread or fabric glue for optional bow shaping
- Ribbon or fabric strip for hanging loop
- Optional florist wire for tail reinforcement
Finished size + customization notes
A 12 inch form will finish about 16 inches wide. The bow style is defined by longer, wider strips, so keep your fabric width around 1.5 to 2 inches and length around 10 to 12 inches for the bow bundles. Add tails in the 18 to 24 inch range if you want that dramatic bottom cascade. If you prefer a more compact look, shorten the tails to 12 to 16 inches.
Step by step instructions
Pick the right base for crisp bows
A wire wreath form is easiest because your knots lock onto the metal and stay evenly spaced. Foam works if you pin or glue, but the ties will not look as clean unless you wrap first. To match the photo, use wire.Choose fabrics with soft structure
The bows look best with cotton, linen blend, chambray, and light canvas. Very thin fabric can look limp. Very thick fabric can look bulky and hard to tie. If your fabric is thin, use a double strip layered together.Cut your main bow strips
Cut strips about 1.5 to 2 inches wide and 10 to 12 inches long. Tear cut strips can look lovely because the edges are softly frayed. If you want a cleaner bow, cut with a rotary cutter for straight edges.Cut a small set of accent strips
Include a few gingham strips and a few floral strips just like the photo. Keep them to around 10 inches long so they blend into the bow ring. Do not overdo patterns. Visual checkpoint: patterns should appear as little surprises, not dominate the wreath.Tie your first bow bundle
Fold a strip in half, loop under the wire, and pull tails through to secure. Now separate the two tails and pinch the fabric near the knot so it puffs outward. The knot becomes the bow center and the tails become bow loops and ends.Make the knots read like bows
After tightening, pull each tail slightly upward, then gently fold each tail back on itself to create a loop shape. If you want extra bow definition, add one small dot of hot glue behind each loop to hold the fold. Keep glue minimal so it stays soft.Work around the wreath in color clusters
The photo alternates pastels in a calm rhythm. A simple method is to repeat: cream, blue, cream, pink, cream, mint, then add one gingham or floral every sixth or seventh bow. This keeps it airy and balanced.Keep spacing consistent
Leave a small fingertip gap between knots so each bow can breathe. If you pack them too tightly, the wreath becomes a dense rag wreath rather than a bow wreath. Visual checkpoint: you should still see shadow depth between bows, not a solid wall of fabric.Add a few smaller ties to fill micro gaps
If you notice a gap that looks too open, add a thinner strip, about 1 inch wide, tied in the same way. This blends without making the whole wreath heavier.Create the bottom tail cluster
Cut three to five long strips in your prettiest mix: one floral, one gingham, one cream, one blush, one lavender or mauve. Length can be 18 to 24 inches. Tie them as a grouped bundle at the bottom center, letting them cascade down.Make the tails look intentional
Stagger the lengths by trimming one or two strips shorter so the ends step down. If you want a more polished look, cut the ends into a shallow V shape. If you want rustic, leave them straight with slight fray.Reinforce the tail bundle
Add a small dot of hot glue where the tail knot touches surrounding bows. If your wreath will face wind, wrap a small piece of floral wire around the knot and the wreath form. Hide the wire under the fabric.Final bow styling
Turn the wreath and gently fluff each bow by tugging the loops outward. Stand back and check color balance. If one area looks too blue or too pink, add one neutral bow next to it to soften.Add hanging loop
Tie a ribbon loop at the top, either matching the cream fabric or using a neutral ribbon. Make sure it is centered so the tail cluster hangs straight down.
Troubleshooting
- My bows do not look like bows, they look like knots
Use wider strips and add a tiny fold behind each side to create loops. Also avoid pulling the knot too tight, it should be snug but not strangled. - The wreath looks too busy
Reduce the number of patterned strips and add more cream. Cream acts like negative space and makes pastels feel calm. - My tails twist and look messy
Press them with a warm iron before tying, or tear strips on grain so they hang straighter. You can also lightly stiffen the tails with fabric stiffener. - The wreath droops at the bottom
Your tail bundle may be too heavy. Shorten tails or use lighter fabric for the long pieces, keeping heavier fabric for the bow ring. - Some knots slide on the form
Make sure you are looping under the wire and tightening the lark’s head knot firmly. If the fabric is slick, switch to cotton.
Finishing details
If you love the slightly frayed edges from the photo, tear your strips instead of cutting and pull a few threads from each end. For a cleaner look, trim frays and lightly press bows with an iron before tying. If hanging outdoors, consider a light fabric protectant spray and bring it in during heavy rain.
Shop Similar
- Pastel fabric bundle for crafts
- Wire wreath form for bow wreath
- Gingham ribbon or fabric strips
- Floral cotton fabric fat quarters
- Fabric stiffener for ribbon tails
Style It With
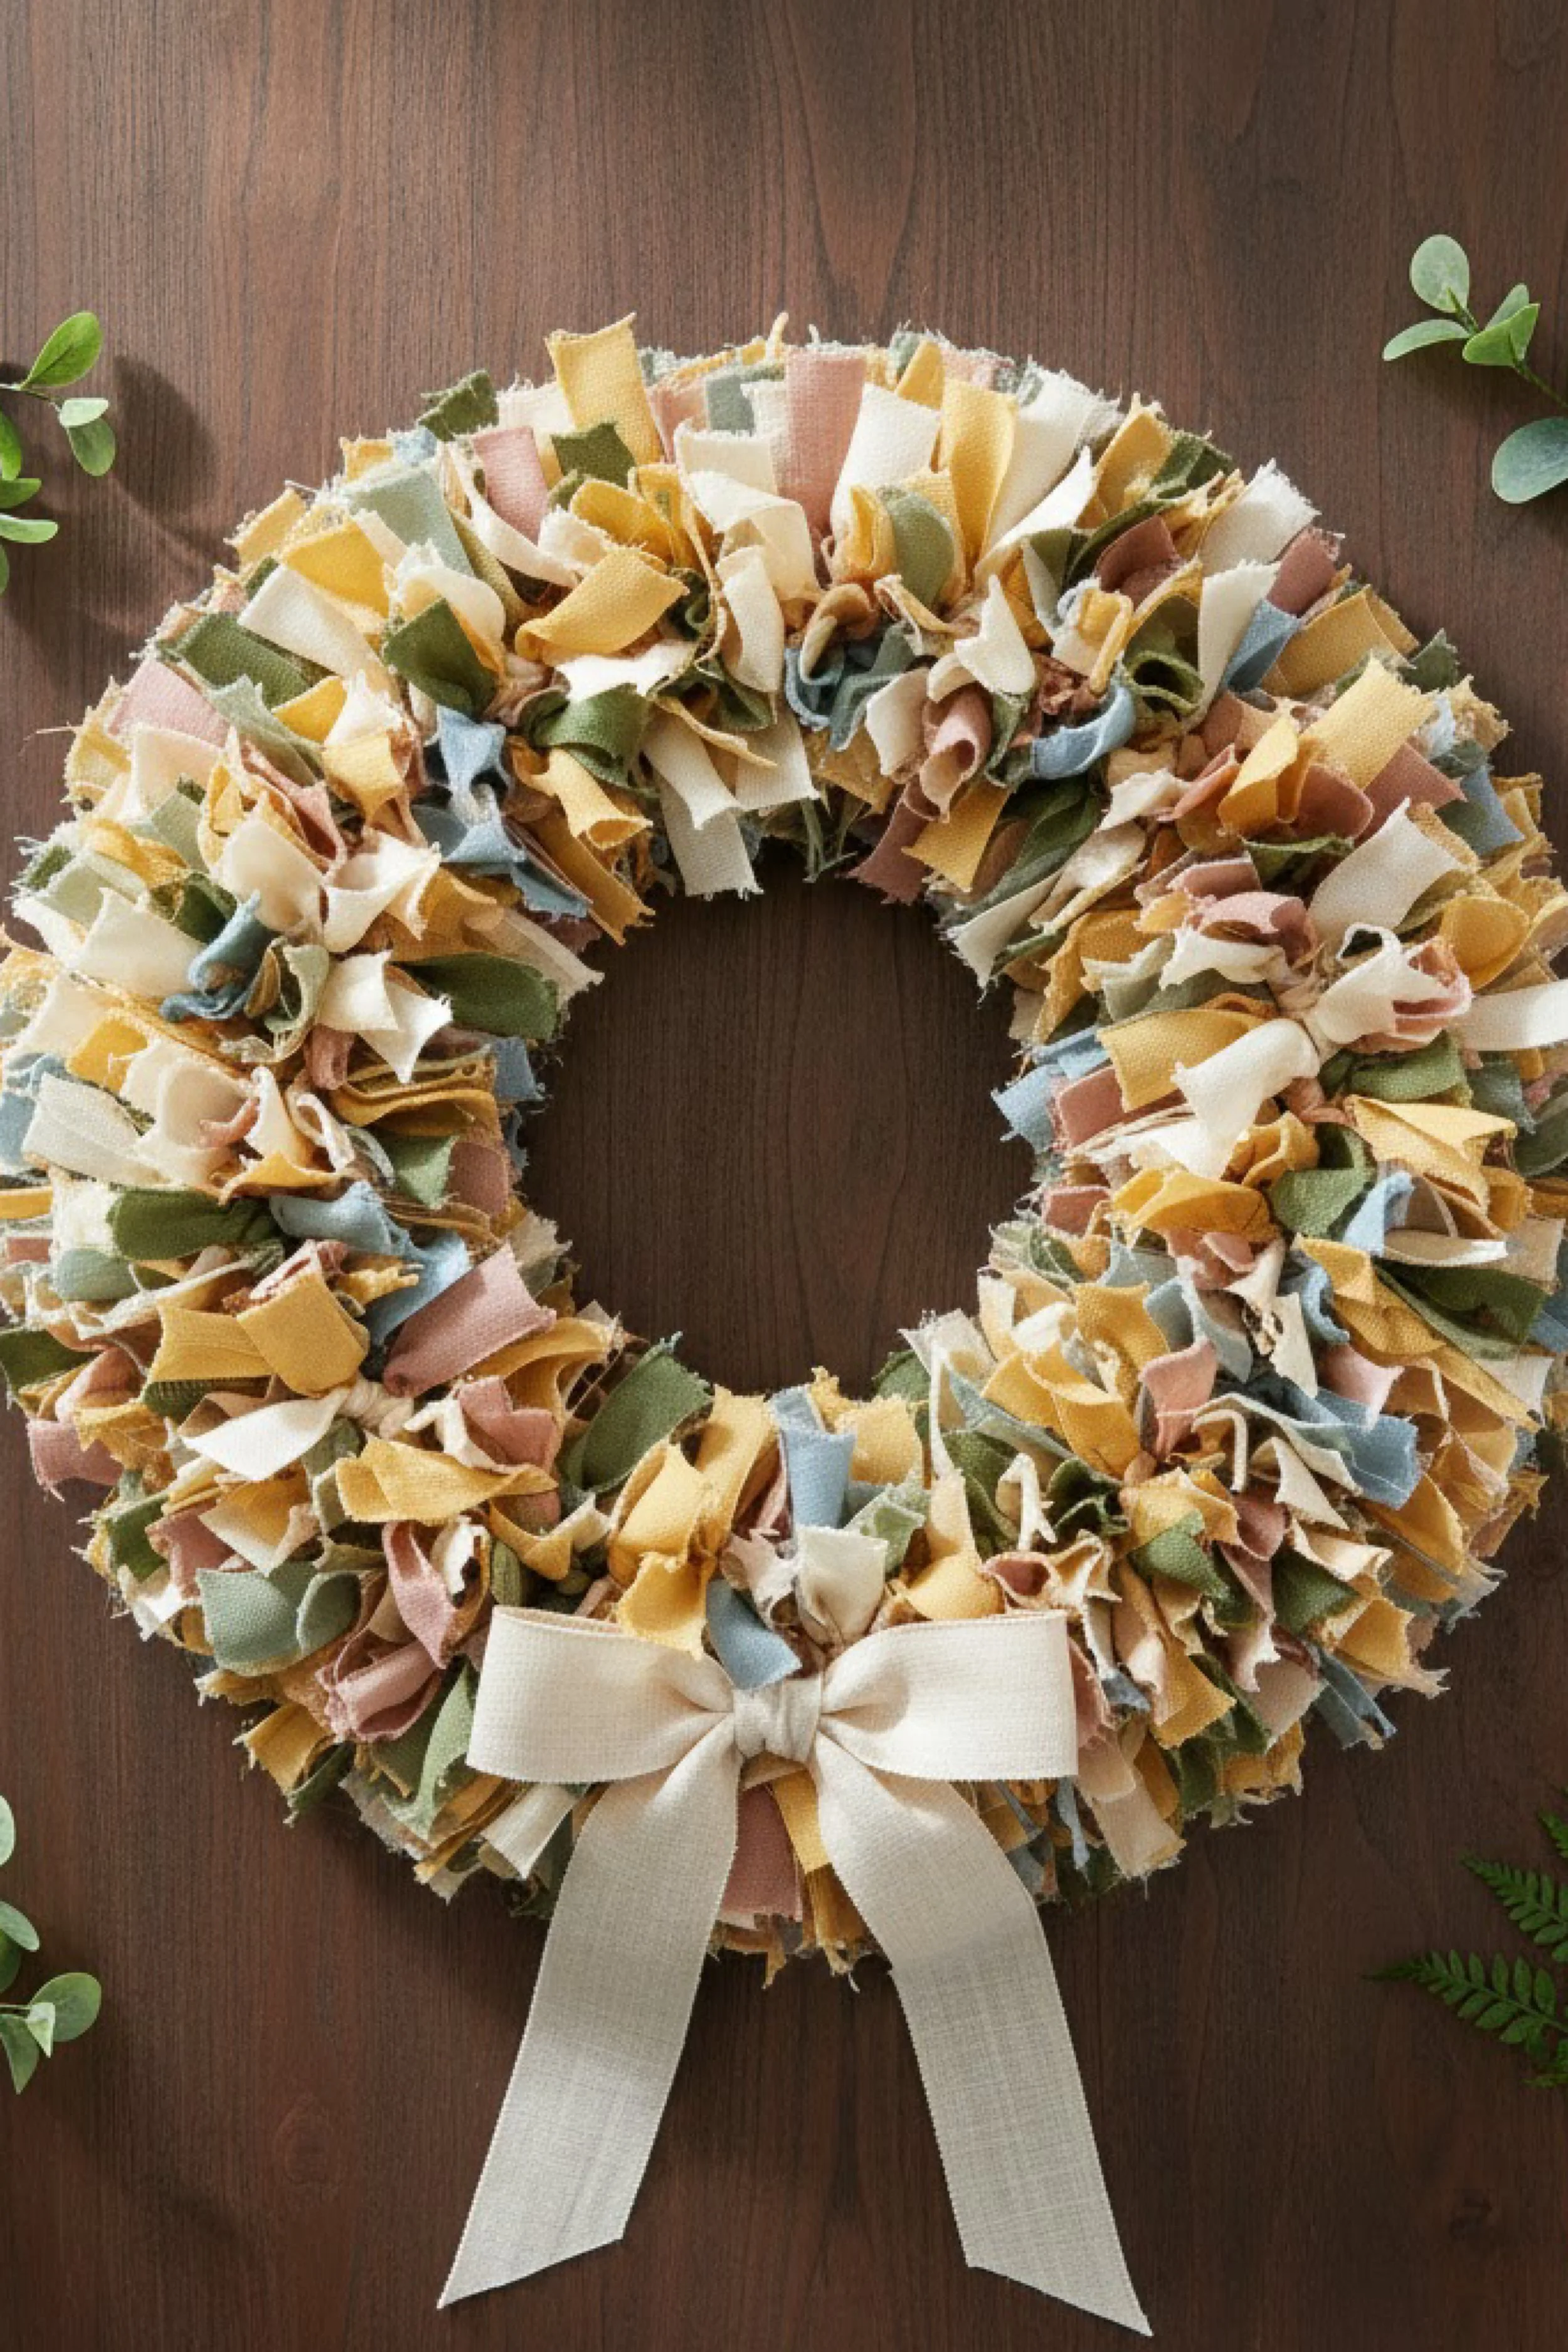
Muted Spring Rag Wreath with Oversized Bow DIY Guide
What you’re making
This project recreates the muted spring rag wreath in the photo: a full, textured ring made from short fabric ties in soft honey, sage, dusty blue, and warm blush, finished with an oversized ivory bow at the bottom. The overall effect is earthy and elevated, like spring tones with a cozy, natural twist. It is the kind of wreath that looks boutique, but it is built from simple strips and a steady tying rhythm.
Materials + tools
- 14 inch wire wreath form for a fluffy finished look
- Fabric scraps in muted tones: butter yellow, sage green, dusty blue, blush, warm cream
- Optional burlap or linen scraps for extra texture
- Scissors or rotary cutter and mat
- Ruler
- Hot glue gun
- Bow material: wide ivory cotton ribbon or torn linen strips
- Floral wire or pipe cleaner for bow attachment
- Optional fray check or clear fabric glue for bow ends
- Wreath hanger or ribbon loop
Finished size + customization notes
Expect a 14 inch form to finish around 18 to 20 inches once packed. This wreath gets its charm from mixed textures and short, chubby tufts. Cut strips shorter for a puffier surface, longer for more movement. The bow can be swapped for a wood bead garland segment, a mini banner, or a simple tag, but the oversized bow is the signature of this look.
Step by step instructions
Select a wire wreath form that has multiple rings
A form with two or three rings gives you depth. The photo wreath is very full, so you will likely tie on at least two rings.Gather fabrics and sort by tone
Lay fabrics in piles: warm yellows, greens, blues, blush tones, and creams. Include a few pieces that are slightly more textured, like linen or light burlap, to mimic the natural look.Cut strips for a dense rag surface
Cut strips about 1 inch wide and 6 to 8 inches long. If your fabric is very soft, go a little longer so it still sticks out after knotting. If your fabric is thick, keep it closer to 6 inches.Add a few texture strips
Cut a small pile of linen or burlap strips about 0.75 inch wide. These should be a minority, maybe one in every eight to ten ties, so they add depth without overpowering.Begin tying on the inner ring
Use a lark’s head knot: fold strip, loop under wire, pull tails through, tighten. Tie steadily around one quarter of the ring before switching rings. Visual checkpoint: after the first quarter, the wreath should already look chunky from the front.Mix colors like a soft mosaic
The photo does not look striped. It looks blended. A good technique is to alternate warm, cool, neutral: yellow, blue, cream, green, blush, cream, then repeat. Add a texture strip occasionally.Move to the next ring to build height
Once the inner ring is mostly covered, add ties to the outer ring. Keep your density high. This is where the wreath becomes plush. If you have a three ring form, add a lighter layer on the middle ring too.Check the front view regularly
Hang the wreath on a hook or hold it upright every so often. The wreath can look full while flat on the table but reveal thin spots when vertical. Add extra ties where you see base peeking.Shape the surface
Run your fingers around the wreath, separating clumps and spreading ends. You want a consistent puff. If some ties are too long, trim lightly to match the overall halo.Create the oversized bow
To match the photo, use a wide ivory ribbon or torn linen strips about 2 to 3 inches wide. Cut two long tails about 18 to 22 inches and two loop pieces about 10 to 12 inches. Form loops, pinch center, and wrap a smaller strip around the middle to create a bow center. Secure with hot glue and a few stitches if desired.Make the bow look soft but structured
If ribbon is too stiff, soften by gently crumpling and smoothing. If it is too floppy, add a small hidden piece of floral wire behind each loop to hold shape. Visual checkpoint: the bow should sit proud and rounded, not collapsed.Attach the bow to the wreath
Position at bottom center. Thread floral wire through the bow center, wrap around the wreath form, and twist tight on the back. Add hot glue behind the bow to anchor into nearby fabric ties.Balance the wreath around the bow
Sometimes the bow makes the bottom look heavier. Add a few extra ties just above the bow so it blends into the wreath body. Keep colors near the bow slightly lighter, like creams and blush, to spotlight it.Add hanging loop and final fluff
Tie a hanging ribbon at the top back. Give the wreath a final fluff and trim any stray threads that distract.
Troubleshooting
- My wreath looks patchy
You need more ties. Rag wreaths rely on density. Add ties in the thin zones, especially on the outer ring. - My colors look too random
Add more cream ties to calm the palette, then repeat your main tones more consistently: yellow, green, blue, blush. - The wreath looks messy not intentionally rustic
Trim the longest ends, reduce fraying on some strips, and add a few smoother cotton strips to clean the surface. - The bow droops
Use wire reinforcement, or switch to a slightly sturdier ribbon. Also make sure the bow is wired to the form, not only glued. - The bow twists sideways after hanging
Your hanger might be off center. Adjust the hanging loop so the wreath hangs straight, then rotate the bow slightly and re secure.
Finishing details
If you want a lightly frayed look, tear strips and gently pull a few threads at the ends. For outdoor durability, consider a light fabric protectant spray and bring it in during storms. Add felt pads on the back to protect your door. If the wreath will be used indoors, you can add a tiny fabric label or wooden tag for a boutique touch.
Shop Similar
- Muted fabric strips bundle for rag wreath
- Large wire wreath form 14 inch
- Ivory cotton ribbon wide
- Linen fabric bundle for crafts
- Floral wire set for wreath making
Style It With
Lavender Ribbon Rag Wreath with Classic Bow How To Guide
What you’re making
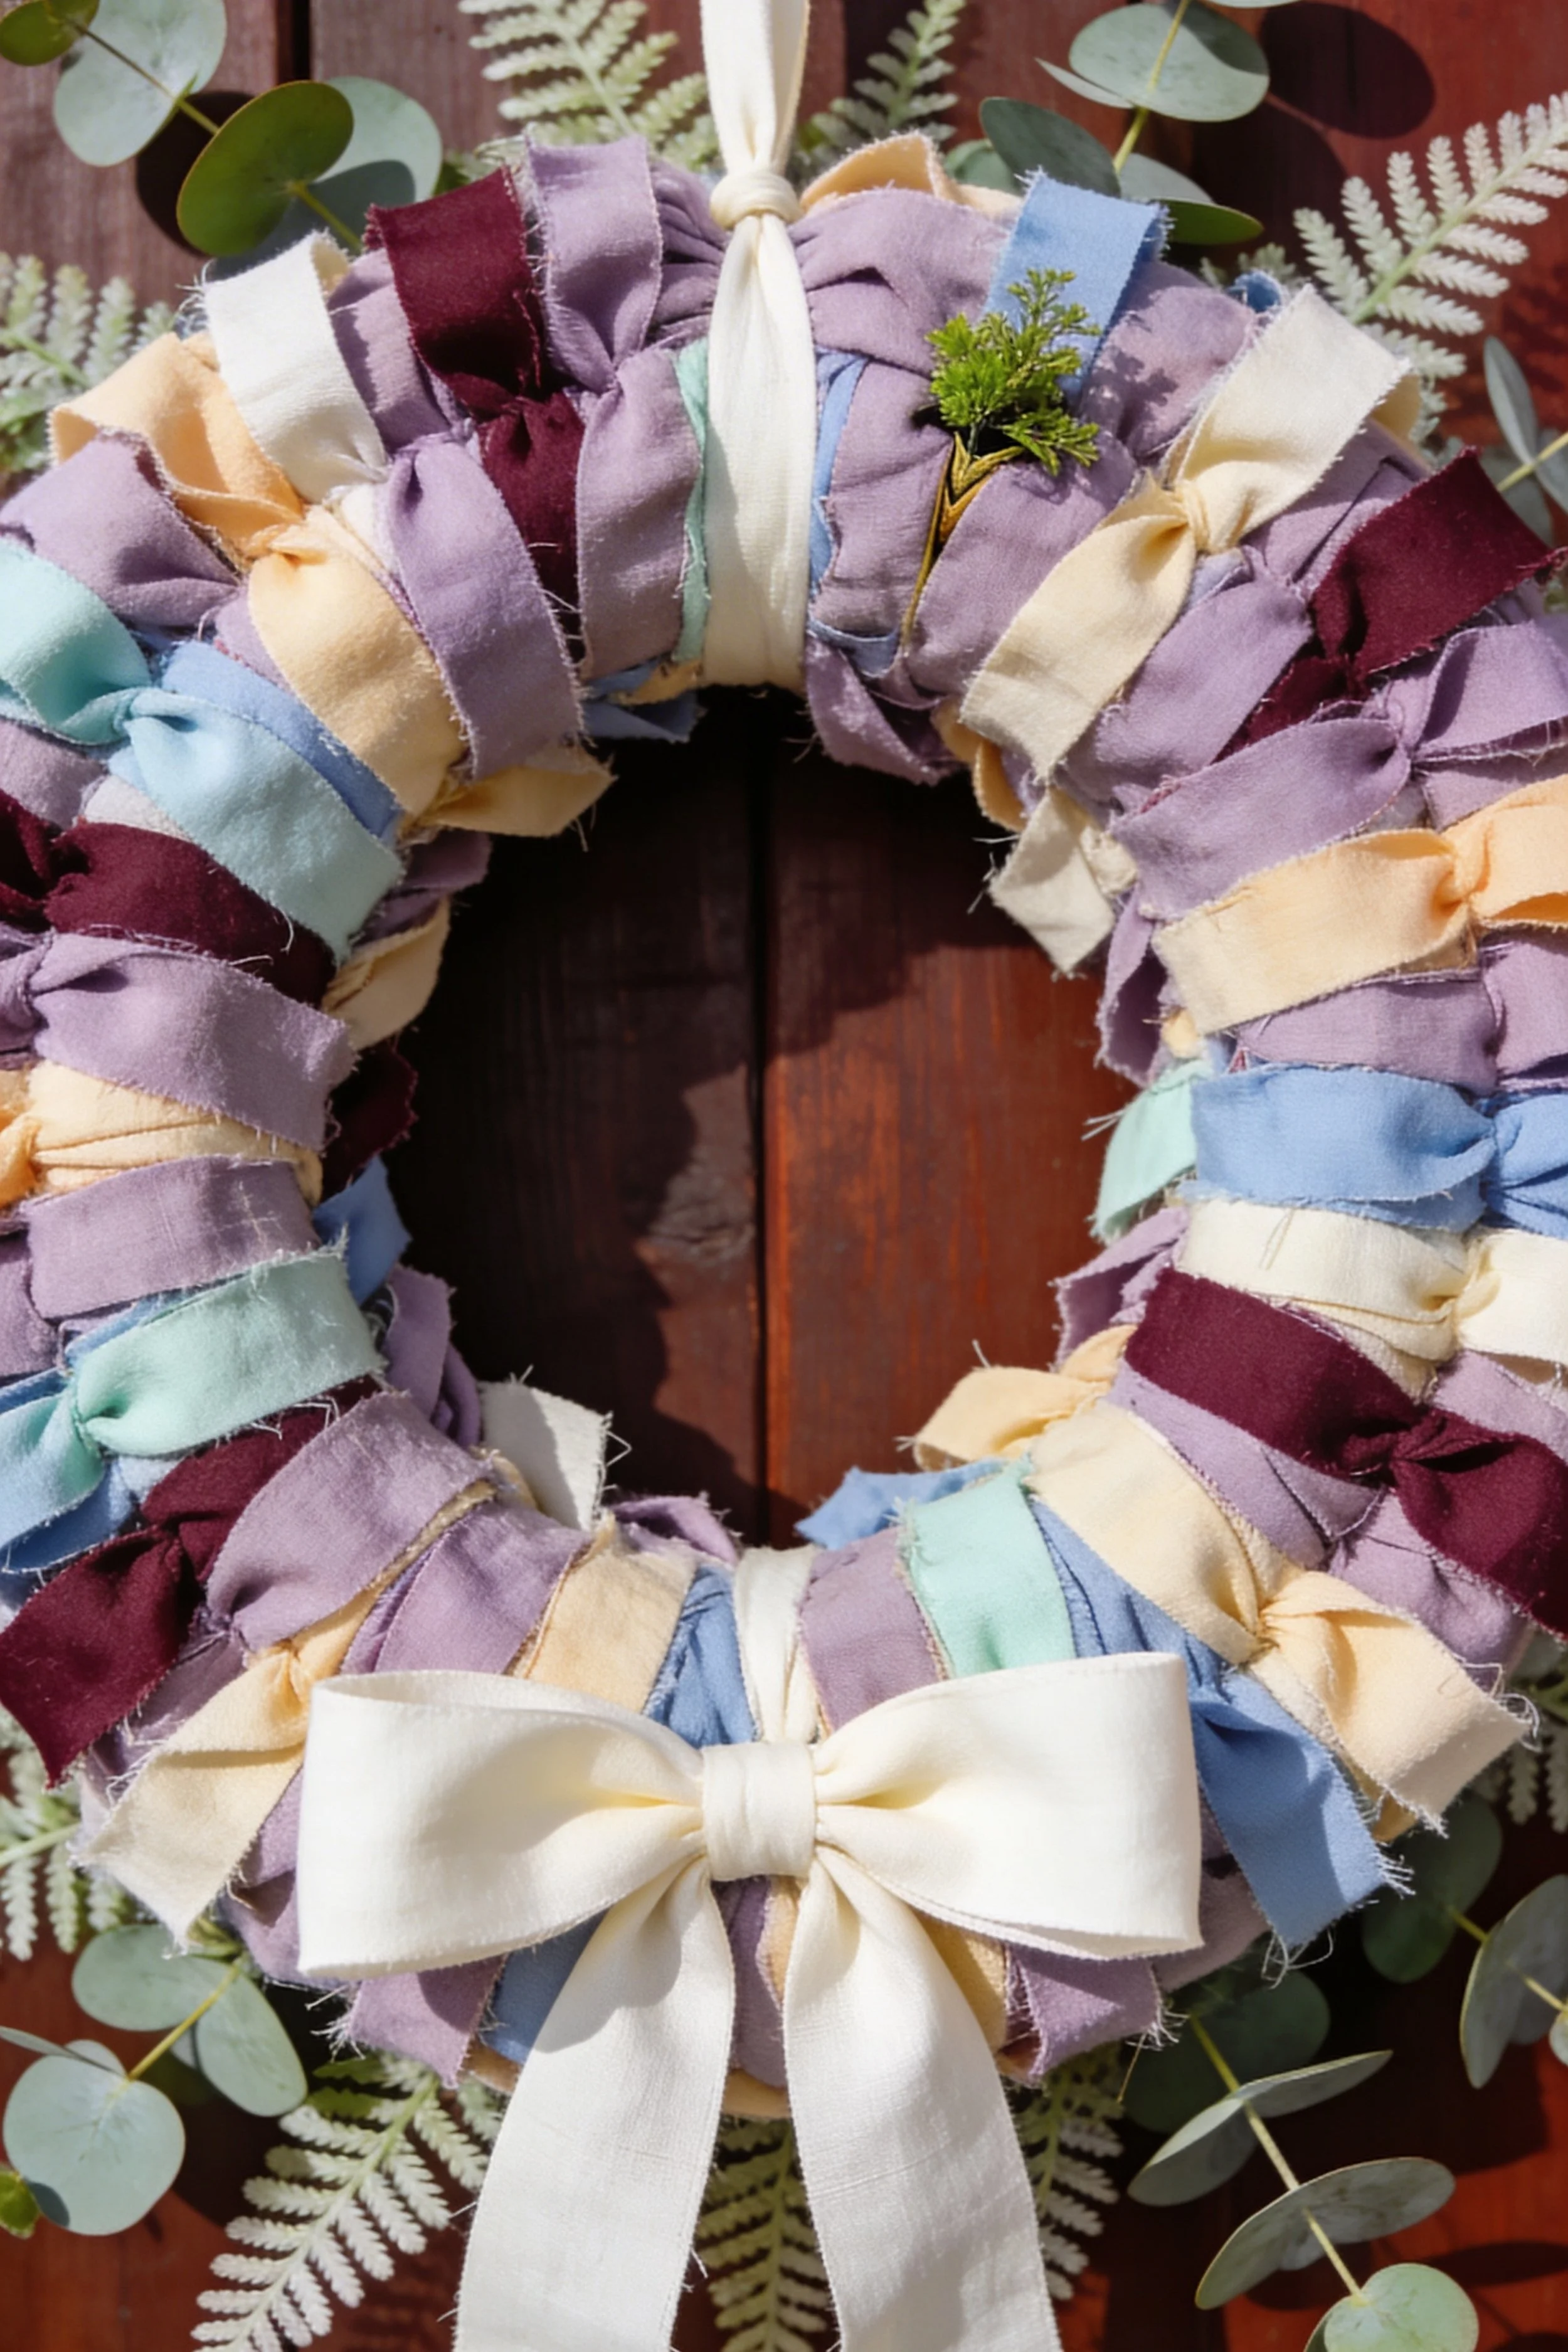
This tutorial recreates the wreath with the dreamy lavender dominant palette from the photo: chunky ribbon like fabric ties wrapped and knotted around a ring, with soft blues, creams, and a few deep berry accents for contrast, finished with a classic cream bow at the bottom. It feels romantic and slightly vintage, especially with the soft, gathered fabric texture. The look is plush and polished while still clearly handmade.
Materials + tools
- 12 to 14 inch wire wreath form
- Fabric or ribbon like strips in lavender, dusty purple, powder blue, cream, and a small amount of deep burgundy
- Optional greenery sprig for the top accent
- Scissors or rotary cutter
- Ruler
- Hot glue gun
- Floral wire or pipe cleaner
- Wide cream ribbon for the bow
- Optional needle and thread for bow shaping
- Optional fray check for ribbon ends
- Hanging ribbon or hanger
Finished size + customization notes
A 12 inch form will finish about 16 to 18 inches. The key to this look is the dominance of lavender, so plan for lavender to be at least half of your strips. Use the deep burgundy sparingly, like punctuation, so it adds depth without darkening the whole wreath. If you want a softer version, replace burgundy with dusty rose.
Step by step instructions
Choose your strips material
The photo looks like soft ribbon or torn fabric with a slightly gathered texture. Cotton and linen work perfectly. If you use ribbon, choose matte ribbon rather than shiny satin to keep the soft look.Cut strips for a chunky wrapped effect
Cut strips about 1 to 1.5 inches wide and 8 to 10 inches long. Slightly longer strips help create the wrapped, plush effect because the knot compresses less of the length.Sort by color ratio
Make piles: lavender large pile, cream medium pile, blue medium pile, pale peach or pale yellow small pile, burgundy tiny pile. Visual checkpoint: when you glance at your piles, lavender should clearly dominate.Start tying with lavender first
Begin on the inner ring and tie lavender strips for several inches. This creates a strong base color that matches the photo.Add cream and blue in gentle alternation
After a small lavender run, add one cream strip, then one blue strip, then return to lavender. This makes the lavender feel framed by lighter highlights.Add burgundy accents intentionally
Place a burgundy strip about every 8 to 12 ties, not more. Space them out so they appear around the wreath like tiny depth notes. If you cluster them, the wreath looks darker than the photo.Build fullness by tying on multiple rings
Move to the outer ring once you have coverage on the inner ring. Keep your knots snug. The wreath in the photo is thick, so plan to cover at least two rings fully.Shape the fabric to look like gathered bundles
After tying each strip, pinch the fabric close to the knot and puff it outward. The goal is a rounded, cushioned surface. Visual checkpoint: you should see soft folds and volume, not flat tails.Fill in thin spots with cream
Cream is your best gap filler because it brightens and looks intentional. If you see a hollow, add one cream strip and one lavender strip right beside it.Add a small greenery sprig accent at the top
The photo includes a tiny green sprig near the top. You can tuck a faux sprig into the ties and secure with a dot of glue, or wire it to the form. Keep it minimal so it looks like a subtle garden touch.Make the classic cream bow
Cut a wide cream ribbon about 36 to 44 inches long. Form two loops, cross them, pinch center, and wrap the center with a smaller strip. Tie or glue securely. Add tails trimmed into a gentle V shape for a finished look.Attach the bow to the bottom center
Use floral wire through the bow center and wrap around the wreath form. Then add hot glue behind the bow to anchor it into multiple fabric ties.Final styling
Fluff the wreath by lifting ties outward and rotating for balance. Trim any ends that are dramatically longer than the rest so the surface stays even.Hang and adjust
Hang the wreath on a door and step back. Adjust the bow so it sits centered and the wreath looks symmetrical. Add one or two lavender strips near any spot that looks sparse from a distance.
Troubleshooting
- The wreath looks too purple heavy
Add more cream and blue highlights, and trim any lavender strips that are noticeably longer and dominating visually. - The wreath looks too striped
You may be alternating too consistently. Mix by adding small clusters of lavender, then a single cream, then two lavender, then one blue. - Burgundy is too noticeable
Remove a few burgundy ties and replace with lavender. Burgundy should read like tiny shadows, not major blocks. - Bow keeps tilting
Wire it to the form, then glue the sides of the bow loops lightly into the surrounding ties so it cannot rotate. - Ends are fraying too much
Use pinking shears, or dab a tiny bit of fray check on the ends, especially if the wreath is outdoors.
Finishing details
For a soft, romantic finish, gently steam the bow so it sits smooth and rounded. If using torn fabric strips, shake the wreath outside to remove loose threads. Add felt pads on the back. For outdoor use, choose colorfast fabrics and consider a light spray protectant.
Shop Similar
- Lavender fabric strips for rag wreath
- Wire wreath form for fabric ties
- Cream wide ribbon for big bow
- Dusty blue fabric bundle
- Faux greenery sprigs small
Style It With
Neutral Burlap Rag Wreath with Sage Bow Make It Yourself Tutorial
What you’re making
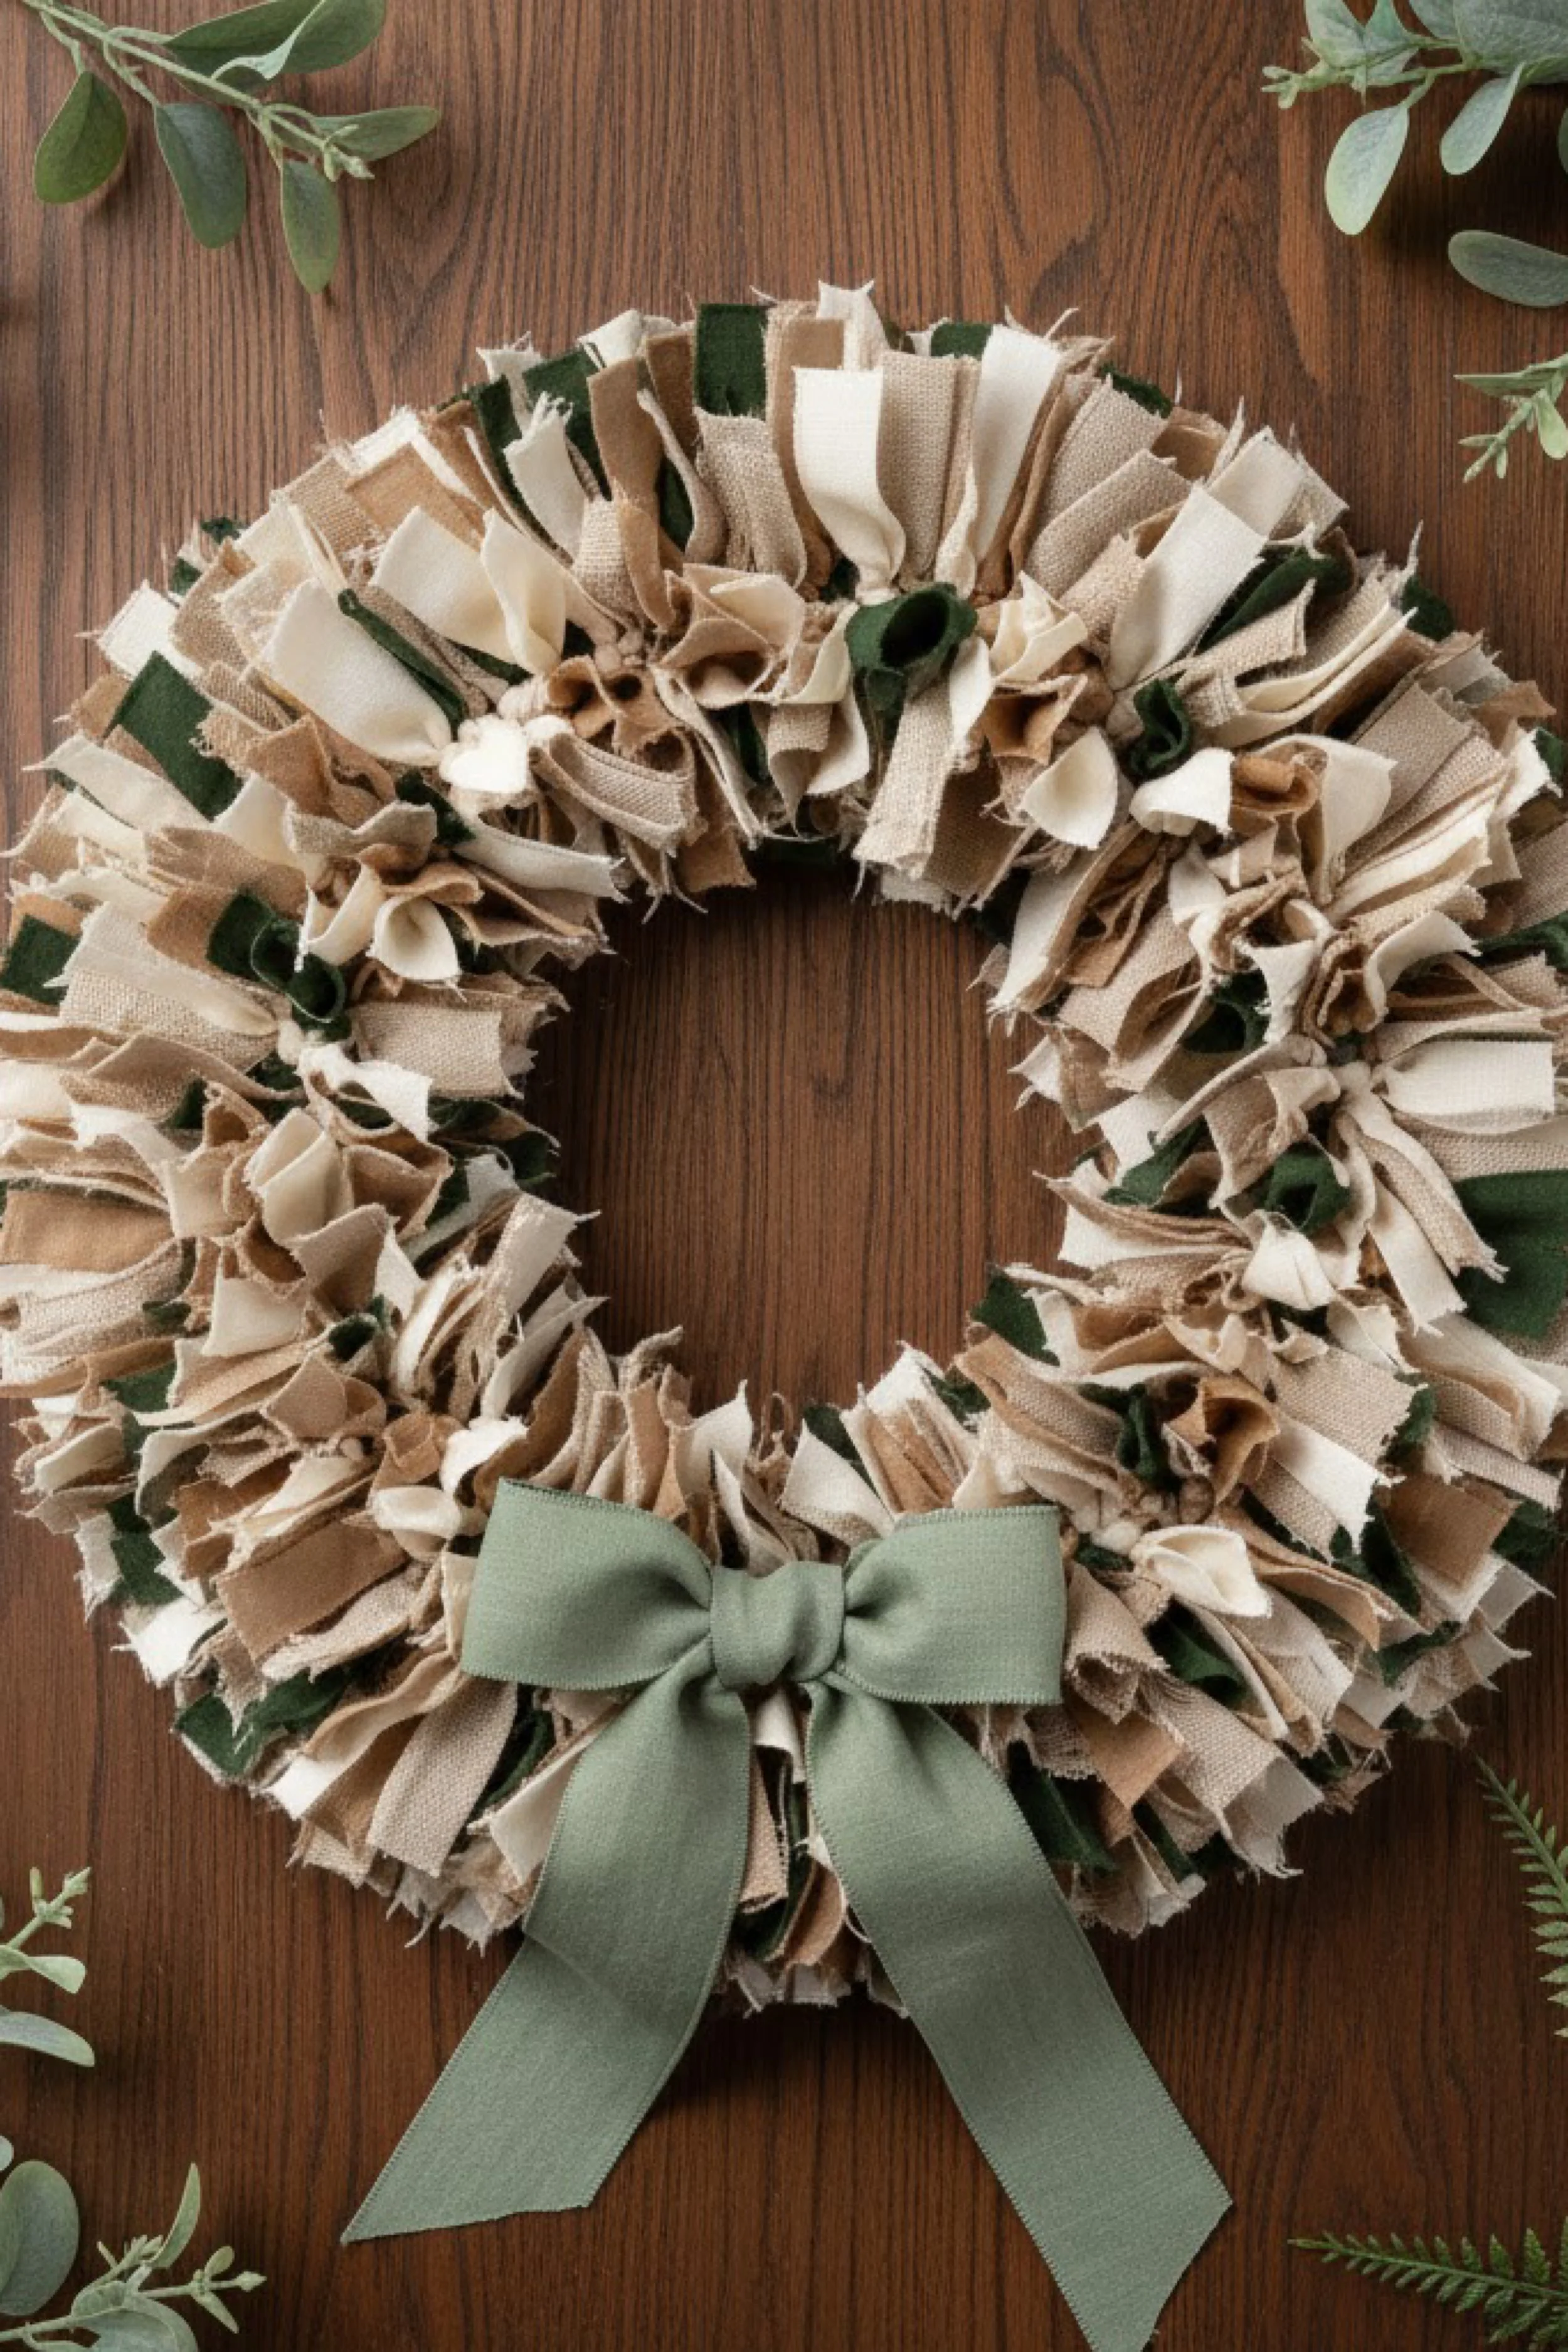
This tutorial recreates the neutral, earthy rag wreath in the photo: a thick ring built from short burlap and cream fabric ties with deep green accents, finished with a soft sage bow at the bottom. It reads modern farmhouse, calm, and timeless, and it works across seasons because the palette is mostly natural. The magic is the texture mix: rough burlap, soft cotton, and a few darker green pieces that add depth.
Materials + tools
- 14 inch wire wreath form
- Burlap strips or burlap ribbon
- Cotton or linen strips in cream and warm tan
- Accent strips in deep green
- Scissors or rotary cutter
- Ruler
- Hot glue gun
- Floral wire
- Sage ribbon for the bow
- Optional fray check for bow ends
- Hanging ribbon or hanger
- Optional felt pads for back
Finished size + customization notes
A 14 inch form finishes around 18 to 20 inches wide when packed. If you want an even chunkier look, use a 16 inch form and keep the same strip size. You can shift the green tone from deep forest to olive or eucalyptus depending on your door color. For a more coastal neutral, add a few dusty blue strips instead of green.
Step by step instructions
Pick your burlap type
Burlap ribbon is easiest because it is already cut. Loose burlap fabric works too, but it frays more. If you want a cleaner wreath, choose burlap ribbon with finished edges.Cut your strips for a chunky neutral texture
Cut most strips about 1 inch wide and 7 to 9 inches long. Burlap can be slightly wider, about 1.25 inches, because it compresses nicely in knots. Keep cream strips slightly narrower so they peek through.Plan your color balance
The photo wreath is mostly tan and cream with deep green sprinkled throughout. Aim for about 70 percent neutrals, 20 percent cream, 10 percent green. Visual checkpoint: when you step back, the wreath should read neutral first, with green as shadow accents.Start on the inner ring with neutrals
Tie tan and burlap strips first. Use the lark’s head knot so everything locks onto the wire. Tighten firmly.Add cream to brighten
Every few ties, add a cream strip. This keeps the wreath from looking muddy and matches the lighter highlights in the photo.Introduce green in small doses
Add a green strip every 8 to 10 ties. Place them evenly around the wreath rather than clustering. This creates a balanced, elevated look.Build fullness on the outer ring
Move to the outer ring and repeat the same ratio. This is where the wreath becomes thick and plush. Do not worry if it looks messy while you tie. It will fluff into shape at the end.Fill gaps with cream and tan pairs
If you spot a thin area, add a cream strip and a tan strip right beside it. The pair creates depth and covers the base quickly.Shape the surface
Run your fingers around and fluff. Burlap can stick out in sharper angles, so tuck or twist ends slightly so it looks intentional. Visual checkpoint: the surface should look like soft ruffles and tufts, not spiky.Make the sage bow
Cut sage ribbon about 36 to 44 inches long. Form a classic bow with two loops and long tails. Wrap the center with a small strip for a clean bow center. If your ribbon is very soft, add a small hidden wire behind each loop to hold shape.Attach the bow securely
Thread floral wire through the bow center and wrap around the wreath form at the bottom. Twist tight on the back. Add hot glue behind the bow for extra grip.Blend the bow into the wreath
Add two or three extra cream strips just above the bow so the transition looks seamless. This also prevents the bow from feeling like it is sitting on top without connection.Add hanging loop
Tie a neutral ribbon or a simple twine loop at the top back. Make sure it is centered so the bow hangs straight down.Final trim and finish
Trim any burlap strands that are excessively frayed or distracting. Add felt pads to the back at three points to protect your door and keep the wreath stable.
Troubleshooting
- Burlap frays everywhere and looks messy
Use burlap ribbon with finished edges, or dab a tiny amount of clear fabric glue on the cut ends. Also keep handling gentle once tied. - The wreath looks too brown
Add more cream strips and reduce burlap density. Cream lifts the whole palette. - Green is too strong
Remove a few green strips and replace with tan. Green should feel like depth, not the main color. - Wreath looks uneven
Fluff and rotate, then fill thin spots. Rag wreaths almost always need a final pass of gap filling once they are hung. - Bow is floppy
Use a slightly stiffer ribbon, or add wire reinforcement. Also ensure the bow is wired to the form, not only glued.
Finishing details
For a tidy farmhouse finish, trim frays selectively rather than trying to eliminate all fraying. A little texture is part of the look. If your door gets direct sun, consider fading resistant fabrics and rotate the wreath seasonally. You can also add a small wooden tag or a simple monogram charm for personalization.
Shop Similar
- Burlap ribbon for wreath making
- Wire wreath form 14 inch
- Sage green ribbon wide
- Neutral cotton fabric strips
- Floral wire for attaching bows
Style It With
If you make one of these wreaths, give it a final fluff right before hanging and then step back from the door to check balance. Tiny changes like adding two extra ties in a thin spot, trimming a few ends for an even halo, or shifting a bow half an inch can make it look instantly more intentional. The best part is that fabric tie wreaths are easy to refresh too. When the season changes, you can swap accents, replace a few colors, or add new ribbons without rebuilding the whole base.
Save your leftover strips in a labeled bag so your next wreath is even faster, and do not be afraid to mix textures. A little linen, a little cotton, and a touch of burlap can create the most expensive looking depth. Whether you go bright, pastel, muted, or neutral, you will end up with a wreath that feels cozy, welcoming, and truly handmade in the best way.