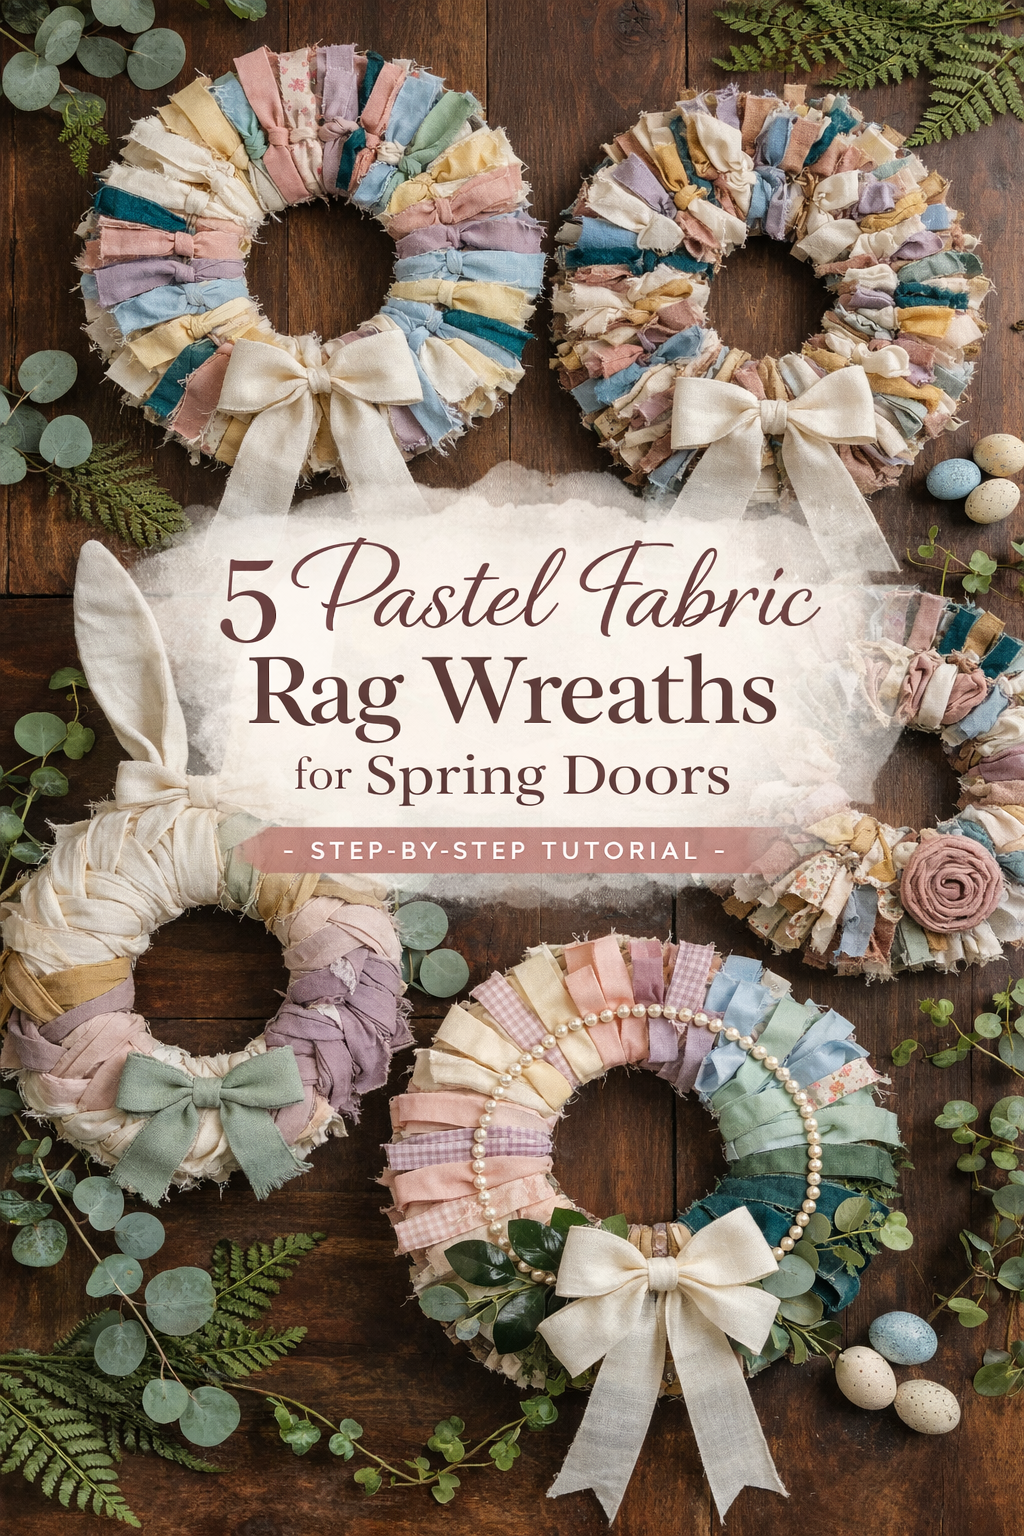
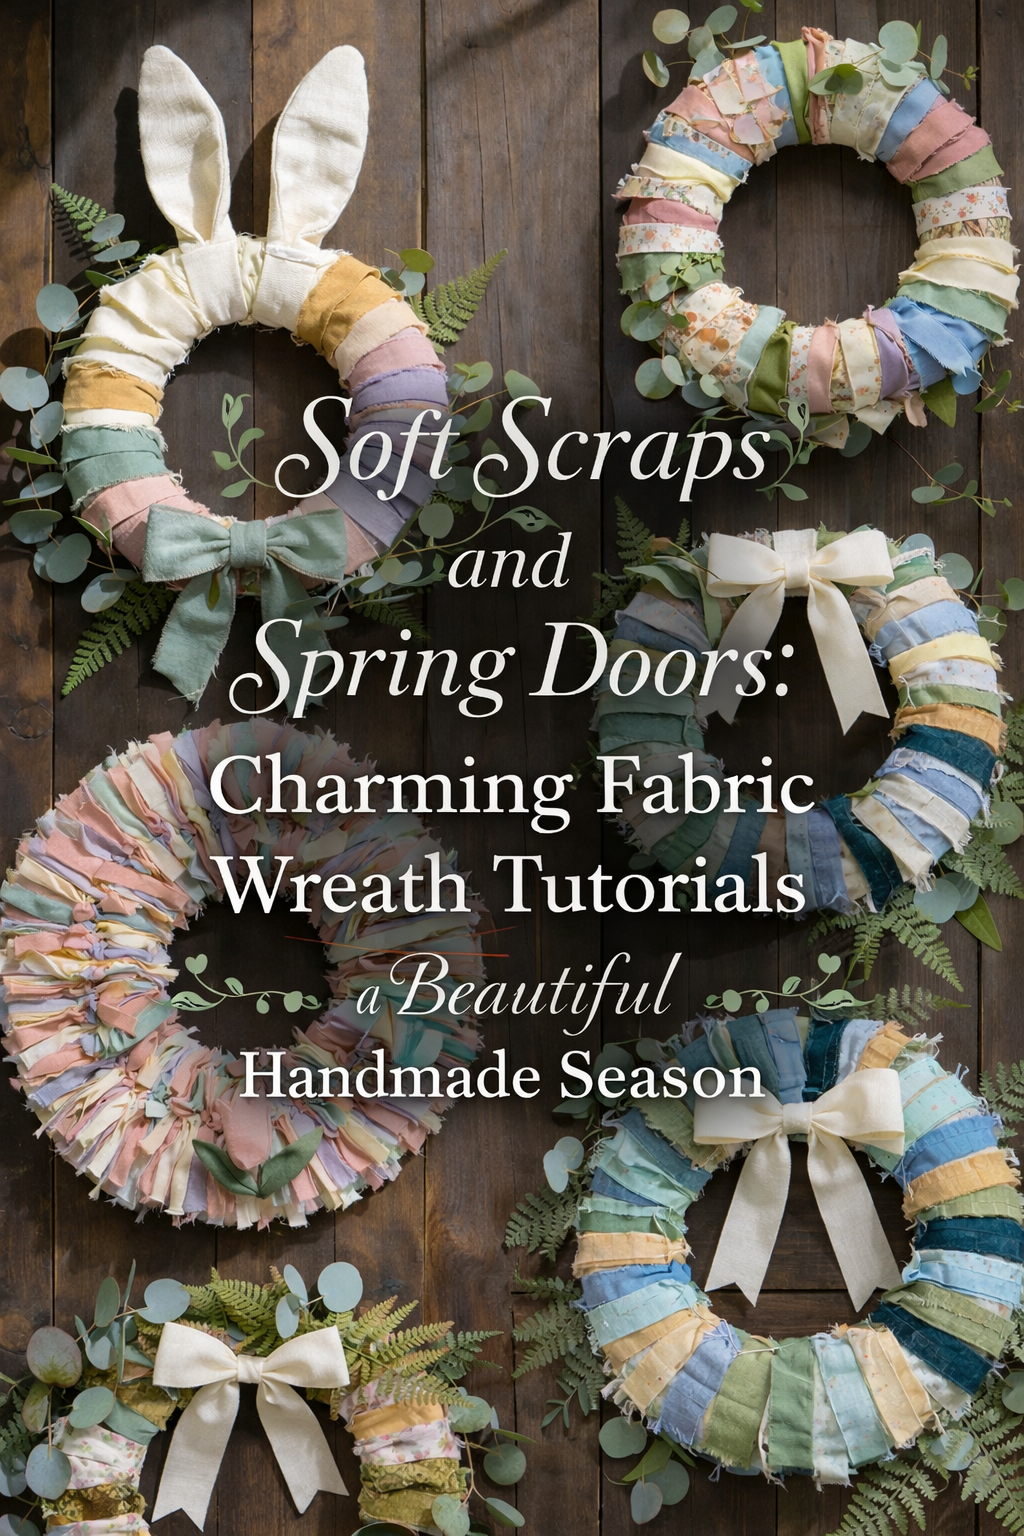
Soft Scraps and Spring Doors: Charming Fabric Wreath Tutorials for a Beautiful Handmade Season
Soft scraps, softened colors, and the quiet charm of handmade details come together in this collection of spring wreath tutorials designed to feel as beautiful as they are approachable. Each wreath in this guide leans into texture first. Frayed linen edges, layered cotton strips, and softly faded pastels create depth that feels collected rather than crafted. These are the kinds of pieces that make a door feel intentional, a space feel seasonal, and a home feel gently lived in.
What makes these wreaths especially satisfying is their flexibility. You are not locked into exact measurements or rigid patterns. Instead, you are working with color, proportion, and placement. A strip can be wider, a tone can be softer, a bow can sit slightly off center, and the result still feels right. That freedom is what gives these designs their warmth. Whether you are drawn to the playful softness of bunny ears, the airy fullness of rag ties, or the more structured elegance of wrapped bands, each project offers a different way to interpret the same quiet spring palette.
As you move through each tutorial, think less about perfection and more about balance. Let the colors breathe. Let the textures show. Let small irregularities become part of the story. By the end, you will not just have a wreath, you will have something that feels distinctly yours, ready to welcome the season in a way that feels both thoughtful and effortless.
Soft Meadow Bunny Wreath Step by Step Tutorial
What you’re making
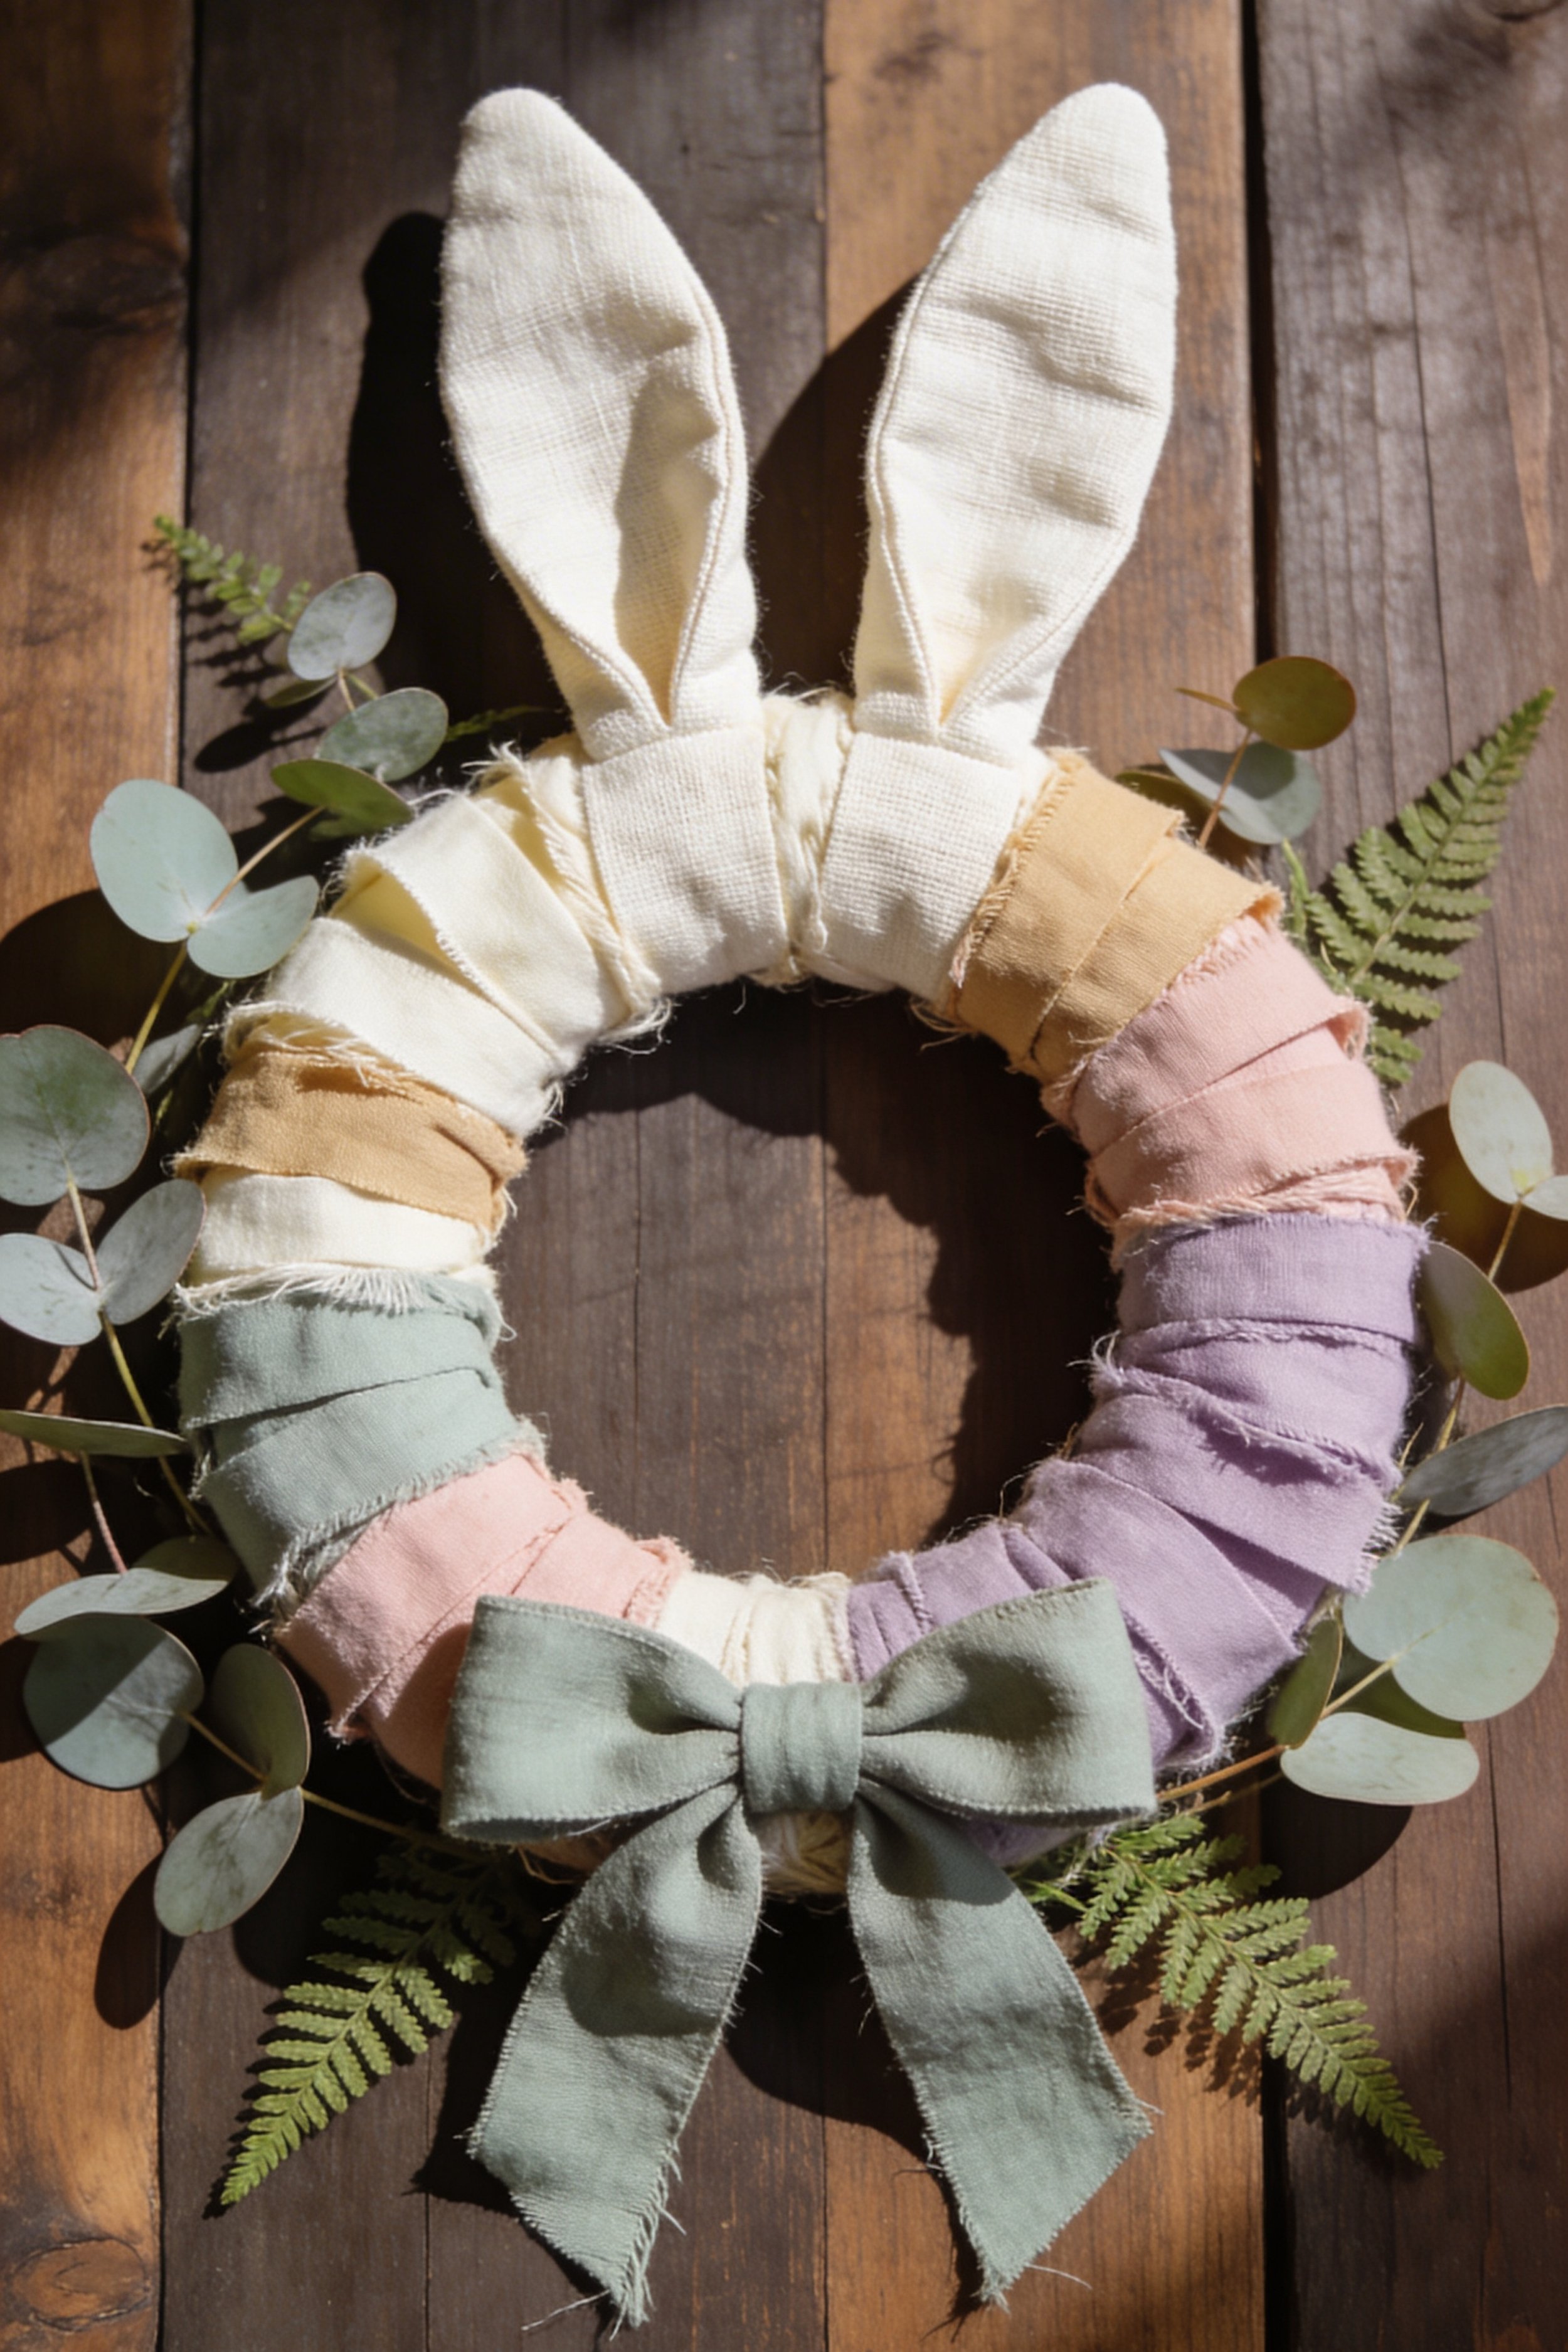
This project creates a soft, storybook inspired spring wreath with wrapped fabric bands, plush bunny ears, eucalyptus accents, fern fronds, and a generous fabric bow. The finished look feels gentle and handmade in the best way, with muted pastel colors that read calm rather than sugary. It is a lovely choice for a front door, nursery, Easter display, or an indoor wall that needs a little spring charm.
The overall shape is simple, but the styling is what makes it special. Instead of fully covering the wreath with one fabric, you will build the look in visible wrapped sections so each color reads clearly. The bunny ears become the focal point at the top, while the bow and greenery balance the design at the bottom.
Materials + tools list
- 10 inch to 12 inch grapevine wreath or straw wreath form
- Muslin, linen, gauze, or soft cotton fabric in cream
- Fabric strips in blush, lavender, sage, warm beige, and ivory
- Extra cream fabric for bunny ears
- Light batting, quilt batting, fleece scraps, or felt for ear padding
- Floral wire
- Wire cutters
- Hot glue gun and glue sticks
- Fabric scissors
- Pinking shears optional
- Twine or jute string
- Needle and thread or fabric glue for ear seams
- Faux eucalyptus stems
- Faux fern stems
- Ruler
- Pencil or disappearing fabric marker
- Ribbon or matching fabric for the bottom bow
- Optional backing felt for extra stability
- Optional hanging loop
Finished size + customization notes
A 10 inch wreath form usually finishes around 14 inches wide once the ears and bow are attached. A 12 inch form usually finishes closer to 16 inches wide.
To make it look closer to the photo, keep the color palette dusty and soft. Avoid bright candy tones. If your fabrics look too crisp, wash and dry them first for a relaxed texture. You can make the ears taller for a more playful look, or slightly shorter for a more refined one. A grapevine form gives a naturally rustic texture, while a straw form gives smoother wrapped sections. Both work beautifully.
Step by step instructions
1. Plan the color story before you wrap
Lay all your fabric strips out on a table and arrange them in the order you want them around the wreath. In the photo, the wrapped sections move softly from beige to cream to blush to lavender to sage, rather than repeating in a strict pattern. That gentle variation is what makes the wreath feel editorial and handmade instead of mass produced.
Tear or cut your strips about 1.5 to 2.5 inches wide. Length can vary. Longer strips are easier for wrapping, especially if you want fewer joins. You should now see a palette that feels soft and balanced from all angles. If one color jumps out too strongly, reduce it or break it up with cream.
2. Prepare the wreath base
If you are using grapevine, trim off any twigs that stick out too dramatically. Leave some texture because it adds charm, but remove anything sharp or unstable. If you are using straw, wrap the base loosely in a neutral strip of muslin first so later layers grip better.
Attach your first strip at the back with hot glue or tie it discreetly with twine. You do not need to cover the base completely at this stage. The goal is to create visible bands that feel intentionally layered. If yours looks too bulky already, use narrower strips or wrap with lighter tension.
3. Wrap in color blocked sections
Take each fabric strip and wrap it around the wreath several times before switching to the next color. Overlap slightly, but do not hide the raw edges completely. The frayed edges are part of the look. Let a little softness and texture show.
Work around the wreath in sections, not tiny alternating wraps. Each color should read as its own moment. In the reference look, the wreath is not perfectly uniform, and that is exactly right. You should now see broad zones of color rather than a barber pole effect. If yours looks striped and busy, unwrap a little and rework with larger sections.
4. Create fullness without heaviness
As you wrap, vary the angle of the strips slightly. Some can sit flatter while others twist a bit to expose raw edges. This creates a layered, dimensional surface. If one section looks thin, tuck a short strip underneath and wrap over it once or twice. If a section looks wider than the photo, tighten the wrap and compress the fabric toward the previous band.
Do not aim for perfection. Aim for softness. The best version of this wreath looks collected and styled, not machine precise.
5. Make the bunny ears pattern
Draw two long ear shapes on paper, each about 8 to 10 inches tall depending on your wreath size. Keep the shape slightly tapered, with rounded tops and a straight bottom edge for attaching. Cut four fabric ear shapes from cream fabric, two for the front and two for the back.
Cut two smaller padding pieces from batting or felt. These should sit inside the ear but stop short of the edges so the seams stay clean. If you want structured ears that stand up more firmly, add a thin piece of floral wire around the outer edge between layers.
6. Sew or glue the ears
Place two ear pieces right sides together and stitch around the sides and top, leaving the bottom open. Turn right side out and insert the padding. Repeat for the second ear. If you do not sew, use fabric glue and allow plenty of drying time before turning.
Press lightly if needed, but keep some softness in the fabric. The ears in the photo are not crisp and flat. They have gentle folds and a slightly cushioned look. You should now see two soft ears that can stand upright with a little shaping.
7. Form the ear bases
Pinch the bottom of each ear inward to create that natural bunny ear fold. Wrap the base with a small strip of cream fabric or twine to secure it. This step changes the ears from simple fabric leaves into believable bunny ears.
Test them against the wreath before gluing. They should sit close together at the top center, angled slightly inward. If yours look too far apart, bring the bases closer until they almost touch. If they look too floppy, add a little more batting or insert floral wire.
8. Attach the ears securely
Use floral wire first, then hot glue second. Thread wire through the base of each ear and anchor it around the wreath form. Once you like the position, add hot glue where the bases meet the wreath. Cover the join with another soft cream wrap if needed so it looks finished and intentional.
Stand back and check the silhouette. You should now see the unmistakable bunny shape from across the room. If the ears lean too much, reinforce the back with extra wire.
9. Add bottom fabric wrapping if needed
Before adding the bow and greenery, assess the lower front of the wreath. This area often needs one last wrap or two to look balanced since it will be highly visible. Add an ivory or sage strip if the center bottom feels sparse. Keep the texture soft and slightly frayed.
10. Make the bow
Cut one long strip of sage or dusty green fabric, roughly 2.5 to 4 inches wide and long enough for generous tails. Fold into two loops, pinch the center, and wrap a narrow matching strip around the middle. Glue or stitch the center wrap in place.
Let the tails hang softly and trim the ends at an angle or shallow V. The bow in the photo is relaxed and matte, not shiny or stiff. If yours looks too structured, crumple the fabric slightly with your hands before attaching.
11. Attach the bow
Glue and wire the bow to the bottom center of the wreath. The tails should drape downward and soften the circle. Make sure the bow scale matches the wreath. Too small and it disappears. Too large and it overpowers the ears.
A good visual checkpoint is this: from a few steps back, the ears should still be the first thing you notice, and the bow should feel like a graceful finishing touch.
12. Add greenery accents
Tuck faux eucalyptus stems around the left and right outer edges and a few fern fronds beneath the bow area. Keep the greenery asymmetrical but balanced. The photo uses just enough greenery to frame the wreath, not enough to turn it into a botanical wreath.
Add stems underneath existing fabric wraps when possible so the mechanics stay hidden. Use small dabs of glue only where needed. If yours starts looking too busy, remove half the greenery and reassess. This design depends on restraint.
13. Refine the color balance
Now rotate the wreath and look for one area that feels too warm, too cool, or too crowded. Add a small corrective wrap if necessary. A tiny piece of cream or sage can calm a section instantly. This is the stage where the wreath goes from homemade to polished.
14. Create a hanging loop
At the back top, wire on a loop of twine, ribbon, or floral wire. Make sure it sits behind the ear bases so the wreath hangs straight. Test the balance before calling it finished. If the bow pulls the wreath forward, add a small felt pad or spacer on the back lower edge.
Troubleshooting
My ears will not stand up
Use a hidden floral wire outline inside each ear or a thicker central wire running from base to tip. Add more padding only if the fabric looks collapsed.
My wrapped sections look messy
Messy is fine. Chaotic is not. Rework by making each color block wider and more intentional. Too many short wraps create visual noise.
My wreath feels too bulky
Use thinner fabric like gauze, muslin, or linen blend. Also reduce overlap. The wreath should feel plush, not stuffed.
My bow looks limp
Try a slightly heavier linen or cotton canvas. You can also glue a narrow hidden strip of floral wire into the top edge of each tail for more shape.
The greenery looks fake
Use fewer stems and trim them smaller. Tuck them deeper into the wreath so only the prettiest tips show.
Finishing details
Trim any threads that look accidental but leave the soft frayed edges that give the wreath warmth. If needed, lightly steam the ears and bow from a distance to relax creases. Add a felt backing pad anywhere wire ends might scratch your door. Store this wreath flat in a box between seasons so the ears keep their shape.
For an upgraded version, add a thin tea stained ribbon behind the bow, line the ear interiors with a slightly warmer ivory fabric, or brush the grapevine base with a little diluted matte white paint for a softer cottage finish. You can also swap the greenery seasonally. Eucalyptus and fern for spring, dried lavender for summer, or bare vine with velvet ribbon for a more transitional look.
Shop Similar
- Soft cream linen fabric for bunny ears
- Pastel torn ribbon and fabric bundle
- Grapevine wreath forms for spring decor
- Faux eucalyptus stems for wreath making
- Artificial fern picks for wreath accents
- Dusty sage linen ribbon for handmade bows
Style It With
Pastel Rag Tie Spring Wreath DIY Guide
What you’re making
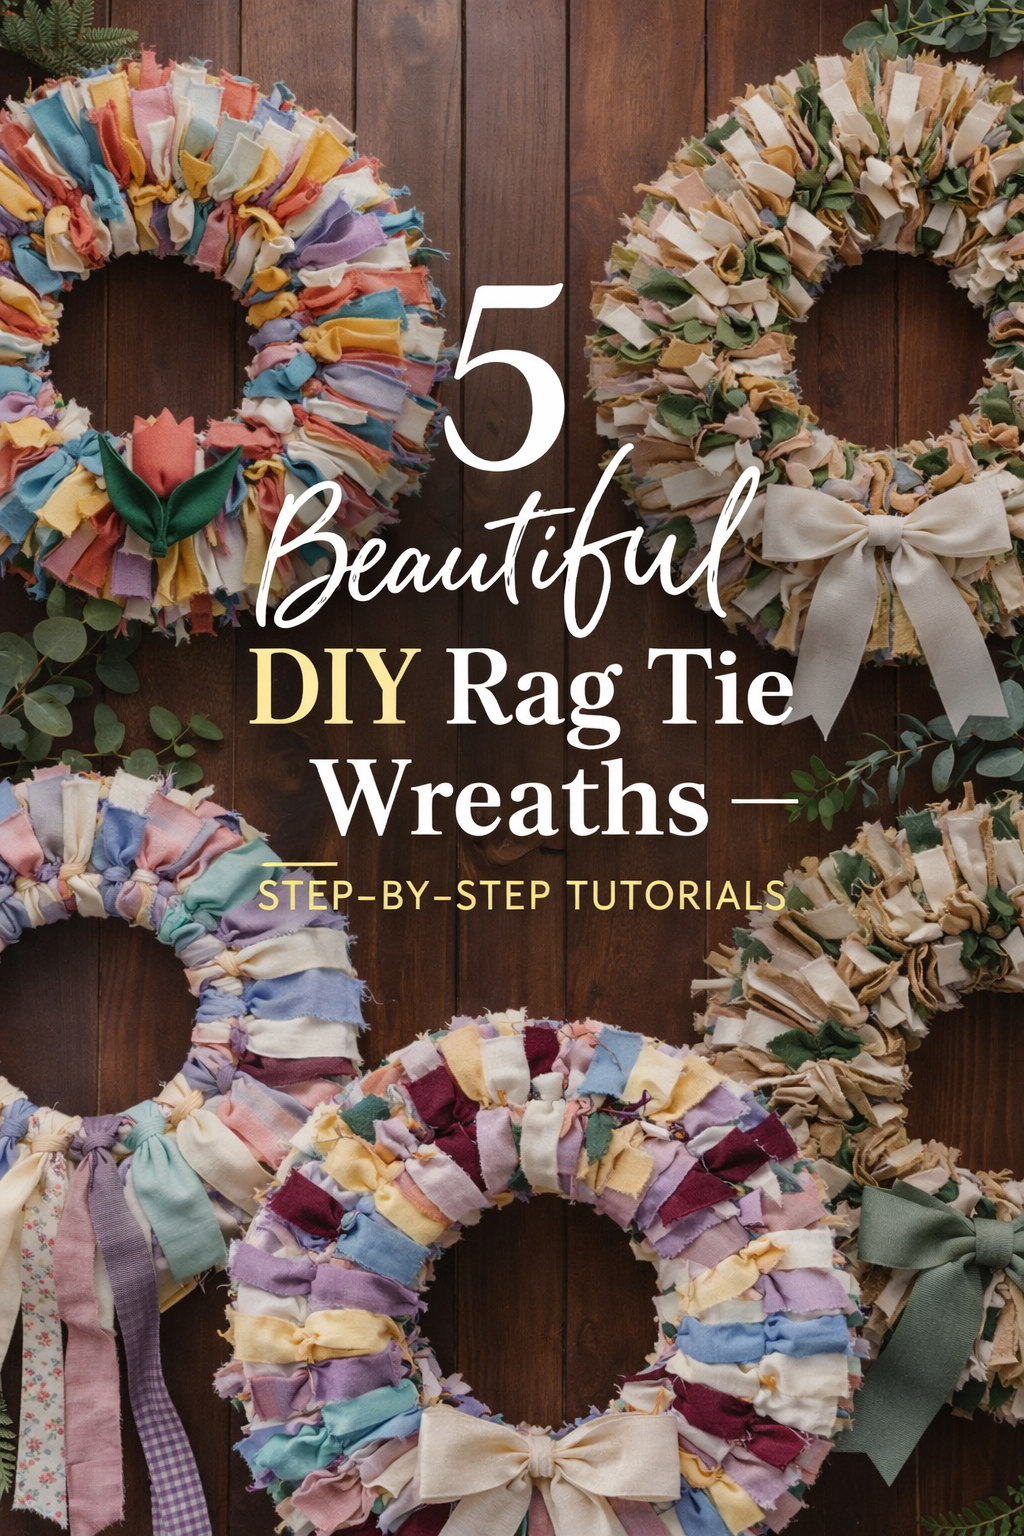
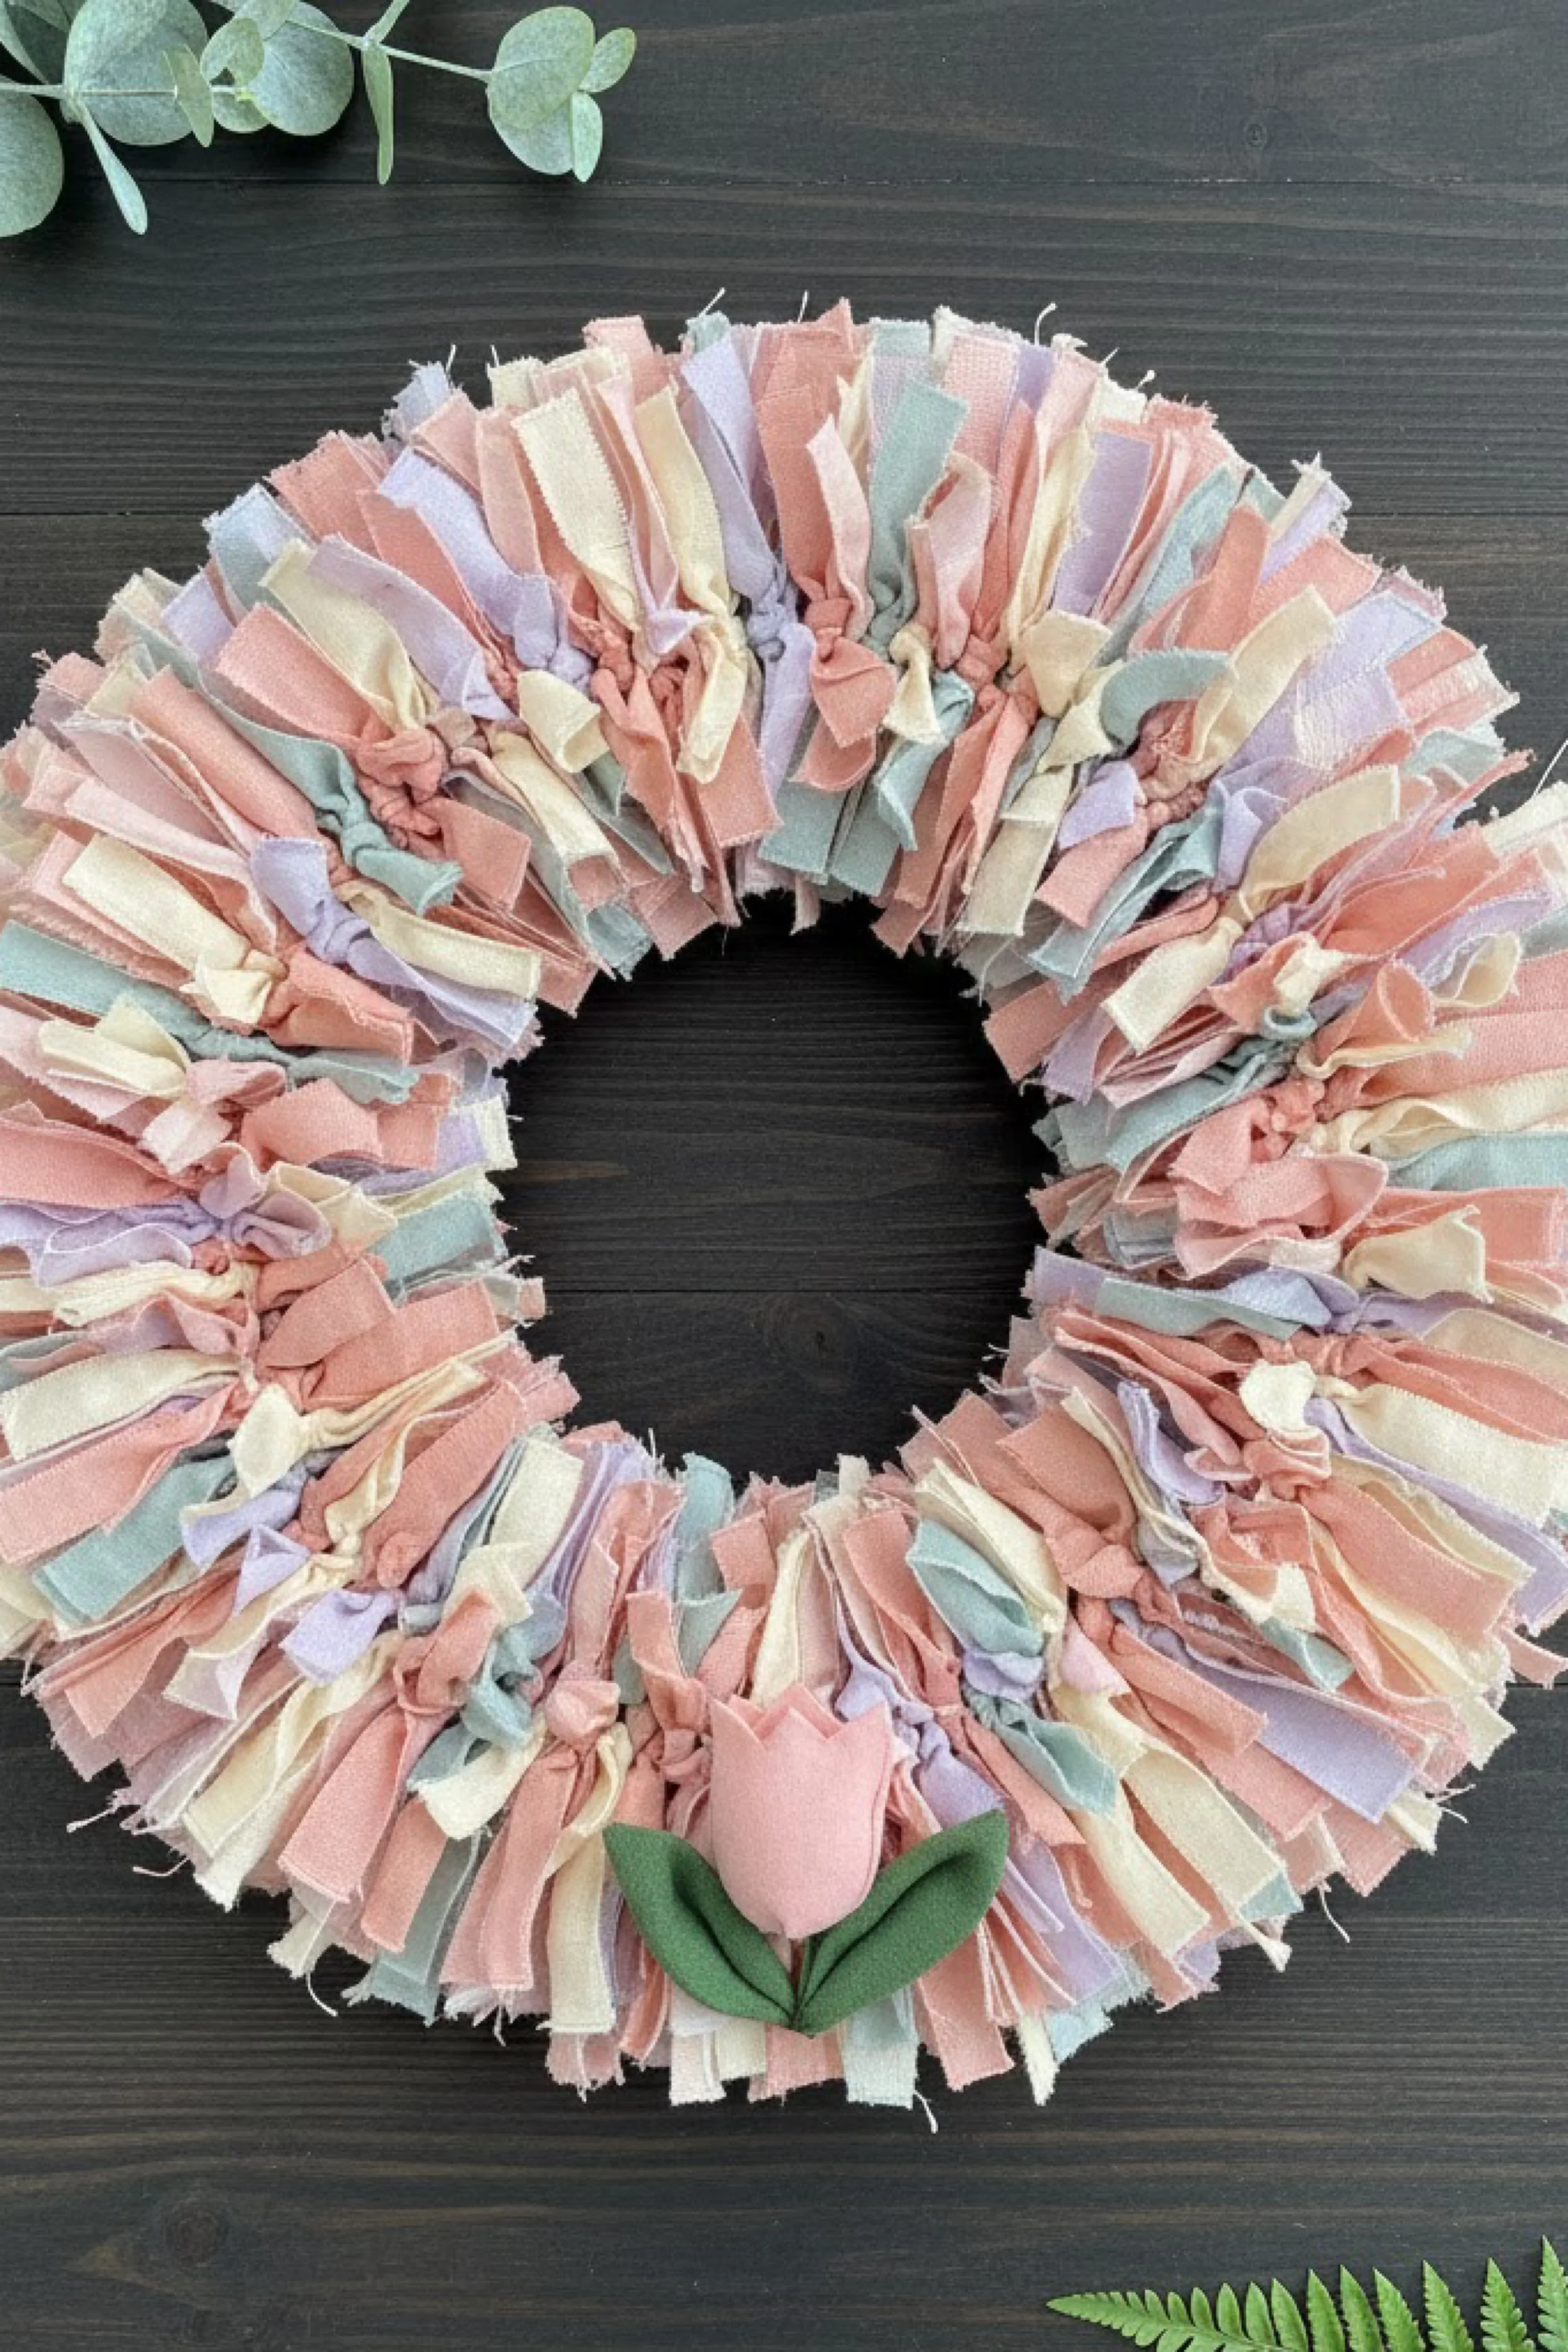
This wreath is a fluffy, texture rich rag tie design made from soft strips of pastel fabric tied densely around a wreath base until it becomes full and cloudlike. The finished look is cheerful, handmade, and wonderfully tactile, with a tiny tulip embellishment that gives it a sweet spring finish. It is one of the easiest wreath styles to make, but when the colors are chosen carefully, it looks surprisingly elevated.
What makes this version special is the faded palette. Instead of using bold holiday colors, you are working with blush, buttercream, pale mint, and lavender. Those shades keep the wreath soft and modern, especially against dark wood.
Materials + tools list
- Wire wreath form or foam wreath form
- Pastel cotton or linen fabric scraps
- Colors in blush, ivory, buttercream, lavender, and pale mint
- Rotary cutter or scissors
- Cutting mat optional
- Ruler
- Felt in pink and green for tulip embellishment
- Hot glue gun and glue sticks
- Needle and thread optional
- Floral wire optional
- Comb or fingers for fluffing
- Hanging ribbon or twine
Finished size + customization notes
A 12 inch base usually finishes around 15 to 17 inches wide once fully tied. Smaller bases work too, but the fluffy look reads best on forms at least 10 inches wide.
Use cotton, homespun, light linen, or quilting fabric for a neat tied look. Use gauze or softer linen for a shabbier, more romantic finish. If the wreath looks too stiff, your fabric may be too heavy. If it looks too flat, you likely need more strips and tighter spacing.
Step by step instructions
1. Choose the right base
A wire form is the classic choice for rag tie wreaths because the strips can be tied directly onto the wire. A foam form works too, but you will usually pin or glue the ties instead of knotting them. For the closest result to the reference image, use a wire wreath form with enough depth to support lots of fabric.
If your wire form has multiple rings, tie most of the strips onto the outer two rings for fullness. You should now have a base that will let the fabric flare outward instead of collapsing inward.
2. Cut fabric strips evenly
Cut your fabric into strips around 1 inch wide and 6 to 8 inches long. If you want a fuller, looser wreath, go slightly longer. Shorter strips create a tidier, more compact look. Mix a few imperfect pieces in with the neat ones because that variation adds charm.
For a 12 inch wreath, prepare more strips than you think you need. A dense wreath can easily take 180 to 250 strips depending on width and fullness. Separate them into color piles so you can control the distribution rather than grabbing blindly.
3. Build a soft repeating palette
Lay out a sample sequence on the table. Try something like blush, ivory, lavender, mint, blush, buttercream, ivory. This does not need to repeat perfectly, but it helps prevent clumping. The photo has good color mingling, which makes the wreath look lush and thoughtful.
You should now see a palette that feels balanced. If one tone is noticeably stronger, reduce its strip count before you begin.
4. Start tying from the inner edge outward
Take one strip, place it under the wire ring, and tie it in a simple double knot. Pull it snug but not so tight that the fabric collapses. Fluff the ends upward and outward. Continue with the next strip right beside it.
As you work, rotate the ends in different directions so the wreath fills out evenly. If all the knots face the same way, the texture can start to look combed instead of soft. After the first 15 to 20 strips, you should see the wreath begin to puff up.
5. Pack the ties densely
The beauty of this project comes from density. Each new strip should sit close to the previous one. Push tied strips together gently every few minutes so gaps disappear. Do not worry if the base still shows a little while you are working. Once the wreath is full, most of that disappears.
A good visual checkpoint is this: when you look from the front, you should see mostly fabric ends and very little base. If the base shows through clearly, you need more strips or tighter spacing.
6. Alternate texture and direction
Some strips can stay flat and ribbonlike. Others can twist slightly before tying. This gives the wreath more movement. If every strip lies the same way, the result can feel stiff. The reference wreath has soft little folds and flicks that catch the light, so let your ties behave naturally.
7. Work in sections to keep balance
Instead of tying all one color around the entire form, finish one section at a time with mixed colors. For example, do the top quarter first, then the sides, then the bottom. This helps you keep the volume even and prevents one area from becoming much fuller than another.
Stand back every so often. You should now see a round silhouette that is staying fairly even all the way around. If one section bulges more, trim a few extra long strips or add fullness to the opposite side.
8. Fill the inner edge
The center opening matters. If you only focus on the outer edge, the inside can look sparse. Angle some knots slightly inward so the center opening stays neat and plush. You do not want the middle to shrink too much, but you do want it framed with softness.
9. Fluff and trim
Once the base is covered, use your fingers to fluff every tied strip. Pull some outward, some upward, and some slightly across each other. This is the stage where the wreath becomes full and airy. Trim only the most awkward pieces. Uneven ends are part of the handmade beauty.
If yours looks too flat, add another round of strips in the emptiest spots. If it looks too wild, trim a few pieces and compress the knots gently toward the base.
10. Make the tulip embellishment
Cut one simple tulip bloom shape from pink felt and two leaf shapes from green felt. If you want extra dimension, cut the bloom as a rounded rectangle with a notched top, then pinch the bottom slightly before gluing. This gives it a more sculpted flower form.
Glue the leaves behind the bloom, letting them angle outward. Keep the embellishment small relative to the wreath. In the photo, the tulip is a sweet accent, not a giant centerpiece.
11. Attach the tulip
Place the tulip at the bottom center of the wreath. Tuck it slightly into the fluffy fabric so it feels integrated, not pasted on top. Use hot glue or floral wire. If you want a more heirloom look, stitch it through the base instead of relying only on glue.
12. Shape the overall silhouette
Now hang the wreath temporarily and assess the outline. A good rag tie wreath should look full all the way around, with no obvious flat spots. The inner opening should remain nicely round. If yours looks oval, redistribute fabric by fluffing fuller areas outward and trimming heavy areas slightly.
13. Add optional refinements
You can tuck in a few tiny eucalyptus sprigs, a narrow ribbon loop at the top, or a second tiny bloom beside the tulip. Keep embellishments restrained. The charm of this wreath is the plush pastel texture itself.
14. Secure for display
Tie a hanging loop at the back using ribbon or twine. Make sure the loop is centered so the tulip sits exactly at the bottom. If needed, add a small weight or felt pad at the back lower edge to keep the wreath from tipping forward.
Troubleshooting
My knots keep slipping
Use cotton or linen rather than slippery satin. Tie a firm double knot and pull evenly on both ends.
The wreath looks sparse
Add more strips. Rag tie wreaths almost always need more fabric than beginners expect.
The colors look patchy
Work in mixed sections rather than color blocking one area. Pull out a few overrepresented strips and replace them.
My center opening is too small
Avoid tying too many strips angled inward. Trim a few inner edge pieces if needed.
The tulip looks too flat
Pinch the felt bloom at the base and glue a tiny fold into it. Layering two bloom shapes can also add dimension.
Finishing details
Give the finished wreath a final fluff with your hands rather than a brush so the frayed edges stay soft. Steam is usually unnecessary, but if any strips have sharp fold lines, a light mist and finger smoothing can help. Store it in a roomy box so the fabric ends do not get crushed.
For a more polished variation, use the same method with torn linen and a velvet bow. For a sweeter nursery version, replace the tulip with a tiny bunny or wooden name tag. For an outdoor covered porch, use fabrics that can handle a little humidity and avoid heavy felt embellishments if the climate is damp.
Shop Similar
- Pastel fabric scrap bundles for wreath making
- Wire wreath forms for rag wreath projects
- Felt sheets in spring colors
- Rotary cutter and self healing mat set
- Pastel linen and cotton ribbon bundle
Style It With
Cottage Ribbon Wrap Wreath How To Guide
What you’re making
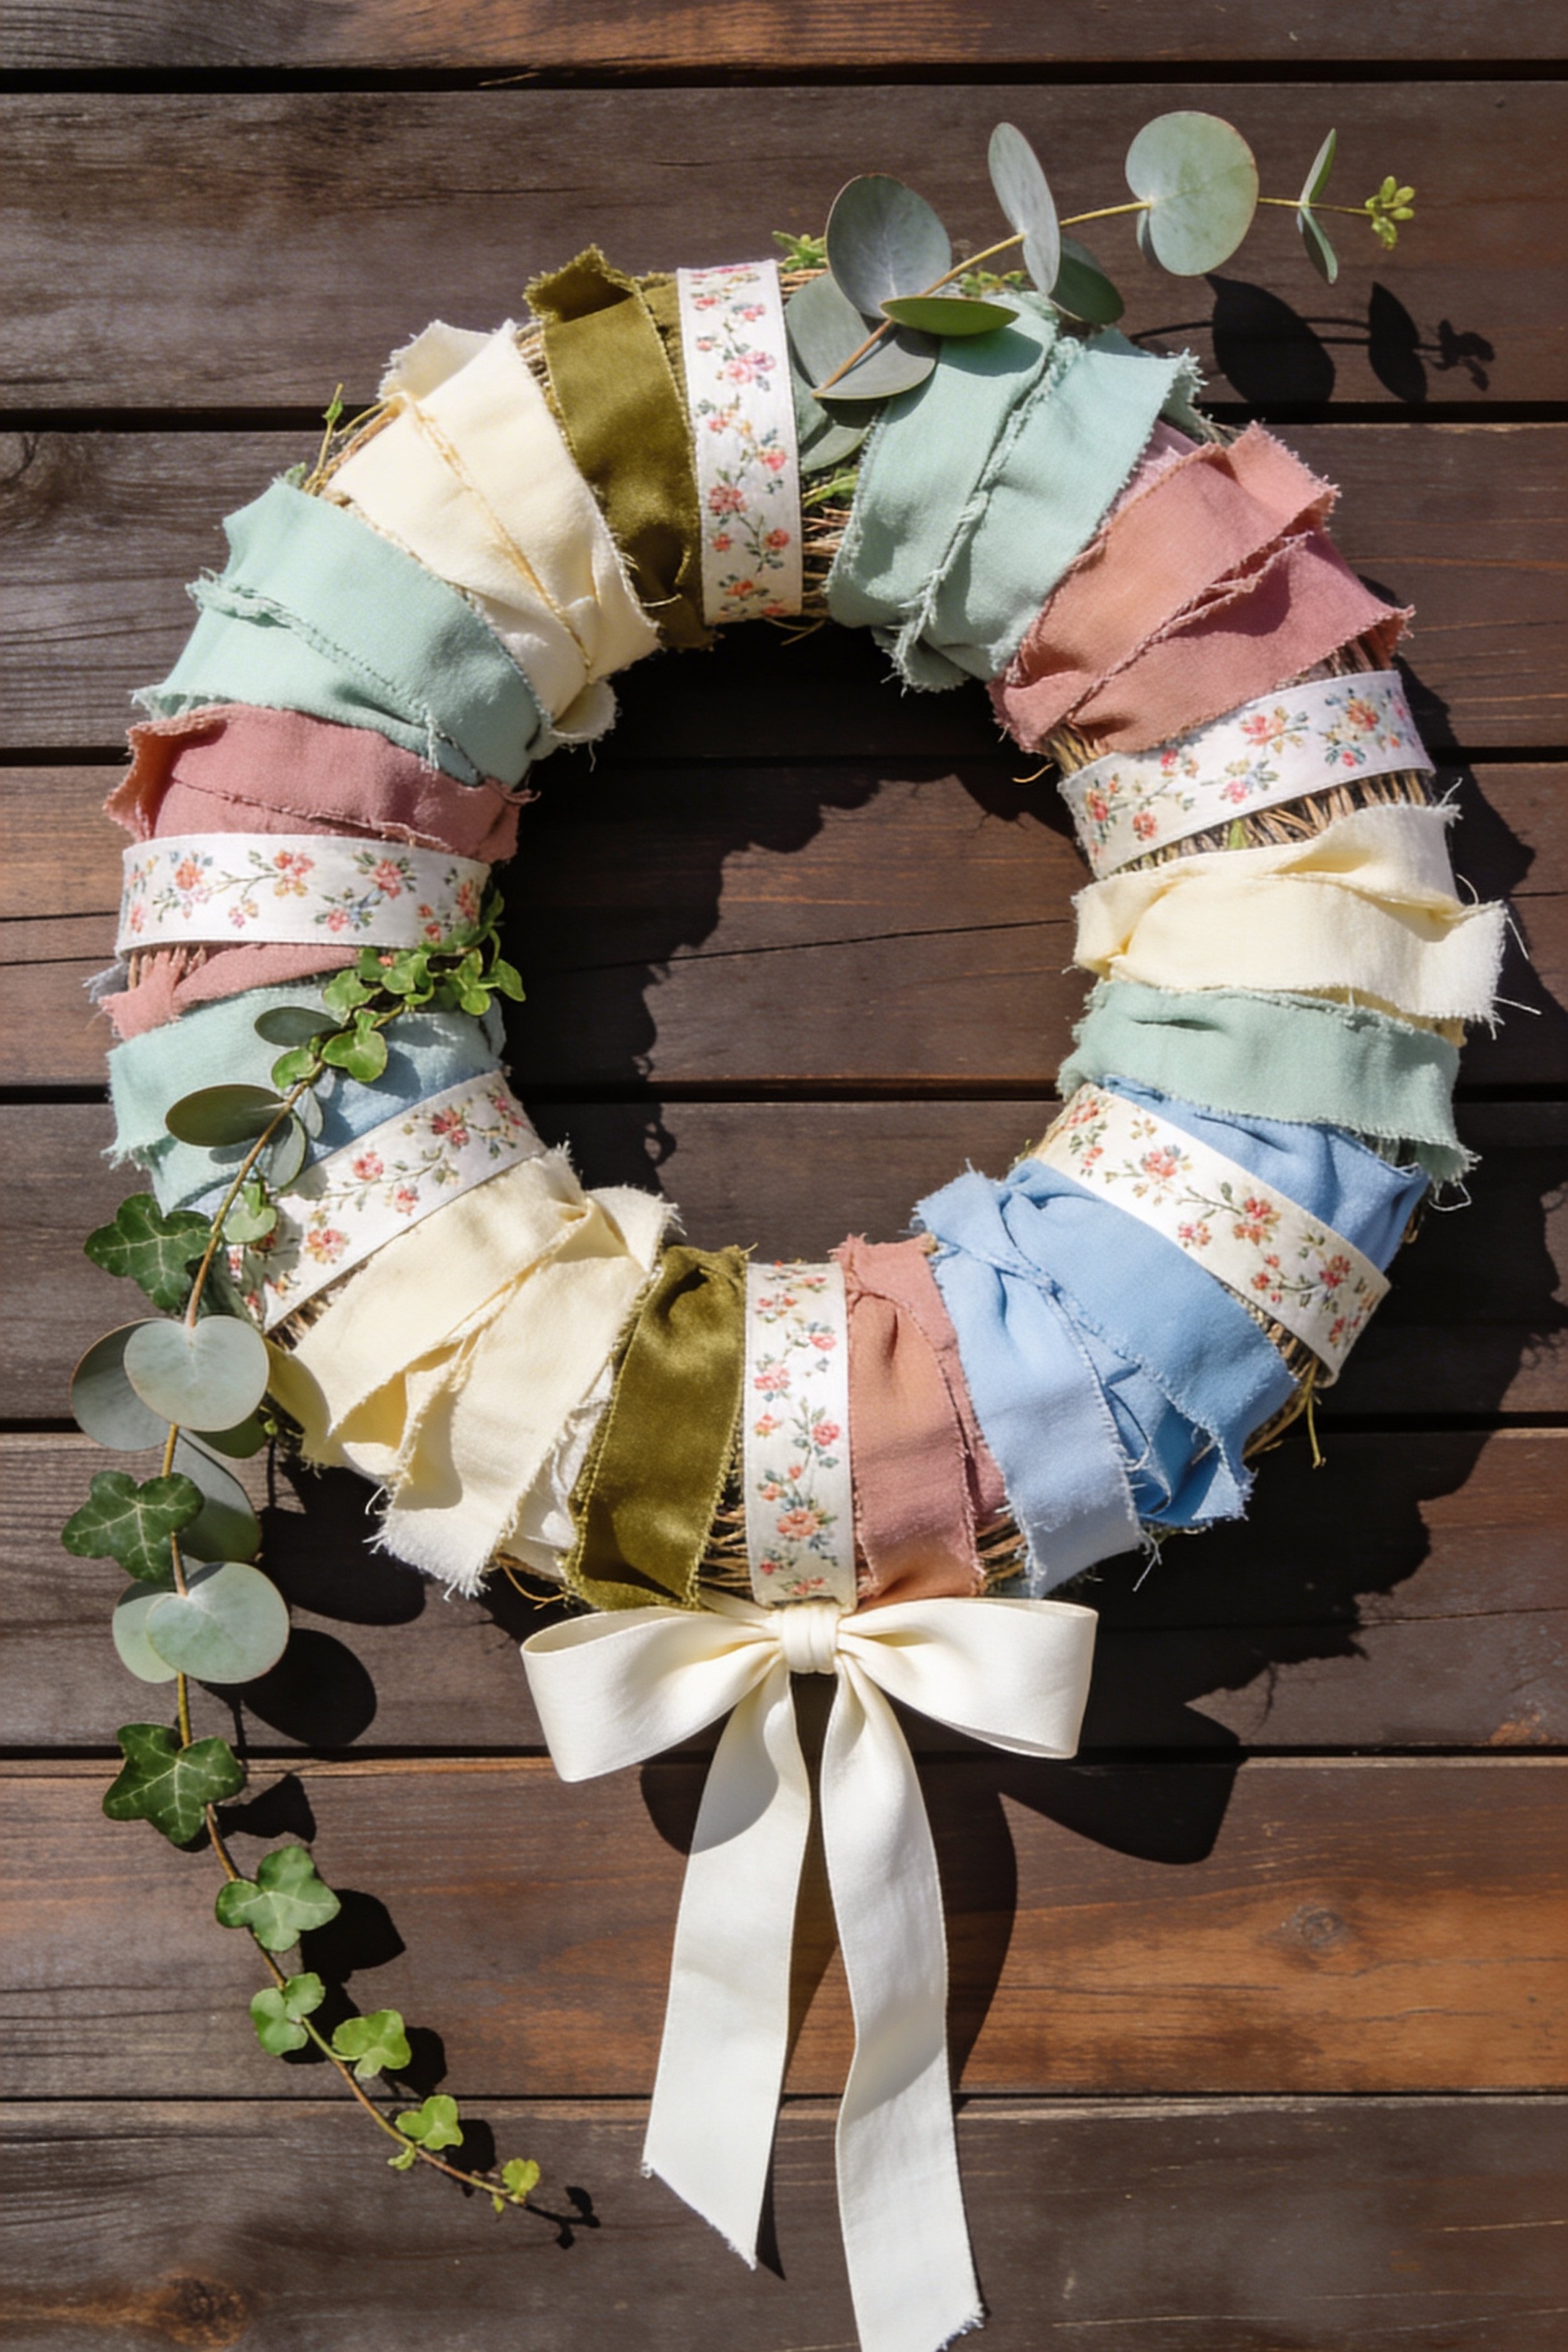
This wreath has a more refined cottage look, with a grapevine style base wrapped in faded fabric strips and spaced floral ribbon bands. The mix of sage, blush, cream, dusty blue, and mossy olive gives it an old fashioned spring charm that feels a little vintage and a little garden inspired. A soft ivory bow anchors the bottom, while eucalyptus and trailing ivy add movement.
This is a great project if you love spring wreaths that feel handmade but not overly fluffy. You are aiming for visible wrapping and pretty spacing, so each material gets a chance to shine.
Materials + tools list
- Grapevine wreath form or twig wreath form
- Lightweight cotton, muslin, or linen fabric strips
- Floral print ribbon in a narrow width
- Ivory ribbon or linen for the bottom bow
- Faux eucalyptus stems
- Faux ivy vine
- Small greenery sprigs optional
- Hot glue gun and glue sticks
- Floral wire
- Wire cutters
- Scissors
- Needle and thread optional
- Twine optional
- Command style wreath hook for hanging during checks
Finished size + customization notes
A 12 inch grapevine wreath usually finishes around 14 to 16 inches wide depending on bow size and greenery. Because this style is less dense than a rag wreath, the base remains part of the design.
This project works best with muted, dusty fabric shades. Keep the floral ribbon narrow so it reads as a delicate detail rather than taking over. If you cannot find floral ribbon, use torn floral cotton strips instead.
Step by step instructions
1. Study the spacing before you begin
Unlike a fully covered wreath, this design leaves parts of the underlying base visible. That means placement matters. Before gluing anything, drape your fabrics and ribbon around the wreath to test the color rhythm. The reference look alternates fabric wraps with occasional floral ribbon bands, creating a collected cottage feel.
You should now see where your blushs, creams, greens, and blues will sit. Make small adjustments until the colors feel balanced around the circle.
2. Prepare the grapevine base
Trim away any sharp ends or broken twigs, but keep the natural texture. A little rustic unevenness is part of the charm. If the wreath base sheds a lot, lightly shake it outdoors first. You can also secure any loose grapevine sections with floral wire before you start decorating.
3. Cut and soften your fabric strips
Cut strips about 1.5 to 2 inches wide. Let the edges fray. If your fabric is brand new and stiff, crumple it gently in your hands to relax it. The wrapped sections in the photo feel softened and lived in, not crisp like freshly cut quilting cotton.
Try to make strips long enough to wrap several times around a section of the wreath. This gives each band a fuller, more elegant look.
4. Begin wrapping with the lightest tones
Start with cream or soft ivory near the upper left or upper right section. Secure the beginning at the back with hot glue or by tucking the strip into the grapevine and tying discreetly with twine. Wrap several times, then stop and secure the end underneath.
The goal is to create broad fabric bands with little bits of grapevine peeking between them. If yours looks too covered, space the sections farther apart. If it looks bare, wrap a little wider.
5. Add the next colors with intention
Move to sage, blush, dusty blue, or mossy olive. Wrap each one in a separate zone. Avoid perfectly even spacing. The reference wreath looks organic, as if the materials were added by eye. Still, keep visual balance in mind. If you place two strong colors close together, soften the area with cream nearby.
A visual checkpoint here: the wreath should now look airy and layered, not crowded. You should be able to see both fabric and vine.
6. Insert the floral ribbon bands
Now take the floral ribbon and wrap it around selected sections, allowing it to sit between or over some fabric wraps. This detail is what gives the wreath its sweet vintage personality. Use it sparingly. Too much floral ribbon makes the design look busy.
Tack the ribbon ends at the back or hide them beneath adjacent fabric wraps. You should now see little moments of floral print that catch the eye without overwhelming the softer solids.
7. Build gentle asymmetry
This wreath benefits from not being perfectly mirrored. Perhaps one side has more sage and the other more blush. One area might show a bit more grapevine. That gentle asymmetry makes the piece feel handmade and styled. Keep it balanced overall, but do not force exact repetition.
8. Secure all wraps invisibly
Once you love the arrangement, reinforce each wrap with a tiny dot of hot glue underneath or with hidden floral wire. Avoid gluing all along the fabric because you want it to retain softness and natural drape. Touch only the places that need anchoring.
9. Make the bottom bow
Use ivory ribbon or fabric with a soft hand. Create two generous loops and long tails. The bow should feel classic and clean, acting as a restful contrast to the mixed wrapping around the wreath.
If using fabric instead of ribbon, press the center fold lightly so the loops hold their shape. The bow in the photo is smooth and refined rather than floppy or oversized.
10. Attach the bow at the lower center
Wire the bow onto the wreath first so it stays secure, then add a small dab of glue. Let the tails hang straight down. If they twist, steam or finger press them gently into place.
Stand back. You should now see the bow grounding the composition and giving the circle a clear front facing orientation.
11. Add eucalyptus and ivy
Tuck faux eucalyptus around the left upper side and into a few other spots. Add a slender ivy vine trailing along one side so the wreath feels alive and lightly garden inspired. Keep the greenery subtle. It should frame the wreath, not turn it into a greenery wreath.
The photo uses just enough foliage to soften the edges and make the design feel springlike. If yours starts looking heavy, remove some greenery until the fabric remains the star.
12. Refine color transitions
Now check whether any two neighboring sections feel too abrupt. If needed, wrap a small cream strip partly over the edge of one section to soften the change. These bridging moments help the whole wreath feel composed.
13. Hide mechanics
Turn the wreath over and trim glue strings, clipped wires, or bulky ribbon ends. Add a felt circle over any rough areas if desired. The front should look natural, but the back should still be tidy enough to hang cleanly.
14. Hang and assess in natural light
Because this wreath relies on quiet color variation, natural light will show you whether it reads softly or too sharply. If one ribbon band stands out too much, swap it for a more faded print. If the bow looks too bright, tea stain natural fabric very lightly for a mellower tone.
Troubleshooting
My wreath looks too sparse
Add one or two more fabric bands, especially in the emptiest sections, but do not fully cover the base.
The floral ribbon feels too busy
Reduce the number of ribbon sections. This style works best with a light hand.
The bow looks too formal
Use a softer linen or raw edge ribbon rather than satin. You can also shorten the loops slightly.
The grapevine is scratching my door
Add felt pads to the back or hang it with a protective ribbon loop.
The colors do not feel cohesive
Introduce more cream. Cream acts like visual breathing room and instantly softens the palette.
Finishing details
For a polished finish, lightly trim any excessively frayed threads, but leave enough raw texture to preserve the handmade character. A quick pass with a low steam setting can relax crushed fabric if the wreath has been stored. For a more heirloom inspired version, use faded floral quilting cotton torn into bands instead of ribbon. For a cleaner modern farmhouse look, skip the ivy and keep only eucalyptus and one ivory bow.
This wreath stores well because it is not overly bulky. Wrap it lightly in tissue and keep it flat in a shallow box. If the bow creases, untie and retie it next season rather than forcing old folds.
Shop Similar
- Grapevine wreath base for spring projects
- Dusty pastel linen fabric strips
- Narrow floral ribbon for cottage crafts
- Ivory linen ribbon for handmade bows
- Faux eucalyptus garland pieces
- Artificial ivy vine for wreath styling
Style It With

Earthy Linen Rag Wreath Make It Yourself Tutorial
What you’re making
This wreath is a fuller rag style design with an earthy spring palette of mustard, dusty blue, olive, cream, and lilac. It feels a little more rustic and grounded than a sugary Easter wreath, which makes it perfect if you like spring decor that still works with wood tones, natural textures, and a relaxed home. The soft ivory bow keeps the design classic and gives the colors a clean focal point.
The finished look is plush and textural, almost like a little ring of gathered linen petals. It is simple to build, but color placement and fullness make the difference between an average wreath and one that looks beautifully styled.
Materials + tools list
- Wire wreath form or foam wreath form
- Linen, cotton slub, homespun, or canvas weight fabric scraps
- Fabric colors in mustard, cream, dusty blue, lilac, sage, and olive
- Scissors or rotary cutter
- Ruler
- Ivory ribbon or linen fabric for bow
- Faux ivy or eucalyptus stems optional
- Hot glue gun and glue sticks
- Floral wire optional
- Twine or hanging ribbon
- Fabric stiffener optional for bow
- Felt pads optional for backing
Finished size + customization notes
A 12 inch wire form makes a nice full wreath that can finish around 16 inches. Because the fabrics in this look are slightly weightier than the pastel rag tie version, the wreath reads a bit more substantial.
Use linen or cotton slub for the most authentic texture. If you use thin quilting cotton only, the wreath may not have the same sculptural fullness. You can mix weights, but keep them all matte.
Step by step instructions
1. Define the mood with fabric choice
Before cutting anything, choose fabrics that feel earthy and muted. The reference look is not glossy, bright, or saturated. Think weathered spring fields rather than candy shop Easter. Mustard should be soft, blue should be dusty, green should be olive or sage, and cream should be warm rather than stark white.
Lay the fabrics together on your table. You should now see a palette that feels natural and collected. If one fabric looks too modern or synthetic, swap it out.
2. Cut strips for fullness
Cut strips roughly 1 to 1.25 inches wide and 6 to 7 inches long. Slight inconsistency is fine and even welcome. Torn strips can look especially lovely in linen because the frayed edges add softness. For a fuller wreath, prepare at least 200 strips for a medium size base.
3. Decide on base method
If using a wire wreath, tie strips directly in double knots. If using a foam base, you can pin folded fabric loops or attach bundles with hot glue. The wire method gives the closest result to the photo because the tied fabric naturally flares upward and outward.
4. Begin with the strongest color sparingly
Start with mustard or olive, but do not overuse them. These deeper tones act like seasoning in the design. Tie a small cluster, then follow with cream and dusty blue. This helps the richer colors feel intentional rather than overwhelming.
A visual checkpoint: after the first handful of ties, the mustard should read as an accent, not a dominant block.
5. Build around the wreath in mixed clusters
Tie strips in short mixed sequences of four to eight strips, then rotate the wreath and repeat elsewhere. This prevents one side from ending up too warm or too cool. Use cream frequently to soften transitions. Lilac works beautifully in smaller pops.
Push each knot snugly beside the previous one. The wreath should gradually puff into a thick ring. If yours looks spiky rather than plush, your strips may be too stiff or too long. Shorten a few and keep going.
6. Work the inner and outer edges evenly
As you tie, alternate whether the strip ends flare more toward the inside or outside edge. This keeps the wreath round and prevents a thin inner rim. Step back every 20 to 30 strips. You should now see a circle that feels evenly padded all around.
7. Encourage curly, petal like folds
The photo has lots of little soft curls and folded fabric mouths. To get that look, twist some strips slightly before tying and leave others flat. Linen especially will hold beautiful organic shapes. Do not smooth everything down. This design wants texture.
8. Fill visible gaps methodically
When the wreath is mostly covered, look for places where the base still shows. Insert extra strips exactly into those spots rather than scattering them randomly. This targeted filling makes the wreath feel professionally finished.
9. Fluff for dimension
Use your fingers to separate clustered strips and tease them into shape. Pull some forward and let others tuck back. The wreath should feel layered, not compressed. If one area bulges too much, trim the longest ends lightly rather than flattening them.
10. Make the ivory bow
Use a soft but slightly heavier fabric or ribbon so the bow holds a generous shape. Form two loops and long tails, then wrap the center with a narrow strip. Stitch or glue securely. If you want extra crispness, add a touch of fabric stiffener to the back only.
The bow in the reference is calm and classic. Keep it centered and elegant, not oversized and theatrical.
11. Attach the bow
Secure the bow at the bottom center. Let the tails extend downward enough to break the circular edge. This adds a graceful vertical line and makes the wreath feel complete.
From a few steps back, you should now see a balanced design with the bow as a bright resting point against the richer fabric colors.
12. Add optional greenery
If you want to echo the photo styling, tuck a few eucalyptus leaves or ivy stems around the outer edges. Keep this light. Too much greenery can compete with the already rich fabric texture. A few soft leaves at the corners are enough.
13. Refine the color distribution
Now rotate the wreath slowly and check for clustering. If too much mustard sits together, add cream and blue nearby. If the wreath feels too cool overall, tuck in one or two extra warm strips. This little balancing act makes a big visual difference.
14. Secure a hanger and test
Tie a loop at the back and hang the wreath. Because rag wreaths are fluffy, the front can hide imbalances until they are vertical. Adjust by fluffing, trimming, or adding one or two extra strips. The center opening should remain nicely round and visible.
Troubleshooting
My wreath looks too messy
Focus on density and color balance. Messy texture is good, but if colors clump randomly the whole piece feels chaotic.
The bow disappears
Use a larger width ivory ribbon or a fabric with a little more body. The bow should contrast clearly against the rag texture.
The wreath feels too thin
Add more strips. Fullness is the secret. Sparse rag wreaths rarely look intentional.
My colors look too sweet
Introduce olive, mustard, or warmer natural linen. These tones ground the palette and keep it from leaning babyish.
The inner ring looks uneven
Tie a few extra strips angled inward only where needed instead of around the whole wreath.
Finishing details
Trim stray threads that stick out too sharply, but do not overgroom the piece. The charm comes from those little frays and folds. If storing long term, place tissue inside the center opening and around the outer edge to preserve the shape. If using this outdoors on a covered porch, keep it away from direct rain and strong sun so the fabrics do not fade unevenly.
Optional upgrades include stitching tiny hidden bells into the bow tails for a soft spring jingle, adding a wooden initial tag behind the bow, or weaving one narrow velvet ribbon through a small section for a subtle luxe twist. You could also create a coordinating mini version for cabinet doors using the exact same fabric palette.
Shop Similar
- Earth tone linen fabric bundle for crafts
- Wire wreath frames for rag wreath projects
- Natural ivory ribbon for large bows
- Muted spring fabric scraps in mustard blue and sage
- Faux eucalyptus stems for rustic wreaths
Style It With
Coastal Garden Scrap Wreath Step by Step Tutorial
What you’re making
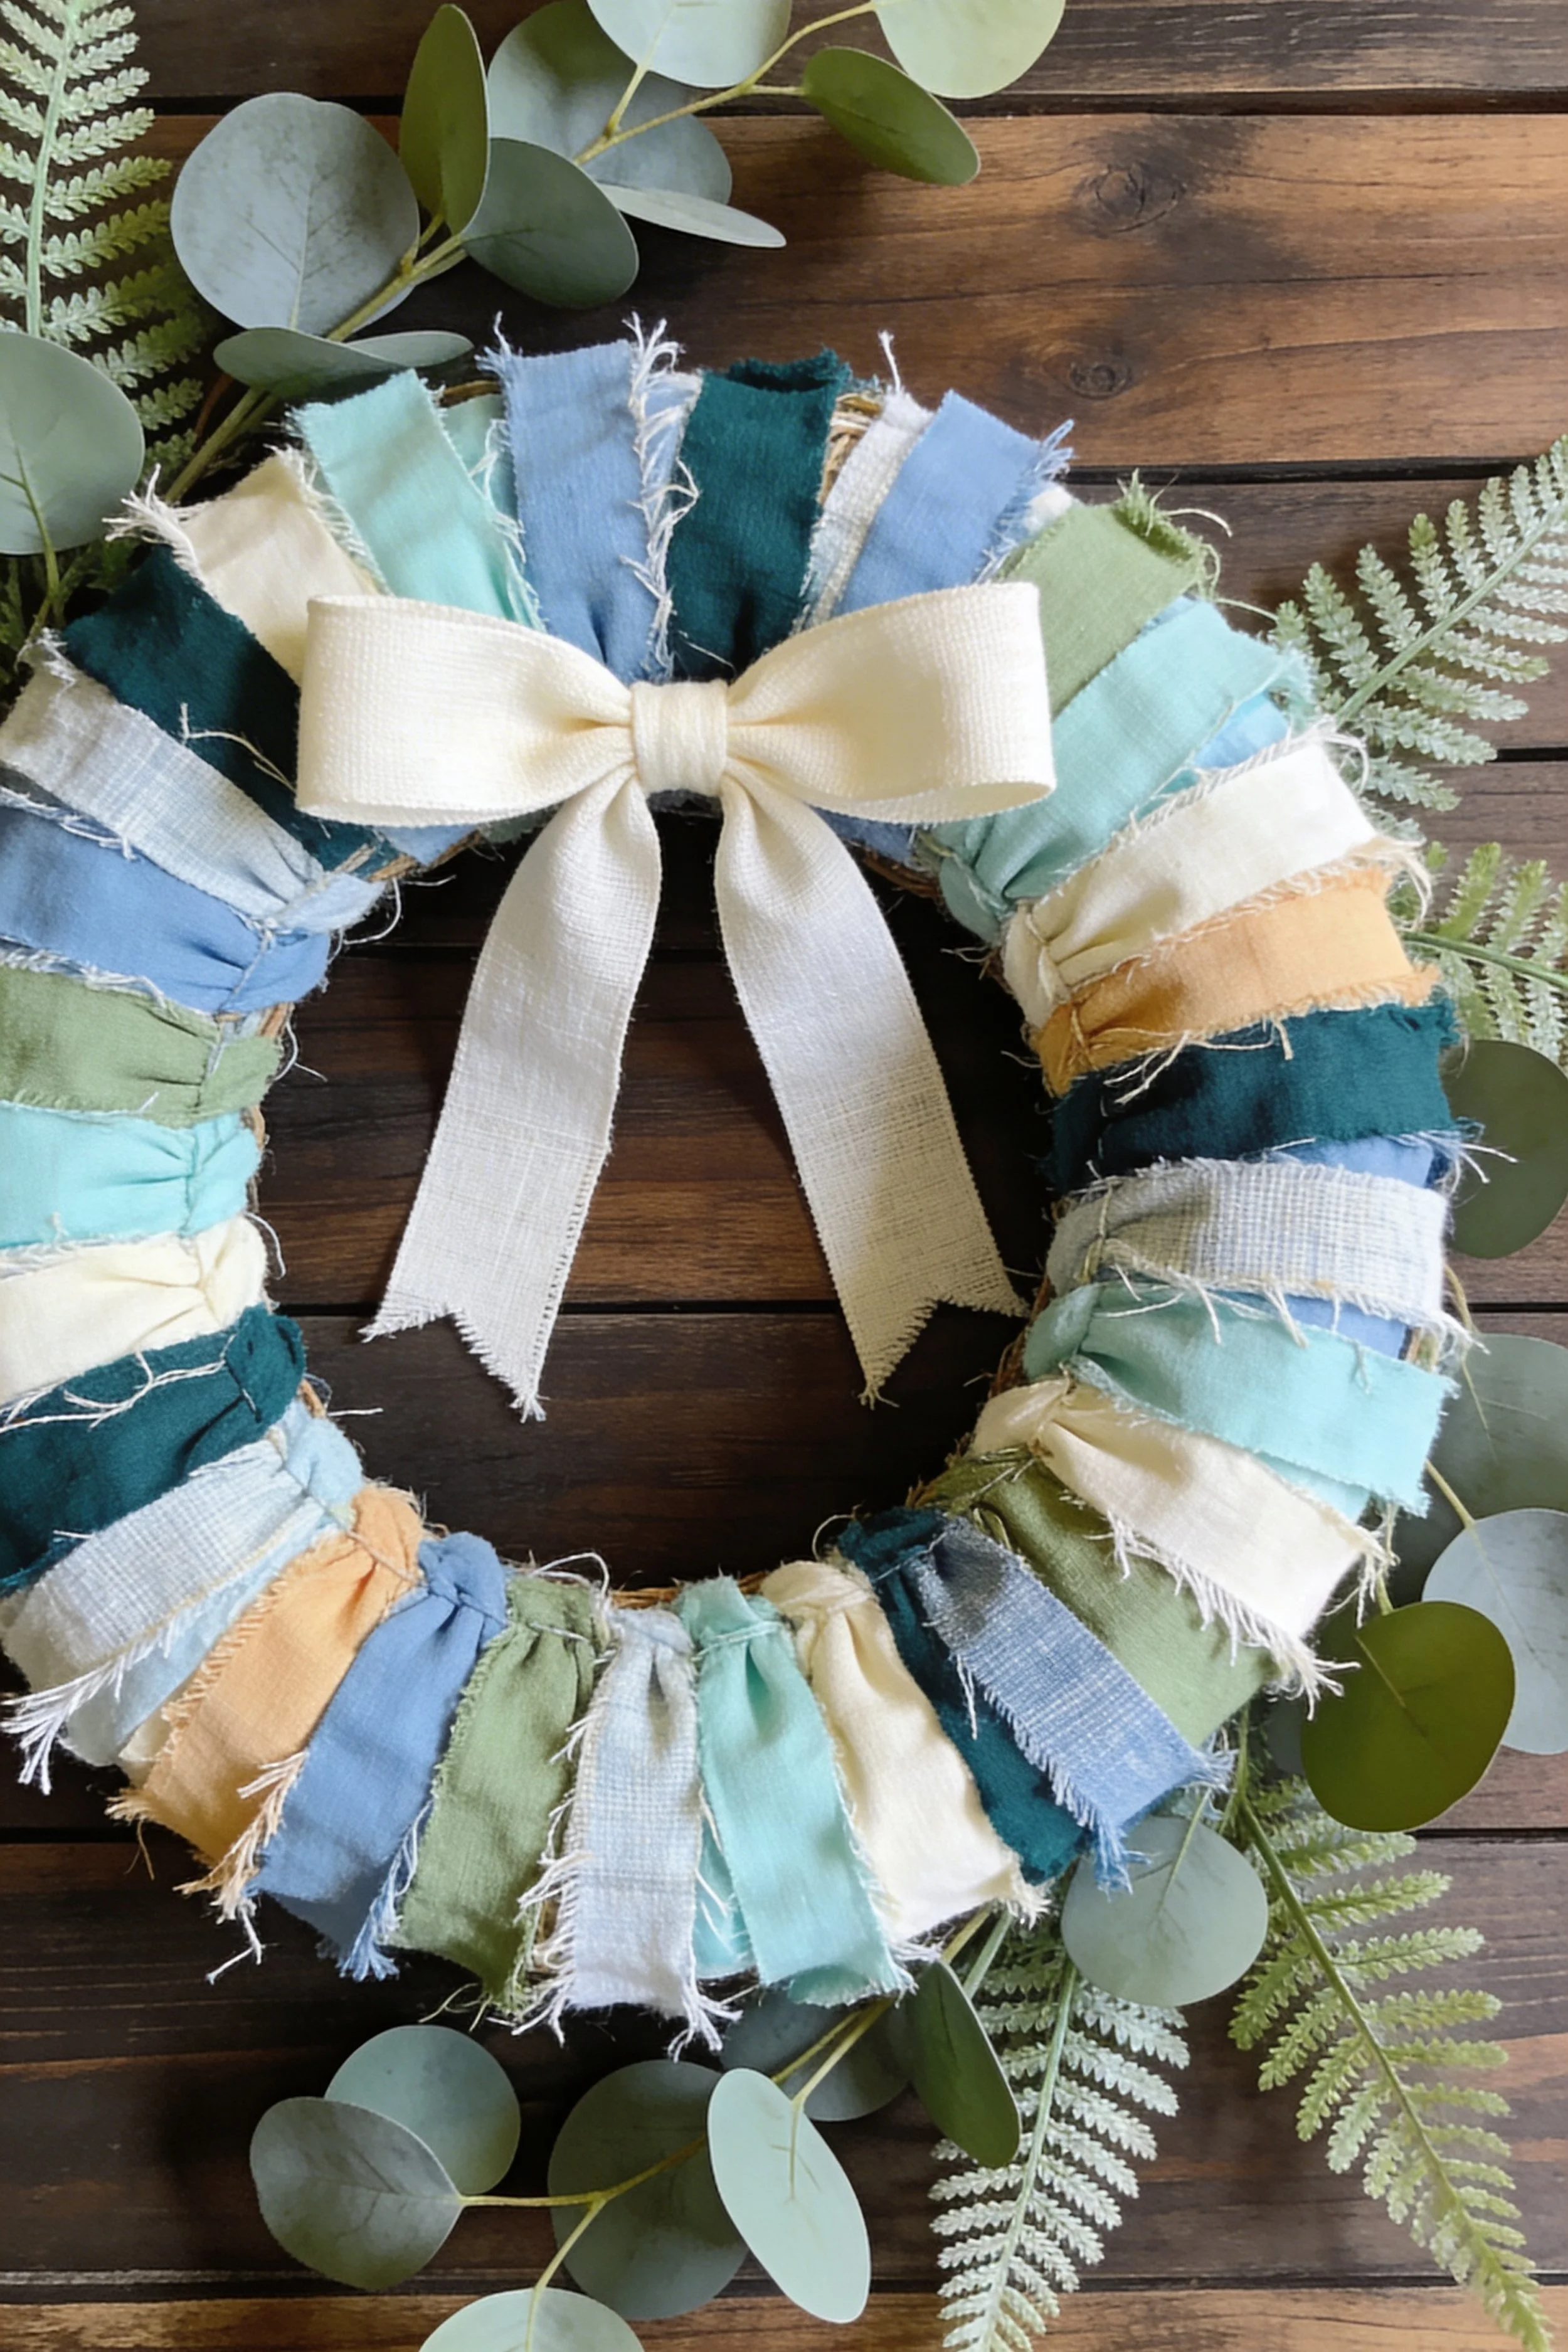
This wreath is a wrapped scrap fabric design with cool watery tones of aqua, sky blue, leaf green, deep teal, cream, and soft butter. It feels fresh and breezy, almost like a meeting point between spring garden style and coastal cottage color. A large ivory bow at the top gives it a polished finished look, while eucalyptus and fern details frame the wreath naturally.
Compared with the fluffier rag tie versions, this one is more structured. You will be wrapping and layering visible strips around a vine style base so the colors read clearly as bands. The finished result looks beautiful on dark wood doors and especially lovely in spaces with white, natural oak, or weathered baskets.
Materials + tools list
- Grapevine wreath form or straw wrapped wreath form
- Fabric strips in teal, aqua, leaf green, dusty blue, butter, and cream
- Ivory ribbon or ivory linen fabric for a large bow
- Faux eucalyptus stems
- Faux fern stems
- Hot glue gun and glue sticks
- Floral wire
- Wire cutters
- Fabric scissors
- Twine optional
- Needle and thread optional
- Measuring tape
- Hanging loop
Finished size + customization notes
A 12 inch base works beautifully and usually finishes around 15 inches wide including the bow. You can also use a 10 inch base for a smaller kitchen or bathroom door wreath.
For the closest look, choose matte, slightly frayed fabrics with enough body to hold visible banding. Soft linen, cotton slub, muslin, and washed canvas all work. If you want a more beachy version, replace the darker teal with pale sea glass tones.
Step by step instructions
1. Curate the palette first
Lay out your fabrics from darkest to lightest. This helps you see whether the palette feels airy and balanced. The deepest teal should be used in smaller amounts, while aqua, dusty blue, and cream should appear more frequently. Butter adds a gentle warmth so the design does not turn icy.
You should now see a palette that feels fresh, calm, and natural. If a green looks too yellow or a blue looks too bright, remove it. This design depends on soft, sophisticated color.
2. Prepare the wreath base
Grapevine is ideal because it adds rustic texture between wraps, but a straw form wrapped in neutral muslin also works. Clean up loose bits, then decide where your top and bottom will be. This matters because the bow sits at the top in the reference photo, which changes how you distribute color around the circle.
3. Cut generous fabric strips
Cut strips around 1.5 to 2.5 inches wide. Vary the widths slightly for a more relaxed look. Longer strips let you wrap smooth sections with fewer interruptions. Tear some pieces rather than cutting all of them for softer edges.
4. Start wrapping with light tones
Begin near the lower left or lower right with cream or pale aqua. Secure the strip at the back and wrap several times, allowing the edges to fray softly. Do not pull too tightly. The fabric should sit with a little loft so the wreath feels layered rather than flat.
A visual checkpoint here: the wraps should look like overlapping bands, not tight athletic tape around a form.
5. Layer in medium and deep tones
Add dusty blue, leaf green, and then a touch of deep teal. Use the darker colors like punctuation. They create depth, but they should never dominate the wreath. Spread them around the circle so one side does not become visually heavy.
If yours looks too dark, immediately add a cream or aqua band nearby to restore brightness.
6. Create movement with angled wraps
Some strips can run straight across the wreath form, while others angle slightly. This keeps the surface lively. The photo shows bands that feel casually placed yet balanced. Too much uniformity makes the wreath look rigid.
7. Keep some base texture visible
Do not fully hide every bit of the underlying form. A little vine peeking through adds warmth and prevents the wreath from looking too bulky. This also helps the palette breathe. If your wreath looks stuffed, space the next few bands farther apart.
8. Make the top bow before final balancing
Create a large ivory bow with enough scale to become a focal point. Two full loops and long tails work well. Place it temporarily at the top without gluing to see how it changes the balance of the colors. Often the area just under the bow needs one more light fabric wrap to look finished.
9. Attach the bow securely
Use floral wire to anchor the bow to the wreath, then add a dot of hot glue beneath the center knot. Let the tails fall gently downward along the inner edge a little before releasing outward. This subtle drape looks more graceful than stiff tails sticking straight out.
You should now see the wreath take on a polished silhouette with a clear top.
10. Add eucalyptus around the outer edges
Tuck eucalyptus stems behind a few fabric sections, especially around the sides and lower edges. The round leaves soften the sharper lines of the fabric bands and echo the fresh spring mood. Hide most of the stem and let only the prettiest leaves show.
11. Add fern for softness
Slide in a few fern fronds where the wreath needs feathery texture. The image uses greenery almost like a frame around the wreath rather than a dense botanical element. If the fern looks too stiff, trim it into shorter sections and tuck just the tips into place.
12. Refine the overall composition
Step back and check whether the wreath feels balanced around the bow. Because the bow is bright and centered at the top, the lower half may need slightly deeper color to ground it. Add one teal or green band near the bottom if necessary. If the bottom already feels heavy, balance with more cream instead.
13. Hide mechanics and soften edges
Trim visible glue strings and tuck in raw ends. If any wrap edges are standing up too sharply, bend them gently or secure just the tip with glue. You want softness, not disorder. The design should feel casually elegant.
14. Create the hanging loop and test
Attach a hanging loop behind the bow so the wreath hangs straight. This is important because the bow needs to sit exactly at the top center. Test it on a hook and make final micro adjustments to bow tails, greenery, and any wraps that shifted during handling.
Troubleshooting
My wreath looks too busy
Reduce either the greenery or the number of colors showing in one area. This design shines when each band can be seen clearly.
The bow looks too small
Scale up. The bow in this style is not a tiny accent. It helps define the whole composition.
My wraps keep slipping on grapevine
Use hidden dabs of glue at the back and anchor a few sections with floral wire beneath the fabric.
The palette does not feel coastal enough
Use more aqua, dusty blue, and cream. Reduce mustard or pink if they sneak in from mixed scrap bundles.
The greenery makes it look crowded
Trim stems into smaller pieces and use fewer of them. Think frame, not bouquet.
Finishing details
This wreath benefits from a final styling pass once hung in place. Adjust the bow tails so they hang smoothly, fan out the eucalyptus leaves, and rotate fern tips so they peek naturally from behind the circle. If you want a slightly more luxe finish, brush the bow with a fabric steamer and add a hidden line of hand stitching at the center knot for crispness.
Optional upgrades include adding a pale wood bead strand tucked subtly behind the bow, weaving one sheer ivory ribbon through a couple of sections for softness, or replacing faux greenery with preserved eucalyptus for a more organic finish indoors. For summer, this palette can transition beautifully with the addition of a tiny starfish charm or soft striped ribbon, while still keeping the spring structure intact.
Shop Similar
- Sea glass tone fabric bundle for wreath making
- Grapevine wreath base for wrapped wreaths
- Ivory linen ribbon for oversized bows
- Faux eucalyptus stems with round leaves
- Artificial fern stems for spring wreath accents
- Washed cotton fabric strips in blue green tones
Style It With
As these wreaths find their place on your doors, walls, or shelves, what lingers is not just the finished piece but the process that shaped it. The slow wrapping, the layering of color, the small adjustments that bring everything into balance. These are quiet crafts, the kind that reward attention without demanding perfection, and that rhythm is part of their beauty.
Each design in this collection can evolve with you. The same base can shift with a different palette, a new ribbon, or a change in greenery. What begins as a spring project can easily become a year round creative habit, one that invites you to revisit materials you already have and see them differently. That is the real charm of fabric wreaths. They are endlessly adaptable, deeply tactile, and always personal.
Let these pieces live where they can be seen and enjoyed daily. A front door greeting guests, a hallway that catches soft afternoon light, or a quiet corner that benefits from a touch of color and texture. Over time, they will settle into your space in a way that feels natural, as though they have always belonged there. And when the season turns again, you will know exactly how to begin the next one.