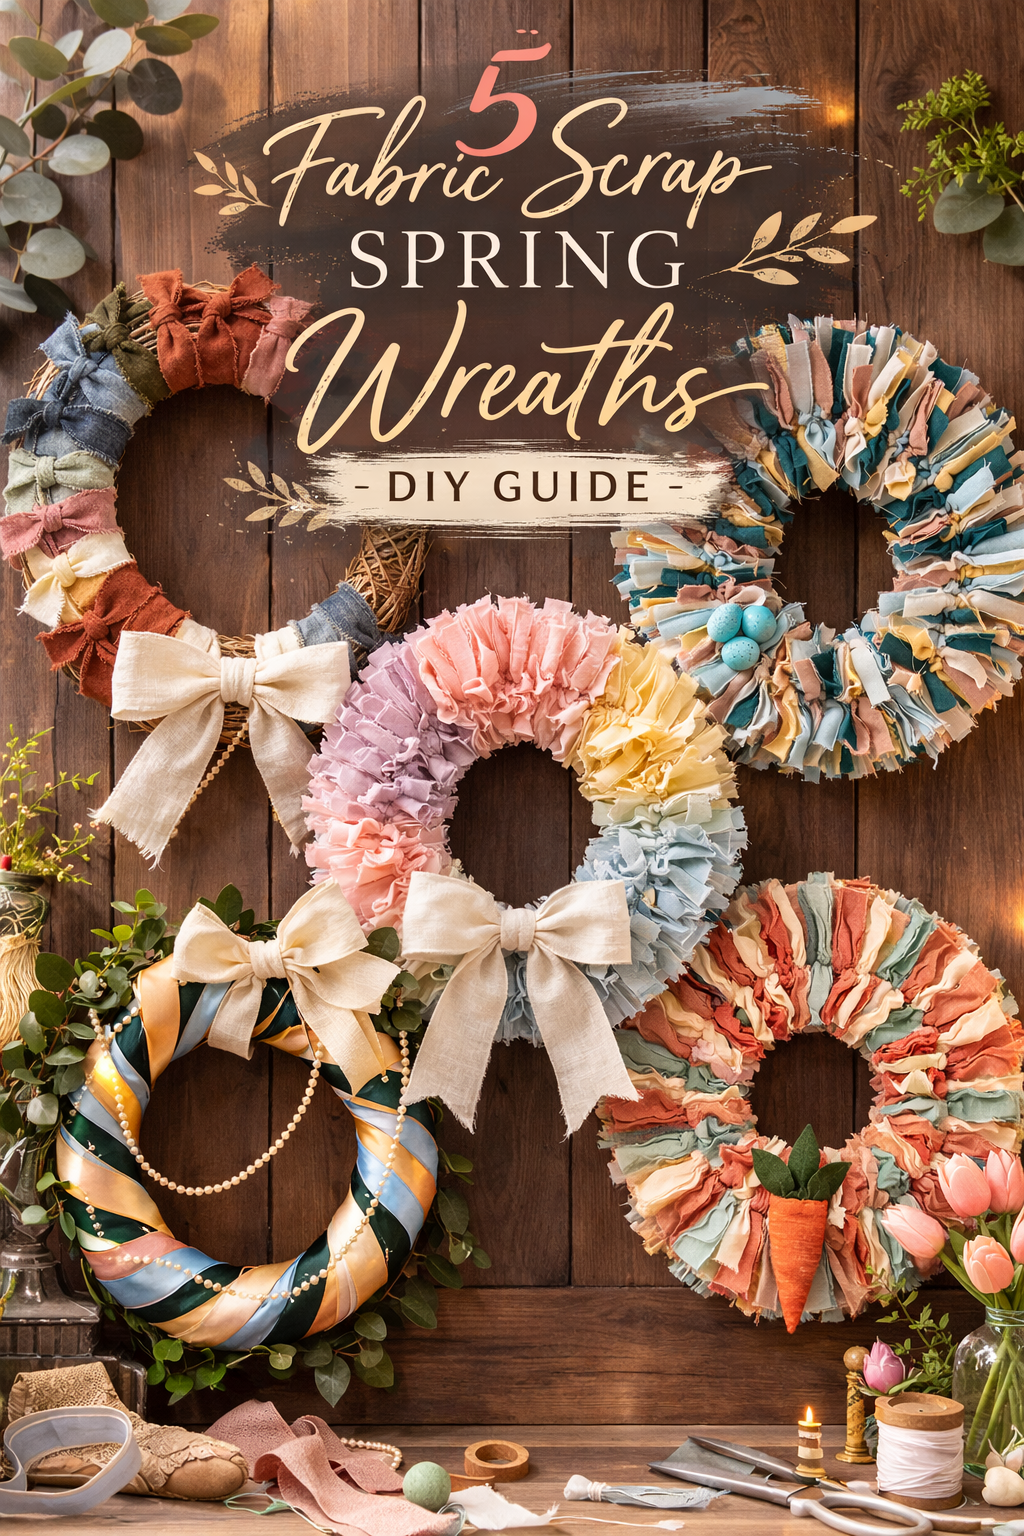
5 Fabric Scrap Spring Wreaths DIY Guide for a Soft Cozy Front Door
More like this
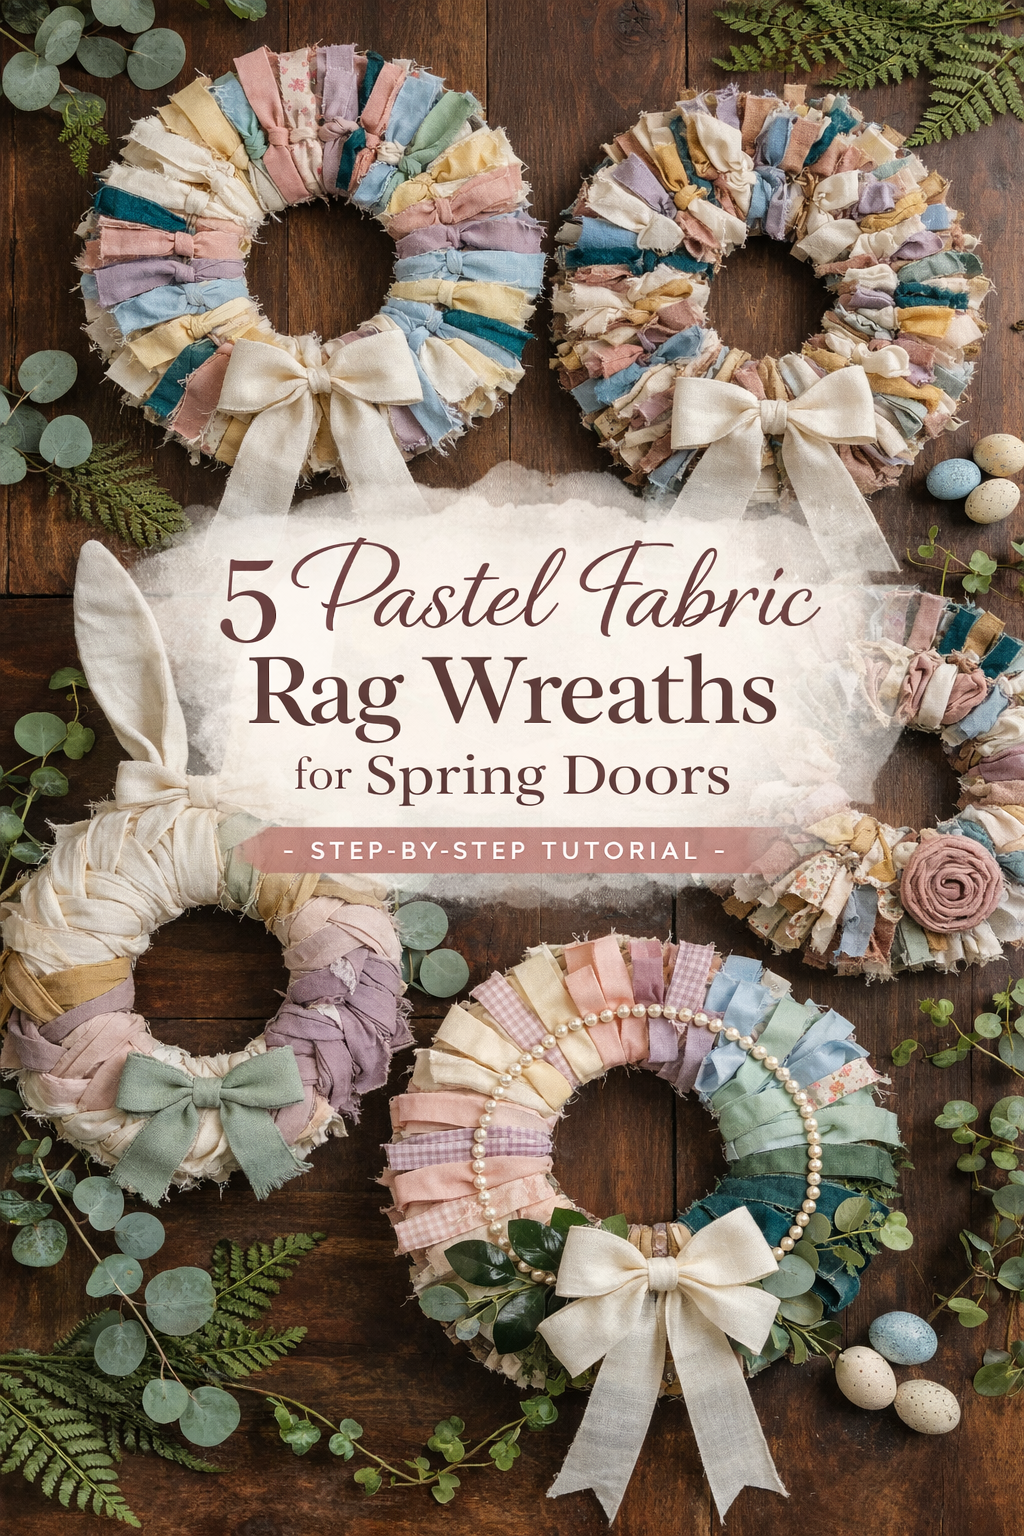
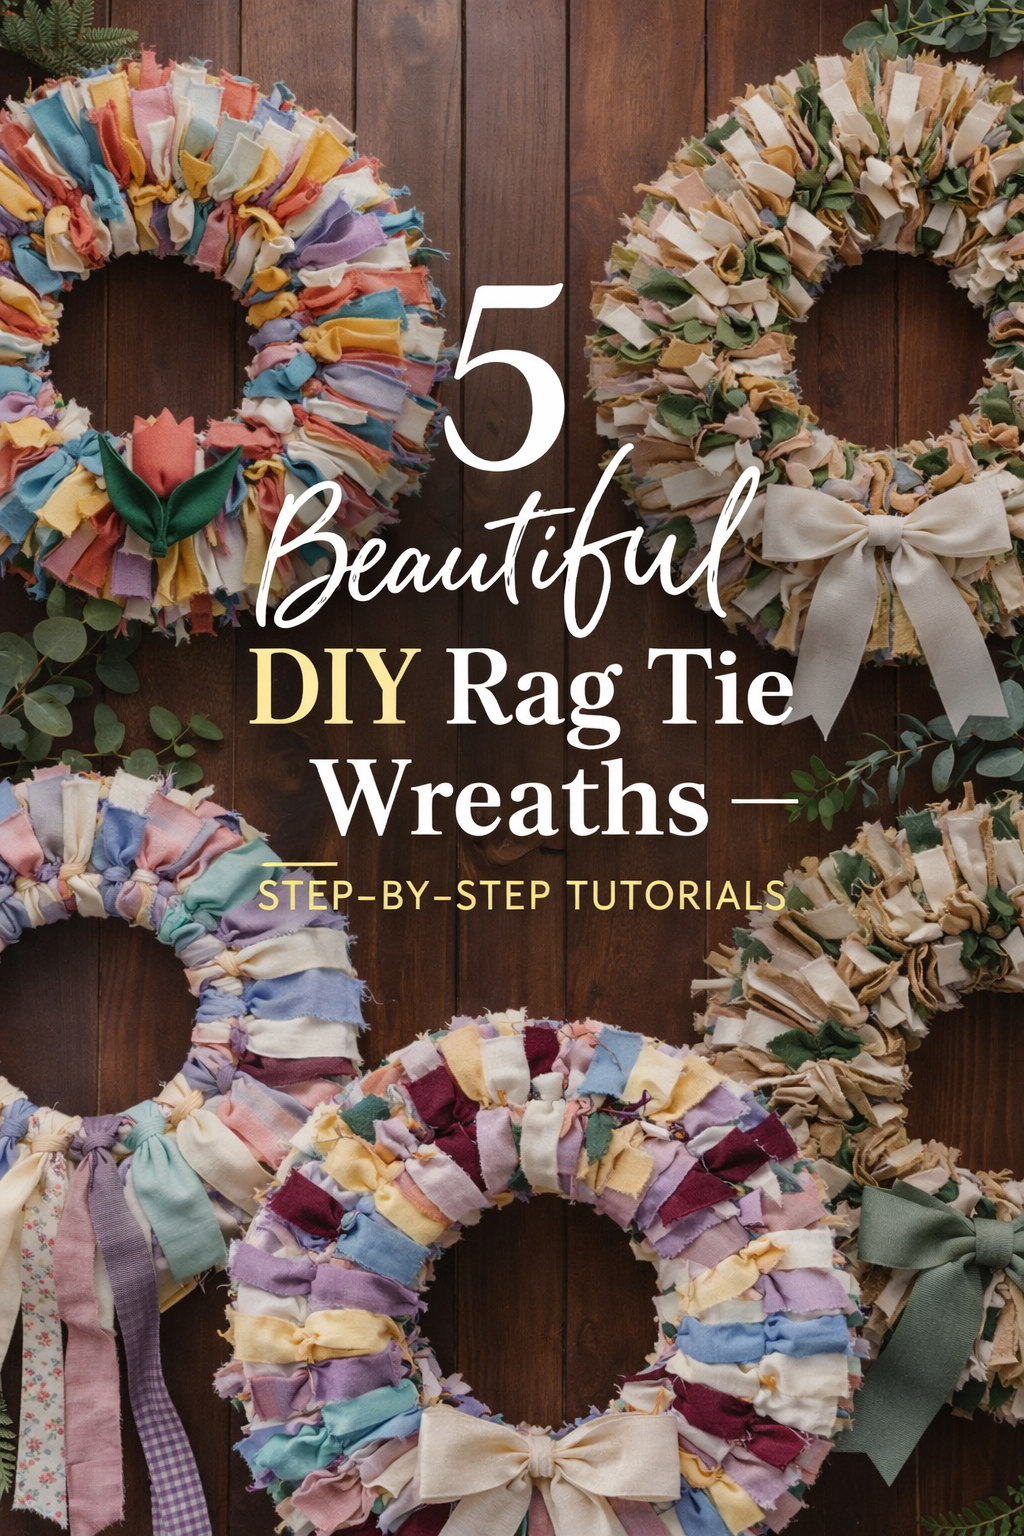
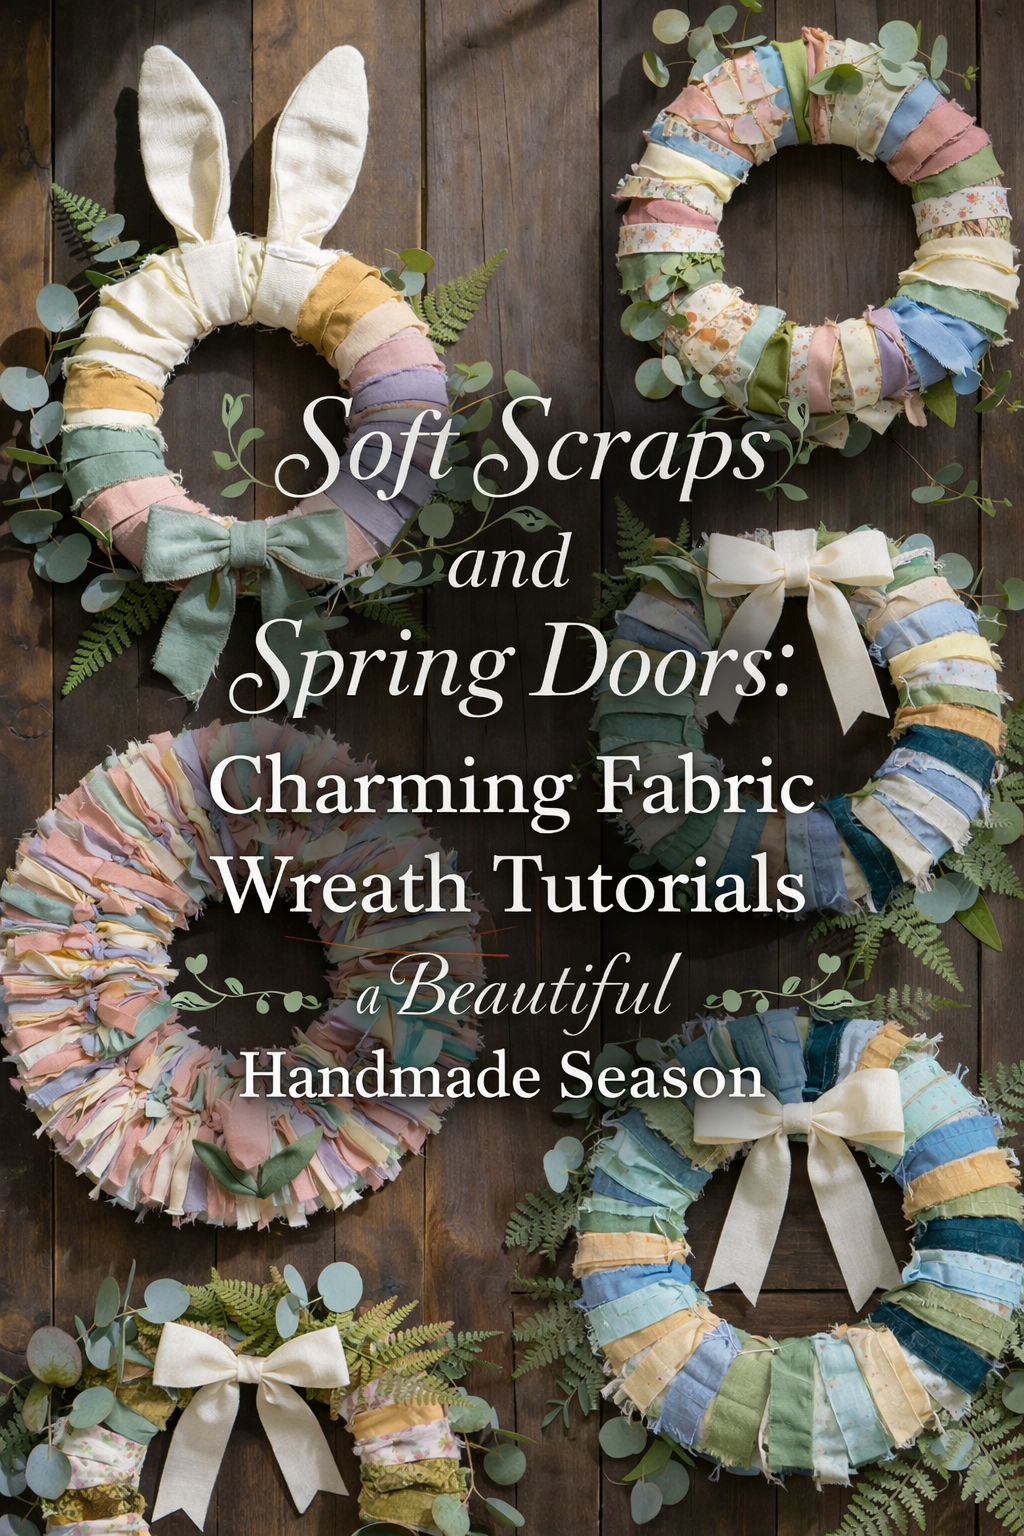
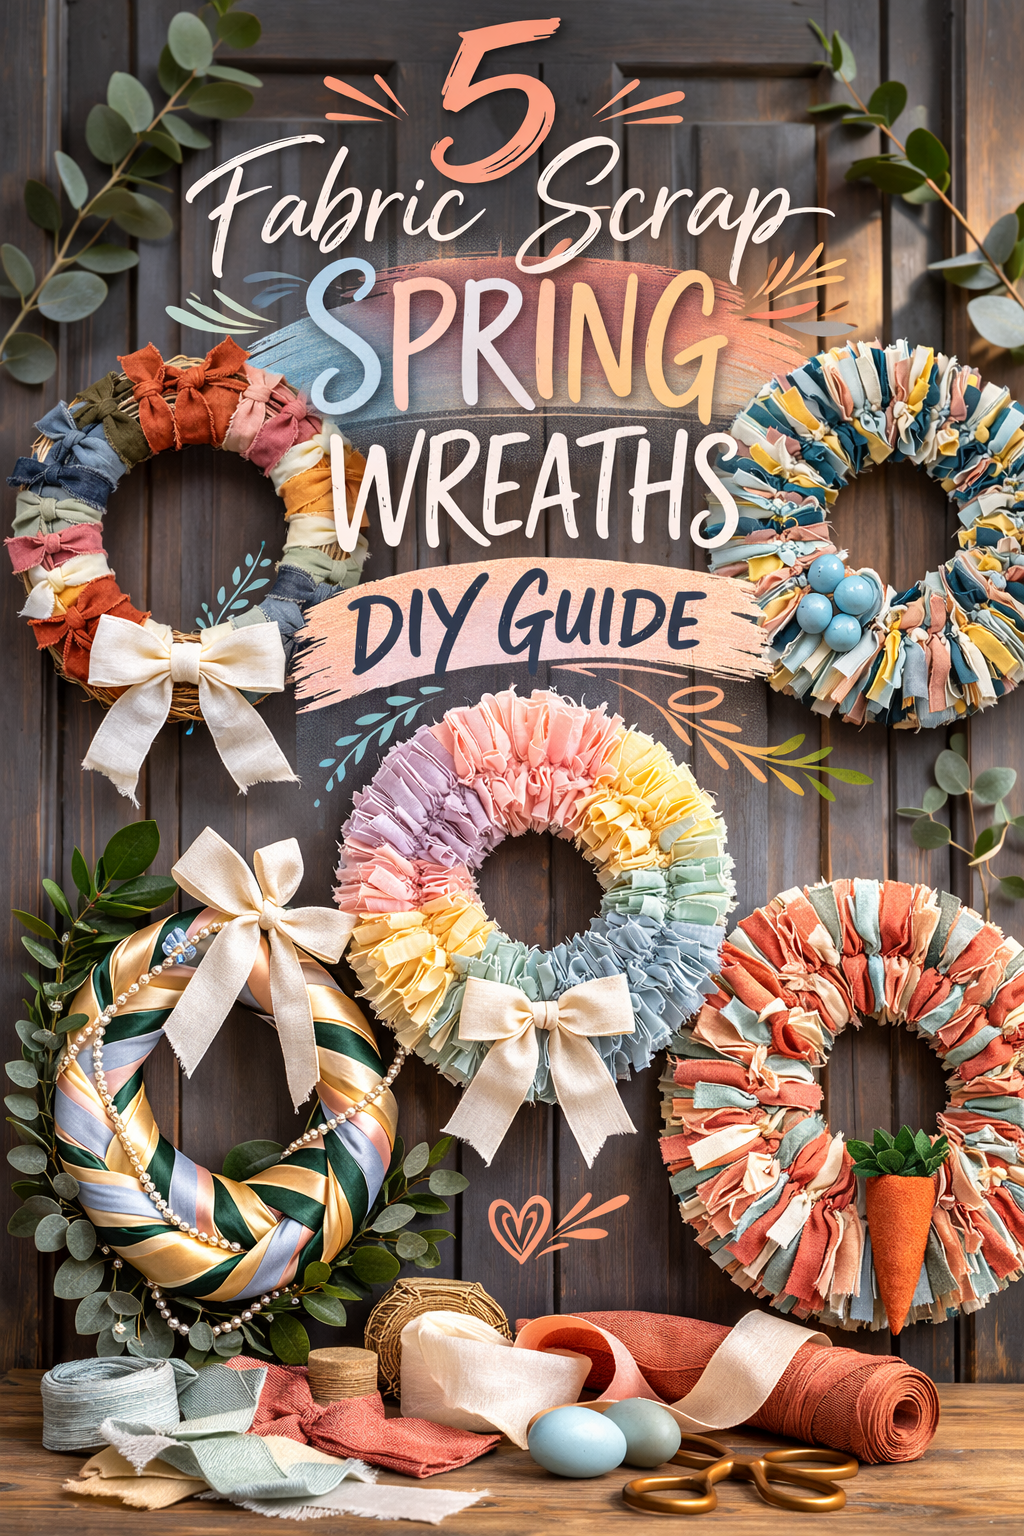
Spring is the perfect excuse to turn a pile of fabric scraps into something that looks like a styled boutique find. In this post you are getting five distinct wreath looks that all share the same cozy texture story but each one hits a different mood, from rustic bow wrapped grapevine to plush rag ties with sweet seasonal accents. These projects are beginner friendly, budget friendly, and genuinely satisfying because you see the wreath get fuller and prettier with every strip you add. Pick one color palette and make a matching set, or mix and match styles for a front door refresh that feels collected and intentional.
💡 Pro Tip: Why I Link to Amazon Search Results and Not One Product
In the Shop the Look and Style it With sections under each bikini, I link to Amazon search results, not single products. Here’s why this matters:
Hot bikinis sell out fast. I don’t want you clicking on a dead link to a sold-out item. Search pages stay updated.
You get more options. Love the vibe but want a different color, cut, or price point? The search results give you everything that matches the look and energy.
I curate each search carefully. These aren’t generic. I spend hours crafting keywords that bring up exactly the kind of bikinis I’d wear—or recommend to my hottest friends.
Support with no pressure. If you click a link, browse, and buy something later, I may earn a small commission at no extra cost to you. That helps me keep bringing you curated collections like this one—powerful, seductive, and always fresh.
So dive in. Click through. Try something risky. These aren’t just bikinis—they’re commands, statements, and maybe even your new favorite weapon of choice.
Rustic Fabric Bow Grapevine Wreath Step-by-Step Tutorial
What you’re making
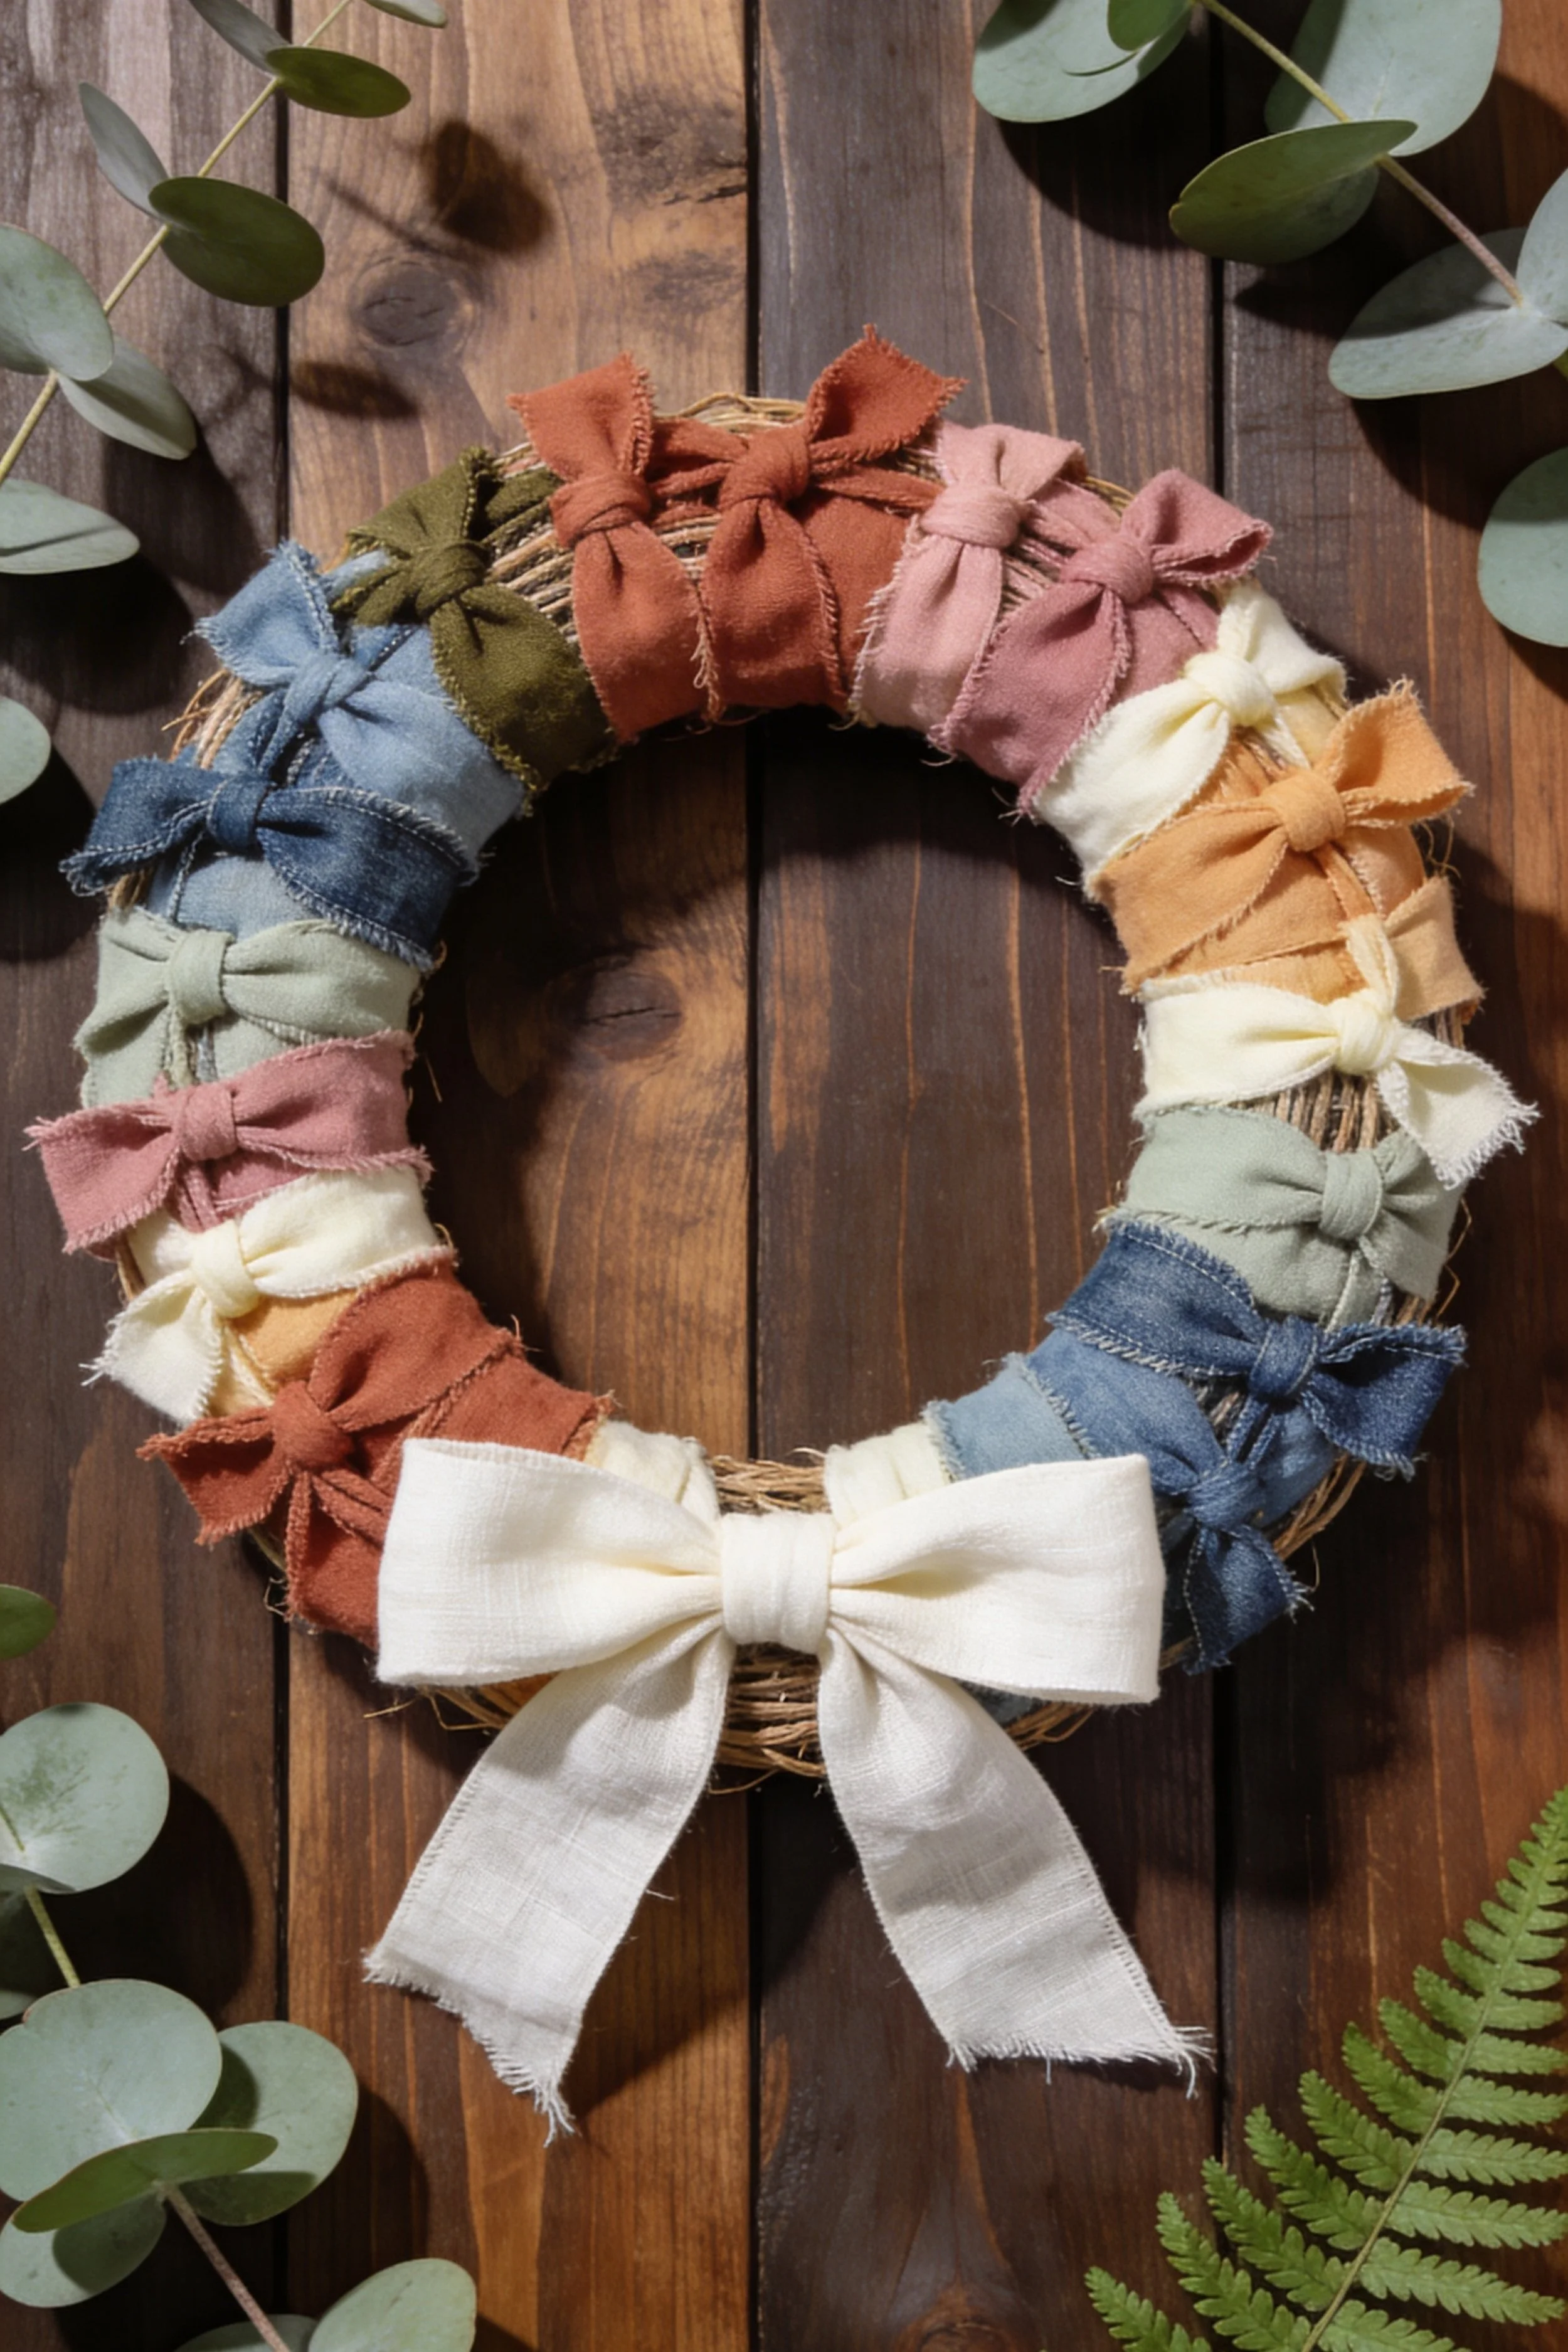
This project recreates a rustic grapevine wreath wrapped in warm, textured fabric bows, finished with one oversized linen bow that feels like a little gift on your door. The look is soft, farmhouse polished, and intentionally imperfect, with frayed edges and muted colors that read cozy and handmade. You can keep the palette earthy like the photo or swap in seasonal shades while keeping the same bow heavy, sculptural vibe.
Materials + tools
- Grapevine wreath form, about 12 to 16 inches
- Fabric scraps in a coordinated palette (linen, cotton, gauze, flannel, or soft canvas)
- One larger piece of fabric for the big bottom bow (linen or cotton looks most like the photo)
- Fabric scissors or rotary cutter and mat
- Ruler or quilting ruler
- Hot glue gun and glue sticks
- Floral wire or thin craft wire
- Optional needle and thread for securing knots
- Optional fray check or clear fabric glue
- Optional faux greenery sprigs (eucalyptus, fern, or olive style) for the photo styled look
- Hanging ribbon or wreath hanger
Finished size + customization notes
- Finished wreath in the photo looks about 14 inches with a full bow ring and a statement bow at the bottom.
- Fabric strip size options:
- For medium bows around the ring: 1.5 to 2 inches wide by 10 to 14 inches long.
- For the oversized bottom bow: 3 to 5 inches wide by 28 to 40 inches long, depending on how dramatic you want the tails.
- If you want a fluffier, softer look, choose lighter fabrics like gauze or linen. If you want crisp bow loops, use cotton or canvas.
- Color placement matters more than exact colors. Aim for gentle alternation with a few repeats so it feels curated, not random.
Step-by-step instructions
Choose your palette like a stylist.
Lay out all your fabrics. The photo uses dusty blues, sage, clay, blush, cream, and a touch of deeper denim. Pick 6 to 10 colors. Make sure at least one is a light neutral, because it creates that airy contrast on the grapevine.
Visual checkpoint: you should see a smooth flow from cool tones to warm tones, with cream acting like breathing room.Prep your wreath base.
Check for loose grapevine bits and trim any sharp ends. Decide which section will be the bottom. In the photo, the big bow sits at the bottom center and the smaller bows wrap evenly around the ring.
Tip: If your wreath is very airy, you can tuck a little raffia or thin jute through the vines to firm up spots where you plan to tie bows.Cut your fabric strips for the small bows.
Cut 18 to 26 strips depending on wreath size and how dense you want it. Start with 22 strips for a 14 inch wreath.
Width: 1.5 to 2 inches.
Length: 11 to 13 inches.
Optional: Snip the ends slightly uneven or at a soft angle to encourage a naturally frayed look.Encourage the soft frayed edge.
Run your fingers along each strip edge and gently pull a few threads. Do not overdo it. The photo has fraying, but it is controlled and pretty.
If your fabric frays too aggressively, apply a tiny dot of clear fabric glue at the cut ends or use fray check.
Visual checkpoint: edges look soft and slightly fuzzy, not shredded.Tie your first bow and set your rhythm.
Choose one fabric strip. Wrap it around a section of grapevine and tie a simple shoelace style bow. Tighten until it is snug but not crushing the vines. Then adjust loops so they sit full and symmetrical.
Tip: If your bow collapses, your fabric is too slippery or too soft. Solve it by using a double knot first, then bow on top, or stitch a couple of hidden hand stitches in the knot.Start building around the ring.
Work in one direction, tying bows side by side. Alternate colors like the photo does, and occasionally repeat a color to keep the palette cohesive.
Spacing: aim for bows touching or barely overlapping. The grapevine should still peek through between knots, because that rustic base is part of the charm.
Visual checkpoint: from a distance you should see a tidy bow garland, not gaps and not a fully covered fabric donut.Lock down any bows that want to twist.
After every 4 to 5 bows, pick up the wreath and gently shake it. If a bow rotates, secure it. Use one of these safe options:- Add a small dab of hot glue under the knot where it touches grapevine.
- Wrap a short piece of floral wire around the knot and twist on the back side.
- Sew two tiny stitches through the knot into itself.
Choose one method and keep it consistent so the wreath behaves on the door.
Balance color around the circle.
Pause at halfway. Step back. You want the distribution to feel even, with no single color clumping in one area unless you are deliberately creating a gradient. The photo reads like a balanced mix with warm tones at top and cool tones on the sides, but it is not perfectly symmetrical.
If yours looks uneven, move a bow. Grapevine makes it easy to untie and retie.Create the oversized bottom bow.
Cut your large fabric strip. Use a slightly heavier fabric like linen for the crisp, luxe look in the photo.
Easy big bow method:- Make two large loops, one on each side, like wrapping a present.
- Cross the loops, pull one through, and tighten to form a big knot.
- Pull tails down and trim ends. The photo shows gently frayed tails with a soft, straight finish, not sharp V cuts.
Visual checkpoint: bow loops look wide and soft, tails hang long enough to feel dramatic.
Attach the big bow securely.
Place it at the bottom center. Thread floral wire through the knot area and anchor it into the grapevine. Then add a small amount of hot glue under the knot for extra stability.
Tip: The big bow will sag if it is only glued. Wire is what makes it stay photogenic for weeks.Refine the bow shapes.
Fluff each small bow. Tug loops outward. If any tails stick up awkwardly, rotate that bow slightly or retie tighter.
If yours looks wider than the photo, your loops are too large. Shorten by pulling more fabric into the knot.
If yours looks skimpy, make loops bigger and let tails shorten a bit.Optional upgrades for a more elevated finish.
Choose one or two:
- Add a thin jute wrap in small sections to add extra rustic texture.
- Tuck in faux eucalyptus stems at two side points, keeping it minimal so bows remain the star.
- Add a small wood tag tied into the big bow for a subtle handmade label moment.
- Swap the big bow fabric for a soft stripe or subtle ticking for a farmhouse twist.
- Add the hanger.
Tie a ribbon loop at the top back or use a wreath hanger. Keep hardware hidden so the front reads like clean styling.
Troubleshooting
- My bows look floppy and flat.
Use a slightly stiffer fabric or double tie the knot before forming the bow. You can also press loops with a warm iron before tying. - The fraying looks messy.
Reduce fraying by trimming threads and sealing ends with a tiny dot of clear fabric glue. Choose tighter weave cotton. - Bows rotate and do not stay put.
Add wire through the knot, or a small hidden glue dot under the knot against grapevine. - The wreath looks too busy.
Remove 3 to 5 bows and let more grapevine show. Add more cream or neutral bows to calm the palette. - My big bow droops.
Wire it on and add a second wire point on each side of the knot, like a three point anchor.
Finishing details
- Trim stray threads for a clean, styled finish.
- If you want extra longevity outdoors, mist lightly with a clear matte fabric protector and keep it under a covered porch.
- If the bow tails crease, steam them gently from a distance and reshape by hand.
- Store flat in a wreath bin, and tuck tissue paper into the big bow loops so they do not collapse.
Shop Similar
- Grapevine wreath forms 14 inch natural
- Linen fabric by the yard natural ivory
- Assorted cotton fabric quarters muted solids
- Floral wire set for wreath making
- Hot glue gun with glue sticks crafting
Style it with
Speckled Egg Rag Tie Wreath Step-by-Step Tutorial
What you’re making
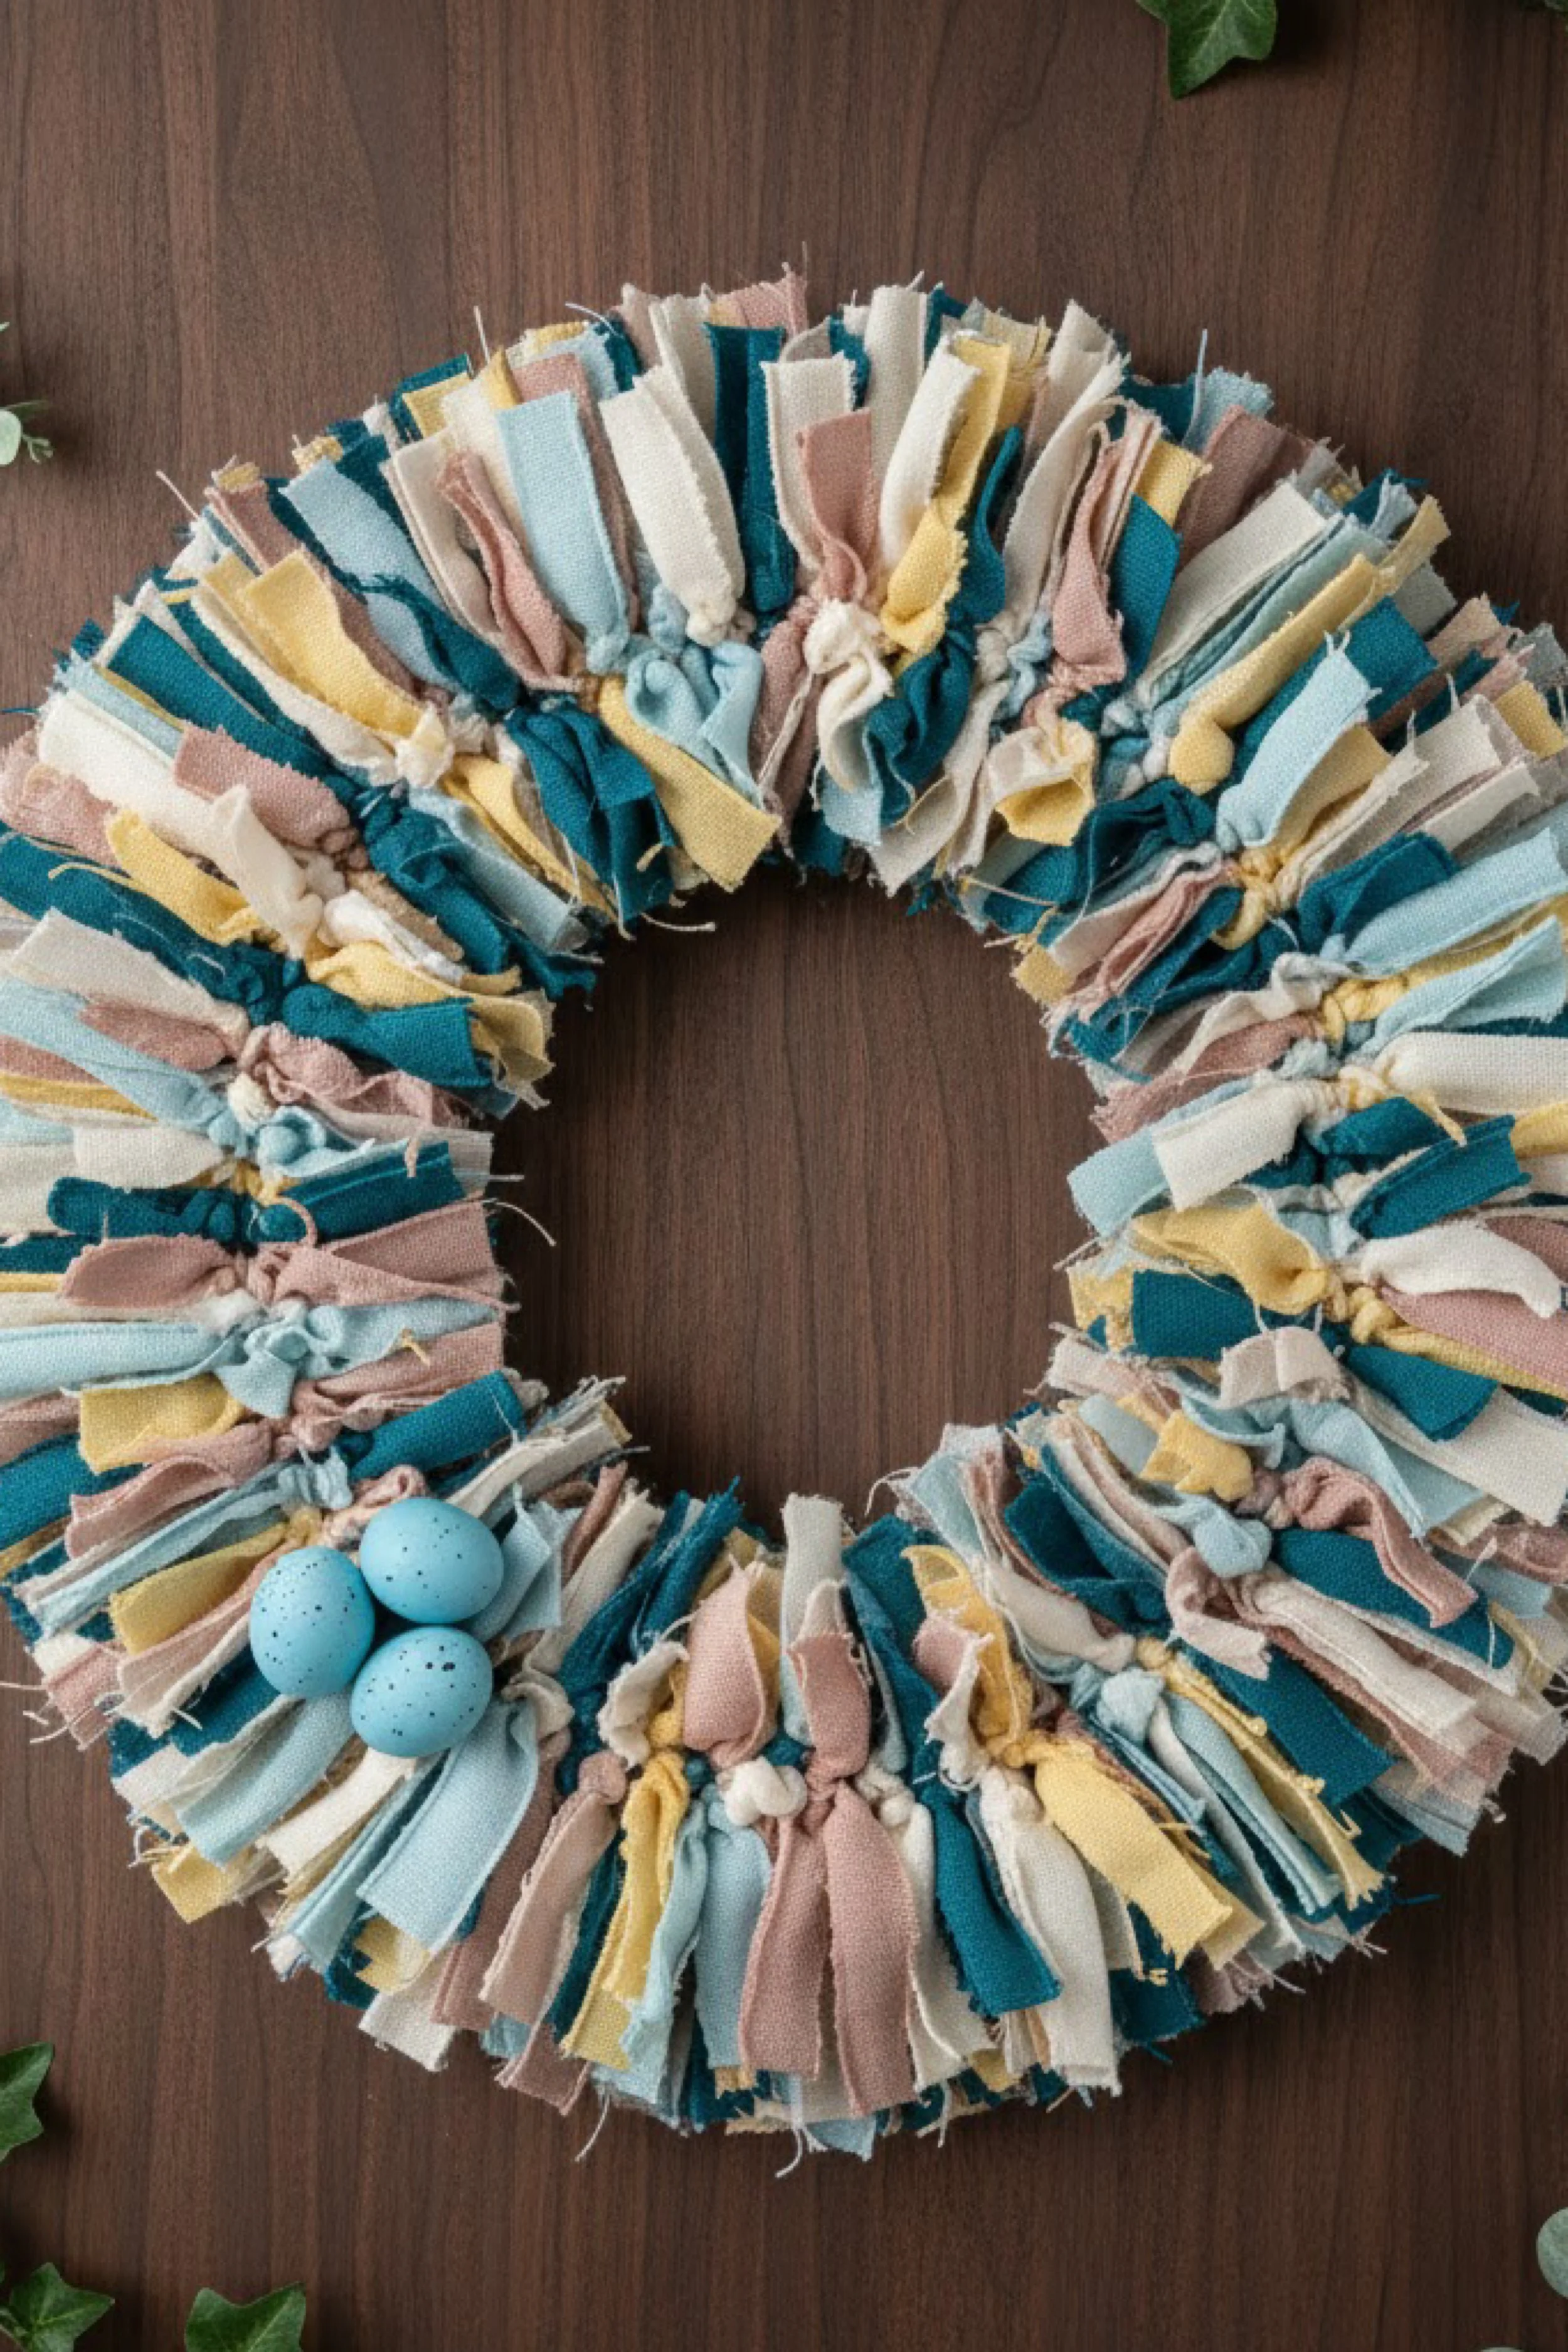
This project recreates a plush rag tie wreath that looks like a soft fabric cloud wrapped around a ring, finished with a tiny nest moment of speckled eggs. The texture comes from strips of fabric tied in dense rows so the edges puff and fringe outward. The palette in the photo leans coastal spring with teal, butter yellow, cream, and blush, but the technique works for any season and any color story.
Materials + tools
- Wreath base: wire wreath frame, foam ring, or sturdy cardboard ring (12 to 16 inches)
- Fabric scraps: cotton, quilting fabric, muslin, chambray, linen, or soft canvas
- Optional: a little yarn or thin cord if you want extra texture in between strips
- Fabric scissors or rotary cutter and mat
- Ruler
- Hot glue gun and glue sticks
- Floral wire or craft wire
- Faux speckled eggs (small)
- Optional small faux moss or raffia for a nest look
- Optional needle and thread for a super secure egg cluster
- Hanging ribbon or wreath hanger
Finished size + customization notes
- The photo looks like a 14 to 16 inch finished wreath with a thick, fluffy outer edge.
- Fabric strip size that matches this density:
- 1 inch wide by 6 to 8 inches long for a very full wreath
- 1.25 inches wide by 7 to 9 inches long for a softer, more ruffled fringe
- Quantity guide:
- For a 14 inch ring: 180 to 260 strips depending on strip width and how thick your base is
- If you want the wreath thinner, use fewer strips or a smaller base. If you want it extra plush, use a thicker foam ring and longer strips.
Step-by-step instructions
Pick the right base for the look.
The fluffiest rag wreaths are easiest on a wire frame because strips can be tied around the metal. Foam rings also work, but you will pin or glue. Cardboard works if it is thick and sturdy.
Visual checkpoint: your base should feel firm enough that it will not bend when you tug fabric tight.Plan your color distribution.
Sort fabric into piles by color: teal, light blue, butter yellow, cream, blush, and a few darker accents if you want depth. The photo uses cream as a constant and lets teal pop in bursts.
Tip: Keep one neutral pile twice as large as the others, because neutrals make the colors look intentional.Cut your fabric strips efficiently.
Stack fabrics and cut strips 1 to 1.25 inches wide. Then cut into lengths 7 to 8 inches.
Time saver: Use a rotary cutter and cut multiple layers at once.
Visual checkpoint: you should have a mountain of strips that feel consistent, not wildly different widths.Start tying strips to the frame.
If using a wire frame, tie each strip with a simple lark’s head or a double knot. The photo reads like individual knots with tails sticking out, so a simple double knot works beautifully.
Steps for a clean knot:- Fold strip in half.
- Slip the folded loop under the wire.
- Pull tails through the loop and tighten.
Alternate method: tie a standard double knot like tying shoes without the bow.
Work in tight rows.
Push knots together as you go. You want no visible wire showing from the front.
Visual checkpoint: when you look at the ring edge on, it should look like a thick fringe trim.Mix colors in a controlled rhythm.
Instead of random, use a repeat pattern. Example that matches the photo vibe:- 2 cream
- 1 teal
- 1 light blue
- 1 cream
- 1 yellow
- 1 blush
Then repeat with slight variation.
If yours starts looking striped, break it up by inserting a few cream strips between bold colors.
Build fullness before you judge.
Rag wreaths look awkward until they are at least 70 percent filled. Keep going.
Visual checkpoint: at halfway, the wreath will look patchy. That is normal. By the time you reach the end, the fringe will blend and puff.Fluff and trim as you go.
Every 30 to 40 strips, pause and fluff the tails outward. Trim any tails that are dramatically longer than the rest.
Tip: Do not trim too much. Uneven edges add to the handmade softness.Fill the whole ring and check the back.
Once the front is dense, peek at the back. If the back looks bare but the wreath will hang on a door, that is fine. If it will hang on glass where both sides show, add a second layer of strips to the back outer edge.Create the egg cluster accent.
The photo shows a tiny trio of speckled eggs set into a little tuft. To recreate:
- Choose one spot at the lower left or lower center.
- Pull fabric tails apart to create a small hollow nest area.
- Add a pinch of faux moss or raffia if you want extra nest realism.
- Attach the eggs securely.
Use a mix of wire and glue so it survives wind and door slams.
- Dab hot glue on the bottom of each egg.
- Press into the nest area.
- Add a thin wire loop around the eggs and anchor into the wreath base behind them. Hide wire under fabric tails.
Visual checkpoint: eggs look tucked in, not perched on top like they could fall.
Final fluffing for the photo finish.
Run your hands around the entire wreath and pull tails outward. Twist a few strips so the fringe looks lively and dimensional.
If yours looks flatter than the photo, your strips are too short or your knots are spaced too far. Add another row of strips in sparse areas.Optional upgrades that keep the same look.
Pick 1 to 3:
- Add a small ribbon bow near the eggs in a matching solid fabric.
- Add a tiny wood tag with a spring word, tied into the nest area.
- Add a few wispy faux greenery sprigs, minimal and tucked, not bulky.
- Add a second egg color, like cream plus pale blue, for extra depth.
- Add your hanger.
Tie a ribbon loop at the top back, or use a wreath hanger. Keep it hidden from the front.
Troubleshooting
- My wreath looks thin and I can see the base.
Add more strips. Rag wreaths are a volume project. Use a tighter knot method and push knots together. - The fringe looks messy, not fluffy.
Use fabrics that fray slightly, like cotton or muslin. Avoid very stretchy knit fabric unless you want a different look. Fluff by separating layers in each strip. - Colors look chaotic.
Increase the amount of cream or neutral strips. Then cluster colors in small repeats rather than random. - Eggs keep popping off.
Use glue plus wire anchoring. If your eggs are very smooth, rough the bottom lightly with sandpaper before gluing. - The wreath feels heavy.
Use a wire frame and lighter fabrics like muslin. Avoid thick denim for every strip.
Finishing details
- Trim stray threads only if they look distracting. A little fringe is part of the charm.
- If hanging outdoors, keep it under a covered area to protect the fabric from rain and fading.
- Store in a wreath bin or large box. Do not crush the fringe. If it flattens, fluff it back with your hands.
Shop Similar
- Wire wreath frames 14 inch set
- Assorted quilting fabric strips spring colors
- Faux speckled eggs mini set
- Craft moss for nest accents
- Wreath storage container round
Style it with
Pastel Rainbow Rag Wreath DIY Guide
What you’re making
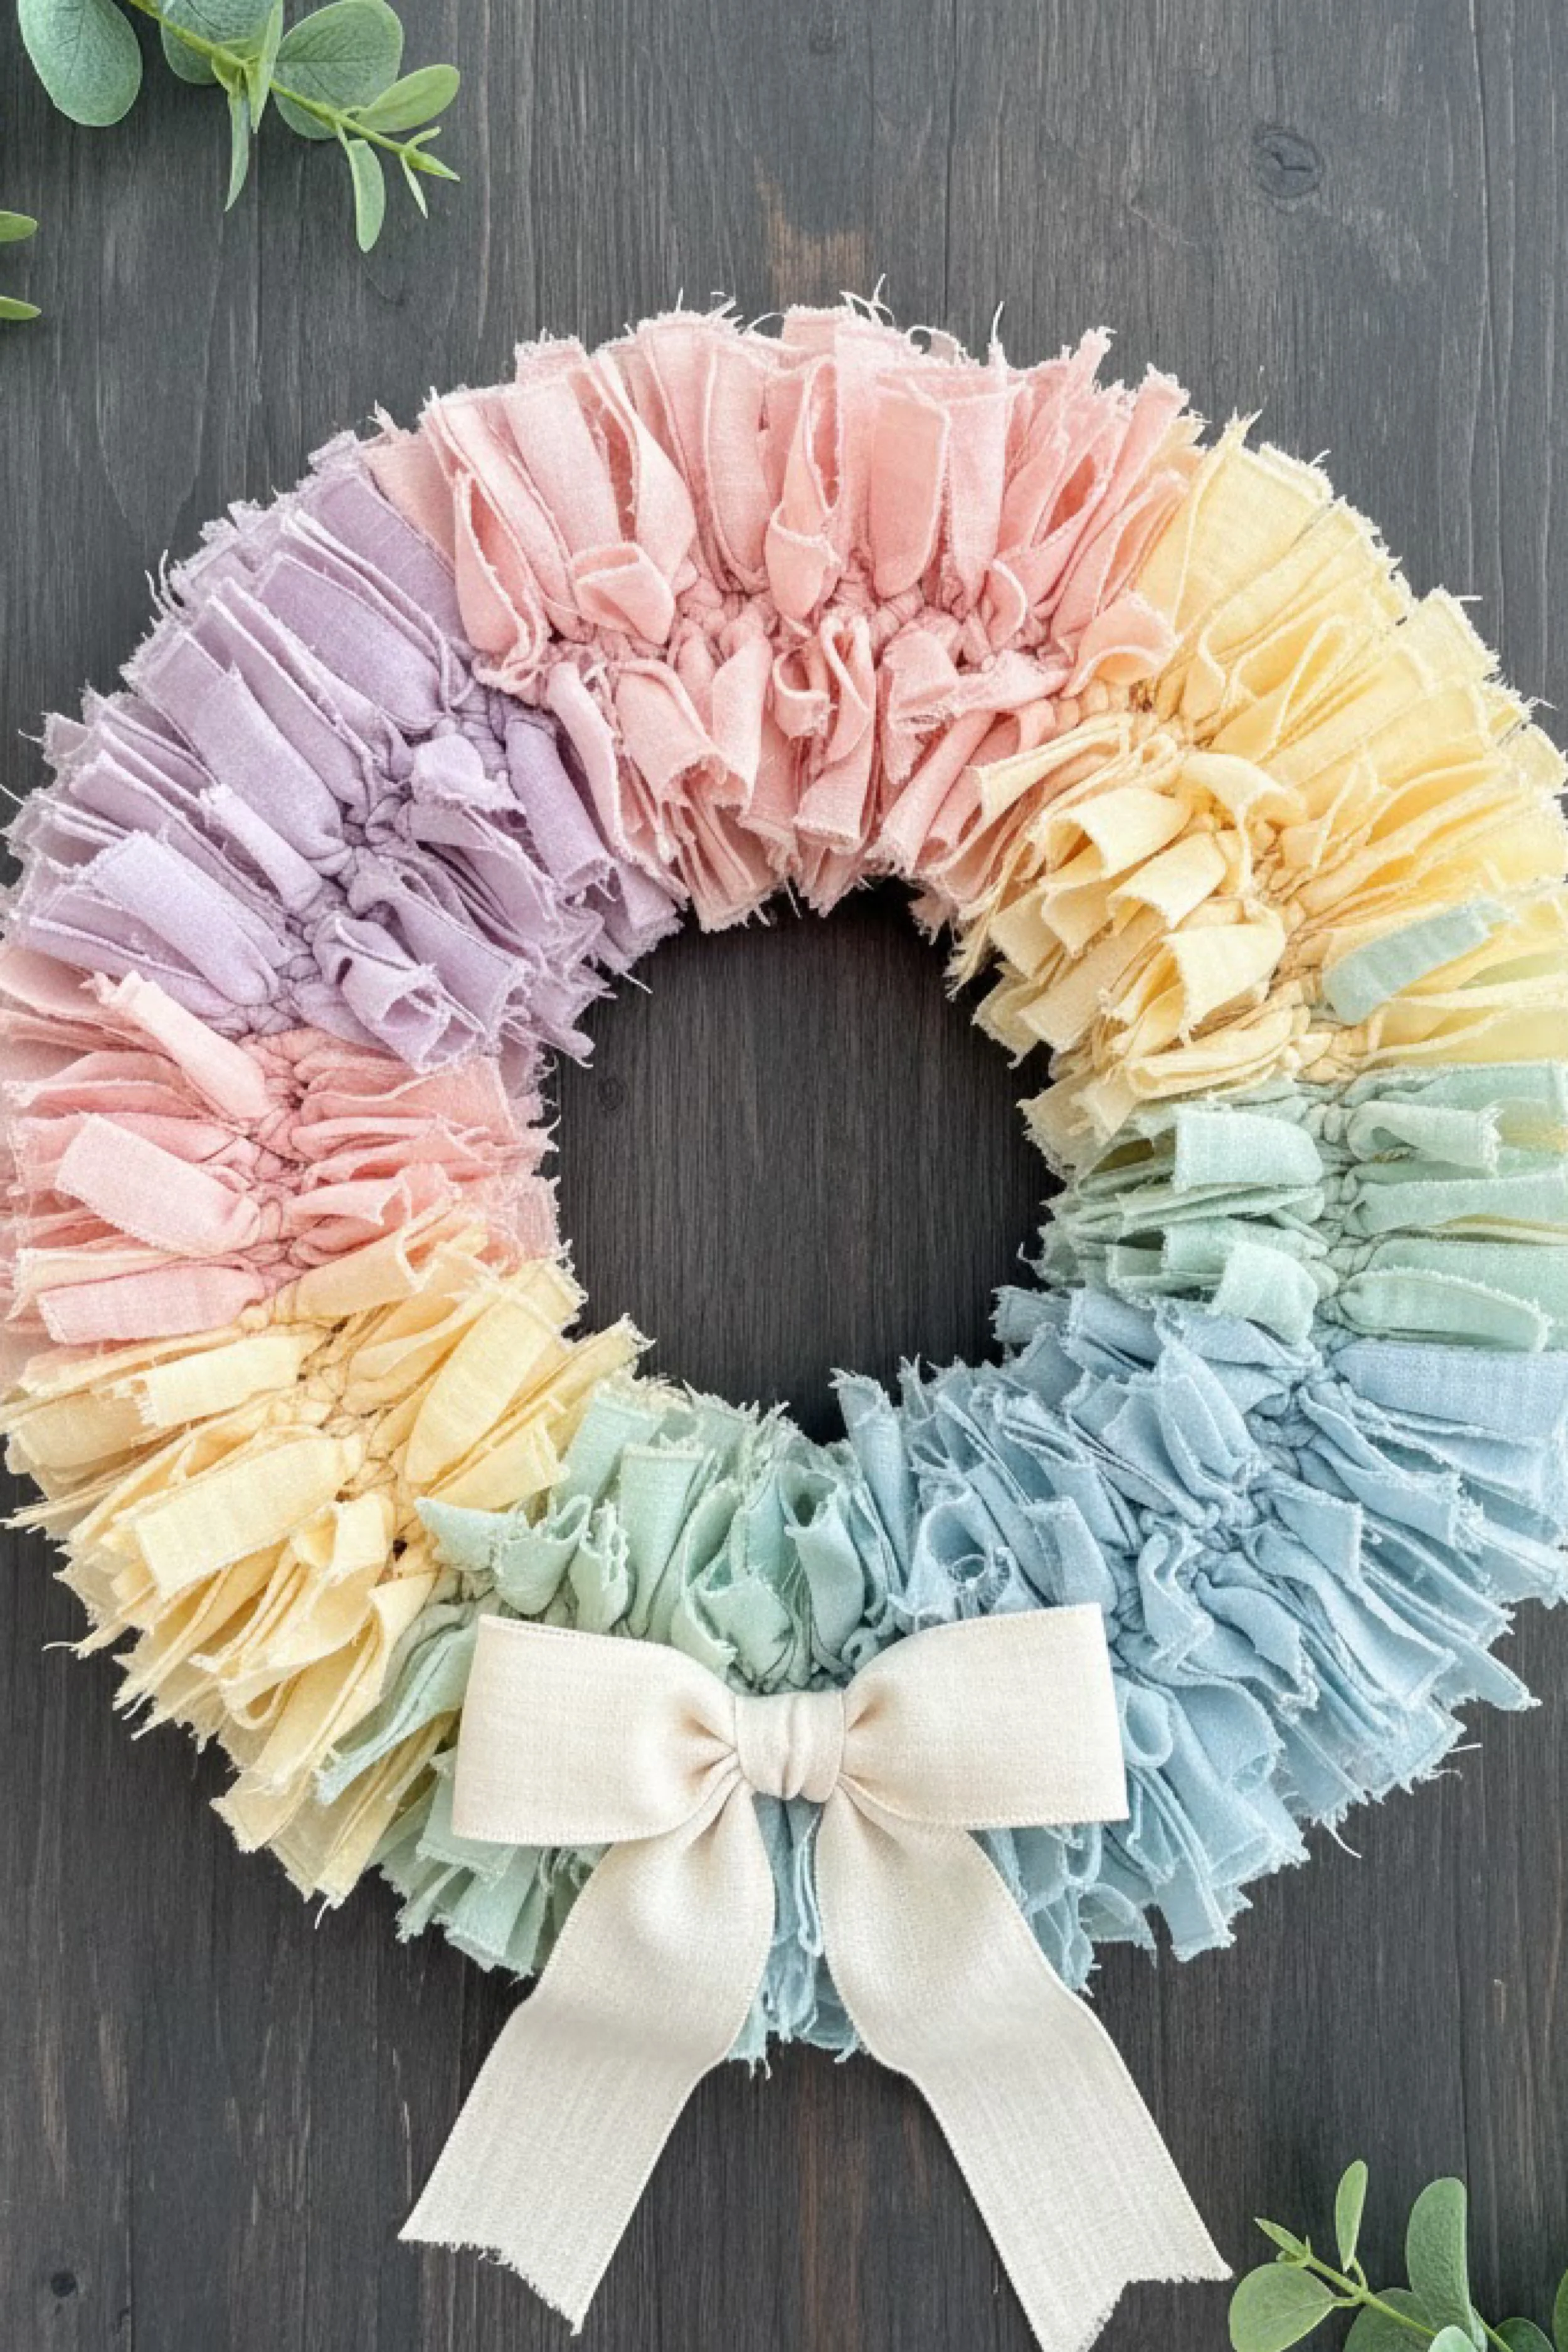
This tutorial recreates a pastel rainbow rag wreath with a soft color block gradient and a clean, oversized neutral bow at the bottom. The texture is all about gentle, frayed fabric loops that puff outward, giving the wreath a plush, airy volume. The photo look feels sweet and modern, like spring candy colors styled in a minimalist way.
Materials + tools
- Wreath base: foam ring or wire wreath frame, about 12 to 16 inches
- Fabric in pastel shades: blush pink, lavender, pale yellow, mint, powder blue, and a little cream
- One neutral ribbon or fabric strip for the large bow (cotton or linen)
- Fabric scissors or rotary cutter and mat
- Ruler
- Hot glue gun and glue sticks
- Straight pins if using foam ring
- Floral wire or craft wire
- Optional fray check or clear fabric glue
- Optional faux greenery sprigs for styling
- Hanging ribbon or wreath hanger
Finished size + customization notes
- The photo reads like a 14 to 16 inch wreath with chunky depth.
- Strip size for this puffed look:
- 1.25 inches wide by 8 to 10 inches long
- Quantity guide:
- 150 to 230 strips depending on base size and fullness
- Gradient placement is the signature. You are creating large color sections that blend gently at the edges rather than a random mix.
Step-by-step instructions
Choose fabrics that fray prettily.
Cotton, muslin, linen blends, and quilting fabric work best. Avoid super stretchy jersey unless you want a different vibe.
Visual checkpoint: when you tug the cut edge slightly, you get a soft fringe, not a clean sealed edge.Set up your rainbow order.
Lay fabrics in the order you want around the ring. The photo uses pastel pink into lavender, then pale yellow, then mint, then pale blue, and it finishes with the neutral bow anchoring the bottom.
Tip: Make your transitions soft by including a few mixed strips near each boundary.Cut your strips.
Cut 1.25 inch wide strips, then cut each into 9 inch lengths.
Make piles by color. Keep extra strips of your two most dominant colors, because those will carry the gradient.Prepare your wreath base.
If using a wire frame, you will tie strips directly. If using foam, you can pin and glue. Foam gives a smoother donut shape, which matches the photo’s clean silhouette.
Visual checkpoint: your base should feel sturdy and symmetrical.Start at the top and work clockwise.
Begin with your first color section at the top. Tie or attach strips closely together.
For wire frame tying method:- Fold strip in half.
- Loop under wire.
- Pull tails through and tighten.
For foam ring method: - Fold strip in half.
- Pin the fold into the foam with a straight pin.
- Dab hot glue at the pin point for security.
Build the first color block.
Fill about one fifth of the wreath with your first shade. Keep spacing tight and consistent.
Visual checkpoint: you should not see base through the front, and the outer edge should look ruffled.Create a blended transition.
For the boundary between pink and lavender, alternate strips for about 10 to 14 placements. Example:- pink, lavender, pink, lavender, then add two lavender, then one pink, then move to mostly lavender.
This is how you get that photo soft fade without harsh stripes.
- pink, lavender, pink, lavender, then add two lavender, then one pink, then move to mostly lavender.
Continue color blocks around the ring.
Repeat the same method for each section. Keep a few cream strips sprinkled through all sections, because cream makes pastels look more expensive and less flat.
If yours looks too segmented, increase the transition zone between colors.
If yours looks muddy, reduce mixed transitions and keep blocks cleaner.Keep the thickness even.
Every 25 to 30 strips, fluff the tails outward and check the ring shape. If one section looks thinner, add more strips there.
Visual checkpoint: from a distance, the wreath should look like a consistent plush ring, not lumpy.Shape the inner circle.
The photo has a crisp inner opening. If your strips are collapsing inward, gently pull tails outward and away from the center hole. On foam, pin a few strips angled outward to encourage a clean inner edge.
Tip: A slightly longer strip length makes the wreath fuller but can crowd the center. If your hole is disappearing, trim strip length by 1 inch on the next batch.Make the large neutral bow.
The bow in the photo is clean and structured with long tails. Use a cotton ribbon or linen strip about 3 to 4 inches wide and 30 to 40 inches long.
Big bow method:
- Create two wide loops.
- Cross and pull through to form a knot.
- Adjust until loops look even and full.
- Trim tails straight with a tiny bit of fraying at the end for softness.
Visual checkpoint: bow should feel like a centerpiece, not a small accent.
Attach the bow at the bottom center.
Use wire through the knot to anchor into the base, then add a small glue dab under the knot.
If you are using foam, push wire ends into the foam and glue over them to lock.
Tip: Do not rely on glue alone for a big bow. Doors move, and wire keeps it stable.Refine the rag texture to match the photo.
The photo looks airy and fluffy, not tangled. Use your fingers to separate fabric layers in each tail and gently pull some edges to encourage a soft fringe.
If yours looks stiff, your fabric is too thick. Mix in a lighter fabric like muslin to soften the overall effect.Optional upgrades that keep the same aesthetic.
- Add a tiny pearl pin cluster in the bow center for a delicate touch.
- Add minimal faux greenery tucked behind the bow tails.
- Add a small felt bunny silhouette tucked into the bow knot for spring without clutter.
- Add a second smaller bow on the top opposite side for balance, but keep it subtle.
- Add a hanger and final fluff.
Tie a hidden loop at the back top or use a hanger. Fluff one last time.
Visual checkpoint: you should see a clean rainbow ring with soft color blocks, and a crisp neutral bow that anchors the bottom.
Troubleshooting
- My rainbow looks harsh and striped.
Increase the transition zone by alternating colors for 10 to 14 strips at boundaries. - The wreath looks flat.
Use longer strips, add more strips overall, or choose a thicker base. Fluff the tails outward. - Center hole is too small.
Shorten strip length by 1 inch, angle attachments outward, and trim any tails creeping into the inner circle. - Bow keeps sagging.
Anchor with wire plus glue, and use a ribbon with a little body, not super soft satin. - Pastels look dull.
Add more cream strips throughout and include a tiny pop of a clearer pastel shade like powder blue to brighten.
Finishing details
- Trim stray threads lightly, but keep a soft fringe edge.
- Steam the bow tails gently if they crease, then reshape by hand.
- For storage, tuck tissue paper into the bow loops and store the wreath in a box so the rag texture stays fluffy.
Shop Similar
- Foam wreath rings 14 inch
- Pastel fabric bundle quilting solids
- Cotton ribbon wide natural ivory
- Straight pins long for foam wreath
- Clear fabric glue fray control
Style it with
Braided Satin Ribbon Grapevine Wreath How-To Guide
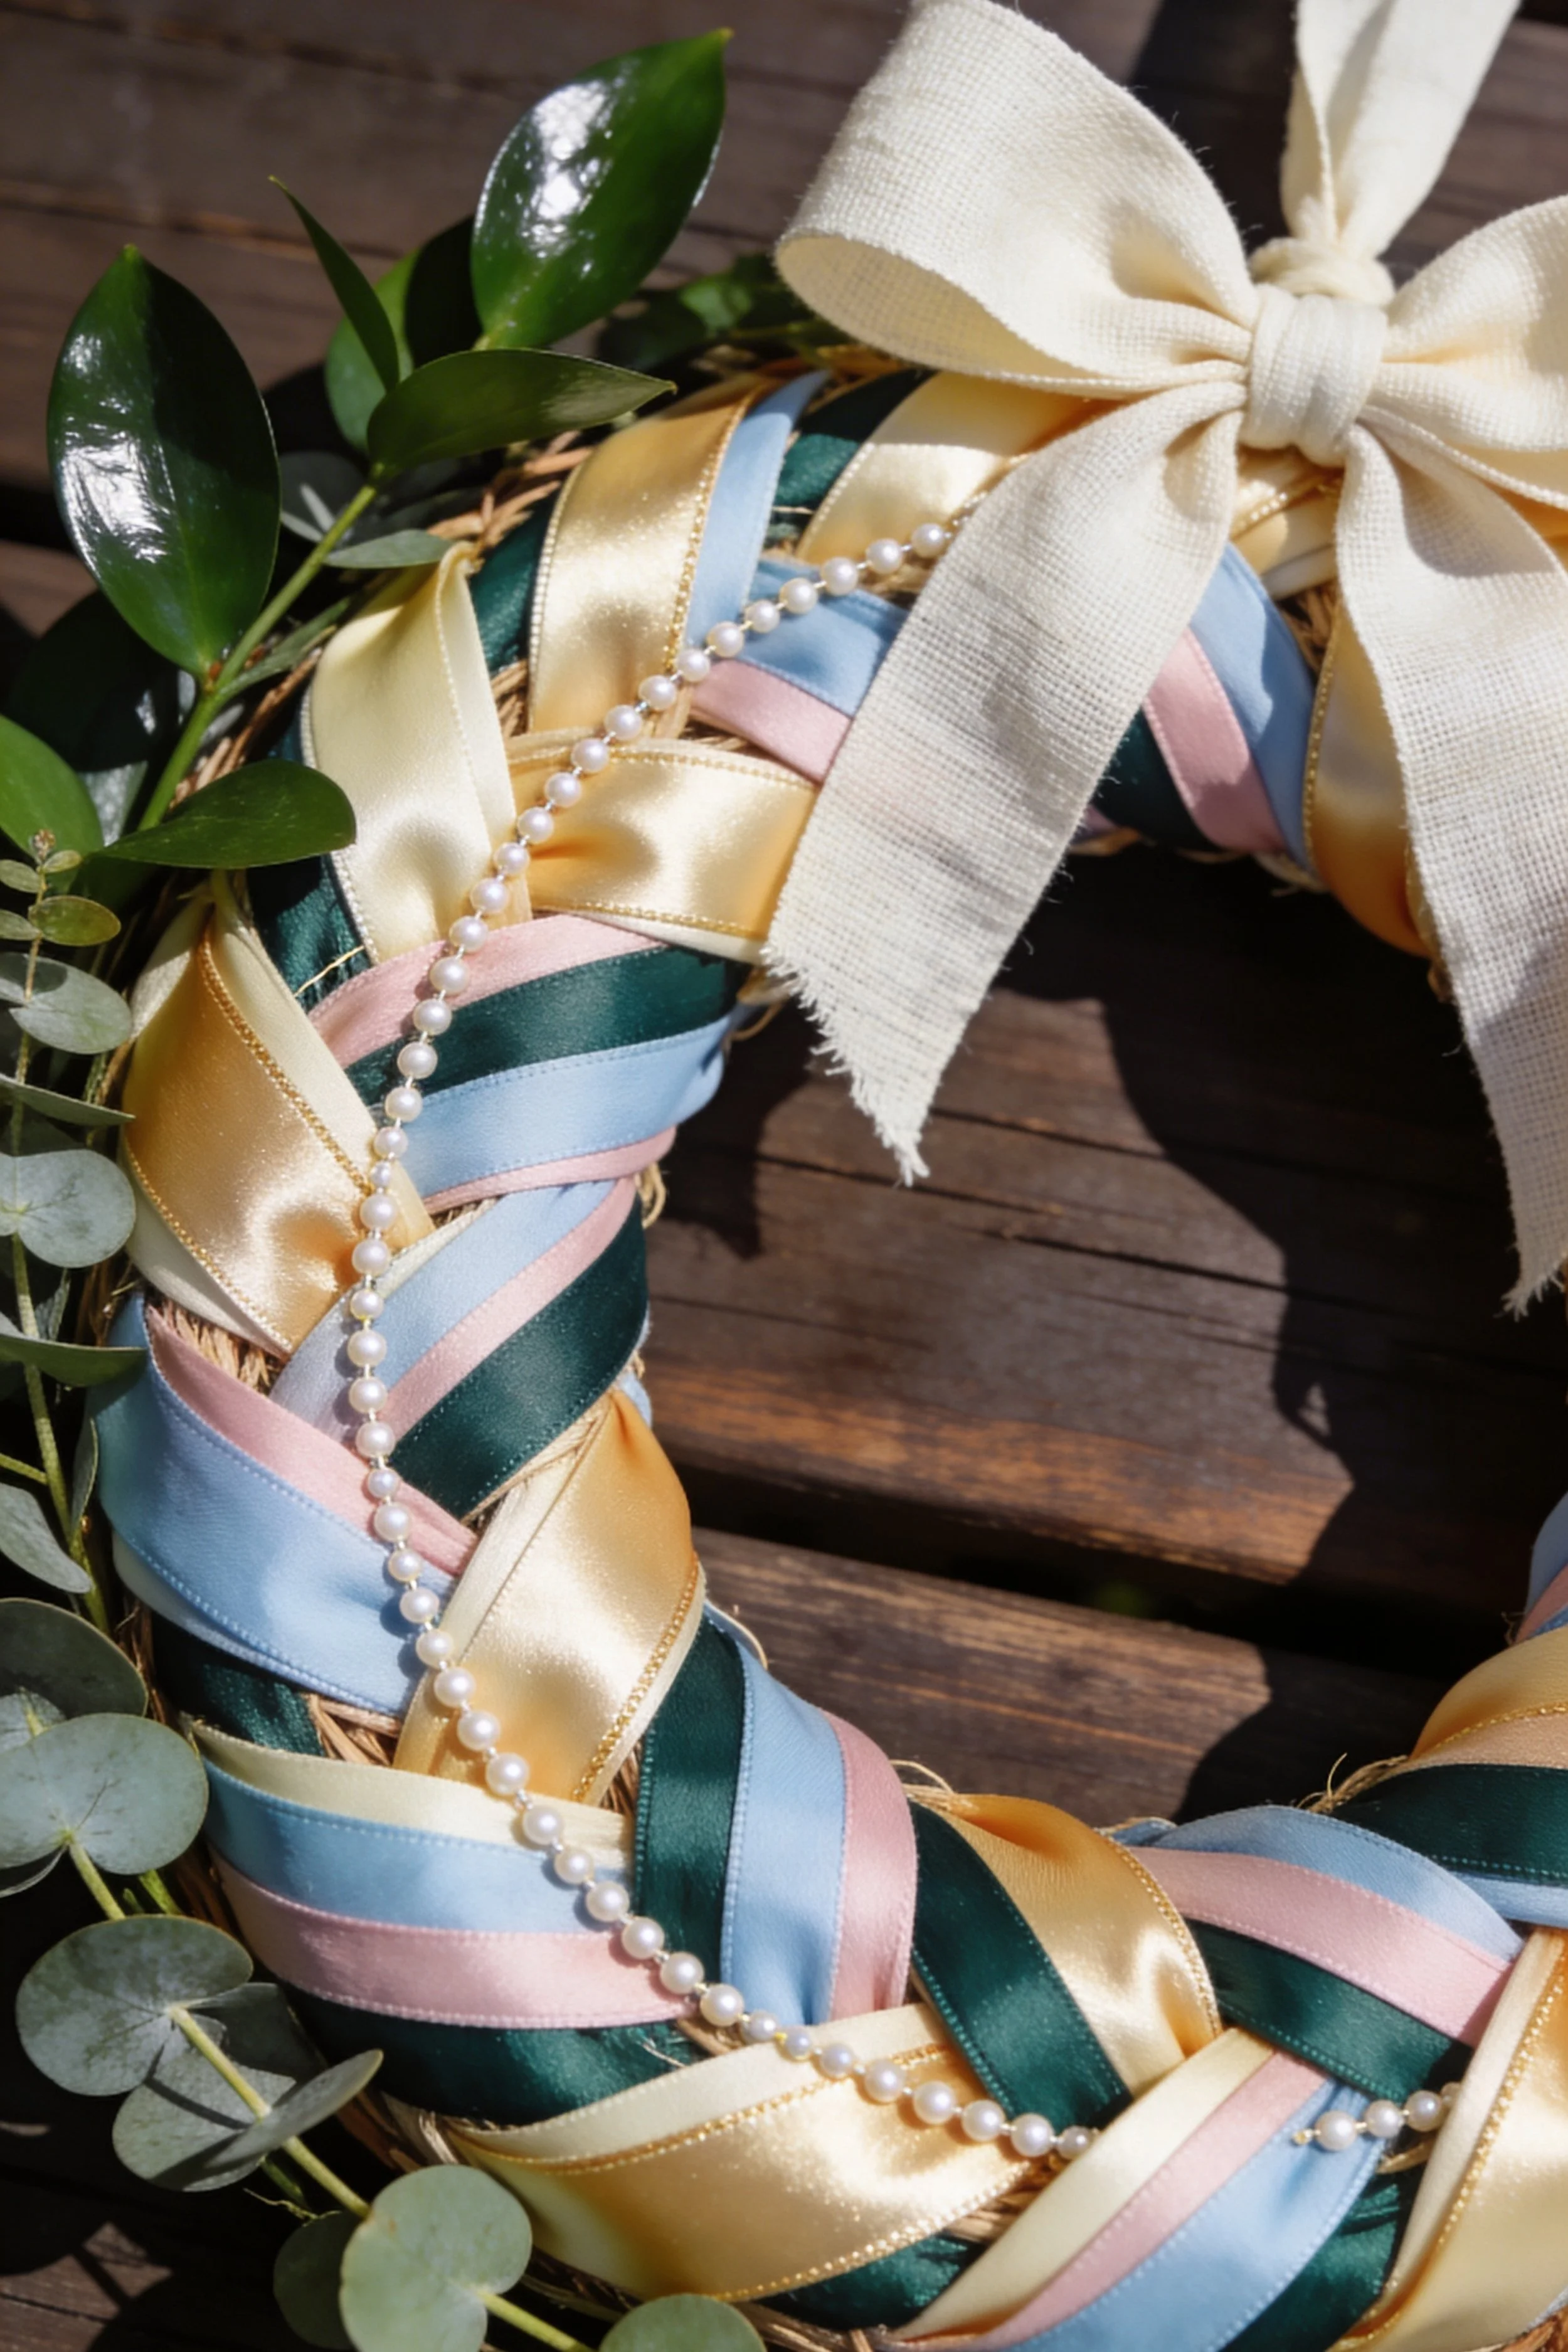
What you’re making
This tutorial recreates a grapevine wreath wrapped in a braided satin ribbon pattern, finished with a crisp neutral bow and a delicate strand of pearls that drapes like jewelry. The photo feels preppy, romantic, and polished, with glossy ribbons in buttery gold, deep green, powder blue, and blush woven in a repeating diagonal. It is the kind of wreath that looks expensive, but the technique is totally beginner friendly once you get the weave rhythm.
Materials + tools
- Grapevine wreath form, about 12 to 16 inches
- Satin ribbon in 3 to 4 colors, 1 to 1.5 inches wide
- Optional narrow ribbon (0.25 to 0.5 inch) for subtle detail
- One wide neutral ribbon for the big bow (linen look or cotton)
- Faux greenery sprigs (boxwood, eucalyptus, or similar) for one side cluster
- Faux pearl garland strand
- Hot glue gun and glue sticks
- Floral wire or craft wire
- Scissors
- Measuring tape
- Optional straight pins or small clips to hold ribbon while you weave
- Hanging ribbon or wreath hanger
Finished size + customization notes
- The photo appears to be a 14 to 16 inch grapevine wreath with ribbon covering most of the visible vine.
- Ribbon length guide:
- For a 14 inch wreath with tight diagonal wrap: 5 to 7 yards total ribbon split across colors
- For a 16 inch wreath: 7 to 10 yards total
- If you want a chunkier braid look, use 1.5 inch ribbon. If you want a more delicate braid, use 1 inch.
- Pearls are optional but they elevate the look instantly. If skipping pearls, keep the bow extra crisp so the wreath still feels finished.
Step-by-step instructions
Decide your color order.
The photo uses gold, deep green, powder blue, and blush. Pick 3 or 4 colors and commit to a repeating order.
Visual checkpoint: your palette should feel like a curated ribbon set, not random.Anchor your first ribbon at the back.
Choose your first color. Leave a 4 inch tail on the back side and wire it to the grapevine. Add a tiny glue dab under the tail.
Tip: Wiring first prevents unraveling later.Create the first diagonal wrap.
Bring ribbon to the front and wrap diagonally across the vine ring, then back to the rear, keeping tension even. Each wrap should overlap the previous by about one third of the ribbon width.
Visual checkpoint: you should see a smooth, glossy diagonal band with no twisting.Add your second ribbon and start the braided effect.
Anchor the second color at the back next to the first anchor point. Bring it forward and wrap diagonally in the opposite direction so the two colors cross, creating an X pattern.
The goal is a gentle crisscross braid, not a messy overlap.
Tip: If your ribbon keeps twisting, flatten it with your fingers as you wrap and keep tension consistent.Continue with third and fourth ribbons.
Add each ribbon anchored at the back and weave it through the pattern. You are essentially layering diagonal bands that alternate direction, creating a braided lattice.
Visual checkpoint: from a few feet away, the wreath should read as a tidy diagonal braid with repeating colors.Lock the weave every few inches.
Grapevine is uneven, so ribbons can shift. Every 3 to 4 inches, add a small hidden glue dot where ribbons cross on the back side.
Safe option: use a small wire twist through the vine to hold a crossing point, then hide it under the next wrap.Keep coverage consistent.
Aim to cover most of the vine but let tiny bits of natural grapevine peek through for texture. The photo still reads grapevine, not a fully ribbon wrapped foam ring.
If you cover too much and lose the vine character, simply widen your gaps slightly between wraps.Work around the ring until you return to the start.
As you approach the beginning, adjust spacing so the pattern looks continuous. End each ribbon on the back side.
Cut ribbon leaving a 4 inch tail, wire it down, then glue it flat.Add greenery cluster.
The photo shows glossy greenery tucked on one side. Choose the left side or upper left for a balanced composition.- Cut a few sprigs.
- Tuck into grapevine and wire in place.
- Add a tiny glue dab if needed.
Visual checkpoint: greenery should look tucked and natural, not like a big bouquet.
Drape the pearl strand.
Position the pearls in a gentle curve across the wreath front. Anchor at two to three points with thin wire.
Tip: Do not over anchor. You want a soft drape, not a stiff line.Make the big neutral bow.
Use a wide cotton or linen look ribbon for that soft matte contrast against satin.
Cut 36 to 44 inches. Tie a large bow with wide loops and long tails.
Visual checkpoint: bow should feel like a statement, and it should visually calm the glossy braid.Attach the bow at the upper right or top area.
In the photo, the bow sits near the top right edge. Place it where it feels balanced with the greenery and pearl drape.
Wire the knot to the grapevine, then add glue under the knot.Refine the braid and fix any gaps.
Step back. Look for any awkward spaces where grapevine shows too much or where ribbon overlaps unevenly.
Fix options:
- Add one extra wrap in a color to fill the gap.
- Shift a crossing point and glue it down.
- Add a narrow ribbon accent tucked under a crossing to smooth the pattern.
- Optional upgrades that match the photo vibe.
- Add a tiny monogram charm near the bow knot for a preppy finish.
- Add a second shorter pearl strand for layered jewelry effect.
- Add a subtle gold edge ribbon to echo the satin sheen.
- Add hanging method and final polish.
Tie a hidden loop at the back or use a hanger. Trim loose threads.
Visual checkpoint: the front should look like a polished ribbon braid with a soft bow and an elegant pearl swoop.
Troubleshooting
- Ribbons twist and look messy.
Use satin ribbon with good structure. Flatten as you wrap. If needed, lightly press ribbon with a warm iron before starting. - Pattern looks uneven.
Your wrap spacing is inconsistent. Unwrap a small section and redo with steady overlap. - Everything slides on the grapevine.
Add more wire anchor points on the back and small glue dots at crossings. - Pearls will not stay draped.
Anchor at two points minimum, three points for a long strand. Hide wire under ribbon crossings. - Bow looks floppy next to satin.
Use a ribbon with body or double layer the bow by tying two bows together.
Finishing details
- If the wreath will hang outdoors, keep it under cover so satin does not spot in rain.
- Store with tissue paper supporting the bow loops.
- If satin gets creased, smooth gently with fingers or a light steam from a distance.
Shop Similar
- Satin ribbon 1.5 inch assorted pastel and jewel tones
- Grapevine wreath form 16 inch natural
- Faux pearl garland strand for decor
- Wide cotton ribbon natural ivory bow
- Craft wire floral wire assortment
Style it with
Carrot Accent Rag Wreath Make-It-Yourself Tutorial
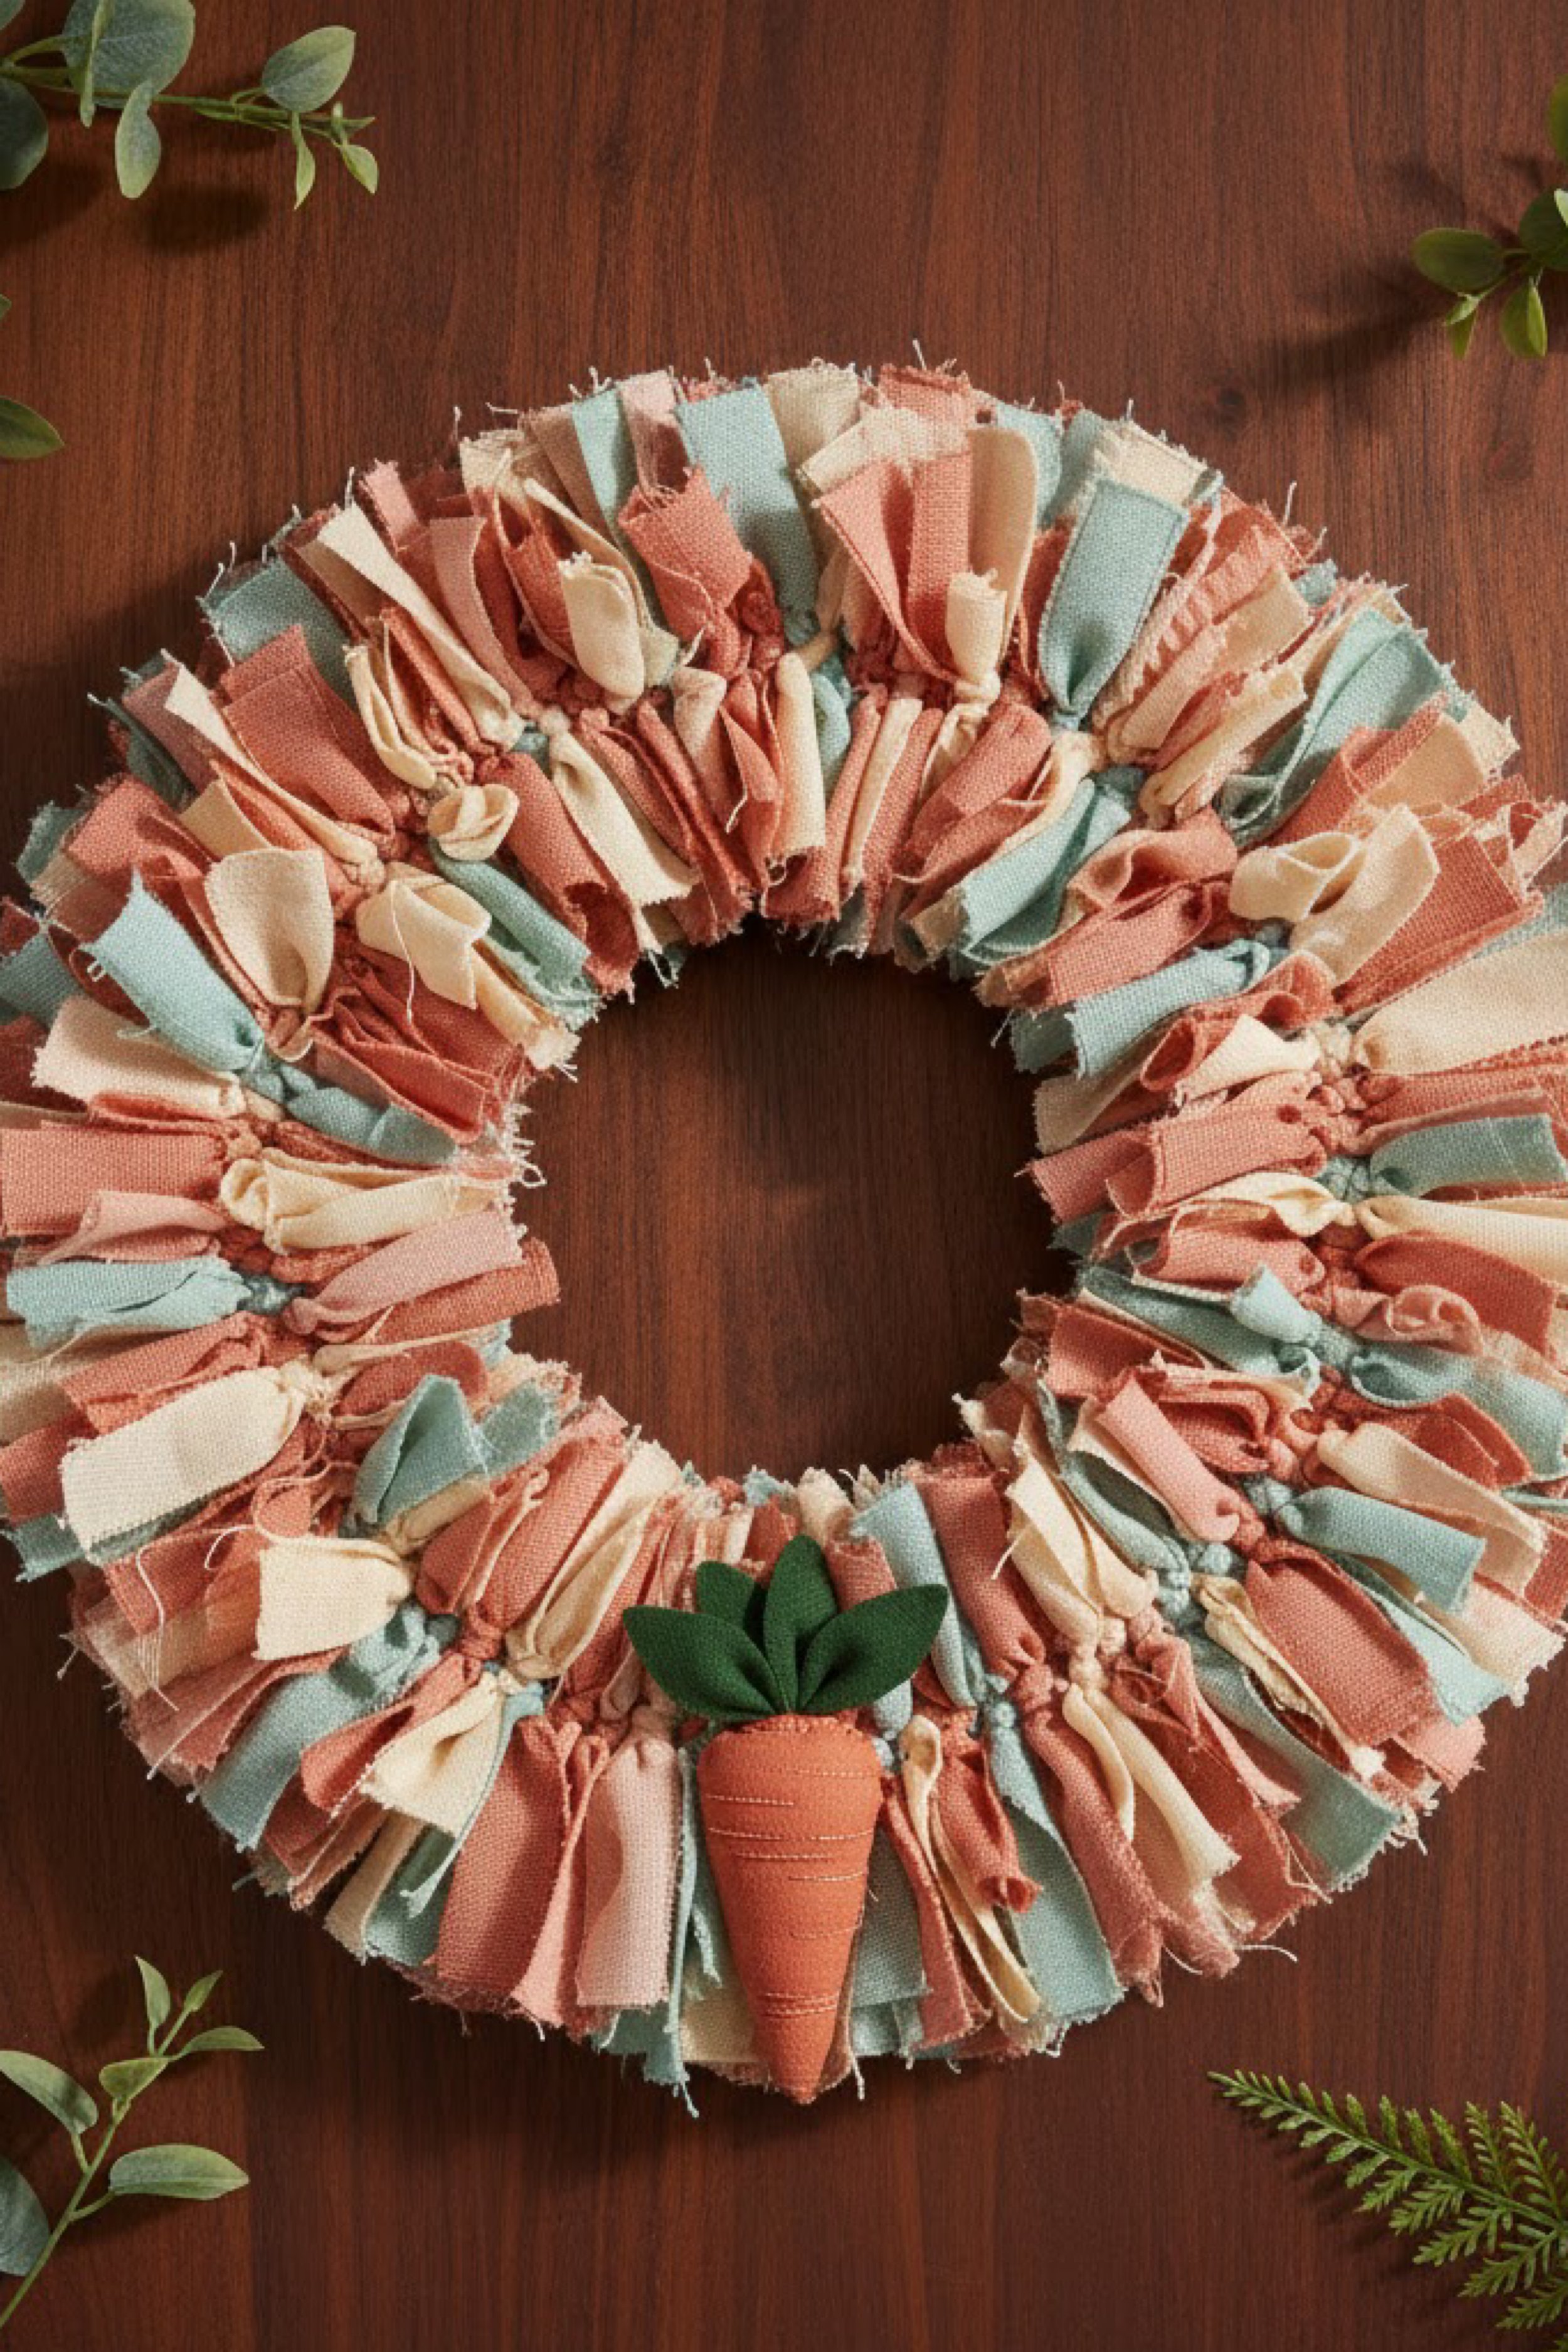
What you’re making
This tutorial recreates a plush rag wreath in warm spring tones with a cute carrot accent at the bottom center. The wreath is built from tied fabric strips that create a thick, fringed texture, then finished with a small fabric carrot that reads playful but still styled. The photo palette leans coral, dusty rose, cream, and soft seafoam, which gives a gentle spring vibe without looking overly bright.
Materials + tools
- Wreath base: wire wreath frame or foam ring, 12 to 16 inches
- Fabric scraps: cotton, muslin, linen blend, quilting fabric in coral, blush, cream, and seafoam
- Matching thread and needle or hot glue
- Fabric scissors or rotary cutter and mat
- Ruler
- Hot glue gun and glue sticks
- Floral wire or craft wire
- Felt or fabric for carrot (orange) and leaves (green)
- Optional stuffing (polyfill or scrap fabric) if you want a plush carrot
- Optional embroidery floss for carrot lines
- Hanging ribbon or wreath hanger
- Optional faux greenery sprigs for styling around the wreath
Finished size + customization notes
- The photo looks like a 14 to 16 inch wreath with a thick rag texture.
- Fabric strip size:
- 1 to 1.25 inches wide by 7 to 9 inches long
- Strip quantity:
- 170 to 260 strips depending on width and fullness
- Carrot size:
- About 4 to 6 inches tall so it reads clearly but does not overwhelm the wreath.
Step-by-step instructions
Choose your fabric mix for that soft, cozy texture.
Use mostly cotton and muslin for a fluffy, frayed edge. Mix in a little linen for texture. The photo has a slightly rustic fringe, not a silky ribbon look.
Visual checkpoint: fabrics should feel matte and soft, not shiny.Sort colors into balanced piles.
Make piles: coral, blush, cream, seafoam. The photo uses coral as the main color, with cream and seafoam creating contrast.
Tip: If your wreath looks too pink, add more cream and seafoam.Cut your strips.
Cut strips 1.25 inches wide and 8 inches long. If your base is thick, go up to 9 inches long.
Keep strips consistent so the wreath edge looks even.Attach strips to the base.
Wire frame method:- Fold strip in half.
- Loop under wire.
- Pull tails through and tighten.
Foam ring method: - Fold strip in half.
- Pin fold into foam.
- Add glue at the fold for security.
Visual checkpoint: strips should sit tight and not slide when you tug.
Build a dense row first.
The first 30 to 40 strips set the thickness. Push knots close together.
If you can see base from the front, you need tighter spacing.Mix colors in a calm repeat.
Try this pattern that matches the photo:- 2 coral
- 1 cream
- 1 seafoam
- 1 coral
- 1 blush
Repeat with small variations.
Visual checkpoint: overall, coral dominates, but you keep seeing little pops of seafoam and cream.
Keep the wreath thickness even.
After each quarter section, fluff the tails outward and compare thickness. If one area looks thinner, add more strips there before moving on.
Tip: Rag wreaths always look better when the volume is consistent.Fill the entire ring.
Continue until the wreath looks plush and full. If you are hanging it on a door and only the front shows, you can keep the back lighter. If it will hang in a window, add strips to the back outer edge as well.Fluff and sculpt the inner opening.
Pull tails away from the center hole so it stays clean and circular.
If your opening is shrinking, trim the next batch of strips 1 inch shorter and add them where needed.Make the carrot embellishment.
Two safe options depending on your comfort level:
Option A: Simple flat felt carrot
- Cut a carrot shape from orange felt, about 5 inches tall.
- Cut two to three leaf shapes from green felt.
- Glue leaves behind the carrot top.
- Add a few stitched or drawn lines for texture.
Option B: Plush carrot with stuffing
- Cut two carrot shapes from fabric.
- Sew around the edges leaving the top open.
- Turn right side out, lightly stuff, then stitch closed.
- Add felt leaves or fabric leaves and stitch or glue in place.
Visual checkpoint: carrot should look slightly imperfect and handmade, like the photo, not overly slick.
- Attach the carrot to the wreath.
Place it at the bottom center. Use wire for strength:
- Thread wire through the carrot top or behind it.
- Anchor wire into the wreath base.
- Add a small glue dab behind the carrot for stability.
Tip: If your wreath is very fluffy, nestle the carrot into the fabric so it looks integrated, not stuck on top.
Refine the texture around the carrot.
Pull a few fabric tails up and around the carrot edges so it feels tucked into the wreath. Trim any tails that poke awkwardly into the carrot shape.
Visual checkpoint: carrot looks nestled, not floating.Optional upgrades that match the photo vibe.
- Add a tiny bow tie on the carrot with a cream strip.
- Add a small bunch of faux greenery behind the carrot leaves.
- Add one or two tiny felt flowers in blush for extra spring charm.
- Add a hand lettered mini tag tied near the carrot for a personalized detail.
Add hanging method.
Tie a hidden ribbon loop at the back top. Keep it clean so the front stays all texture and carrot charm.Final fluff for the perfect finish.
Run your hands around the wreath and fluff tails outward. Twist some strips slightly so they look lively.
Visual checkpoint: you should see a plush ring with coral warmth, balanced by seafoam and cream, and a clear carrot focal point at the bottom.
Troubleshooting
- My wreath looks thin.
Add more strips and push knots closer. Rag wreaths need density to look like the photo. - Fabric frays too much and looks messy.
Choose tighter weave cotton, trim stray threads, and seal ends lightly with clear fabric glue. - Colors look too random.
Increase cream and coral repeats, and keep seafoam as an accent rather than equal. - Carrot falls off.
Use wire anchoring plus glue, not glue alone. If the carrot is heavy, add two wire anchor points. - The center hole looks uneven.
Re fluff and pull tails away from the center. Trim a few inner tails if needed.
Finishing details
- Lightly trim stray threads, but keep a soft fringe vibe.
- If hanging outdoors, keep it under cover and consider a light fabric protector mist.
- Store in a box without crushing the carrot. Place tissue paper around it so it keeps its shape.
Shop Similar
- Wire wreath frame 14 inch
- Fabric strips bundle coral blush cream
- Seafoam fabric quarters quilting
- Felt sheets orange and green
- Hot glue gun kit with glue sticks
Style it with
If you make one of these wreaths, hang it up and give it a day to settle, then do a final fluff and trim for that magazine tidy finish. The best part is how customizable they are, swap colors for any season, add a single statement bow, tuck in a tiny accent, or keep it minimal and let the texture do all the talking. Save your leftover strips in a labeled bag so next time you can make a second wreath in half the time. Your door deserves a little handmade personality, and this is the kind of craft that makes the whole entry feel warmer the second it goes up.