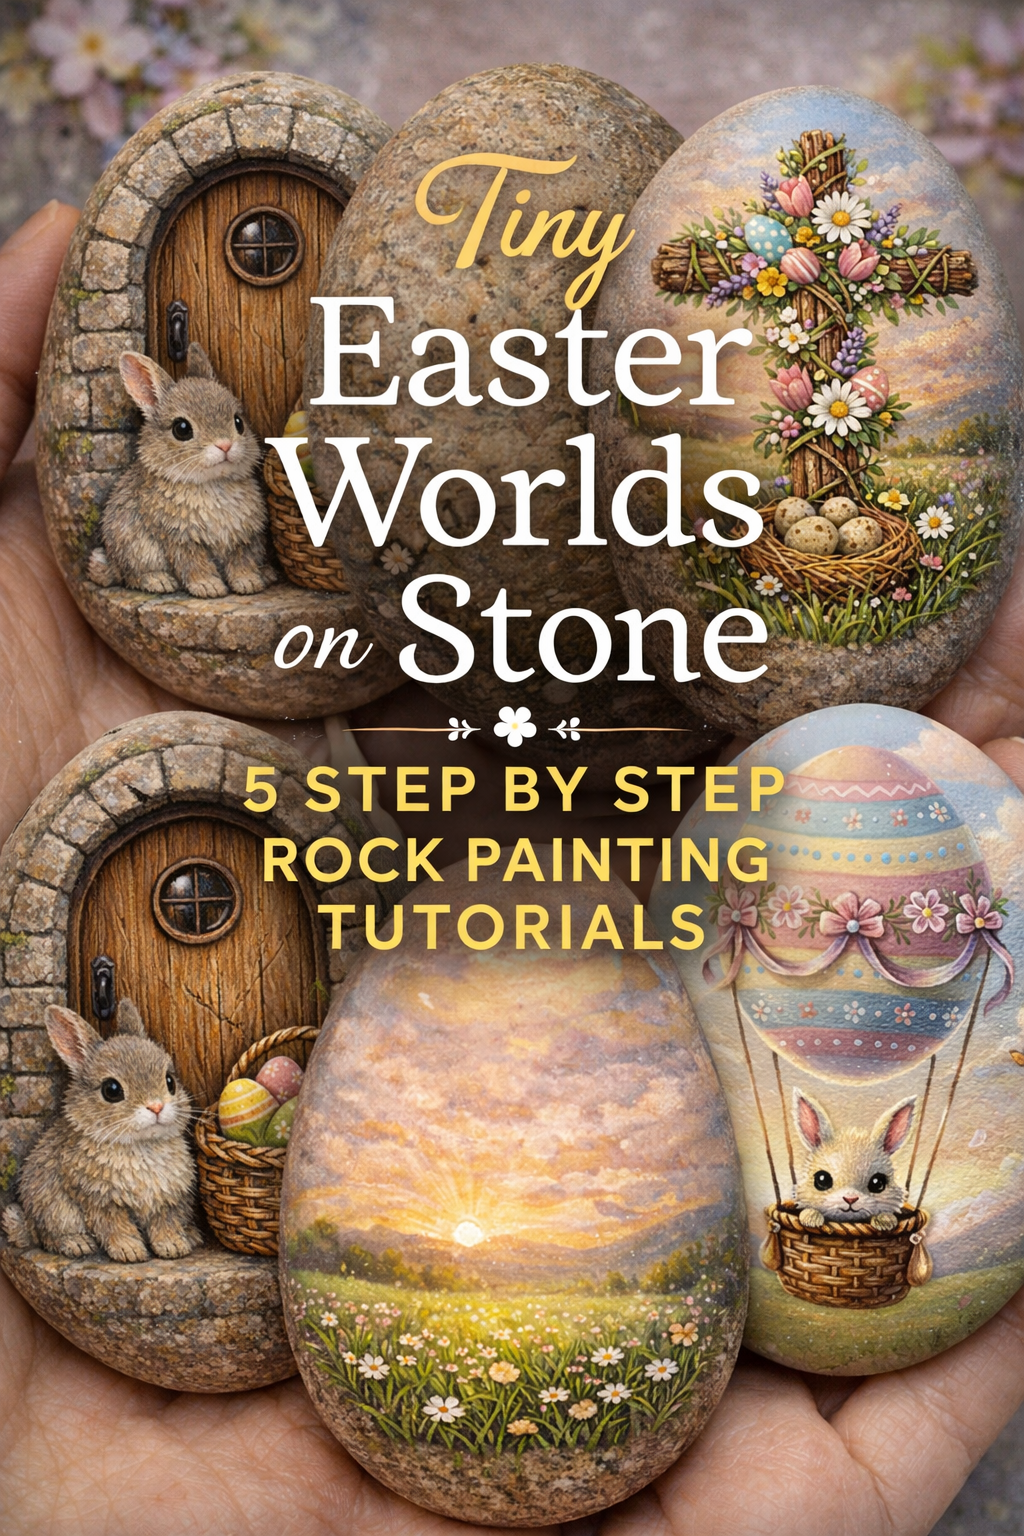
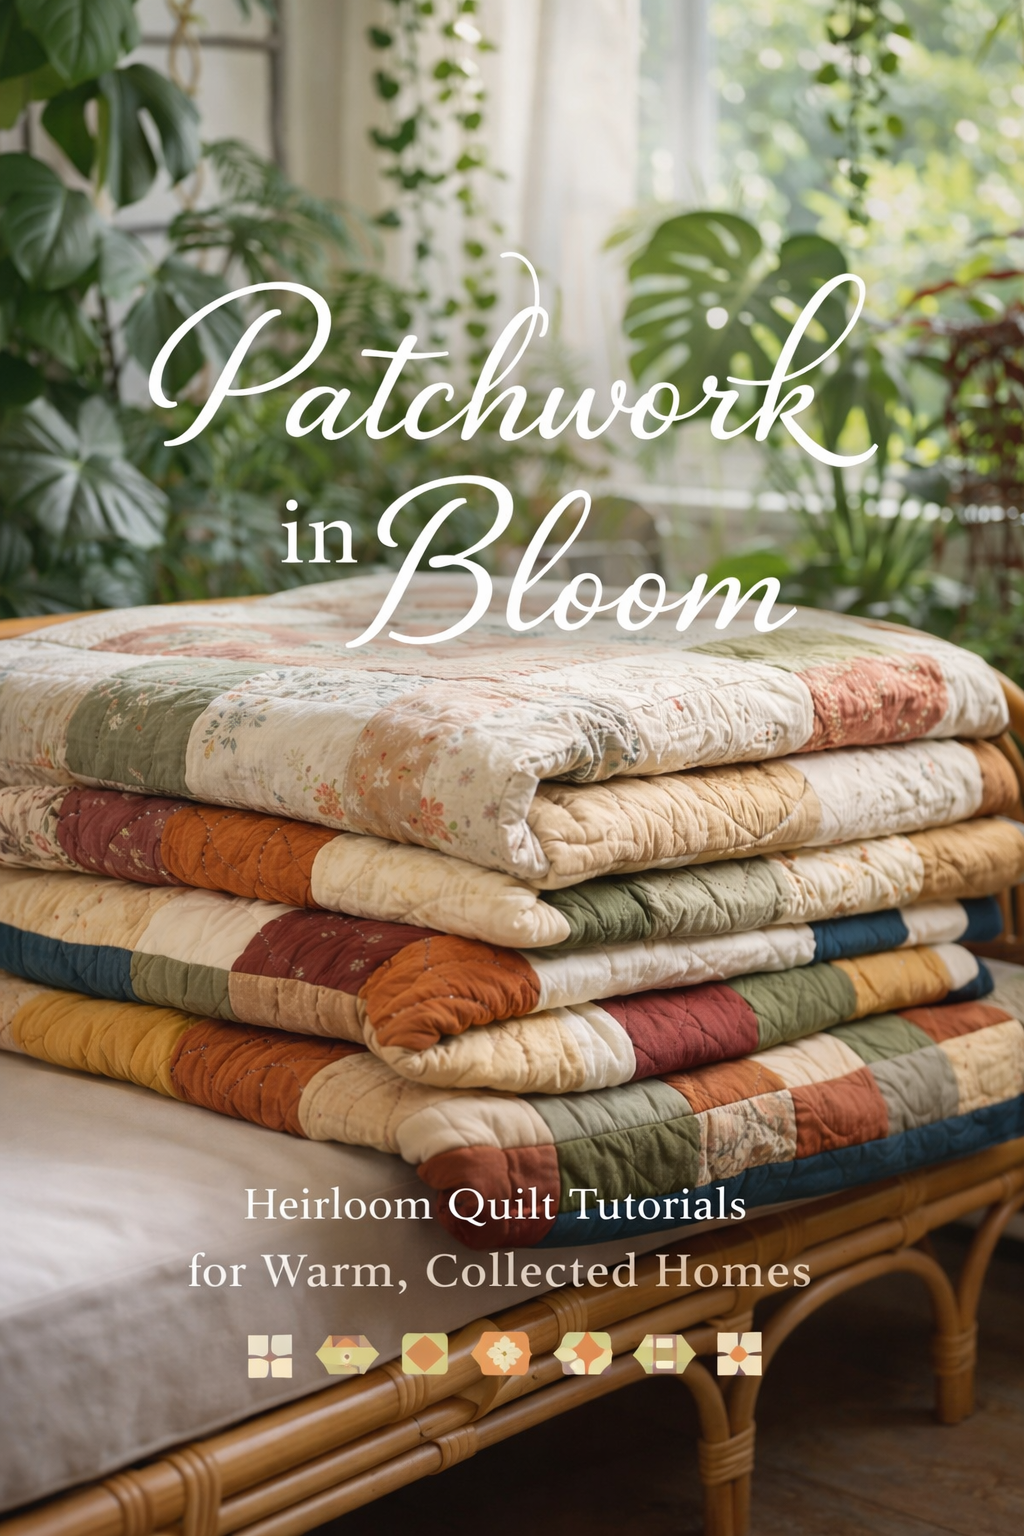
Patchwork in Bloom: Heirloom Quilt Tutorials for Warm, Collected Homes
More like this
💡 Pro Tip: Why I Link to Amazon Search Results and Not One Product
In the Shop the Look and Style it With sections under each bikini, I link to Amazon search results, not single products. Here’s why this matters:
Hot bikinis sell out fast. I don’t want you clicking on a dead link to a sold-out item. Search pages stay updated.
You get more options. Love the vibe but want a different color, cut, or price point? The search results give you everything that matches the look and energy.
I curate each search carefully. These aren’t generic. I spend hours crafting keywords that bring up exactly the kind of bikinis I’d wear—or recommend to my hottest friends.
Support with no pressure. If you click a link, browse, and buy something later, I may earn a small commission at no extra cost to you. That helps me keep bringing you curated collections like this one—powerful, seductive, and always fresh.
So dive in. Click through. Try something risky. These aren’t just bikinis—they’re commands, statements, and maybe even your new favorite weapon of choice.
There is something especially beautiful about a patchwork quilt when it is allowed to feel both timeless and alive. This collection brings together five distinctive quilt tutorials that all speak the same warm design language while offering different moods, structures, and levels of detail. Some lean modern and graphic with oversized color blocking. Others feel softer and more heirloom inspired, with florals, hexagons, and gentle hand finished texture. Together, they create a post that feels collected rather than repetitive, which makes it especially satisfying for readers who want options without losing a clear point of view.
What ties these projects together is their rich, earthy palette and their ability to transform a room the moment they are draped across a bed, sofa, or wicker daybed. These are quilts made to be used, styled, folded, gifted, and admired in natural light. Whether your reader is drawn to a minimalist patchwork, a romantic botanical throw, or a more traditional hexagon layout, each tutorial offers a practical path toward a result that still feels elevated and editorial. This is the kind of handmade project that slows a room down in the best way and reminds us that functional pieces can still feel deeply personal, artful, and full of soul.
Earthtone Patchwork Quilt Step by Step Tutorial
What you’re making
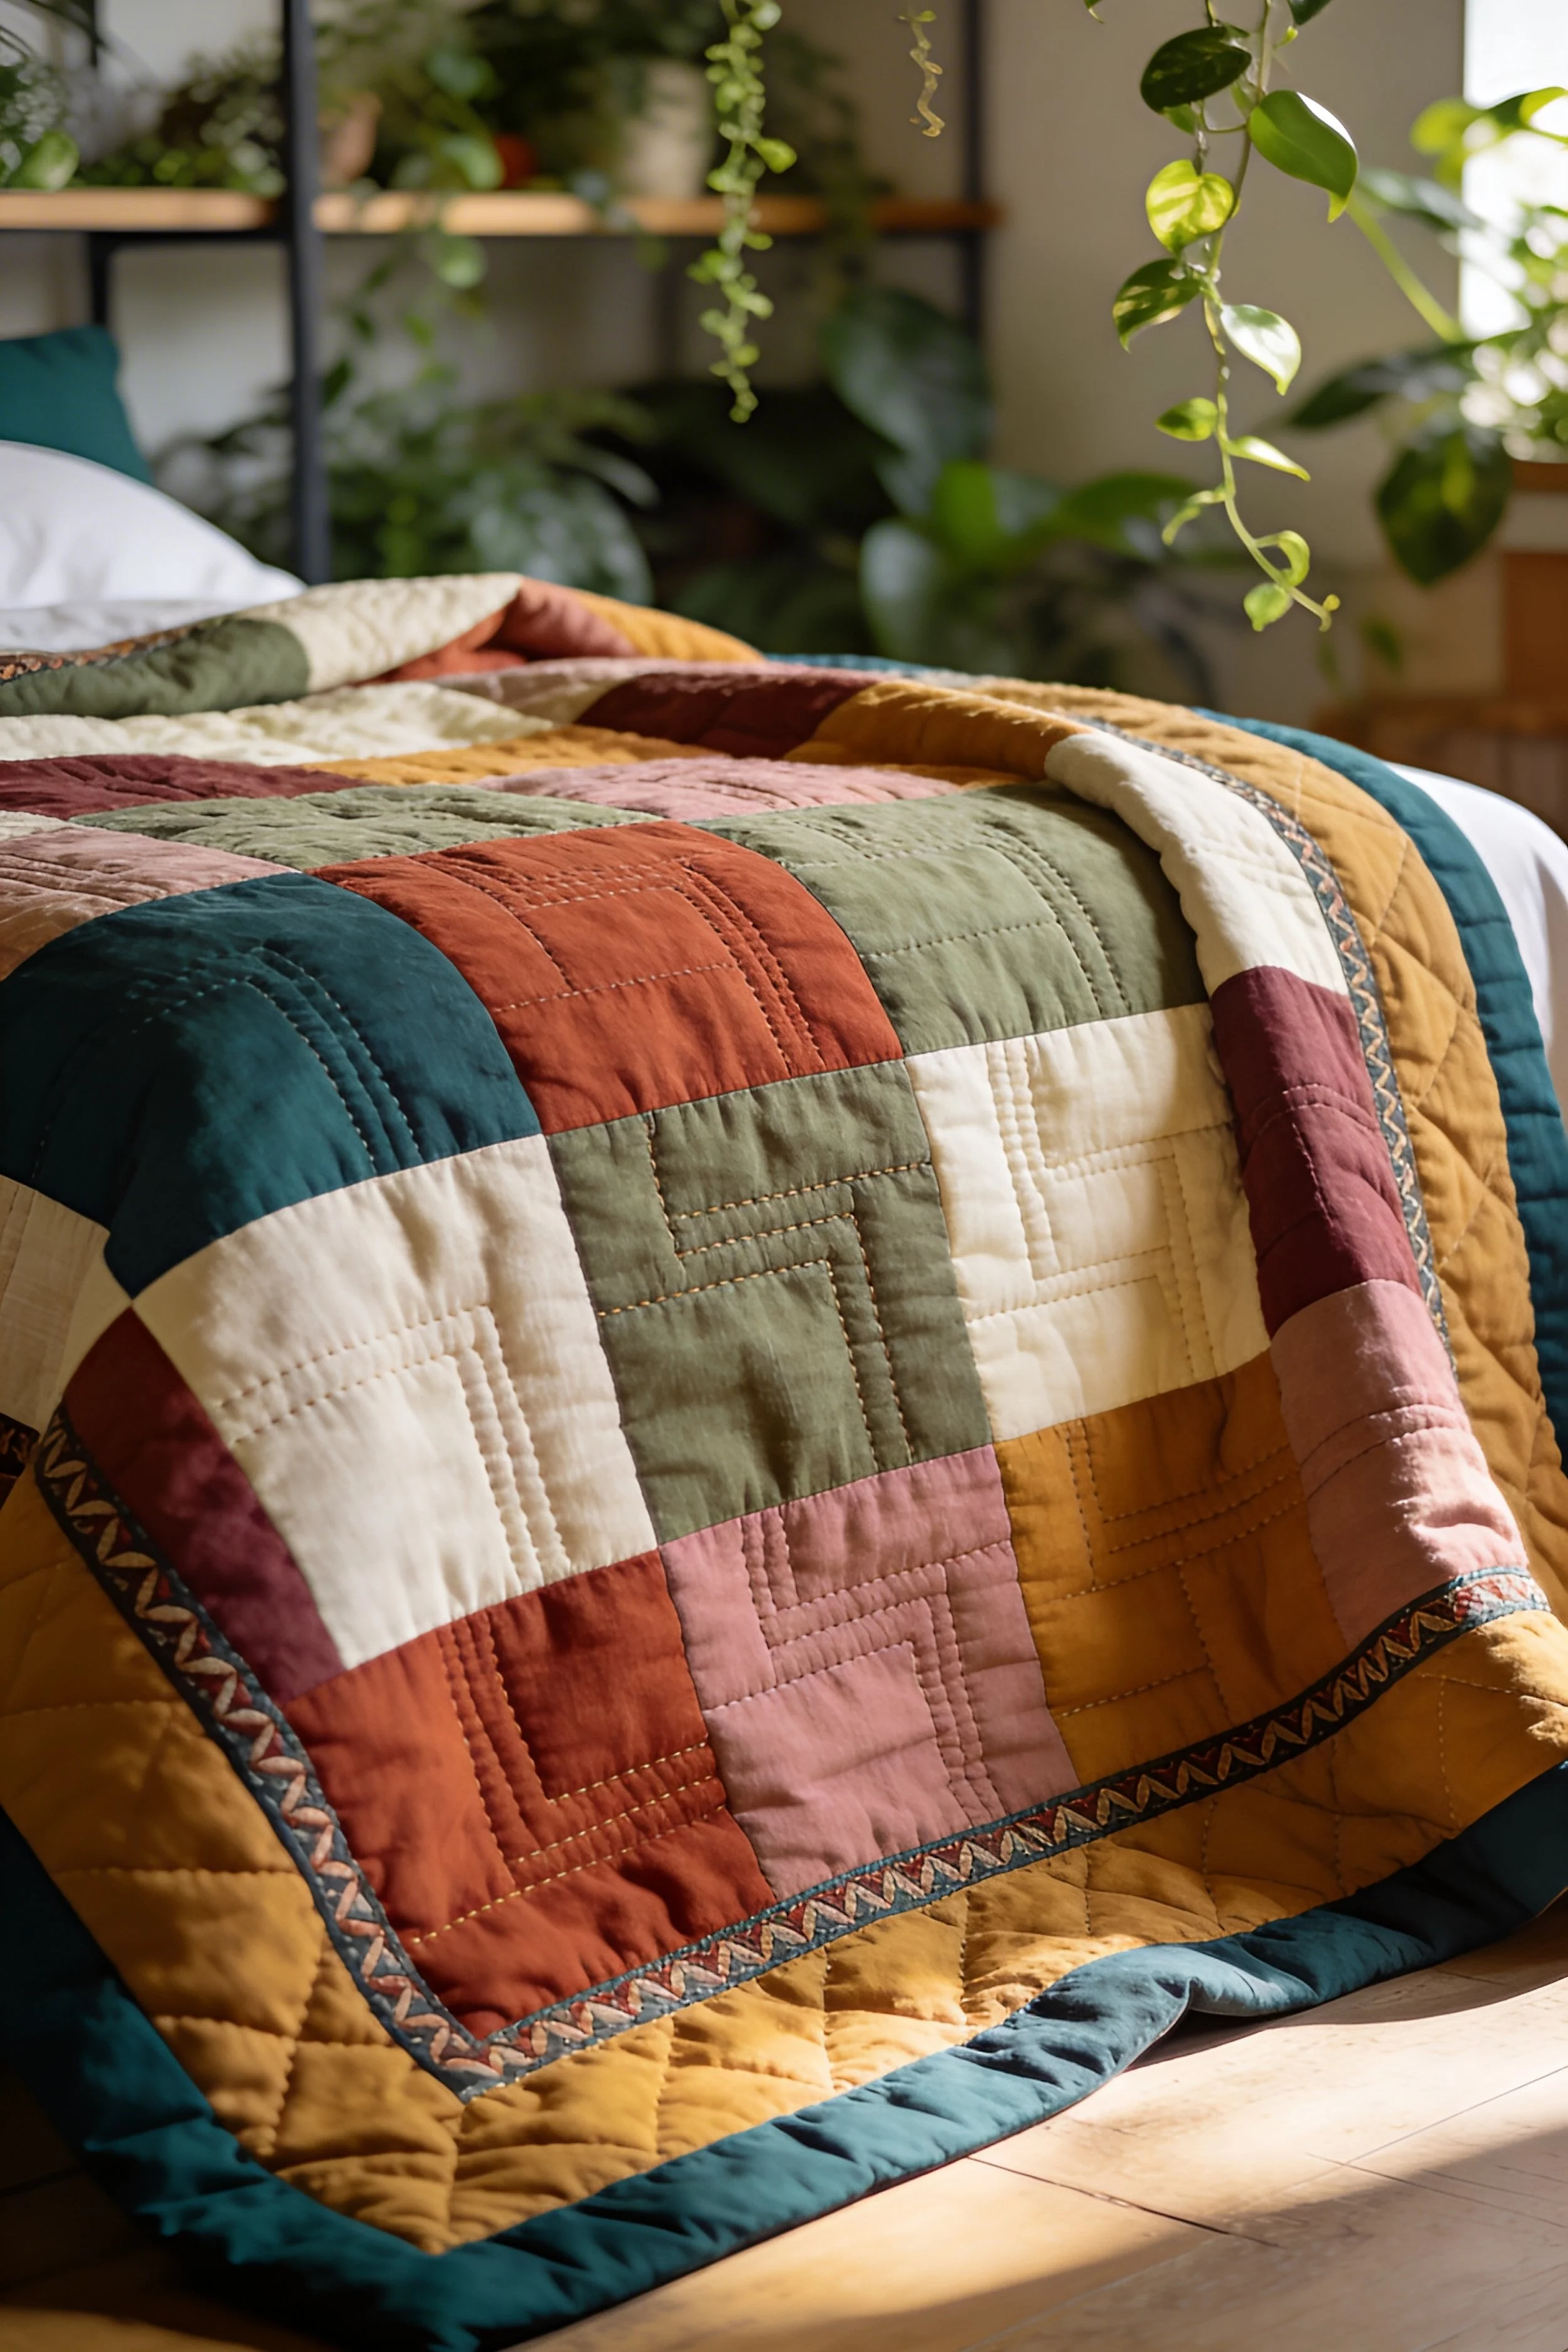
You’re making a warm, modern patchwork quilt with a softly sun washed palette of deep teal, clay, blush, olive, cream, and golden ochre. The look in the photo feels contemporary and handmade at the same time, with large rectangular and square pieces, visible straight line quilting, and a polished binding that frames the quilt beautifully. This is the kind of project that looks equally at home on a bed, folded over a reading chair, or layered in a plant filled room with lots of natural light.
The charm of this design is that it looks elevated without requiring complicated piecing. The blocks are generous, the seams are straightforward, and the quilting texture is subtle rather than fussy. If you are newer to quilting, this is a very approachable way to get a high end result.
Materials + tools
- 100 percent cotton quilting fabric in deep teal, rust clay, dusty blush, olive green, warm cream, and golden mustard
- Optional: linen cotton blend for a softer, slightly rumpled look
- Backing fabric, about 2 to 4 inches larger than your quilt top on all sides
- Cotton batting or bamboo cotton blend batting
- Coordinating thread for piecing
- Quilting thread in cream, gold, or light brown
- Rotary cutter
- Self healing cutting mat
- Quilting ruler
- Fabric scissors
- Seam ripper
- Pins or fabric clips
- Iron and ironing board
- Sewing machine with quarter inch foot if you have one
- Walking foot for quilting
- Safety pins or basting spray
- Binding fabric, preferably teal or mustard for the framed edge look
- Hand sewing needle for finishing the binding
Finished size + customization notes
A throw size of about 50 x 65 inches works beautifully for this design and matches the scale in the image. You can also enlarge it to about 60 x 80 inches for a twin bed by adding more rows and widening the borders.
To customize the look, keep the blocks fairly large. Small pieces will change the feel and make it look busier than the photo. If you want a moodier version, increase the teal and olive. If you want a softer version, use more blush and cream. You can also choose either all cotton for crisp structure or a mix of cotton and linen blend if you want the quilt to drape more softly over the bed.
Step by step instructions
1. Plan your color balance
Before you cut anything, lay out your color story. The photo works because the tones feel grounded and evenly distributed. None of the colors completely dominate. Cream acts like visual breathing room, teal anchors the corners and outer areas, and the warmer rust and mustard shades bring depth.
A good starting ratio is about 30 percent light fabric, 25 percent warm medium fabric, 20 percent green, 15 percent blush, and 10 percent dark teal. You do not have to be exact, but avoiding too much of one color helps the final quilt feel balanced.
Visual checkpoint: when your fabrics are stacked together, they should feel earthy, muted, and sun warmed rather than bright or primary.
2. Cut your patchwork pieces
This quilt look is made from simple squares and rectangles, so choose a few finished sizes and repeat them. One easy recipe is:
- Cut 6.5 inch squares
- Cut 6.5 x 12.5 inch rectangles
- Cut a few 12.5 inch squares for stronger visual weight
These measurements include seam allowance. Larger pieces create the calm, modern feel you see in the image.
Sort your cut pieces into piles by color. Keep your cream pieces especially clean because they show lint quickly.
Tip: starching your fabric lightly before cutting can help if you want very crisp, accurate blocks. Skip this if you prefer a softer, more relaxed finish.
3. Create a loose patchwork layout
Spread the pieces on the floor or a design wall. Start with cream, then place rust, blush, olive, mustard, and teal around it. Avoid putting too many dark or warm pieces in one area. The photo has a balanced scatter, not a strict repeating pattern.
Try offsetting rectangles and squares so the patchwork feels organic. This is not a traditional block based quilt where everything repeats exactly. Think of it more like a composed collage.
Step back often. Squint at the layout from across the room. This helps you see whether one section feels too dark, too pale, or too warm.
Visual checkpoint: you should now see a top that feels balanced and relaxed, with no one corner pulling all the attention.
4. Sew the quilt top in rows
Once you like the layout, sew pieces together into horizontal rows. Use a quarter inch seam allowance throughout. Press seams as you go. You can press to one side for speed or press open if you want flatter joins. For a quilt with many larger pieces like this, both options work.
After making each row, sew the rows together. Match seam intersections as closely as you can, but do not obsess over absolute perfection. The handmade quality is part of the appeal here.
Tip: if one row seems slightly longer, do not stretch the shorter row to fit. Recheck seam allowance first. Even a slightly wide seam repeated several times can throw off the alignment.
5. Add borders
The quilt in the image has the feeling of a framed piece, so add at least one border. A wide outer border in mustard or golden ochre gives the same rich, warm edge. You can also add a narrow inner border first in cream or teal if you want more definition.
Measure through the center of the quilt top vertically and horizontally before cutting border strips. This gives a more accurate fit than simply measuring the outer edge, which may have stretched slightly.
Sew side borders first, then top and bottom.
Visual checkpoint: once the border is on, the quilt should suddenly look more finished and cohesive, like the patchwork is sitting inside a picture frame.
6. Prepare the quilt sandwich
Press the quilt top and backing. Lay the backing wrong side up, smooth it well, then add batting, then place the quilt top right side up. Smooth each layer as you go. Pin baste with safety pins every few inches or use basting spray if you prefer.
This step matters more than many beginners realize. Good basting prevents shifting, puckers, and pleats during quilting.
Tip: if the top seems a little wavy at this stage, do not panic. Gentle smoothing often fixes it. If there is significant fullness, check whether borders were added too loosely.
7. Quilt with straight lines
The stitching in the photo looks understated and architectural. Straight line quilting is perfect for that. Use a walking foot and quilt lines that echo the patchwork shapes. You can stitch just inside seams, through the center of larger pieces, or create parallel lines across the quilt.
A spacing of about 1 to 2 inches works well for a soft, lightly padded look. Wider spacing keeps the quilt drapey. Closer spacing makes it flatter and more structured.
Start quilting near the center and work outward. This helps distribute any tiny shifts instead of pushing them into one edge.
Visual checkpoint: you should now see the quilt surface coming alive with subtle texture. The lines should support the patchwork, not overpower it.
8. Trim and square the quilt
After quilting, lay the quilt flat and trim the batting and backing flush with the quilt top. Use a large ruler to check corners. The goal is a tidy rectangle.
If one side has become slightly uneven, square it gently by trimming only what is necessary. Do not over trim and shrink your border more than needed.
9. Make and attach binding
Cut 2.25 inch wide strips for binding. Join them end to end, press in half lengthwise, and sew the raw edges to the front of the quilt using a quarter inch seam allowance. Miter the corners carefully.
A dark teal binding gives a bold modern finish close to the image. Mustard gives a softer, tonal edge. Either works beautifully. Choose teal if you want more contrast and mustard if you want the quilt to blend more gently into the room.
Fold the binding to the back and hand stitch it down for a polished result.
Visual checkpoint: the binding should frame the quilt evenly and make the whole project look intentional and complete.
10. Let it relax
Once finished, wash the quilt gently if your fabrics are prewashed and colorfast. A light wash helps the quilting lines soften and gives that inviting, lived in texture. If you want the crispest possible presentation, skip washing and steam press the quilt lightly instead.
Drape it over the bed as shown in the image, letting the front edge puddle slightly. This styling really shows off the quilting and border.
Troubleshooting
My quilt top is not lying flat
This usually comes from inconsistent seam allowance or borders being attached without measuring through the center. Recheck seam accuracy and ease fullness gently while quilting if it is minor.
My corners do not match perfectly
That is common in patchwork. Focus on overall alignment rather than one or two imperfect intersections. Pressing carefully and pinning seam joins before sewing helps a lot.
The quilt shifted while quilting
Use more basting pins next time and begin quilting from the center outward. A walking foot also makes a major difference.
My fabric colors look wrong together
If the quilt feels too heavy, add more cream. If it feels washed out, add one or two deeper teal or rust pieces. The right balance often comes from adjusting only a small section.
My binding looks wavy
This can happen if it was stretched while sewing. Attach it with the quilt supported flat on the table and avoid pulling the binding as you stitch.
Finishing details
For the exact look in the photo, keep the finish neat but not overly formal. A soft batting gives the quilt body without stiffness. Hand finished binding adds that boutique quality. If you want extra structure so the quilt holds a sculptural drape over the bed, use cotton batting instead of a loftier polyester batting.
Weave in or bury thread tails instead of backstitching in obvious places on the surface. Steam rather than aggressively pressing after quilting. Store the quilt folded loosely or draped, not sharply creased. Optional upgrades include adding a pieced backing in leftover colors, stitching a label into one corner, using hand quilting thread for a more artisanal line texture, or adding a narrow decorative trim between the border and binding for a custom studio made feel.
Shop Similar
- Earthy cotton quilting fabric bundle in teal rust blush olive and cream
- Throw size cotton batting for modern patchwork quilts
- Deep teal quilt binding fabric and jelly roll friendly yardage
- Rotary cutter quilting ruler and self healing mat set
- Walking foot for straight line machine quilting
Style It With

Hexagon Garden Quilt DIY Guide
What you’re making
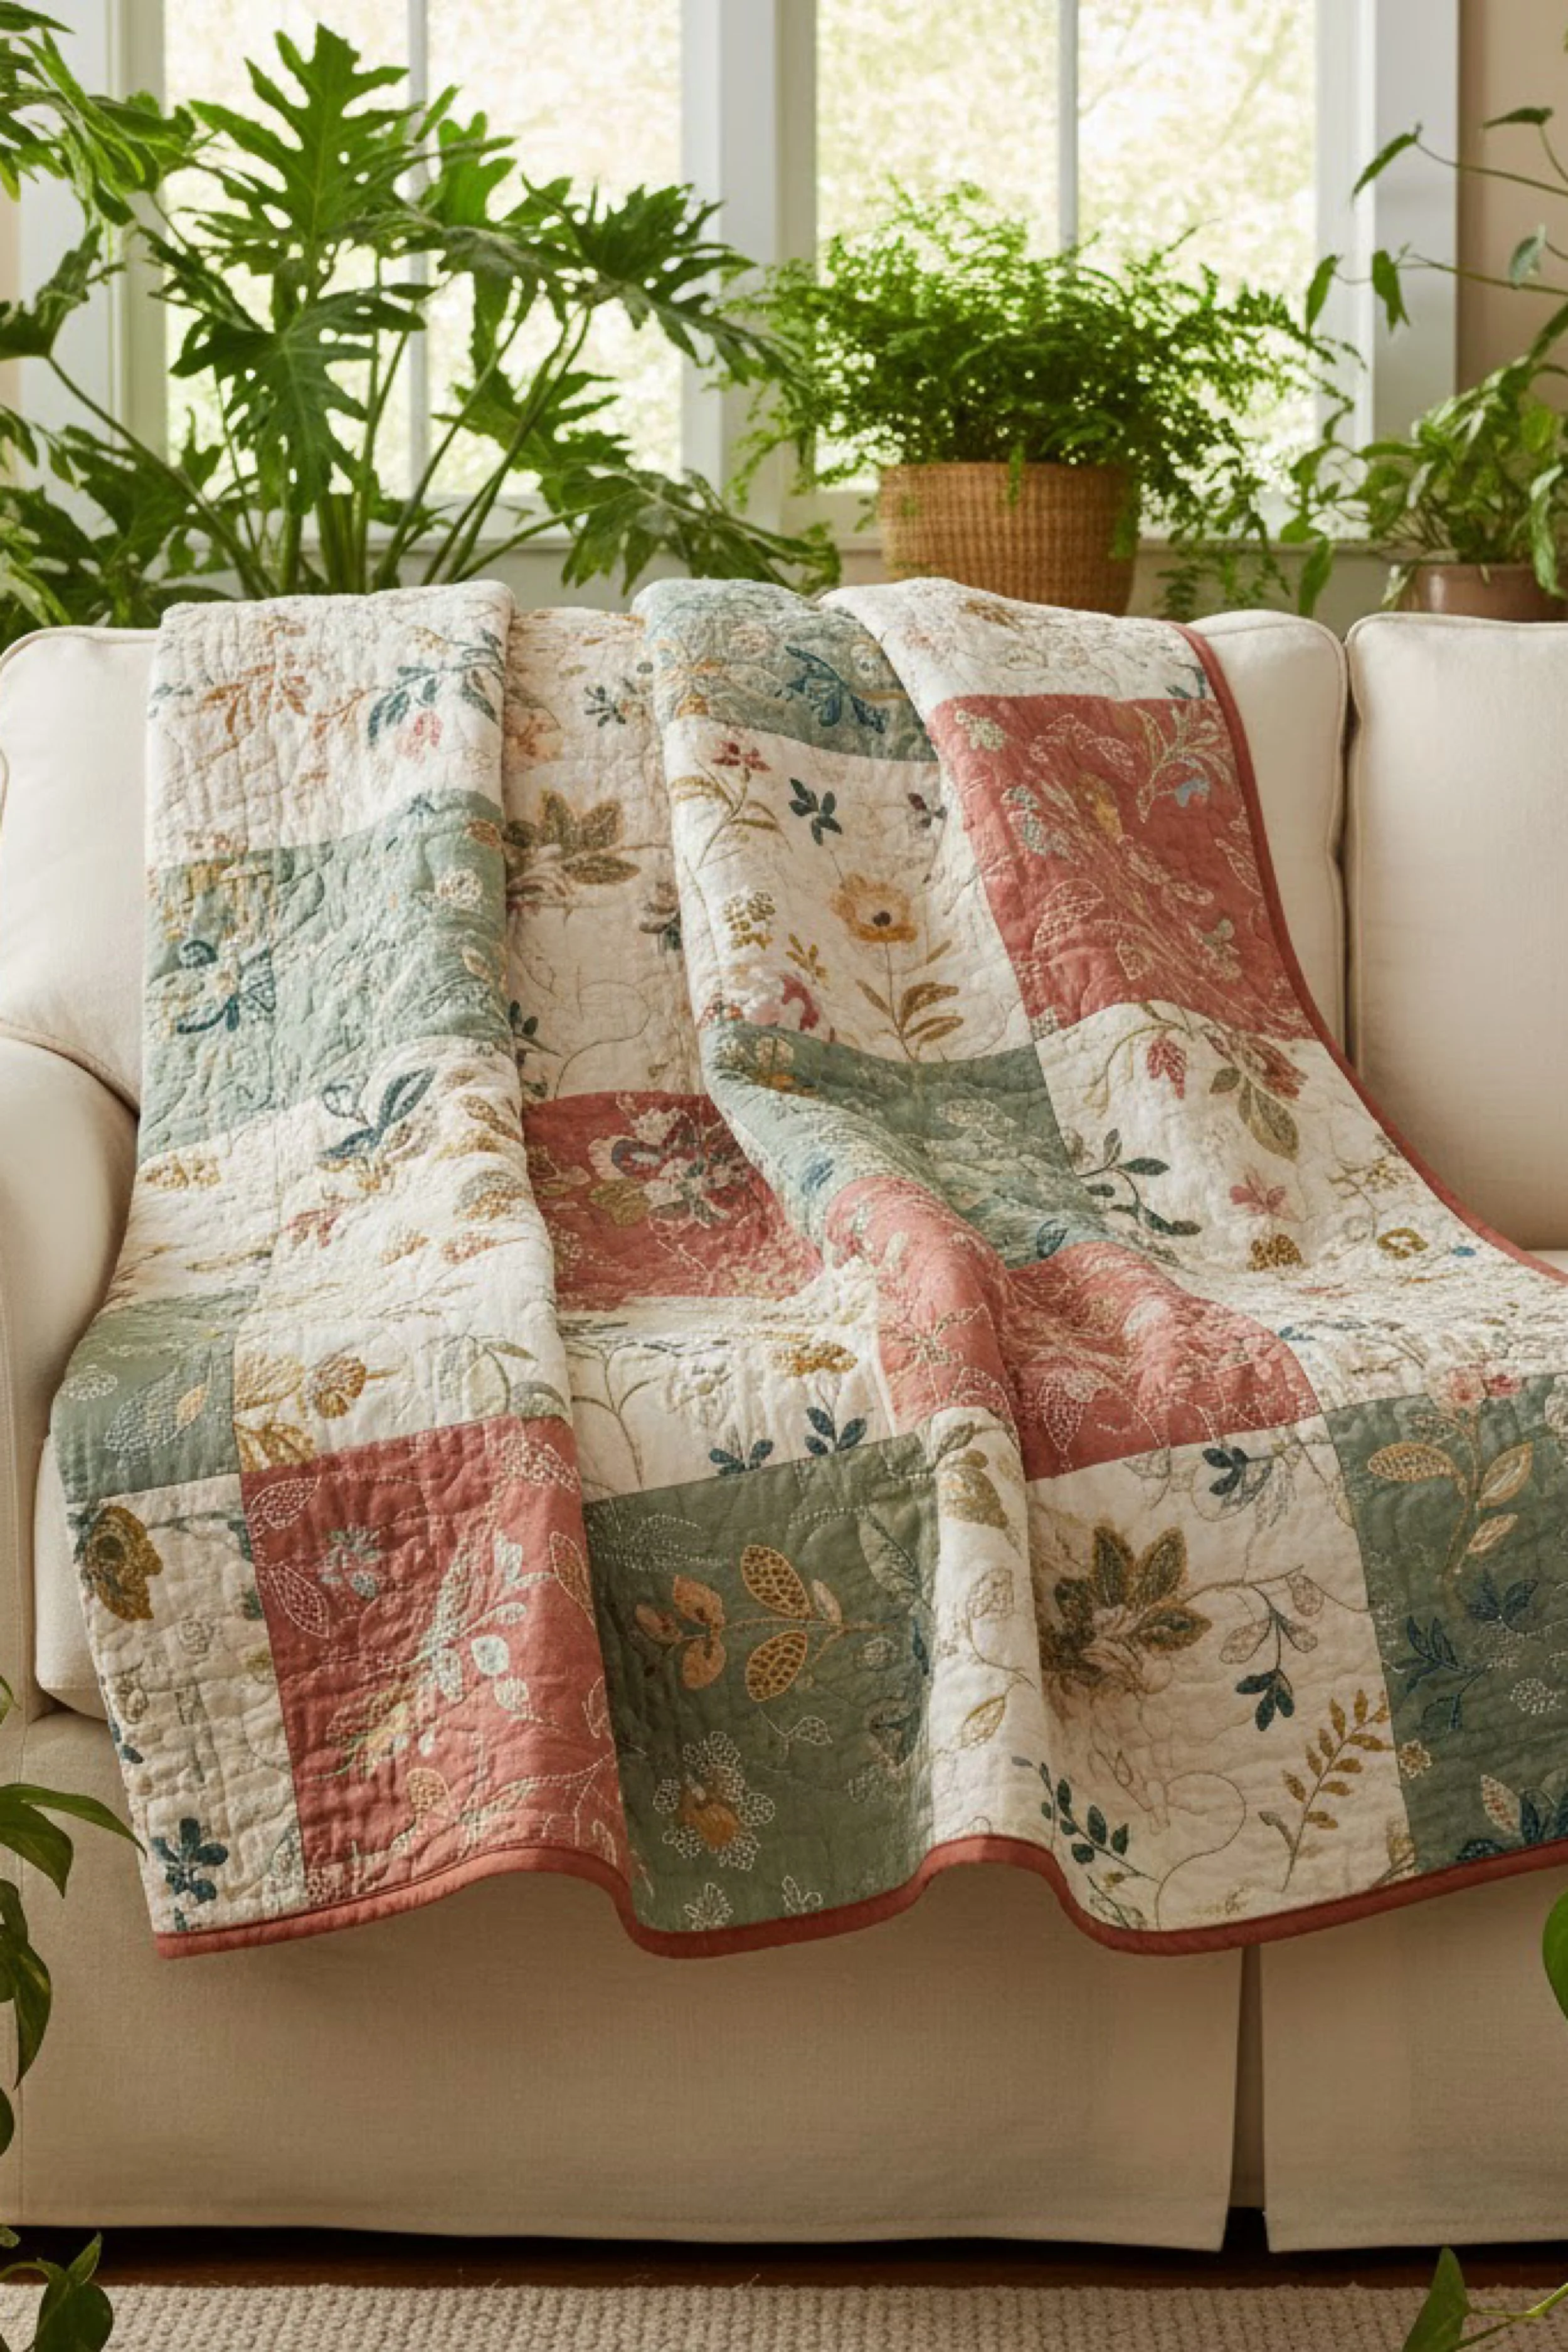
You’re making a hexagon patchwork quilt with a romantic, vintage inspired garden feel and rich autumn toned colors. The photo shows a beautifully draped quilt with hexagon units in burgundy, cream, olive, rust, mustard, and small floral prints, finished with hand stitched texture and soft borders. It has that collected heirloom quality that feels both old fashioned and fresh inside a plant filled sunroom.
This project is perfect if you love English paper piecing looks but want something you can actually finish and use. You can make it fully by hand for a true heirloom approach, or combine hand piecing with machine assembly to speed things up.
Materials + tools
- Quilting cotton in burgundy, wine, rust, mustard, olive, cream, and small ditsy floral prints
- Optional: a few blue accent pieces for the tiny pop visible in the photo
- Hexagon paper templates, around 2 to 3 inch finished size
- Cardstock or pre cut paper pieces
- Fabric glue pen or basting thread
- Hand sewing needles for English paper piecing
- Fine piecing thread
- Rotary cutter and ruler
- Fabric scissors
- Iron
- Sewing machine for borders and backing if desired
- Cotton or cotton bamboo batting
- Backing fabric
- Safety pins or basting spray
- Quilting thread for hand ties or hand quilting
- Binding fabric in rust or burgundy
- Clips or pins
Finished size + customization notes
A throw quilt around 52 x 68 inches recreates the look well. Because hexagon quilts grow organically, it helps to choose your approximate size first, then count how many columns and rows of hexagons you need.
Larger hexagons make the quilt more modern and quicker to finish. Smaller hexagons make it more detailed and traditional. If you want the exact cozy, gently busy look of the image, aim for medium hexagons and mix solids with a few floral prints. Keep the prints small scale so they blend rather than shout.
Step by step instructions
1. Build your fabric palette
This quilt works because the colors feel rich and slightly faded, not bright. Pull fabrics that feel warm, earthy, and softly aged. Cream and pale yellow lighten the design. Burgundy and rust add depth. Olive keeps it grounded. Small floral prints add the sweet vintage note.
A useful trick is to group fabrics into light, medium, dark, and print categories. Try to keep at least a few choices in each category so the layout has dimension.
Visual checkpoint: when you lay your fabrics together, the palette should remind you of pressed flowers, old books, terracotta pots, and late afternoon sunlight.
2. Cut hexagon pieces
Trace and cut fabric hexagons with enough margin around each paper template to fold over the edges. If using paper templates with a 2.5 inch finished size, add at least a quarter inch all around for turning.
You can either cut individual hexagons or rough cut squares first and trim as you baste around the papers. The second method is often easier for beginners.
Tip: finger pressing the folds as you baste helps keep points crisp and neat.
3. Baste the hexagons
Place each paper template on the wrong side of a fabric piece. Fold the seam allowance around and secure it with thread or a fabric glue pen. Thread basting is more traditional and reusable. Glue basting is faster. Both are valid. Choose based on whether you prioritize speed or reusability.
As you baste, keep similar tones in separate stacks so you can design more easily later.
Visual checkpoint: each basted hexagon should feel flat, neat, and symmetrical. Lumpy edges now will make stitching more difficult later.
4. Arrange the pattern
Lay the hexagons out on a design wall, floor, or table. The photo does not use a rigid grandmother’s flower arrangement. Instead, it scatters colors and prints in a softly balanced way. Try to avoid clustering all florals together. Spread them out so they sparkle across the quilt.
You can create diagonal movement by repeating burgundy and olive along gentle lines. Place cream and pale yellow pieces between darker units so the design breathes.
Tip: snap a phone photo when you like the arrangement. That makes it much easier to keep track as you start stitching.
5. Stitch hexagons together
Whip stitch or ladder stitch hexagons right sides together by hand. Work in small sections rather than trying to manage the whole quilt at once. Rows, diamonds, or flower like clusters all work. Choose whichever assembly order feels easiest to keep organized.
Take tiny stitches only catching the folded edges, not the papers. This keeps the seam nearly invisible from the front.
If hand piecing is not your favorite part, you can hand piece the central panel for authenticity, then machine add borders later. That gives you the same look with less time investment.
Visual checkpoint: you should now see the quilt top growing with flexible, soft movement. The joins should look tidy from the front with no large gaps between hexagons.
6. Remove papers gradually
Do not remove papers until the surrounding seams support each hexagon. Once a unit is fully enclosed by other hexagons, you can pop the paper out and reuse it.
This keeps the quilt stable while you continue stitching. If you remove papers too early, the shape can distort.
7. Square up the center panel
Hexagon quilts have jagged edges unless you leave them intentionally shaped. The quilt in the photo appears to have structured borders, so you will likely want to square the center. The easiest way is to add partial hexagons around the outside or appliqué the hexagon panel onto a background before adding borders.
A practical beginner friendly option is to trim the panel carefully with enough seam allowance and then add border strips to create a rectangular quilt. Another good option is to fill edge gaps with coordinating triangles and partial shapes.
This is the step where the quilt changes from a pieced top to a finished design.
8. Add borders
The photo suggests multiple soft borders, including warm yellow and rust tones. Add a narrow cream border first if you want separation from the busy center, then a slightly wider warm yellow border, then finish with rust or burgundy.
Measure the quilt through the center before cutting borders. This prevents waviness. Press each border well after attaching.
Visual checkpoint: the center should now feel framed and composed. The quilt should look much more intentional and ready for quilting.
9. Make the quilt sandwich
Lay backing fabric wrong side up, place batting on top, then the quilt top right side up. Smooth carefully and baste well. Hexagon quilts benefit from good basting because the many seam lines create lots of opportunities for tiny shifts.
Tip: if the quilt top feels slightly stretchy on the bias, handle it gently and avoid pulling while pinning.
10. Quilt or hand tie for the heirloom look
The photo reads as softly quilted with visible hand stitched charm. You have two great choices.
Option one is hand quilting along selected hexagon seams or in simple big stitch lines using pearl cotton or quilting thread. This gives a cozy handmade finish.
Option two is machine quilting with a walking foot along diagonal paths that echo the hexagon geometry. Keep the stitching subtle so the patchwork stays the star.
If you want the quilt to look especially similar to the photo, choose a hand finished look with visible but tidy stitched lines.
Visual checkpoint: the texture should feel soft and inviting, not dense or overly flattened.
11. Trim and bind
Square the quilt as much as possible after quilting. Trim excess batting and backing. Bind with rust, burgundy, or warm cream. A rust binding gives a lovely glow around the edge and suits the photo well.
Miter the corners and hand stitch the binding to the back. This final hand finished step really suits the heirloom feel of the project.
12. Style and enjoy
Drape the quilt loosely over a daybed, wicker sofa, or reading bench. Let one corner trail toward the floor so the border and front texture both show. This style instantly gives you the same collected, greenhouse room look as the image.
Troubleshooting
My hexagons are not lining up
Usually this comes from inconsistent folding during basting or taking too large a stitch. Make sure papers are the same size and stitches only catch the folded edges.
My quilt top is stretching
Hexagons create bias edges. Keep papers in until units are well supported and handle the top gently when moving it.
The prints look too busy
Spread your florals farther apart and add more solids or near solids. Small prints are best for this style.
My borders are rippling
Measure through the center rather than using the quilt edge as your guide. Bias edges can grow slightly.
Hand quilting feels too slow
Use big stitch quilting with a slightly thicker thread. It is quicker and still gives beautiful visible texture.
Finishing details
To really lean into the heirloom charm, wash the finished quilt gently so the seams soften and the fabrics relax. You can also skip washing for a pressed, display ready look. If you plan to use the quilt often, choose a cotton bamboo batting for softness and drape. If you want more body for styling across furniture, choose all cotton batting.
Optional upgrades include adding a pieced label with the date, stitching a few extra decorative hand tacks in the floral areas, using vintage inspired reproduction prints, or adding a thin piping strip between the final border and binding for a more tailored finish.
Shop Similar
- Hexagon paper piecing templates for hand pieced quilts
- Vintage floral quilting fabric bundle in earthy colors
- Hand quilting needles and fine piecing thread set
- Throw size cotton bamboo quilt batting
- Rust quilt binding fabric for vintage style quilts
Style It With
Botanical Patchwork Throw How To Guide
What you’re making
You’re making a soft botanical patchwork throw quilt with large printed squares in muted sage, dusty rose, cream, and gentle nature motifs. The overall look is quiet, airy, and romantic, with the kind of easy drape that works beautifully over a sofa in a bright plant filled room. It feels less rustic than a scrap quilt and more like a refined, softly vintage home textile.
This is a wonderful beginner friendly project because the construction is straightforward. The elegance comes from fabric choice, soft quilting, and clean finishing rather than complicated blocks.
Materials + tools
- Botanical print quilting cotton in sage, blush, cream, and faded coral
- Tonal solids or blender fabrics to coordinate with the prints
- Backing fabric in cream, sage, or a small floral print
- Low loft cotton batting
- Coordinating piecing thread
- Quilting thread in cream or pale sage
- Rotary cutter
- Cutting mat
- Acrylic quilting ruler
- Sewing machine
- Quarter inch foot
- Walking foot
- Pins or clips
- Iron and ironing board
- Basting spray or safety pins
- Binding fabric in dusty rose, sage, or soft coral
- Hand sewing needle for binding
- Optional: washable fabric marker for marking gentle quilting lines
Finished size + customization notes
A couch throw around 50 x 60 inches is perfect for this design. You can also scale it to baby quilt size by making fewer rows, or enlarge it to 60 x 72 inches for a generous lap quilt.
The key customization choice is print scale. The quilt in the image uses prints that are detailed but not overly bold. Look for fabrics with delicate leaves, stems, birds, butterflies, or wildflower motifs. If the prints are too large, the quilt loses the calm patchwork look. If they are too tiny, the design can feel muddy from a distance.
Step by step instructions
1. Choose a soft botanical palette
Begin by selecting fabrics that feel faded and natural. Think pressed flowers, old wallpaper, herbal tea boxes, and watercolor field guides. The image uses creamy backgrounds with sage and rosy accents, so avoid anything too neon, overly saturated, or stark.
A good mix is about half printed fabrics and half solids or subtle blenders. This helps the eye rest and gives the quilt a graceful rhythm.
Visual checkpoint: your fabric pull should look airy and garden inspired, with no single print overwhelming the others.
2. Cut simple patchwork squares and rectangles
For a quilt like this, large squares are your friend. Cut a combination such as:
- 8.5 inch squares
- 8.5 x 12.5 inch rectangles
- A few 4.5 x 8.5 inch pieces for variation if desired
These larger pieces allow the printed motifs to show beautifully. Too many tiny cuts would make the quilt look much busier than the photo.
Sort pieces by dominant tone so you can distribute rose, sage, and cream evenly.
3. Build a gentle layout
Lay the pieces out in rows. Alternate prints and solids so the pattern feels calm. If you place several busy prints together, insert a soft solid square nearby to create breathing room.
Try not to create obvious stripes unless that is intentional. The photo feels relaxed and naturally balanced rather than rigidly planned.
Tip: when working with prints, step back often. A quilt can look lovely up close but too chaotic from afar if you do not check the whole composition.
Visual checkpoint: you should now see a soft patchwork field where the prints mingle rather than compete.
4. Sew the rows
Piece the rows with a quarter inch seam. Press after each seam to keep the top flat. Pressing to one side is fine for this project, though pressing open can help if your prints are lightweight and you want very flat joins.
As rows are completed, keep them in order. A row label with sticky notes or clips can save a lot of confusion.
5. Join the rows into a top
Sew the rows together carefully. Pin at major seam intersections to help alignment. Again, perfection is not the goal. Smooth flow is. This style of quilt is forgiving because the beauty comes from the overall atmosphere.
If one piece was cut slightly off and causes a row to twist, it is better to fix it now than to hope quilting will hide it later.
6. Add a narrow border if you want more polish
The quilt in the photo has a neat, finished feel. A narrow border in dusty rose or sage can help recreate that. You can skip borders if you love the minimal look, but even a 2 inch finished border often makes the quilt feel more intentional.
Measure through the center for border lengths. Sew side borders first, then top and bottom.
Visual checkpoint: with the border attached, the quilt should look calmer and more framed.
7. Baste the layers
Press the top and backing. Create the quilt sandwich with backing, batting, and top. Because the finished quilt in the image has a very soft, lived in drape, low loft cotton batting is ideal.
Smooth each layer carefully and baste thoroughly. Plant themed prints tend to look best with gentle quilting that does not crush the surface too heavily, so good basting helps you use lighter quilting without puckers.
8. Quilt with soft curves or light grid lines
You have two good options for this style.
The first is a simple crosshatch or grid using straight lines. This gives a clean, understated finish and works well for beginners.
The second is gentle organic wave quilting, which suits botanical prints beautifully. Mark soft flowing lines and quilt them with a walking foot or free motion quilting if you are comfortable with it.
The image suggests a subtle, not overly busy quilting texture. Keep your quilting spaced enough to preserve drape.
Visual checkpoint: the quilt should now have a softly crinkled, inviting surface that still lets the botanical prints shine.
9. Trim and bind
Trim the edges square. Prepare binding strips about 2.25 inches wide. A dusty rose binding is especially lovely here because it echoes the soft pink squares in the image without looking too dark.
Attach the binding to the front, then fold it to the back and hand stitch. A machine finished binding is fine for practicality, but hand stitching gives the most refined result.
10. Give it the right final texture
After finishing, a gentle wash can bring out that romantic quilted texture. If your prints are delicate or your colors are not pretested, use cool water and color catchers the first time. Air dry partially, then finish drying flat or on low.
Drape the quilt over a sofa back with soft folds rather than pulling it flat. The image looks relaxed and domestic, not formal or tightly staged.
Troubleshooting
My prints disappear into each other
Add more contrast. Use a few lighter cream pieces or one or two slightly deeper sage or coral pieces to separate similar prints.
The quilt looks too busy
Increase the size of the solid sections or remove one or two stronger prints. Large scale calm is the goal.
My quilting puckered the front
This often means the layers were not basted securely enough or you started quilting from one edge. Start near the middle and work outward.
The throw feels too stiff
Use lower loft batting next time and widen your quilting spacing. Dense quilting can make a soft sofa throw feel board like.
The border is wavy
Borders likely stretched during sewing or were cut from the quilt edge instead of measured. Measure through the center and support the quilt fully while stitching.
Finishing details
This style looks best when the finish feels soft, elegant, and unfussy. A low loft batting and gentle quilting preserve that graceful drape. For an especially pretty finish, consider rounded corners before binding, though square corners are easier and more classic. You can also add hand tied quilting knots in a few floral centers if you want extra charm.
Optional upgrades include a reversible floral backing, scalloped machine stitching along the border, a decorative embroidered label, or a subtle flange inserted under the binding for extra definition. Keep all extras restrained so the serene botanical surface remains the focal point.
Shop Similar
- Botanical quilting fabric bundle in sage blush and cream
- Low loft cotton batting for soft throw quilts
- Dusty rose quilt binding fabric and matching thread
- Walking foot and quilting starter kit
- Floral backing fabric for vintage inspired quilts
Style It With
Minimalist Color Block Quilt Make It Yourself Tutorial
What you’re making
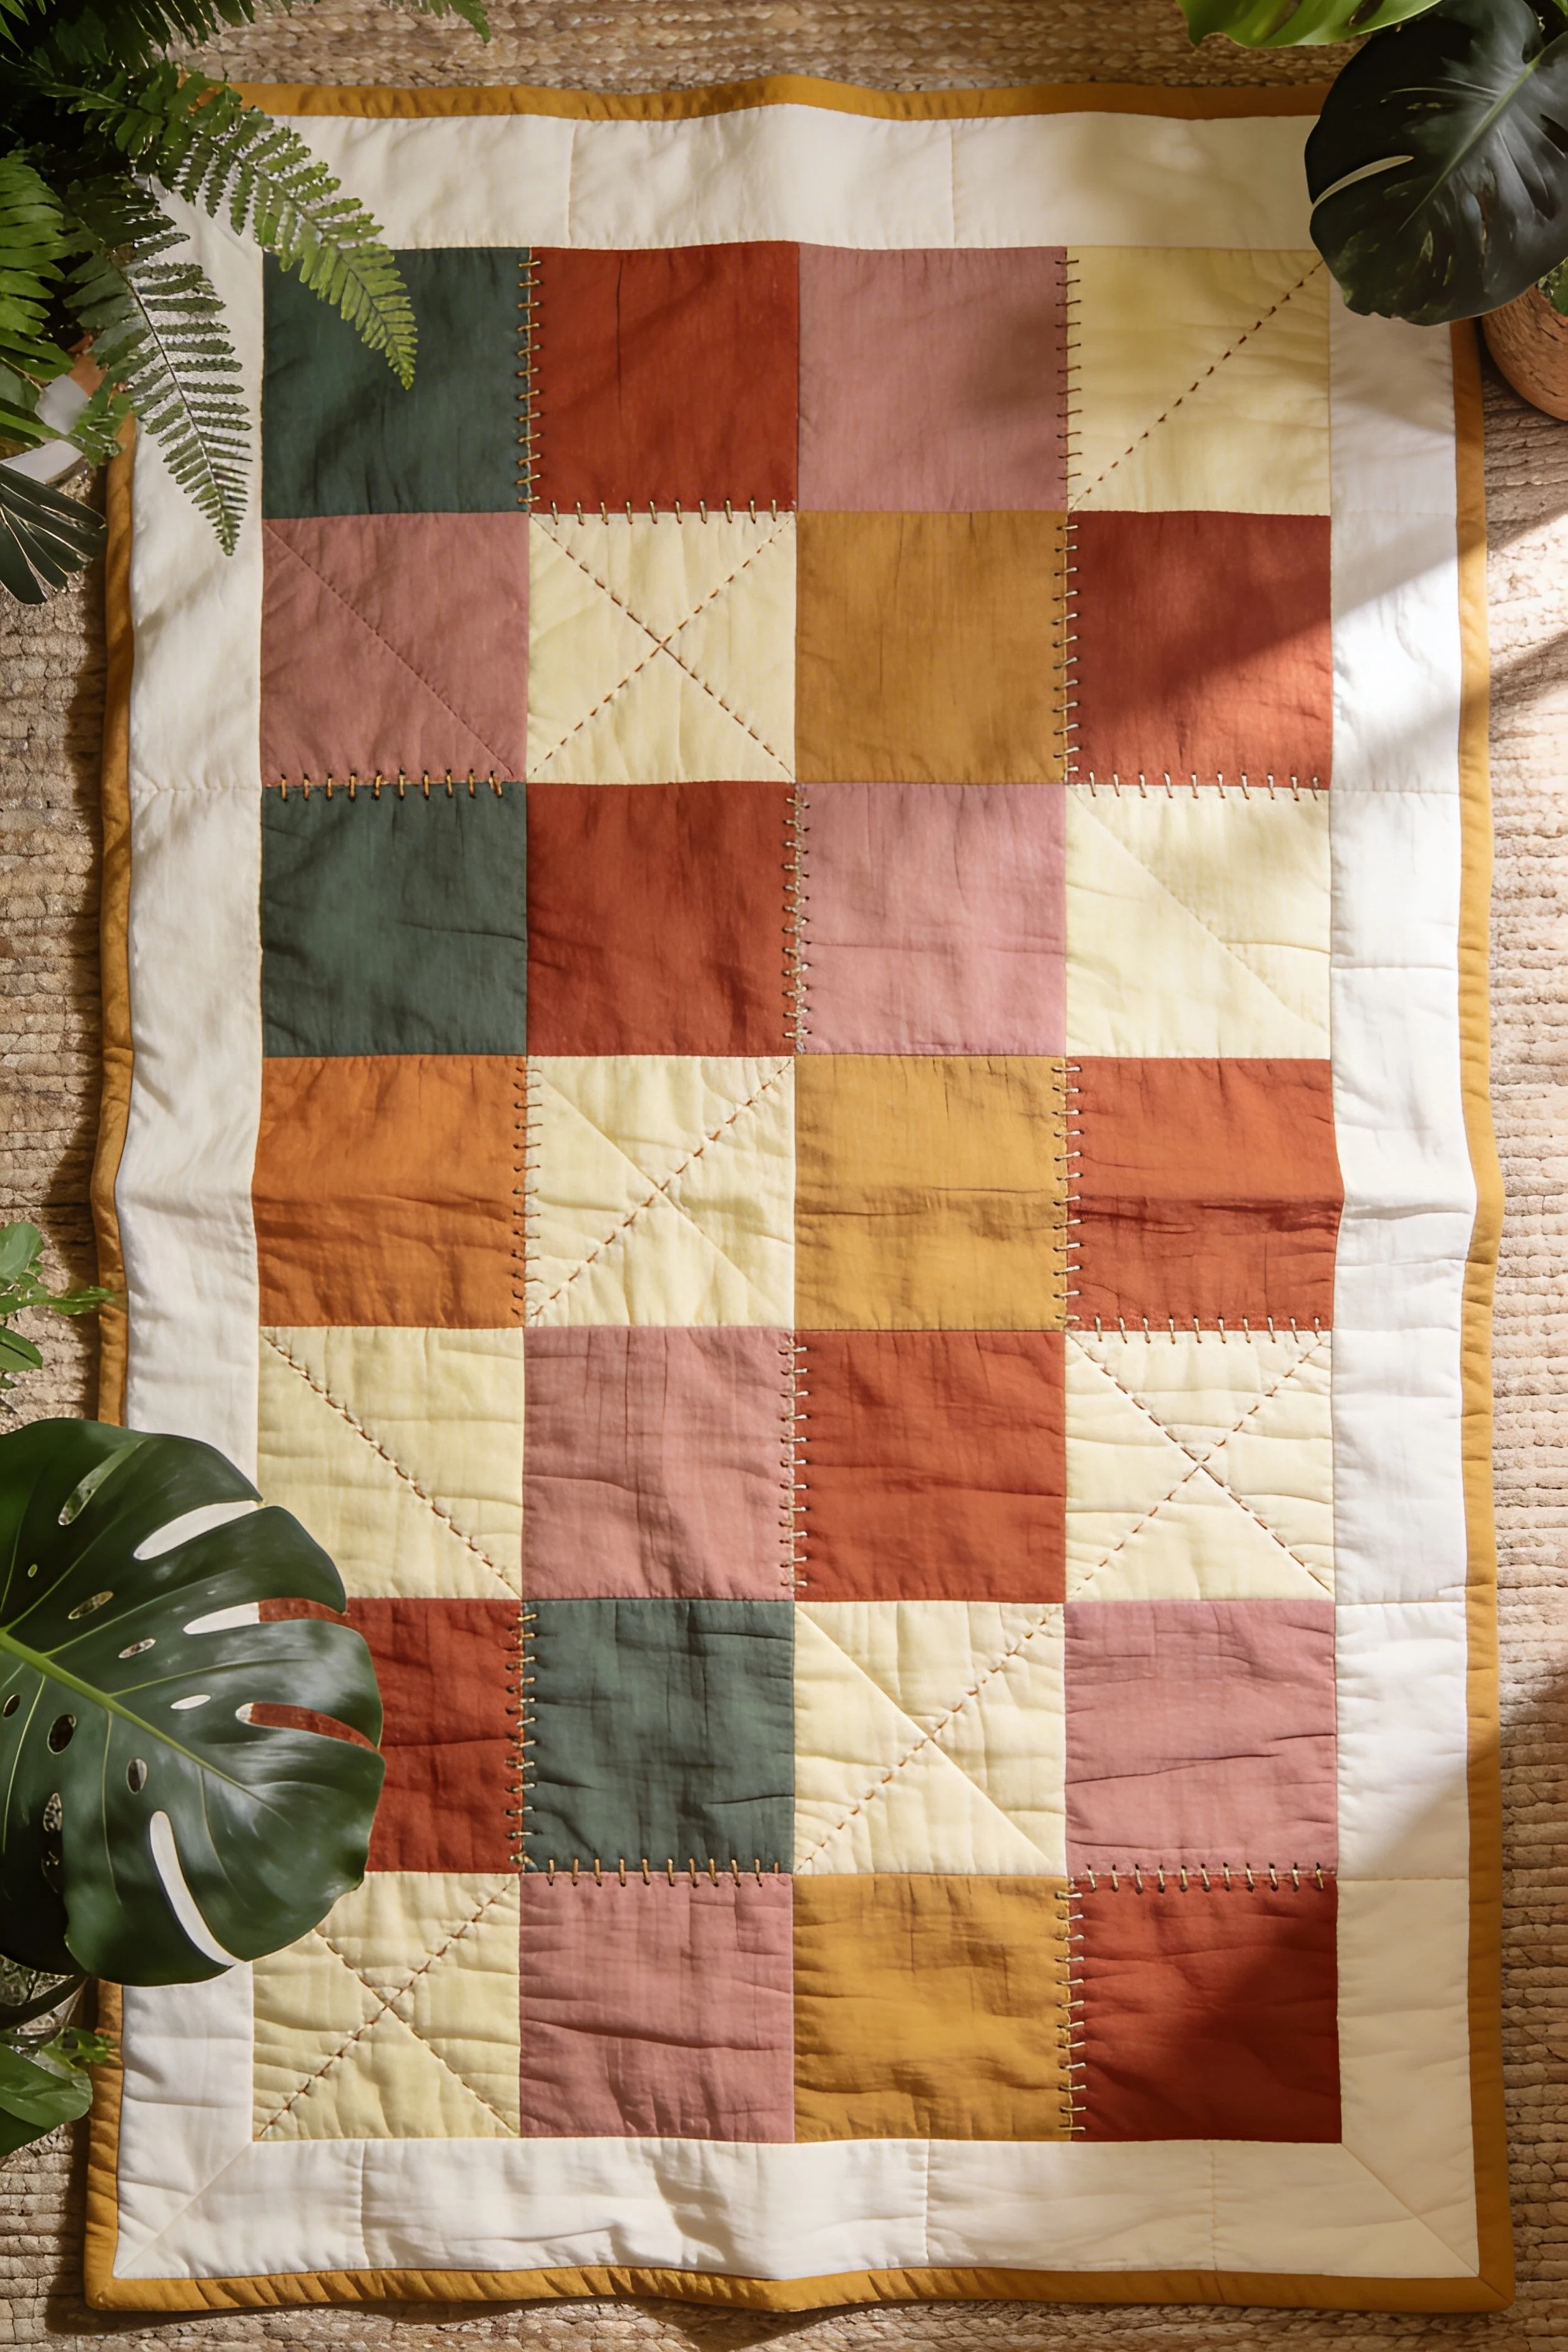
You’re making a modern color block quilt with oversized squares, a creamy border, and warm earthy shades of rust, blush, mustard, olive, and ivory. The design in the photo is simple, graphic, and calm, with visible hand style decorative stitching that adds just enough texture to keep it from feeling flat. It is the perfect project if you love the idea of quilting but prefer clean lines and restrained design over busy traditional patchwork.
This quilt is especially beginner friendly because it relies on large pieces and a simple arrangement. The sophistication comes from your fabric palette, neat construction, and subtle stitched detailing.
Materials + tools
- Solid quilting cotton or linen cotton blend in rust, blush, mustard, olive, ivory, and cream
- Extra cream fabric for the border
- Binding fabric in mustard or warm ochre
- Backing fabric in cream or a subtle tonal print
- Cotton batting
- Thread for piecing
- Heavier thread or pearl cotton for visible decorative stitching if desired
- Rotary cutter
- Quilting ruler
- Cutting mat
- Sewing machine
- Quarter inch foot
- Walking foot
- Hand sewing needle for decorative stitches
- Iron and ironing board
- Pins or clips
- Basting spray or safety pins
- Fabric marker
- Seam ripper
Finished size + customization notes
A great finished size for this style is about 48 x 64 inches. That gives you a modern throw proportion that matches the look of the image. Because the pieces are large, it also sews up relatively quickly.
To customize, you can shift the palette cooler or warmer while keeping the same structure. For the exact feel of the photo, stay in dusty muted tones rather than bright ones. If you like a more natural texture, use linen cotton blend. If you want the easiest piecing and the flattest seams, use all quilting cotton.
Step by step instructions
1. Decide on your block recipe
This quilt has a clean, modular look built from larger square units. One practical way to recreate it is with 8 inch finished blocks made from either:
- One solid square
- Four smaller quarter squares
- Half square triangle style units
- Simple diagonal seam units for variation
You do not need a complex repeated pattern. The image feels thoughtfully varied but still quiet. The trick is to mix a few block types while keeping the fabric palette disciplined.
Visual checkpoint: your planned block options should feel few and intentional, not like a sampler quilt with too many different ideas.
2. Cut your pieces
Cut the following as a starting point:
- Full squares from each color
- Smaller squares to combine into four patch style units
- A set of squares that can be cut diagonally for half square triangle inspired blocks
You can make as many blocks as needed for your chosen size. Keep the cream and ivory pieces plentiful because they brighten the design and help it breathe.
Tip: label your pieces if your fabrics are similar in tone. Blush, rust, and mustard can look surprisingly alike when stacked.
3. Sew your block variations
Make a batch of simple full square blocks first. Then sew some four patch style blocks. Then create a few diagonal blocks by pairing two triangles into one square. The quilt in the image also features decorative stitch lines crossing certain blocks, so consider where those accents will go before final assembly.
Press carefully. Because this design is so minimal, crisp seams make a noticeable difference.
Visual checkpoint: each finished block should look clean and architectural. If a block feels too busy, simplify it.
4. Lay out the quilt
Arrange the blocks into a rectangle, balancing color and shape. Do not place all the darkest blocks in one area. Spread mustard and rust around so the warmth feels even. Keep enough cream and ivory between stronger colors.
This kind of quilt benefits from negative space. Resist the urge to fill every block with contrast. The quiet blocks are what make the colored ones feel special.
Take a photo and view it in black and white if you can. That helps you spot whether all the darker values accidentally landed on one side.
5. Add decorative stitch planning
One distinctive detail in the image is the visible line work inside some blocks. You can recreate that in two ways.
The first option is to quilt these lines later through all layers.
The second option is to add decorative hand stitching to the quilt top before layering. This works especially well if you want a crafted, slow made look.
Mark simple X shapes, diagonal lines, or edge stitches on selected blocks. Keep it restrained. A few special blocks go further than covering everything.
Visual checkpoint: you should now see a balanced layout with occasional stitch details that add interest without clutter.
6. Sew rows and join them
Piece your blocks into rows with a quarter inch seam. Press seams to one side or open, depending on bulk. Then sew rows together.
Because the design is graphic, alignment matters a bit more here than with a busy print quilt. Take your time matching seams so the grid looks intentional.
If a row seems slightly off, measure it before forcing it into place. Fixing one block is easier than fighting the whole quilt later.
7. Add the wide border
The photo includes a generous cream border that gives the quilt breathing room. Cut border strips wide enough to make a noticeable frame, not just a tiny edge. A 4 inch finished border is a good place to start.
Measure through the center of the quilt for accurate border lengths. Sew side borders first, then top and bottom.
This border is important to the overall look. It gives the design that gallery like, composed quality.
Visual checkpoint: once the border is attached, the quilt should feel calm, modern, and polished.
8. Layer and baste
Create your quilt sandwich with backing, batting, and top. Smooth carefully and baste thoroughly. Large open areas in minimalist quilts show puckers more easily, so extra care here pays off.
Tip: use a floor or large table and smooth from the center outward. Do not rush this stage.
9. Quilt with simple lines
Straight line quilting is ideal here. Stitch in the ditch around major block seams, then add select lines inside blocks where you want more texture. You can also quilt a simple grid across the border to keep it crisp.
Use a walking foot and start near the center. Keep thread color subtle unless you want the stitches to become a stronger design feature.
If you love the hand stitched look from the image, add a second pass of large hand stitches along a few seam lines after machine quilting.
Visual checkpoint: the quilt surface should now have understated structure, with just enough stitched detail to look bespoke.
10. Trim and bind
Trim the quilt square and prepare your binding. A mustard binding gives a beautiful warm edge that echoes the border tone in the photo. Sew binding to the front, fold to the back, and finish by hand for the cleanest look.
Take extra care at corners because the minimalist design makes finishing details more visible.
11. Final styling
This quilt looks especially beautiful laid flat or lightly draped in a bright room with woven textures and plants. If you want the exact visual mood of the photo, display it where the warm palette can glow in natural light.
A light steam press after finishing helps the blocks lie neatly, but do not flatten it so much that you lose the quilted texture.
Troubleshooting
My quilt looks too plain
Add a few more stitched accents inside select blocks rather than adding more fabrics. Texture is the answer here, not more pattern.
My colors feel off
If it looks too orange, add more blush and cream. If it feels washed out, deepen one or two blocks with olive or rust.
My border ripples
Measure through the center and avoid easing too much fullness into the border. Large borders reveal inaccuracies quickly.
The decorative stitching looks messy
Mark your lines lightly first and use a longer stitch length or larger hand stitch spacing. Slow, even stitches look better than tiny tense ones.
My quilt is not square
Large block quilts magnify small cutting errors. Check block size before assembly and square up the top before adding borders if needed.
Finishing details
The best finishing detail for this quilt is restraint. Use simple binding, soft batting, and a clean back. For a more artisanal finish, add visible hand stitches in a coordinating thread along a few block divisions. For a more polished designer look, keep the quilting purely machine stitched and minimal.
Optional upgrades include a pieced backing from leftover solids, a contrast thread for the decorative stitching, a sleeve for hanging the quilt as wall art, or a linen label stitched discreetly on the back. This quilt can easily function as both a practical throw and a textile statement piece.
Shop Similar
- Solid quilting fabric bundle in blush rust mustard olive and cream
- Linen cotton blend fabric for modern quilts
- Cotton batting for modern throw quilts
- Quilting ruler rotary cutter and mat kit
- Pearl cotton for visible hand quilt stitching
Style It With

Cozy Cottage Patchwork Quilt Step by Step Tutorial
What you’re making
You’re making a cozy cottage style patchwork quilt with soft cream, camel, sage, rust, and gentle blue accents, finished with rounded softness and a bold contrasting binding. The quilt in the image looks inviting and practical, with large squares, visible quilting motifs inside some blocks, and enough structure to drape beautifully over a daybed or bench. It feels handmade in the best possible way, calm, homey, and quietly special.
This project is perfect for anyone who wants a useful everyday quilt with a warm natural palette and a little extra personality from the contrast edge.
Materials + tools
- Quilting cotton or linen cotton blend in cream, warm tan, camel, sage, rust, and one deep blue for binding
- Extra cream fabric for light blocks
- Backing fabric in cream, tan, or a subtle stripe
- Cotton batting
- Piecing thread
- Quilting thread in cream, tan, or medium brown
- Rotary cutter
- Cutting mat
- Quilting ruler
- Sewing machine
- Quarter inch foot
- Walking foot
- Iron and ironing board
- Pins or clips
- Safety pins or basting spray
- Binding fabric in deep blue
- Hand sewing needle
- Optional washable marker for quilting motifs
Finished size + customization notes
A finished size around 50 x 65 inches works beautifully for this design. It is large enough for practical lounging but still manageable for a newer quilter.
The quilt can easily be customized by changing the binding color. In the photo, the blue edge adds a subtle but memorable contrast. If you want a softer version, bind in tan or sage instead. If you want the exact look, keep the quilt body neutral and let the edge provide the drama.
Step by step instructions
1. Pull a warm neutral palette
This quilt succeeds because the color story is soft and grounded. Start with cream and tan as your base. Add rust for warmth, sage for earthiness, and just a little blue for contrast. Avoid overly bright blues or greens. The palette should feel sun faded and natural.
Lay the fabrics together and check the balance. Cream should be the biggest visual area. The stronger colors appear as supporting players.
Visual checkpoint: your palette should feel calm and cottage like, with one surprising cool note from the deep blue.
2. Choose a simple grid layout
The image reads as a straightforward patchwork grid made from generous squares and rectangles. A simple block size such as 8 inches finished makes the project easy to cut and sew.
Mix in a few blocks made from smaller units if you want more detail, but keep most of the quilt composed of large pieces. This helps preserve the open, airy feel.
A good plan is to make rows of mostly square blocks and let the quilting motifs create added interest later.
3. Cut your fabric
Cut a balanced mix of squares in cream, tan, sage, and rust. Keep cream plentiful. Then cut a smaller number of accent pieces in contrasting shades.
If using linen cotton blend, press carefully before cutting because these fabrics can shift more than quilting cotton. Accurate cutting makes the whole project smoother.
Tip: stack and subcut using a large ruler to keep your pieces consistent.
4. Lay out the quilt top
Arrange the squares on the floor or design wall. Separate same colored blocks so they do not clump together. The image shows rhythm rather than repetition. It looks casual, but the color distribution is thoughtful.
Add a few cream heavy sections to stop the quilt from feeling too dense. Place rust blocks where you want warmth and energy. Place sage where you want quiet grounding.
Visual checkpoint: from across the room, the layout should feel balanced and restful, not stripey or accidental.
5. Sew the quilt top
Sew blocks into rows using a quarter inch seam. Press carefully. Then join the rows.
Because the blocks are large, the top comes together quickly. This is a nice stage to enjoy because the quilt begins to look finished very early in the process.
If seams do not align perfectly, focus on keeping the overall grid straight. Tiny differences are rarely noticeable once the quilt is draped.
6. Plan the quilting motifs
One appealing detail in the image is the mix of simple quilting designs inside certain blocks. Some blocks have geometric starburst style quilting, while others have lines or subtle motifs. You can recreate this by marking a few different easy patterns.
Examples include:
- An X from corner to corner
- A simple star made from straight lines
- Parallel vertical or horizontal lines
- A square spiral
- Stitch in the ditch around block edges
Use only two or three motif types so the quilt remains cohesive.
Visual checkpoint: your quilting plan should add handcrafted character without turning the quilt into a sampler of too many designs.
7. Layer and baste
Prepare the backing, batting, and quilt top. Smooth and baste thoroughly. Since the quilt has larger plain areas, puckers are easier to spot, so secure basting matters.
A cotton batting keeps the quilt soft and breathable. If you want a plumper throw for lounging, a cotton polyester blend is also fine, but it will look slightly puffier than the image.
8. Quilt the design
Using a walking foot, quilt around and through the blocks. Start with stitch in the ditch along major seam lines to stabilize the quilt. Then add your block motifs in selected areas.
You do not need to quilt every block the same way. In fact, variation makes the quilt more charming. Just keep the spacing fairly even so the quilt wears well over time.
The blue binding in the photo makes the quilt feel modern, so let your quilting stay simple rather than ornate.
Visual checkpoint: the quilt should now have visible but understated texture, with certain blocks standing out gently through line work.
9. Add the binding
Trim the quilt square. Cut binding strips 2.25 inches wide from the deep blue fabric. Join the strips, press in half, and attach to the front of the quilt.
This edge is one of the most distinctive parts of the look. The cool blue frame makes the warm patchwork feel fresh and current. Sew carefully so the edge stays smooth and even.
Fold the binding to the back and hand stitch for a clean finish.
10. Wash or steam finish
If you love the crisp look, steam the quilt lightly and style it immediately. If you want more cozy texture, wash it gently and dry on low until just dry. The quilting will crinkle slightly and look even softer.
Drape it over a wicker daybed or bench and let it fall in soft folds, just like the image.
Troubleshooting
My quilt feels too yellow or brown
Add more cream and sage to lighten it. The palette should feel balanced, not muddy.
The blue binding looks too strong
Choose a softer navy or slate blue rather than a bright primary. You can also narrow the visible binding width slightly.
My quilting motifs wobble
That is normal at first. Mark them lightly before sewing and lengthen your stitch slightly for smoother lines.
My quilt top shifted during quilting
Baste more densely and begin from the center. Smooth the quilt frequently as you work.
The drape feels stiff
Lower loft batting and less dense quilting will help. This quilt should feel cozy and fluid, not rigid.
Finishing details
For a polished finish, bury your thread tails where possible and keep the back neat. A contrast binding deserves tidy corners, so take your time with the miters. If you want extra personality, add a pieced backing strip made from the leftover patchwork colors. You could also stitch a small hand embroidered label to the back edge.
Optional upgrades include adding hand stitched topstitching around the binding, using a striped backing for a subtle cottage touch, quilting a larger starburst motif in one center block for emphasis, or making a matching pillow cover from leftover fabric. This quilt is a lovely everyday piece, so durability and softness should guide your finishing choices.
Shop Similar
- Warm neutral quilting fabric bundle with cream rust sage and tan
- Deep blue quilt binding fabric for contrast edges
- Cotton batting for soft everyday throw quilts
- Walking foot and quilting marking tools
- Linen cotton blend fabric in neutral quilt colors
Style It With
By the end of this collection, the real appeal of patchwork becomes impossible to miss. A quilt is never just a blanket. It is color, texture, atmosphere, and memory stitched together into something useful enough for everyday life and beautiful enough to shape the mood of a space. These five tutorials show just how much range that can hold, from clean modern geometry to soft botanical romance to richly layered heirloom charm. Each one gives readers a chance to make something that feels intentional from the first cut to the final binding stitch.
That is what makes a post like this so strong. It is not only about learning technique. It is about helping someone picture the finished piece in their own home and then giving them the confidence to make it. A handmade quilt can warm a bed, soften a reading nook, brighten a guest room, or become the one piece everyone reaches for when the light turns golden and the house gets quiet. These designs invite exactly that kind of use. They are practical, beautiful, and lasting, which is why patchwork never really goes out of style.