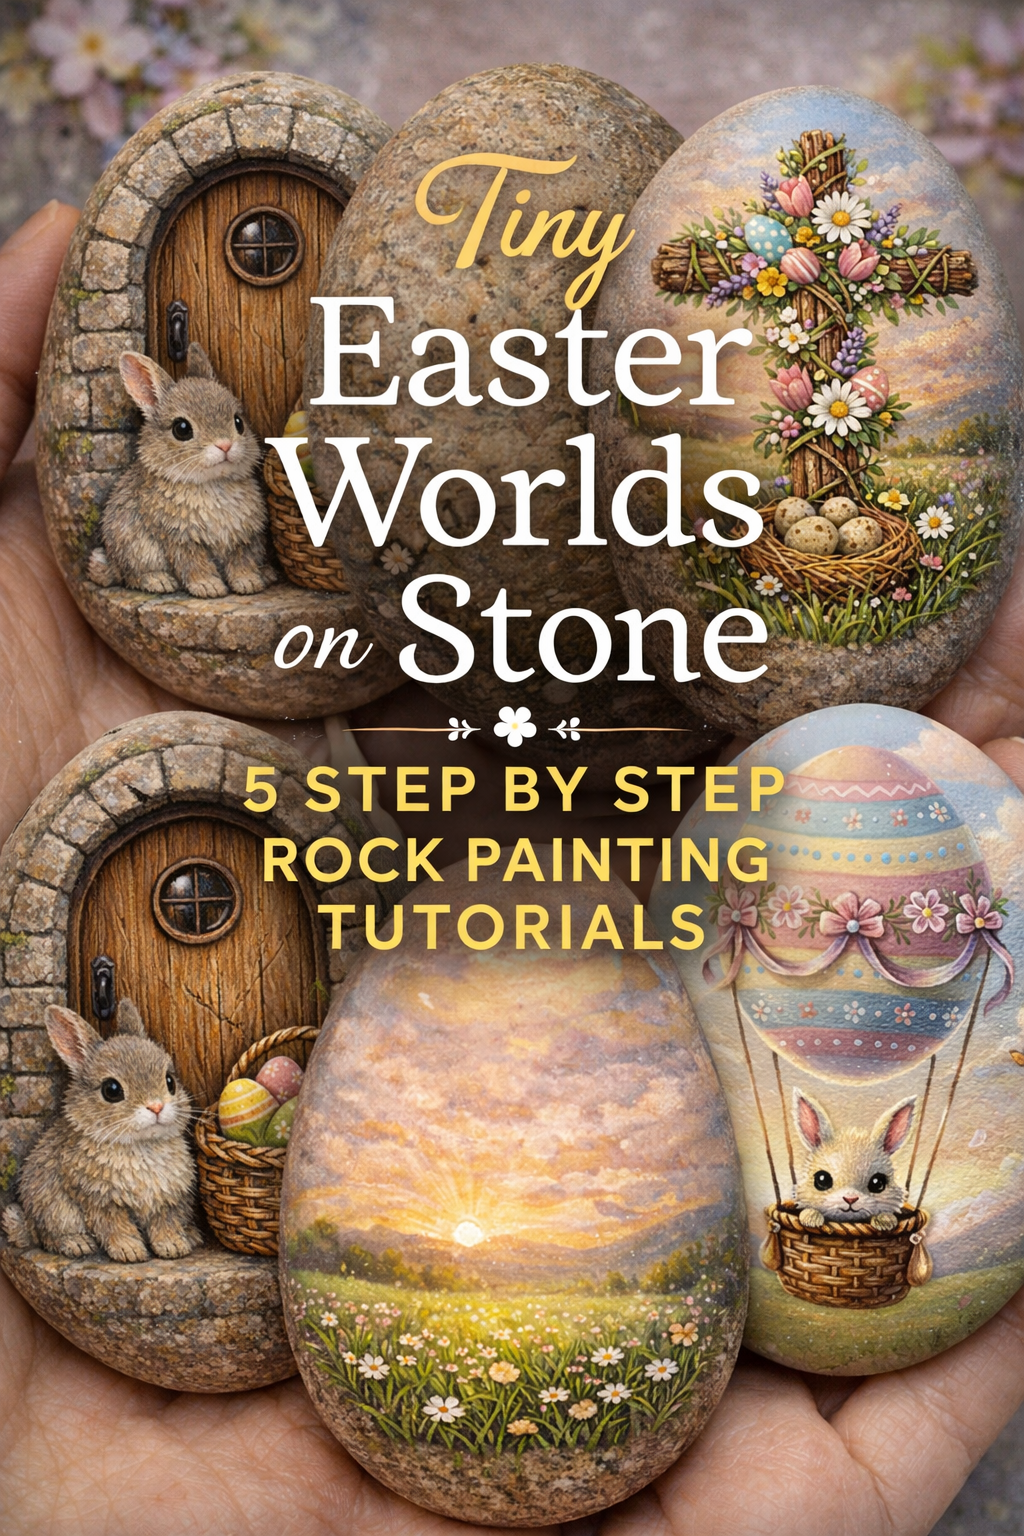
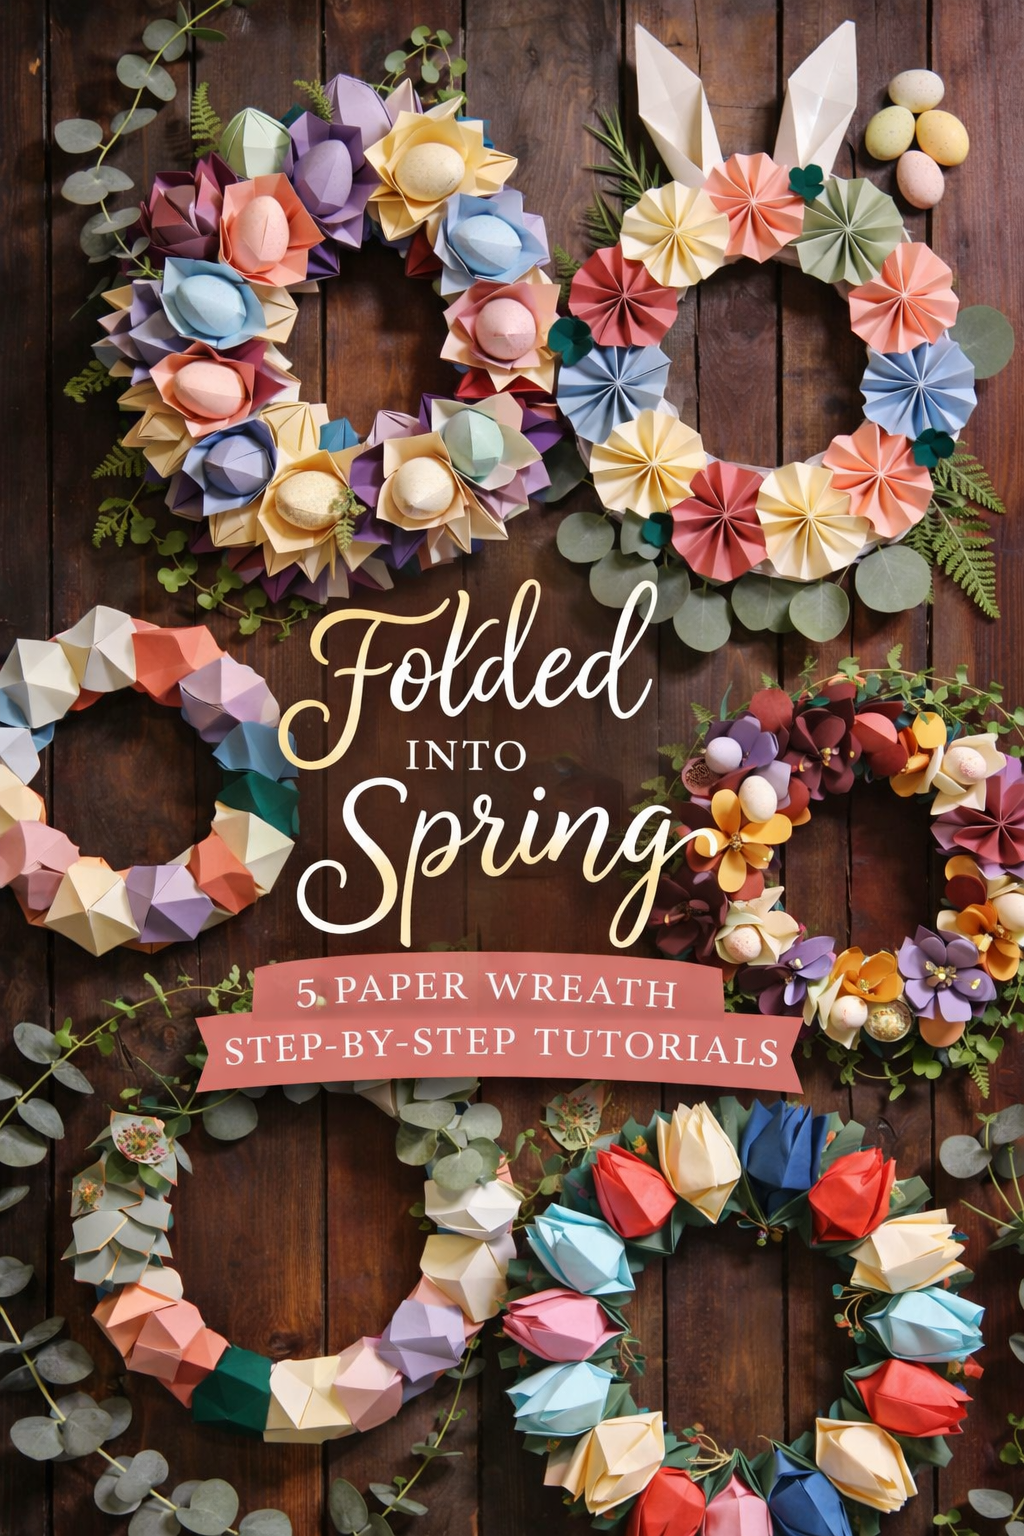
Tiny Easter Worlds on Stone: 5 Step by Step Rock Painting Tutorials

More like this

💡 Pro Tip: Why I Link to Amazon Search Results and Not One Product
In the Shop the Look and Style it With sections under each bikini, I link to Amazon search results, not single products. Here’s why this matters:
Hot bikinis sell out fast. I don’t want you clicking on a dead link to a sold-out item. Search pages stay updated.
You get more options. Love the vibe but want a different color, cut, or price point? The search results give you everything that matches the look and energy.
I curate each search carefully. These aren’t generic. I spend hours crafting keywords that bring up exactly the kind of bikinis I’d wear—or recommend to my hottest friends.
Support with no pressure. If you click a link, browse, and buy something later, I may earn a small commission at no extra cost to you. That helps me keep bringing you curated collections like this one—powerful, seductive, and always fresh.
So dive in. Click through. Try something risky. These aren’t just bikinis—they’re commands, statements, and maybe even your new favorite weapon of choice.
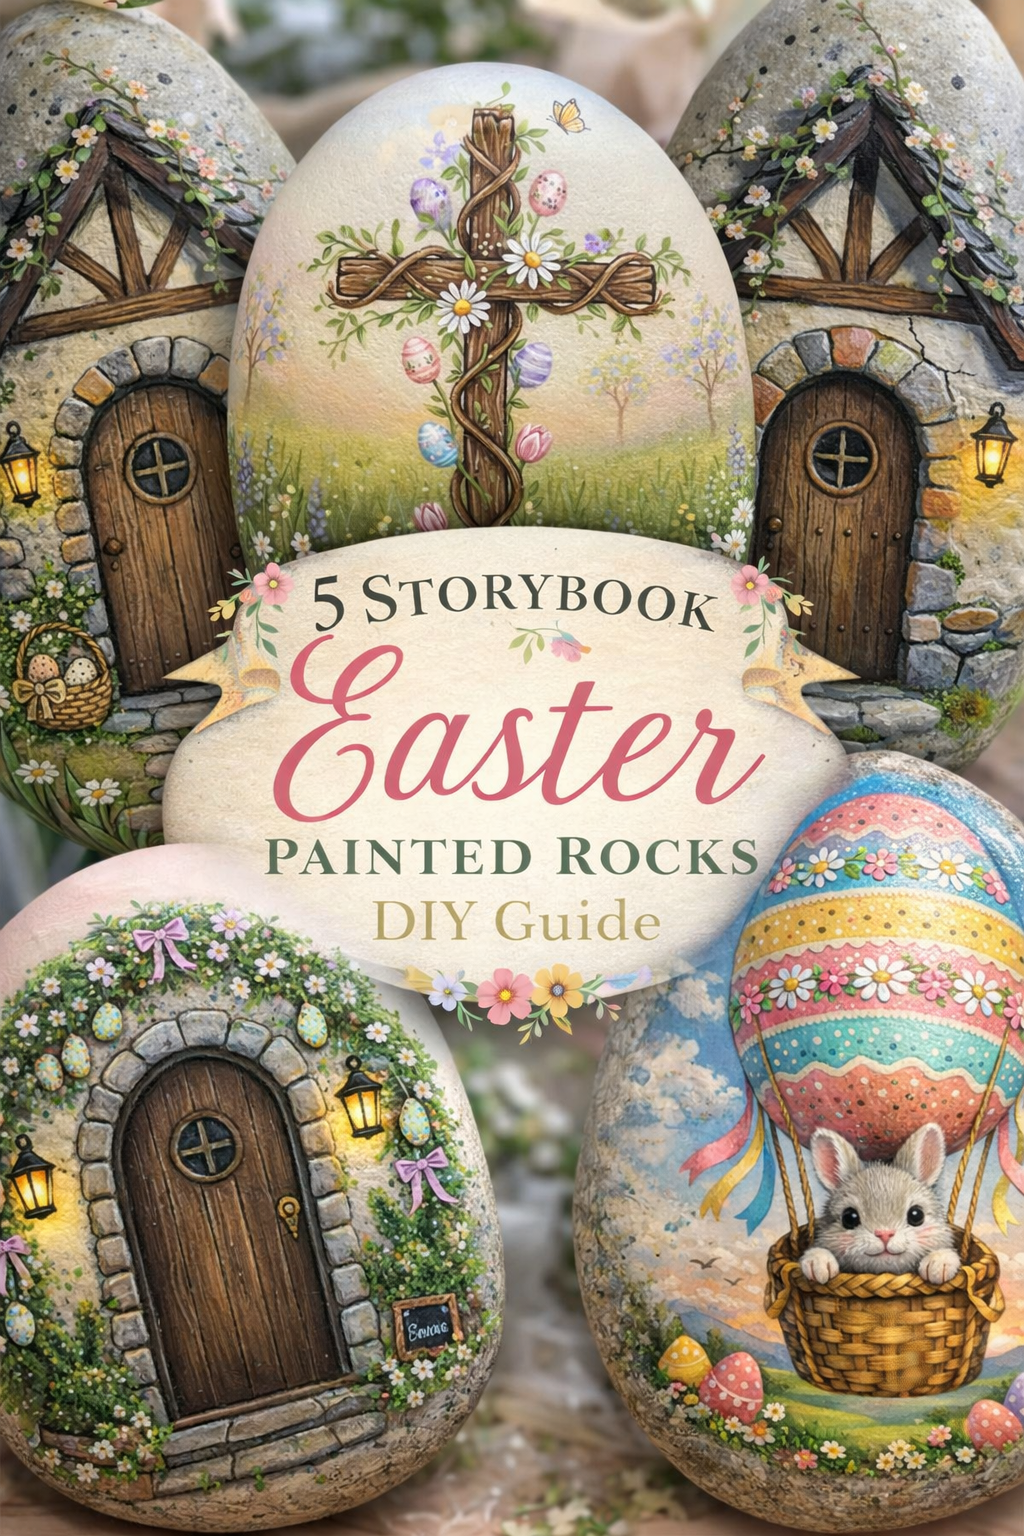
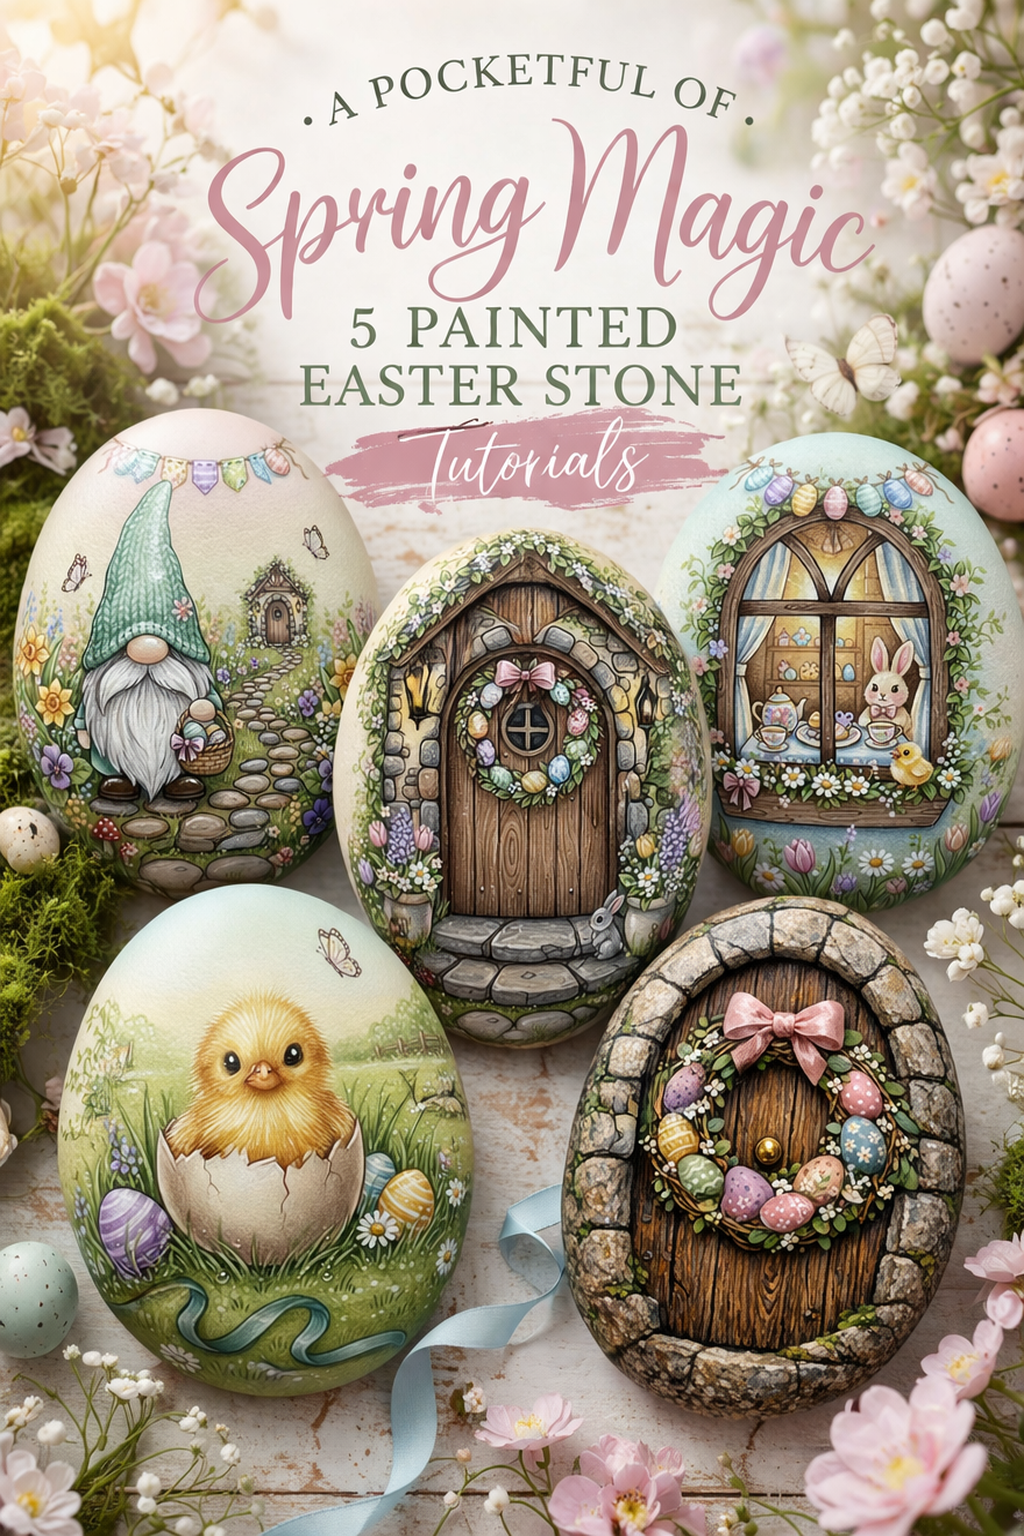
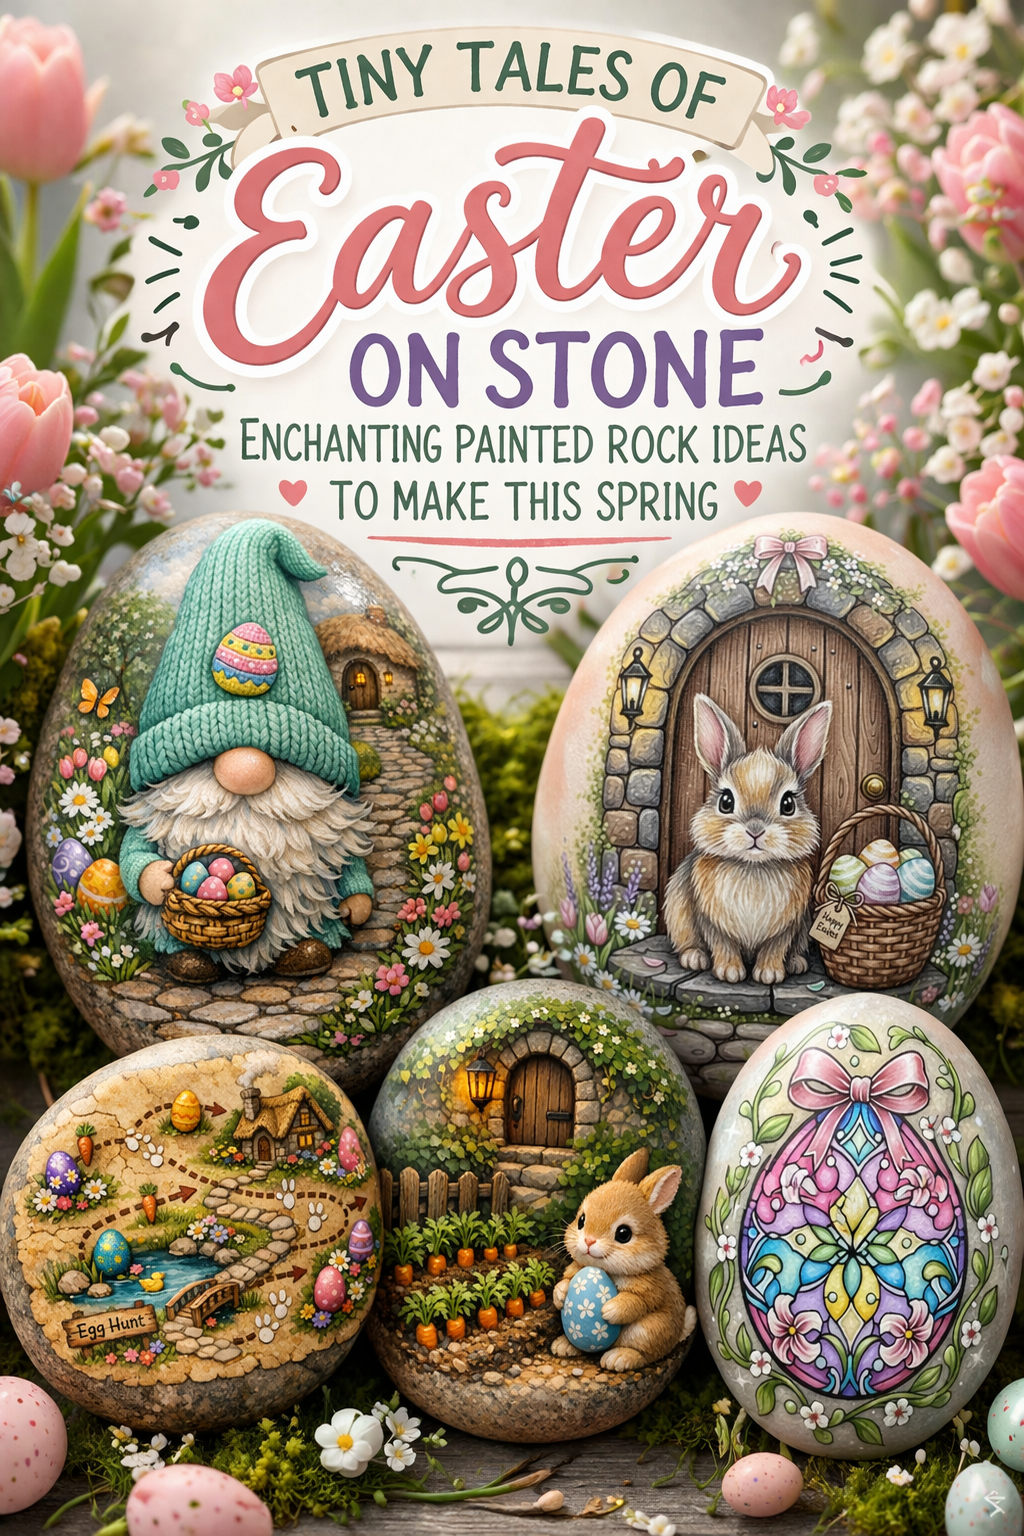
There is something especially magical about Easter crafts that feel tiny enough to hold in your hand and detailed enough to tell a whole story. This collection of painted stone tutorials turns ordinary smooth rocks into miniature spring worlds filled with hatching chicks, woodland bunnies, floral crosses, pastel balloons, and glowing fairy doors. Each design captures a different side of Easter charm, from sweet and playful to peaceful and symbolic, while still keeping the process approachable for a patient beginner.
What makes these projects so satisfying is the combination of natural texture and painted detail. The shape of each stone already gives you the perfect foundation for an egg inspired silhouette, and from there you build layers of color, shadow, and tiny decorative accents that make each piece feel alive. Whether you want to create a thoughtful handmade gift, style a spring shelf, fill an Easter basket with something unexpected, or simply spend an afternoon painting something beautiful, these tutorials are designed to help you create keepsake pieces that feel both whimsical and polished. Set out your paints, choose your favorite smooth stones, and let this little collection of Easter worlds come to life one brushstroke at a time.
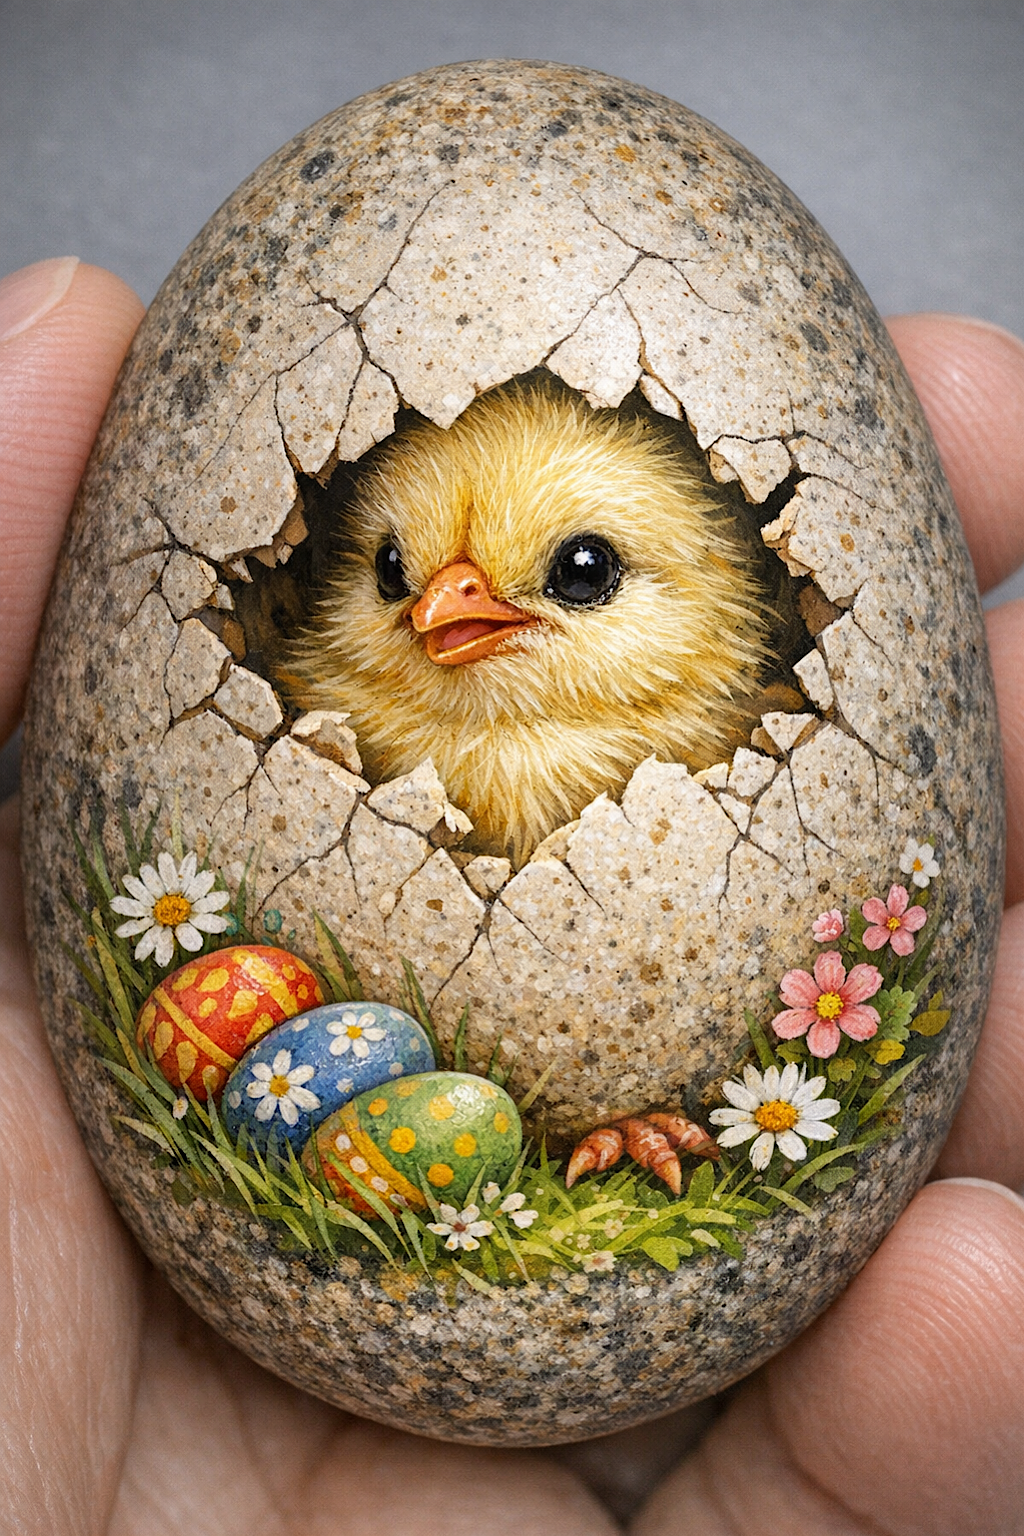
Cracked Chick Easter Egg Rock Art Step by Step Tutorial
What you’re making
You’re painting an Easter egg shaped stone so it looks like a tiny chick is hatching right out of the rock. The finished piece has a realistic cracked shell opening, soft yellow fluff, glossy black eyes, a tiny orange beak, spring grass, daisies, and a cluster of decorated Easter eggs near the base. It is the kind of project that feels impressively detailed when finished, but it is absolutely possible to build in layers if you work patiently and let each section dry.
This look works best on a smooth oval river rock that naturally resembles an egg. The magic of this design is contrast: rough stone texture on the outside, delicate baby chick features in the center, and cheerful miniature floral details along the bottom edge.
Materials and tools
- Smooth egg shaped river rock, about 3 to 5 inches tall
- Mild soap and water
- Soft toothbrush or small scrub brush
- Paper towels or lint free cloth
- Matte acrylic paints in ivory, cream, warm gray, tan, brown, black, white, lemon yellow, golden yellow, pale peach, orange, grass green, olive green, pink, blue, red, and tiny touches of lavender
- Acrylic paint pens in white, black, and fine detail colors if preferred
- Small round brushes in sizes 0, 1, and 2
- Fine liner brush for cracks and whisker like feather strokes
- Small flat brush for base coating and dry brushing
- Graphite pencil or white transfer pencil
- Palette or ceramic plate
- Cup of water
- Cotton swabs
- Optional magnifier or reading glasses for tiny details
- Matte or satin acrylic sealer
- Optional gloss varnish just for the eyes and beak
Finished size and customization notes
A 3 to 4 inch stone is the easiest size for this design because it fits comfortably in your hand while still giving you enough space for the chick’s face and the tiny Easter accents. If your stone is smaller, simplify the bottom floral border and paint only one or two decorated eggs. If your stone is larger, you can widen the cracked opening and add more fluffy feather texture around the chick.
You can shift the color palette easily. A pale butter yellow chick looks classic, while a slightly deeper golden chick gives more contrast against a cool gray stone. If your rock is very dark, prime the painted area with a thin coat of ivory first so your colors stay bright.
Step by step instructions
Wash and prepare the stone.
Scrub the rock with soap, water, and a toothbrush to remove dust and oils. Rinse well and dry completely. If the stone is polished and very slick, lightly buff the painting area with a fine sanding pad or simply apply a thin matte base coat in diluted ivory to help later layers grip. You should now see a clean, dry surface with no chalky residue or damp spots.Study the shape before you sketch.
Turn the rock until the broadest rounded side faces forward. The best front is usually the side that already feels the most egg like. Imagine the chick’s face sitting slightly above center, with the grassy floral border hugging the lower curve. This planning step matters because natural stone shape does a lot of the design work for you.Lightly map the composition.
Sketch a rough oval opening where the shell will appear broken. Keep the opening wide enough to show both eyes and the beak. Then draw a soft rounded chick head within that opening. Add a loose grassy border at the bottom and place three tiny eggs off to one side. Do not press hard. These are guide marks, not permanent lines.Paint the inner shadow area first.
Before painting the chick, fill the inside of the cracked opening with a very dark mix of brown and black. Keep the darkest color near the shell edges and slightly lighter toward the center where the chick will sit. This underpainting creates depth. If yours looks too flat, blend a bit of warm umber into the darkness instead of using pure black everywhere.Block in the shell edges.
Mix ivory with a touch of warm gray and tan to create a believable shell tone that still feels separate from the natural rock. Paint jagged broken shell pieces around the opening, following your sketch. Let some triangular and irregular chunks overlap the dark interior. Leave tiny unpainted lines between some pieces for cracks. You should now see the illusion of a broken egg shell sitting on top of the stone.Start the chick with a soft base layer.
Paint the chick’s face and chest area in a pale creamy yellow. Keep the paint smooth and opaque. Do not worry about fluff texture yet. Shape the head as a rounded puff that fills the opening naturally. A little asymmetry makes it look more alive.Build feather texture with layered strokes.
Once the base is dry, load a fine brush with slightly darker golden yellow and pull tiny short strokes outward from the beak area, cheeks, forehead, and neck. Add lighter cream strokes on top, especially around the brow and the chest fluff. Think of painting fur or fine down. Your strokes should follow the form, curving gently around the face. You should now see the chick become soft rather than flat.Place the eyes carefully.
Paint two glossy black ovals set low enough to feel baby like and close enough together to feel sweet. Add a hint of dark brown around the edges so they nest into the face. When dry, dot in crisp white highlights. Those highlights should land in similar positions in both eyes. If one eye looks larger, widen the fluffy feathers around the smaller eye instead of trying to keep enlarging the paint.Paint the beak.
Use peachy orange for the upper and lower beak. Shape it as a tiny soft triangle with a separated lower mouth. Add warm coral or burnt orange in the opening of the beak and a lighter highlight on the upper ridge. A tiny nostril dot helps sell the realism. If the beak becomes too big, trim the edges with feather colored paint once dry.Deepen the chick shadows.
Add a whisper of warm brown where the head tucks behind shell fragments and under the cheeks. This makes the chick feel nested inside the shell instead of pasted on top. The lower chest can have a few slightly darker strokes to suggest fluffy depth.Refine the cracked shell.
With a liner brush, paint fine branch like cracks radiating from the opening across the upper shell area. Use a brown gray, not stark black. Highlight a few shell chip edges with pale ivory and shadow their lower edges with a diluted gray brown. This light and shadow pairing makes the shell pieces look lifted and broken. If yours looks wider than the photo inspiration, simply extend more cracks upward so the opening feels intentionally dramatic.Blend the shell into the rock.
Because the stone itself is speckled, dry brush a touch of gray and tan across your painted shell so it harmonizes with the natural surface. This is one of the most important realism steps. You want the shell to look like part of the stone painting, not a flat white patch.Paint the grassy base.
Along the bottom curve, paint loose dark green blades first. Layer medium green, olive, and a few yellow green highlights over them. Vary the direction and length of the grass so it feels lively. Allow some blades to overlap the tiny eggs and shell base to create depth.Add the mini Easter eggs.
Paint three small eggs nestled into the grass. Start with solid base colors such as red orange, blue, and mint green. Once dry, decorate them with dots, stripes, tiny flowers, or curved bands in yellow, white, and orange. Keep patterns bold and simple at this scale. You should now see a cheerful little cluster balancing the chick above.Paint the flowers.
Add daisies with white petals and warm yellow centers, plus one or two pink blossoms for extra spring color. Use small comma shaped petals rather than trying to perfect every bloom. Add tiny leaf clusters around the flowers so they feel anchored in the grass.Add tiny foreground details.
A few little white flowers, a suggestion of moss, or tiny brown shell pieces near the bottom make the scene richer. Keep these details subtle. They should support the main chick, not compete with it.Correct edges and sharpen focus.
Step back and check what stands out first. It should be the chick’s eyes, face, and the cracked opening. If the flowers or eggs are stealing focus, mute them slightly with a soft glaze of cream or gray. If the chick looks lost, brighten the feather highlights around the cheeks and forehead.Seal the rock.
Let everything dry fully. Apply a matte or satin acrylic sealer in thin coats. After that dries, add a tiny bit of gloss varnish only to the eyes and beak if you want them to sparkle. That contrast makes the chick feel extra lifelike.
Troubleshooting
My chick looks flat.
Add more value contrast. Use darker warm brown shadows under the shell edges and brighter cream feather strokes on the forehead and chest.
The shell opening does not look broken.
Make the edges more jagged and irregular. Add highlight to the top edge of each chip and a slight shadow beneath.
The eyes look spooky instead of cute.
Move the white highlights higher and make sure both eyes are similar in size and angle. Softer feathering around the eyes also helps.
My tiny eggs look messy.
Let the base color dry completely before adding patterns. At miniature scale, dots and simple bands look better than overly complicated motifs.
The painted section feels separate from the stone.
Glaze a bit of gray tan over the shell and even the grass shadows so the whole design picks up the tone of the rock.
Finishing details
For the prettiest finished result, keep the surface mostly matte and reserve shine for only the eyes and beak. That difference in finish makes the chick look moist and alive while preserving the natural stone charm everywhere else. If you plan to display the rock outdoors on a porch or in a covered garden shelf, use an outdoor rated clear sealer and give it two to three light coats rather than one heavy coat.
You can also turn this design into a small collection by painting matching seasonal companions: one chick, one bunny, one floral cross, one fairy door, and one pastel balloon motif. Displayed together in a shallow moss lined tray, they read like a tiny Easter story set. Optional upgrades include adding a ribbon hanger with strong adhesive on the back for wreath display, attaching the finished rock to a small wooden stand, or tucking it into a spring centerpiece among faux moss and mini nests.
Shop Similar
- Smooth egg shaped river rocks for painting
- Fine detail acrylic paint brush set
- Matte acrylic paint set with spring colors
- White and black acrylic paint pens for rock art
- Clear matte sealer for painted rocks
Style It With
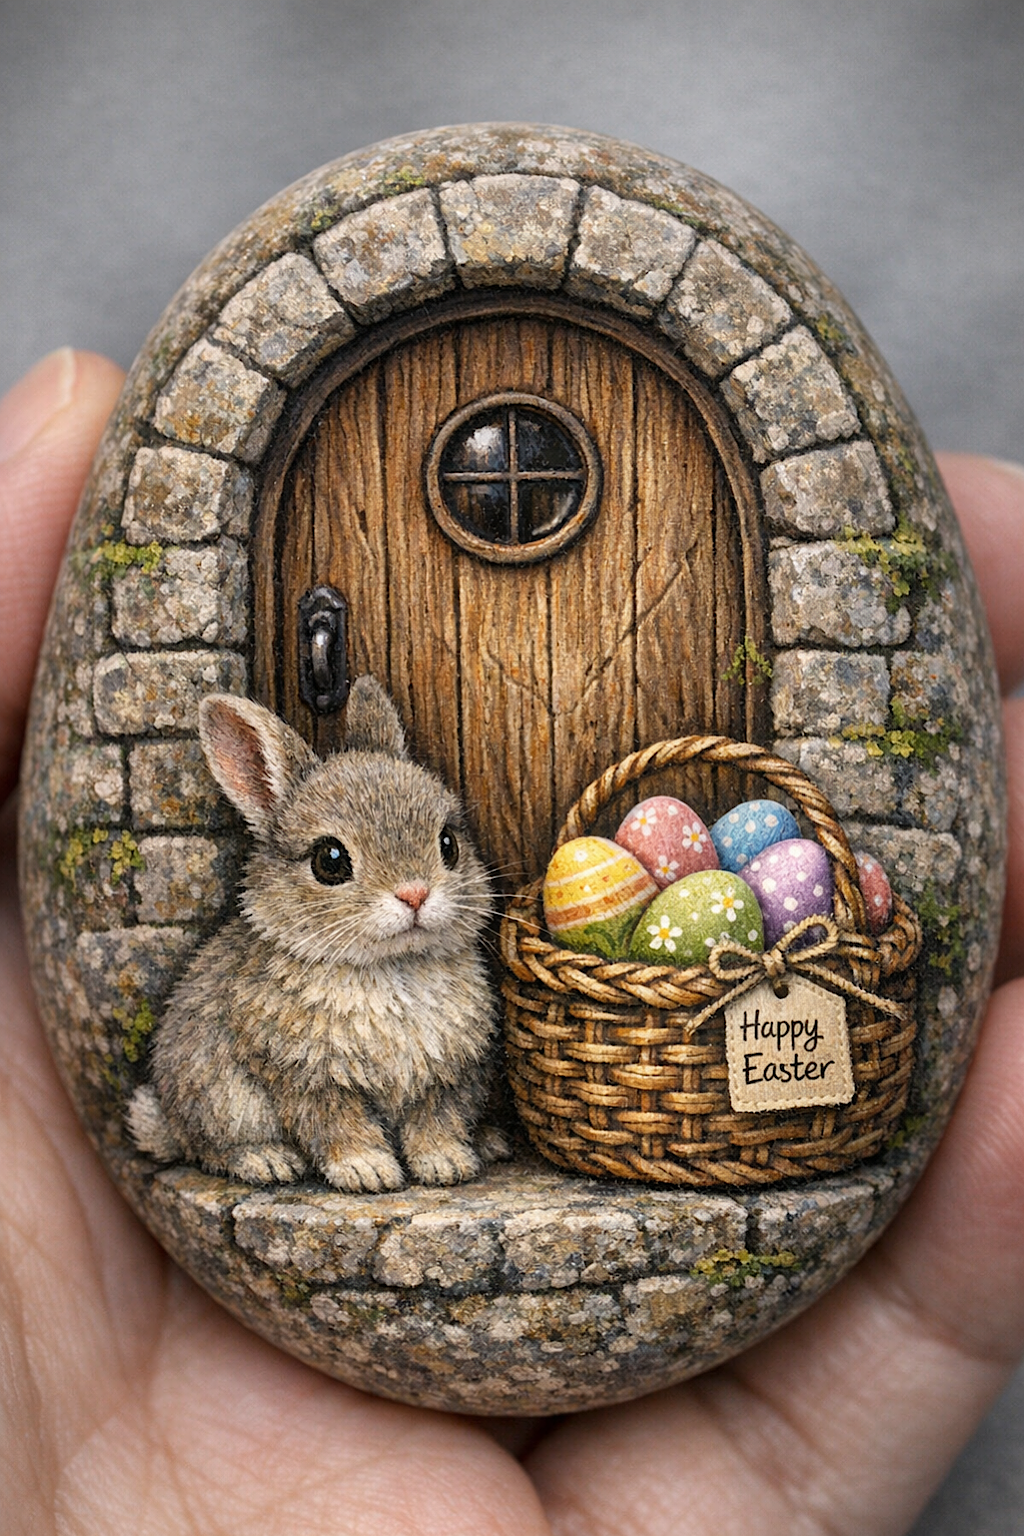
Bunny Cottage Door Easter Rock Painting DIY Guide
What you’re making
You’re creating a storybook style painted rock that looks like a tiny bunny sitting outside a rustic cottage door with a basket of pastel Easter eggs. The finished design has a stone arch, weathered wood door, soft gray bunny fur, a woven basket, and a warm woodland feel that makes the rock look like a miniature enchanted doorway.
This is a wonderful project for beginners who want a detailed result without needing to paint a full landscape. The door and arch give you a strong structure, while the bunny and basket bring in all the charm.
Materials and tools
- Smooth oval river rock, 3 to 5 inches tall
- Soap, water, and cloth for cleaning
- Acrylic paints in gray, cream, tan, brown, black, white, pink, moss green, pastel yellow, pastel blue, pastel purple, and soft peach
- Small round brushes in size 0, 1, and 2
- Fine liner brush
- Small flat brush
- Pencil or transfer pencil
- Palette
- Water cup
- Paper towels
- Optional acrylic paint pens for tiny details and lettering
- Matte or satin sealer
- Optional gloss varnish for the bunny’s eyes
Finished size and customization notes
This design works beautifully on an upright oval stone because the arch doorway fills the height nicely. A taller stone gives the door more presence. A wider stone gives the bunny more room, which is helpful if you want a fluffier rabbit or a larger basket.
You can customize the mood by changing the stonework. For a cottage feel, use warm gray and tan stones with moss. For a fairytale look, soften everything with more cream and pale taupe. For a more rustic Easter piece, make the door darker and the basket more heavily textured.
Step by step instructions
Clean and dry the rock.
Wash off dust and oils, then dry thoroughly. Hold the stone upright and decide which side gives you the smoothest front. The best face should have enough uninterrupted space for a centered arch door.Sketch the main shapes.
Lightly draw an arched wooden door in the upper center. Around it, sketch a stone arch made from uneven blocks. Add a stone step at the bottom. On one side of the step, draw a sitting bunny. On the other side, sketch a basket filled with eggs. You should now see a balanced doorway scene with the bunny and basket acting like visual bookends.Base paint the door opening.
Fill the door area with a medium warm brown. Paint the inside edge of the arch a darker brown so the doorway feels recessed. Keep that shadow darker along the sides and top.Paint the wood grain.
Once the base coat dries, use a liner brush and slightly darker brown to pull vertical grain lines down the door. Add a few thinner lighter tan streaks as highlights. Do not make every line straight. Slight wobble looks more natural. The door should now feel wooden rather than flat.Add the little round window.
Paint a small round window near the top of the door. Outline it in dark brown or black, then add a crossbar inside. Fill the panes with a very deep brown black and add tiny white highlights to suggest glass reflection. If your circle goes uneven, correct the outer edge with the door color before adding more detail.Block in the stone arch.
Paint each stone block in slightly different mixes of gray, taupe, beige, and warm cream. Variation is the key here. Real stone never looks identical block to block. Leave narrow dark lines between the blocks to create mortar joints. You should now see the arch frame begin to stand out from the rock.Shade the stones for dimension.
Add a soft shadow on the lower edge of each stone and a gentle highlight on the upper edge. This simple light pattern turns flat painted shapes into believable stones. Add a little moss green in crevices, especially near the outer arch and lower stones.Paint the step.
Use the same stone colors for the bottom step, but make it slightly darker beneath the bunny and basket so they look grounded. A faint shadow under both objects keeps them from floating.Paint the bunny shape.
Start with a warm gray tan base for the bunny. Keep the head rounded and slightly oversized for sweetness. Add cream to the chest, muzzle, and inner ear areas. The bunny should sit close to the door, almost as though it lives there.Add fur texture.
Using a fine brush, pull tiny short strokes in light cream and darker gray following the direction of fur growth. The cheeks and chest need the softest fluff. The back can be slightly smoother. You should now see the bunny become plush and dimensional.Paint the face.
Add large dark eyes, a tiny pink nose, and subtle mouth lines. A small white highlight dot in each eye makes the face come alive. Keep the expression gentle and curious. If the bunny looks too stern, soften the eye shape into rounder ovals and brighten the muzzle.Paint the basket.
Block in the basket with a medium brown. Then use a liner brush to create a woven pattern using darker and lighter strokes. Suggest crossing bands rather than painting every weave perfectly. Add a looped handle and a little tied tag if you want the same cozy look. A small label can say “Happy Easter” if your hand is steady, but a blank tag also looks lovely.Add the eggs inside the basket.
Paint the egg shapes in pastel yellow, pink, blue, green, and lavender. Decorate them with dots, stripes, and tiny daisies. Because the basket is already textured, keep the egg patterns a bit cleaner so they stand out.Deepen the shadows.
Darken the space between bunny and basket, under the basket rim, and under the bunny paws. Add a soft shadow under the round window arch as well. These little depth cues make the miniature scene feel tucked into the stone.Add moss and age.
Dot mossy green and yellow green onto cracks between some stones and near the step. Dry brush a touch of pale tan over the outer stone arch for age and texture. This step is what gives the piece that tiny old cottage feel.Refine the outlines selectively.
Do not outline everything. Instead, sharpen only the most important edges: the door frame, bunny eyes, basket rim, and a few stones. Too much outlining can flatten the design. You want soft storybook realism, not a cartoon look.Check proportion and focal point.
The eye should go to the bunny first, then the door, then the basket. If the basket becomes too bright, soften it with a thin beige glaze. If the bunny gets lost, brighten the ear edges and chest fluff.Seal the finished rock.
Let the paint cure fully, then seal in thin layers. A matte seal keeps the stone believable. A touch of gloss on the bunny’s eyes is optional and very pretty.
Troubleshooting
My stones look like flat bricks.
Use more color variation and more obvious top highlights with lower shadows.
The door does not look wooden.
Add layered vertical grain lines in different browns instead of just one flat brown coat.
The bunny face looks off.
Paint the eyes first, then place the nose exactly centered beneath them. Adjust the muzzle with cream paint to rebalance the face.
The basket weave looks messy.
Simplify. Paint alternating short horizontal and vertical strokes. At this size, suggestion works better than perfection.
The whole scene feels crowded.
Reduce detail in the outer stones and let the bunny and basket hold the focus.
Finishing details
This rock looks especially beautiful displayed upright on a small stand or nestled into a spring shelf vignette with moss, faux eggs, and a little lantern. If you want a more antique cottage mood, lightly age the colors with a sheer beige gray wash once everything is dry. If you want a brighter children’s room feel, keep the pastels crisp and the moss minimal.
Optional upgrades include adding a tiny brass like door knob highlight, a glowing amber reflection in the round window, a second mini flower pot by the step, or a delicate floral vine trailing around the arch. You can even create a whole village by painting coordinating door stones with different tiny animals.
Shop Similar
- Smooth oval river rocks for detailed painting
- Mini detail paint brushes for acrylic crafts
- Pastel acrylic paint set for spring rock art
- Fine tip acrylic paint pens for lettering and details
- Satin clear sealer for painted stone crafts
Style It With
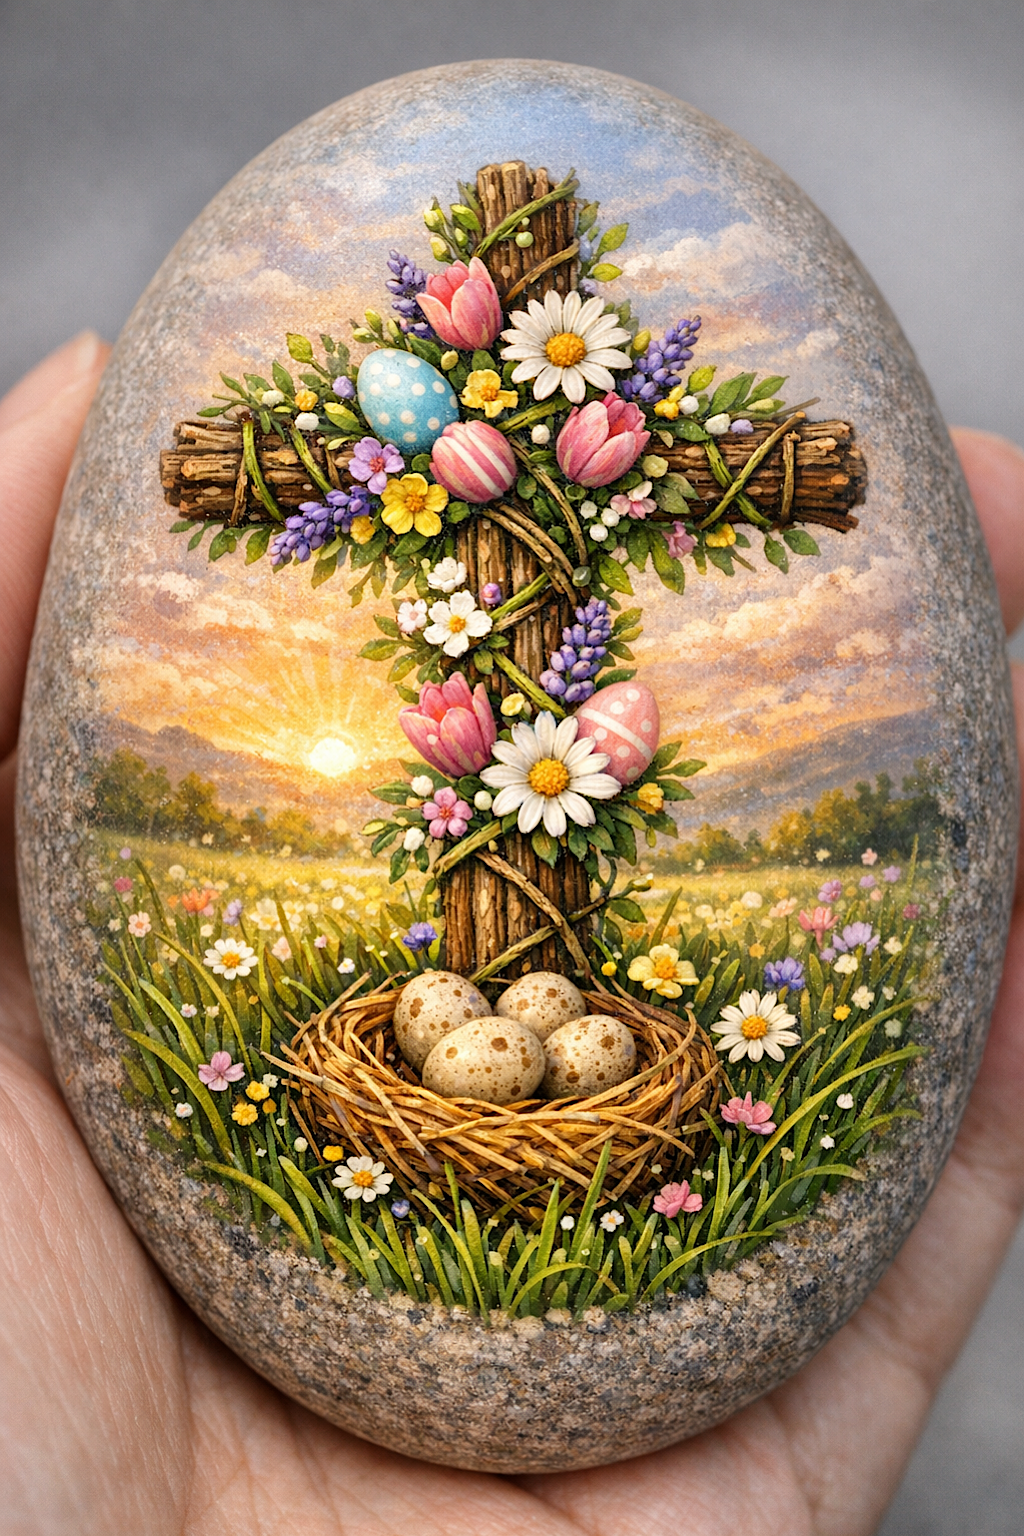
Floral Easter Cross Painted Rock How To Guide
What you’re making
This project turns a smooth stone into a softly glowing Easter scene with a rustic wooden cross wrapped in flowers and pastel eggs, set above a little nest in a grassy meadow at sunrise. The finished rock feels peaceful, symbolic, and richly layered, with warm sky tones behind the cross and delicate spring botanicals tied around the wood.
Although the design looks intricate, it breaks down into manageable parts: sky first, meadow second, cross structure third, then flowers, eggs, and the nest. If you paint in that order, the scene stays organized and far easier to control.
Materials and tools
- Smooth oval stone, 4 to 6 inches tall for best detail
- Soap and water
- Acrylic paints in pale blue, cream, peach, soft gold, pink, lavender, green, olive, brown, white, warm gray, and speckled tan
- Small round brushes
- Fine liner brush
- Small flat brush for sky blending
- Palette
- Pencil
- Water cup
- Paper towels
- Optional dotting tool
- Matte sealer
- Optional satin or soft gloss for final protection
Finished size and customization notes
A larger rock gives the sunrise and meadow enough room to breathe, which is important in this design because the background contributes almost as much beauty as the floral cross itself. On a smaller stone, crop the landscape tighter and keep only a few flowers around the cross.
You can customize the symbolism and palette gently. Add more tulips for a garden feel, more daisies for a classic Easter look, or more lavender tones for a cottage inspired palette. A cooler sunrise creates a softer mood, while a golden one feels more radiant.
Step by step instructions
Prepare the stone.
Wash the rock and let it dry. Choose the side that has the most open, smooth face for painting. Because this design includes a background landscape, it helps if the stone does not have too many pits or cracks in the central area.Sketch the major shapes.
Draw a simple wooden cross centered on the stone. It should sit slightly above the lower third so there is room for the nest and meadow below. Sketch the horizon line low on the rock and a loose nest at the base. Then add a winding floral vine around the cross arms and stem. You should now see a vertical focal design with the cross rising from a spring field.Paint the sunrise sky.
Use a flat brush to blend pale blue at the upper sky into peach, cream, and warm gold near the horizon. Keep the brightest glow where the sun will sit, just off center near the horizon line. Soft horizontal blending works best. If the sky gets muddy, let it dry and glaze lighter colors over it instead of overworking wet paint.Add soft clouds.
With a small round brush, float in pale cream clouds tinted with a hint of lavender gray. Keep edges soft. These clouds should support the sunrise, not overpower it. You should now see a calm background with a gentle morning atmosphere.Paint distant meadow forms.
Along the horizon, add blurred tree or shrub shapes in muted greens and olive browns. Keep them soft and low contrast so they recede naturally. A landscape that is too dark will fight with the cross.Block in the foreground grass.
Paint the lower portion of the stone in layered greens. Start with deeper olive and medium green, then add lighter yellow green blades on top. Make the grass thickest near the base of the cross and around the nest. Leave some little openings for flowers.Paint the wooden cross base color.
Use a medium warm brown for the cross. Keep the wood arms slightly uneven so they feel rustic and handmade. Once dry, add darker groove lines and lighter dry brushed highlights to create bark or weathered grain. You should now see the cross separate clearly from the landscape.Wrap the vine around the cross.
Paint thin twisting green stems that spiral around the wood. Vary the green with olive, leaf green, and a hint of brown. Let some sections disappear behind the wood and reappear. This layering makes the vine feel wrapped instead of pasted on.Add leaves and fillers.
Paint small leaves in mixed greens around the vine, especially at the arm intersections and where flowers will cluster. Add tiny filler buds and little white blossoms. Build in stages. The vine should look lush but still allow the wood to show through.Paint the main flowers.
Add pink tulips, white daisies, tiny yellow blossoms, and lavender sprigs. Use larger blooms where you want emphasis and smaller blooms to trail outward. The top arm of the cross can carry the most decoration, while the stem holds a second cluster lower down. You should now see the cross become celebratory and springlike.Add pastel Easter eggs among the florals.
Nestle a few decorated eggs within the vine work. A soft blue egg on the upper section and a pink egg lower down balance the composition beautifully. Keep the patterns simple: dots, stripes, and tiny floral marks.Paint the sun glow.
Add the sun near the horizon and blend a pale yellow white halo around it. Then lightly glaze warm gold into nearby sky and meadow. This light source should feel gentle, not harsh. It gives the whole scene a hopeful radiance.Create the nest.
At the base of the cross, paint a woven nest in warm straw browns. Build it from many fine curved strokes that overlap like twigs. Then paint three speckled eggs nestled inside. Use cream and tan with tiny brown speckles. If the nest looks stiff, add a few loose twig ends to break the outline.Plant the nest into the grass.
Add grass blades overlapping the bottom of the nest and tiny flowers around it. This makes the nest feel settled in the meadow rather than sitting on top of it.Strengthen shadows and highlights.
Add soft shadow on the lower right or lower left sides of the cross, depending on your light direction. Highlight the opposite sides of the wood and flower petals. Add darker green beneath dense leaves and brighter touches on the top petals. This gives the miniature scene believable depth.Refine details selectively.
Sharpen the centers of daisies, the stripes on eggs, and a few wood grain lines. Keep the far landscape blurred. The strongest detail belongs to the central cross area and the nest.Check the balance.
Step back and make sure the cross remains the focal point. If the grass gets too busy, glaze a tiny bit of warm green over it to calm it. If the sunrise looks dull, brighten the horizon glow with a soft cream gold layer.Seal the rock.
Once fully dry, apply thin coats of matte or satin sealer. A satin finish can be especially pretty on this design because it enhances the sunrise glow without making the stone look too shiny.
Troubleshooting
My sunrise turned muddy.
Let it dry fully, then repaint with translucent pale layers. Gentle layering is safer than overblending.
The cross disappears into the background.
Darken the wood shadows and brighten the sky directly behind the cross.
The flowers feel random.
Cluster them intentionally at the top arm and lower stem, then use smaller filler blossoms to connect those groups.
The nest looks like a brown blob.
Use many directional straw strokes in both light and dark values, not one solid brown shape.
The piece feels too busy.
Reduce detail in the meadow and distant trees. The floral cross should remain the star.
Finishing details
This design looks especially lovely in soft natural light because the sky colors and floral details become more dimensional. For display, prop it on a small easel or place it among faux moss and a few quail style speckled eggs to echo the nest. If you are making several symbolic Easter stones, this one pairs beautifully with a chick, bunny, and fairy door design.
Optional upgrades include gold leaf accents on the sunrise edge, pearl dimensional paint dots in flower centers, a slightly textured modeling paste under the nest before painting, or a hand lettered word such as “Hope” or “Grace” on the back of the stone. Keep embellishments subtle so the painted imagery remains elegant and serene.
Shop Similar
- Large smooth river rocks for painting scenes
- Artist acrylic paints in pastel and earth tones
- Fine liner brushes for floral detail painting
- Matte spray sealer for painted stone crafts
- Mini dotting tools for tiny flower centers
Style It With
Bunny Balloon Easter Egg Stone Art Make It Yourself Tutorial
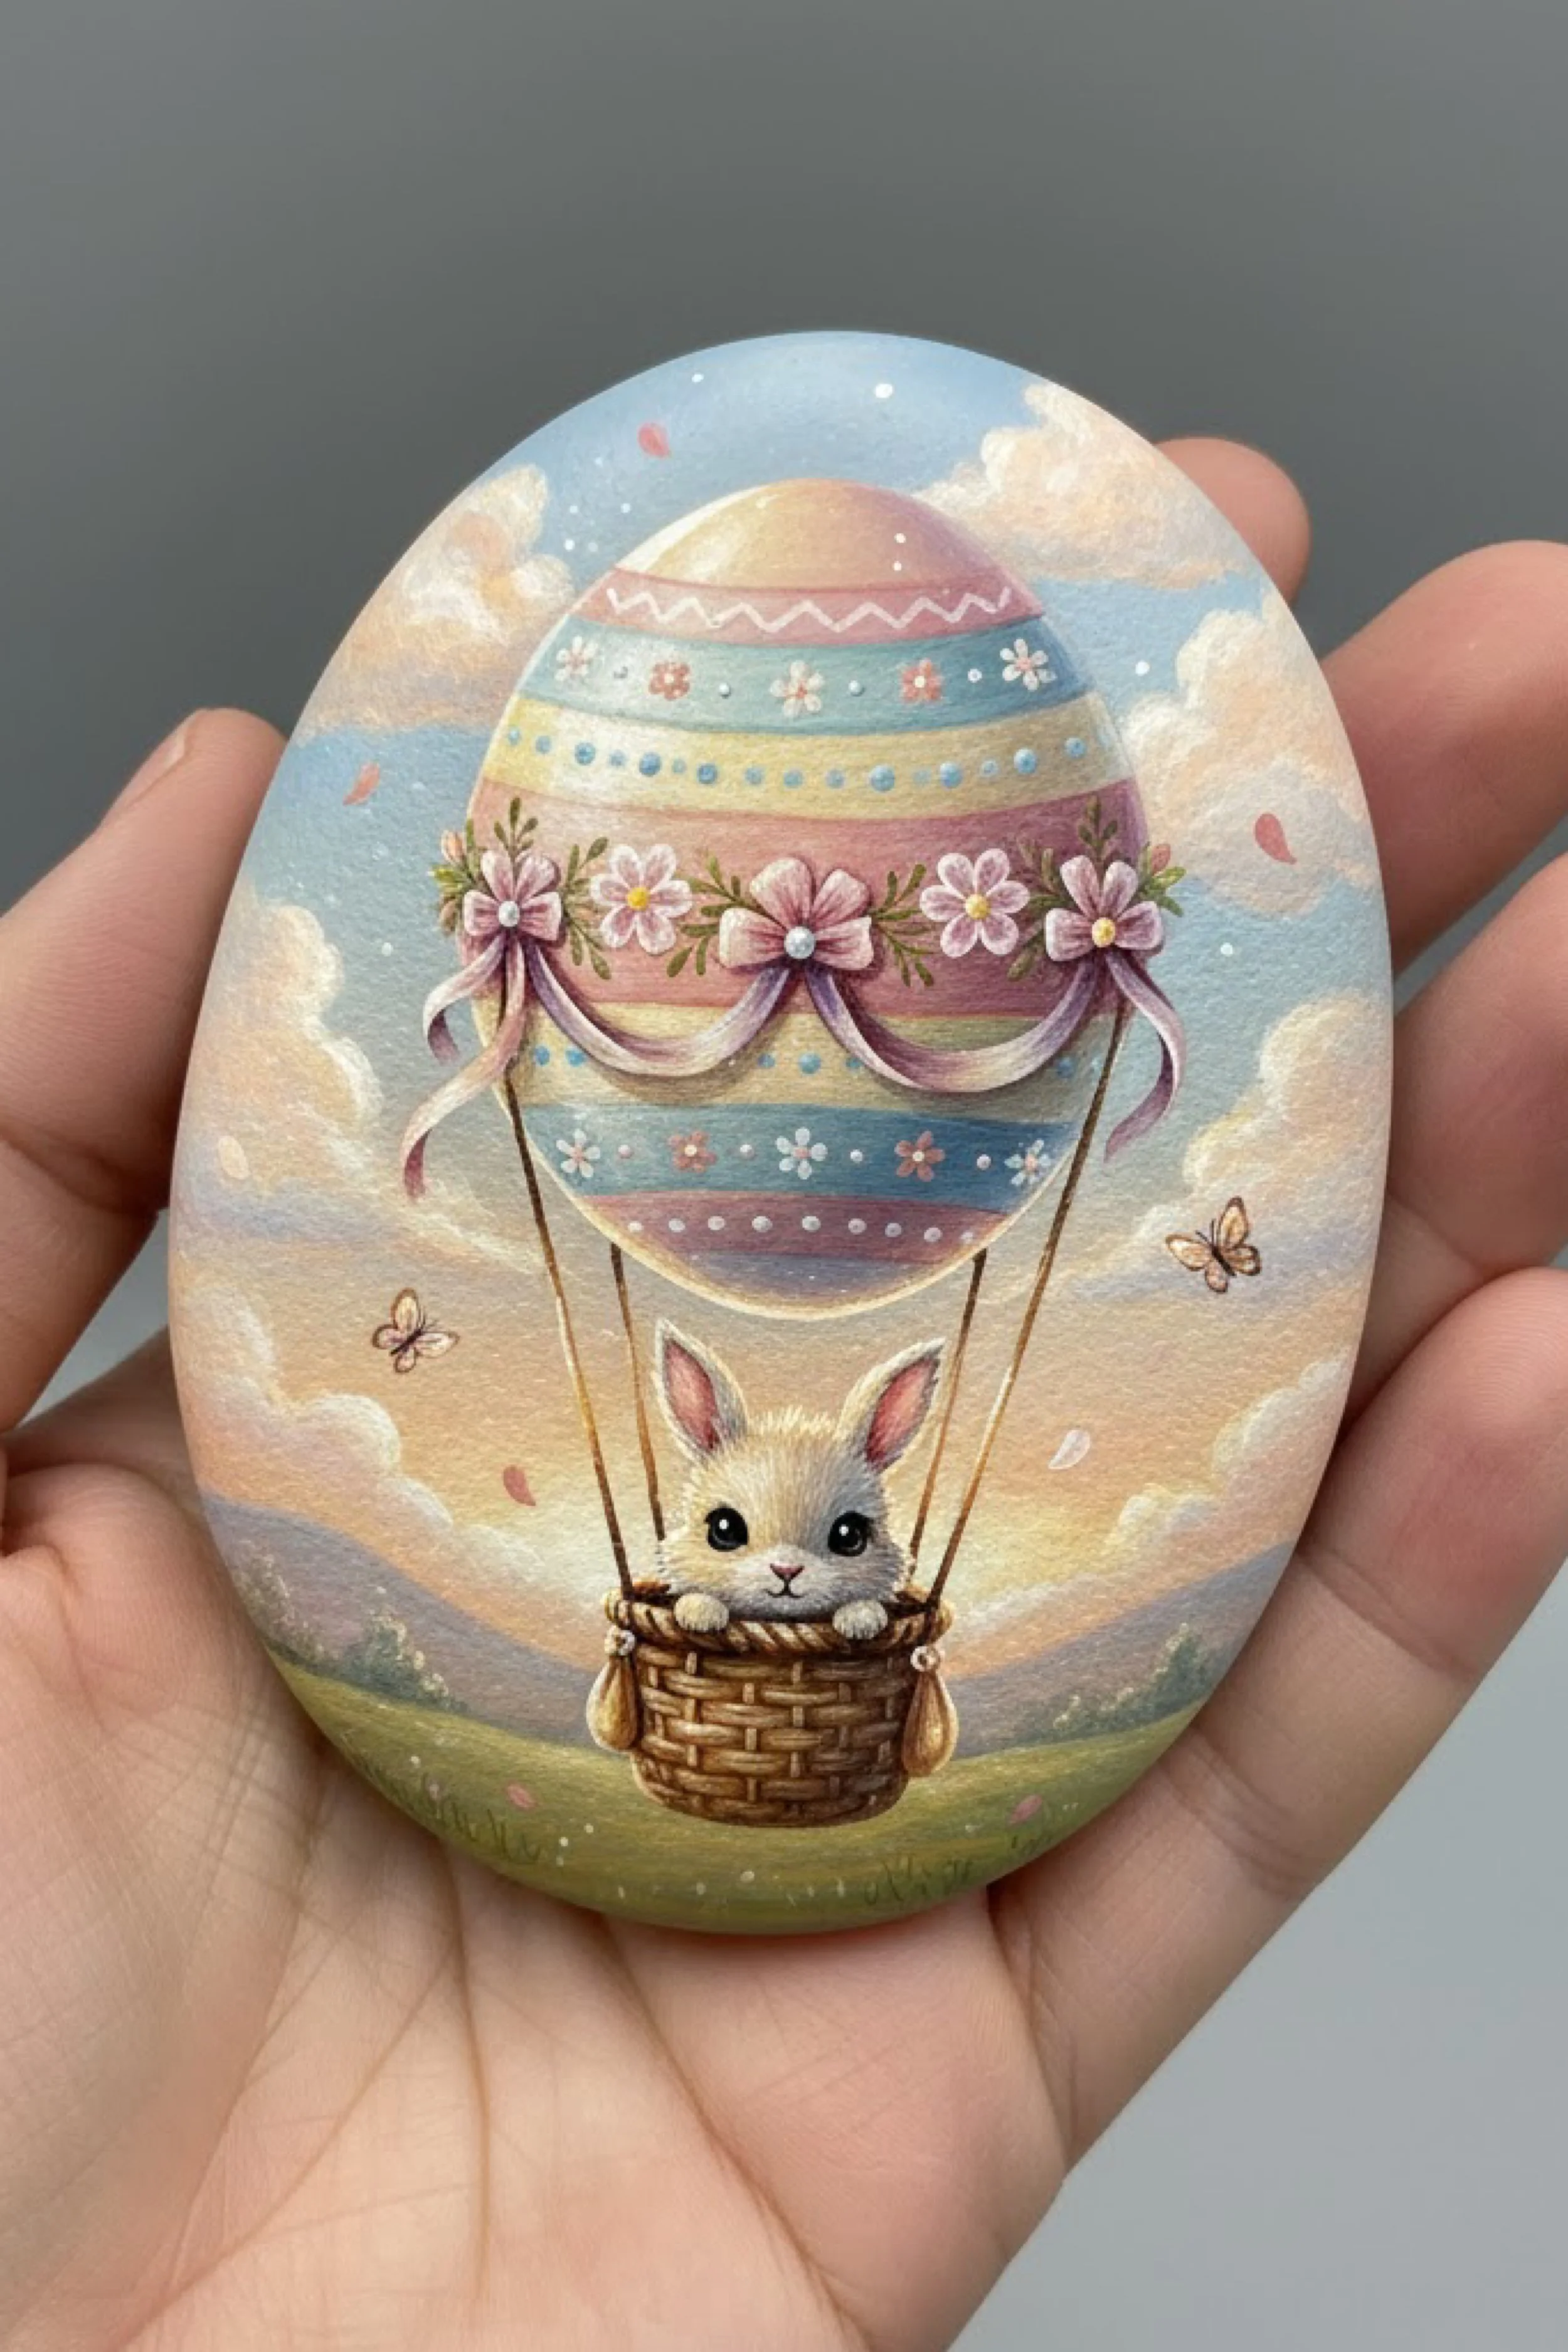
What you’re making
This painted rock design features a tiny bunny riding in a basket suspended beneath a pastel Easter egg hot air balloon. It has a dreamy sky, soft clouds, delicate ribbon garlands, little blossoms, and an airy spring palette that feels whimsical and gentle. The result looks like a tiny storybook illustration wrapped onto a stone.
The best part of this project is that it relies more on clean shape placement than on heavy realism, so it is a very approachable design if you enjoy decorative painting. The basket, balloon, and bunny can all be simplified while still looking magical.
Materials and tools
- Smooth egg shaped rock, 3 to 5 inches tall
- Soap and water
- Acrylic paints in pastel pink, lavender, pale yellow, mint, sky blue, cream, white, tan, brown, black, soft gray, and green
- Fine detail brushes
- Small round brush
- Flat brush for sky blending
- Pencil
- Palette
- Water cup
- Paper towels
- Optional paint pens for dots and tiny floral accents
- Matte sealer
Finished size and customization notes
This design is ideal on a lighter stone because the pastel sky and balloon stay luminous. If your stone is dark, prime the entire face with a thin coat of ivory or pale sky blue first. A smaller rock still works well because the design is vertically simple: balloon on top, bunny basket below.
You can customize the balloon pattern easily. Use stripes, dots, scallops, floral bands, or even tiny hearts. You can also swap the bunny for a chick, lamb, or little mouse if you want a coordinated set.
Step by step instructions
Prep the stone.
Clean the rock thoroughly and dry it. Choose the flattest face for the design. The most pleasing orientation is usually one where the top half has enough room for a large balloon and the lower center can hold the basket.Sketch the main layout.
Draw a large oval balloon shape near the top center. Beneath it, sketch a small basket. Connect the balloon to the basket with four thin lines. Add the bunny peeking over the basket rim. Sketch soft hills along the bottom and a few floating petals or butterflies around the balloon. You should now see a clear, charming silhouette before any paint begins.Paint the background sky.
Blend a pale sky blue into warm peach and cream near the horizon. Keep it very soft and dreamy. Add light cloud shapes around the balloon area. Do not make the background too busy. The balloon needs room to stand out.Paint the distant hills.
Along the lower third, add gentle lavender gray hills fading into the horizon. Keep them light and soft so they read as distance. A little green meadow strip at the bottom helps ground the basket composition.Base coat the balloon.
Fill the balloon with a pale cream or pastel base. Let that dry before adding decorative bands. A light base keeps later pattern colors bright and clean.Add the balloon bands and pattern.
Paint horizontal pastel bands in pink, yellow, mint, blue, and lavender. Decorate them with dots, tiny flowers, scallops, and delicate zigzags. Keep the center of the balloon slightly brighter than the edges for a rounded form. You should now see the balloon start to feel like a floating decorated Easter egg.Paint floral garlands and ribbons.
Add a ribbon swag wrapping across the balloon front with little blossoms spaced along it. Use mauve pink and lavender for the ribbon and tiny white or pink flowers for the garland. Add small hanging ribbon tails for movement.Shade the balloon.
Deepen the outer edges with a slightly darker version of each band color. Add a pale creamy highlight down the center. This single highlight band makes the egg balloon feel round and softly glowing.Paint the basket.
Use medium brown as a base, then add darker brown weave lines and lighter tan highlights. The basket should be small but sturdy. Shape it with a slight curve so it looks dimensional.Add the suspension lines.
Paint four thin dark lines connecting the balloon to the basket. Keep them evenly spaced and slightly angled. These lines are tiny, but they give the illusion that the basket is truly hanging.Paint the bunny.
Use a warm cream or pale taupe base. Add pink inside the ears, dark glossy eyes, and a tiny nose. Let the bunny peek over the basket rim with its paws resting on the edge. This pose makes the character instantly adorable. If the face feels too low, enlarge the ears slightly to restore proportion.Refine the bunny fur.
Add short cream and light tan strokes around the cheeks and forehead. Keep the body mostly hidden so you do not need too much detail. The head and paws do all the storytelling here.Add movement around the balloon.
Paint two tiny butterflies or drifting petals near the sides. A few small floating dots can mimic pollen or sparkles. Keep these accents delicate.Strengthen the lower landscape.
Add a soft green meadow with a few tiny flowers under the basket. This grounds the composition and echoes the spring palette. Do not add too many details or the lower section will feel heavy.Adjust contrast.
If the balloon blends into the sky, deepen the clouds just beside it or add a soft outline shadow. If the basket disappears, brighten the top rim and darken the underside.Sharpen focal details.
The bunny’s eyes, the balloon patterns, and the flower garland deserve the crispest detail. Everything else can remain softly painted. This contrast is what makes the design feel polished.Check symmetry loosely.
The balloon should feel balanced, but it does not need to be perfectly geometric. In fact, a little hand painted softness adds charm. If one side looks too heavy, add an extra flower or a slightly brighter highlight to the opposite side.Seal the design.
Once the piece is dry, use a matte sealer. If you like, add a second thin coat for durability. A matte finish suits the dreamy illustrated look beautifully.
Troubleshooting
My balloon looks flat.
Add a lighter center highlight and darker edges.
The suspension lines look shaky.
Rest your painting hand on the table or your other hand and pull the brush slowly in one confident motion.
The bunny looks too tiny.
Widen the ears and brighten the face. Even small changes make the character read more clearly.
My pastel colors turned dull.
Paint over an ivory base first, especially on darker stones.
The design feels crowded.
Remove extra butterflies or flowers. Let the balloon remain the main statement.
Finishing details
This design is lovely as part of a pastel Easter collection because it introduces a more whimsical, floating motif among more grounded scenes like chick eggs and cottage doors. Display it with soft ribbon, faux cloudlike cotton batting, or pale ceramic eggs for a light airy look.
Optional upgrades include adding pearl dots to the balloon, a gold highlight line on the basket rim, soft iridescent glaze over the sky, or a tiny name or date painted on the back. If you are painting for gifts, this design has a particularly sweet nursery or child friendly charm without losing its elegant hand painted feel.
Shop Similar
- Egg shaped rocks for spring painting crafts
- Pastel acrylic paint set for decorative art
- Fine detail brushes for miniature painting
- Acrylic paint pens for dots and floral accents
- Matte clear coat for painted rocks
Style It With
Easter Fairy Door Rock Painting Step by Step Tutorial
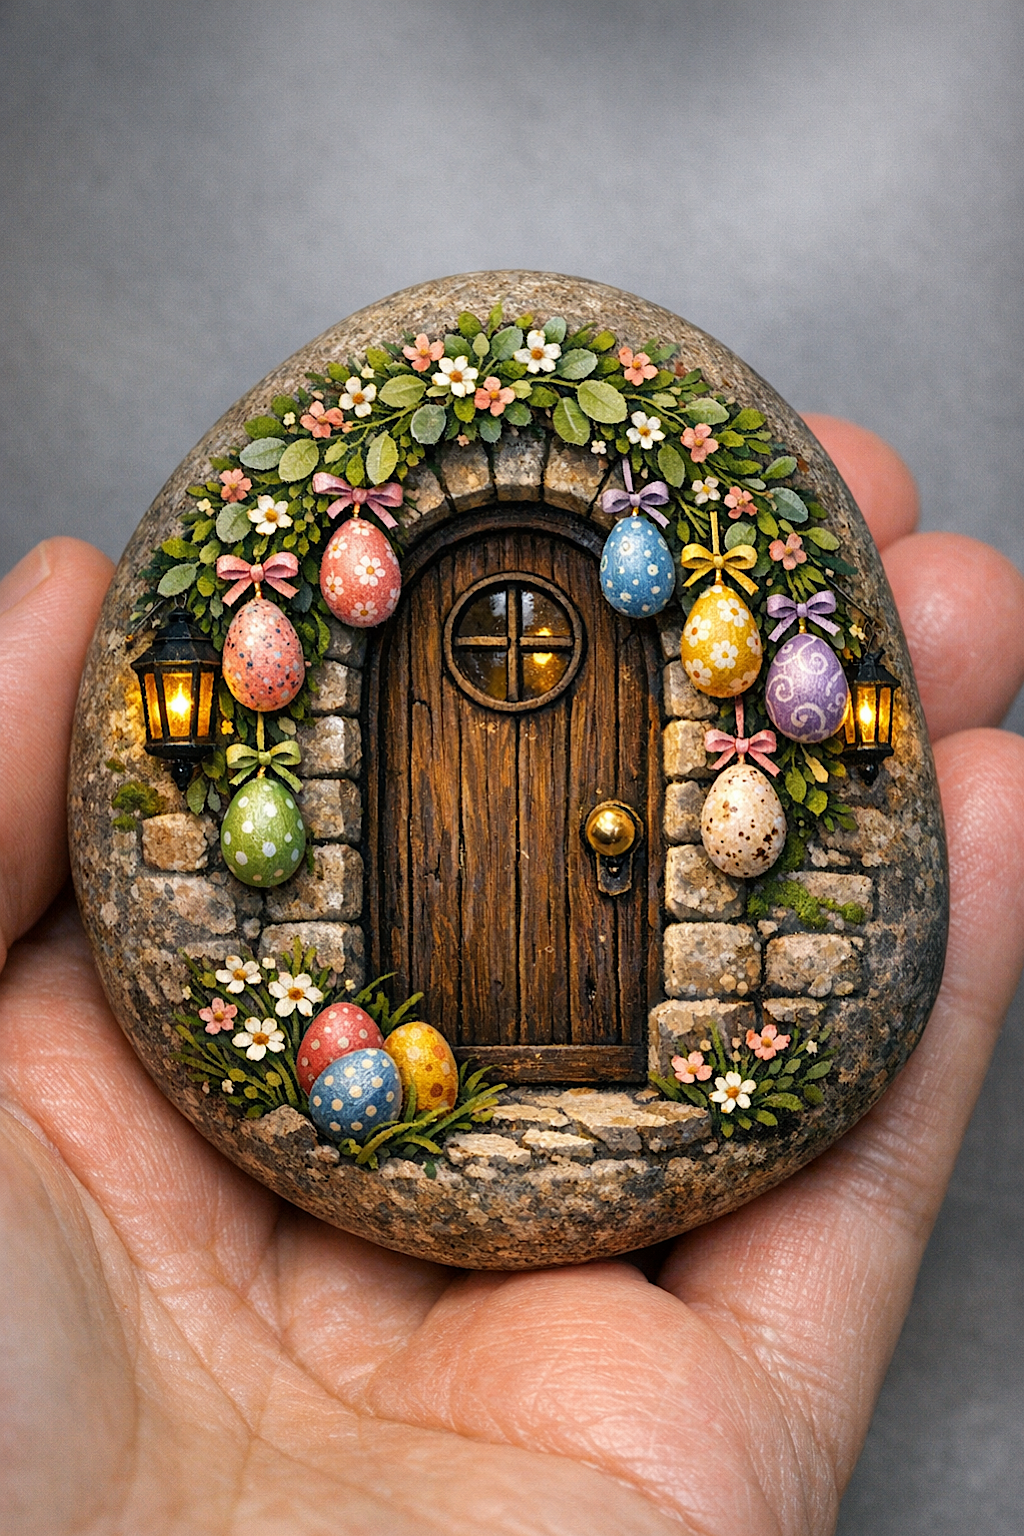
What you’re making
This project creates a charming fairy style Easter doorway painted directly onto an egg shaped stone. The design includes a rustic wooden door set into a stone arch, glowing lanterns, floral garland, pastel hanging eggs, tiny blooms, and a welcoming springtime cottage mood. It feels like a little hidden Easter home tucked inside the rock.
The appeal of this design comes from texture and layering. You will paint stone, wood, greenery, ribbon, eggs, and warm light effects all in one small composition. Working methodically from the largest shapes to the smallest details makes it very manageable.
Materials and tools
- Smooth egg shaped stone, 4 to 5 inches tall
- Soap and water
- Acrylic paints in brown, tan, gray, cream, black, gold, yellow, moss green, leaf green, pink, blue, purple, white, peach, and red
- Detail brushes
- Fine liner brush
- Small flat brush
- Pencil
- Palette
- Water cup
- Paper towels
- Optional metallic gold paint for knob highlights
- Matte or satin sealer
- Optional gloss just for lantern glow points
Finished size and customization notes
This design benefits from a medium to large stone because the garland, hanging eggs, and lanterns need a little room. If your stone is smaller, simplify the garland and use only two or three hanging eggs instead of many.
You can customize the feel of the piece by adjusting the light. A brighter golden lantern glow makes the door feel more enchanted, while a more muted finish makes it feel rustic and old world. You can also choose different egg colors to match your spring decor.
Step by step instructions
Clean and orient the rock.
Wash the stone well and dry it fully. Set it upright and choose the face that naturally frames a centered doorway. A slightly broader lower half is useful because you need room for the step and bottom egg cluster.Sketch the full doorway scene.
Draw a rounded wooden door in the center. Frame it with stone blocks. Above the door, sketch an arching leafy garland that drapes from one side to the other. Hang several eggs from ribbons along the garland. Add lanterns on each side and a little cluster of eggs and flowers near the bottom. You should now see the entire scene arranged before you commit to paint.Block in the door.
Paint the door a deep warm brown. Add even darker brown or black around the inner edge of the arch to create recessed depth. Leave the round window unpainted for now.Add wood grain and structure.
Pull vertical strokes in lighter tan and darker walnut brown over the door. Add subtle cracks and grain lines for age. Paint the round window near the top and outline it carefully. Add a tiny golden brown door knob on one side. The door should now feel weathered and inviting.Paint the stone arch.
Fill the stone blocks in varied grays, taupes, creams, and warm beige tones. Keep each block slightly different. Add dark mortar lines between them. This variation is what keeps the arch believable.Shade and highlight the stones.
Add top highlights and lower shadows to each block so they read as dimensional stones. Place a little mossy green in the crevices and along the lower side stones. You should now see the doorway carved into a tiny old stone wall.Paint the step and lower ground.
Add a stone threshold at the bottom and deepen the shadow beneath the door. Paint a small grassy base with flowers and egg accents where needed.Build the leafy garland.
Paint the garland with dark green leafy masses first. Then add medium and light green leaves on top in many small strokes. Keep the garland fuller at the top center and taper it toward the sides. The key is density with visible leaf variation.Add the flowers.
Dot in tiny white and peach blossoms among the leaves. Add a few pink blooms for color balance. The flowers should soften the stone arch and create a spring festival mood.Paint the hanging eggs.
Add egg shapes suspended beneath the garland with tiny bows and thin ribbon lines. Use different pastel colors such as blue, yellow, coral, purple, green, and speckled cream. Decorate each egg with simple dots, flowers, or swirls. This is one of the most delightful parts of the project, so take your time.Paint the lanterns.
On both sides of the arch, paint small black lantern shapes. Fill the inner glass area with warm yellow and amber. Add a soft glow around the lantern centers by lightly dry brushing diluted warm yellow onto the surrounding stone. You should now see a cozy lit doorway effect.Paint the round window glow.
Fill the window panes with deep warm brown or muted black, then add a tiny amber reflection or faint warm glow. This subtle warmth connects the door to the lantern light.Refine the door hardware.
Add a metallic looking highlight on the knob and a darker shadow beneath it. A tiny touch of bright gold or pale cream on the knob makes it instantly more believable.Add the lower eggs and flowers.
At the base of the doorway, paint a few larger decorated eggs nestled in grass beside tiny flowers. These lower details echo the garland above and balance the composition vertically.Deepen the shadows.
Add dark accents in the mortar joints, under the garland, beneath the eggs, and under the step. Without these shadows, the piece can look decorative but flat. With them, it becomes miniature architecture.Sharpen the focal points.
The door, lanterns, and hanging eggs deserve the crispest detail. You can leave outer leaf edges softer. If the garland gets too overwhelming, glaze parts of it with a transparent olive wash to push it back slightly.Check warmth and charm.
Ask yourself whether the scene feels inviting. If it feels cold, warm up the lantern centers and the window. If it feels too dark, lighten the upper flowers and leaf highlights. You should now see a finished little Easter fairy doorway full of story.Seal the piece.
Protect your work with a matte or satin sealer. Satin is especially nice here because it enriches the wood and lantern tones while keeping the stone believable.
Troubleshooting
My stones all look the same.
Mix different grays, tans, and creams so each block is slightly unique.
The garland looks like a blob.
Start with dark leaf masses, then add lighter leaves on top instead of painting every leaf individually from the start.
The lanterns do not glow.
Use a warmer yellow orange center and softly feather a little diluted glow around it.
The hanging eggs look awkward.
Make sure their ribbon attachment points are clear. A tiny bow at the top helps explain the shape.
The door is getting lost.
Darken the inner arch shadow and brighten the wood grain highlights.
Finishing details
This is a gorgeous design for display in a spring entryway vignette, especially next to tiny lantern decor, faux moss, and pastel eggs. Because the composition is already rich, keep surrounding styling simple so the painted details can shine. It also makes a lovely gift stone for someone who enjoys cottagecore, fairy gardens, or seasonal decor.
Optional upgrades include dimensional pearl dots on flower centers, a soft metallic dry brush on the knob, a faint wreath shadow under the garland, or a little personalized house number on the back. You can also build a series of doorway stones with different seasonal garlands for year round display.
Shop Similar
- Egg shaped river stones for decorative painting
- Detail brush set for miniature acrylic work
- Spring pastel acrylic paints for rock crafts
- Fine acrylic paint pens for tiny floral details
- Satin sealer for painted stone decor
Style It With
There is something especially magical about Easter crafts that feel tiny enough to hold in your hand and detailed enough to tell a whole story. This collection of painted stone tutorials turns ordinary smooth rocks into miniature spring worlds filled with hatching chicks, woodland bunnies, floral crosses, pastel balloons, and glowing fairy doors. Each design captures a different side of Easter charm, from sweet and playful to peaceful and symbolic, while still keeping the process approachable for a patient beginner.
What makes these projects so satisfying is the combination of natural texture and painted detail. The shape of each stone already gives you the perfect foundation for an egg inspired silhouette, and from there you build layers of color, shadow, and tiny decorative accents that make each piece feel alive. Whether you want to create a thoughtful handmade gift, style a spring shelf, fill an Easter basket with something unexpected, or simply spend an afternoon painting something beautiful, these tutorials are designed to help you create keepsake pieces that feel both whimsical and polished. Set out your paints, choose your favorite smooth stones, and let this little collection of Easter worlds come to life one brushstroke at a time.