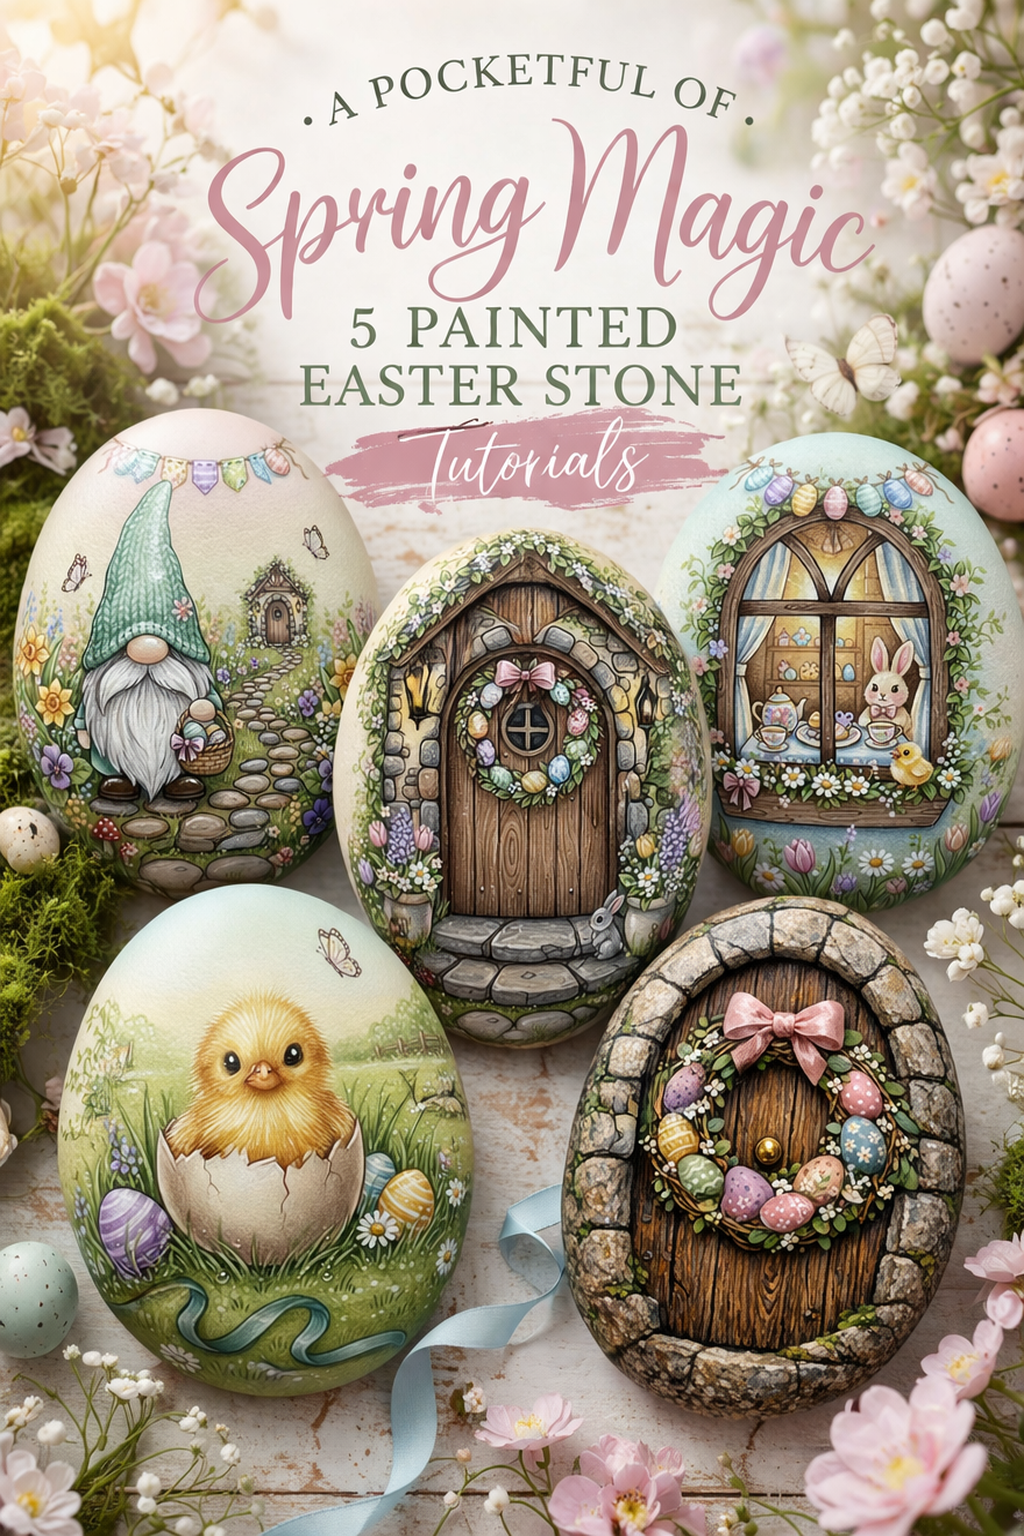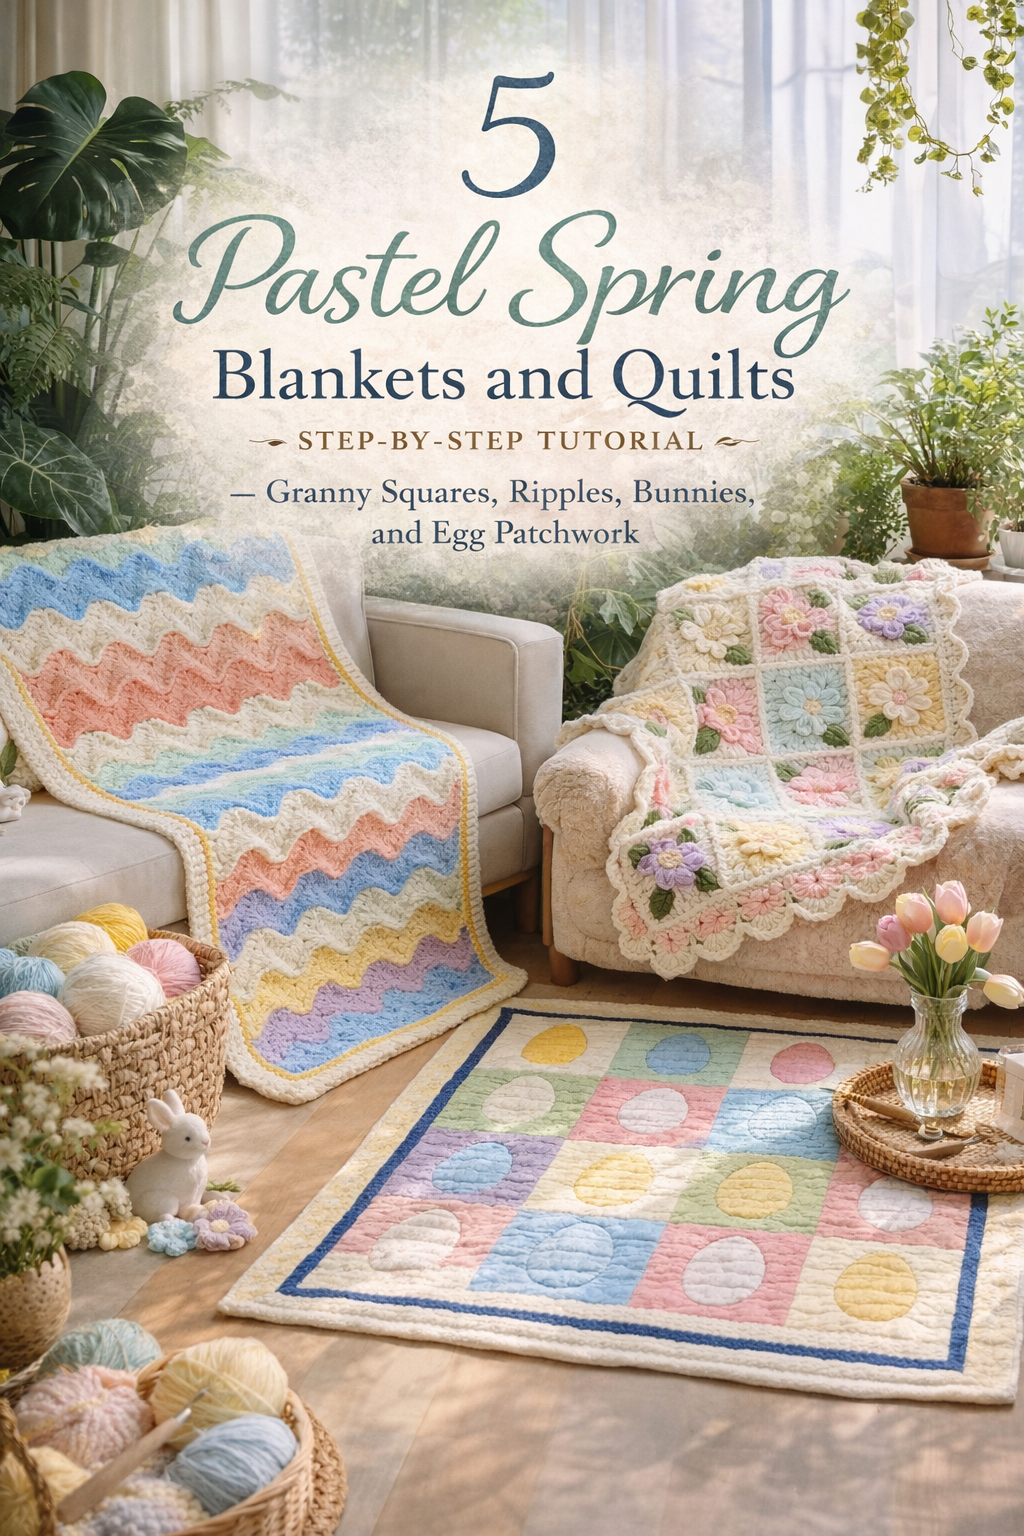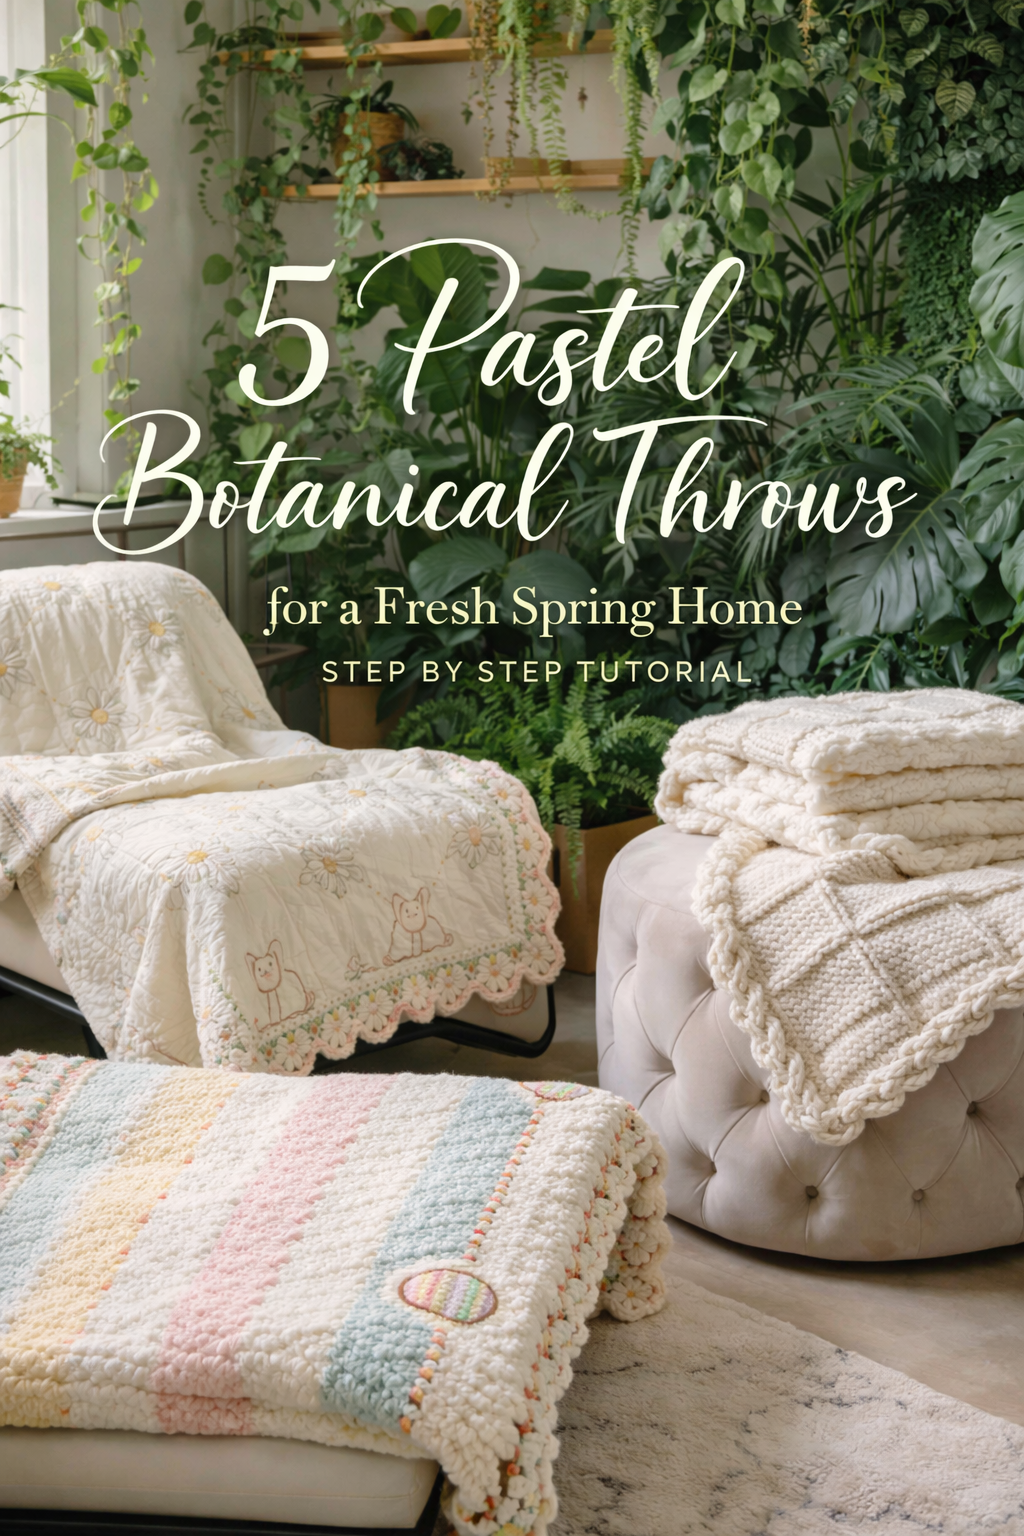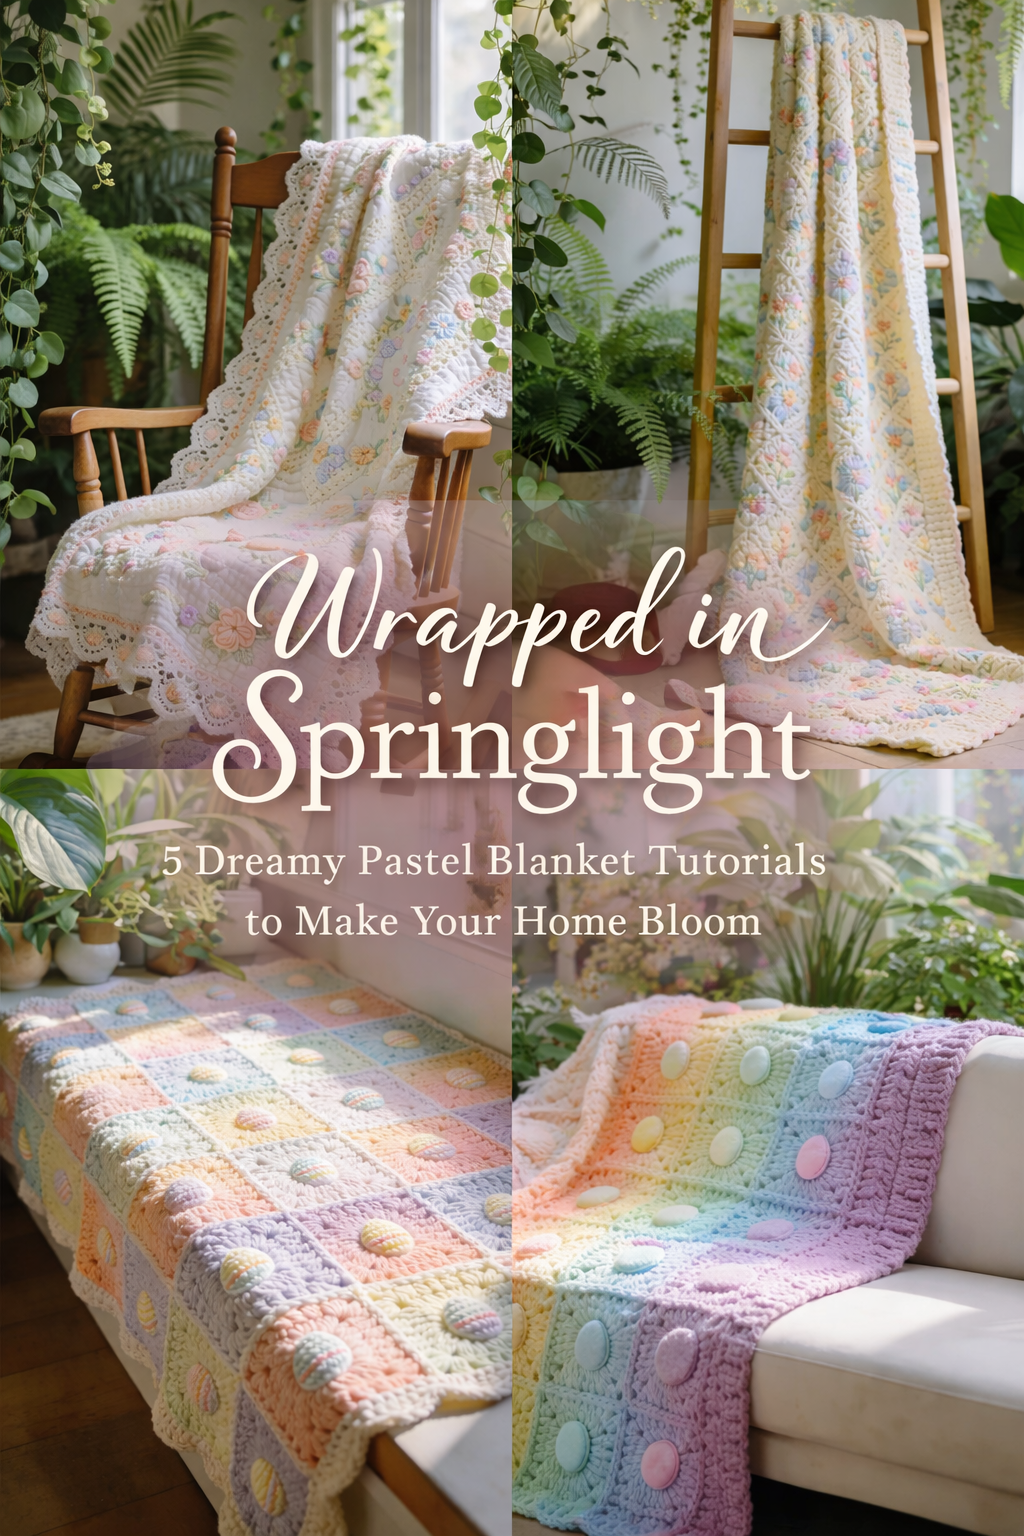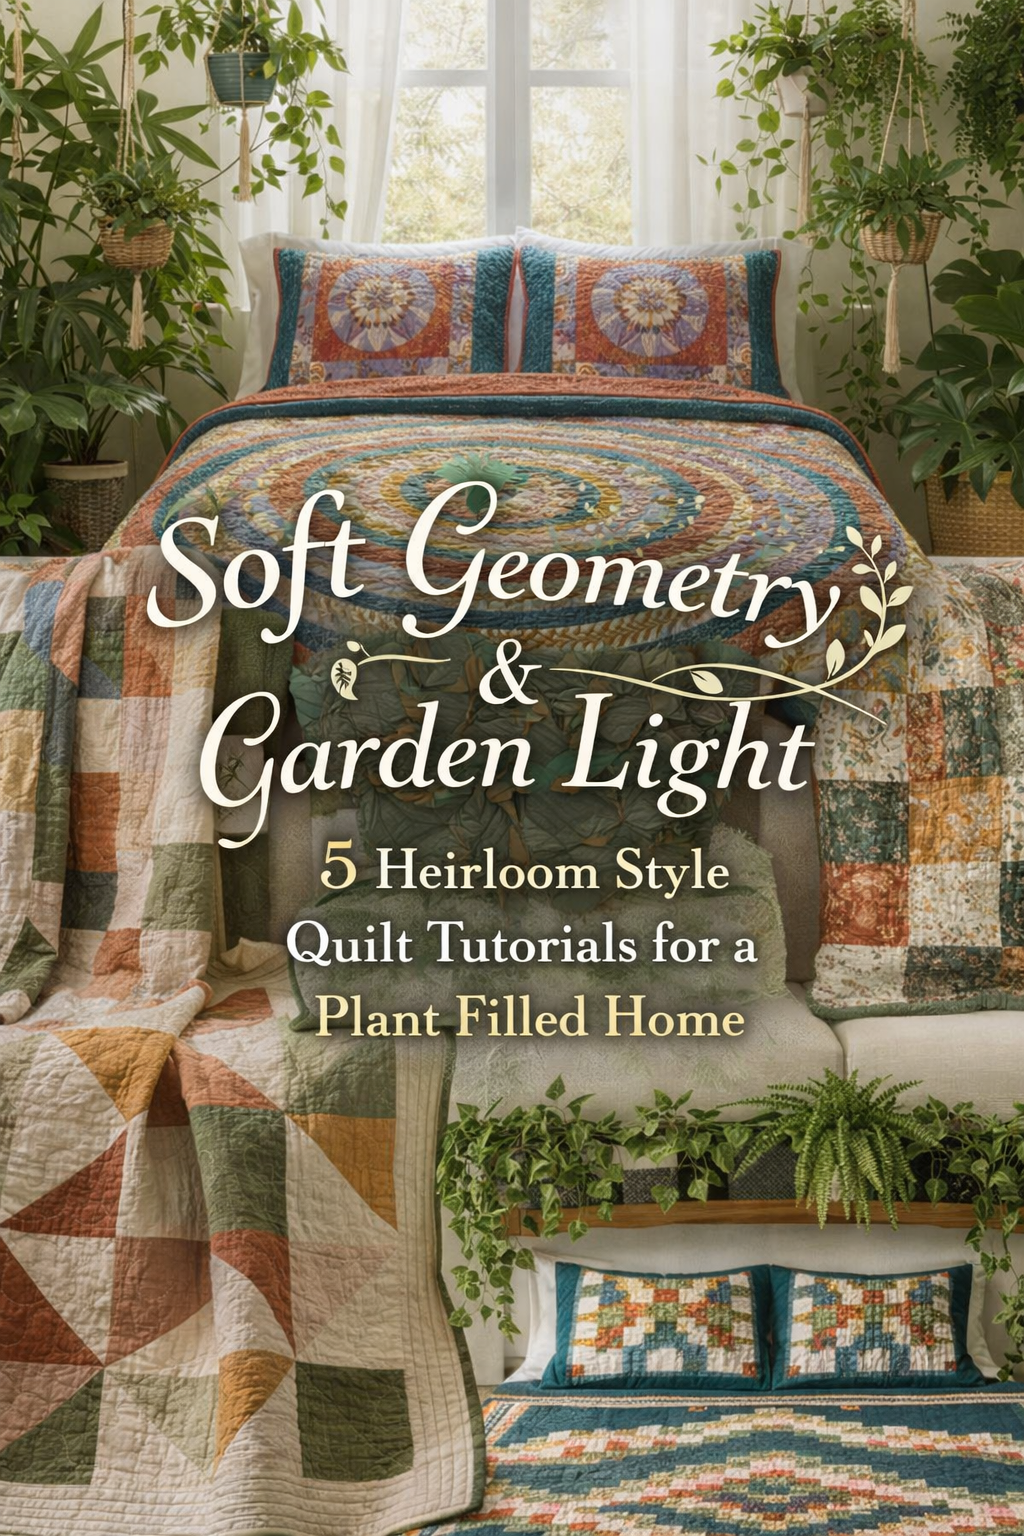
# Soft Geometry and Garden Light: 5 Heirloom Style Quilt Tutorials for a Plant Filled Home

More like this
💡 Pro Tip: Why I Link to Amazon Search Results and Not One Product
In the Shop the Look and Style it With sections under each bikini, I link to Amazon search results, not single products. Here’s why this matters:
Hot bikinis sell out fast. I don’t want you clicking on a dead link to a sold-out item. Search pages stay updated.
You get more options. Love the vibe but want a different color, cut, or price point? The search results give you everything that matches the look and energy.
I curate each search carefully. These aren’t generic. I spend hours crafting keywords that bring up exactly the kind of bikinis I’d wear—or recommend to my hottest friends.
Support with no pressure. If you click a link, browse, and buy something later, I may earn a small commission at no extra cost to you. That helps me keep bringing you curated collections like this one—powerful, seductive, and always fresh.
So dive in. Click through. Try something risky. These aren’t just bikinis—they’re commands, statements, and maybe even your new favorite weapon of choice.
There’s something quietly powerful about a quilt draped in a sunlit room, especially when it lives among greenery. The softness of stitched fabric, the rhythm of repeating shapes, and the warmth of earthy color palettes all come together to create pieces that feel both deeply personal and effortlessly styled. In this collection, we’re leaning into that feeling. Think softened geometry, botanical palettes, and textures that invite you to reach out and touch them.
Each of these five quilt tutorials captures a slightly different mood, from relaxed modern patchwork to intricate medallion layouts and vintage inspired florals. What ties them together is their ability to live beautifully in a plant filled home. These are not just projects to make. They are pieces designed to soften a space, catch the light, and become part of your everyday environment in the most natural way.
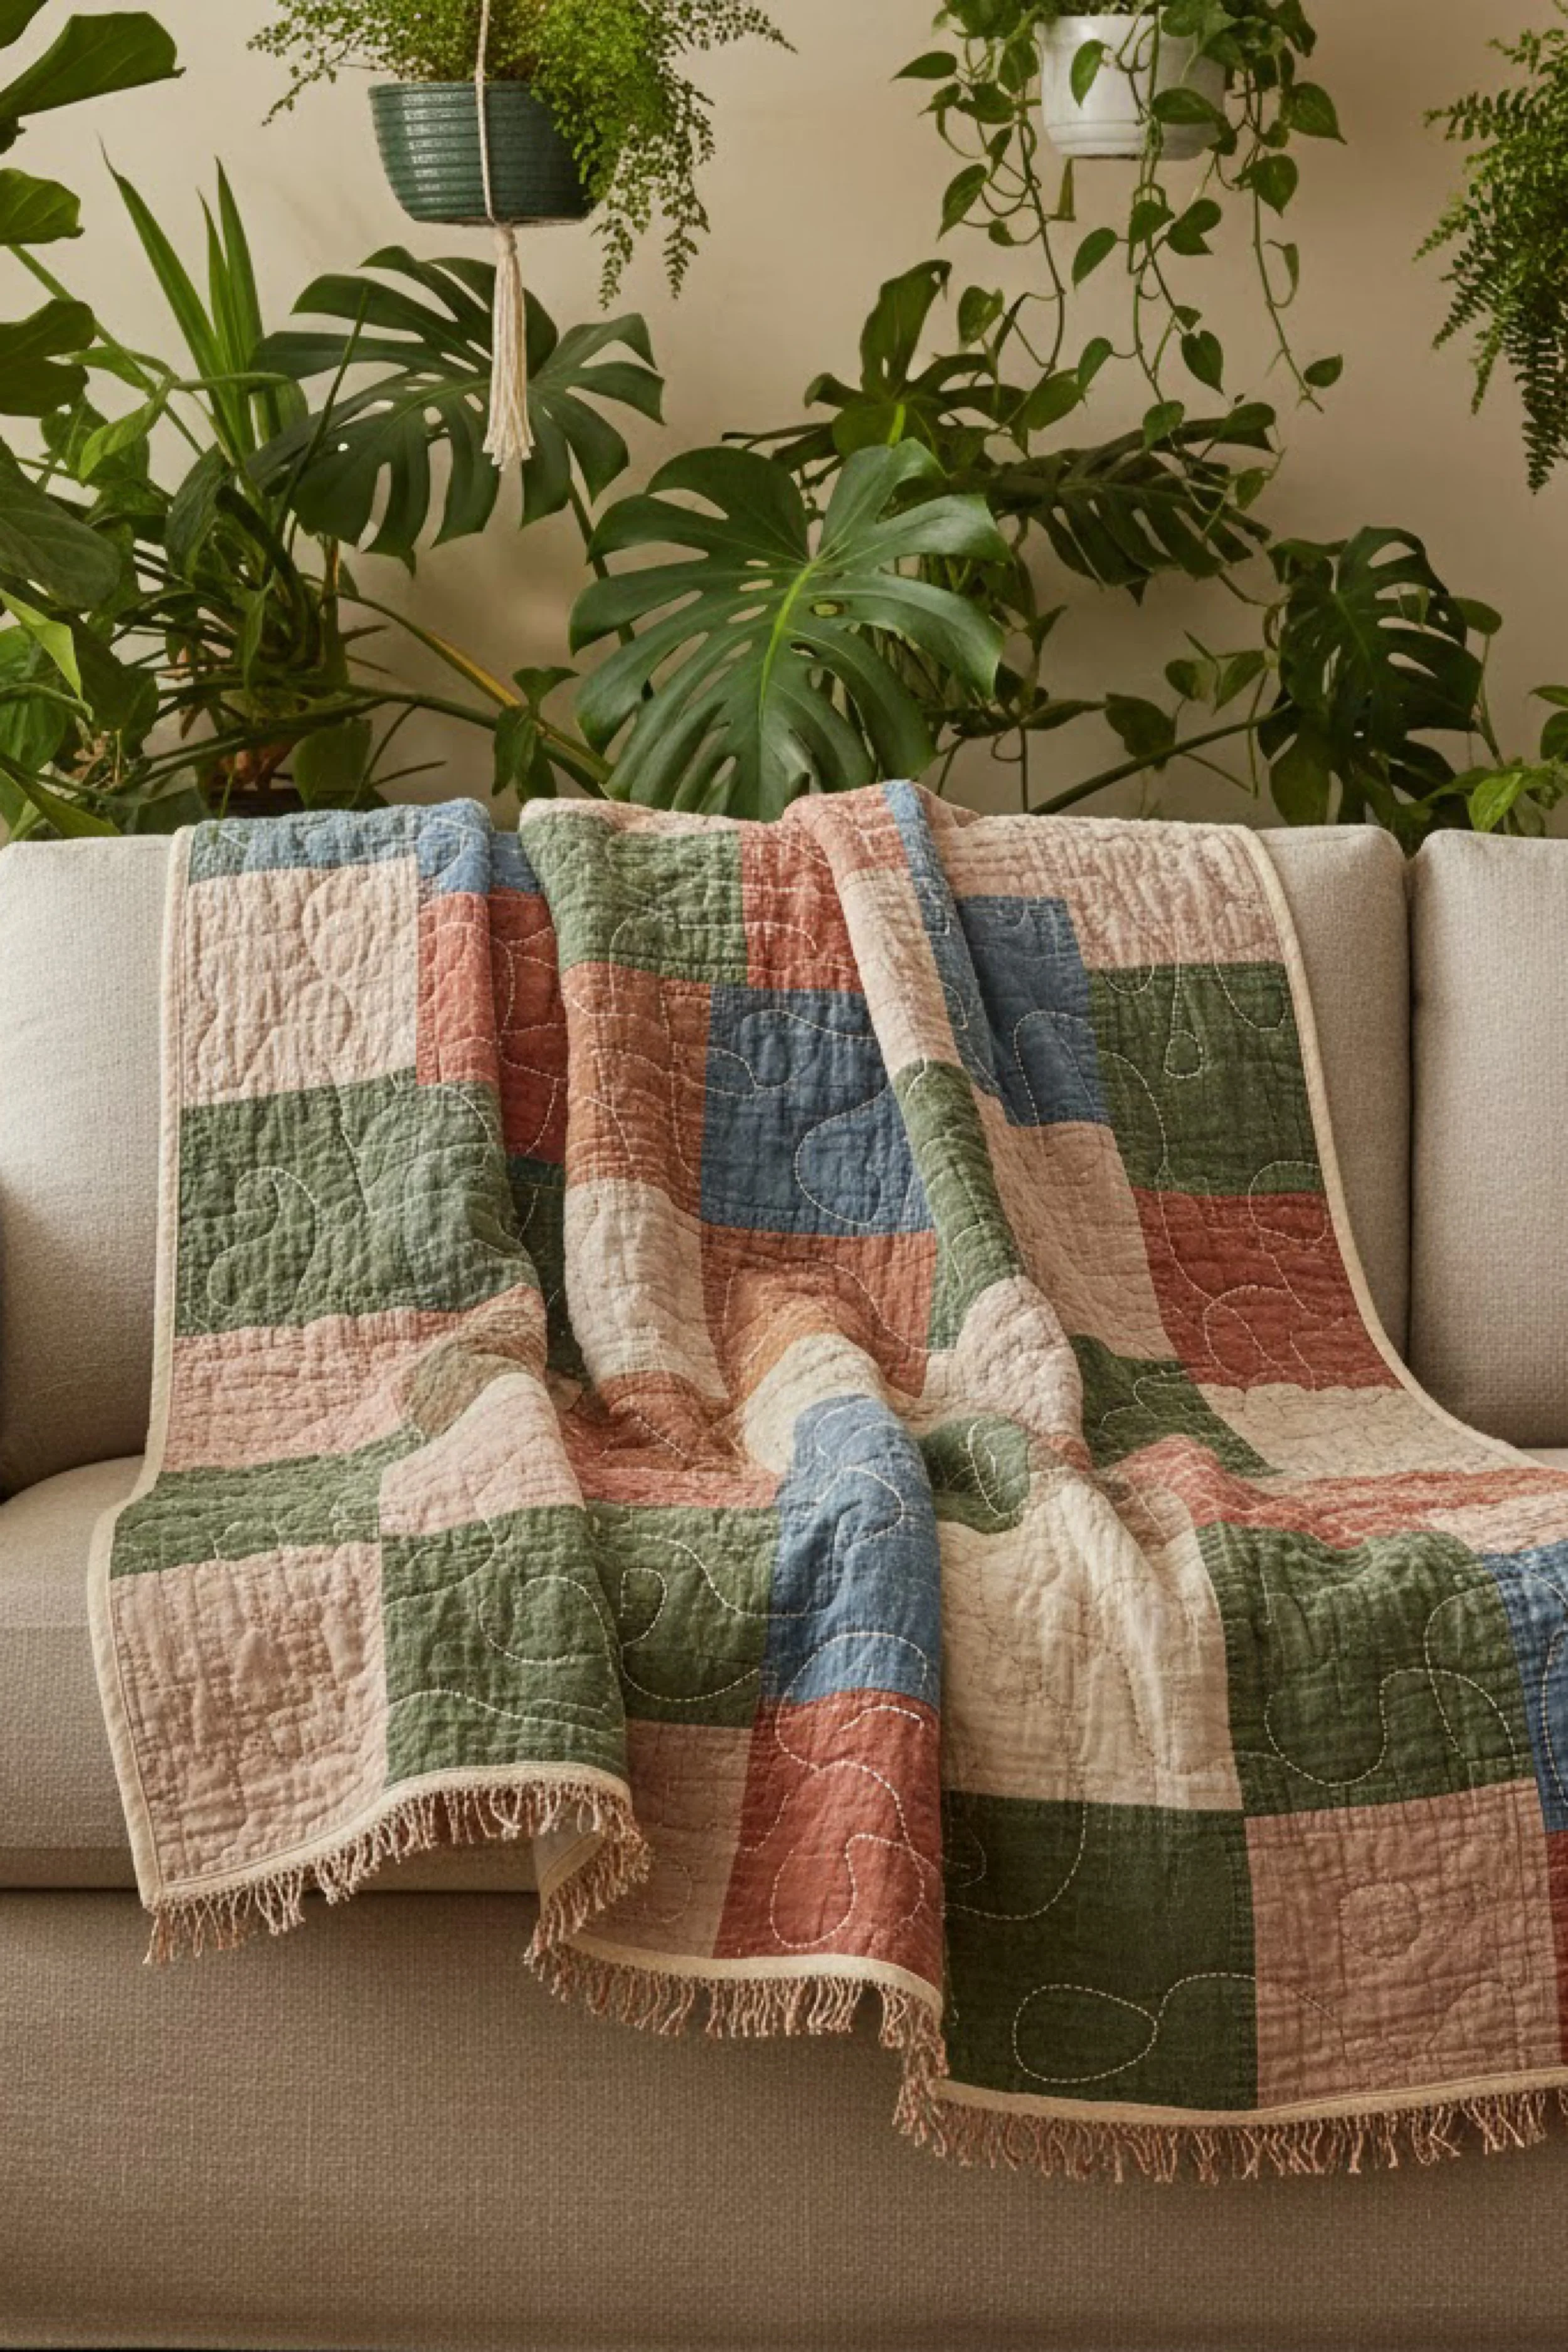
Modern Colorblock Sofa Quilt — Step by Step Tutorial
What you’re making
You’re making a soft, modern patchwork throw quilt with large rectangular color blocks, gentle earthy tones, visible organic free motion quilting, and a relaxed drape that feels casual but elevated. The look in the photo reads handmade, lightly rumpled, and intentionally imperfect, which makes it ideal for beginners who want a polished result without needing tiny pieces or extremely fussy matching.
This quilt works beautifully as a couch throw, reading nook blanket, or end of bed accent. The palette leans blush, clay, sage, denim blue, and warm cream, so the finished piece feels both botanical and contemporary. The best part is that the quilting lines are loose and curvy, so precision matters less than flow.
Materials + tools list
- Quilting cotton or cotton linen blend fabric in blush pink
- Quilting cotton or cotton linen blend fabric in sage green
- Quilting cotton or cotton linen blend fabric in dusty clay
- Quilting cotton or cotton linen blend fabric in muted denim blue
- Quilting cotton or cotton linen blend fabric in warm cream
- Backing fabric, pieced or one large cut
- Cotton batting, low loft or very low loft
- Binding fabric in cream or soft beige
- Neutral cotton thread for piecing
- Contrasting quilting thread in cream or soft ivory
- Rotary cutter
- Self healing cutting mat
- Acrylic ruler
- Fabric scissors
- Sewing machine
- Walking foot or free motion quilting foot
- Pins or quilt clips
- Safety pins or spray baste
- Iron and ironing board
- Optional fringe trim or woven edge detail if you want the relaxed fringe look
Finished size + customization notes
A great target size for this look is about 50 by 70 inches for a throw. You can enlarge it to 60 by 80 inches for a fuller couch drape by adding more columns and rows of blocks.
Use larger rectangles if you want a bolder, more minimal look. Use slightly smaller rectangles if you want more movement and patchwork detail. If your fabric has a looser weave, stabilize it with pressing and careful handling so the quilt stays crisp while you assemble it.
Step by step instructions
Study the look before you cut.
Notice what makes this quilt feel special. The blocks are generous, not tiny. The colors repeat, but not in an obvious checkerboard. The quilting is made of soft wandering loops and curves, not rigid straight lines. The edges feel tidy but not stiff. Before cutting anything, sketch a loose layout with around five colors. You should now see a plan that feels balanced but still organic.Choose the right fabric texture.
The photo suggests a softly crinkled finish rather than a very slick or shiny surface. Standard quilting cotton works well, but if you want even more of that relaxed texture, choose a cotton gauze, cotton slub, or cotton linen blend for the top. If you are unsure, quilting cotton is the safer beginner option because it cuts more cleanly and shifts less while sewing.Build your color palette.
Pick one light neutral, two medium warm tones, one earthy green, and one muted accent color. A good formula is cream, blush, clay, sage, and dusty blue. Lay the fabrics side by side in daylight. If one color shouts louder than the rest, either reduce how much of it you use or swap to a softer tone. The finished quilt should feel mellow and leafy, not loud.Cut your patchwork pieces.
For an easy version, cut rectangles and squares in a mix of these sizes: 8 by 10 inches, 8 by 8 inches, 10 by 10 inches, and 6 by 10 inches. Keep the heights compatible so rows can still be assembled without tricky inset seams. This quilt look benefits from variety, but not chaos. Cut enough pieces to create a finished top near 50 by 70 inches.Lay out the quilt top on a floor or design wall.
Arrange the pieces so no single color forms a heavy block in one area unless you want that effect on purpose. Spread the green around the design to echo the indoor plant backdrop in the photo. Let the blush and clay pieces warm the center. Tuck blue in smaller doses for contrast. If yours looks wider or more rigid than the photo, break up long rows of the same tone.Sew the blocks into rows.
Use a quarter inch seam allowance and press after each seam. Press seams open if your fabrics are thick or textured. Press to one side if you are using standard quilting cotton and want easier assembly. Join pieces row by row, then join the rows into a full quilt top. Keep checking that the top stays reasonably square, but do not panic over slight waviness. The crinkled washed finish later will soften minor imperfections.Square the quilt top.
Once the full top is assembled, trim the outside edges so they are straight and even. This matters because the large blocks can exaggerate an uneven edge. You should now see a top that feels modern, balanced, and softly architectural.Piece or cut your backing.
A single backing fabric is easiest, but a pieced backing in one or two of your top colors looks beautiful too. Make sure the backing is at least 3 to 4 inches larger than the top on all sides. This extra space helps during quilting and prevents frustrating shifting.Make the quilt sandwich.
Layer the backing right side down, then batting, then quilt top right side up. Smooth each layer carefully from the center outward. Pin baste or spray baste thoroughly. Because this quilt has larger blocks, any puckers will show more clearly, so take your time here. If the surface ripples now, they will only become more noticeable later.Plan the quilting design.
The stitching in the photo looks like loose free form squiggles and curved paths. Beginners can absolutely mimic this look. Draw a few practice lines on paper first. Think of meandering garden paths, long loops, open petals, and gentle swirls. Avoid very tiny loops because they can stiffen the quilt and make mistakes more obvious.Quilt the layers together.
Start in the center and work outward. Use a walking foot if you prefer slightly more controlled curving lines, or a free motion foot if you are comfortable lowering the feed dogs. Keep your movements fluid. You should now see the quilt begin to gain texture and character. If one area looks more densely quilted than another, add a few extra lines in nearby spaces so the overall density stays even.Check drape as you go.
Pause halfway through and lift one edge of the quilt. It should still feel soft and foldable. If it feels board like, your quilting is too dense. Use larger curves for the remaining sections. This is one of the biggest differences between a display quilt and a quilt that looks inviting on a sofa.Trim the edges after quilting.
Once quilting is complete, trim all four sides square. Use a large ruler and take your time. Clean edges give the handmade style a finished professional look.Prepare and attach the binding.
Cut binding strips 2 1/4 inches wide for a standard clean edge. If you want to recreate the relaxed edge impression from the photo, use a soft woven binding or add a narrow fringe trim beneath the binding on two short edges. Join the strips, press them in half lengthwise, and sew the binding to the quilt front. Fold to the back and hand stitch or machine stitch in place.Wash gently for the final texture.
The photo has that lovely puckered quilt surface that comes alive after washing. Wash on a gentle cycle and tumble dry low, or air dry partially then finish briefly in the dryer. This brings the quilting lines forward and softens the block transitions.Style and evaluate.
Drape the quilt casually over a sofa arm or back cushion. You should now see those large color fields folding into each other with soft sculptural movement. If yours looks flatter than the photo, it may need one wash or slightly looser styling.
Troubleshooting
My quilt top looks stiff and boxy.
Use more varied block placement and avoid arranging all rectangles in perfect predictable rows. A slightly offbeat layout feels more like the photo.
The quilting is puckering.
This usually means the quilt sandwich was not basted securely enough or you pulled the fabric while quilting. Slow down, support the weight of the quilt, and work on a large flat surface.
My curves look jerky.
Practice drawing loops on paper first, then sew more slowly. Bigger curves are easier and look more elegant than tiny scribbles.
My colors do not feel balanced.
Step back several feet from the layout. Move the darkest or strongest color around until the eye travels across the quilt naturally.
The quilt is not draping like the photo.
Use low loft batting and avoid dense quilting. A soft cotton batting usually gives the best couch throw drape.
Finishing details
After binding, clip any loose threads and inspect both sides in bright light. If you added fringe, lightly comb it with your fingers so it hangs evenly. Steam the quilt gently if needed, but do not flatten all the texture you just created. This style shines when it looks lived in, soft, and touchable.
Optional upgrades include adding a pieced backing in leftover colors, attaching a small woven label, using hand quilting in a few sections for extra charm, or sewing on a thin muslin lining if your top fabrics are especially lightweight. Another beautiful option is using variegated quilting thread in a very subtle tone blend, though beginners may prefer a single cream thread for a calmer result.
Shop Similar
- Earth tone quilting cotton bundle for modern patchwork throws
- Low loft cotton batting for soft drape quilts
- Cream quilt binding fabric for relaxed neutral edges
- Free motion quilting foot for curved organic stitching
- Large acrylic quilting ruler and rotary cutter set
Style It With
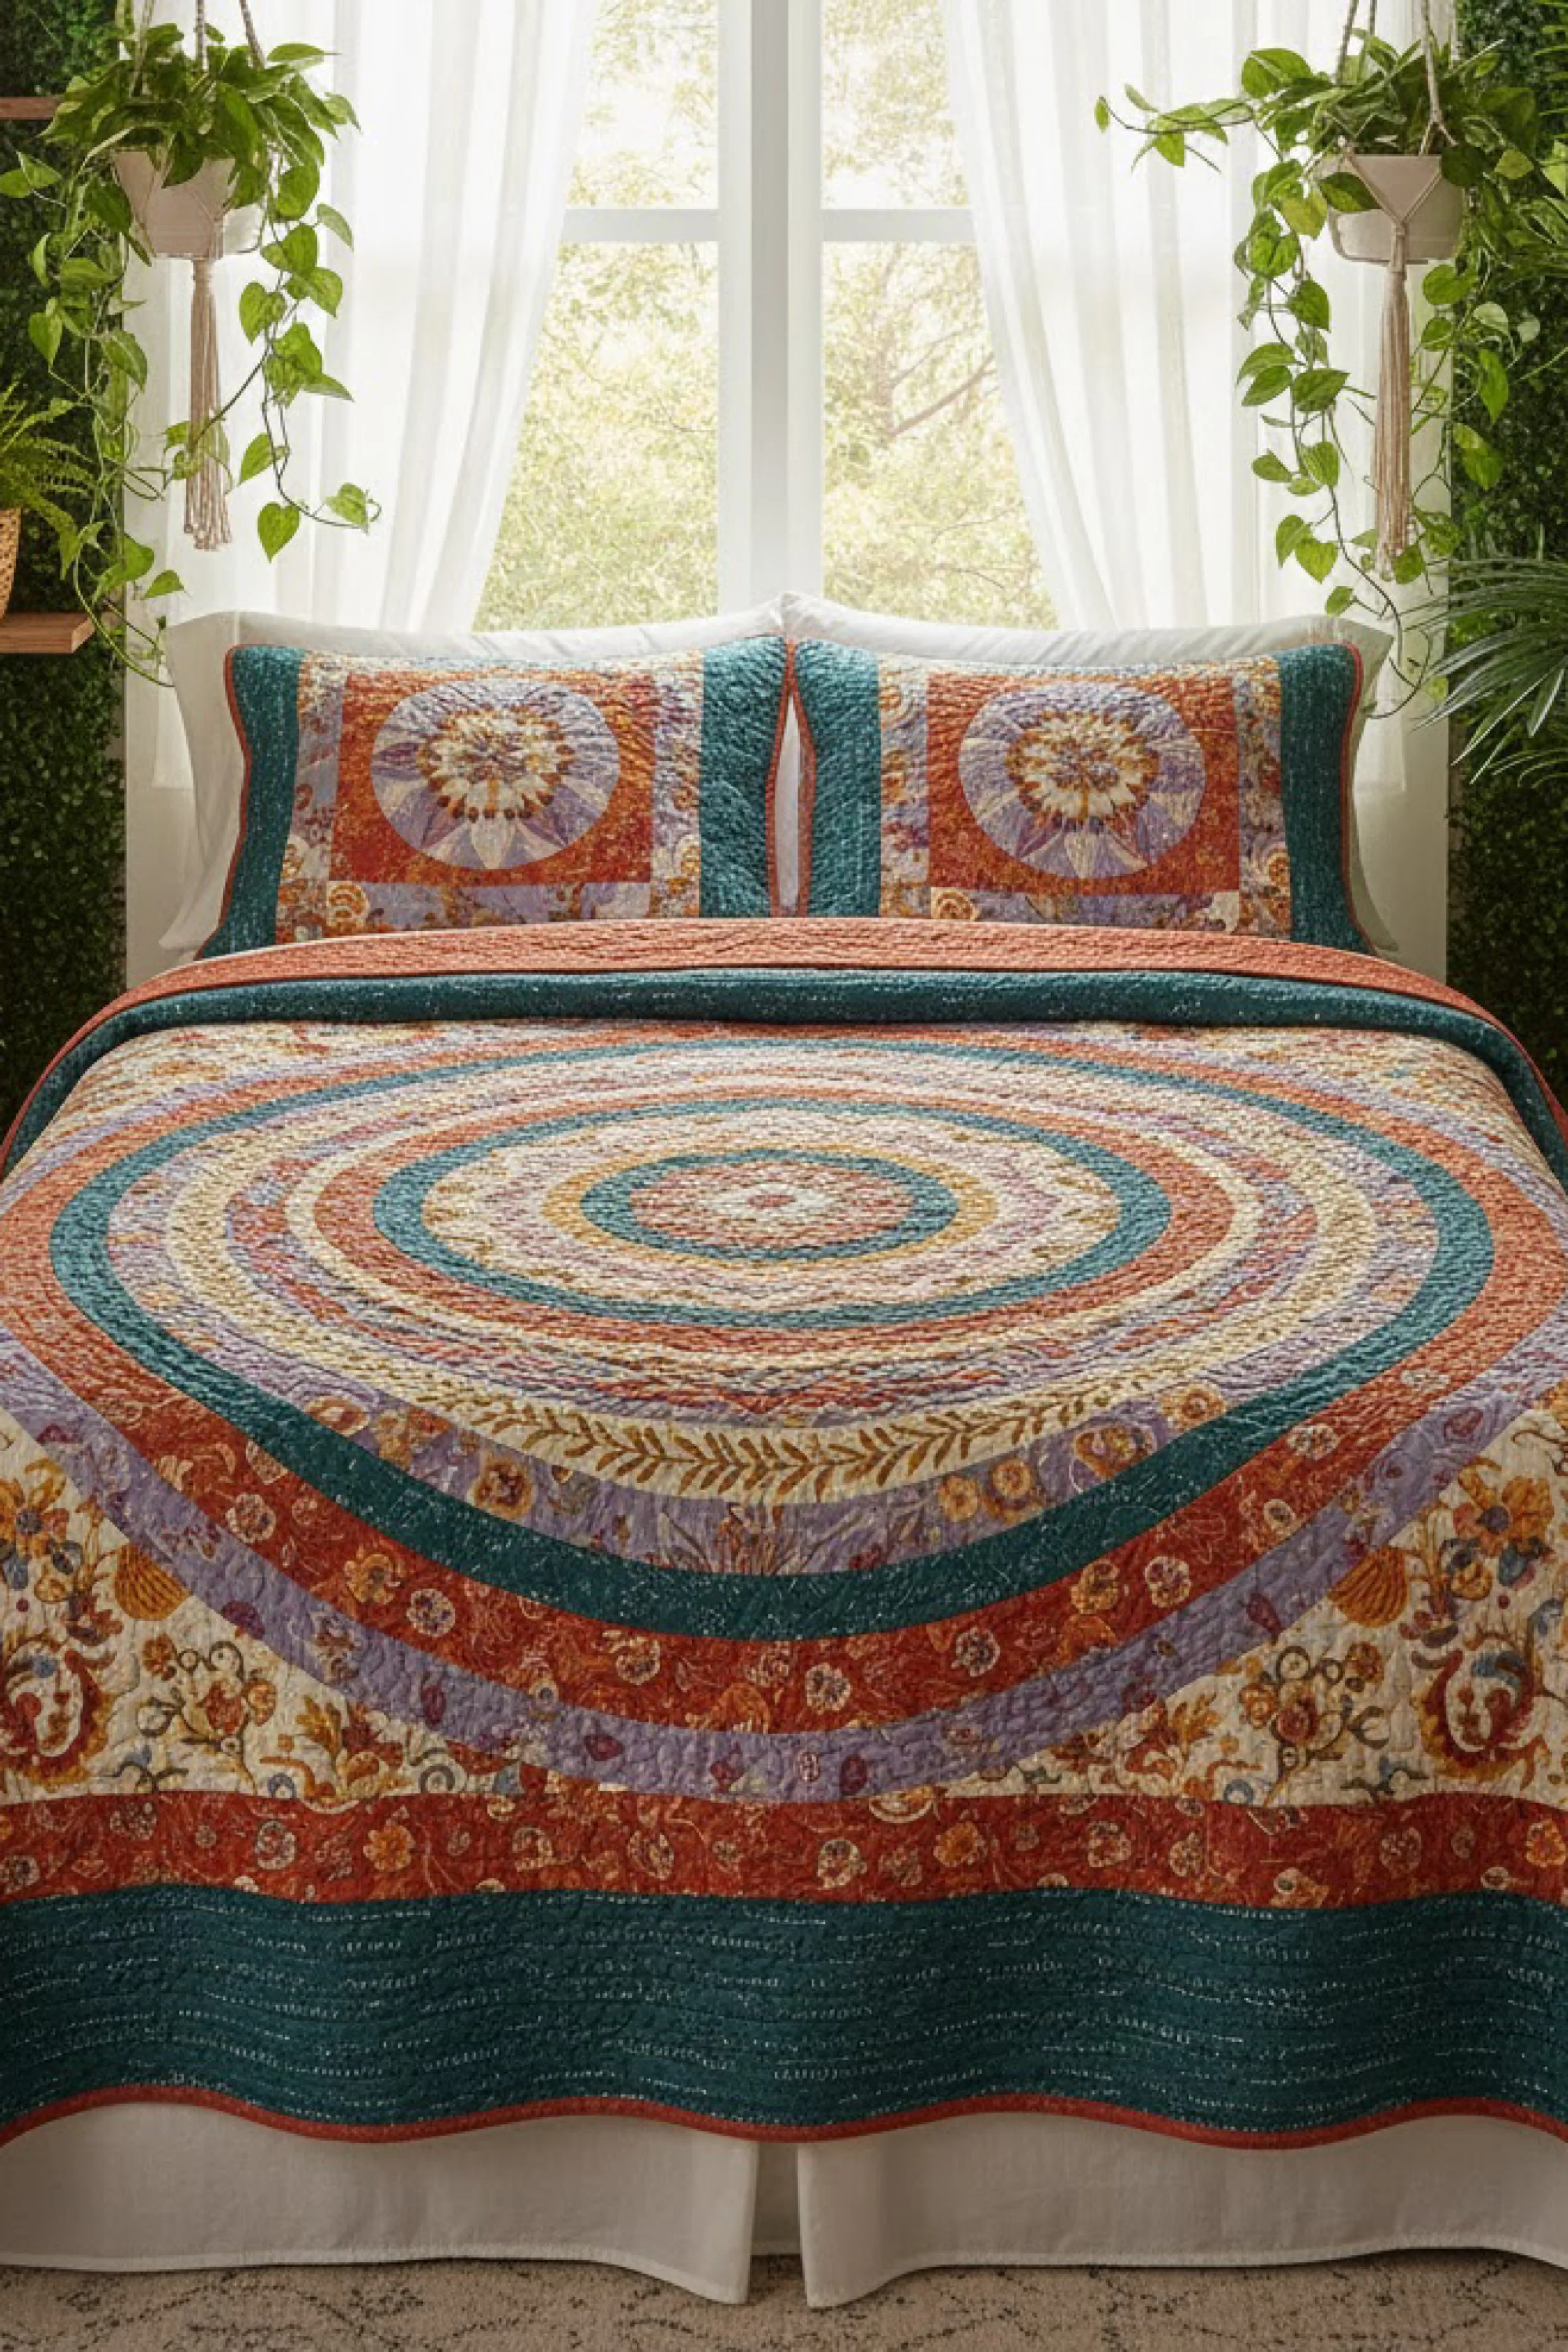
Concentric Boho Medallion Quilt — DIY Guide
What you’re making
You’re making a dramatic medallion style quilt with concentric rings, floral border prints, jewel toned accents, and a rich bohemian palette that feels both ornate and cozy. The quilt in the image has the look of a statement bed quilt, with a centered circular composition built from pieced rings and decorative strip borders.
Although it looks intricate, you can recreate this effect by breaking the design into manageable rounds and treating each section as its own border. The final result feels lush and layered, especially when paired with matching pillow shams and warm natural light.
Materials + tools list
- Quilting cotton in teal, rust, cream, lavender, gold, and soft coral
- Assorted floral and ornamental print fabrics for outer rings and borders
- Solid or subtle texture fabric for the central medallion rings
- Backing fabric, extra wide if possible
- Cotton batting or cotton bamboo blend batting
- Binding fabric in rust or deep teal
- Coordinating thread for piecing
- Neutral or matching thread for quilting
- Rotary cutter
- Quilting rulers, including a long ruler
- Fabric scissors
- Sewing machine
- Iron and ironing board
- Pins or quilt clips
- Safety pins or spray baste
- Optional circle template, compass, or flexible ruler
- Optional foundation paper for accurate piecing of the center
Finished size + customization notes
A queen bed version can be about 90 by 96 inches, but you can scale this down to a throw by reducing the number of surrounding borders. The central medallion can be enlarged or simplified depending on your skill level.
If you want the look without complex curved piecing, use more rings made from segmented strips and slightly faceted shapes. From a distance, it will still read as circular and layered.
Step by step instructions
Identify the major design zones.
This quilt is easiest to build when you stop seeing it as one giant complicated object. Break it into five sections: the center medallion, the inner rings, the decorative middle rings, the lower floral border area, and the outer deep teal frame. Once you mentally separate those sections, the whole project feels much more approachable.Create your color story first.
The photo blends teal, rust, warm ivory, lavender, muted gold, and multicolor floral prints. Lay your chosen fabrics out together and make sure the tones feel warm and slightly faded rather than neon. You should now see a palette that feels collected, artistic, and a little vintage.Draft the center medallion.
Start with a small central shape around 6 to 8 inches across. This can be a square in a square block, a small polygon, or a simple pieced rosette. Surround that center with narrow rounds of fabric to begin building the medallion. If precise curves feel intimidating, piece the rings from short straight segments. When sewn together, the eye still reads them as concentric movement.Build the inner circular bands.
Work outward one round at a time. Each new ring should be wider than the previous one. Alternate solids and subtle prints so the pattern does not become muddy. Press carefully after each addition. If your medallion starts to ripple, measure each side and trim or ease slightly before the next round.Use templates for balance, not perfection.
A flexible ruler or large paper template helps you keep the rings visually even. Do not aim for mathematical perfection. The charm of this style comes from the handmade richness. If yours looks slightly faceted instead of perfectly round, that is completely fine and still very true to the look.Add contrasting ring bands.
The quilt in the photo has strong color bands that help the medallion stand out. Add a teal band, then a warm rust band, then a floral or patterned band. Keep checking the quilt from several feet away. You should now see the center radiating outward with a sense of depth and rhythm.Create the ornamental lower section.
This quilt has a strong decorative band near the foot of the bed. To recreate that feel, piece several horizontal strip borders using floral prints, vine motifs, or small medallion fabrics. Stitch them together and attach as full width borders. This adds richness and helps anchor the more geometric circular center.Frame the quilt with deep outer borders.
The dark teal outer border is important because it contains all the warm internal colors. Cut wide border strips and add them last, mitering the corners if you want a refined finish. A straight seam works too if you are a beginner. The outer frame should calm the visual energy of the quilt and make the whole composition feel intentional.Make matching shams if desired.
The photo includes pillows that echo the quilt. You can make simple envelope back shams using leftover medallion inspired blocks. This is optional, but it helps the full bed look styled and complete.Assemble the backing and batting.
For a large bed quilt, piece the backing carefully or use extra wide backing fabric. A cotton bamboo blend batting adds lovely softness and drape, while standard cotton gives more classic quilt structure. For this look, either works well. Choose cotton if you want a slightly crisper heirloom feel, or bamboo blend if you want a softer sink into it finish.Baste thoroughly.
Large quilts need patient basting. Spread the backing flat, smooth the batting, then the quilt top. Use many safety pins or a spray baste plus a few pins for security. If the layers shift, the medallion will look off center after quilting, so this step deserves extra care.Plan quilting that supports the design.
This style benefits from quilting that follows the rings and borders. Stitch along the ring edges to emphasize the medallion structure. Then add gentle all over quilting in the print areas, such as curved lines, soft spirals, or echo quilting. You should now see the quilt surface gaining relief without hiding the printed fabrics.Quilt from the center outward.
Begin near the medallion and work outward. Rotate the quilt often to stay comfortable at the machine. If one ring gets slightly distorted, the quilting will help stabilize it. Keep your stitching density fairly even across the entire quilt so the finished texture looks balanced.Add special quilting to the floral bands.
In the decorative border sections, try simple vine like quilting, gentle waves, or leaf inspired curves. These details echo the botanical prints and make the quilt feel layered and luxurious. If that sounds too advanced, straight line quilting one quarter inch apart also looks beautiful.Trim and bind.
Square the quilt carefully after quilting. Bind it with rust or deep teal fabric to frame the edge. A double fold binding is durable for bed use. Stitch slowly around the corners so they turn neat and full.Wash for texture and softness.
The slight puckering after washing makes all those rings and border seams come alive. Use cool or warm water on gentle, then dry low. Once dry, spread the quilt over the bed and smooth it into place. You should now see a cozy medallion composition that feels almost tapestry like.
Troubleshooting
My circles are not looking circular.
That is usually a piecing geometry issue, but remember this design can be more medallion than perfect circle. Step back and assess from a distance. Often it looks far more balanced than it seems up close.
The quilt is too busy.
Insert one or two calm solid bands between your prints. Deep teal or warm cream works especially well.
My bed quilt feels heavy.
Choose low loft cotton batting and avoid overly dense quilting. Large bed quilts can become heavy fast.
The medallion is drifting off center.
Measure from the center outward after each added band. Trim and correct gradually instead of waiting until the end.
The prints do not blend.
Repeat each print in at least two places. That repetition creates cohesion.
Finishing details
For a refined finish, hand stitch the binding on the back and give the quilt a light steam press after washing. Add matching shams, a small woven label, or even a hanging sleeve if you want the piece to double as wall art. Optional upgrades include hand quilting around the center medallion, using metallic accent thread very sparingly in the innermost ring, or adding a flange edge between the quilt and binding for extra definition.
This quilt also benefits from thoughtful fabric scale. Use larger prints in the wider outer bands and smaller prints closer to the center. That helps the medallion read clearly and keeps the eye moving outward in rings. The look is richly layered, but it remains approachable if you treat each round as one simple task at a time.
Shop Similar
- Teal rust and lavender quilting fabric bundle for boho quilts
- Cotton bamboo blend batting for soft bed quilts
- Extra wide quilt backing fabric in warm neutral tones
- Flexible quilting ruler for curved medallion layouts
- Deep teal quilt binding fabric and strip bundles
Style It With

Geometric Autumn Star Throw Quilt — How To Guide
What you’re making
You’re making a crisp geometric throw quilt built from large triangular patchwork units in olive, rust, mustard, cream, and soft blush. The design has the energy of pinwheels and starbursts, but the overall finish stays calm because the shapes are oversized and the palette is earthy rather than loud.
This is the kind of quilt that looks striking draped over a sofa and still feels beginner friendly because the shapes repeat. The clean border quilting and soft color balance keep it modern, while the warm tones make it feel inviting and handcrafted.
Materials + tools list
- Quilting cotton in olive green
- Quilting cotton in rust
- Quilting cotton in mustard
- Quilting cotton in blush
- Quilting cotton in cream
- Backing fabric
- Low loft cotton batting
- Binding fabric in olive or cream
- Neutral piecing thread
- Matching or neutral quilting thread
- Rotary cutter
- Cutting mat
- Quilting ruler
- Half square triangle ruler optional
- Sewing machine
- Iron and ironing board
- Pins or clips
- Safety pins or spray baste
Finished size + customization notes
A throw size around 54 by 72 inches works beautifully for this look. You can make it wider for a couch back by adding another vertical repeat, or shorter for a chair throw by removing one row.
If you want a sharper, more graphic quilt, increase the contrast between your light and dark fabrics. If you want the softer look shown in the photo, choose muted tones with similar warmth and medium value spacing.
Step by step instructions
Understand the building block.
This quilt reads complicated at first glance, but it is mostly made from repeated triangles that combine into square units. Once you decide on a unit size, the rest becomes repetition. Think of it as making a handful of star like blocks, then arranging them in a bold modern grid.Select your palette with restraint.
The reason this quilt feels stylish is not only the geometry but the balance of color. Use olive, rust, mustard, cream, and blush, with cream acting as breathing space. Keep the olive and rust prominent, and use mustard as a bright accent rather than a dominant color. You should now see a palette that feels earthy and architectural.Cut your half square triangle pieces.
An easy approach is to make large half square triangles and combine them into block units. Cut squares at 8 inches for a finished 7 1/2 inch half square triangle, or adjust to your desired scale. Pair olive with cream, rust with cream, mustard with blush, and a few mixed combinations for variety.Sew the half square triangles.
Draw a diagonal line on the back of the lighter square, place right sides together, stitch a scant quarter inch on each side of the line, then cut apart on the line. Press carefully toward the darker fabric or open if you prefer less bulk. Trim each unit to a consistent size. Accuracy here makes the rest of the quilt much easier.Create larger composite blocks.
Arrange four triangle units at a time into pinwheel, kite, or star like groupings. The photo suggests repeated angular movement rather than one identical block over and over, so build a few versions that use the same colors in slightly different placements. This gives the quilt a lively but cohesive rhythm.Lay out the full quilt.
Place the blocks on a floor or design wall. Alternate directional movement so the eye travels across the surface instead of getting stuck in one corner. Add cream areas strategically to keep the design from feeling crowded. If yours looks too heavy in one area, move a darker block outward and a lighter block inward.Add quiet framing strips if needed.
The photo has a soft border structure that keeps the bold center from feeling chaotic. You can add cream or olive sashing between sections or save the calm framing for the border. Either approach works. Beginners often like a narrow internal strip because it gives a little visual breathing room.Sew blocks into rows.
Join the blocks row by row, matching points as neatly as you can. Use pins where triangle points meet. Press every seam before moving on. If the rows are getting wavy, remeasure your units. Most issues in geometric quilts come from inconsistent trimming.Add borders.
A wide cream border with repeated straight line quilting gives the photo its finished, gallery like edge. Add inner and outer borders in cream and olive if desired. Measure through the center of the quilt before cutting border lengths. This prevents the outer edges from bowing.Prepare the backing and batting.
Use a soft neutral backing if you want the front to remain the focus, or piece a backing from leftovers for extra interest. Low loft cotton batting is ideal because it keeps the quilt flexible while letting the quilting lines show nicely.Baste well.
Smooth the layers flat and secure them thoroughly. Strong geometry highlights any distortion, so careful basting is especially important for this design.Choose quilting that complements the shapes.
The quilt in the image shows clean parallel quilting lines near the borders and gentle texture through the center. Straight line quilting is a great beginner choice here. Quilt lines about one half inch to one inch apart, following the border shapes and some major seam lines. You can also add simple echo quilting around selected block forms.Quilt from the center outward.
Begin in the middle and work symmetrically to reduce shifting. Roll or fold the quilt as needed to fit through the machine throat. You should now see the geometric forms becoming more defined as the stitching adds dimension.Avoid over quilting.
This quilt should remain cozy. Too many lines can make it stiff. Use enough quilting to secure the layers, but keep the spacing generous. If the center already feels nicely textured, let the border quilting do the rest of the visual work.Trim and bind.
Square the quilt and add binding in olive or cream. Olive gives a crisp frame, while cream makes the whole piece feel lighter and more airy. Stitch the corners carefully for a neat, tailored finish.Wash and style.
After a gentle wash, the quilt will soften and the stitched lines will settle into the surface. Drape it over a sofa rather than pulling it tight. You should now see those triangles fold into one another in a way that looks both modern and inviting.
Troubleshooting
My points are getting chopped off.
Use a scant quarter inch seam and trim every triangle unit accurately before assembly.
The colors feel too harsh.
Swap one high contrast fabric for a softer muted version, especially the mustard or rust.
My rows are not lining up.
Check whether your half square triangles were trimmed consistently. Even an eighth inch difference repeats fast across a quilt.
The quilt feels too busy.
Add a wider cream border or insert a few more light units in the center layout.
The finished quilt is flatter than the photo.
Wash it once and let the batting puff slightly. That crinkle adds charm.
Finishing details
This quilt benefits from a clean finish. Clip threads closely, steam only lightly, and let the wash texture do most of the visual work. Optional upgrades include a striped binding, a pieced backing made from leftover triangles, hand tied corner tassels for a playful touch, or a matching cushion cover using one of the central block arrangements.
If you want a more heirloom look, hand quilt a few accent lines in thick cotton thread over the machine quilted base. If you want a more modern style, keep the quilting minimal and the edges sharp. Either direction still preserves the bold geometric spirit of the original.
Shop Similar
- Autumn earth tone quilting fabric bundle with olive rust and mustard
- Half square triangle quilting ruler for precise block trimming
- Low loft cotton batting for throw quilts
- Olive green quilt binding strips
- Rotary cutter mat and ruler quilting starter set
Style It With
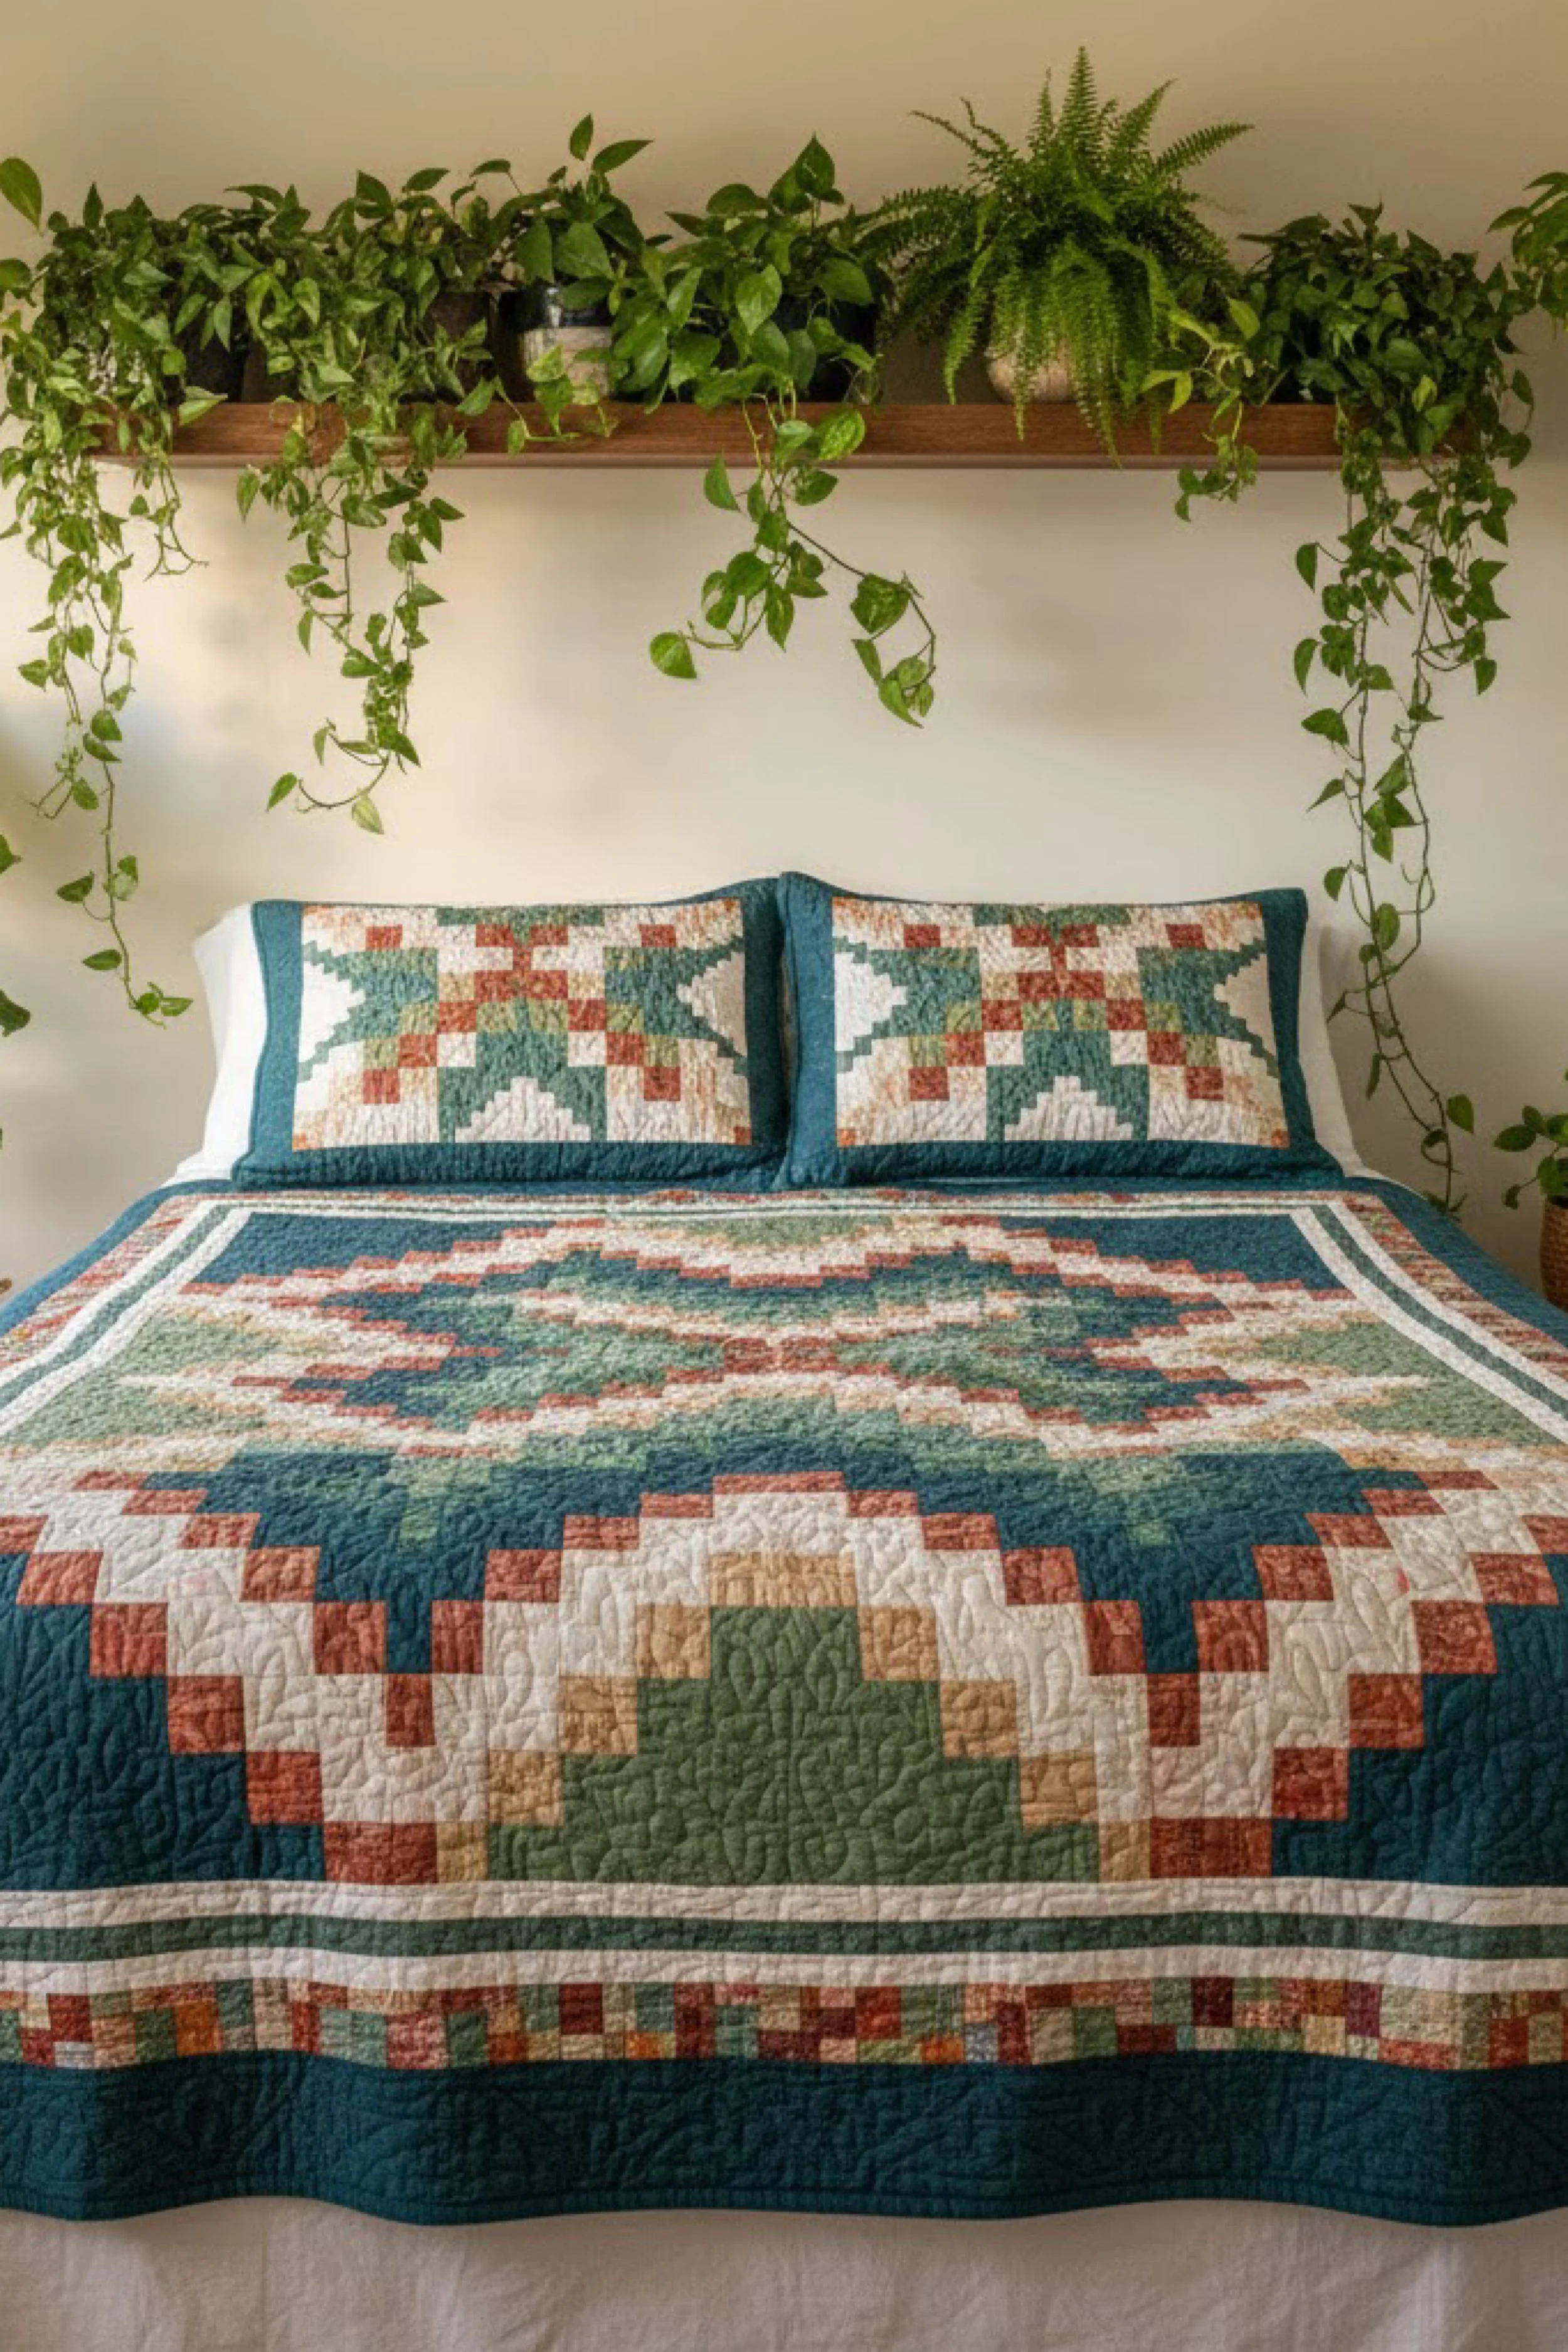
Southwestern Diamond Bed Quilt — Make It Yourself Tutorial
What you’re making
You’re making a bold Southwestern inspired bed quilt with stepped diamonds, small pieced accents, a deep teal ground, and a structured symmetry that feels graphic but still warm. The overall mood is classic cabin meets collected vintage textile, with a crisp center motif and matching pillow panels that echo the same desert inspired geometry.
This quilt is ideal if you love strong pattern but want a timeless result. The design looks detailed, yet it can be broken down into manageable strips and block units, making it very achievable with patience and a clear cutting plan.
Materials + tools list
- Quilting cotton in deep teal
- Quilting cotton in sage
- Quilting cotton in rust
- Quilting cotton in cream
- Quilting cotton in warm tan
- Small scrap fabrics in coordinating tones for pixel like border accents
- Backing fabric
- Cotton batting
- Binding fabric in deep teal
- Neutral thread for piecing
- Matching quilting thread
- Rotary cutter
- Cutting mat
- Long quilting ruler
- Small square ruler
- Sewing machine
- Iron and ironing board
- Pins or clips
- Safety pins or spray baste
Finished size + customization notes
A full or queen size quilt works best for this style because the central diamond really needs room to breathe. A good target is about 84 by 96 inches. You can also make it as a large throw around 60 by 72 inches by simplifying the surrounding borders.
The easiest customization is scale. Larger pieces create a more modern version. Smaller pieces create a more traditional Southwestern feel. For beginners, larger is better because it reduces the number of seams.
Step by step instructions
Break the design into a center and borders.
This quilt is much less intimidating once you identify the main center diamond and the horizontal framing bands around it. Instead of thinking about the whole bed quilt at once, focus on making one central motif and then building outward.Choose the right fabric balance.
The photo relies on deep teal as the grounding color. Cream and sage lighten the design, while rust and tan bring warmth. Keep teal dominant or the Southwestern look will weaken. Lay the fabrics together and confirm that teal visually anchors the palette before you begin cutting.Draft the center diamond.
You can build the center from diagonal rows, strip piecing, or a diamond template. For a beginner friendly route, create the motif using square and rectangle based stepped shapes that form a diamond illusion. From a distance, the stepped edges read beautifully and are far easier than true set in diamonds.Cut the central units.
Cut a series of rectangles and squares in teal, sage, cream, rust, and tan. Arrange them into mirrored stepped rows that widen toward the middle and narrow toward the top and bottom. Take a photo of the layout before sewing. You should now see a centered motif with clear symmetry.Sew the central motif row by row.
Join each row carefully and press after every seam. Then stitch the rows together, matching key color changes along the center line. Accuracy matters here because the eye will notice if the central shape leans to one side.Add side fields of teal.
Once the center motif is complete, frame it with teal sections so the diamond appears to float in a larger field. This negative space is what gives the quilt its bold presence. If yours feels too crowded, increase the amount of teal around the motif.Build the lower and upper border bands.
The quilt in the photo has strong banding near the top and bottom, including smaller pieced accents. Make narrow strip borders in cream and sage first, then add a wider pieced border using tiny squares or rectangles in rust, tan, sage, and cream. These small accents add richness and echo the pillow design.Create the pillow sham panels.
Use leftover small pieced units to make coordinating sham fronts. The photo looks especially complete because the pillows repeat the quilt language. You can make simple envelope back shams and frame the front panels in teal.Assemble the full top.
Join the center field with the top and bottom borders, then add side borders if desired. Measure frequently to keep everything square. You should now see the full Southwestern composition emerge, with the central motif held firmly inside the outer frame.Choose a quilting motif.
This style looks wonderful with a mix of seam following and motif quilting. Quilt along the major diamond edges to emphasize structure. Then fill larger teal areas with feathers, leaves, or soft curves. The quilting in the photo looks moderately dense, enough to give texture without flattening the design.Baste with extra care.
Because this is a bed sized quilt with broad dark areas, any tucks or ripples will show. Secure the quilt sandwich thoroughly. Smooth from the center outward and pin more than you think you need.Quilt the center first.
Start with the main diamond motif so it stays stable and centered. Then quilt outward through the surrounding teal field and finally the borders. Working in this order helps the quilt lie flat and keeps the visual focus crisp.Add texture to the teal areas.
Large dark fields can look empty unless the quilting adds life. Try leaf motifs, echo diamonds, or elongated curves. If you are newer to quilting, a gentle all over serpentine line works nicely and still keeps the handmade feel.Emphasize the border sections.
Quilt straight or slightly curved lines in the smaller border bands. This contrast between organic center texture and cleaner border stitching adds polish. You should now see the quilt surface catching the light beautifully.Trim and bind.
Trim the quilt square and bind it in deep teal for a seamless frame. Teal binding reinforces the edges and helps the entire design feel grounded.Wash and soften.
After washing, the quilt gains that wonderful puckered texture that makes a bed quilt feel inviting rather than stiff. Spread it neatly over the bed, fold the top edge back slightly if you want to show the sheets, and place the matching shams in front.
Troubleshooting
My center diamond is leaning.
Measure each row before joining. If one row is slightly long, trim or ease it before it throws off the full motif.
The colors are feeling too busy.
Increase the teal field around the center or simplify one of the pieced borders.
My small border pieces are frustrating.
Cut slightly oversized and trim them after sewing into units. That extra room can save a lot of aggravation.
The quilt is not lying flat.
Check whether your border strips were measured from the quilt edges rather than the center. Always measure through the center to avoid waviness.
The design looks too harsh.
Use softer muted rust and sage fabrics rather than very saturated tones.
Finishing details
For finishing, hand stitch the binding if you want a quieter edge, or machine stitch for durability. Add matching pillow shams for the full styled bed look. Optional upgrades include a pieced backing using leftover mini border fabrics, a flange between the quilt top and binding, or hand tied tassels on the shams for a subtle rustic accent.
A very beautiful advanced option is using big stitch hand quilting in cream thread over selected teal areas after the machine quilting is finished. This adds artisan texture without requiring the whole quilt to be hand quilted. Another option is to wash the finished quilt with a few clean towels the first time to soften it and enhance the cozy crinkle.
Shop Similar
- Southwestern quilting fabric bundle in teal rust sage and cream
- Deep teal quilt backing fabric and wide binding fabric
- Cotton batting for queen size quilts
- Small square quilting ruler for pieced borders
- Envelope back pillow sham supplies for quilted pillows
Style It With
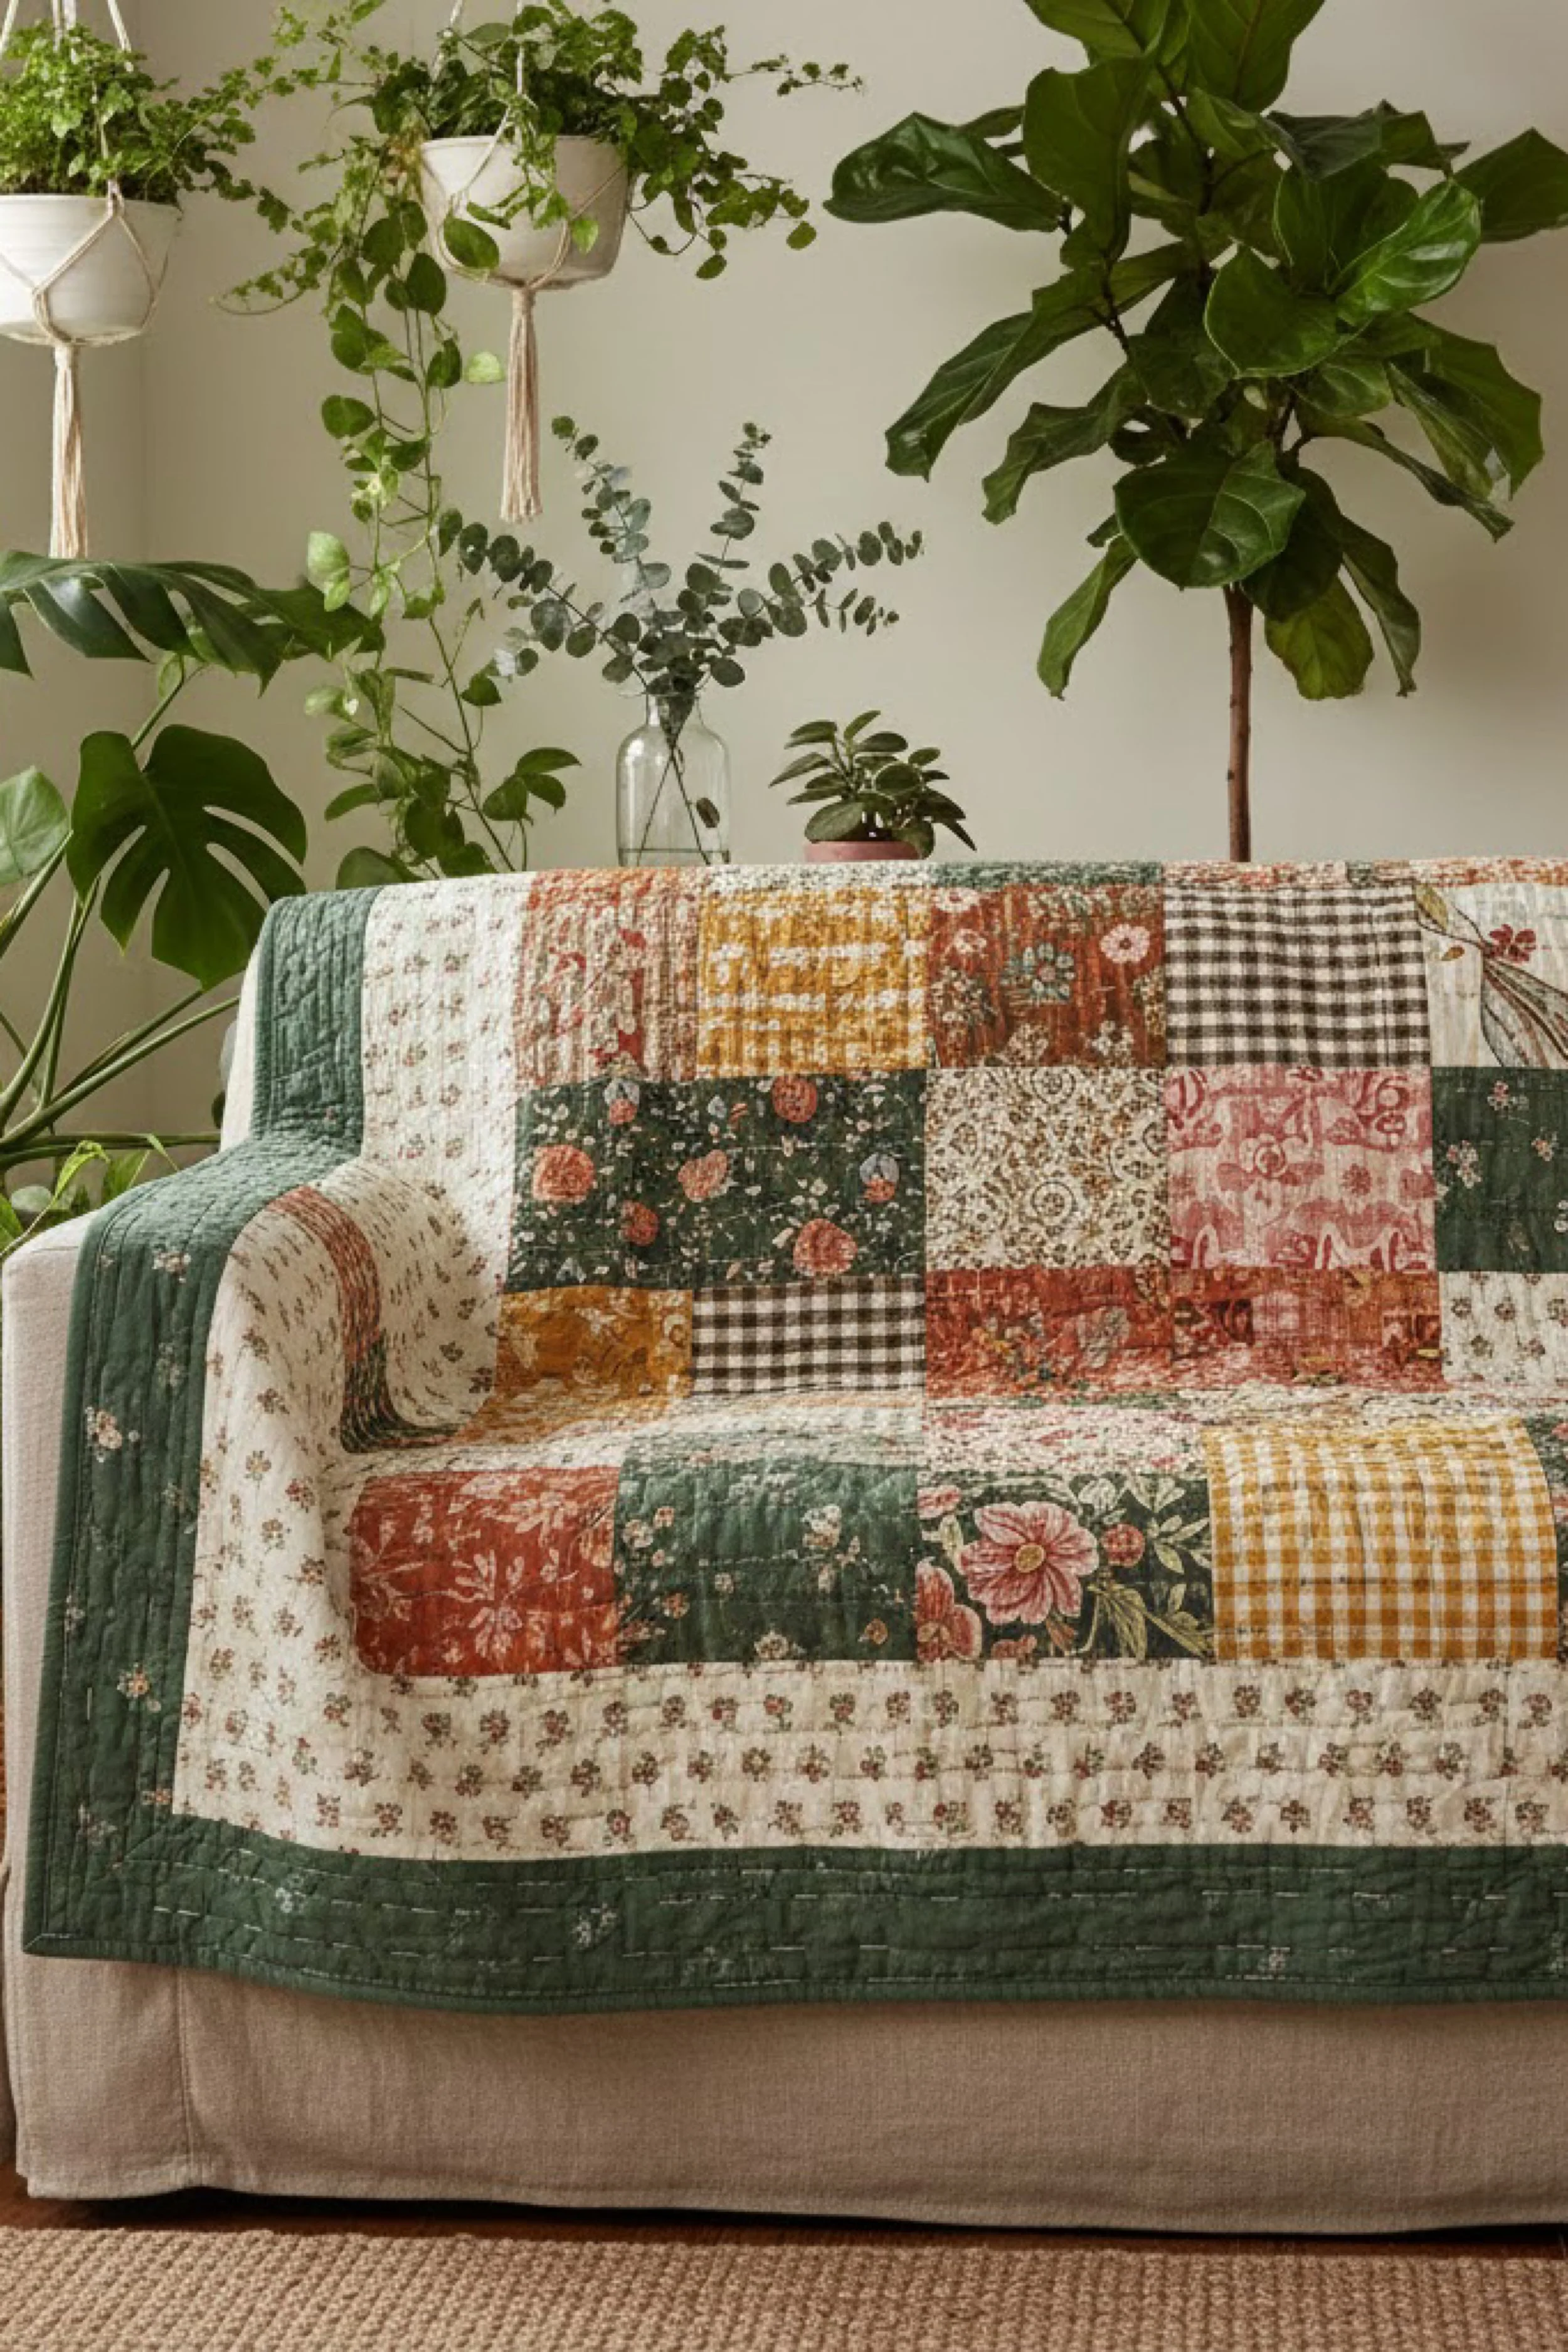
Vintage Floral Patchwork Couch Quilt — DIY Guide
What you’re making
You’re making a charming vintage inspired patchwork quilt with mixed florals, tiny ditsy prints, gingham, earthy green framing, and a gently nostalgic cottage feel. The quilt in the photo looks collected rather than overly coordinated, which is exactly what gives it so much personality.
This is a wonderful project for someone who loves scrappy quilting, soft botanical palettes, and the idea of turning many small prints into one harmonious throw. The final result feels cozy, romantic, and perfect for draping over an armchair or sofa in a plant filled room.
Materials + tools list
- Assorted floral quilting cotton scraps
- Tiny print quilting cotton scraps
- Gingham quilting cotton
- Earthy green border fabric
- Cream or off white patchwork accent fabric
- Backing fabric
- Cotton batting
- Binding fabric in green
- Neutral piecing thread
- Quilting thread in cream, green, or light brown
- Rotary cutter
- Cutting mat
- Acrylic ruler
- Sewing machine
- Iron and ironing board
- Pins or clips
- Safety pins or spray baste
Finished size + customization notes
A sofa throw around 50 by 65 inches is ideal for this look. You can make it larger by adding more patchwork rows or increasing the outer border. Because this style is scrappy, it is very easy to customize with fabrics you already have.
If you want a more antique look, lean into smaller floral prints and faded colors. If you want a fresher cottage version, keep the same structure but use slightly cleaner whites and brighter florals.
Step by step instructions
Gather fabrics that feel related, not identical.
This quilt works because the prints vary in pattern and scale but still live in the same world. Pull florals, ditsy prints, soft checks, and a few darker grounding fabrics. Aim for warm rose, mustard, olive, cream, and soft brown. Add one deep green for the border so the patchwork has a visual frame.Sort your fabrics by value and mood.
Place the fabrics into light, medium, and dark groups. Also separate the most floral pieces from the checks and the more neutral fillers. This makes layout far easier later. You should now see which prints can act as spotlight pieces and which ones should play supporting roles.Cut a mix of patchwork rectangles and squares.
For an easy construction plan, cut most pieces into 5 inch squares and 5 by 7 inch rectangles. This gives variety without becoming difficult to assemble. Include a few longer strips if you want the patchwork to feel even more collected and less grid like.Choose your hero prints.
The photo includes a few prints that immediately catch the eye, like florals and gingham. Pick several of your prettiest fabrics and spread them across the design instead of clustering them together. This keeps the eye moving through the quilt.Lay out the patchwork center.
Arrange the pieces in rows, mixing florals with quieter prints so no area becomes too busy. Darker fabrics should be spaced out to anchor the design. If yours starts to look muddy, insert more cream or light print pieces. The layout should feel charming and varied, not cramped.Sew the pieces into rows.
Use a quarter inch seam and press as you go. Because the fabrics are varied, the seams will visually disappear more than they do in a geometric quilt, which is very forgiving for beginners. Join rows carefully and keep checking that the overall top stays fairly square.Add a green border around the center.
The deep green border in the photo is what transforms the patchwork from simply sweet to truly finished. It contains all the little prints and gives the quilt a calm edge. Cut border strips wide enough to make a clear frame, about 3 to 4 inches finished.Consider a second inner border if needed.
If your patchwork feels too busy against the green, add a narrow cream or print border between the center and the outer frame. This little pause can make the whole quilt breathe.Prepare the backing.
Use a single backing fabric in a soft floral or plain warm neutral, or piece the backing from leftover fabrics for a more homespun look. If piecing the back, keep one side simpler so the front remains the star.Make the quilt sandwich.
Layer backing, batting, and top. Smooth everything carefully and baste well. This style can hide small piecing irregularities, but puckers in the quilting still need to be avoided.Choose the quilting style.
Straight line quilting, simple grid quilting, or gentle hand look lines all suit this quilt. The photo suggests a soft all over texture rather than dramatic quilting motifs. Try stitching along patchwork seams and adding a few parallel lines in the border for subtle structure.Quilt the patchwork center first.
Begin in the middle and move outward. If you want extra vintage character, quilt in slightly wavy lines rather than ruler straight perfection. The effect should feel cozy and domestic, not overly crisp.Quilt the border with intention.
In the green border, echo the edge of the quilt with parallel lines or a simple rectangular spiral. This helps frame the piece and gives that border a nice visual weight. You should now see the patchwork center held neatly inside the outer frame.Trim and bind.
Bind the quilt with matching green fabric for a seamless cottage finish. A green binding also hides wear nicely if the quilt will be used often.Wash for softness.
Once washed, the quilt will get that lovely crinkled texture that makes mixed florals feel even more inviting. Spread it over a chair, sofa, or bed corner and let the folds show off different prints.Refine the vintage mood.
If you want the quilt to look even more heirloom inspired, add one or two patches with visible hand stitching, or sew on a simple cotton label with the date. These tiny touches make the finished piece feel deeply personal.
Troubleshooting
My scrap mix looks messy instead of charming.
You likely need more repetition. Repeat each major color several times across the quilt.
The florals are competing too much.
Add small quiet prints and creams between them.
The green border feels too dark.
Choose a sage or moss green instead of a very deep forest tone, or insert a cream inner border.
My quilt top is stretching.
Press instead of dragging the iron, and handle the assembled rows gently.
The final quilt does not feel vintage enough.
Choose softer, less bright prints and use a slightly crinkled finish after washing.
Finishing details
Trim threads carefully and inspect both sides before washing. If you want a particularly soft antique inspired finish, wash with a gentle detergent and dry low. Optional upgrades include scalloped edges, hand tied corners, a pieced striped binding, or a ruffled pillow to pair with the quilt.
This quilt style is especially lovely when you let the prints tell the story. Do not worry about making every piece match perfectly. The beauty is in the mix. As long as the colors belong to the same warm earthy family and the green border frames them confidently, the result will feel beautifully intentional.
Shop Similar
- Vintage floral quilting cotton scrap bundle
- Green quilt border fabric in moss and forest tones
- Ditsy print and gingham quilting fabric pack
- Cotton batting for soft throw quilts
- Quilt label tags and fabric markers for handmade gifts
Style It With
By the time you finish even one of these quilts, you begin to understand why they hold so much presence in a room. They are not just blankets or decor. They are layers of intention, color, and texture that evolve with use. They fold, drape, and soften over time, becoming more beautiful the more they are lived with.
Whether you choose the bold geometry, the delicate florals, or the rich medallion style, each quilt here offers a chance to create something lasting. Let them live casually across a sofa, at the foot of a bed, or layered into a sunlit corner surrounded by plants. The beauty of these pieces is not perfection, but presence. Soft, grounded, and quietly striking.