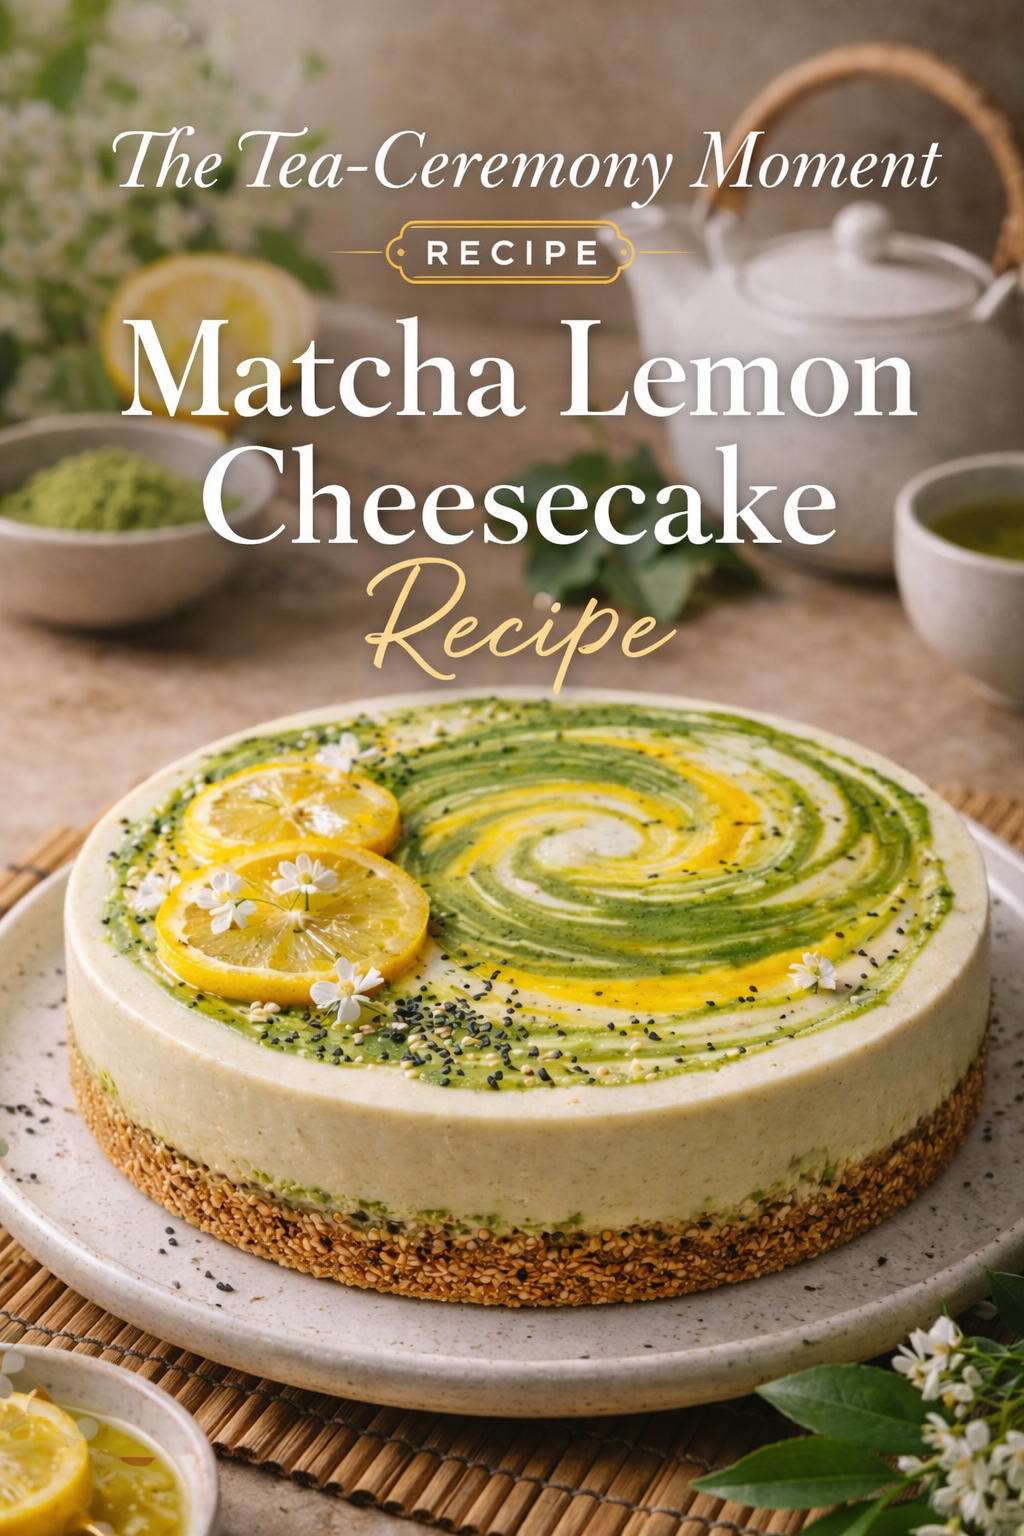
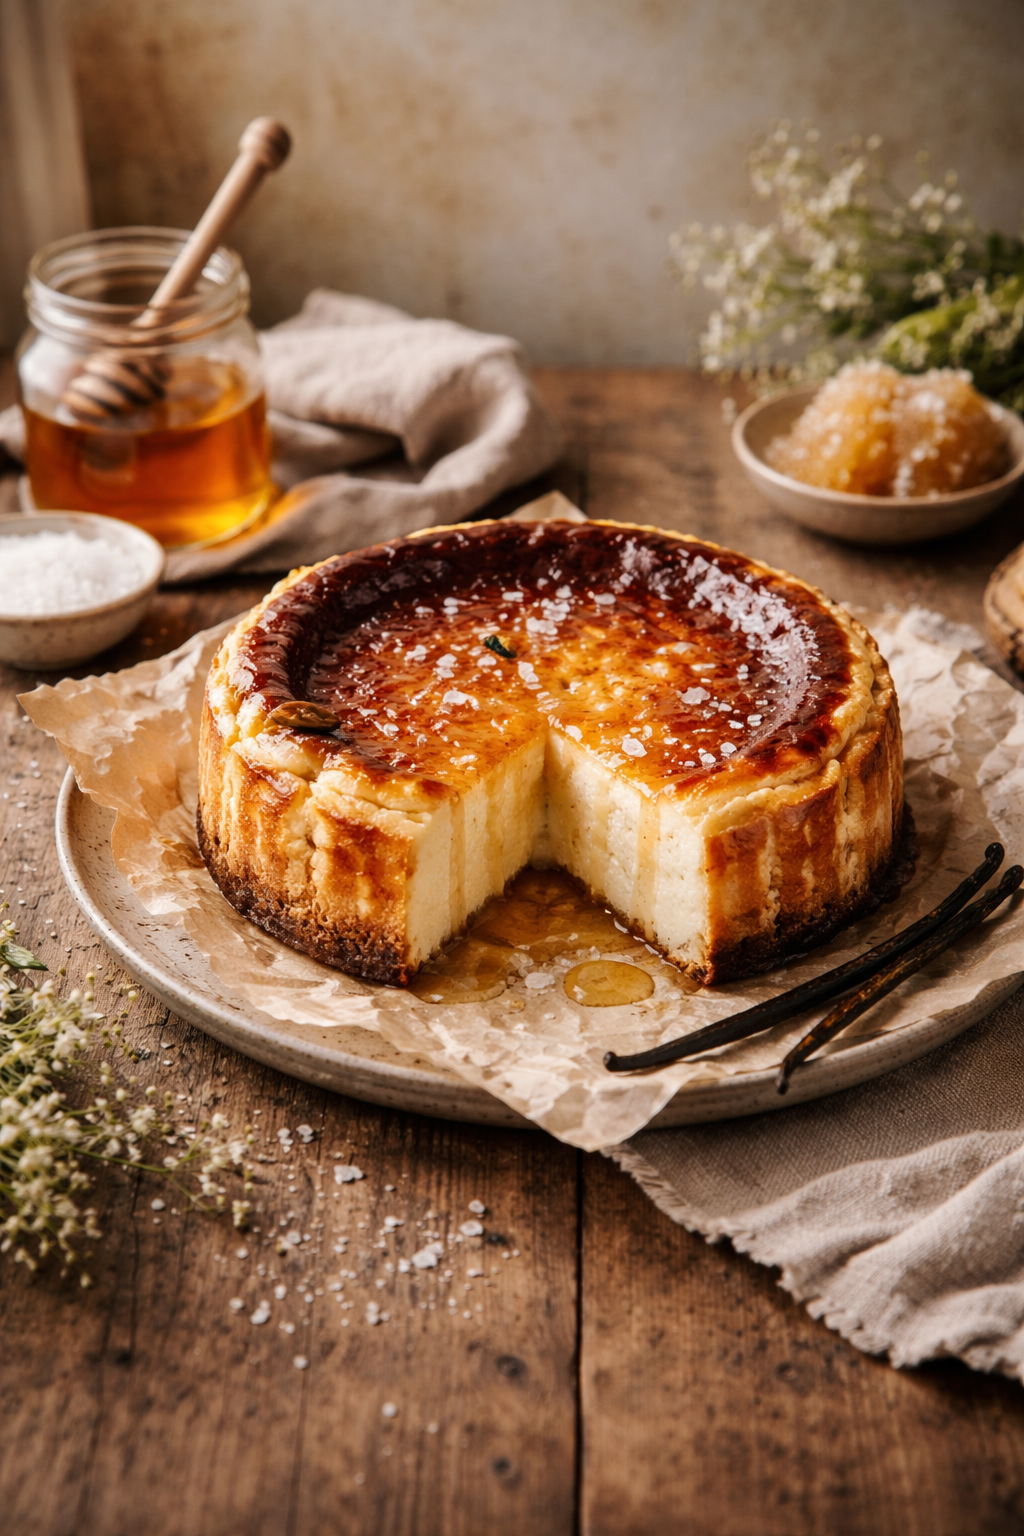
The Crackle That Stops the Room: Honey-Salted Vanilla Bean Cheesecake Recipe
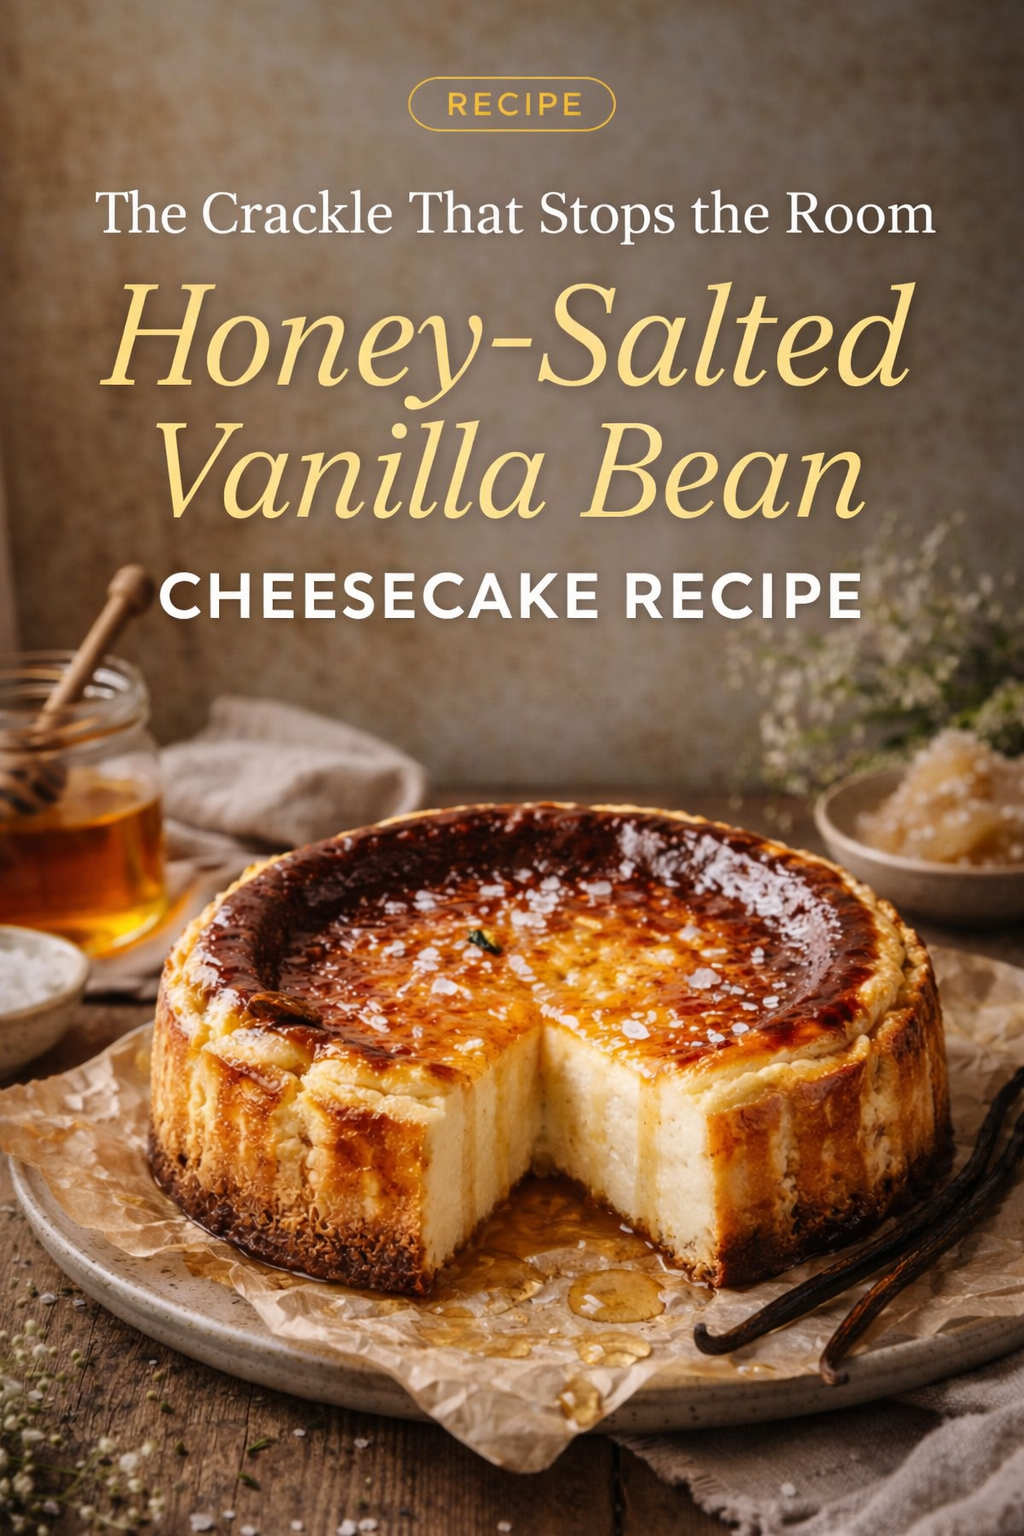
The first thing you notice is the sheen—an amber, glassy top that looks like it was kissed by heat until it turned into a thin, caramelized lacquer. Light catches it in little flashes, the way it does on brûléed sugar, and the surface holds a scatter of flaky salt like tiny, irregular snow. Beneath that crackle, the cheesecake stands tall and calm, pale at the center with a gentle golden edge, as if it’s been sun-warmed rather than baked. A single slice has been lifted away, and the cut face tells the truth: dense but not heavy, creamy without being wet, smooth in a way that feels expensive.
Everything around it leans into the same mood—rustic, golden, quietly dramatic. There’s parchment crinkled under the cake like a soft frame, honey pooled in slow, glossy drops on the plate, and vanilla beans resting nearby like dark brushstrokes. A jar of honey sits open with a wooden dipper, the kind that makes you want to twist it once, just to watch the ribbon fall. Off to the side, a bowl of sugar crystals waits like a prop that’s also a promise—sweetness you can hear when it hits the top. The table is weathered, real wood with a lived-in grain, and the background fades into a warm blur that makes the whole scene feel like late afternoon in a quiet kitchen.
This is the kind of dessert that doesn’t beg for attention—yet somehow gets it anyway. It has that rare balance of comfort and spectacle: familiar cheesecake softness, but with a top layer that adds a faint snap and a whisper of smoke-sweet caramel. The honey doesn’t just sweeten; it changes the shape of the flavor, turning vanilla into something more floral and sunlit. The salt doesn’t just “enhance”; it sharpens the edges so every bite feels more dimensional, like the difference between a photograph and a film still.
Vanilla is the backbone here, and it’s worth treating it like the lead character. When you use real vanilla bean, the fragrance is rounder, warmer—less “extract” and more candlelit pastry shop. It’s the kind of ingredient that makes you slow down, the way you do when you reach for vanilla beans with a rich, aromatic profile or vanilla bean paste that gives you those signature specks and you know the dessert will look as good as it tastes. The honey matters too. Something bright and clean—wildflower, clover, even orange blossom—turns the drizzle into a finishing note instead of a sugary blanket, especially when it flows from a simple honey dipper that makes drizzling feel intentional instead of messy.
The top is where the personality lives. That burnished layer can come from a thin brûlée finish, or from a carefully caramelized surface that forms naturally when the bake is steady and patient. Either way, it helps to have the right tools on hand—something like a kitchen torch that gives you precise caramelization for that glassy crackle, or even a springform pan that releases cleanly without drama so the edges stay tall and proud. The finishing salt shouldn’t be the standard table kind; you want flakes that land softly and melt into the honey—think flaky sea salt that looks like tiny crystals, not dust.
And then there’s the moment it’s sliced. Cheesecake has a way of making time slow down in the kitchen—people drift closer, plates appear, conversations go quiet for a second. The knife slides through the crackle top with a gentle resistance, then glides through the center like satin. The first bite does exactly what it should: caramel whisper, honeyed warmth, vanilla depth, and that final spark of salt that makes you go back in for another forkful before you’ve even finished the first. It doesn’t feel like a “special occasion” dessert so much as a dessert that turns an ordinary night into one—golden, soft-edged, and memorable in that quiet, inevitable way.
Honey-Salted Vanilla Bean Cheesecake
A tall, creamy vanilla bean cheesecake finished with a caramelized crackle top, warm honey drizzle, and flaky sea salt.
Ingredients
Crust
- 1 1/2 cups graham cracker crumbs
- 3 tbsp granulated sugar
- 6 tbsp unsalted butter, melted
- Pinch of fine salt
Filling
- 24 oz cream cheese, room temperature
- 1 cup granulated sugar
- 1/2 cup sour cream, room temperature
- 1/2 cup heavy cream, room temperature
- 3 large eggs, room temperature
- 1 large egg yolk, room temperature
- 1 tbsp vanilla extract
- Seeds from 1 vanilla bean (or 2 tsp vanilla bean paste)
- 1 tbsp cornstarch (optional, for a slightly firmer slice)
- 1/4 tsp fine salt
Finish
- 2–4 tbsp honey, warmed slightly for drizzling
- Flaky sea salt, to taste
- 2–3 tbsp granulated sugar (optional, for a brûléed crackle top)
Method
- Heat oven to 325°F. Wrap a 9-inch springform pan with heavy foil.
- Mix crust ingredients and press firmly into the pan. Bake 10 minutes; cool.
- Beat cream cheese and sugar until smooth (low speed). Mix in sour cream, heavy cream, vanilla, vanilla bean, salt, and cornstarch (if using).
- Add eggs and yolk one at a time, mixing just until combined.
- Pour into crust. Bake in a water bath 60–75 minutes, until edges are set and the center still jiggles slightly.
- Turn oven off, crack the door, and cool 45–60 minutes. Chill at least 6 hours (overnight preferred).
- Optional: sprinkle sugar on top and torch to a glossy crackle.
- Drizzle with warm honey and finish with flaky sea salt before serving.
In-Depth Step-by-Step Guide: Crackle Top, Creamy Center, Zero Stress
Cheesecake rewards calm technique. The goal is a batter that’s smooth and creamy (not airy), a bake that’s gentle (not aggressive), and a chill that sets everything into that clean, sliceable luxury.
1) Set up your pan like you mean it
Use a 9-inch springform pan and seal it well. Cheesecake + water bath is the classic path to an even, crack-free bake, but it only works if the pan is protected. Wrap the outside in multiple layers of foil, or use a reusable silicone pan wrap made for water baths if you want a simpler setup. If you’ve ever had a soggy crust, it’s almost always water sneaking in.
Line the bottom with parchment if you like easy insurance, and lightly grease the sides so the cake can rise without grabbing. A crust that stays crisp starts with a firm press—use the flat bottom of a measuring cup or a simple tart tamper that makes the press uniform.
2) Bake the crust briefly, then cool completely
Mix crumbs, sugar, salt, and melted butter until it looks like wet sand. Press firmly. That first 10-minute bake sets the crust so it doesn’t turn to paste under the filling. Let it cool while you make the batter—warm crust can encourage bubbles and softening.
Variation ideas:
- Swap in crushed cookies for a deeper flavor.
- Add a pinch of cinnamon or a tiny scrape of nutmeg for a warm edge.
3) Room temperature is not optional
Cold cream cheese leaves lumps; overmixing to fix lumps adds air; air causes cracks. Let everything come to room temp: cream cheese, sour cream, heavy cream, eggs. If you’re short on time, let eggs sit in warm water for 10 minutes.
This is also where vanilla becomes the headline. Split a bean and scrape the seeds with a small paring knife. If you’d rather skip the slicing, vanilla bean paste is a clean substitute that still gives those specks and that deeper aroma. Either way, a little prep here changes the whole personality of the cheesecake.
4) Mix for silk, not fluff
Start low and slow:
- Beat cream cheese and sugar just until smooth.
- Add sour cream and heavy cream until blended.
- Add vanilla and salt.
- Add eggs last, one at a time, mixing only until the streaks disappear.
Why this matters: eggs whip into foam if you overmix. Foam expands in the oven, then collapses as it cools—hello cracks and a slightly spongy texture. Keep it calm. If you want extra structure, cornstarch is a quiet helper: it firms the slice slightly without making it dense.
Troubleshooting:
- Lumps: usually cold ingredients. Let the batter sit 10 minutes, then gently mix again on low.
- Too many bubbles: tap the bowl on the counter; skim surface bubbles with a spoon.
5) Water bath: gentle heat, better texture
Place the wrapped pan in a roasting pan. Pour hot water into the roasting pan until it reaches about halfway up the springform. The steam moderates heat, keeping the edges from overcooking while the center sets slowly.
If you bake without a water bath, you can still get a great cheesecake, but the odds of cracks and dryness rise. For consistent results, it’s worth it.
6) Know what “done” looks like
Bake at 325°F until the edges are set but the center still wobbles slightly when you nudge the pan. It shouldn’t look liquid—more like a soft jiggle. Depending on your oven, this can be 60–75 minutes.
Why this matters: if you bake until the center is fully firm, it will likely end up dry after chilling. Cheesecake finishes setting as it cools.
7) The cool-down is part of the bake
Turn the oven off, crack the door, and let the cheesecake rest inside for 45–60 minutes. This gradual temperature change prevents dramatic contraction (another crack culprit). Then remove it, cool to room temperature, and chill at least 6 hours—overnight is better for the cleanest slices.
If you want ultra-neat slices, a long, thin knife helps, and it’s worth having a sharp chef’s knife that glides cleanly through chilled cheesecake. Dip in hot water, wipe, repeat.
8) Creating the crackle top (two reliable paths)
Path A: Torch crackle (fast, dramatic)
- Sprinkle a thin, even layer of sugar on top.
- Use a kitchen torch to melt it into a glossy amber shell.
- Let it cool 2–3 minutes to harden.
Tips:
- Keep the flame moving to avoid bitter spots.
- A thin layer is better than thick—thick sugar can turn into hard candy that’s tough to cut.
Path B: Natural bronzed top (soft crackle) If you prefer a more subtle crackle and an even, bronzed finish, bake gently and cool slowly. You’ll get that caramel-toned surface that looks like it belongs on a bakery display, especially when finished with honey and salt.
9) Honey + salt finishing: the signature moment
Warm honey for a few seconds so it drizzles in clean ribbons. A floral honey is gorgeous here—if you’re shopping, look for honey suited for drizzling and finishing. Drizzle lightly first, then add more slice-by-slice so it doesn’t soak the surface.
Finish with flakes, not dust. The visual and the texture matter—flaky sea salt lands like crystals, melts on the tongue, and turns sweetness into something more elegant.
Variations that still feel on-theme
- Citrus-honey: add 1 tsp lemon zest to the batter; finish with honey + salt.
- Brown sugar crust: swap white sugar in the crust for brown sugar for deeper caramel notes.
- Vanilla-forward: use both vanilla bean and a splash of extract for a layered aroma.
- No sour cream: substitute full-fat Greek yogurt for a slightly tangier finish.
Common problems and quick fixes
- Cracks: usually overmixing, too hot an oven, or skipping the slow cool. It’ll still taste perfect—honey drizzle covers everything beautifully.
- Soggy crust: water bath leak—use more foil or a silicone wrap.
- Grainy texture: ingredients too cold or batter overworked. Room temp and low-speed mixing fixes most of it.
- Loose center after chilling: underbaked or cut too soon. Chill overnight; if it’s still loose, bake a bit longer next time until the center jiggle is smaller.
When it’s done right, the slice tells the whole story: crackle on top, creamy heart, honeyed shine, salt sparkle. It’s a dessert that looks like it took all day—even when the technique is just patience, temperature, and a few smart choices.