Spring Splendor: DIY Nail Art Ideas to Brighten Your Tips
Spring Splendor Starts at Your Fingertips: A Fresh Take on DIY Nail Art That Speaks in Bloom
When spring rolls around, it brings more than just longer days and blooming trees. It stirs something in the soul—a craving to break from the dull, the drab, and the predictable. In a season defined by renewal, your nail art can be more than a pretty accessory. It can be a mood, a message, a mirror to the freshness you feel inside. This is not just about painting your nails; it’s about curating a whole vibe right at your fingertips.
Spring is not passive. It does not ask politely to be noticed. It bursts forth with unapologetic energy—lilacs pushing through frozen ground, tulips stretching toward the sky, and dew-kissed mornings that feel like invitations to bloom. So ask yourself this: if your nails could tell a story, what would they say this season? Would they whisper soft florals and lace, or shout with neon tips and glitter storms? Both? Good. Spring contains multitudes, and your nail art should too.
The Emotional Palette of Spring
Let’s get personal. Nail art is intimate. You see it every time you type, stir coffee, touch your face. It’s one of the few art forms made for both the viewer and the wearer. And spring, with its emotional palette—soft pinks of cherry blossoms, lemon yellows of daffodils, periwinkle skies—offers unlimited ways to express joy, hope, playfulness, even nostalgia. There’s a reason pastel nails surge every March. They carry the promise of longer days and lighter hearts.
But this season, you can go beyond the basics. Think of your nails as little canvases, not just to echo the season but to evolve it. Pair a sheer pink with gold foil for a sunrise effect. Create abstract petals with negative space. Layer gloss over matte to mimic the soft glisten of rain on windows. Spring doesn’t stay static. Neither should your designs.
Why DIY Nail Art Matters Right Now
The rise of at-home nail design isn’t just about convenience or budget, though those reasons matter. It’s about ritual. It’s about taking time—an hour, maybe two—to focus on yourself. To paint slowly, breathe deeply, and create something beautiful just because you can. In a culture that often pushes productivity and perfection, there’s rebellion in doing something simply for joy.
DIY nail art is no longer just for the crafty. Thanks to high-quality nail tools, reusable stickers, press-on kits, gel alternatives, and endless tutorials, anyone can create salon-level results at home. That’s empowerment wrapped in polish.
This season especially, homegrown beauty matters. You’re not waiting to bloom. You’re blooming right where you are.
Nail Art as Storytelling
Here’s a thought: your nails are one of the first things people notice in close proximity. That swipe of color on your fingertip can say I’m bold, I’m soft, I’m creative, I’m celebrating something. Every line you paint or jewel you place adds to that story.
Let’s say you do a set of lavender nails with hand-painted vines and tiny white daisies. That’s not just a floral moment. That’s cottagecore elegance. That’s you walking barefoot through a greenhouse on a Sunday morning. That’s a love letter to spring in three coats of polish.
Or maybe you go with lime green squiggles over nude nails. That’s edgy and clean. That’s cocktails on a rooftop, citrus in the sun, and danceable music in your earbuds. That’s youth in color form.
Nail art is where whimsy meets identity.
Building Your Spring Nail Kit
Before diving into the art, let’s talk tools. A well-stocked spring nail kit makes all the difference. Here’s what you should have ready:
Base coat & top coat – Non-negotiables for polish longevity and shine.
Fine tip brushes – For intricate floral detailing or dainty linework.
Dotting tools – Essential for daisies, polka dots, and geometric forms.
Spring polish palette – Pastels, metallics, clear tints, and maybe one bold neon for contrast.
Pressed flower decals – Real or faux florals can be embedded into your polish for a romantic vibe.
Foil sheets & chrome powders – Perfect for adding dimension and shimmer.
Cuticle oil – Spring hydration is just as important for your nail beds as your skin.
Bonus: Keep a quick-dry top coat handy for layering effects, and try a peel-off latex barrier if you want to get experimental with gradients or water marbling.
Nail Art Trends Blooming This Season
Spring 2025 is especially full of contrast. There’s a strong return to clean minimalist design—nudes, negative space, and barely-there linework. But right next to that is an explosion of maximalist joy—3D floral gems, sculpted butterflies, iridescent rainbows, and translucent tips that look like Easter candy.
Some trends worth trying:
Pastel ombré tips that fade into soft neutral bases
Micro florals hand-painted across sheer nails
Rainbow french tips using spring’s full color wheel
Pressed botanicals sealed under gel top coats
Lemon-sugar chrome for that tart meets sweet aesthetic
Pearl appliqués that give a nod to vintage spring weddings
Shattered glass effect in iridescent film to mimic dew
Each trend is adaptable. You can go subtle with one accent nail, or full-send on all ten fingers. Let the mood of the week decide.
From Brunch to Bloom: Designing Around Occasions
Think about your spring plans—Easter brunches, park dates, rooftop drinks, weddings, graduations. Your nail art can be the supporting cast to your outfits. A soft pink with silver microflakes works for a daytime baby shower. Pastel green french tips with a single butterfly charm elevate a garden party dress. Nude bases with daisy chains feel right for a slow Sunday picnic.
Design around your calendar. Or flip it—design your calendar around your nail art. Build a weekend look around a polish shade you can’t stop staring at. Let your outfit accessorize you.
Mood-Based Nail Pairings
To take your DIY nail art game to the next level, match your manicures to your mood board. Here’s how:
Dreamy & Soft – Try a dusty rose base with iridescent top coat and a single heart decal.
Bold & Electric – Paint electric lilac with silver lightning bolt linework.
Calm & Minimalist – Go for translucent sheer beige with negative space arches in white.
Romantic & Wild – Choose deep periwinkle with scattered flower petals and gold flakes.
Fresh & Whimsical – Create mint green abstract swirls with yellow dot accents.
Matching your nails to your emotions turns self-expression into art. And art, in its best form, heals.
Mistakes Are Part of the Art
Here’s a reality check: not every dot will be even. Not every flower will be symmetrical. That’s fine. In fact, that’s beautiful. DIY nail art is not about achieving perfection—it’s about the process. The tiny moments of stillness. The concentration. The fun.
Some of the best designs come from mistakes. A smudged petal turns into a watercolor effect. A too-thick line becomes a bold stroke. A failed chrome layer becomes your new signature texture.
Let the process be playful. Let it be human.
Nail Art as Ritual
If you’ve ever had a hard week and sat down to paint your nails, you already know: this is therapy in action. Creating beauty from the tip of a tiny brush builds patience, confidence, and presence. Nail art gives you a pocket of control, a slice of escape, and a way to see transformation happen right before your eyes.
Make it your Sunday ritual. Brew tea, turn on music, open a window, and lose yourself in the colors. Make it about more than polish. Make it about becoming.
What to Do With Nail Art You Love
Once your mini masterpieces are complete, don’t let them fade into your camera roll. Celebrate them.
Post a hand-shot on Instagram or Pinterest with seasonal props like flowers, sunglasses, or your morning coffee.
Create a “Spring Nail Diary” to track each week’s designs with notes and polish combos.
Print a small flipbook of your nail art for the season. Yes, really. Think of it as a visual journal of your mood and growth.
Link your blog or TikTok tutorial to your favorite looks. Nail art is a community, and every swipe or save is someone’s next inspiration.
Now that we’ve set the tone, gathered your tools, aligned your moods, and primed your canvas, it’s time to dive into the ideas. Below, you’ll find an overflowing garden of DIY nail art looks curated to capture the spirit of spring. From pastels to florals, from soft shimmer to playful pattern, these designs are made for your hands—and your heart. Let’s paint the season, one fingertip at a time.

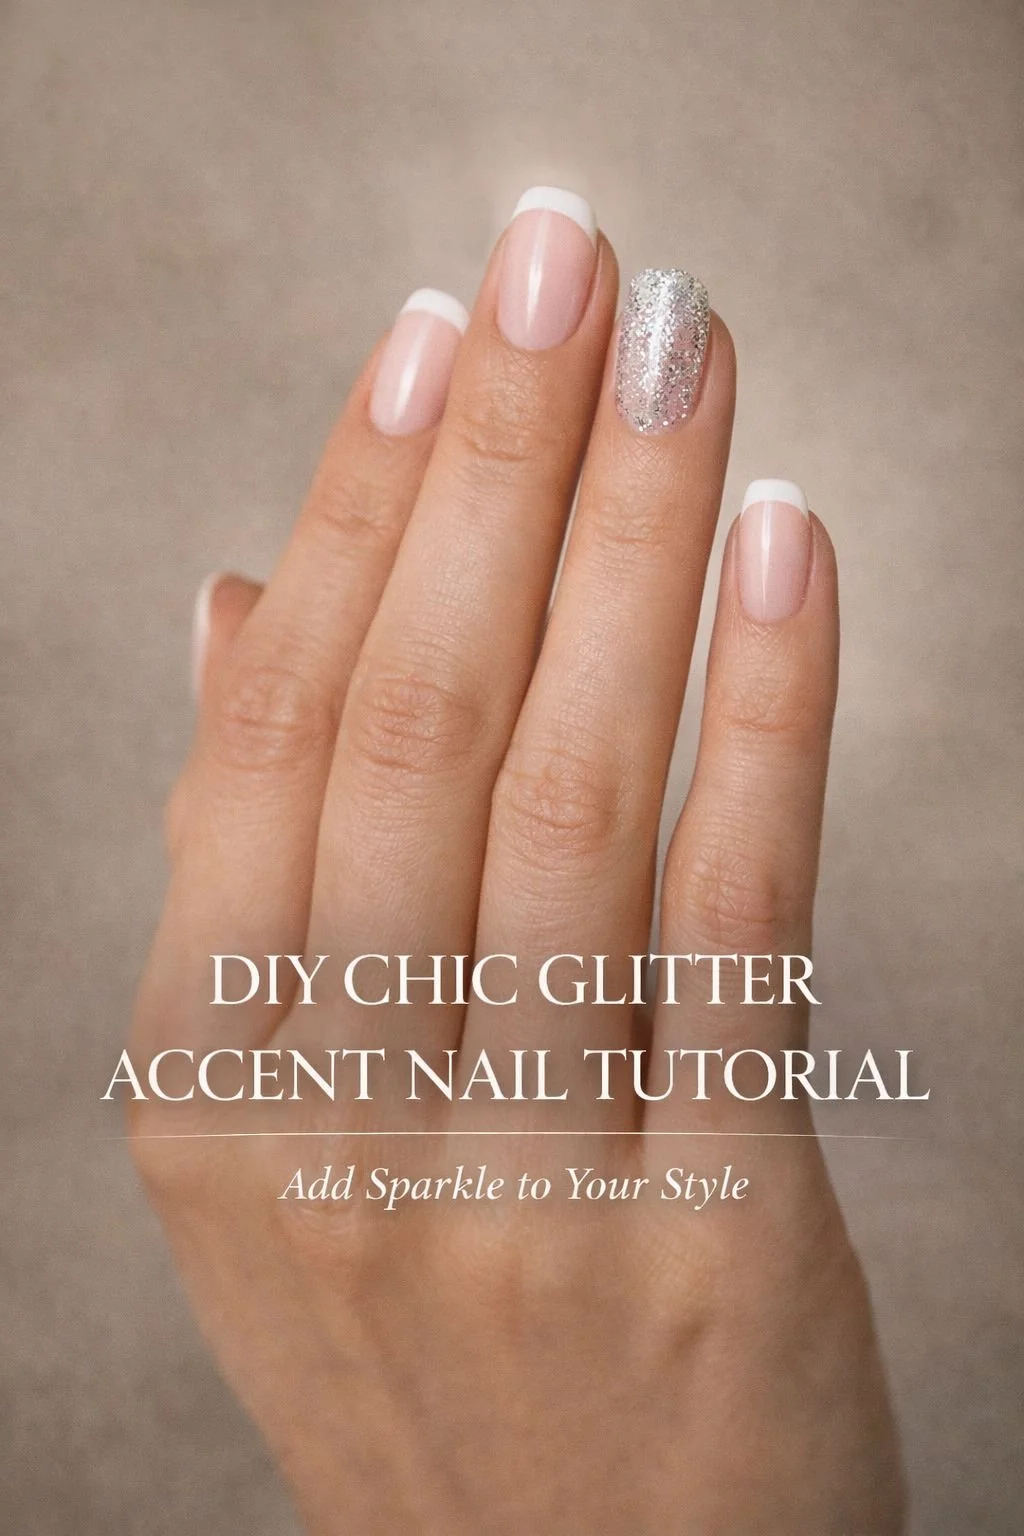
Add a touch of spring to your style with these delicate floral nails! Here's how to get the look:
What You'll Need:
Light pink nail polish
Glittery top coat
Flower nail decals or a fine nail art brush
Clear nail polish
Tweezers (if using decals)
Steps:
Base Color: Start by painting your nails with the light pink polish as the base color. Let it dry completely.
Glitter Time: Apply a thin layer of the glittery top coat for a subtle sparkle.
Floral Art: Place a flower decal on the nail using tweezers or hand-paint a simple flower using a fine brush dipped in white polish. If painting, let your inner artist shine with a simple five-petal design.
Seal the Deal: Once the flowers are set and dry, apply a layer of clear nail polish to seal in your design.
Cure and Admire: Allow your nails to cure properly, and you're ready to flaunt those dreamy, floral tips!
Perfect for a sunny day out or a picnic in the park!
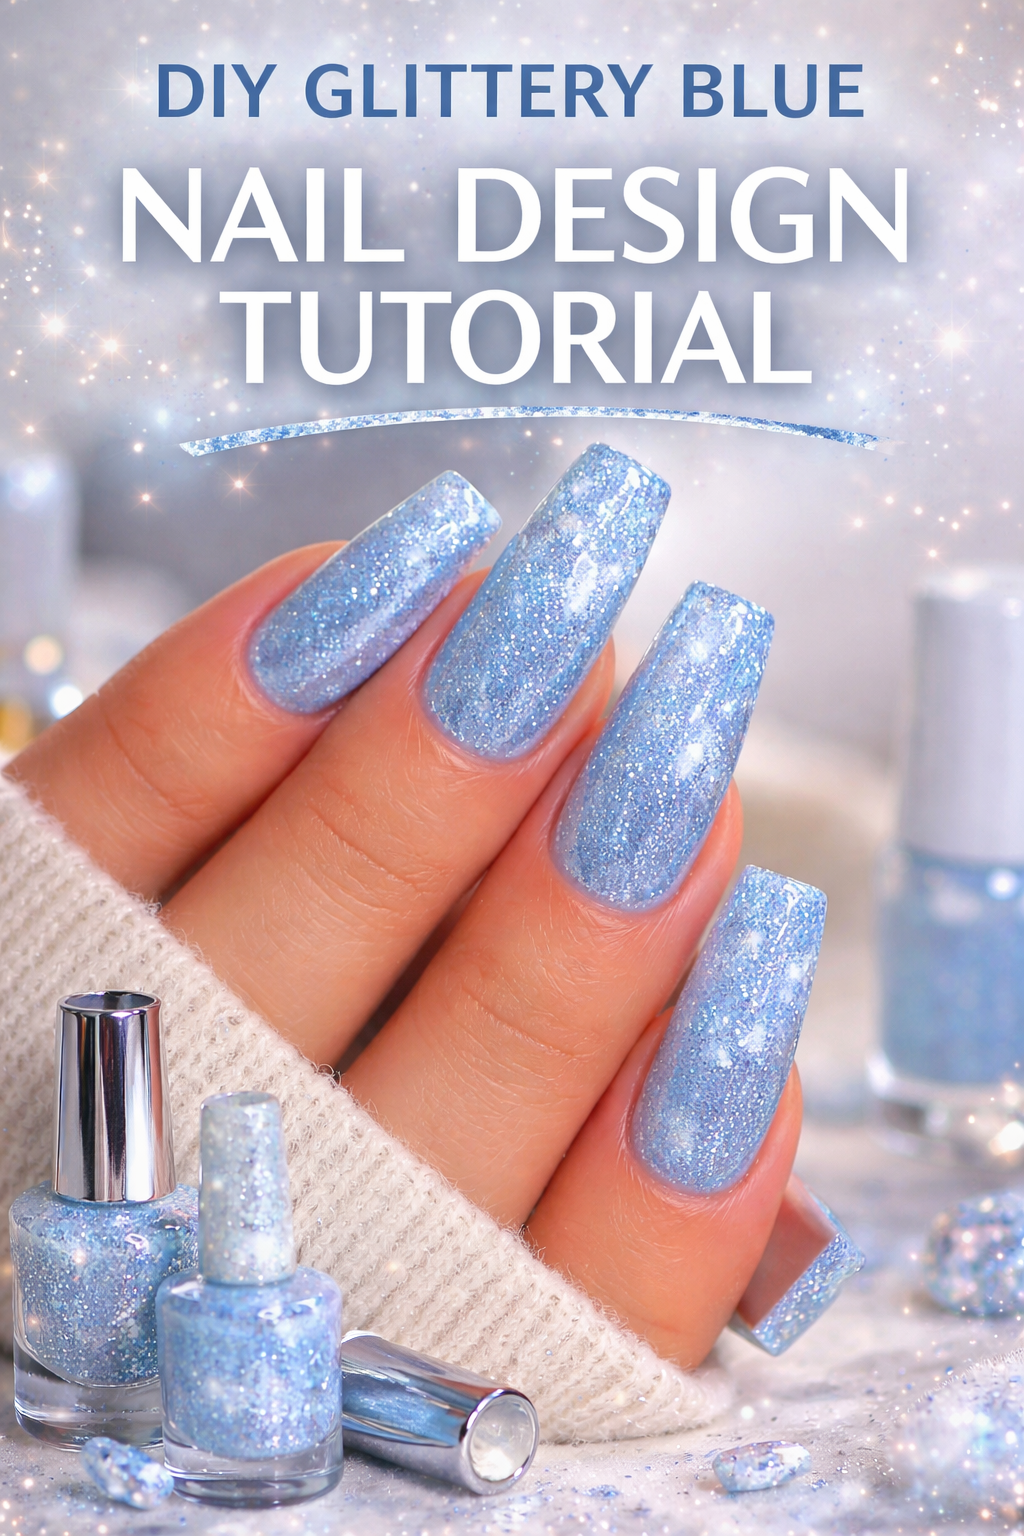
Elevate your nail game with this dazzling ombre glitter manicure! Here's a step-by-step to achieve the look:
What You'll Need:
Nude base nail polish
Pink glitter nail polish
Makeup sponge
Toothpick or dotting tool
Top coat polish
Steps:
Base Layer: Begin with a clean, nude base coat on all nails and let it dry completely.
Sponge the Glitter: Apply a generous amount of pink glitter polish onto a makeup sponge. Dab it lightly onto the tips of your nails, slowly moving downward to create a gradient effect.
Clean Up: Use a toothpick or dotting tool to clean up any excess glitter around the edges.
Seal with Top Coat: Apply a clear top coat to seal the design and give your nails a glossy finish.
Dry and Dazzle: Allow your nails to dry completely and get ready to sparkle with every gesture!
This chic design is perfect for adding a touch of glamour to your everyday look!
Spring Splendor: DIY Nail Art Ideas to Brighten Your Tips #nails #beauty https://t.co/BYmcvjxOze pic.twitter.com/iUYZALmM7q
— Glam Artistry Hub (@glamartistryhub) March 22, 2024
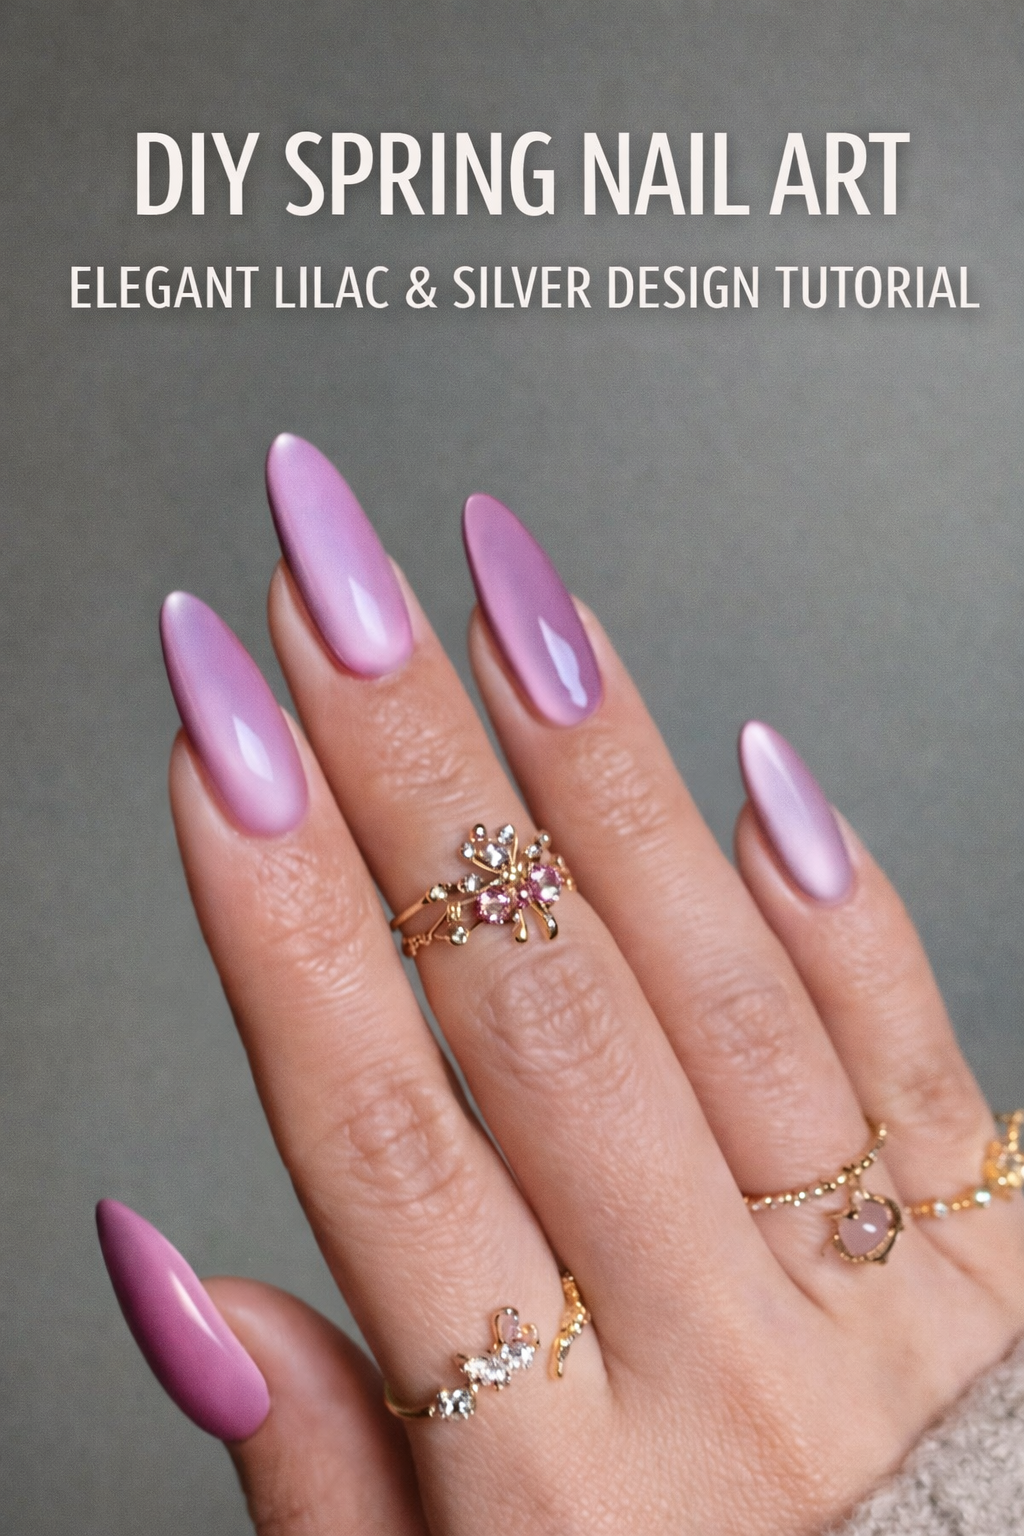
Create a dazzling spring-inspired manicure with these crystal-embellished nails that blend elegance and sparkle.
What You'll Need:
Sheer pink nail polish
Holographic glitter polish
Nail glue
Flatback crystals in various sizes
Tweezers
Top coat
Steps:
Sheer Base: Start by applying two coats of sheer pink polish to all nails, allowing each coat to dry thoroughly.
Glitter Accent: Apply a swipe of holographic glitter polish on the nails you choose for an accent, or create a gradient effect for a subtle sparkle.
Crystal Placement: Dab a small amount of nail glue on the back of each flatback crystal. With precision, use tweezers to place the crystals onto your accent nails in your desired pattern.
Seal the Design: Carefully apply a top coat around the crystals to seal the rest of the nail, avoiding the crystals themselves to maintain their shine.
Let it Set: Allow your nails to dry completely, and enjoy the luxurious touch of spring on your fingertips!
Note: The top coat can sometimes dull the crystals' sparkle, so apply it cautiously.
Embrace the season with this sophisticated, sparkling look!
Spring Splendor: DIY Nail Art Ideas to Brighten Your Tips #nails #beauty https://t.co/BYmcvjxOze pic.twitter.com/bCcfd9Tbfy
— Glam Artistry Hub (@glamartistryhub) March 22, 2024
Infuse a touch of whimsy into your look with this purple paw print nail design, purr-fect for animal lovers and trendsetters alike.
What You'll Need:
Light purple nail polish
Dark purple nail polish
Glittery purple nail polish
A dotting tool or the tip of a bobby pin
Clear top coat
Steps:
Light Purple Base: Paint all your nails with a light purple polish as the base. Let it dry completely.
Paw Prints: Using the dotting tool or bobby pin, dip into the dark purple polish and create small paw print designs on select nails. Start with a larger central dot for the pad, then add four smaller dots for the toes.
Glitter Accent: Choose a nail to serve as your accent and apply the glittery purple polish for a sparkly pop.
Top Coat Finish: Once your design has dried, apply a clear top coat to all nails to seal the design and add a glossy finish.
Dry and Flaunt: Let your nails dry completely, and you're ready to show off your playful, pet-inspired nails!
This charming design will have everyone 'pawsing' to admire your stylish nails!
Spring Splendor: DIY Nail Art Ideas to Brighten Your Tips #nails #beauty #springnails https://t.co/BYmcvjxOze pic.twitter.com/uKHzS9dcbb
— Glam Artistry Hub (@glamartistryhub) March 22, 2024
Embrace a celestial vibe with this enchanting purple gradient and starry sparkle nail design that’s absolutely dreamy.
What You'll Need:
Light lavender nail polish
Purple glitter nail polish
Sponge for gradient effect
Small star nail decals or stickers
Clear top coat
Tweezers (if using decals)
Steps:
Base Prep: Paint all your nails with the light lavender polish as the base and let them dry.
Create the Gradient: Apply the purple glitter polish to a sponge and gently dab it onto the tips of your nails, blending downward to achieve a seamless gradient.
Starry Accents: While the glitter polish is still tacky, use tweezers to carefully place star decals on the nails, focusing on the gradient area for a cascading star effect.
Top Coat for Shine: Apply a clear top coat to seal your design and give a smooth, finished look.
Cure and Admire: Wait for your nails to dry completely, then step out with a touch of the night sky at your fingertips!
Get ready to stargaze through your day with this whimsical and stylish manicure!
As our nail art journey comes to a close, we hope you've found inspiration and confidence to try these designs and perhaps even craft your own unique variations. The beauty of DIY nail art lies in its endless possibilities and the personal touch you bring to each design. Remember, the most fabulous nail creations come from experimenting and letting your creativity flow. So, keep playing with colors and textures, and don't forget to share your nail art adventures with the world. Your nails are not just an accessory but a form of self-expression that tells a story—your story. Now go forth and dazzle with every flick and wave of your beautifully adorned hands!