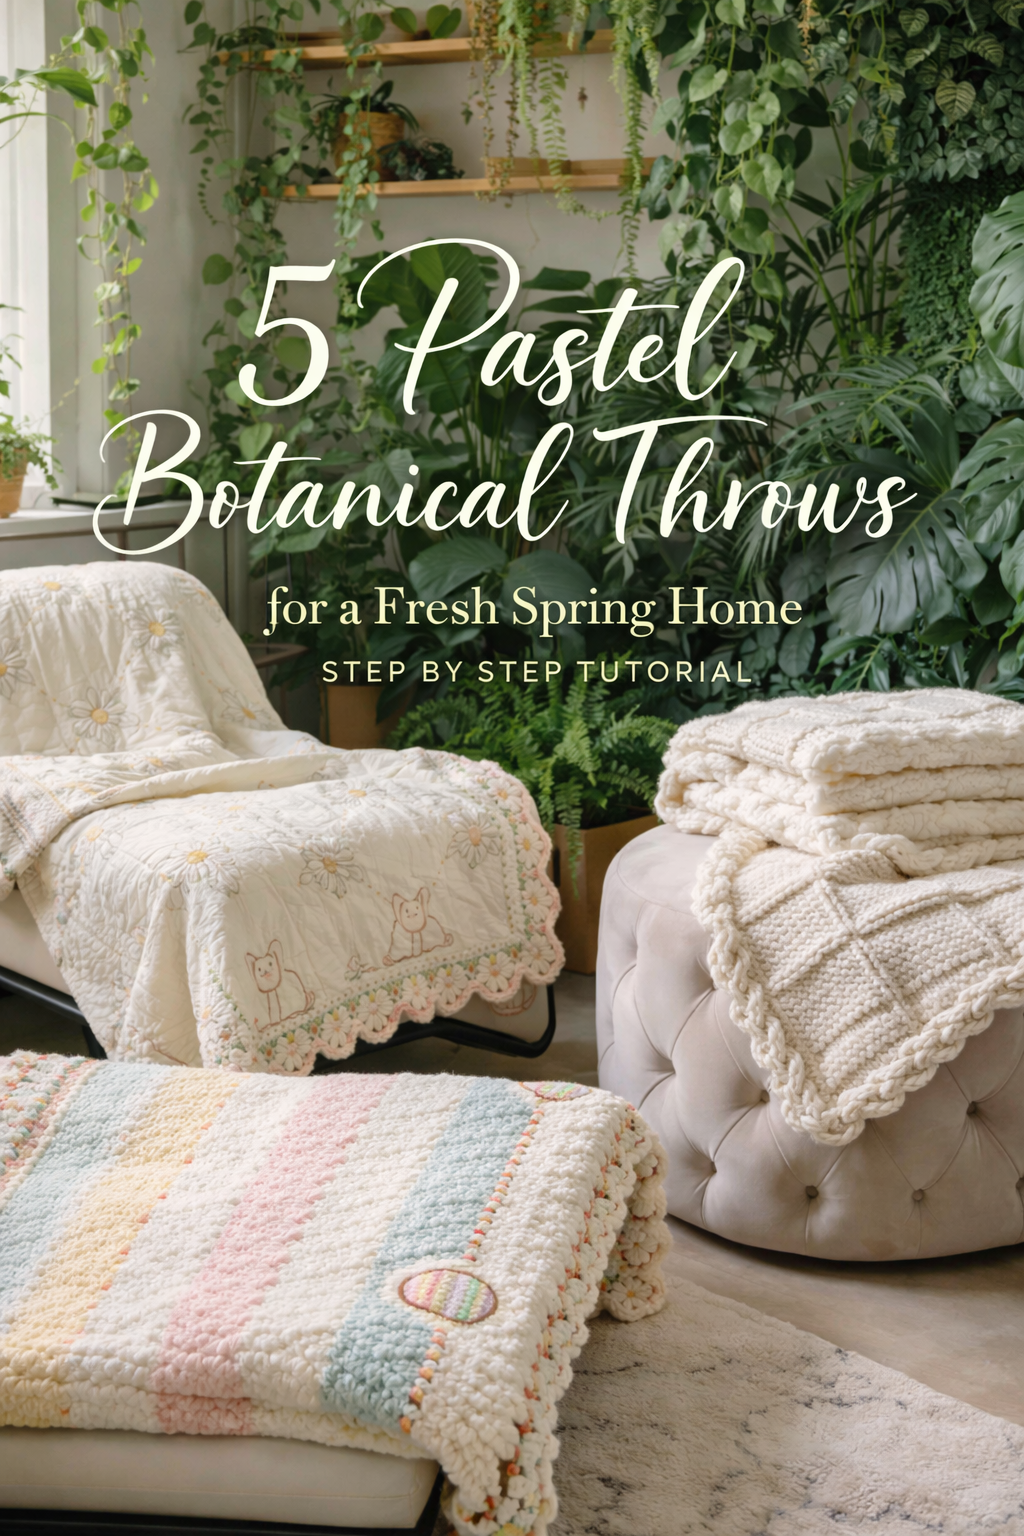
5 Dreamy Pastel Crochet Blankets and Pillow Projects That Instantly Refresh Your Home — Step by Step Tutorials for a Cozy Spring Reset
More like this
There is something instantly calming about crochet in spring colors. It softens a room without demanding attention, and it makes everyday spaces feel more lived in and cared for. In this collection, you are recreating five cozy looks that all share the same mood: creamy neutrals, pastel pops, and that clean handmade texture that photographs beautifully against lush greenery and warm wood.
These projects are designed to be satisfying, not stressful. Each blanket or pillow uses repeatable stitches and clear visual checkpoints so you always know you are on track. If you are new to crochet, you will love how quickly the fabric starts to look like the finished photo. If you have more experience, you will appreciate the built in customization so you can adjust size, color order, and edging details while keeping the exact same aesthetic.
Set up a little craft corner, pick your softest cream yarn, and treat the first few rows like a warm up. By the time you finish one piece, you will already be planning where the next one goes. Draped over a chaise, folded at the foot of the bed, or layered with pillows, these pastel makes turn your home into a spring reset that lasts all year.
💡 Pro Tip: Why I Link to Amazon Search Results and Not One Product
In the Shop the Look and Style it With sections under each bikini, I link to Amazon search results, not single products. Here’s why this matters:
Hot bikinis sell out fast. I don’t want you clicking on a dead link to a sold-out item. Search pages stay updated.
You get more options. Love the vibe but want a different color, cut, or price point? The search results give you everything that matches the look and energy.
I curate each search carefully. These aren’t generic. I spend hours crafting keywords that bring up exactly the kind of bikinis I’d wear—or recommend to my hottest friends.
Support with no pressure. If you click a link, browse, and buy something later, I may earn a small commission at no extra cost to you. That helps me keep bringing you curated collections like this one—powerful, seductive, and always fresh.
So dive in. Click through. Try something risky. These aren’t just bikinis—they’re commands, statements, and maybe even your new favorite weapon of choice.
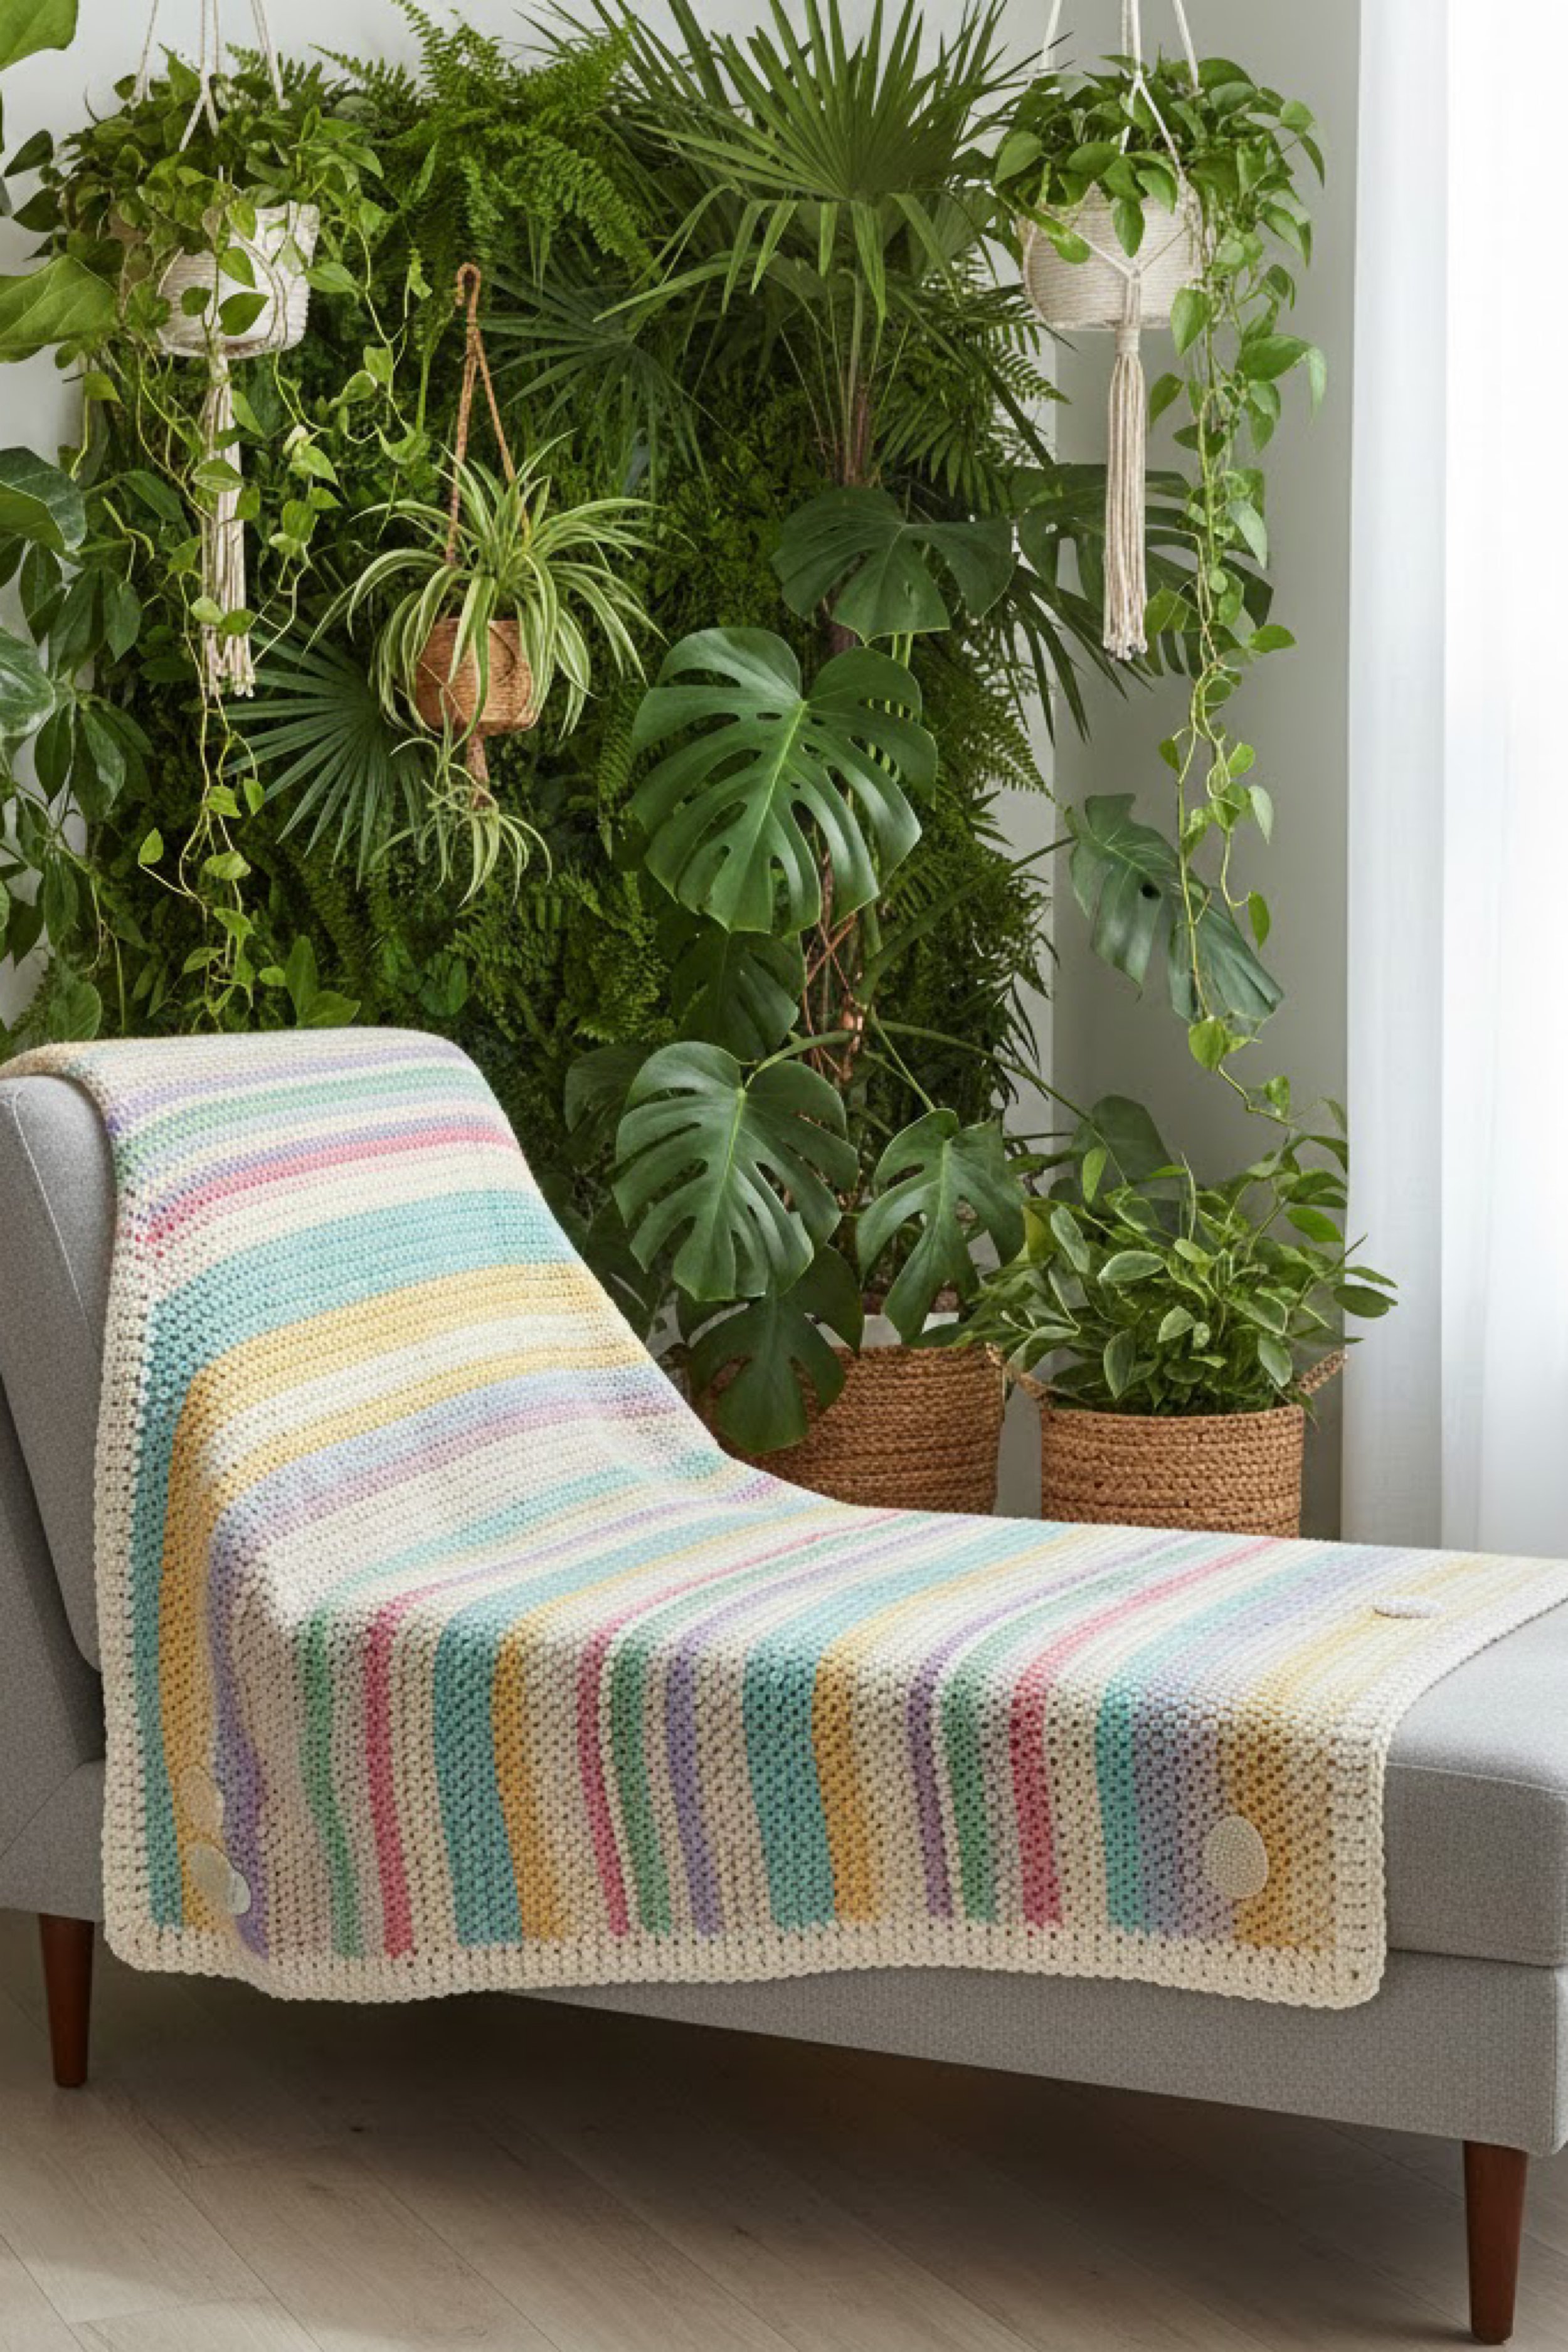
Pastel Stripe Crochet Throw Blanket Step-by-Step Tutorial
What you’re making
This is a soft, clean lined pastel stripe crochet throw with a creamy border that makes the colors look extra crisp, just like the photo. The fabric has that gently pebbled texture that drapes beautifully over a chair without looking floppy or lumpy. You will work simple rows, swap colors in tidy stripes, then finish with a neat border so the whole piece feels polished.
This tutorial is written so you can match the look even if you are not sure of the exact stitch from the photo. You can choose either a linen stitch texture or a tight single crochet texture and still land on the same vibe.
Materials + tools
- Worsted weight yarn in cream or warm white for the base and border
- Worsted weight yarn in pastel stripes, think mint, baby blue, butter yellow, blush pink, lavender, and a soft coral
- Crochet hook size 5 mm or 5.5 mm
- Scissors
- Yarn needle for weaving in ends
- Stitch markers
- Measuring tape
- Optional, blocking mats and pins
- Optional, steamer or spray bottle for finishing
Finished size + customization notes
A classic throw is about 50 by 60 inches. A chair throw like the photo can be closer to 40 by 55 inches. The easiest way to resize is to adjust your starting chain in multiples of 2 for the linen stitch option, or any number for the single crochet option.
Color planning tip: Keep one cream yarn consistent through the entire project so the pastel stripes feel like they are floating in the same calm background.
Step-by-step instructions
1. Choose your texture that matches the photo
The photo reads as a small, nubby, grid like texture, which is most similar to linen stitch, also called moss stitch. If you want a slightly firmer look, you can do tight single crochet. Both look right in pastel stripes with a cream border.
Visual checkpoint: After five rows, you should see a tiny woven look, like little squares, not tall columns.
2. Foundation chain
For a 40 inch wide chair throw, chain 140 with worsted yarn and a 5.5 mm hook.
Option A linen stitch: you will work across, skipping and chaining to build the woven texture.
Option B single crochet: you will work one single crochet in each chain.
If your chain puckers, go up half a hook size just for the chain, then switch back for Row 1.
3. Row 1 setup
Option A linen stitch
- Single crochet in the fourth chain from the hook.
- Chain 1, skip 1 chain.
- Single crochet in the next chain.
- Repeat chain 1, skip 1, single crochet across.
- End with a single crochet in the last chain.
- Turn.
Option B single crochet
- Single crochet in the second chain from the hook.
- Single crochet across.
- Chain 1, turn.
Visual checkpoint: Your first row should look even and flat. If it is wavy, your starting chain is too tight.
4. Build the body in clean pastel stripes
The photo has narrow stripes, most about one to three rows tall. A good plan is two rows per pastel color, with occasional single row accents.
Option A linen stitch rows
- Chain 2, turn.
- Work single crochet into each chain 1 space from the row below.
- Chain 1 between each single crochet.
- End with single crochet into the last stitch.
- Turn.
Option B single crochet rows
- Chain 1, turn.
- Single crochet across, keeping your edges neat.
- Turn.
5. How to change colors cleanly
To get crisp stripes, change color on the last stitch of the row.
- Work the last stitch until you have two loops left on the hook.
- Yarn over with the new color and pull through the last two loops.
- Chain your turning chains in the new color.
- Carry the old color up the side only if stripes repeat quickly. Otherwise cut and weave later.
Visual checkpoint: The stripe edge should look like a tidy ladder of color blocks, not messy dots.
6. Stripe map that matches the photo vibe
Repeat this sequence across the blanket height, adjusting as needed:
- Cream, 4 rows
- Pastel blue, 2 rows
- Cream, 2 rows
- Butter yellow, 2 rows
- Cream, 2 rows
- Mint, 2 rows
- Cream, 2 rows
- Lavender, 2 rows
- Cream, 2 rows
- Blush, 2 rows
- Cream, 2 rows
- Soft coral, 1 row
- Cream, 3 rows
Then repeat.
If yours looks busier than the photo, increase the cream spacing. If it looks too empty, make the pastel stripes three rows instead of two.
7. Keep your edges straight
The photo shows very straight edges, which is mostly consistent tension.
- Place a stitch marker in the first and last stitch or last space of every row.
- Count stitches every ten rows.
- If you accidentally add stitches, it will start to flare outward. If you drop stitches, it will taper.
Visual checkpoint: Fold the blanket in half occasionally. Both sides should line up.
8. Finish the last rows in cream
For the clean framed look, finish with about 6 to 10 rows of cream before the border. This makes the pastel stripes feel intentional.
9. Add the border
Use cream. Round 1
- Single crochet evenly around the blanket.
- Work 3 single crochet in each corner to turn neatly.
- Join with a slip stitch.
Round 2
- Chain 1.
- Single crochet in each stitch around.
- In corners, do 3 single crochet in the center corner stitch again.
- Join.
Round 3 optional finishing round If you want the photo’s slightly thicker edge, do one more round of single crochet. For a softer edge, do a round of half double crochet instead.
Visual checkpoint: The border should flatten the piece, not ripple. If it ripples, you added too many stitches on the long sides. If it cups, you need more stitches around the edge.
10. Weave ends like a pro
Weave each end through at least 3 inches of stitches, change direction once, then trim. For linen stitch, weave through the dense grid so it disappears.
Troubleshooting section
Cream rows look looser than pastel rows
Your tension changed during color swaps. Try one hook size smaller for the cream sections, or consciously pull the cream yarn a touch tighter.
Edges are wavy
This is almost always extra stitches at the ends. Use stitch markers and make sure you end the row exactly where you began.
Stripes look jagged
Change colors on the last stitch of the row, not at the start of the next row. Also keep your turning chain consistent.
Fabric feels too stiff
Move up to a 5.5 mm hook, or switch from single crochet to linen stitch. Linen stitch is flexible and drapes well.
Fabric feels too holey
Use a smaller hook, or choose single crochet. Also consider a slightly thicker yarn.
Finishing details
Light blocking will make this look magazine neat. Lay flat, gently shape to a rectangle, and pin corners square. Mist lightly with water or steam from a distance, then let dry fully. If you want the border to look extra crisp, do one final pass of steam just on the edge.
Optional upgrades
- Add tiny crochet dots in matching pastels at the corners for a subtle detail.
- Add a simple fabric backing for a heavier, cozy feel.
- Add a tag label on one corner for a handmade signature.
- Add a second border round in a soft pastel instead of cream for a framed color pop.
Shop Similar
- Worsted weight pastel yarn bundle
- Cream worsted yarn for crochet blankets
- Crochet hook set with 5 mm and 5.5 mm
- Blocking mats and pins for crochet
- Yarn needles and stitch markers set
Style It With
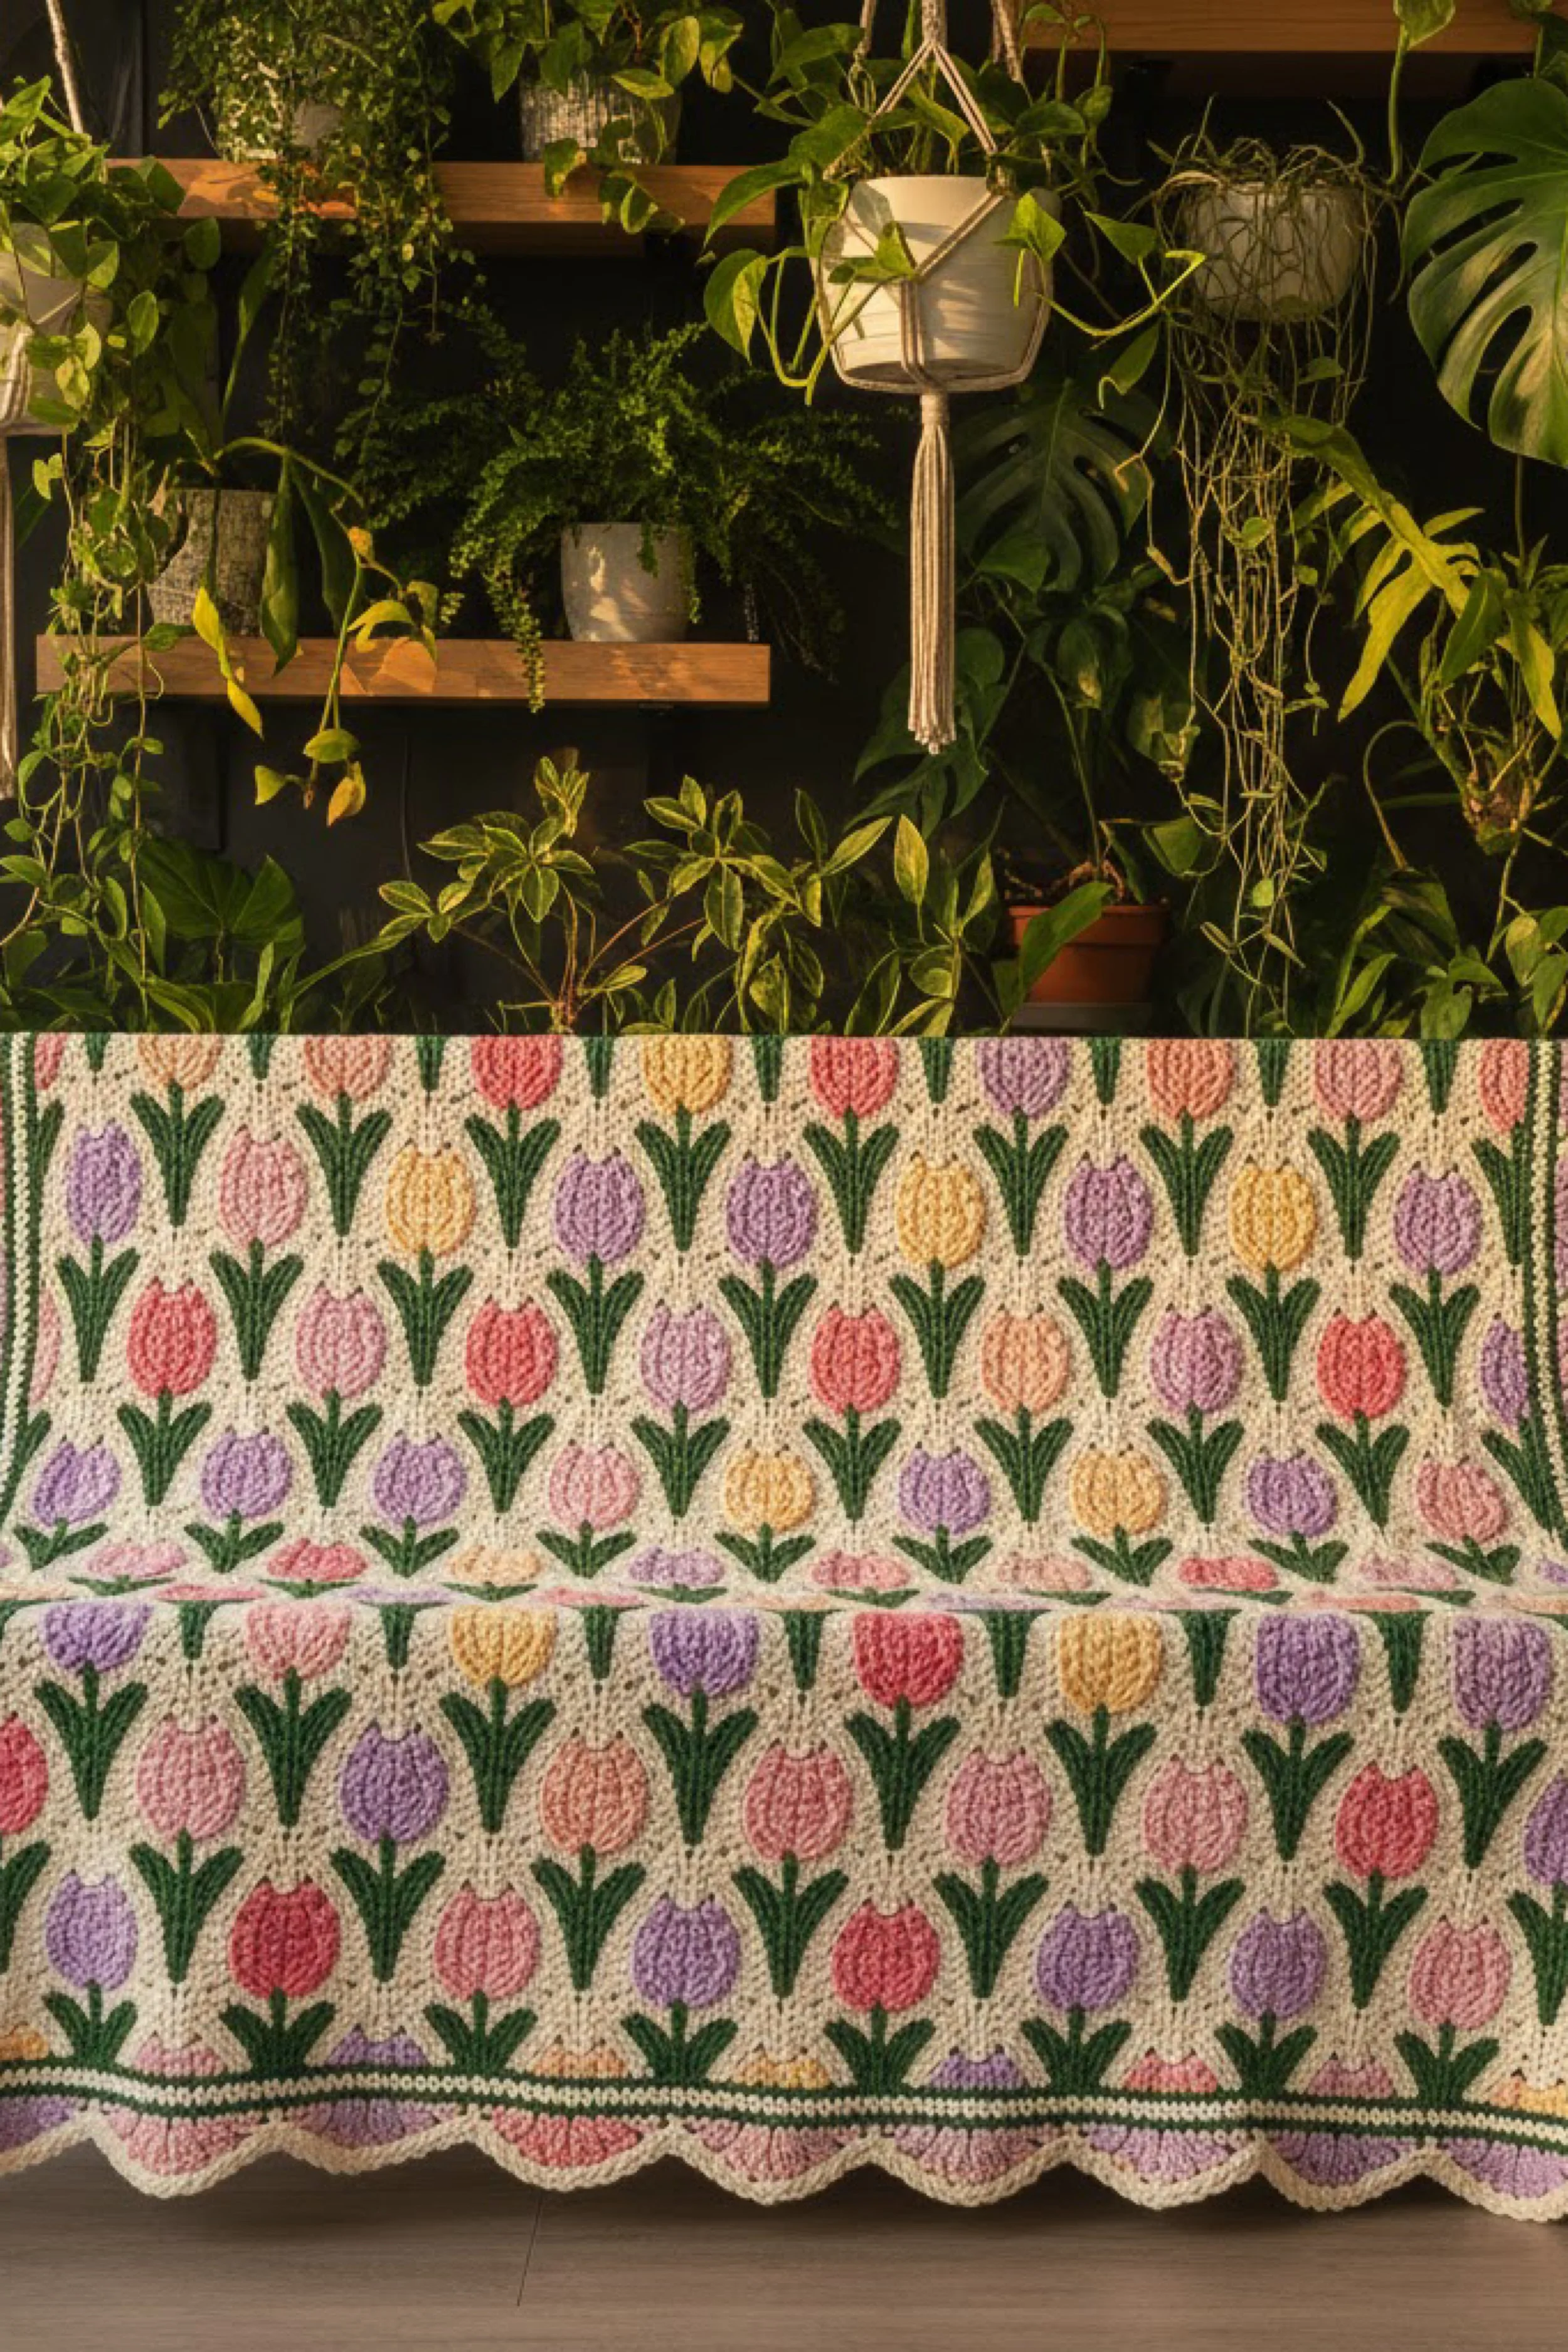
Tulip Tapestry Crochet Blanket How-To Guide
What you’re making
This is a statement tulip blanket with repeating rows of chunky tulip blooms in spring pastels, set on a creamy background with deep green stems. The look is graphic but still soft, with the flowers popping forward like little stitched pillows. The bottom edge has a gentle scallop that finishes it like a heirloom throw.
You will recreate the look using simple colorwork techniques that stay beginner friendly. If you have never done tapestry crochet, this guide keeps it clean and calm, with easy ways to avoid tangled yarn.
Materials + tools
- Worsted weight yarn in cream or oatmeal for the background
- Worsted weight yarn in deep green for stems and leaves
- Worsted weight yarn in tulip colors, pink, coral, lavender, and butter yellow
- Crochet hook size 4.5 mm to 5 mm for tighter colorwork
- Scissors
- Yarn needle
- Stitch markers
- Measuring tape
- Optional, bobbin cards or clothespins to manage yarn
- Optional, fabric for backing or lining
Finished size + customization notes
A throw version is about 48 by 60 inches. A couch sized version can be 55 by 70 inches. The tulip pattern is easiest when your stitch count is a multiple of the tulip repeat. Use a repeat of 10 stitches per tulip plus 2 stitches between tulips as spacing. You can add extra cream stitches at the sides for a framed look.
If you want the blooms larger like the photo, use worsted yarn and a slightly smaller hook so the stitches pack in and the colors look solid.
Step-by-step instructions
1. Decide how you will do the tulips
There are two safe ways to match the photo.
Option A tapestry single crochet with carried yarn
This gives a dense, graphic look and is closest to the crisp tulip shapes.
Option B surface crochet stems on top of a cream blanket with appliqué blooms
This is easier, and still reads like the photo from across a room.
The photo looks like Option A, so the steps focus there, with Option B notes included.
2. Create your tulip chart
Each tulip is basically a rounded bulb with two small side curves, then a stem and simple leaves. Use this mini chart logic in single crochet rows:
Row A bulb base, widest part
Row B bulb middle, slightly narrower
Row C bulb top, narrow, then stem begins
Then several rows of stem in green
A simple tulip bulb can be 6 stitches wide at the widest point and 4 stitches wide at the top.
Visual checkpoint: Your tulips should look plump and oval, not pointy triangles.
3. Foundation chain
Chain 170 for a medium throw width. This allows multiple tulips across with spacing.
Row 1: single crochet in second chain from hook and across. Chain 1, turn.
Tip: Use a smaller hook for the foundation chain if it loosens too much, or go up one hook size if it tightens.
4. Establish the cream background rows
Work 4 to 6 rows of single crochet in cream. This matches the photo’s calm margin above the tulips.
5. Start tulip row placement
You will place tulips in staggered columns, like a field. The photo shows tidy rows, so we will do aligned rows first, then you can stagger if you want.
Plan your row like this: Cream spacing at side, then repeat units of cream, green stem base, tulip bulb, cream gap, and repeat.
6. Tapestry crochet basics that keep it clean
- Crochet over the unused yarn color so it is hidden inside stitches.
- Keep carries short, ideally under 5 stitches. If you need longer, drop and pick up with bobbins.
- Always pull the carried yarn gently so it does not bunch.
Visual checkpoint: The back will look busy but tidy, with no long dangling loops.
7. Work the stems first
For each tulip column, crochet a green stem segment:
- In the row where stems begin, switch to green for 2 stitches.
- Switch back to cream for the background.
- In the next rows, stack those green stitches directly above to form a stem line.
Stems in the photo are thicker than a single stitch line. Use 2 stitches wide stems for a bold look.
8. Add leaves
Leaves can be done by widening the green area for one row, then narrowing again.
Example:
Row leaf start: green 3 stitches wide
Next row: green 2 stitches wide
Then back to stem width 2
This creates a simple leaf flare without complicated shaping.
9. Build the tulip bulbs
When you reach the bulb section, change to your bloom color.
Bulb shaping across three rows:
Row bulb base: bloom color 6 stitches wide
Row bulb mid: bloom color 5 stitches wide
Row bulb top: bloom color 4 stitches wide
Then return to green for the stem above, or end the flower there and continue background.
To center the bulb above the stem, place the bulb stitches evenly around the stem stitches.
Visual checkpoint: After the first bulb, step back and check the silhouette. You should see a rounded tulip, not a heart. If it looks heart like, reduce the top width.
10. Repeat across the row
Repeat tulip placement every 12 stitches. Keep a cream gap so the flowers do not touch.
11. Repeat tulip rows down the blanket
The photo shows many rows of flowers. Space rows about 6 to 8 rows apart, depending on your tulip height. A good rhythm:
- Stem rows, about 6 rows
- Bulb rows, 3 rows
- Cream spacer rows, 2 rows
Repeat.
12. Top border area
Finish with 6 to 10 rows of cream for a framed top.
13. Add side and top border
Work single crochet around the whole blanket in cream for one round, then a second round in green if you want a subtle outline like the photo’s strong stem color.
14. Scalloped bottom edge
The photo has a scallop, which you can add around the entire blanket or only at the bottom. Scallop stitch round:
- In the border round, skip 1 stitch.
- Work 5 double crochet in the next stitch.
- Skip 1 stitch, slip stitch in the next.
- Repeat.
If you want a smaller scallop, use 3 half double crochet instead of 5 double crochet.
Visual checkpoint: Scallops should sit flat and wave gently, not curl upward.
15. Option B easy method notes
If tapestry feels intense, crochet a cream throw in your favorite stitch, then surface crochet green stems and attach simple tulip appliqués. This is slower but extremely beginner friendly and very clean on the back.
Troubleshooting section
Colors peek through the cream background
Your tension is too loose or your hook is too big. Drop down a hook size and keep stitches snug.
Tulips look like blobs
Use fewer bulb stitches, and keep the bulb to three rows tall. Also make sure your green stem is centered.
Green carries show through pastel bulbs
Do not carry dark green behind light pastel if it will show. Use bobbins and only carry the same color behind itself in the bulb area.
Edges are pulling inward
Tapestry crochet can tighten the fabric. Relax your tension, or go up one hook size while keeping color changes snug.
Scallop edge is ruffling too much
You have too many scallops. Add more skipped stitches between shells, or reduce the number of stitches in each shell.
Finishing details
Weave ends firmly, because colorwork ends can wiggle loose over time. Block lightly to square up the edges. If you want the blanket to feel extra premium, add a simple cotton backing with a few hand tacks at the corners and center. For a flatter drape, steam lightly, especially around the scallops.
Optional upgrades
- Add tiny embroidered highlights on the tulip bulbs in a lighter shade for a dimensional look.
- Add a green outline border for a framed garden feel.
- Add a personalized label tag on the corner.
- Add a backing fabric to hide the tapestry back completely.
Shop Similar
- Pastel worsted yarn set for colorwork
- Deep green yarn for crochet stems
- Tapestry crochet bobbins and yarn cards
- Crochet hooks 4.5 mm to 5 mm
- Blocking mats for squaring crochet blankets
Style It With
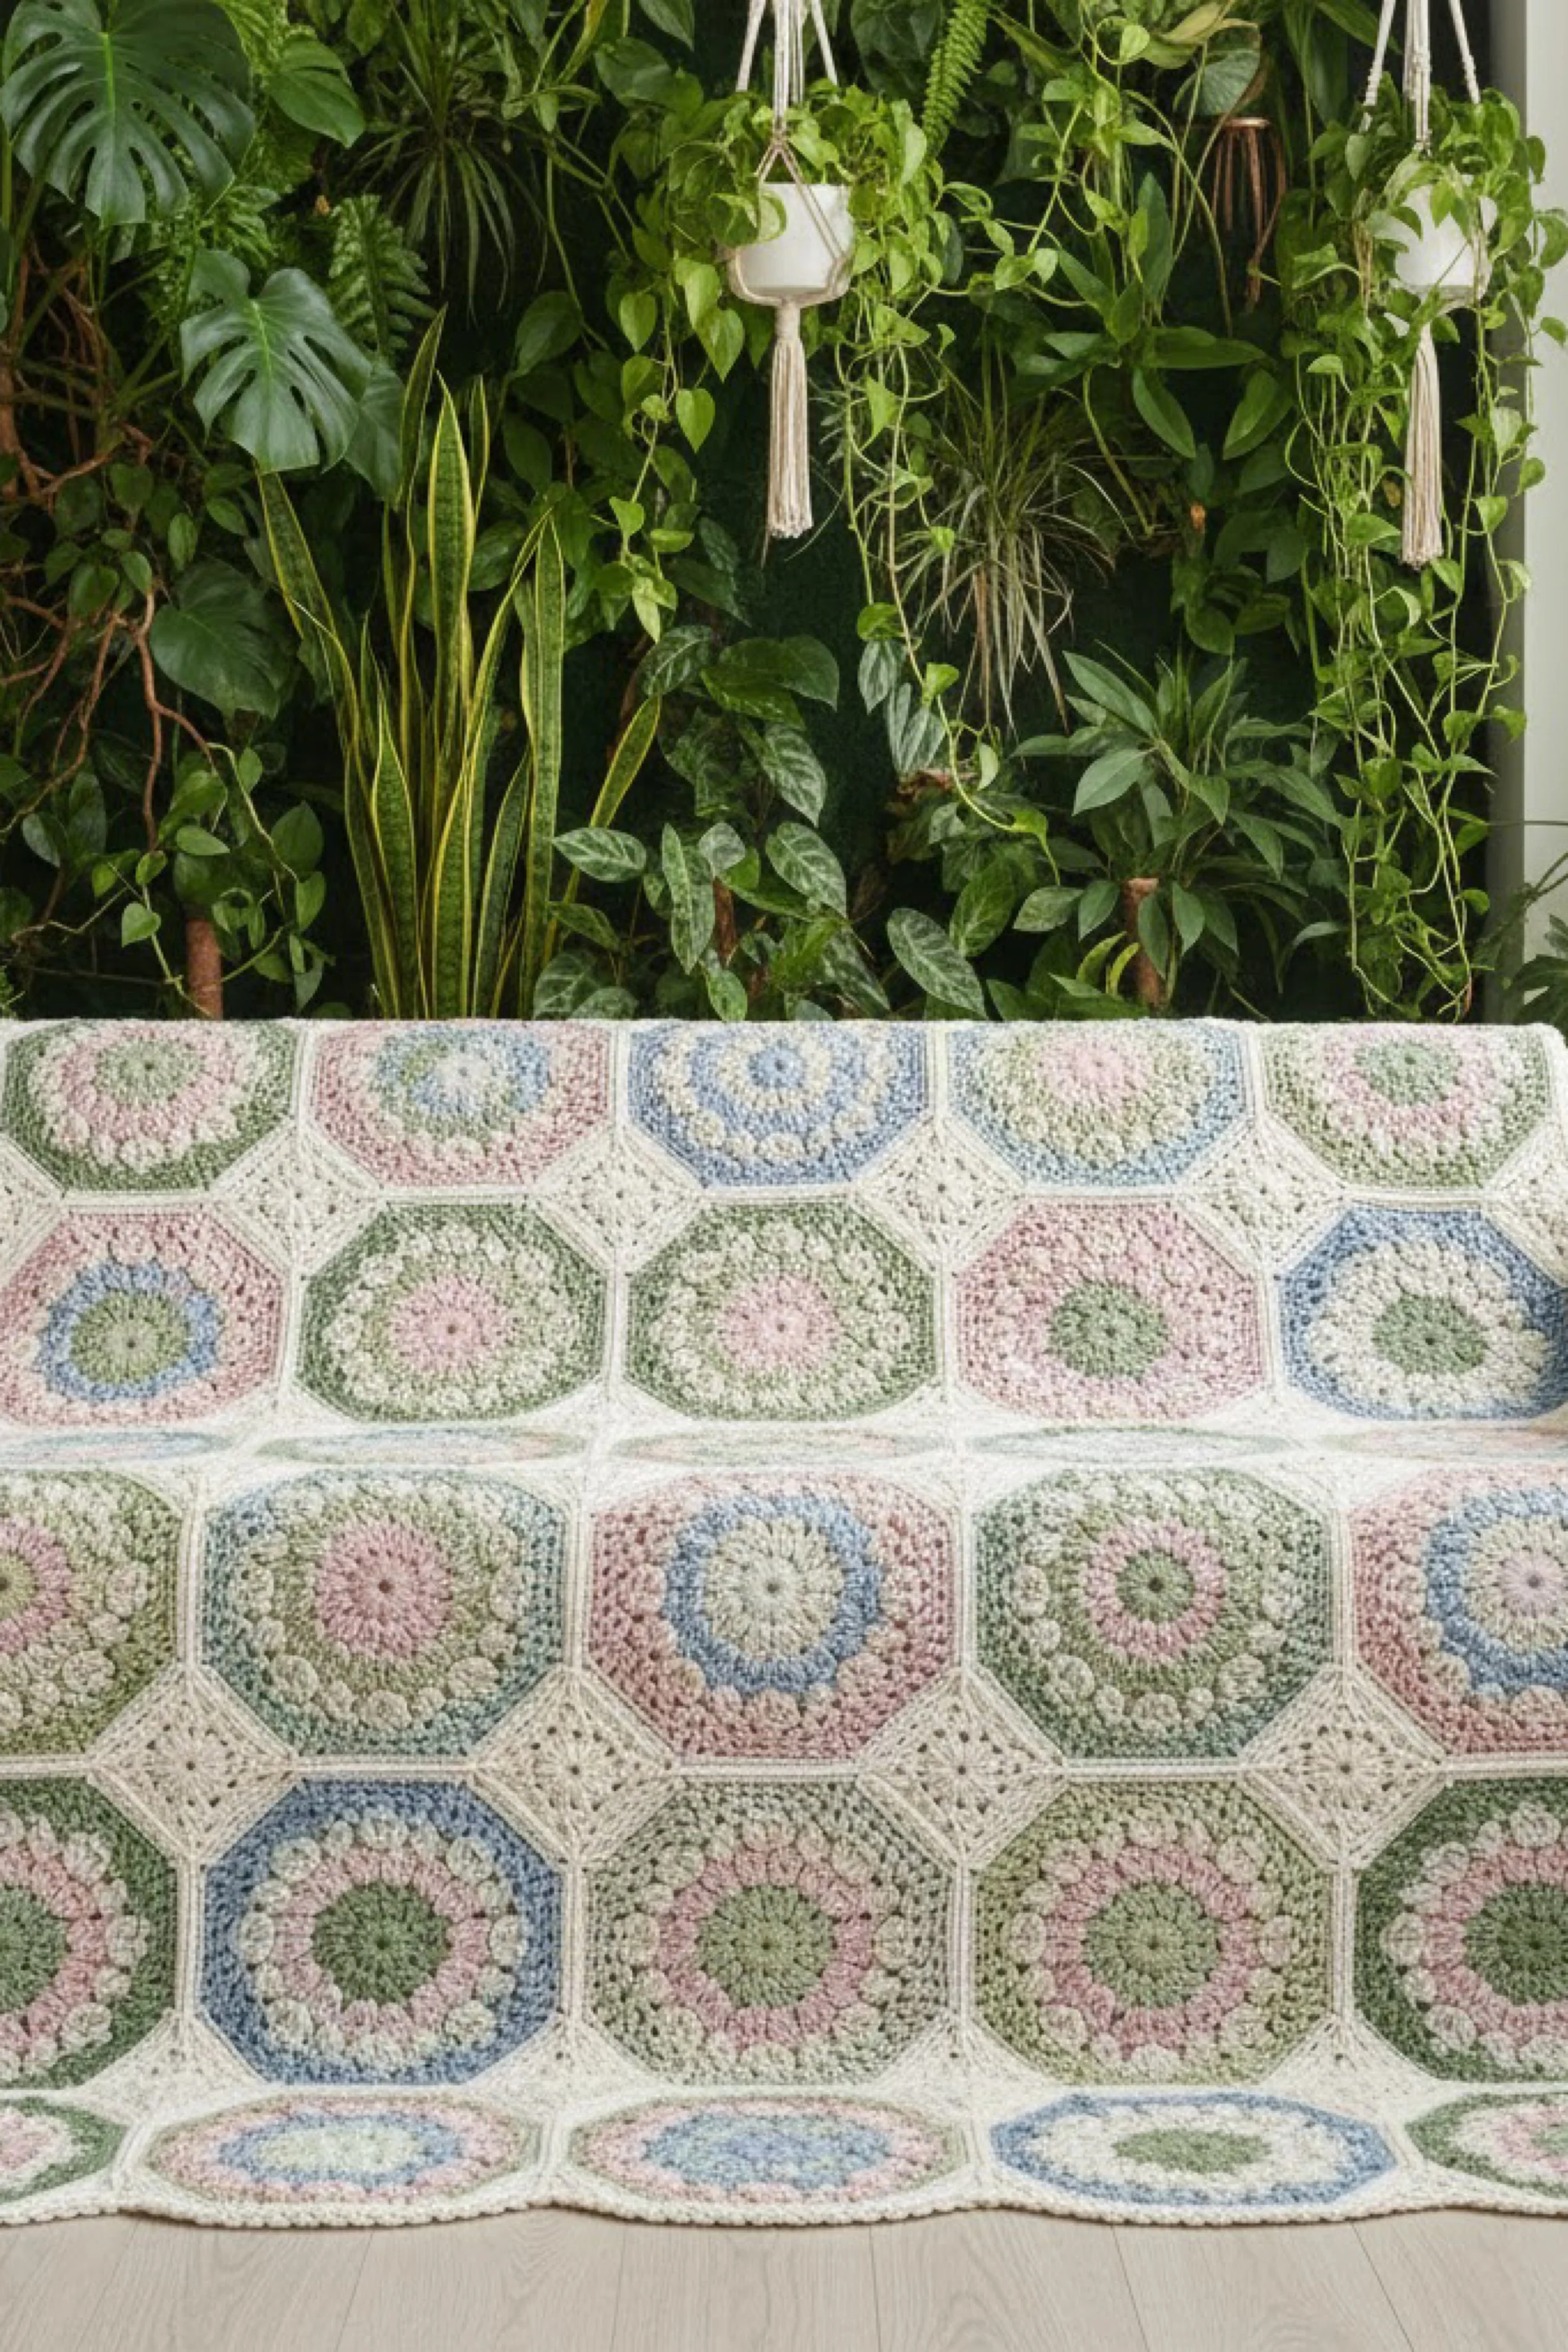
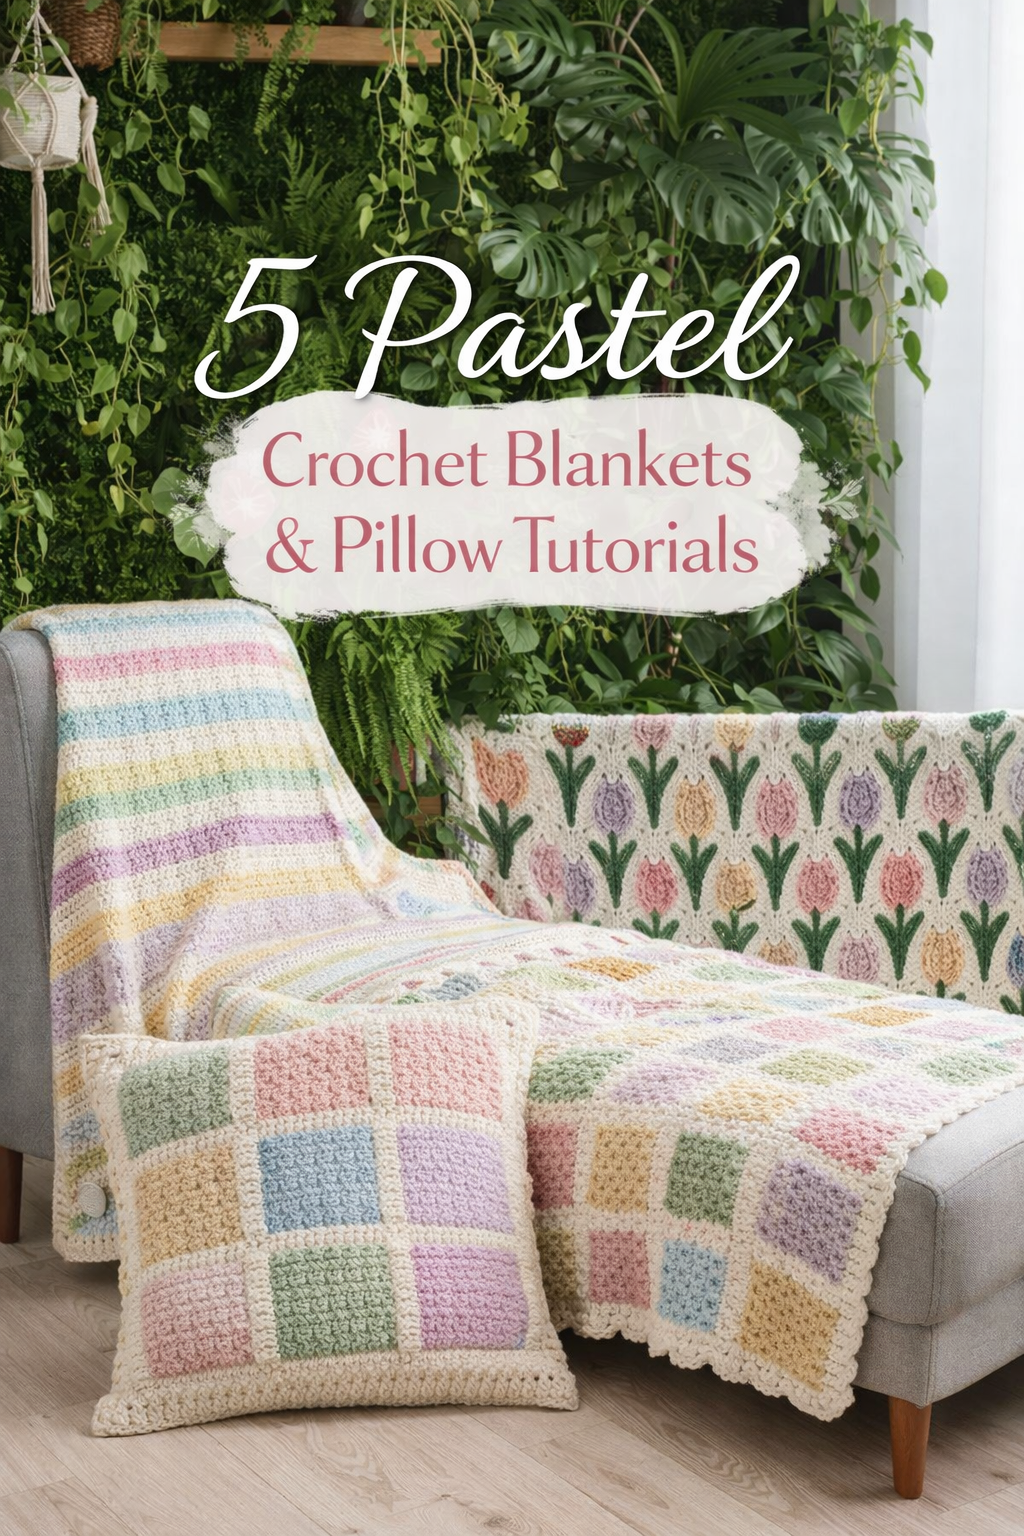
Pastel Octagon Motif Crochet Blanket DIY Guide
What you’re making
This is a motif blanket built from soft pastel octagons that look like calm, floral medallions, then joined with creamy squares and clean seams. The overall effect is airy, vintage, and very boutique, like something you would spot folded at the end of a bed. The motifs have subtle texture changes that read like petals and rings.
You will crochet octagon motifs, add small connector squares, join everything in a neat grid, then finish with a simple border that keeps the edges straight.
Materials + tools
- Worsted weight yarn in cream for joining, connector squares, and border
- Worsted weight yarn in pastels, mint, blush, baby blue, lavender, soft butter, and pale sage
- Crochet hook size 5 mm
- Scissors
- Yarn needle
- Stitch markers
- Measuring tape
- Optional, blocking mats and pins
- Optional, join as you go tools, extra stitch markers
Finished size + customization notes
Each octagon in the photo looks about 7 to 9 inches across with the cream join. A throw could be 5 motifs by 6 motifs. A bed topper could be 6 by 8 motifs or larger.
To resize, decide how many motifs you want, then add connector squares between motifs and at corners. Motif blankets are modular, so you can stop whenever it fits your space.
Step-by-step instructions
1. Understand the layout
An octagon cannot tile perfectly on its own, so you fill the gaps with squares. The photo shows a repeating pattern: Octagon, square, octagon, square, and so on.
Visual checkpoint: When you place motifs on the floor, you should see little diamond shaped gaps that will become squares.
2. Crochet the octagon motif base
You will work in rounds. Each round increases at eight corners.
Round 1
- Make a magic ring.
- Chain 3, counts as first double crochet.
- Work 11 double crochet into the ring.
- Join with slip stitch to the top of chain 3.
Round 2
- Chain 3.
- Double crochet in same stitch.
- Two double crochet in each stitch around.
- Join.
Round 3, create eight corners
- Chain 3.
- Double crochet in next stitch.
- In the next stitch, work 2 double crochet, chain 2, 2 double crochet. This is your corner.
- Work 2 double crochet across the next two stitches.
- Repeat corner every 3 stitches, total eight corners.
- Join.
Visual checkpoint: You should now see a shape that wants to become a stop sign, not a circle.
3. Build the pastel medallion rings
The photo looks like gentle rings of color, sometimes alternating cream and pastel. Use this round plan:
Round 4, switch to a new pastel, work double crochet with corners
Round 5, switch to cream or a second pastel, add texture with puff stitches or popcorn stitches spaced evenly
Round 6, return to pastel, add simple chain spaces to open it slightly
Round 7, final cream round to stabilize
If you want the same dimensional look as the photo, use puff stitches. Puff stitch tip: Yarn over, insert, pull up loop, repeat three times, then yarn over and pull through all loops.
4. Keep corners consistent
Every octagon round should keep the eight corners in the same place: Corner structure: 2 double crochet, chain 2, 2 double crochet into each corner space.
If your motif is getting wavy, your corners are too loose. Reduce chain 2 to chain 1.
5. Make enough octagons
For a small throw: Make 30 octagons, arranged 5 by 6. For a larger bed throw: Make 48 octagons, arranged 6 by 8.
Color planning: Keep a repeating mix, so no two adjacent octagons are identical. The photo looks intentionally varied but still cohesive.
6. Block motifs before joining
This step is the secret to that crisp, expensive look.
- Soak motifs briefly in cool water.
- Squeeze gently, no twisting.
- Pin each octagon to the same measurement, corner to corner.
- Let dry fully.
Visual checkpoint: All octagons should be the same size. If yours vary, your join will ripple.
7. Crochet the connector squares
You will fill each gap between four octagons with a cream square. Simple square pattern:
- Chain 4, join to make ring.
- Round 1, chain 3, work 2 double crochet, chain 2, repeat three more times. Join.
- Round 2, work 3 double crochet in each side space, corners are 3 double crochet, chain 2, 3 double crochet. Join.
Make enough squares: In a 5 by 6 layout, you will need squares between motifs and along edges. A safe rule is to make one square for every motif, then you will not run short.
8. Choose your joining method
Option A whip stitch join, very neat Lay two motifs right sides up, stitch through both loops of the cream edges with a yarn needle.
Option B slip stitch join, slightly textured ridge Hold motifs together and slip stitch through both loops along the seam.
Option C join as you go, fastest if you like planning Join each motif to its neighbors on the final round.
The photo reads like a clean, slightly raised join, so slip stitch join is a great match.
9. Join octagons to squares
Join each octagon side to a side of a square. You are building a grid.
- Arrange one row on the floor.
- Join octagon to square, square to octagon, across.
- Build the next row the same way.
- Then join rows together.
Visual checkpoint: The grid should lie flat. If it puckers, your squares are too small or your join is too tight.
10. Add a border
Work one round of single crochet in cream around the entire blanket. Corners: Work 3 single crochet in each corner stitch area, so it turns cleanly.
Then add one round of half double crochet for a slightly thicker frame.
Optional final round: Crab stitch, also called reverse single crochet, gives a polished twisted edge.
Troubleshooting section
My octagons are not the same size
Your tension changed between colors. Block all motifs, and if some are still small, add one extra round in cream to match size.
The blanket ripples after joining
Either your squares are too big, or your join is too loose. If it ripples outward, reduce square size by one round. If it ripples inward, loosen joining.
Corners look pointy
Reduce corner chain spaces. Use chain 1 instead of chain 2.
Motifs look too open and lacy
Use a smaller hook, or swap chain spaces for solid stitches in the later rounds.
Seams feel bulky
Use whip stitch through back loops only, or use a thinner cream yarn for joining while keeping the same motif yarn for the body.
Finishing details
Weave in every tail, especially at color changes. Steam block the finished blanket lightly, focusing on the joins and corners. If you want it to feel extra luxe, add a soft cotton backing with a few invisible hand tacks at motif centers.
Optional upgrades
- Add a contrast border in pale sage for a garden frame effect.
- Add tiny pom poms at the corners for a playful finish.
- Add a label tag for a handmade signature.
- Add a lining to hide the back joins if you want ultra clean bed styling.
Shop Similar
- Pastel worsted yarn assortment
- Cream yarn for joining crochet blankets
- Blocking mats and rust proof pins
- Stitch markers and tapestry needles
- Crochet hook 5 mm ergonomic
Style It With
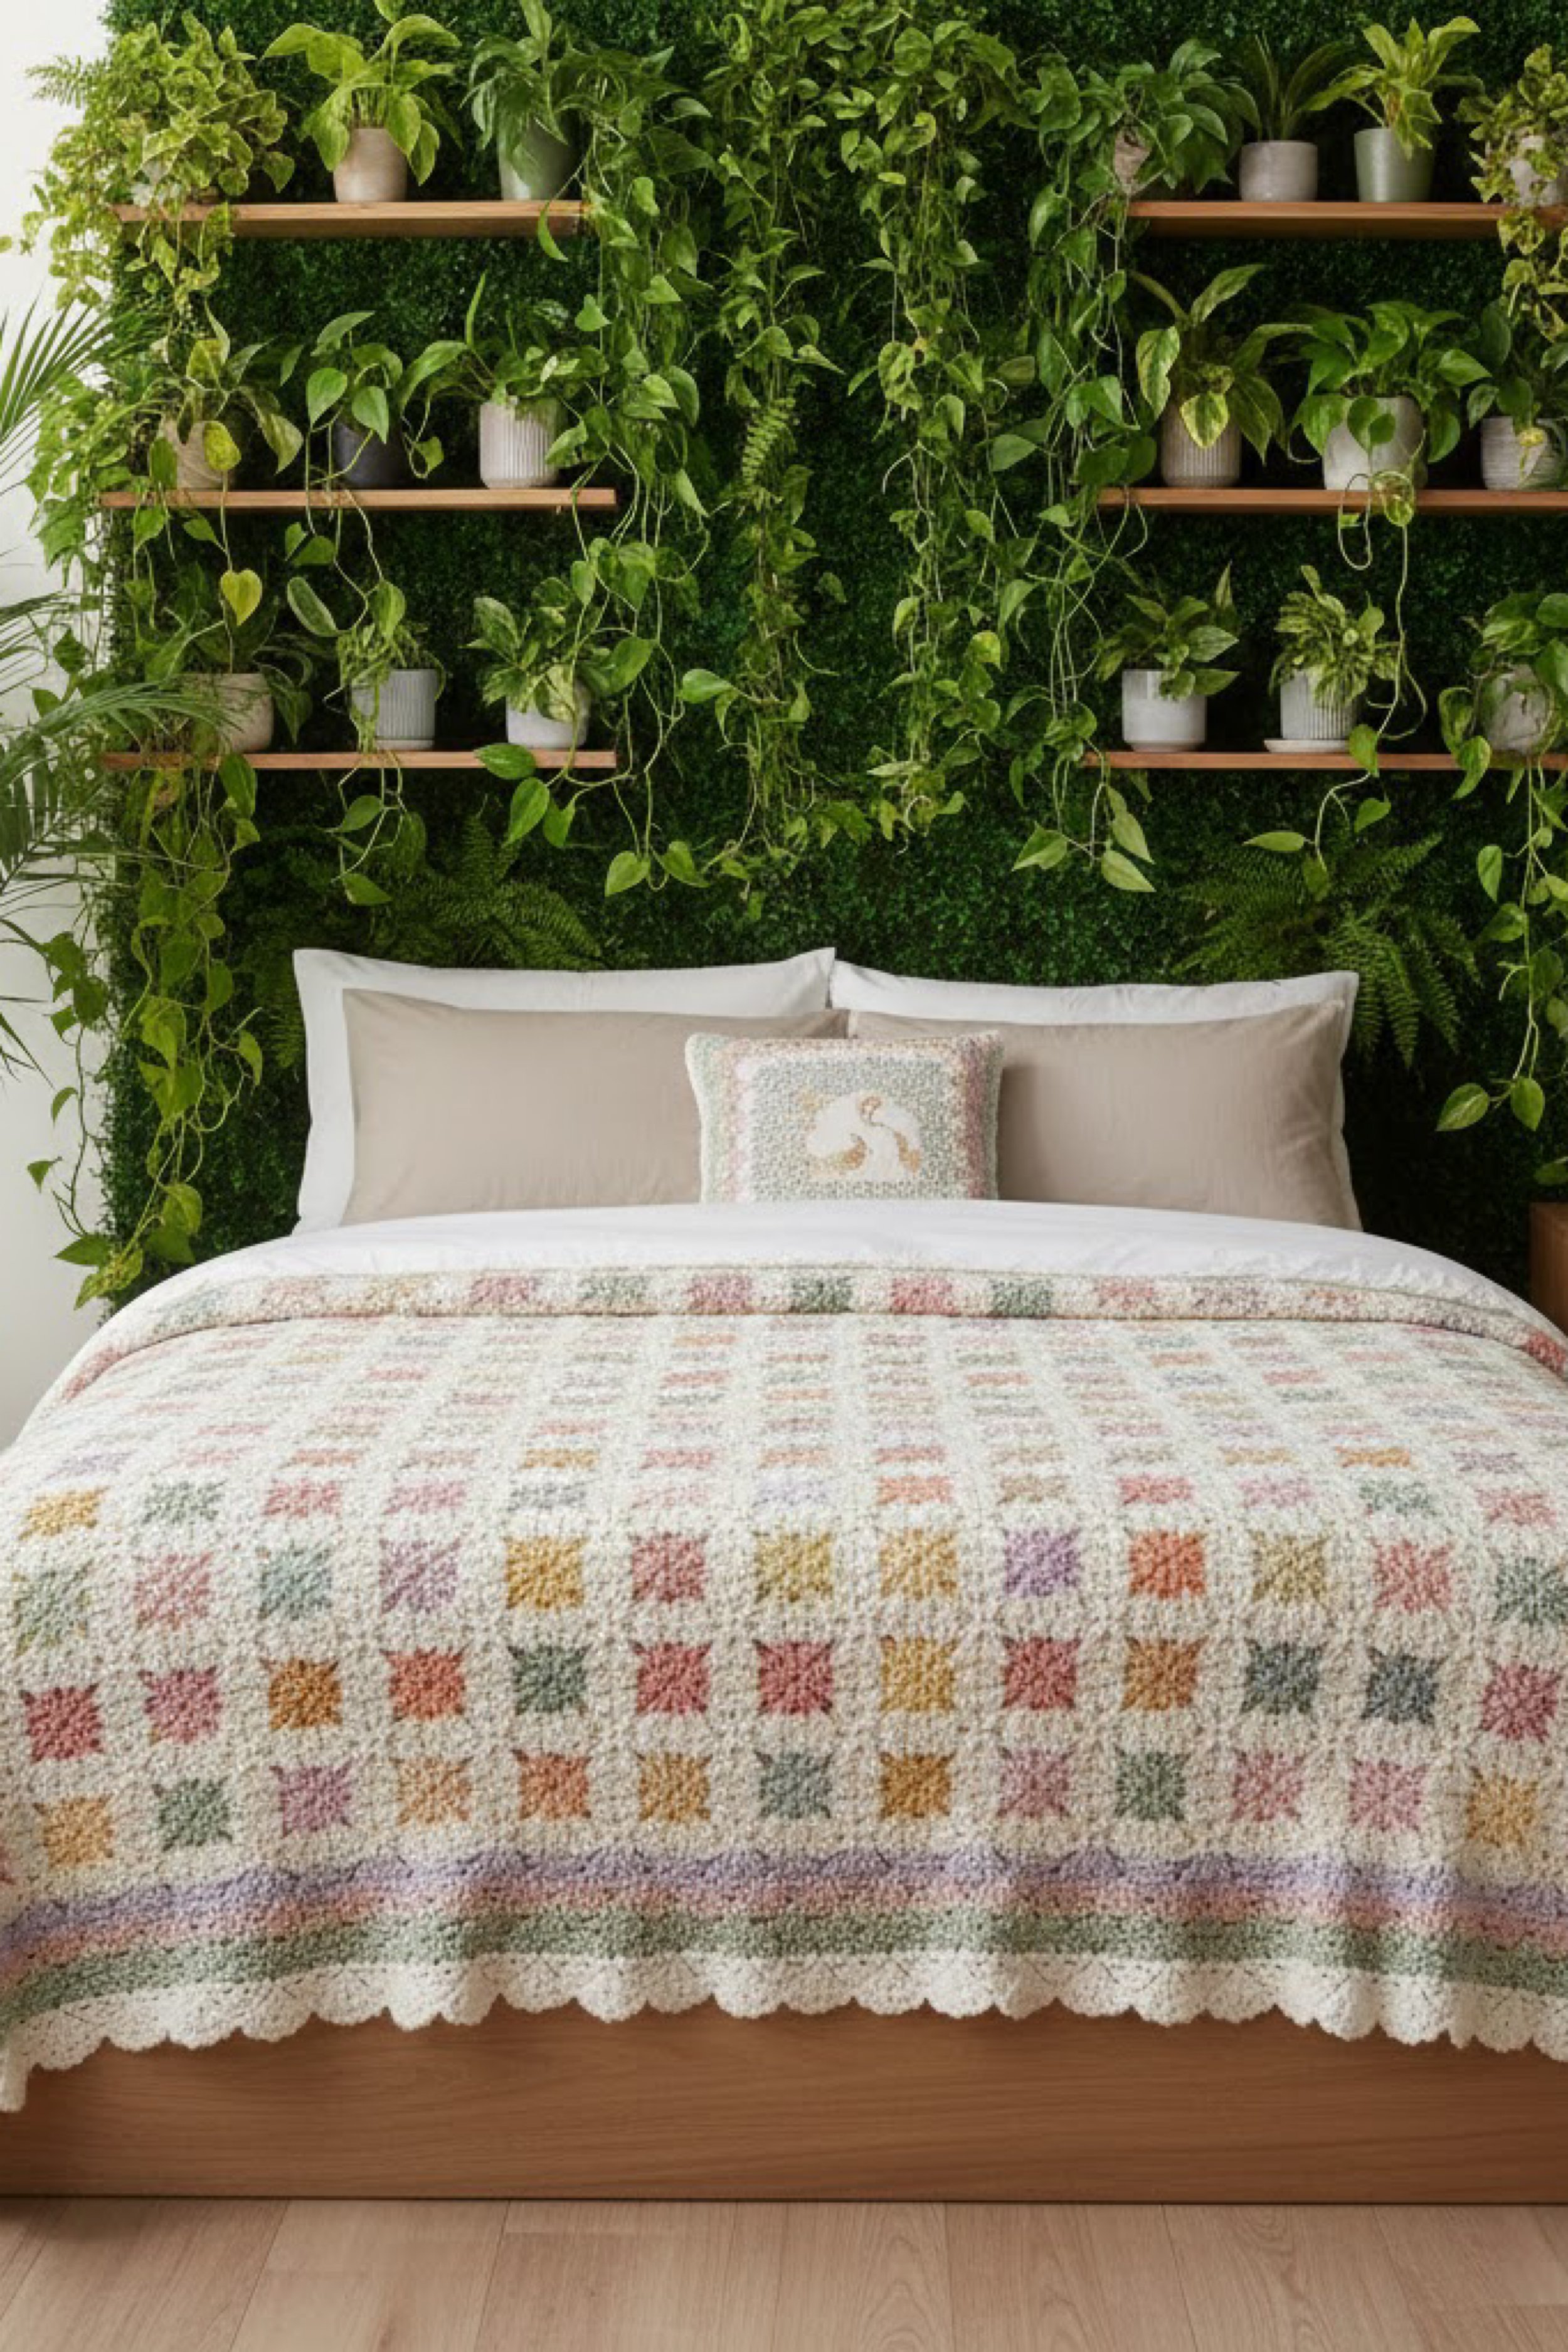
Pastel Gingham Bedspread Make-It-Yourself Tutorial
What you’re making
This is a pastel gingham style crochet bedspread with a creamy base, soft checker blocks in spring colors, and a sweet scalloped edge that reads like a lace trim. The checks are small and evenly spaced, giving that tidy quilt vibe, but with plush crochet texture. It looks cozy, curated, and very bedroom ready.
You will create the gingham effect using three yarn tones per color family, then build the blanket in a simple grid. If you want a faster version, you can crochet individual squares and join them.
Materials + tools
- Worsted weight yarn in cream for the base and border
- Worsted weight yarn in pastel accent colors, muted pink, butter yellow, lavender, sage, dusty blue, and soft peach
- Crochet hook size 5 mm
- Scissors
- Yarn needle
- Stitch markers
- Measuring tape
- Optional, blocking tools
- Optional, fabric for backing
Finished size + customization notes
A full bedspread can be 80 by 90 inches or larger. A topper look like the photo can be 70 by 85 inches. Because gingham is all about proportion, decide your square size first. In the photo, the squares are small, about 2 to 3 inches across.
You can do this in rows with color changes, or in motif squares. Squares are easier to keep perfectly even.
Step-by-step instructions
1. Choose construction method
Option A one piece blanket in corner to corner style
This gives a check pattern easily and drapes well.
Option B classic granny style squares joined in a grid
This is the cleanest way to control the gingham scale and match the photo.
The photo reads like a very even grid, so Option B is the best match.
2. Plan your gingham color logic
True gingham uses three values:
Light, medium, and dark. In crochet, you can fake this with:
Cream as light
Pastel color as medium
Pastel color held double or a slightly deeper shade as dark
If you do not want to hold yarn double, choose a second shade that is one step deeper.
Visual checkpoint: When you place squares next to each other, you should see a subtle checker shift, not random blocks.
3. Crochet the gingham squares
Make cream background squares with a colored center block that creates the check.
Square recipe, about 3 inches Round 1
- Magic ring.
- Chain 3, work 2 double crochet, chain 2, repeat three more times. Join.
Round 2, cream
- In each corner, work 3 double crochet, chain 2, 3 double crochet.
- On each side, work 3 double crochet in the space between clusters.
- Join.
Round 3, color placement
To create a check, swap one side cluster color.
Example:
Top side, pastel pink
Right side, cream
Bottom side, pastel pink
Left side, cream
Corners stay cream for a tidy grid.
This creates a gentle checked effect when assembled.
Alternate square types:
Type 1, two opposite sides colored
Type 2, the other two opposite sides colored
Type 3, all cream
Type 4, all colored sides, for a darker square
Make a mix so the bedspread looks like a quilt grid.
4. Make enough squares for your bed size
For a 70 by 85 inch topper with 3 inch squares, you need about 24 squares across and 29 squares down, total 696 squares. That is a lot, so you can also enlarge squares to 5 inches and cut the count dramatically.
A practical match to the photo: Make 5 inch squares, then you need about 14 across and 17 down, total 238 squares.
Visual checkpoint: Lay out 4 squares. The pattern should already look like gingham.
5. Join squares neatly
Use cream yarn.
Option A mattress stitch join for invisible seams
Option B slip stitch join for a subtle ridge
The photo reads soft and flat, so mattress stitch is ideal.
- Lay squares right sides up.
- Stitch through the inside loops along edges.
- Pull gently to close the seam.
6. Keep rows straight during assembly
Join squares into long rows first, then join rows together. This keeps alignment perfect. After every two rows, lay it flat and tug gently at corners to square it.
7. Add the scalloped lace edge
The photo has a delicate scallop. Create it in cream. Round 1 single crochet around Work 1 single crochet per stitch along edges. In corners, work 3 single crochet.
Round 2 scallop
- Slip stitch in first stitch.
- Skip 1 stitch.
- Work 5 double crochet in next stitch.
- Skip 1 stitch.
- Slip stitch in next stitch.
- Repeat all the way around.
If you want a softer scallop, replace double crochet with half double crochet.
Visual checkpoint: The scallops should align evenly around corners. If a corner scallop looks squished, add an extra skipped stitch before and after the corner.
8. Optional top sheet style border stripe
The photo has a subtle band near the edge. You can add a pastel stripe round before the scallop, like a single round of half double crochet in lavender or sage, then return to cream for the scallop.
Troubleshooting section
My gingham does not look like checks
You need value contrast. Add a darker version of each pastel, or hold the pastel yarn double in selected squares.
Seams are bulky
Use mattress stitch instead of slip stitch, and do not stitch too tightly.
The bedspread edges wave
Block aggressively, and make sure your border stitch count is even. If the scallop ruffles, reduce shell size.
Squares are different sizes
Block each square, or crochet one extra round on the smaller ones to match. Consistency matters for a grid.
The blanket feels too heavy
Use a lighter weight yarn, or increase hook size slightly for more drape.
Finishing details
Block the entire bedspread in sections if you cannot pin it all at once. Steam lightly to settle seams. Weave in ends in multiple directions so they do not pop out after washing. For a true bed topper feel, add a lightweight cotton backing and stitch it down at seam intersections.
Optional upgrades
- Add corner tassels in pastel bundles for a playful finish.
- Add a monogram patch at the center like a quilt label.
- Add a deeper border stripe in sage for a botanical frame.
- Add a matching pillow cover using the same squares.
Shop Similar
- Pastel yarn pack for crochet blankets
- Cream worsted yarn bulk skeins
- Crochet blocking mats large set
- Tapestry needles for weaving ends
- Ergonomic crochet hooks 5 mm
Style It With
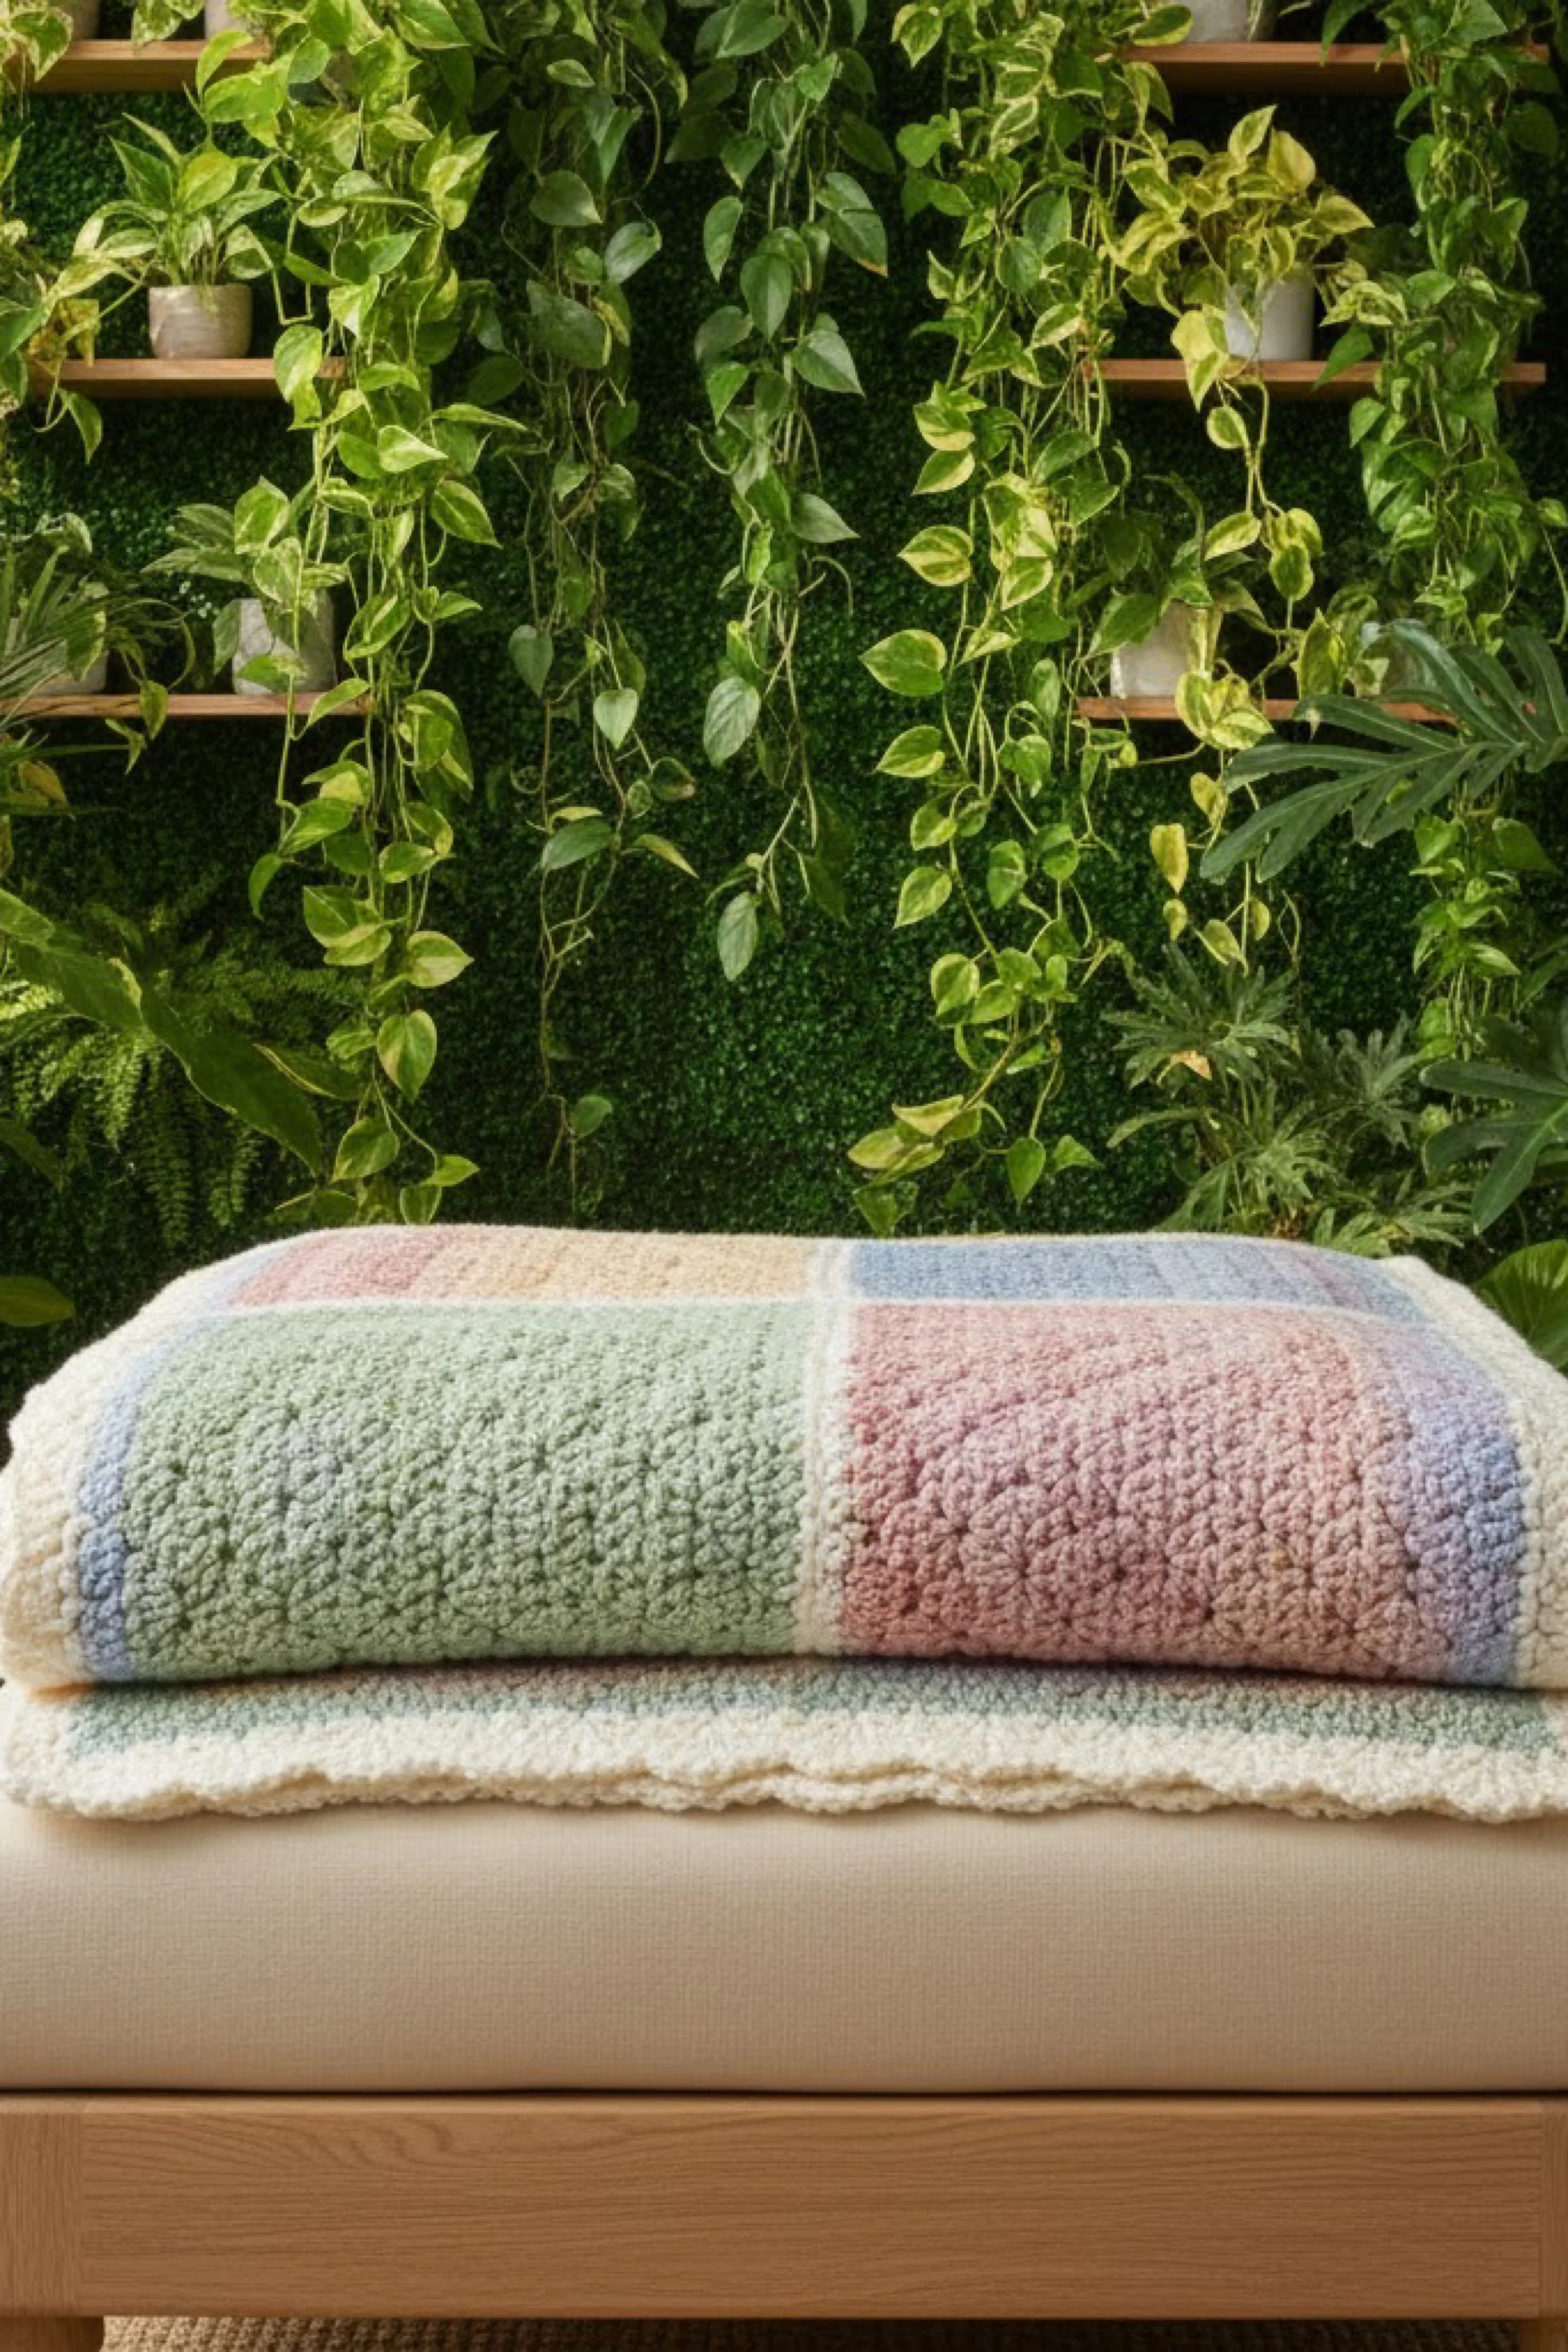
Chunky Pastel Patchwork Pillow and Throw How-To Guide
What you’re making
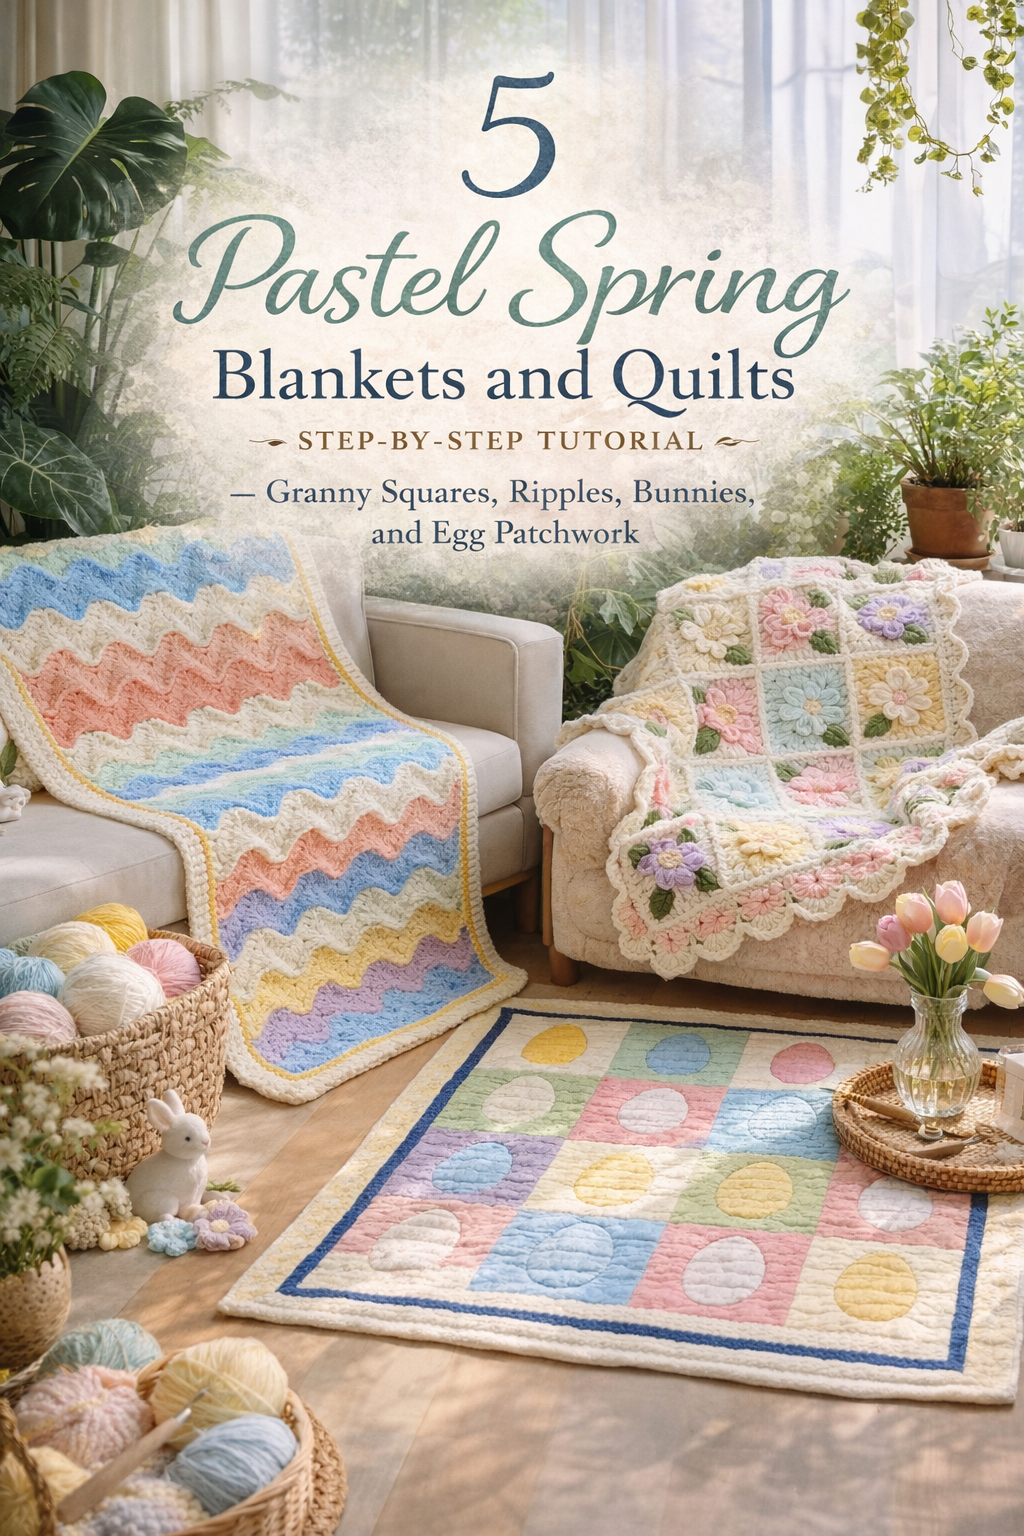
This is a cozy, chunky patchwork look made from plush, puffed blocks in soft pastels, finished with a creamy border that frames everything like a cloud. In the photo, the pillow has big color blocks that look like marshmallow squares, and the blanket underneath has the same soft, textured vibe. The overall feel is modern, simple, and very touchable.
You will recreate the look using super bulky chenille style yarn and big, clean blocks. This guide gives you two safe builds: a fast stitched together patchwork, or a seamless color block method.
Materials + tools
- Super bulky plush yarn, chenille style, in cream
- Super bulky plush yarn in pastel green, pastel blue, blush pink, and lavender
- Crochet hook size 8 mm to 10 mm
- Scissors
- Yarn needle with a large eye
- Stitch markers
- Measuring tape
- Optional, pillow insert in a size like 18 by 18 or 20 by 20 inches
- Optional, grippy rug pad underlay if used on a bench or bed
Finished size + customization notes
Pillow cover sizes
18 by 18 inches is classic
20 by 20 inches is extra plush like the photo
Throw size A lap throw can be 40 by 55 inches. A bed throw can be 50 by 70 inches. Because bulky yarn grows fast, you can adjust easily by adding blocks.
Block size In the photo the pillow blocks look large, about 6 to 8 inches each. Keep blocks big for that modern patchwork vibe.
Step-by-step instructions
1. Choose your stitch for plush yarn
Plush chenille looks best in simple stitches.
Best choices
Single crochet for dense, puffy texture
Half double crochet for slightly taller plush ribs
Lemon peel stitch for gentle texture
The photo reads like dense single crochet, so we will use that.
2. Make a test swatch
With your chosen hook, crochet a 10 stitch by 10 row square in single crochet. Measure it. Plush yarn varies wildly. This step keeps your pillow from ending up oversized.
Visual checkpoint: The fabric should look like tiny plush pebbles, not loose ladders.
3. Create the patchwork blocks
Make four color blocks for the pillow front, and optionally more for the throw.
Pillow front block recipe
- Chain enough stitches to make a square, usually 16 to 18 stitches for bulky yarn.
- Single crochet across. Chain 1, turn.
- Repeat until the block is as tall as it is wide.
- Fasten off.
Make one block each in pastel green, pastel blue, blush, and lavender.
4. Join blocks into a pillow front
Lay blocks in a 2 by 2 grid. Join with whip stitch using cream yarn.
- Stitch blocks together in pairs to form two rows.
- Stitch rows together.
- Keep seams snug but not tight.
Visual checkpoint: The seams should create a soft cross shape, not a hard ridge. If it ridges, loosen the stitch tension.
5. Add a cream frame to the pillow front
Work a border around the entire patchwork front in cream.
- Attach cream yarn to any corner.
- Single crochet evenly around.
- In each corner, work 3 single crochet in the corner stitch.
- Do 2 to 4 rounds, depending on how wide you want the frame.
This border is what makes it match the photo’s clean, cushy outline.
6. Make the pillow back
Option A envelope back, easiest Make two rectangles in cream that overlap. Each rectangle should be the pillow width, and about two thirds of the pillow height.
Option B single panel back with zipper Make one full panel in cream and install a zipper. This looks premium but takes more finishing skills.
Envelope back instructions
- Crochet rectangle 1, width equals pillow width, height equals about 12 inches for an 18 inch pillow.
- Crochet rectangle 2 same size.
- Add a simple single crochet edging on the inner overlap edges to keep them neat.
7. Assemble the pillow
- Place pillow front right side up.
- Place envelope panels on top, right sides down, overlapping at the center.
- Clip or pin around edges.
- Whip stitch or single crochet join around all sides in cream.
Turn right side out, insert pillow form, and fluff.
Visual checkpoint: The pillow should look plump with clean corners. If corners collapse, tighten the last two stitches at each corner during assembly.
8. Create the matching throw
You can do this two ways.
Option A large patchwork blocks, fastest
- Crochet big blocks in each pastel, about 10 to 12 inches square.
- Join in a grid, like 4 across and 5 down.
- Add a cream border around the whole throw.
Option B long color block stripes
- Crochet in cream.
- Change colors for large panels, like 12 rows per color.
- Add a cream border.
The photo shows a large block pillow and a creamy base throw, so Option A matches best.
9. Add the throw border
Work 2 rounds of single crochet in cream around the throw. For a soft edge, finish with one round of half double crochet.
10. Weave ends securely in plush yarn
Plush yarn ends can slip. Use this method:
- Thread the tail on a needle.
- Weave through the center of stitches for at least 4 inches.
- Change direction and weave back 2 inches.
- Pull gently and trim.
Optional: Add a tiny dab of fabric glue to the tail end inside the stitch path, only if you know it is washable safe for your use.
Troubleshooting section
My plush yarn is shedding and splitting
Use a larger eye needle and avoid ripping out stitches repeatedly. Plush yarn hates frogging. If you must undo, do it slowly.
Blocks are not the same size
Plush yarn tension shifts easily. Block the squares lightly by hand shaping. If still off, add one extra row or one extra stitch on smaller blocks.
Seams look bulky
Use whip stitch through the inner loops only, and keep stitches spaced evenly.
Pillow looks flat
Use a slightly larger pillow insert than the cover, like a 20 inch insert for an 18 inch cover. This gives that plush showroom look.
Border is curling
Your border stitch count is too tight. Go up one hook size for the border rounds.
Finishing details
Fluff the pillow by squeezing corners outward and smoothing seams with your fingers. For the throw, a gentle steam from a distance can help the border relax, but do not press plush yarn directly with heat. If you want a more structured edge, add a hidden slip stitch seam tape along the inside border when sewing a backing.
Optional upgrades
- Add a subtle raised seam look by using single crochet join on the right side.
- Add a hidden zipper for a cleaner back.
- Add a matching small lumbar pillow using two blocks across and one block down.
- Add a simple label tag centered on one border side.
Shop Similar
- Super bulky plush chenille yarn cream
- Pastel chenille yarn set
- Large crochet hooks 8 mm to 10 mm
- Pillow inserts 18x18 and 20x20
- Yarn needle set large eye
Style It With
Once you have finished your final border and woven in the last tail, take a moment to style your piece the way it deserves. A gentle block will square the edges, even out the stitches, and give you that boutique finish that makes handmade look high end. Then bring in the fun part: layering. Pastel crochet looks best when it has contrast, so pair it with clean neutrals, warm wood, and a little plant life for that fresh, sunlit vibe you see in the photos.
If one of the patterns felt slightly different in your hands than it looked in the image, that is completely normal. Yarn weight, hook size, and tension all shift the texture, and you can use that to your advantage. A smaller hook makes crisp colorwork and sharper motifs. A slightly larger hook adds drape for throws that puddle perfectly over furniture. Either way, the look stays the same: soft spring color, creamy framing, and a finished edge that feels intentional.
Keep your scraps, too. Pastel leftovers are perfect for mini matching projects like a pillow front, a small basket liner, or a sweet accent stripe on your next throw. Most of all, enjoy the fact that these are pieces you will actually use. Cozy, washable, and beautiful on camera, they are the kind of handmade staples that make a home feel styled without trying too hard.