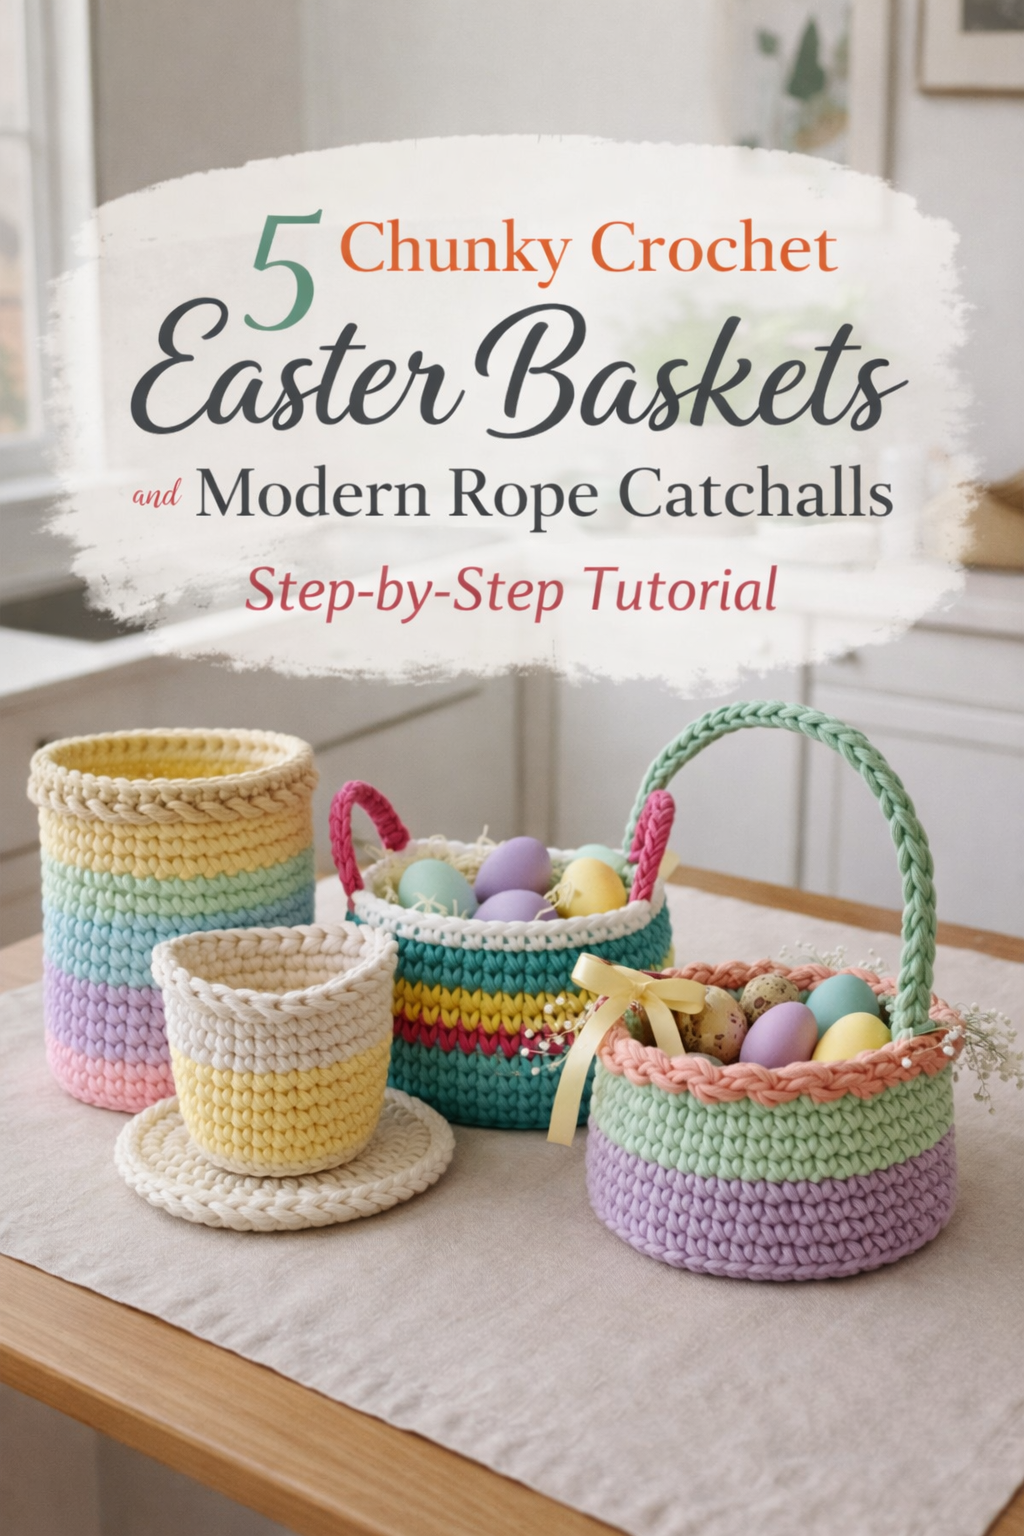
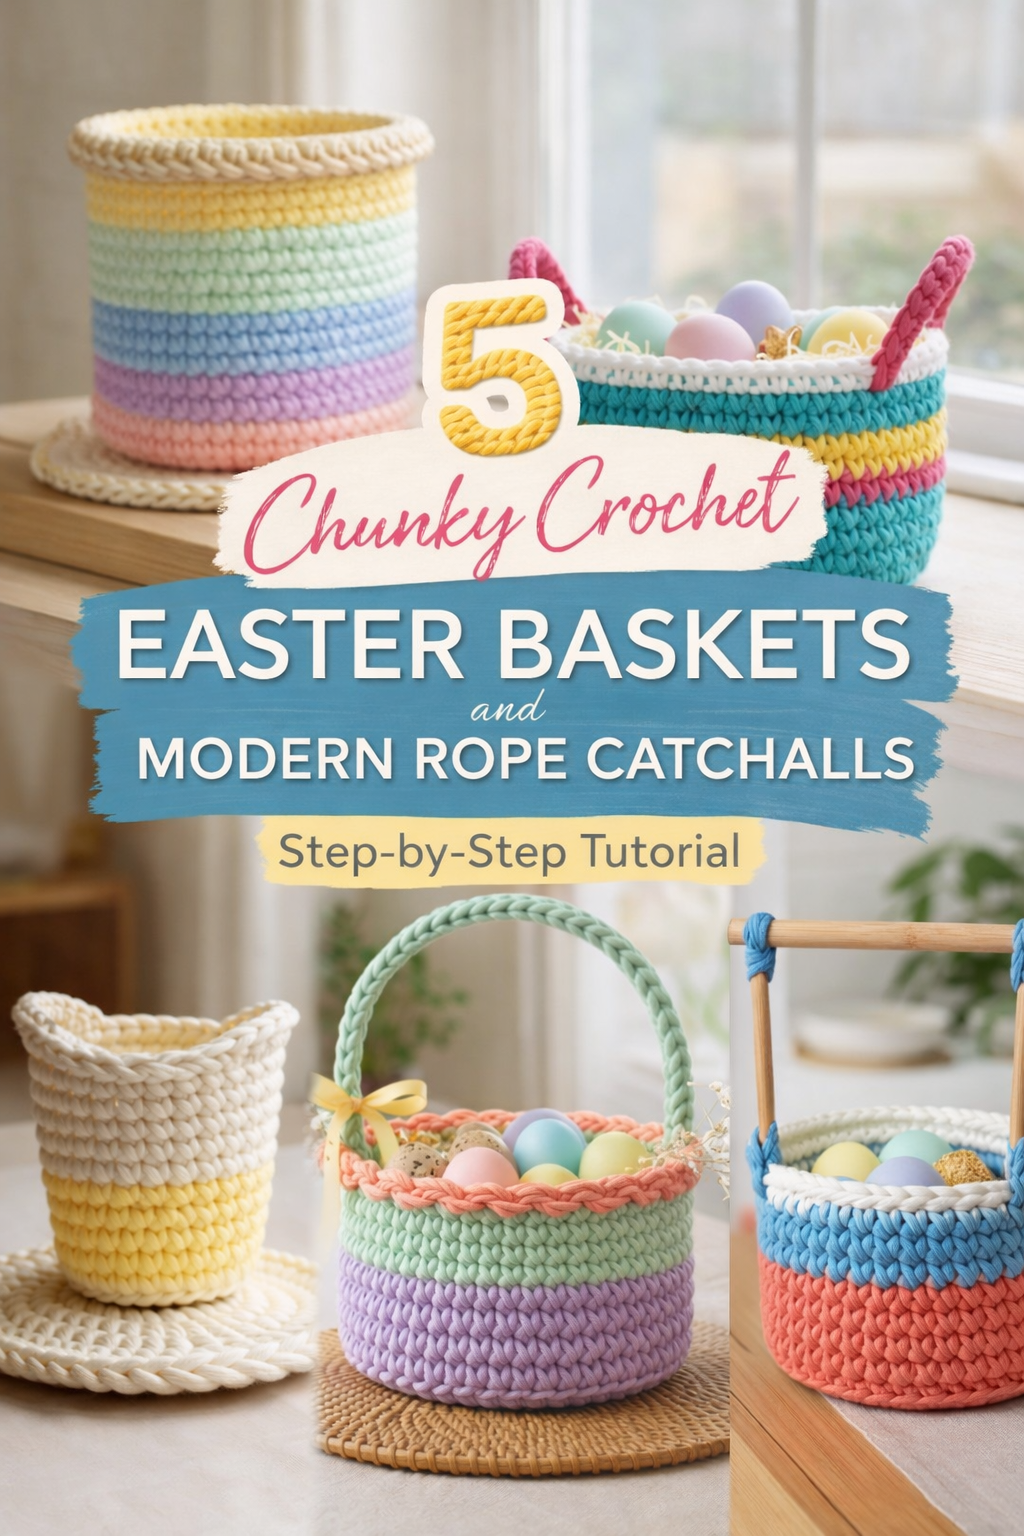
5 Chunky Crochet Easter Baskets and Modern Rope Catchalls Step-by-Step Tutorial
More like this
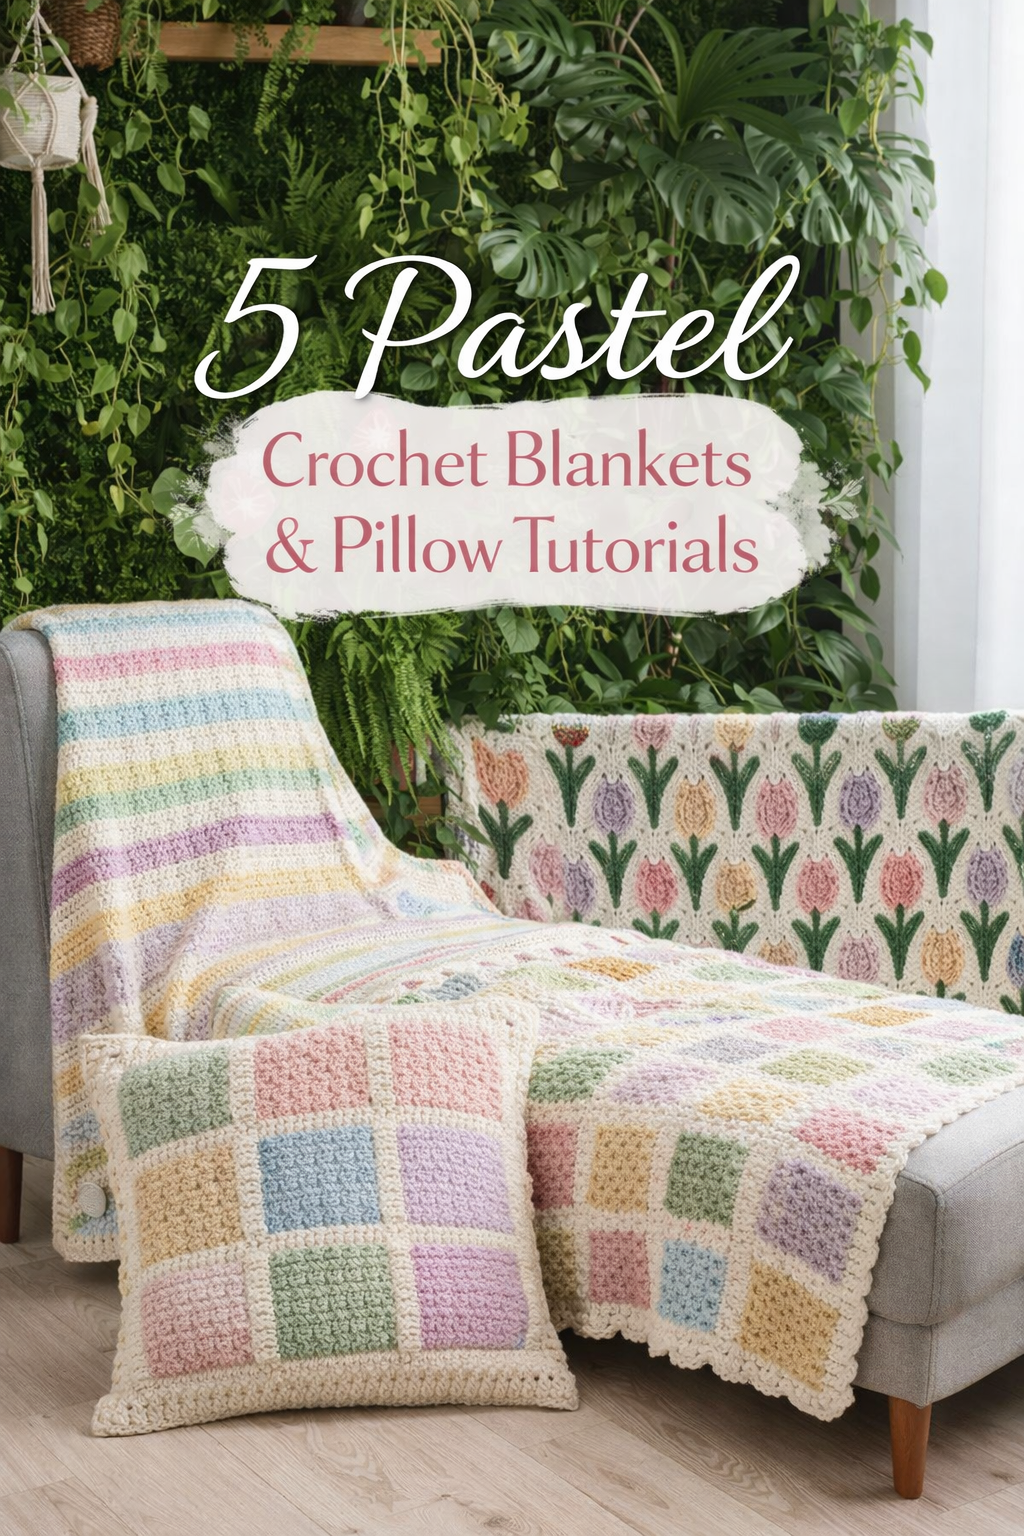
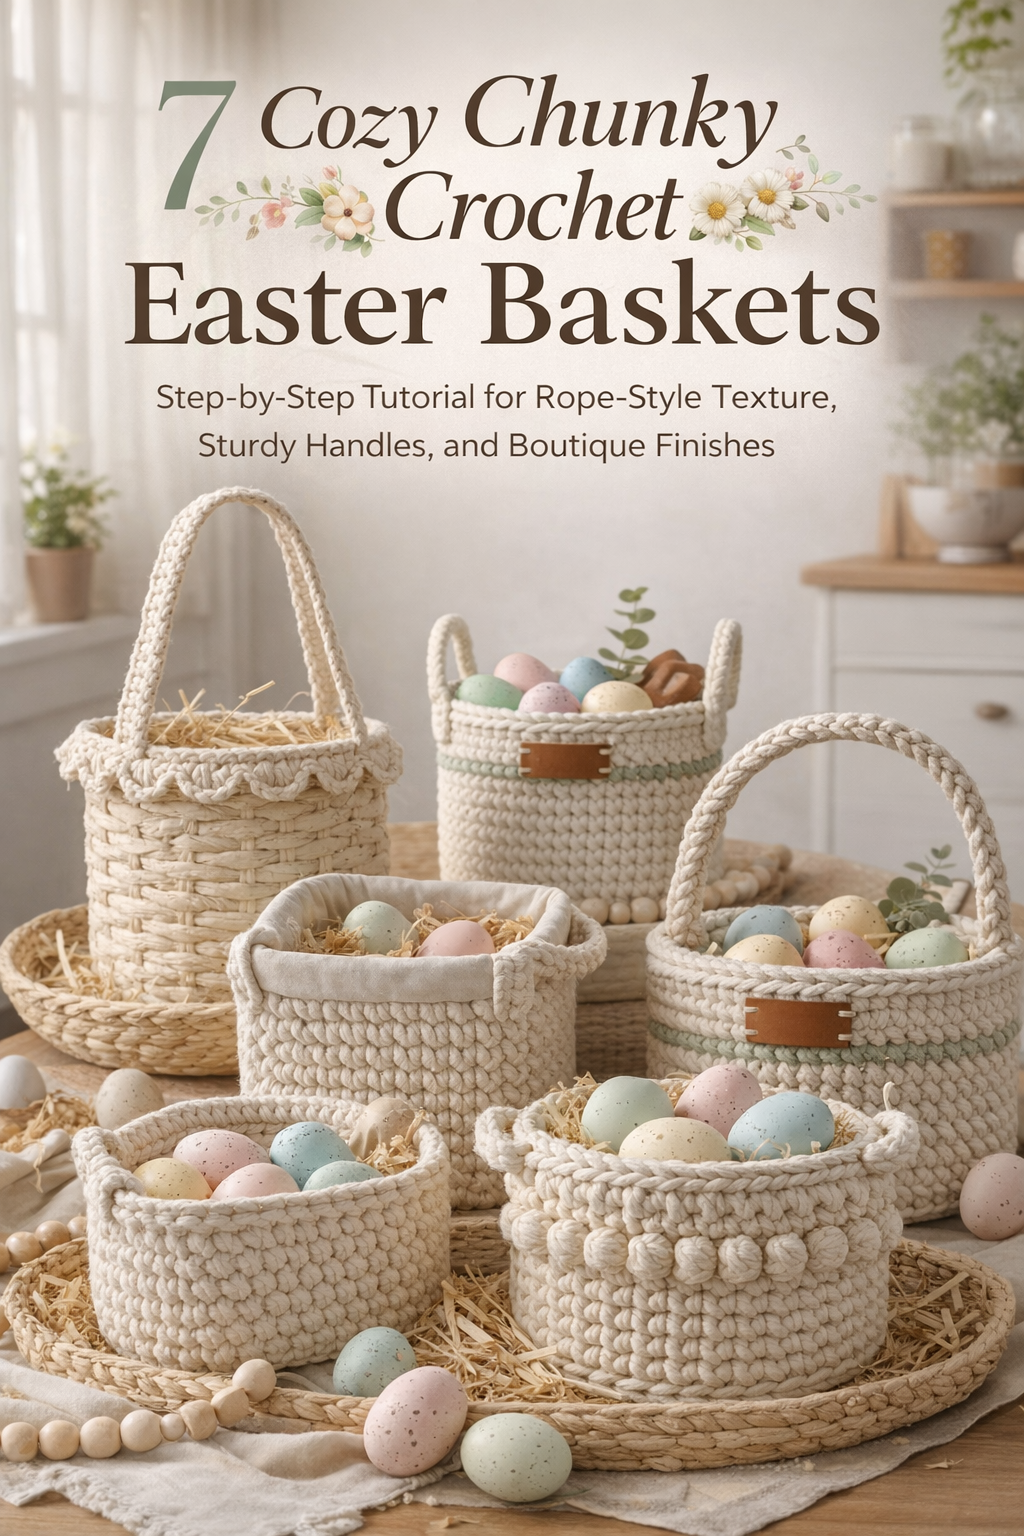
There is something instantly satisfying about a chunky crochet basket because it looks finished the moment it stands up on its own. These five looks lean into that modern rope texture, clean color blocking, and crisp rims that make handmade storage feel like decor. If you are brand new to working with thick cotton cord, this is a perfect place to start because the stitches are simple, the shapes are forgiving, and the payoff is big.
In this post you will recreate each basket exactly as pictured, from the soft two tone mini catchall with its matching coaster to the bright stripe Easter basket with handles, the pastel bow handled heirloom style, the wood frame handled centerpiece, and the tall rainbow storage cylinder. You will also learn the small details that make these projects look boutique, like a back loop turning round for sharp sidewalls, clean color changes, and a smooth rope rim that reads polished in photos. Grab your cord, pick your palette, and let your first round be the moment your spring styling gets real.
💡 Pro Tip: Why I Link to Amazon Search Results and Not One Product
In the Shop the Look and Style it With sections under each bikini, I link to Amazon search results, not single products. Here’s why this matters:
Hot bikinis sell out fast. I don’t want you clicking on a dead link to a sold-out item. Search pages stay updated.
You get more options. Love the vibe but want a different color, cut, or price point? The search results give you everything that matches the look and energy.
I curate each search carefully. These aren’t generic. I spend hours crafting keywords that bring up exactly the kind of bikinis I’d wear—or recommend to my hottest friends.
Support with no pressure. If you click a link, browse, and buy something later, I may earn a small commission at no extra cost to you. That helps me keep bringing you curated collections like this one—powerful, seductive, and always fresh.
So dive in. Click through. Try something risky. These aren’t just bikinis—they’re commands, statements, and maybe even your new favorite weapon of choice.
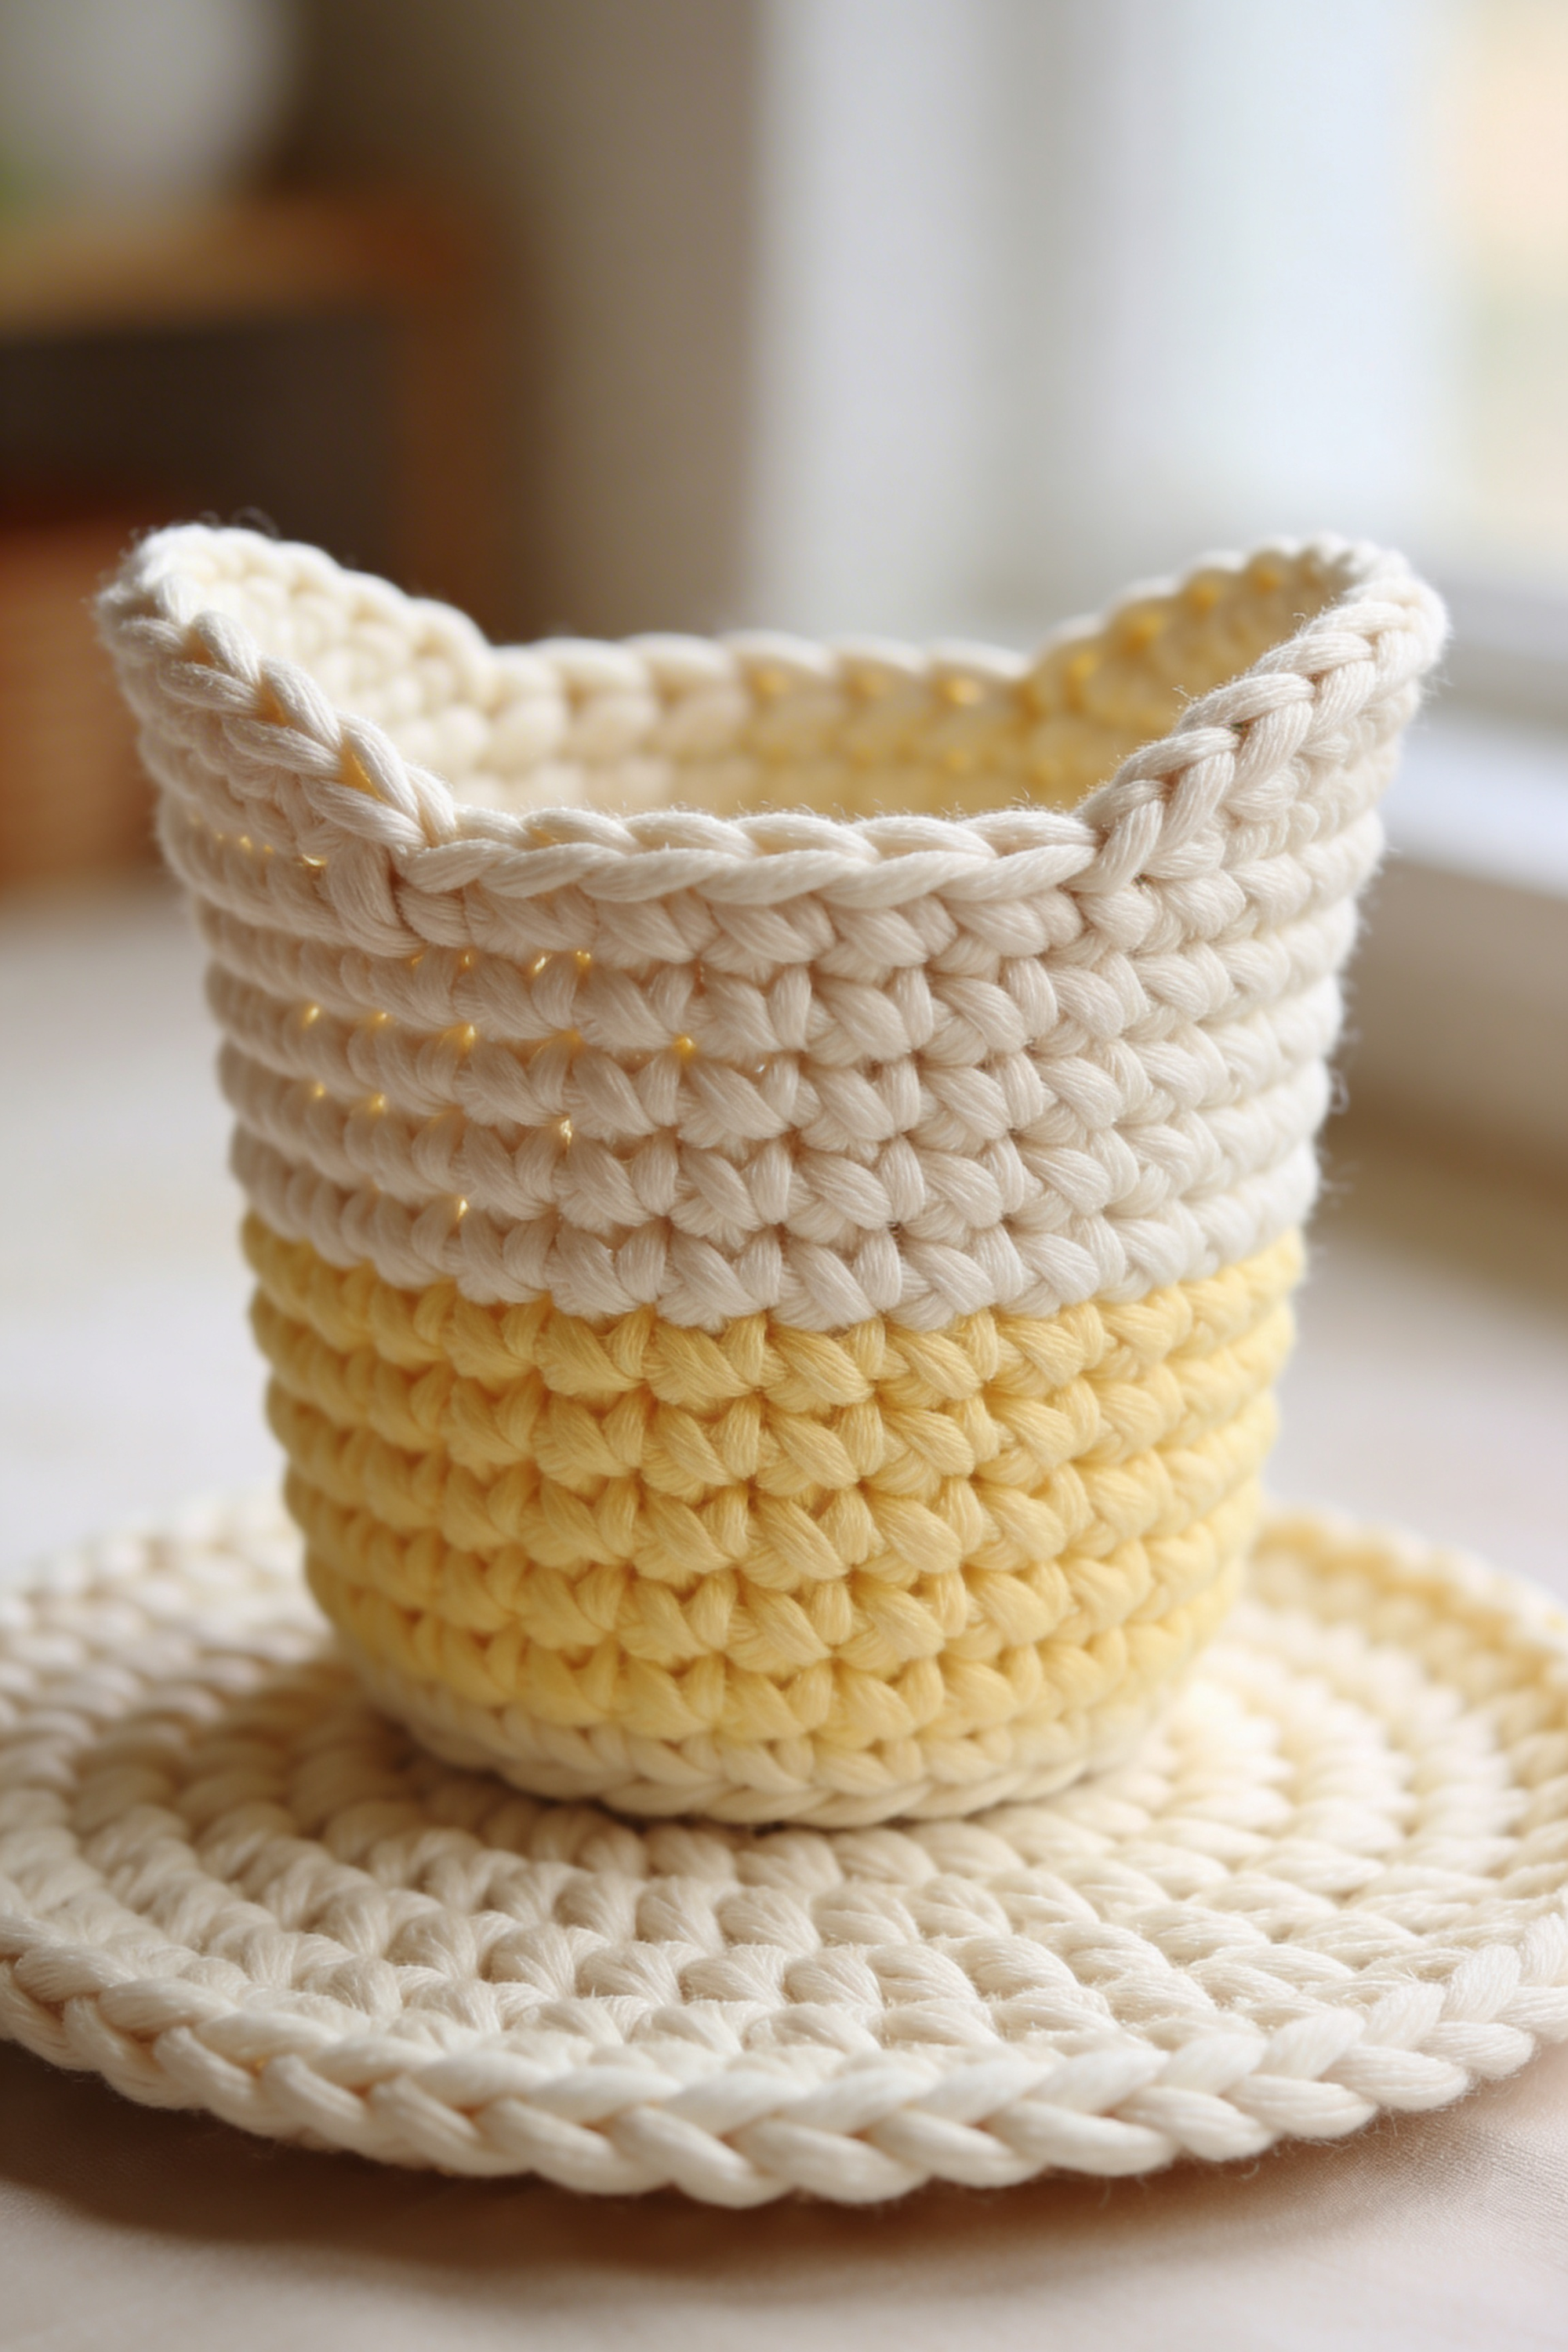
Two Tone Mini Crochet Catchall Basket With Matching Coaster DIY Guide
What you’re making
This project recreates the cozy two tone mini crochet basket you see in the photo, with that soft buttery fade from pale cream into warm pastel yellow and a smooth rope like rim that looks almost braided. It is sturdy enough to stand on its own, perfect for cotton rounds, hair ties, keys, or small craft tools, and it includes the matching chunky coaster base for that styled tabletop moment. The texture comes from working tight single crochet stitches in thick cotton cord, then finishing with a clean rounded edge.
Materials and tools
- Chunky cotton cord or cotton rope yarn in cream and pastel yellow
- Crochet hook sized for your cord, usually 8 mm to 10 mm for 5 mm cord
- Stitch marker
- Tapestry needle with a large eye
- Sharp scissors
- Measuring tape or ruler
- Optional for extra structure: stiff felt circle for the base, or fabric liner
- Optional for a polished edge: flexible craft wire or clear nylon line
Finished size and customization notes
The sample look is a small catchall, about 4 to 5 inches wide and 3 to 4 inches tall, with a shallow matching coaster about 5 to 6 inches wide. To make it wider, add more increase rounds on the base. To make it taller, add more plain rounds on the walls. If your cord is thinner or thicker than the photo, your size will shift. Choose your hook so stitches look snug and stacked, not airy.
Visual checkpoint After the base is finished, you should see a flat, thick circle with visible rope like stitches and no ruffling. If it curls, your hook is too small or tension too tight. If it waves, your hook is too large.
Step by step instructions
Part 1, Make the matching chunky coaster
- Make a magic ring with cream cord. If your cord is very stiff, chain 2 and work into the first chain instead.
- Round 1: Work 6 single crochet into the ring. Pull tight. Place a stitch marker in the first stitch.
- Round 2: Increase in every stitch, meaning 2 single crochet in each stitch. You now have 12 stitches.
- Round 3: Work 1 single crochet, then increase. Repeat around. You now have 18 stitches.
- Round 4: Work 2 single crochet, then increase. Repeat around. You now have 24 stitches.
- Round 5: Work 3 single crochet, then increase. Repeat around. You now have 30 stitches.
- Round 6: Work 4 single crochet, then increase. Repeat around. You now have 36 stitches.
- Round 7: Work 5 single crochet, then increase. Repeat around. You now have 42 stitches.
- Keep adding rounds until your coaster matches the photo scale. For most chunky cords, 42 to 54 stitches makes a good coaster size.
- Finish with one round of slip stitch in each stitch to create that smooth braided looking edge. Keep slip stitches relaxed so the coaster stays flat.
- Fasten off, weave ends to the back, and gently massage the coaster flat with your hands.
Optional upgrade If you want a perfect flat coaster, steam lightly from a distance and press under a book for a few minutes, or stitch a felt circle to the underside.
Part 2, Crochet the two tone mini basket
- Start the base in cream, same as the coaster, but stop smaller. Make a magic ring.
- Round 1: 6 single crochet into ring.
- Round 2: Increase in each stitch. 12 stitches.
- Round 3: 1 single crochet, increase. 18 stitches.
- Round 4: 2 single crochet, increase. 24 stitches.
- Round 5: 3 single crochet, increase. 30 stitches.
- Round 6: 4 single crochet, increase. 36 stitches.
- For a basket like the photo, stop around 30 to 36 stitches depending on your cord thickness. The base should look like a small saucer, about the width of your palm.
Visual checkpoint Your base should lie mostly flat with a slight natural curve at the edge from the thick cord. It should not ripple.
- Turn the base into walls. Next round: Work 1 single crochet in the back loop only of each stitch. This creates a crisp turning ridge and makes the sides stand up.
- Now build height in cream. Work single crochet in each stitch for 2 to 4 rounds, depending on how tall you want the cream band. Keep your stitch marker moving each round so you do not lose count.
- Switch to pastel yellow. On the last cream stitch, yarn over with cream, pull up a loop, then yarn over with yellow and finish the stitch. This keeps the color change clean.
- Continue single crochet in each stitch for 3 to 6 rounds in yellow to match the photo’s deeper yellow section. If you want the fade look, alternate one round cream and one round yellow for two rounds before going full yellow.
- Create the smooth rope like rim. Option A, slip stitch rim: Work one full round of slip stitch in each stitch. Keep it even, not tight.
- Option B, rope rim with a corded edge: Lay a strand of matching cord, nylon line, or thin craft wire along the top and single crochet around it for one round, enclosing it inside the stitches. This makes the rim stand and look extra polished.
- Fasten off with a long tail. Thread onto the tapestry needle and weave through several stitches inside the basket, then trim.
Optional upgrades for the same look but extra function
- Add a thin felt base inside. Trace the base, cut a circle, and drop it in for extra stability.
- Add a simple liner. Cut a fabric circle and rectangle, whip stitch into a tube, and hand stitch to the inside rim.
- Add a label tag. Stitch a small faux leather label to the outside.
Troubleshooting, common mistakes and fixes
- Basket sides flare outward too much: Your hook is too large or tension too loose. Drop one hook size and keep stitches snug.
- Basket curls inward: Your hook is too small or you are pulling stitches too tight. Go up one hook size and relax your slip stitch rim.
- Base ruffles or waves: Too many increases or loose tension. Remove one increase round or tighten tension slightly.
- Base makes a bowl shape before you want it: Too few increases. Add one more increase round to flatten.
- Color change looks jagged: Use the clean change method, finishing the last stitch with the new color, and weave ends along the back of stitches rather than straight down.
- Rim looks lumpy: Even out tension on the last round, and try the corded edge option for a smoother finish.
Finishing details
Gently shape the basket with your hands, pressing the base flat and smoothing the sides. If you used cotton cord, a light steam helps the stitches settle. Keep steam at a distance and do not soak the yarn. For a crisp rim, work the last round slightly tighter than the body, or use the corded edge method. Weave ends securely and trim close.
Shop Similar
- Chunky cotton rope yarn for crochet baskets
- Crochet hooks for thick cord 8 mm to 10 mm
- Tapestry needles large eye for cord yarn
- Felt sheets for basket base inserts
- Cotton cord pastel yellow and cream
Style It With
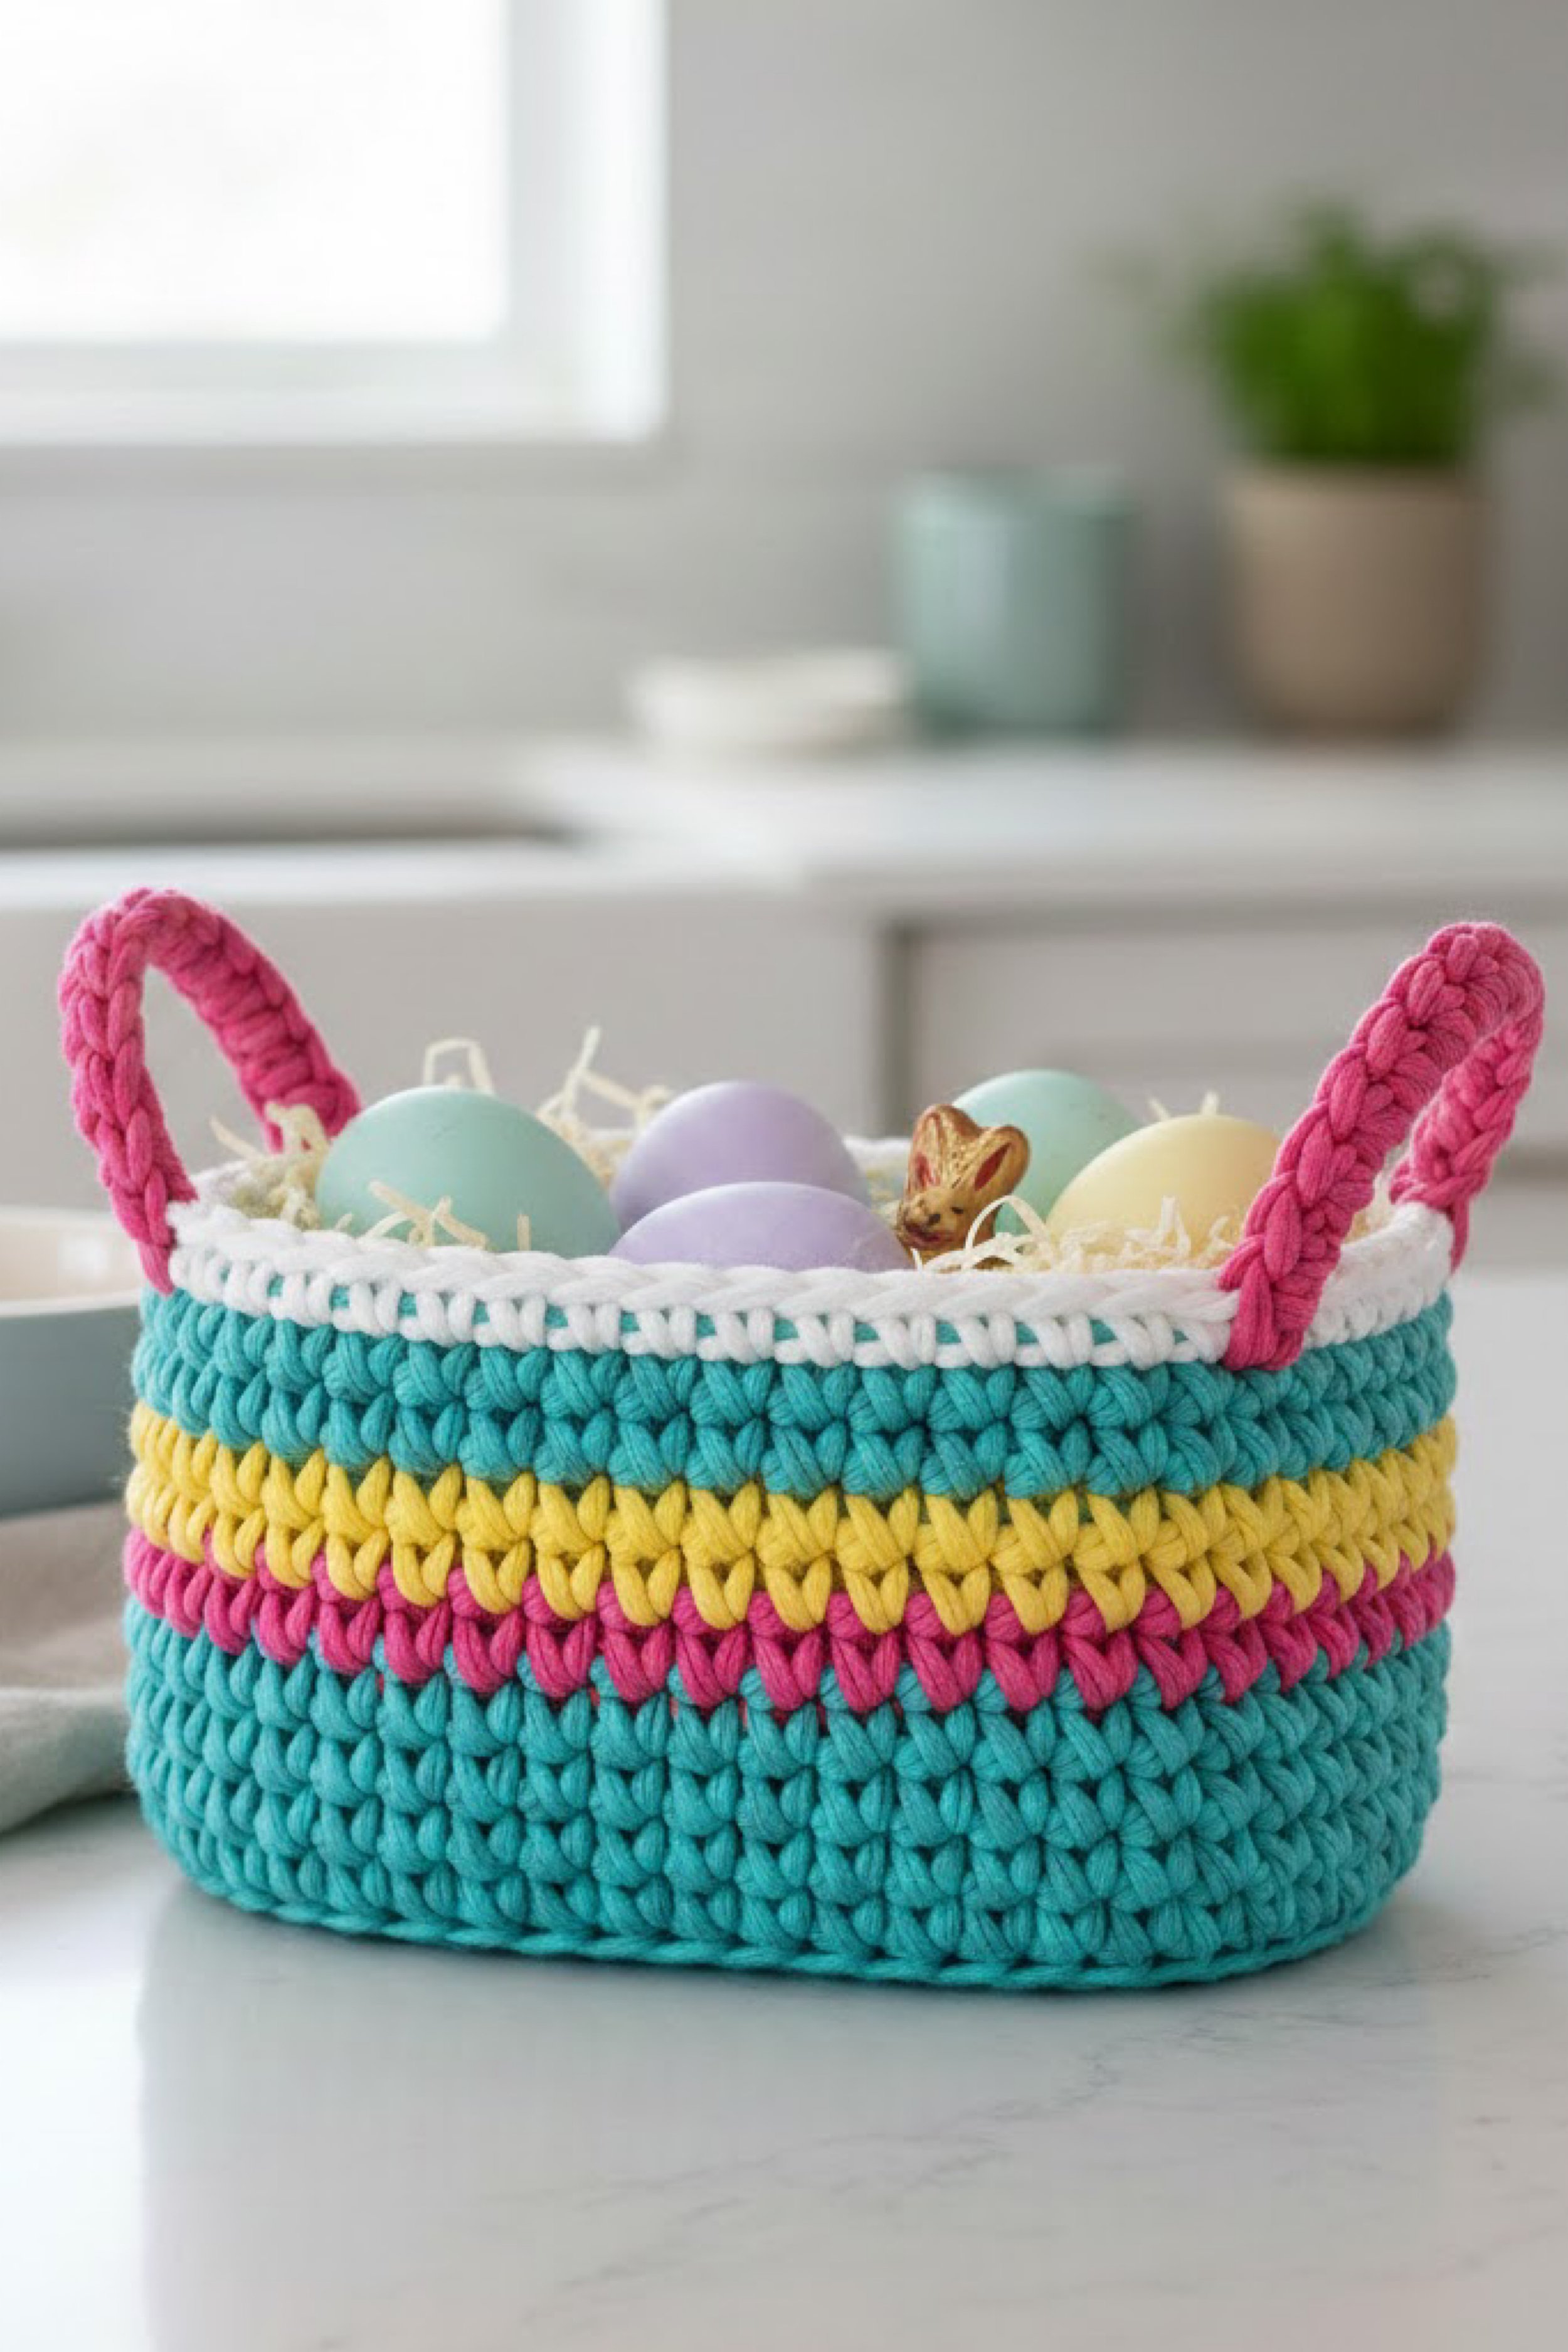
Bright Stripe Crochet Easter Basket With Chunky Handles DIY Guide
What you’re making
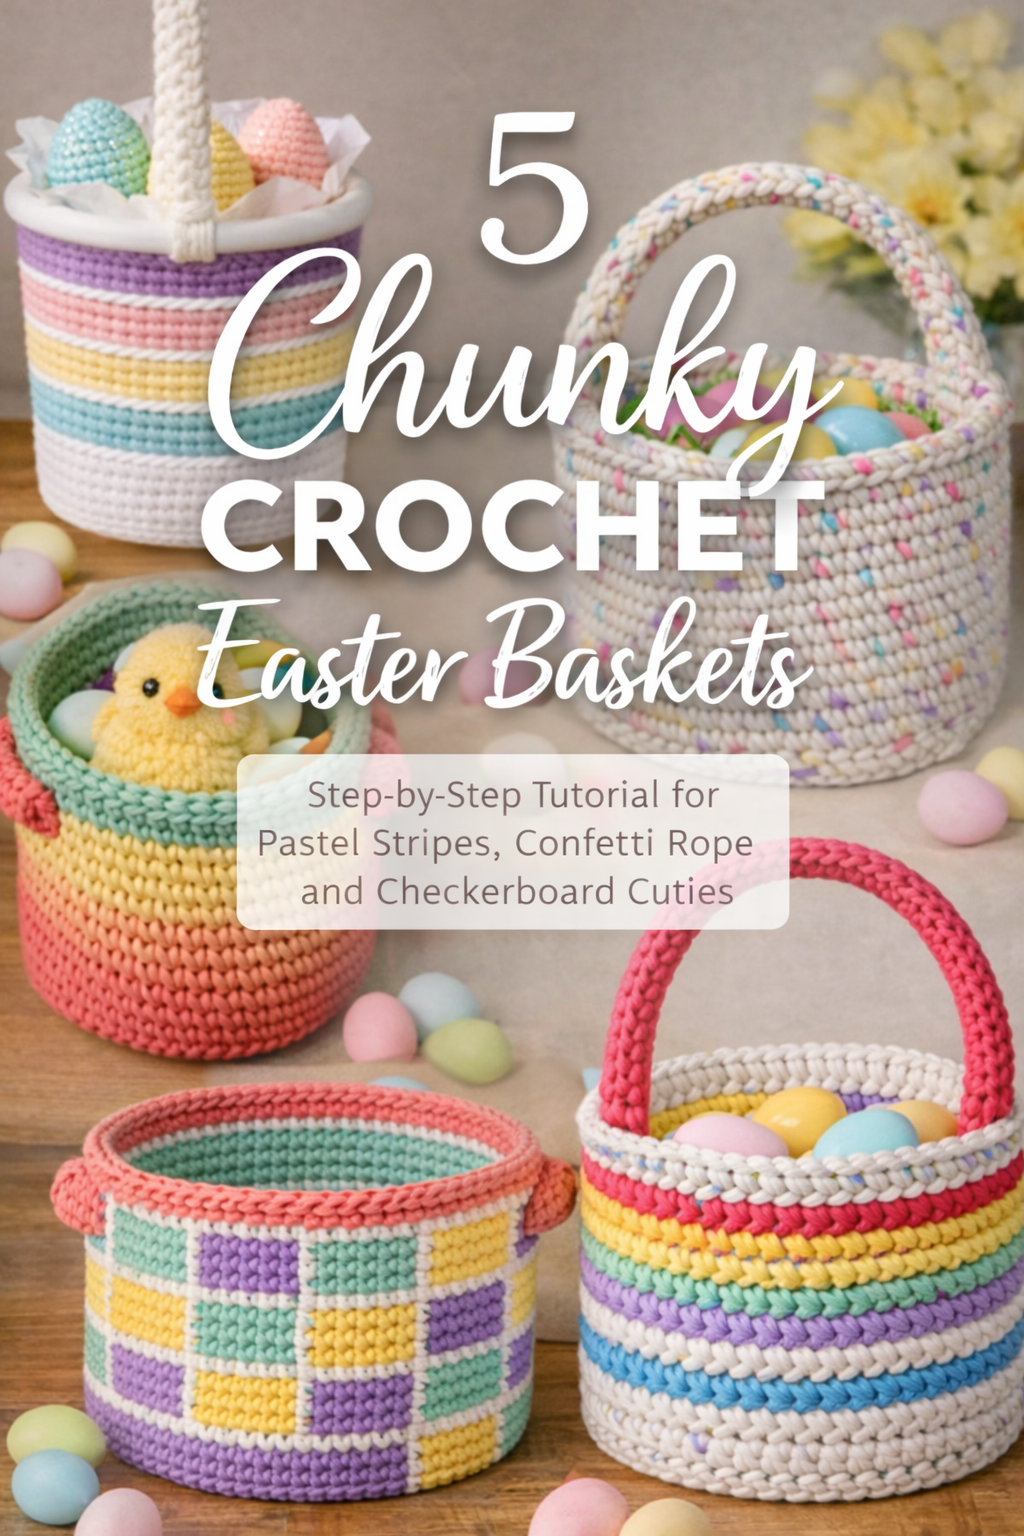
This tutorial recreates the bold striped Easter basket in the photo, with a thick, squat shape, bright teal body, candy pink and sunshine yellow accent bands, a clean white rim, and two chunky handles that stand up like soft arches. The stitches are tight and plush, giving that modern rope basket feel. It is designed to hold plastic eggs and shredded paper grass, but it also works as a spring storage bin long after the holiday.
Materials and tools
- Chunky cotton cord or bulky cotton yarn in teal, pink, yellow, and white
- Crochet hook sized for your yarn, typically 8 mm to 10 mm for cord
- Stitch marker
- Tapestry needle
- Scissors
- Measuring tape
- Optional structure: plastic canvas sheet, stiff felt, or a round placemat insert
- Optional handle support: nylon line, thin craft wire, or extra cord strand
Finished size and customization notes
The pictured basket looks about 9 to 10 inches wide and 5 to 6 inches tall. You can make it more oval by adding a few increases on two opposite sides only, but the easiest path is a round base that reads as softly oval once filled. If you want taller sides, add more teal rounds before the stripe bands.
Visual checkpoint You should see clean stacked rows with visible V shaped stitches. The basket should stand without collapsing. If it slumps, use a smaller hook or consider an insert.
Step by step instructions
Part 1, Crochet the base
- Start with teal. Make a magic ring.
- Round 1: 6 single crochet into the ring. Place a marker in the first stitch.
- Round 2: Increase in each stitch. 12 stitches.
- Round 3: 1 single crochet, increase. 18 stitches.
- Round 4: 2 single crochet, increase. 24 stitches.
- Round 5: 3 single crochet, increase. 30 stitches.
- Round 6: 4 single crochet, increase. 36 stitches.
- Round 7: 5 single crochet, increase. 42 stitches.
- Round 8: 6 single crochet, increase. 48 stitches.
- Continue until the base is about 9 inches across. With thick cord this is often 48 to 60 stitches.
Fixing base shape If your base begins to ripple, pause increases for one round and work one single crochet in each stitch to tighten it back to flat.
Part 2, Turn the walls up
- Next round: Work back loop only single crochet in each stitch. This forms a ridge and makes the sidewall stand.
- Now work single crochet in each stitch for 4 to 6 rounds in teal to create the main body height.
Visual checkpoint The walls should look like a neat cylinder. If yours flares, tighten tension or switch to a smaller hook.
Part 3, Add the candy stripe bands
- Switch to pink. Use a clean color change by finishing the last teal stitch with pink.
- Work 1 round of single crochet in pink.
- Switch to teal and work 1 round if you want a thin separation line, or skip for a bolder band.
- Switch to yellow and work 1 round of single crochet.
- Switch to teal and work 1 to 2 rounds to match the photo spacing.
- Switch to pink and work 1 round.
- Switch back to teal and work 2 to 3 rounds, ending about one inch below the rim line.
Pro tip for crisp stripes Carry yarn up the inside only if you are comfortable with thicker walls. Otherwise, cut and rejoin each color for the cleanest look.
Part 4, Create the clean white rim
- Switch to white and work 1 round of single crochet.
- For the rounded rim look, work 1 round of slip stitch in white. Keep it even and slightly relaxed so it does not cinch.
Optional upgrade For a thicker rim like rope binding, work one more round of single crochet in white with a second strand of white held alongside as a core, enclosing it in the stitches.
Part 5, Add the two chunky handles
Handles in the photo look like thick crocheted tubes sewn into the rim. Here is the easiest sturdy method.
- Decide handle placement. Find two opposite points on the basket. Mark about 8 stitches for each handle attachment area, leaving a gap between them.
- Make handle 1. With pink, chain a length that makes a handle arch, usually 18 to 26 chains depending on basket width and desired height.
- Starting in the second chain from the hook, work single crochet in each chain back to the start. This makes a thick strap.
- For extra thickness, turn and work another row of single crochet across the strap. If your yarn is very thick, one row may be enough.
- Optional support: Lay nylon line or a thin cord along the strap and crochet around it on the second row to make the handle stand up.
- Fasten off leaving a long tail.
- Sew the handle ends to the marked rim areas using whip stitch through multiple stitches. Go through the rim stitches and a few stitches down the sidewall for strength.
- Repeat for handle 2.
Visual checkpoint When you lift the basket, the handles should not pull the rim inward. If they do, widen your attachment area or sew deeper into the sidewall.
Troubleshooting, common mistakes and fixes
- Basket is floppy: Use a smaller hook, tighter single crochet, or add a base insert such as plastic canvas or felt.
- Stripes look uneven: Count rounds carefully and keep your seam aligned by always marking the first stitch of the round.
- Color jog at the seam: Try an invisible join by slip stitching to join rounds and starting the next round in the next stitch, or use a spiral but hide jog by placing it at the back.
- Rim curls: Your slip stitches are too tight. Rip back and redo with looser tension, or replace with a single crochet round.
- Handles droop: Add the nylon line support option, add a second row, or sew a second line of stitches along each handle end.
Finishing details
Weave all ends inside the basket, running them through the backs of stitches for several inches. Shape the basket by pressing the base flat and adjusting the walls. If you used cotton cord, a gentle steam helps the stitches settle. Add shredded paper grass and pastel eggs to recreate the exact photo styling. For longer life, consider a removable liner that can be shaken out after the holiday.
Shop Similar
- Chunky cotton cord yarn in bright teal
- Bulky cotton yarn bundle in pink yellow teal white
- Plastic canvas sheets for basket inserts
- Crochet hook set large sizes 8 mm 10 mm
- Shredded paper grass pastel Easter basket filler
Style It With
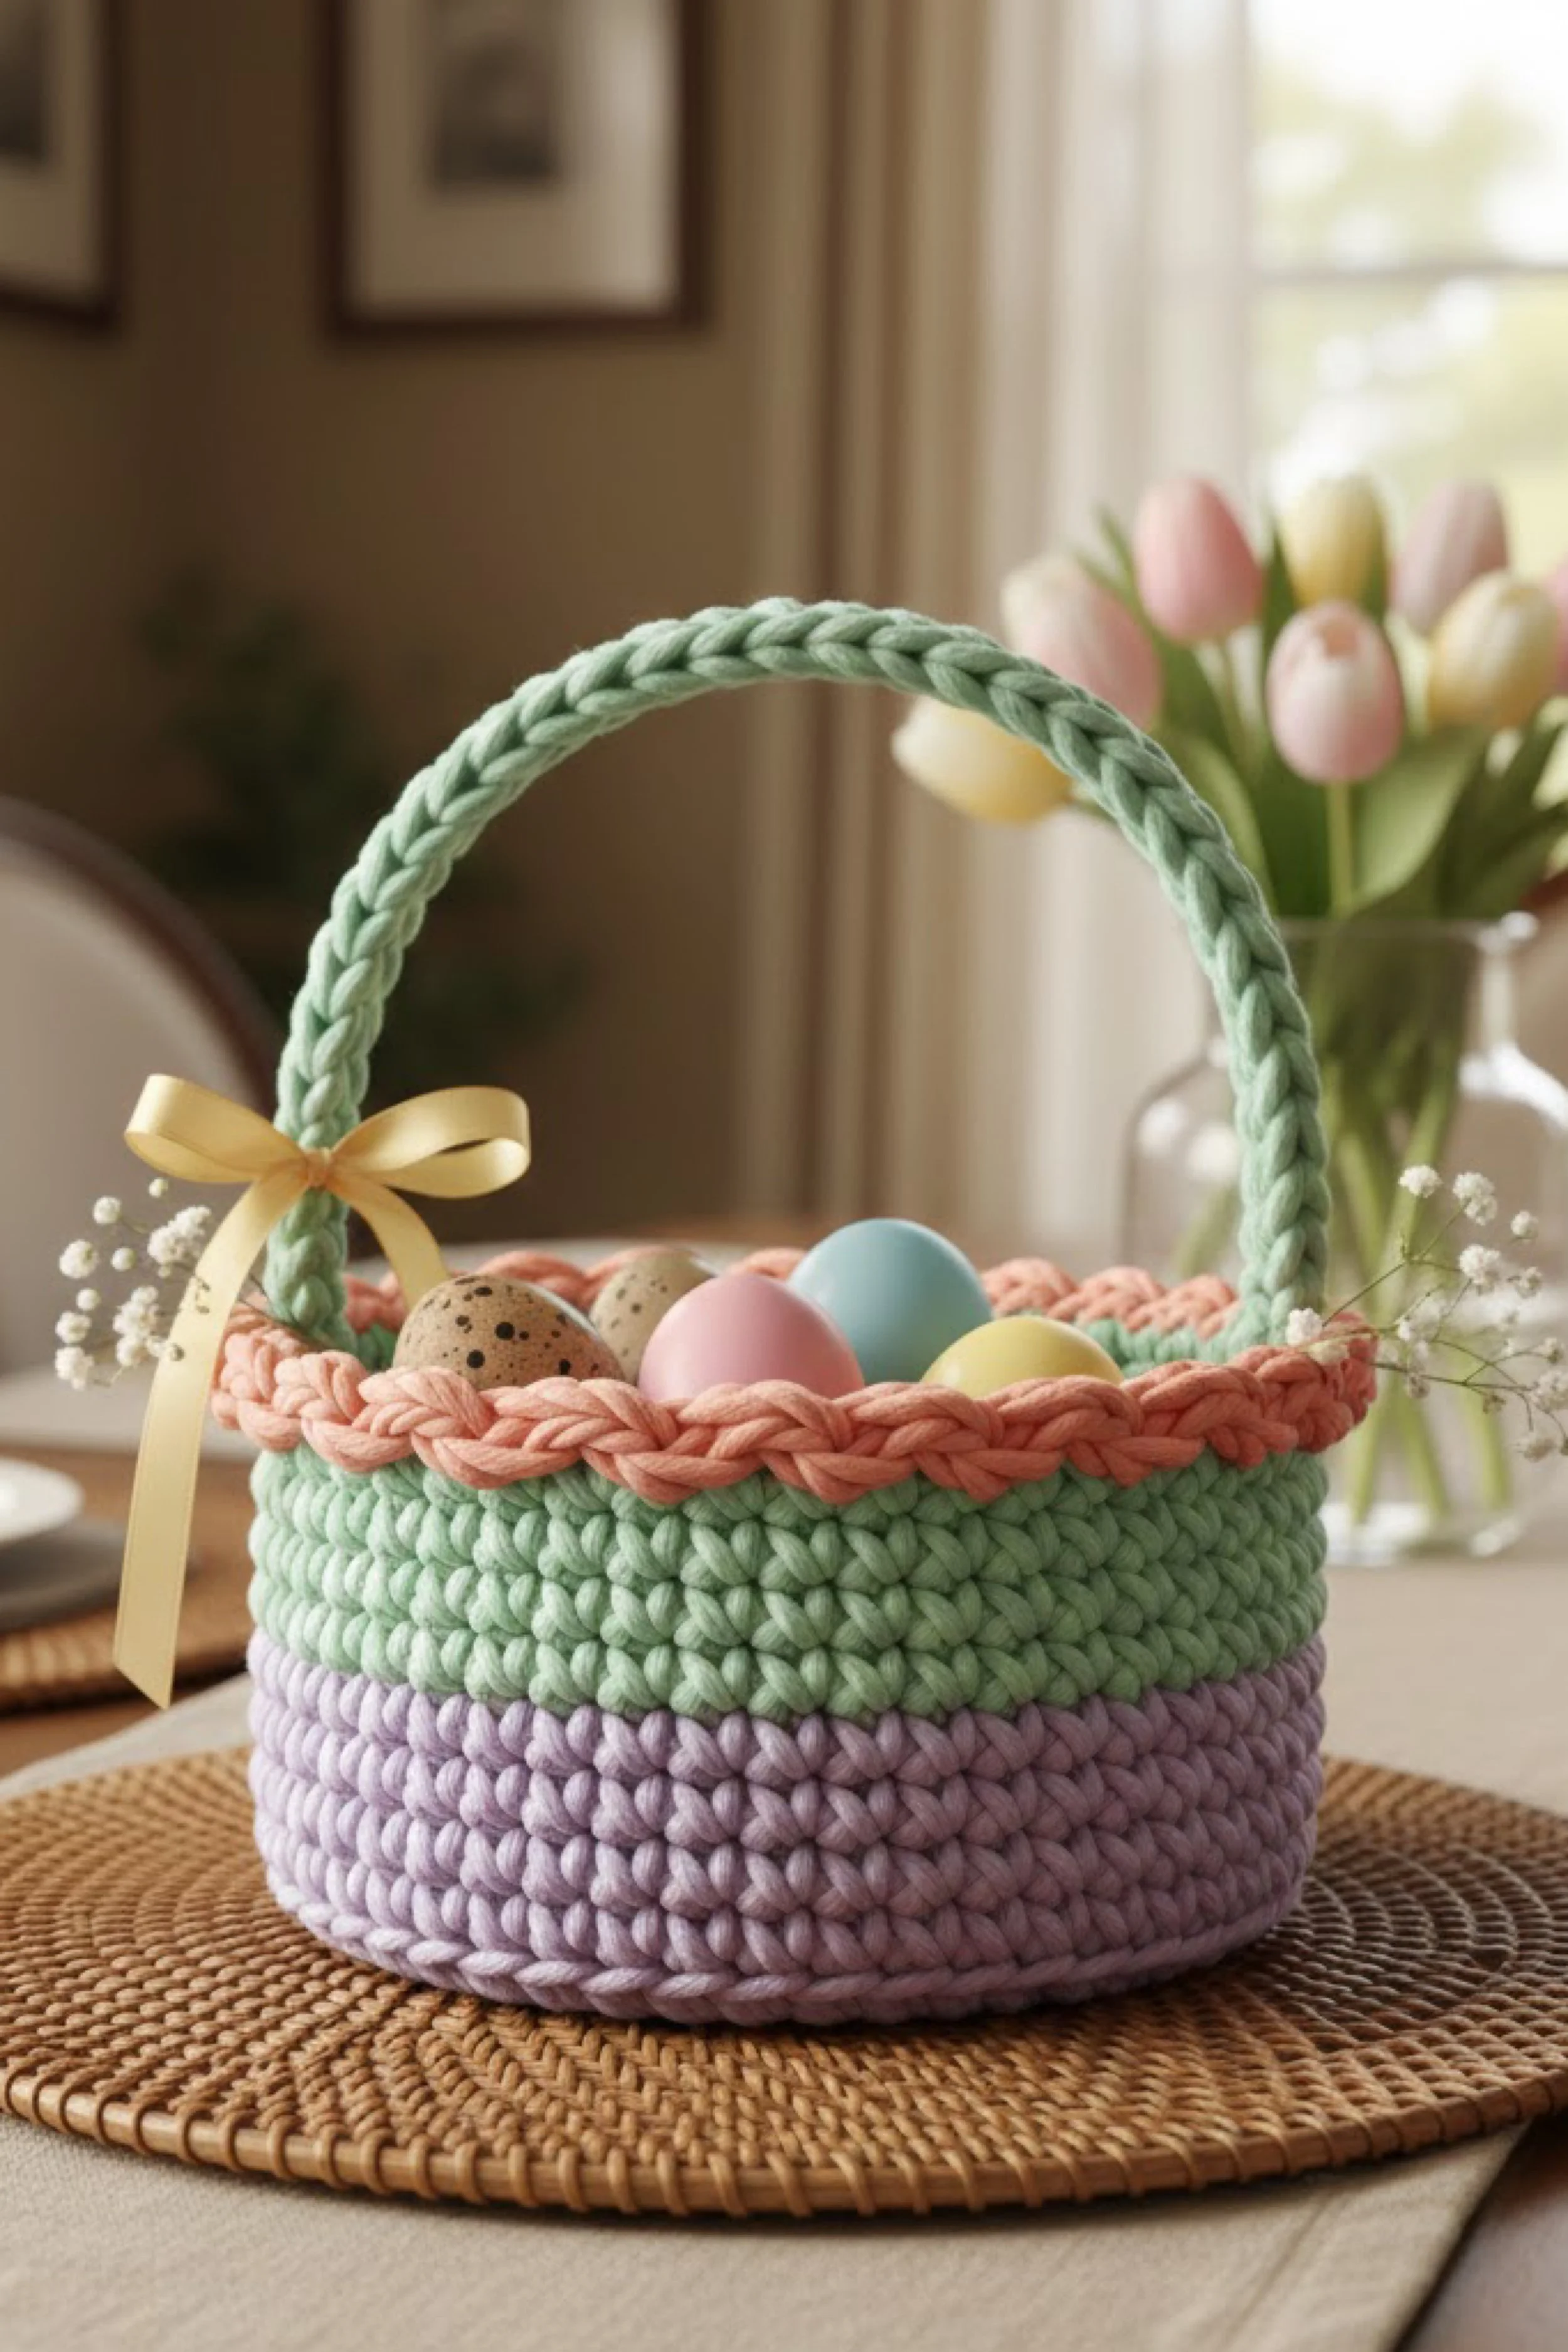
Pastel Braided Rim Crochet Easter Basket With Tall Handle DIY Guide
What you’re making
This project recreates the soft pastel Easter basket in the photo, with a chunky lavender base, mint green middle, and a warm peach rim finished with a thick braided looking edge. The tall handle arches high over the basket and is finished in mint to match, with a simple satin ribbon bow tied at one side for that styled spring tabletop feel. The texture is tight single crochet using thick cotton cord, which gives the basket its sculpted, modern look.
Materials and tools
- Chunky cotton cord or bulky cotton yarn in lavender, mint, and peach
- Crochet hook sized for your cord, usually 8 mm to 10 mm
- Stitch marker
- Tapestry needle
- Scissors
- Measuring tape
- Optional handle support: nylon line, thin craft wire, or extra cord core
- Optional basket support: plastic canvas, stiff felt, or a removable fabric liner
- Satin ribbon in pale yellow or cream for the bow
Finished size and customization notes
The pictured basket is medium, about 8 to 9 inches wide and 5 inches tall, with a handle that rises about 8 to 10 inches above the rim. Make it wider by adding base increase rounds. Make it taller by adding more straight rounds before the rim. If your handle sags, add a core support or double layer it.
Visual checkpoint You should see a neat spiral of stacked stitches with no gaps, and the basket should stand upright before you add the handle.
Step by step instructions
Part 1, Crochet the base in lavender
- Make a magic ring with lavender.
- Round 1: 6 single crochet into the ring. Mark first stitch.
- Round 2: Increase in every stitch. 12 stitches.
- Round 3: 1 single crochet, increase. 18 stitches.
- Round 4: 2 single crochet, increase. 24 stitches.
- Round 5: 3 single crochet, increase. 30 stitches.
- Round 6: 4 single crochet, increase. 36 stitches.
- Round 7: 5 single crochet, increase. 42 stitches.
- Continue until the base is about 8 inches across, often 42 to 54 stitches with thick cord.
Base correction If the base ripples, remove one increase set by spacing increases farther apart, or work one plain round with no increases.
Part 2, Turn up the walls
- Next round: Back loop only single crochet in each stitch. This creates a clean ridge and helps the wall stand.
- Work single crochet in each stitch for 3 to 5 rounds in lavender to create the lower band.
Visual checkpoint The lavender band should be tall enough to match the photo, roughly one third of the basket height.
Part 3, Add the mint middle
- Switch to mint with a clean color change on the last lavender stitch.
- Work 3 to 5 rounds of single crochet in mint, matching the photo’s main middle band.
Tip for crisp color changes Cut and rejoin at the back seam rather than carrying thick cord up the inside, unless you want extra thickness.
Part 4, Add the peach rim band
- Switch to peach and work 1 to 2 rounds of single crochet.
Part 5, Create the braided looking rim
There are two safe options depending on your comfort level.
Option A, slip stitch cap 15. Work one full round of slip stitch in peach, keeping tension even and slightly relaxed. This gives a rounded rope edge.
Option B, crab stitch edge 16. Work reverse single crochet around the rim. This stitch naturally forms a twisted cord look. Keep it consistent and do not pull tight.
Visual checkpoint The rim should look thick and smooth, with a defined top edge that frames the opening.
Part 6, Make the tall handle
The handle in the photo looks like a thick crocheted strap attached at two opposite points.
- Find two opposite points on the basket rim. Mark each with stitch markers. For a balanced look, place the handle attachments slightly forward of the seam.
- With mint, chain a long length to create the arch. For this size basket, start with 40 to 55 chains.
- Row 1: Single crochet in the second chain from the hook and in each chain across.
- Row 2: Turn and single crochet across again. This makes a thicker strap.
- Optional support core: On row 2, lay nylon line or thin craft wire along the edge and crochet over it so it becomes hidden inside the stitches. This helps the handle stand tall.
- Fasten off leaving long tails.
Part 7, Attach the handle
- Place one handle end on the first marked spot. Sew through multiple rim stitches and into one round below the rim for strength.
- Sew the other end to the opposite marked spot. Test the arch shape before tightening all stitches.
- Reinforce with a second pass of stitching so the handle does not tear out when loaded.
Visual checkpoint When you lift the handle, the rim should not fold inward. If it does, widen the attachment area and sew deeper.
Part 8, Add the ribbon bow
- Cut a ribbon length about 14 to 18 inches.
- Tie a simple bow at the base of the handle on one side. Trim tails at an angle.
- Optional upgrade: Add a small stitch through the knot to keep it from slipping.
Optional upgrades
- Add a liner: A simple cotton drawstring liner makes it look boutique and helps hold smaller candy.
- Add a name tag: A small stitched label turns this into a keepsake basket.
- Add a structured base: Insert plastic canvas covered in fabric for an ultra flat base.
Troubleshooting, common mistakes and fixes
- Handle droops: Add the support core, add a third row to the strap, or sew a second hidden strap underneath.
- Basket leans: Your base may be uneven. Check that increases were evenly spaced and that your turn up round was back loop only.
- Rim curls inward: Your last round is too tight. Redo with looser tension or switch to a single crochet round.
- Color jog is visible: Place the seam at the back and use an invisible join at each color change.
- Stitches look gappy: Use a smaller hook and keep consistent tension.
Finishing details
Weave ends neatly along the inside walls, following the stitch path so tails disappear into the texture. Shape the basket by pressing the base flat and smoothing the sides with your hands. A light steam helps cotton cord relax into that plush, sculpted look. Add paper grass and pastel eggs to match the photo styling, and display on a woven placemat for the warm spring table vibe.
Shop Similar
- Chunky cotton cord pastel yarn set lavender mint peach
- Crochet hooks large sizes for basket making
- Nylon line for stiffening crochet handles
- Plastic canvas for basket bases
- Satin ribbon pale yellow for Easter bows
Style It With
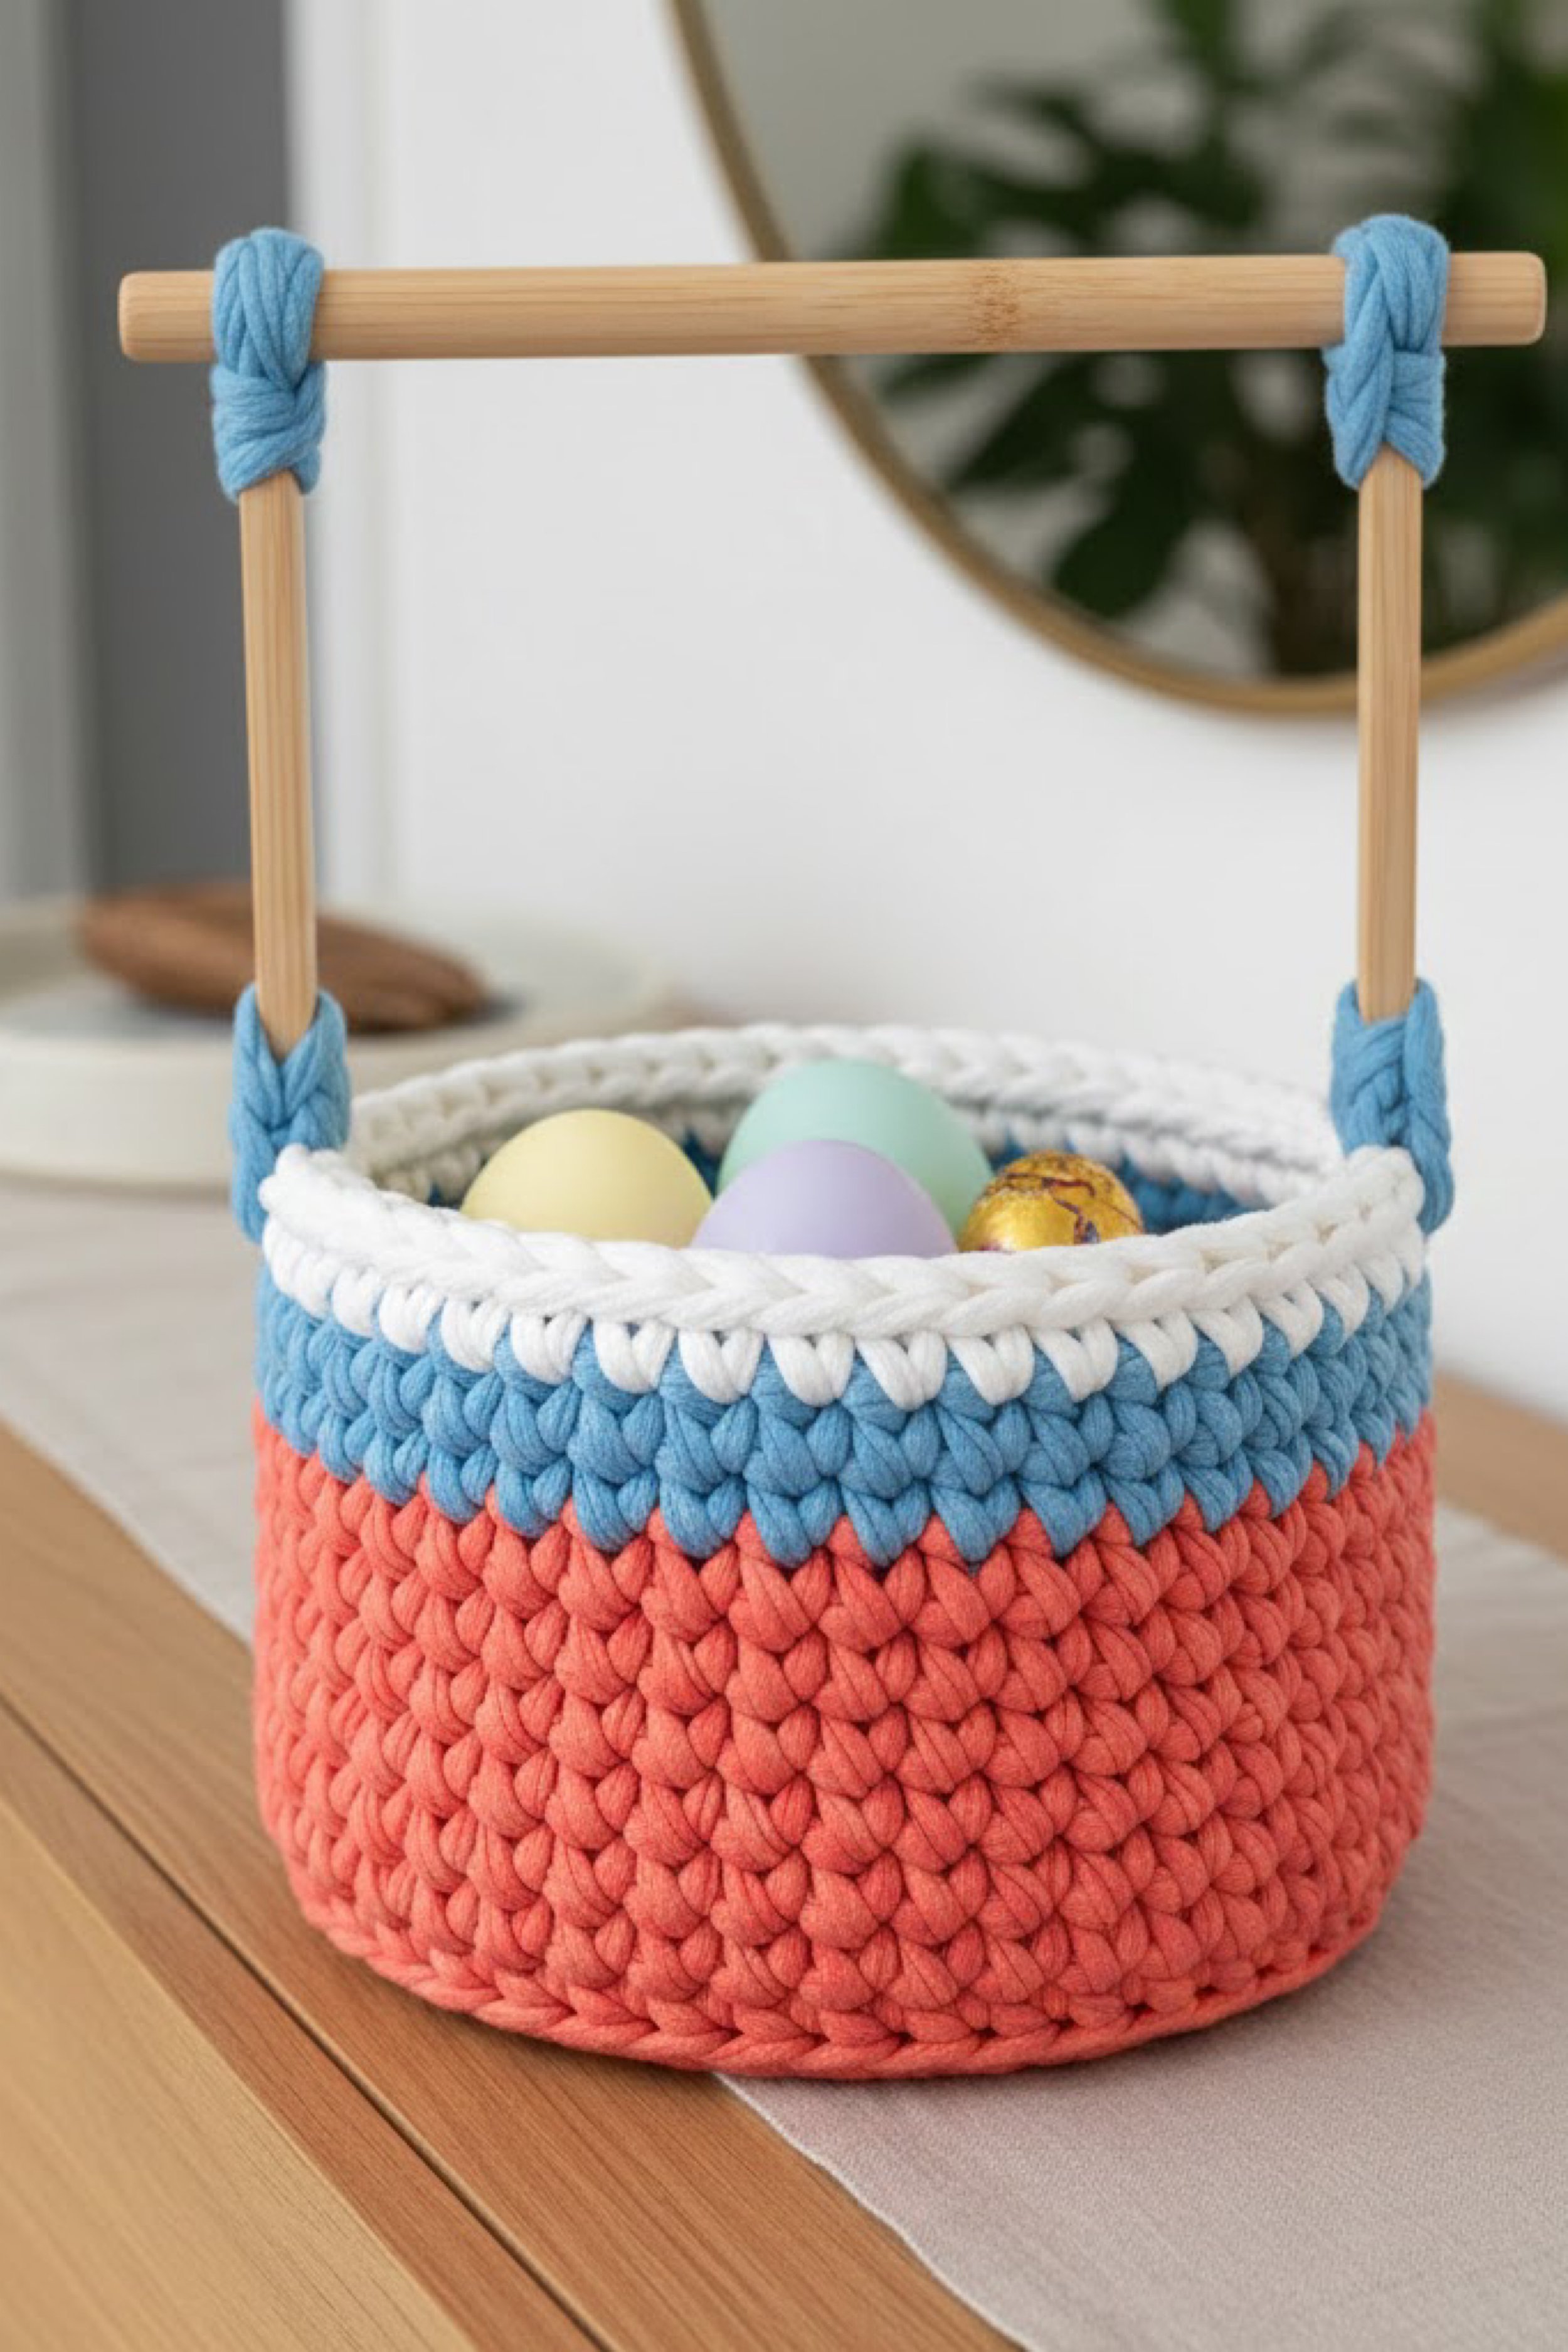
Wood Frame Handle Crochet Egg Basket With Color Block Stripes DIY Guide
What you’re making
This tutorial recreates the structured egg basket in the photo, with a chunky crochet body in coral red and denim blue, a crisp white rim, and a simple rectangular wood frame handle that makes it look modern and slightly Scandinavian. The handle is made from smooth wood dowels, then lashed to the basket with yarn wraps so it feels intentionally crafted and sturdy. This is the perfect centerpiece basket for eggs, small gifts, or spring table styling.
Materials and tools
- Chunky cotton cord or bulky yarn in coral red, denim blue, and white
- Crochet hook sized for yarn, typically 8 mm to 10 mm for cord
- Stitch marker
- Tapestry needle
- Scissors
- Measuring tape
- Two wood dowels for the handle uprights, about 8 to 10 inches long
- One wood dowel for the top bar, about 10 to 12 inches long
- Optional: wood glue for a fixed frame, or drill and small screws if you prefer hardware
- Optional: sandpaper for smoothing dowel ends
- Optional base support: plastic canvas or felt insert
Finished size and customization notes
The pictured basket is about 8 to 9 inches wide and 5 to 6 inches tall. The handle frame rises about 7 to 9 inches above the rim. If you want a wider basket, increase the base stitch count. If you want the same proportions, keep the height shorter so it stays squat and sturdy.
Visual checkpoint The body stitches should look tight and uniform, and the rim should be firm enough to hold the handle lashing.
Step by step instructions
Part 1, Crochet the base in coral
- Make a magic ring with coral.
- Round 1: 6 single crochet into ring. Mark first stitch.
- Round 2: Increase in every stitch. 12 stitches.
- Round 3: 1 single crochet, increase. 18 stitches.
- Round 4: 2 single crochet, increase. 24 stitches.
- Round 5: 3 single crochet, increase. 30 stitches.
- Round 6: 4 single crochet, increase. 36 stitches.
- Round 7: 5 single crochet, increase. 42 stitches.
- Continue until base reaches about 8 inches, commonly 42 to 54 stitches with thick cord.
Part 2, Turn the walls up
- Next round: Back loop only single crochet in each stitch to create the turning ridge.
- Work single crochet in each stitch for 3 to 5 rounds in coral to form the lower color block.
Visual checkpoint Your coral section should match the photo as the dominant lower half.
Part 3, Switch to blue for the upper section
- Change to denim blue cleanly on the last coral stitch.
- Work 2 to 4 rounds of single crochet in blue, depending on desired height.
Part 4, Add the white rim
- Switch to white. Work 1 round of single crochet.
- Work 1 round of slip stitch in white for a smooth capped edge.
Optional upgrade Work the last round as reverse single crochet for a rope like ridge that looks extra finished.
Part 5, Prepare the wood frame handle
- Choose dowels. You need two upright pieces and one top piece. Sand any rough ends.
- Create a simple frame. Option A, friction fit and lash only: Overlap the top bar onto the uprights and lash with yarn wraps at each corner, no glue needed.
- Option B, glued joints: Add a small dab of wood glue at each corner, hold square, and let dry fully before lashing.
- Wrap each corner with blue yarn for the look in the photo. Start with a knot under the overlap, then wrap tightly around both dowels 12 to 20 times. Finish with a knot and weave tail under wraps.
Visual checkpoint The frame should feel rigid when you gently twist it. If it wobbles, add more wraps or use glue.
Part 6, Attach the frame to the basket
- Decide placement. The uprights sit on opposite sides of the basket, with the bottom ends resting just outside the rim line.
- Using blue yarn, lash each upright to the basket. Thread the tapestry needle and stitch around the upright and through the rim stitches, working in a tight figure eight pattern.
- Make at least three passes around each attachment point, going through the rim and one round below for strength.
- Tie off inside the basket and weave in ends.
Extra stability option Add a small felt pad between the dowel and basket wall where it touches, then stitch through the felt too. It reduces wear over time.
Part 7, Add a base insert if desired
- If you want a super flat base, cut a circle of plastic canvas or felt slightly smaller than the base.
- Drop it inside and stitch a few discreet tacking stitches around the edge to keep it in place.
Optional upgrades
- Add a lining: A removable fabric liner makes it feel boutique and hides lashing stitches inside.
- Add a tag: A small label on the rim makes it look handmade market ready.
- Add a color stripe: Add one thin white stripe between coral and blue for extra pop.
Troubleshooting, common mistakes and fixes
- Basket body feels loose: Use a smaller hook or tighter tension. Thick cord baskets need snug stitches.
- Rim collapses when handle is attached: Add an extra rim round, use reverse single crochet, or stitch a hidden round of cord inside the rim.
- Frame leans: Your attachments are not symmetrical. Measure distances from seam and reattach evenly.
- Handle joints slip: Add more wraps, tighter wraps, or use the glue option.
- Color change looks messy: Always finish the last stitch of the old color with the new color, and weave ends sideways into the stitch path.
Finishing details
Weave in ends securely and trim close. Shape the basket by pressing the base flat and smoothing the walls. If the rim needs extra firmness, run a hidden strand of cord inside the top round and stitch over it like a core. For styling like the photo, fill with pastel eggs and keep the background clean and bright so the color blocks pop.
Shop Similar
- Wood dowels smooth craft sticks for handles
- Chunky cotton cord yarn coral red
- Chunky cotton cord yarn denim blue
- Plastic canvas sheets for basket inserts
- Large eye tapestry needles for cord yarn
Style It With
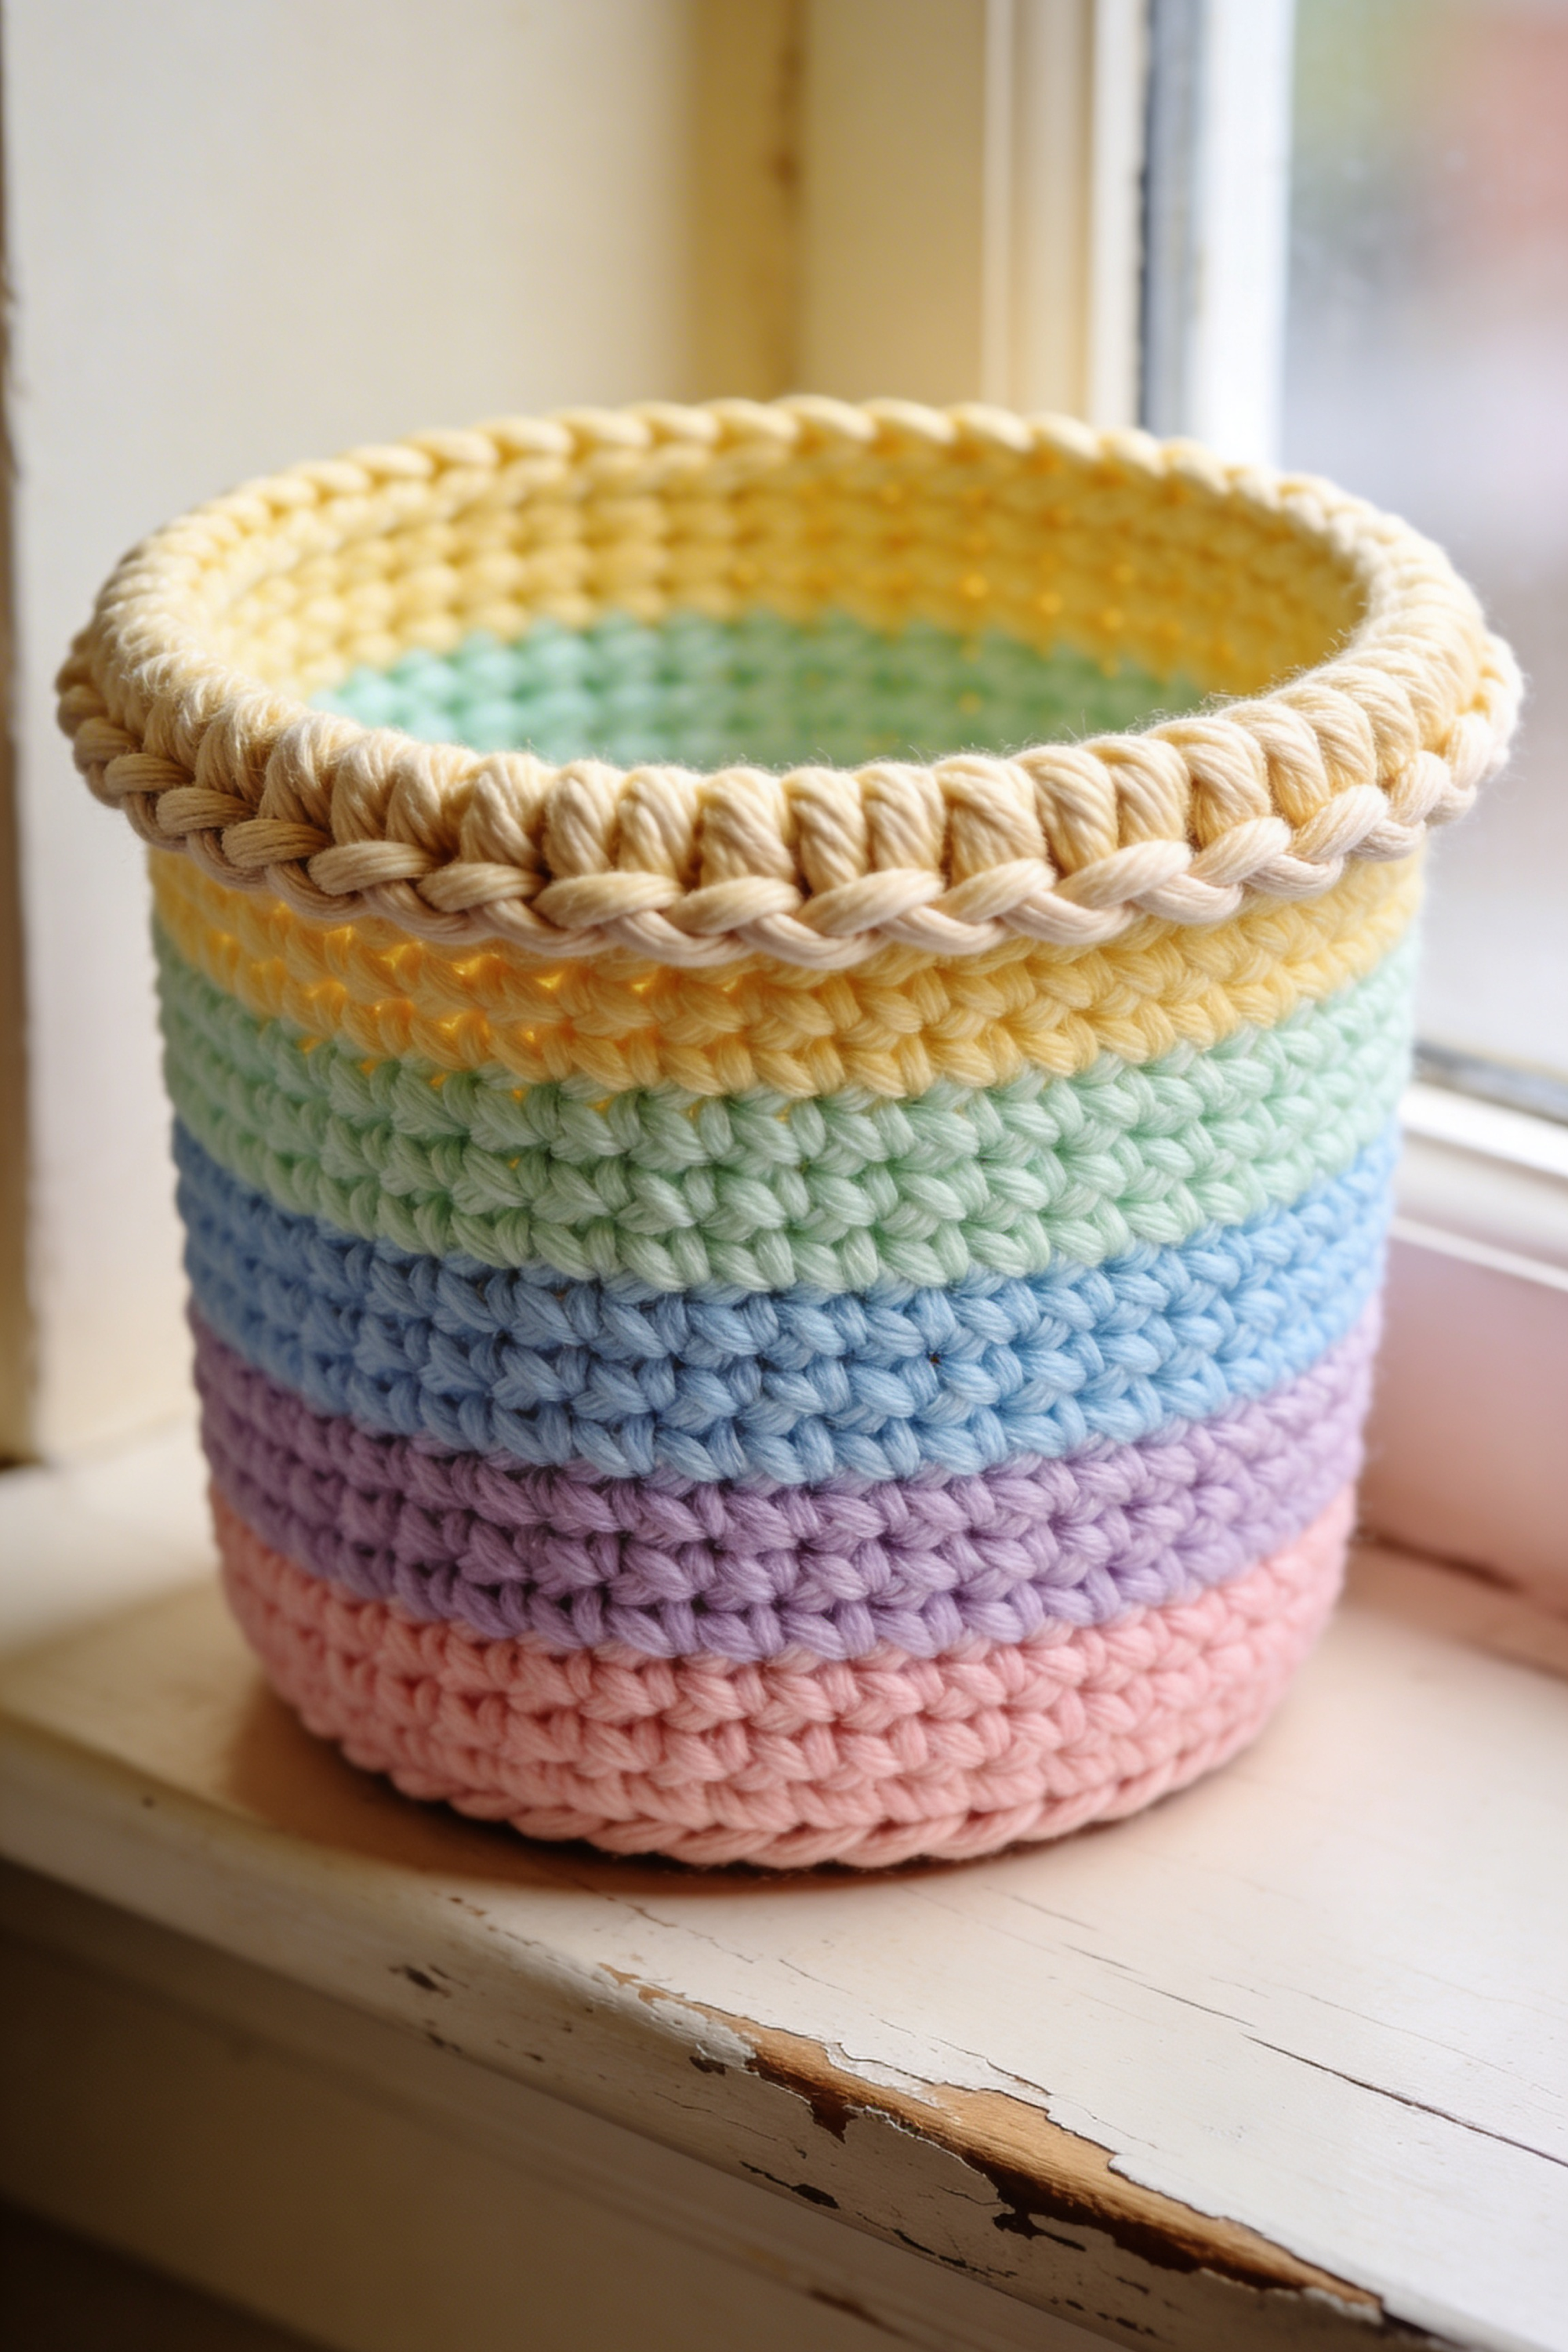
Tall Pastel Rainbow Storage Basket With Chunky Rope Rim DIY Guide
What you’re making
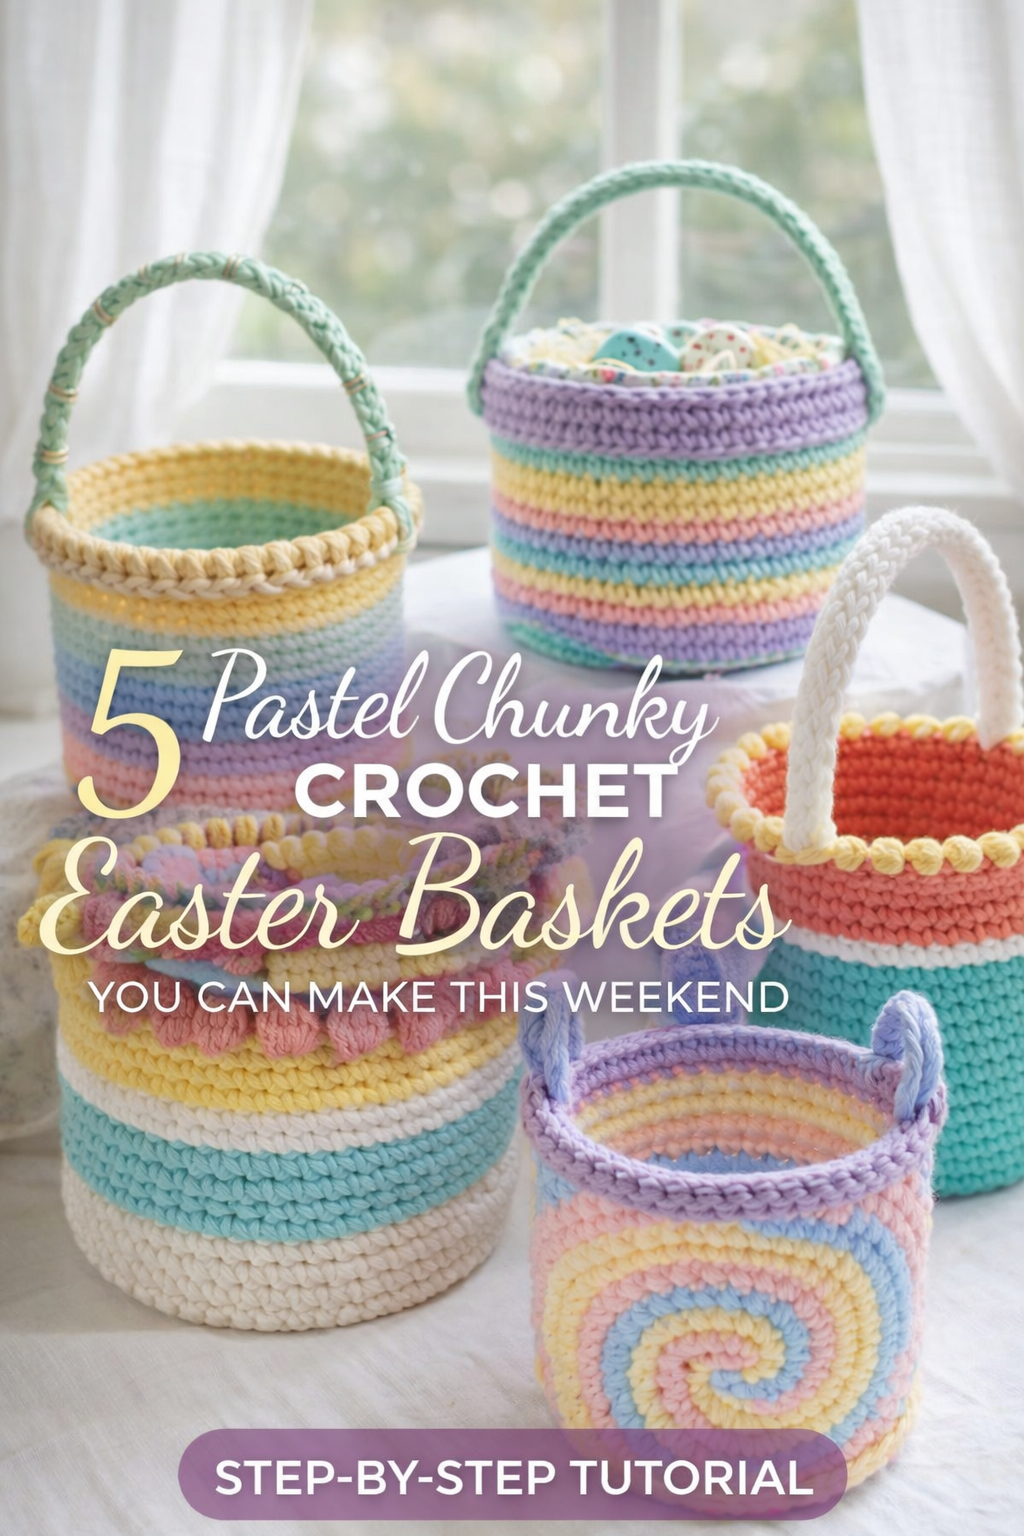
This tutorial recreates the tall pastel rainbow basket in the photo, with stacked color bands that feel like spring sorbet, finished with a thick rope like rim that looks braided and smooth. The shape is a clean cylinder that stands up confidently, making it perfect for craft supplies, nursery storage, or a soft seasonal display near a sunny window. The texture comes from tight single crochet in chunky cotton cord, which gives the basket that modern, sculptural look.
Materials and tools
- Chunky cotton cord or bulky cotton yarn in pastel pink, lavender, light blue, mint, and butter yellow
- Crochet hook sized for cord, typically 8 mm to 10 mm
- Stitch marker
- Tapestry needle
- Scissors
- Measuring tape
- Optional structure: plastic canvas, stiff felt, or a cut down placemat for the base
- Optional for extra firm rim: nylon line or extra cord strand as a core
Finished size and customization notes
The pictured basket looks about 7 to 8 inches wide and 7 to 9 inches tall. To make it wider, add base increase rounds. To make it taller, add more straight rounds in each color. If you want the same crisp cylinder, keep your stitch count consistent and avoid accidental increases.
Visual checkpoint Your sides should go straight up with minimal flare. The stripes should look even and horizontal.
Step by step instructions
Part 1, Crochet a flat round base
- Start with pastel pink. Make a magic ring.
- Round 1: 6 single crochet into ring. Mark first stitch.
- Round 2: Increase in every stitch. 12 stitches.
- Round 3: 1 single crochet, increase. 18 stitches.
- Round 4: 2 single crochet, increase. 24 stitches.
- Round 5: 3 single crochet, increase. 30 stitches.
- Round 6: 4 single crochet, increase. 36 stitches.
- Round 7: 5 single crochet, increase. 42 stitches.
- Round 8: 6 single crochet, increase. 48 stitches.
- Continue until base is about 7 to 8 inches wide. With thick cord, 48 to 60 stitches often lands in that range.
Base check Lay the circle on a table. It should be flat. If it waves, reduce increases by spacing them farther apart. If it cups, add one more increase round.
Part 2, Turn the walls up cleanly
- Next round: Work back loop only single crochet in each stitch. This makes the turning ridge and helps the walls stand.
- Work 2 rounds of single crochet in pink to create the first band.
Part 3, Add the pastel stripe stack
The photo shows several soft bands. Keep each band 1 to 2 rounds for a striped look, or 2 to 3 rounds for thicker blocks. Here is a stripe plan that matches the vibe:
- Switch to lavender. Work 2 rounds.
- Switch to light blue. Work 2 rounds.
- Switch to mint. Work 2 rounds.
- Switch to butter yellow. Work 2 rounds.
- Repeat the sequence again, or adjust based on your yarn colors, until the basket reaches the desired height.
Tip for clean stripes Always change colors on the final yarn over of the last stitch of the previous round. Weave ends into the inside of the same color section so they disappear.
Visual checkpoint You should see tidy horizontal bands with consistent stitch size. If one color looks looser, your tension changed. Pull slightly tighter on that color or drop hook size for that section.
Part 4, Create the chunky rope rim
This rim is the signature look in the photo. Choose one of these safe options.
Option A, slip stitch rope edge 18. Work 1 round of slip stitch around the top in your rim color. In the photo, a warm neutral or the top stripe color works beautifully. 19. Keep slip stitches even. Do not pull tight or the rim will cinch.
Option B, corded rim for extra structure 20. Lay a strand of matching cord or nylon line along the top edge. 21. Work 1 round of single crochet, enclosing the strand inside the stitches as you go. This creates a firm, rounded rim. 22. Follow with a final round of slip stitch for that smooth capped finish.
Visual checkpoint The rim should look like a continuous rope ring, smooth and slightly raised.
Part 5, Optional base insert for a perfect cylinder
- If you want a sturdier basket, cut a circle of plastic canvas or felt slightly smaller than the base.
- Insert it, then stitch a few small tacking stitches through the base stitches to anchor it.
Optional upgrades
- Add handles: Create two small side handles with short crocheted straps, sewn into the rim.
- Add a liner: A neutral cotton liner makes it feel boutique and hides inner ends.
- Add a label: A small stitched tag elevates it into giftable territory.
- Add a gradient: Instead of stripes, blend colors by alternating every few stitches for two rounds at each transition.
Troubleshooting, common mistakes and fixes
- Basket flares outward: Accidental increases happened. Count stitches each round. If stitch count grows, remove the extra stitches and keep it even.
- Basket leans: Uneven tension or a base that is not flat. Recheck base increases and ensure the turning ridge round is back loop only.
- Stripes look slanted: The seam is visible in a spiral. Place the seam at the back, or use joined rounds with a slip stitch join each round if you want perfectly aligned stripes.
- Rim pulls tight: Slip stitches were too tight. Redo the rim with looser tension or switch to single crochet for the final round.
- Stitches look loose and gappy: Use a smaller hook and keep yarn tension steady.
Finishing details
Weave all ends inside the basket by following the path of the stitches for several inches, then trim. Shape the basket by pressing the base flat and smoothing the sides upward. A gentle steam helps cotton cord settle, but keep steam light and do not soak the yarn. For the photo look, place it near a bright window on a worn painted sill or light wood surface to make the pastel bands glow.
Shop Similar
- Pastel chunky cotton cord yarn set for baskets
- Large crochet hook set for thick cord
- Plastic canvas for sturdy basket bases
- Clear nylon line for firm crochet rims
- Cotton rope basket labels handmade tags
Style It With
Once you make one of these baskets, you start seeing a million places it can live. A tiny catchall by the sink, a bright handled basket for holiday mornings, a pastel centerpiece that lives on the table all season, a wood frame handled caddy that looks intentional in any room, and a tall rainbow cylinder that turns clutter into color. The best part is that every version uses the same core skills, so each new basket feels faster and more confident than the last.
Before you call it done, take two minutes for the finishing touches that elevate the look in photos. Shape the base flat, smooth the walls with your hands, weave ends deeply so nothing peeks through the texture, and add structure if your basket will be handled often. Then style it like the images, with a few pastel eggs, paper grass, or a simple placemat underneath, and let the chunky stitches do what they do best, which is make handmade feel clean, modern, and display worthy.