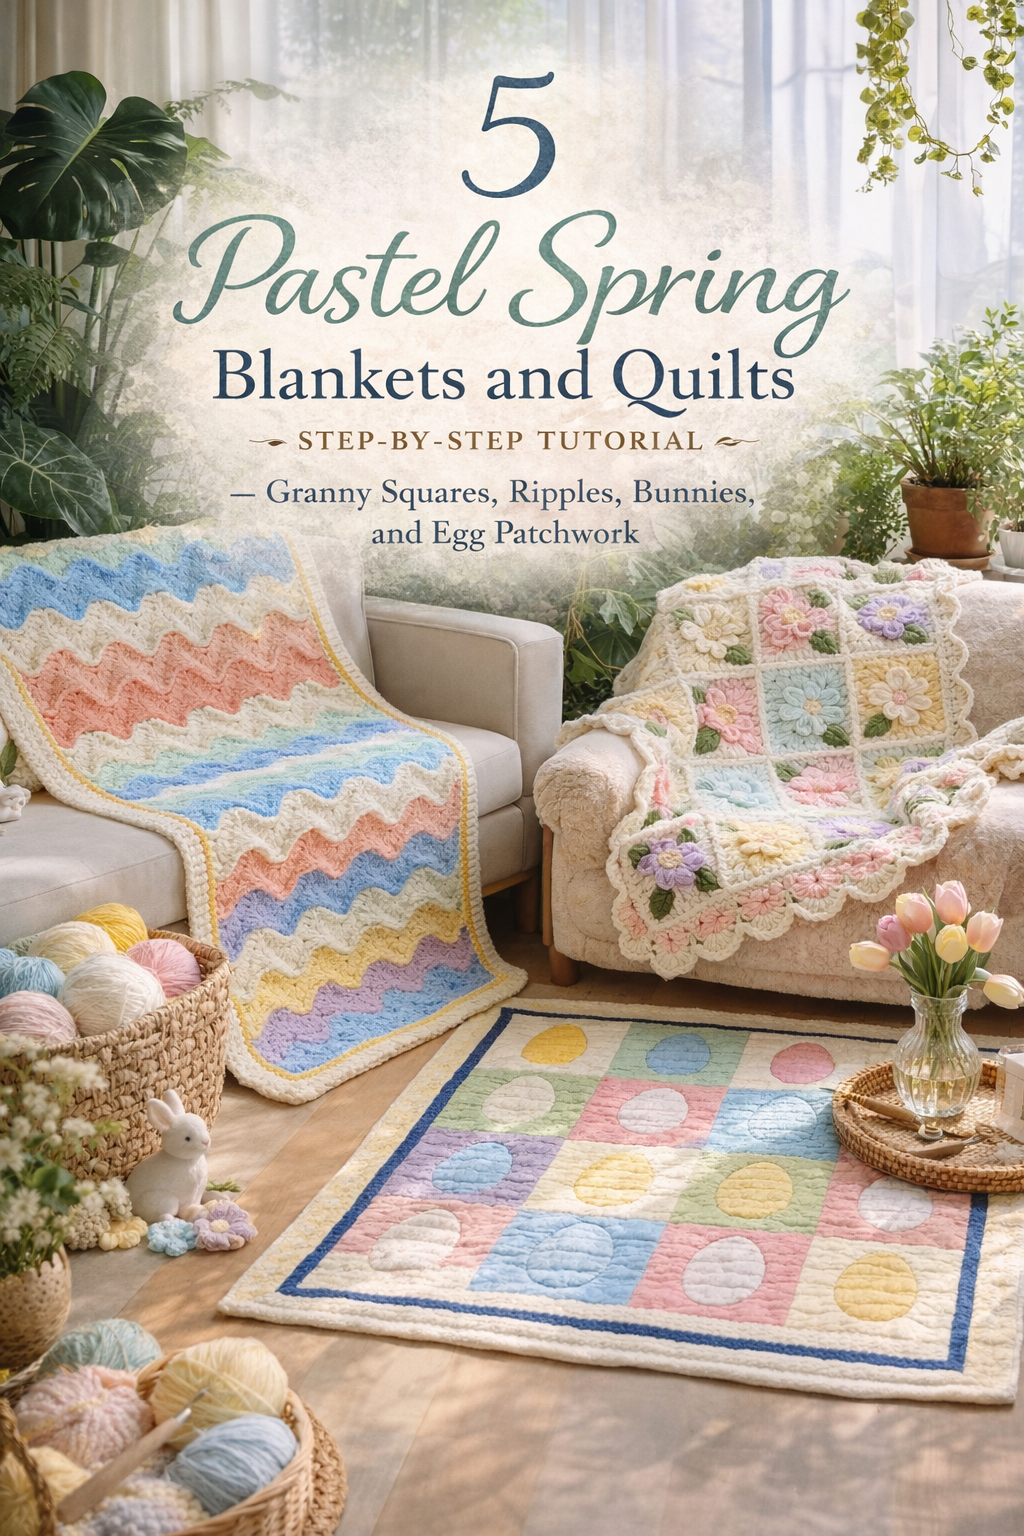
5 Pastel Garden Crochet Blankets and Runners Step-by-Step Tutorial

More like this
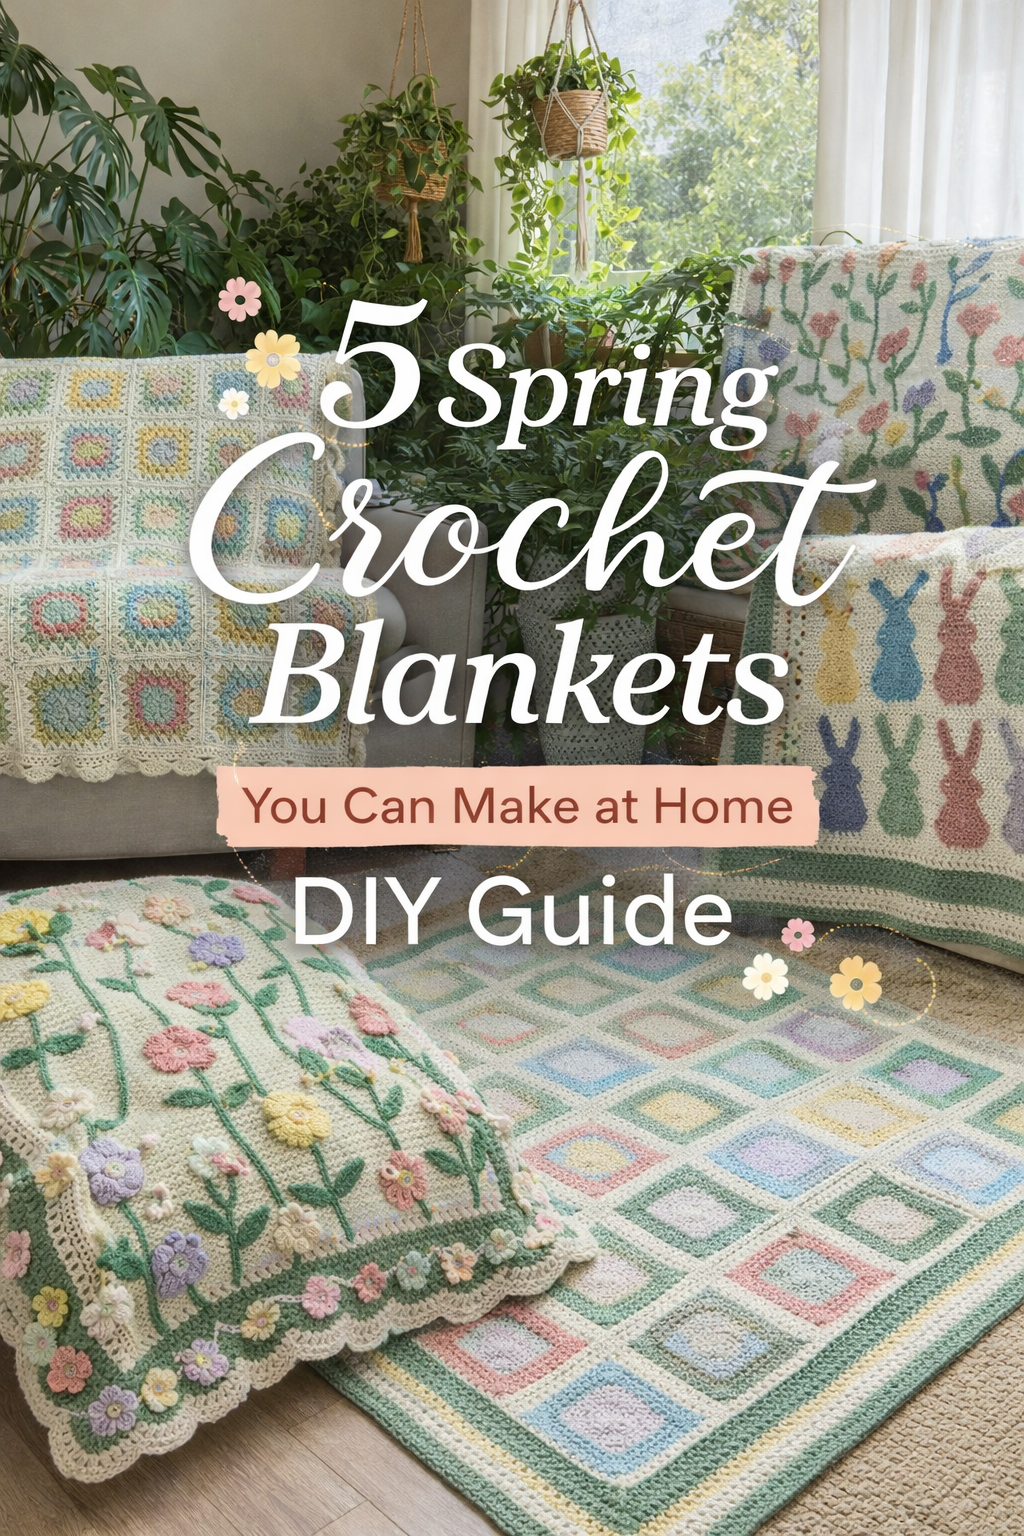
If your home is anything like mine, there is always a sunny corner begging for something soft and handmade. This tutorial is all about that exact feeling: pastel crochet textures, floral motifs, and sweet scalloped edges that look like they belong in a plant filled nook. You will learn how to recreate five dreamy Pastel Garden inspired makes, from heirloom style floral blankets to runners and table toppers that instantly brighten a space.
Each project is designed to be approachable and satisfying, with clear steps, visual checkpoints, and easy ways to customize your colors and sizing. Pick one piece to start, or treat it like a mini collection and make the whole set for a beautifully coordinated, cozy home moment.
💡 Pro Tip: Why I Link to Amazon Search Results and Not One Product
In the Shop the Look and Style it With sections under each bikini, I link to Amazon search results, not single products. Here’s why this matters:
Hot bikinis sell out fast. I don’t want you clicking on a dead link to a sold-out item. Search pages stay updated.
You get more options. Love the vibe but want a different color, cut, or price point? The search results give you everything that matches the look and energy.
I curate each search carefully. These aren’t generic. I spend hours crafting keywords that bring up exactly the kind of bikinis I’d wear—or recommend to my hottest friends.
Support with no pressure. If you click a link, browse, and buy something later, I may earn a small commission at no extra cost to you. That helps me keep bringing you curated collections like this one—powerful, seductive, and always fresh.
So dive in. Click through. Try something risky. These aren’t just bikinis—they’re commands, statements, and maybe even your new favorite weapon of choice.
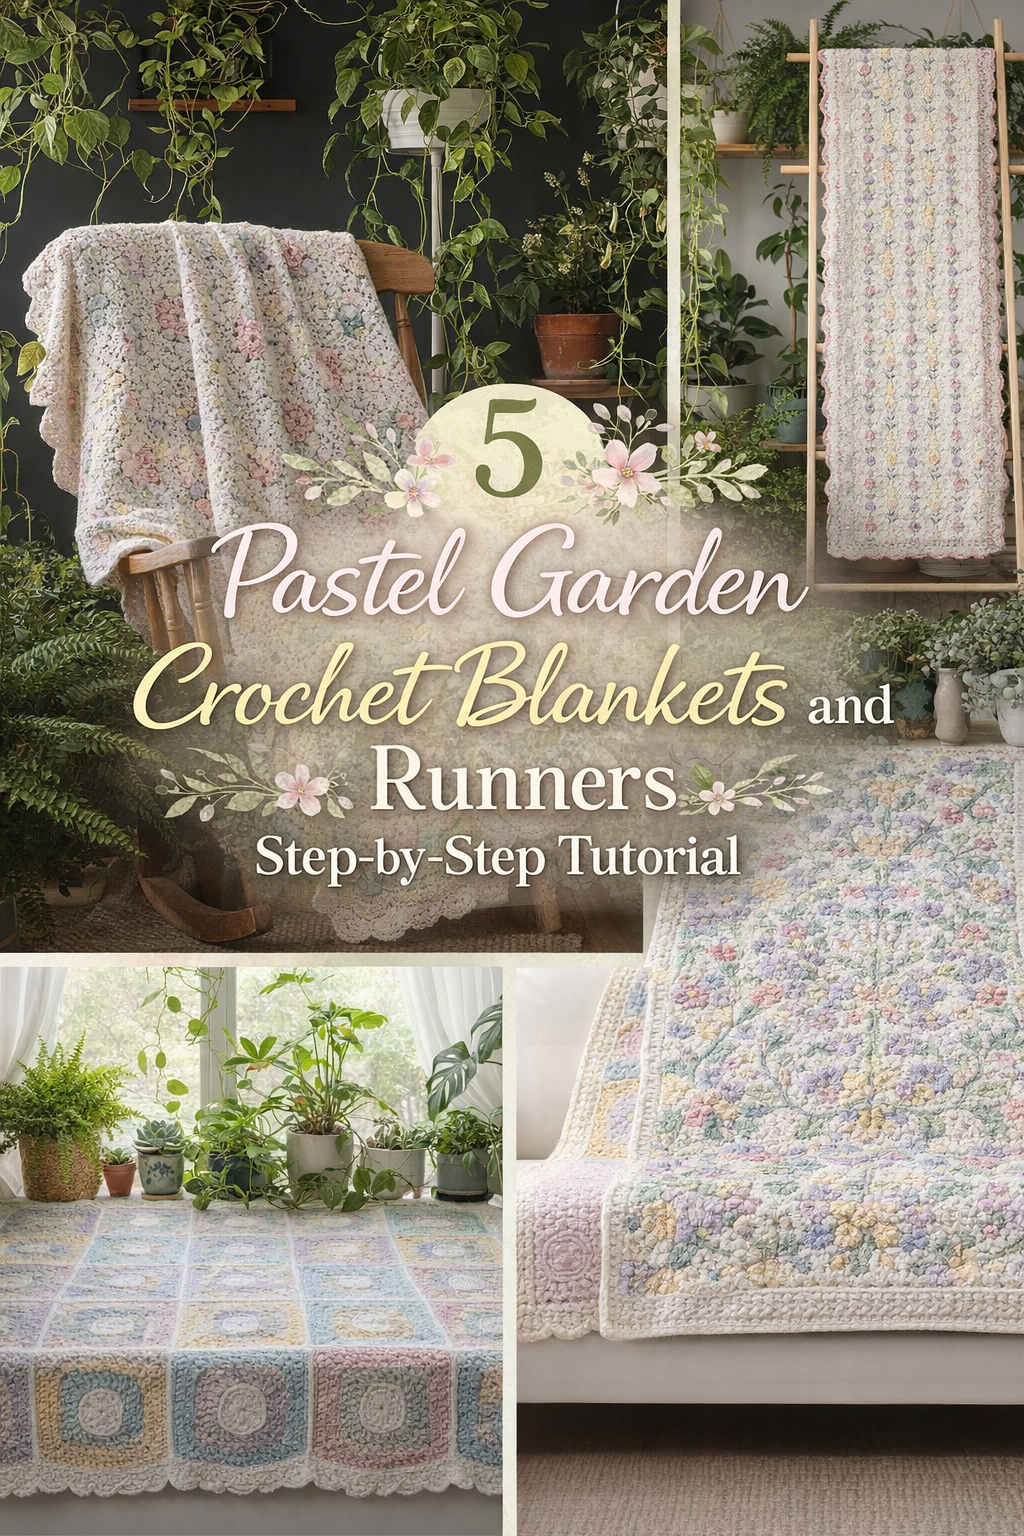
Heirloom Garden Granny Blanket Step-by-Step Tutorial — Floral Appliqué Squares With Scalloped Edge
What you’re making
This project recreates the cozy, heirloom look in the photo: a light, creamy granny style blanket scattered with soft pastel florals and finished with a romantic scalloped border. The vibe is cottage garden meets modern neutrals, with enough texture to feel special but still drapey and snuggle friendly. You will build a repeating granny square base, then add simple dimensional flowers and leafy touches, and finally frame everything with a scallop edge that makes the whole piece feel polished.
Materials + tools
- Worsted weight or light worsted yarn in a warm cream or oatmeal for the base
- Coordinating pastel yarn scraps for flowers and leaves (blush pink, dusty rose, lilac, butter yellow, sage, soft aqua)
- Optional speckled yarn for subtle confetti effect (or add color pops with embroidery instead)
- Crochet hook that matches your yarn (commonly 5.0 mm to 6.0 mm for worsted)
- Smaller hook for appliqués if you want crisp petals (commonly 4.0 mm to 4.5 mm)
- Stitch markers
- Yarn needle for weaving ends and appliqué sewing
- Scissors
- Blocking mats and pins (highly recommended)
- Optional fabric backing for extra stability (light cotton) and hand sewing needle and thread
Finished size + customization notes
A classic throw size is about 50 by 60 inches, but this blanket style is extremely flexible. Each granny square can be adjusted by adding or removing rounds, and the overall size changes by adding more squares across and down. If you want a baby blanket, aim for about 30 by 36 inches. If you want a couch throw like the photo, plan for a larger grid.
Visual style notes to match the photo
- Keep the base square color light and consistent so the florals read clearly.
- Use muted pastels, not neon brights.
- Distribute flower colors evenly so no one color clumps in one corner.
- Use a scallop border in a soft blush or dusty rose to echo the floral tones.
Step-by-step instructions
1. Choose your square plan and do a quick swatch
Make one test granny square with your chosen base yarn and hook. Block it lightly and measure it. Many worsted granny squares land around 5.5 to 7 inches depending on rounds and tension.
Checkpoint You should now see a neat, flat square with crisp corners and a soft drape. If yours is wavy, your corners may have too many stitches or your tension is loose. If yours is cupping, your tension is tight or your corners are too few stitches.
2. Crochet the classic granny square base
Use your favorite granny square method. This version keeps the look clean and open like the photo.
Round 1
- Make a magic ring or chain 4 and join to form a ring.
- Chain 3 (counts as first double crochet).
- Work 2 double crochet into ring, chain 2.
- Repeat three more times to make four clusters total, each separated by chain 2.
- Join to the top of the starting chain 3.
Round 2
- Slip stitch into the next space to reach a corner space.
- Chain 3, work 2 double crochet, chain 2, work 3 double crochet into the corner space.
- Chain 1, move to next corner space, repeat corner cluster.
- Continue around, joining at the end.
Round 3 and onward
- Each corner space gets the same corner cluster: 3 double crochet, chain 2, 3 double crochet.
- Each side space gets 3 double crochet clusters separated by chain 1.
Make enough rounds so your square feels substantial but still airy. Many blankets like the photo use a medium square size so the florals have room without feeling crowded.
Checkpoint Your square should lie flat. The corners should look like neat right angles. If your square is turning into a diamond or twisting, check that you are always placing corner clusters into the corner chain space.
3. Make a full set of squares
Plan a grid. For a throw, you might do 7 squares across by 8 squares down if your squares are around 7 inches. For smaller squares, increase the count.
Practical approach
- Make all squares first.
- Weave in ends as you go so you do not face a mountain later.
- Lightly block each square once you have a stack of 10 to keep sizing consistent.
Checkpoint Stack two squares and compare. They should be nearly identical in size. If one is larger, you may need to switch hooks or tighten tension.
4. Join squares in a clean, slightly raised seam
To match the cozy definition in the photo, a join that leaves a subtle ridge works beautifully. Two great options are whip stitch join or slip stitch join.
Option A whip stitch join
- Lay squares right sides up.
- Thread yarn needle with base yarn.
- Stitch through the outer loops along the edge, pulling snug but not tight.
Option B slip stitch join
- Hold two squares with right sides facing.
- Insert hook through both outer loops, slip stitch across.
Checkpoint The blanket should stay flat at the joins. If it puckers, loosen join tension. If it gapes, tighten slightly.
5. Add floral appliqués for the garden look
The photo reads like scattered blossoms and buds over a neutral field. You can create this with simple crochet flowers sewn onto selected squares.
Easy five petal puff flower
- With flower color, make a magic ring.
- Work 5 petals. Each petal can be: chain 2, work a puff stitch into ring, chain 2, slip stitch into ring.
- Puff stitch method: yarn over, insert into ring, pull up loop, yarn over, pull through 2 loops, repeat until you have 5 to 7 loops on hook, yarn over and pull through all, then chain 1 to secure.
Simple layered rose
- Chain 25 to 35 depending on size.
- Work 2 double crochet into each chain along to create a ruffle.
- Roll into a spiral and stitch the base to secure.
Add small leaf accents
- Chain 6.
- Work slip stitch, single crochet, half double crochet, double crochet, half double crochet along chain.
- Chain 1 and work back down the other side of chain with mirrored stitches.
- Slip stitch to finish.
Placement strategy
- Do not put a flower on every square. The photo has airy spacing.
- Try one flower for every two to three squares, then add tiny buds or leaves in between.
- Mix flower sizes so the field feels organic.
Checkpoint Step back and squint. You should see an even scatter of color across the blanket. If one area feels heavy, move a flower to a quieter area before sewing it down.
6. Secure the appliqués
Use a yarn needle and matching yarn tail to stitch petals to the base in several spots. Focus on centers and a few petal tips.
Tip If you want the flowers to stay puffy, do not stitch every edge. Tack lightly so they keep dimension.
7. Add subtle surface details for a speckled garden feel
The blanket in the photo has a delicate confetti look. You can mimic this in two safe ways.
Option A use a speckled base yarn This is the simplest. Your whole blanket gets that gentle scatter without extra work.
Option B add tiny embroidery knots or straight stitches With leftover pastel yarn, add occasional small stitches between flowers. Keep them sparse. Think of it as tiny petals drifting.
Checkpoint From a distance, it should read as soft texture, not polka dots. If you can easily count each stitch from across the room, you added too many.
8. Crochet the border frame rounds
Before scallops, add a clean border to square up edges.
Round 1 single crochet border
- Attach base yarn in any corner.
- Work single crochet evenly around, placing 3 single crochet in each corner.
- Along sides, aim for one single crochet per stitch or space, adjusting slightly to keep it flat.
- Join.
Round 2 transition round
- Work half double crochet around for a softer frame, again placing 3 stitches in corners.
Checkpoint Edges should look straight, not ruffled. If it ripples, reduce stitches along the sides. If it pulls inward, add a few extra stitches.
9. Add the scalloped edging in blush
This is the signature finish that matches the photo’s romantic outline.
Classic scallop
- Work single crochet into the next stitch.
- Skip one stitch.
- Work 5 double crochet into the next stitch.
- Skip one stitch.
- Work single crochet into the next stitch.
- Repeat around.
Corners When you reach a corner, you can either place the scallop directly into the corner stitch or add one extra stitch before and after so the scallop turns smoothly.
Checkpoint You should now see rounded shells that sit neatly on the edge. If shells curl, your tension is tight or your hook is too small. If shells sag, your tension is loose or your hook is too large.
10. Block for the heirloom drape
Blocking is what makes the scallops bloom and the granny texture look crisp.
Wet blocking
- Soak blanket in cool water with gentle soap.
- Press out water with towels, do not wring.
- Pin edges to mats, shaping scallops evenly.
- Let dry fully.
Steam blocking
- Pin blanket dry.
- Hover steam iron above fabric, do not press down.
- Let cool and dry.
Checkpoint The blanket should look calmer, more even, and the scallops should be consistent.
Troubleshooting
- My granny squares are different sizes Block each square and measure again. If differences persist, redo the smallest ones or add one extra round to match size. Consistency matters more than speed.
- My blanket edges ripple after joining This usually happens when you have too many stitches in border rounds. Pull out the border and redo with fewer stitches along the long sides.
- My flowers look flat and sad Use puff petals or add a second layer. Also stitch only the center and a couple of petal points so they stay dimensional.
- My scallops are curling Go up a hook size for the scallop round, or reduce from 5 double crochet per shell to 4 double crochet.
- The blanket feels stiff Choose a softer yarn blend and use a slightly larger hook for the base. Blocking also helps drape.
Finishing details
- Weave in all ends in multiple directions so they do not pop out with use.
- If you want extra stability for heavy use, add a lightweight cotton backing. Lay fabric under blanket, pin, and hand stitch around edges with small whip stitches.
- Optional upgrade 1 add a simple lining strip just behind the scallop to make the edge feel more structured.
- Optional upgrade 2 add a tiny crochet picot on top of each scallop for extra sweetness.
- Optional upgrade 3 add a small label tag in one corner for a handmade signature moment.
- Optional upgrade 4 add a few embroidered stems connecting blossoms for an illustrated garden effect.
Shop Similar
- Soft worsted base yarn in warm cream
- Muted pastel yarn bundle for floral appliqués
- Crochet blocking mats and pins set
- Ergonomic crochet hook set with 5.0+mm sizes
- Tapestry needles for yarn sewing
Style It With
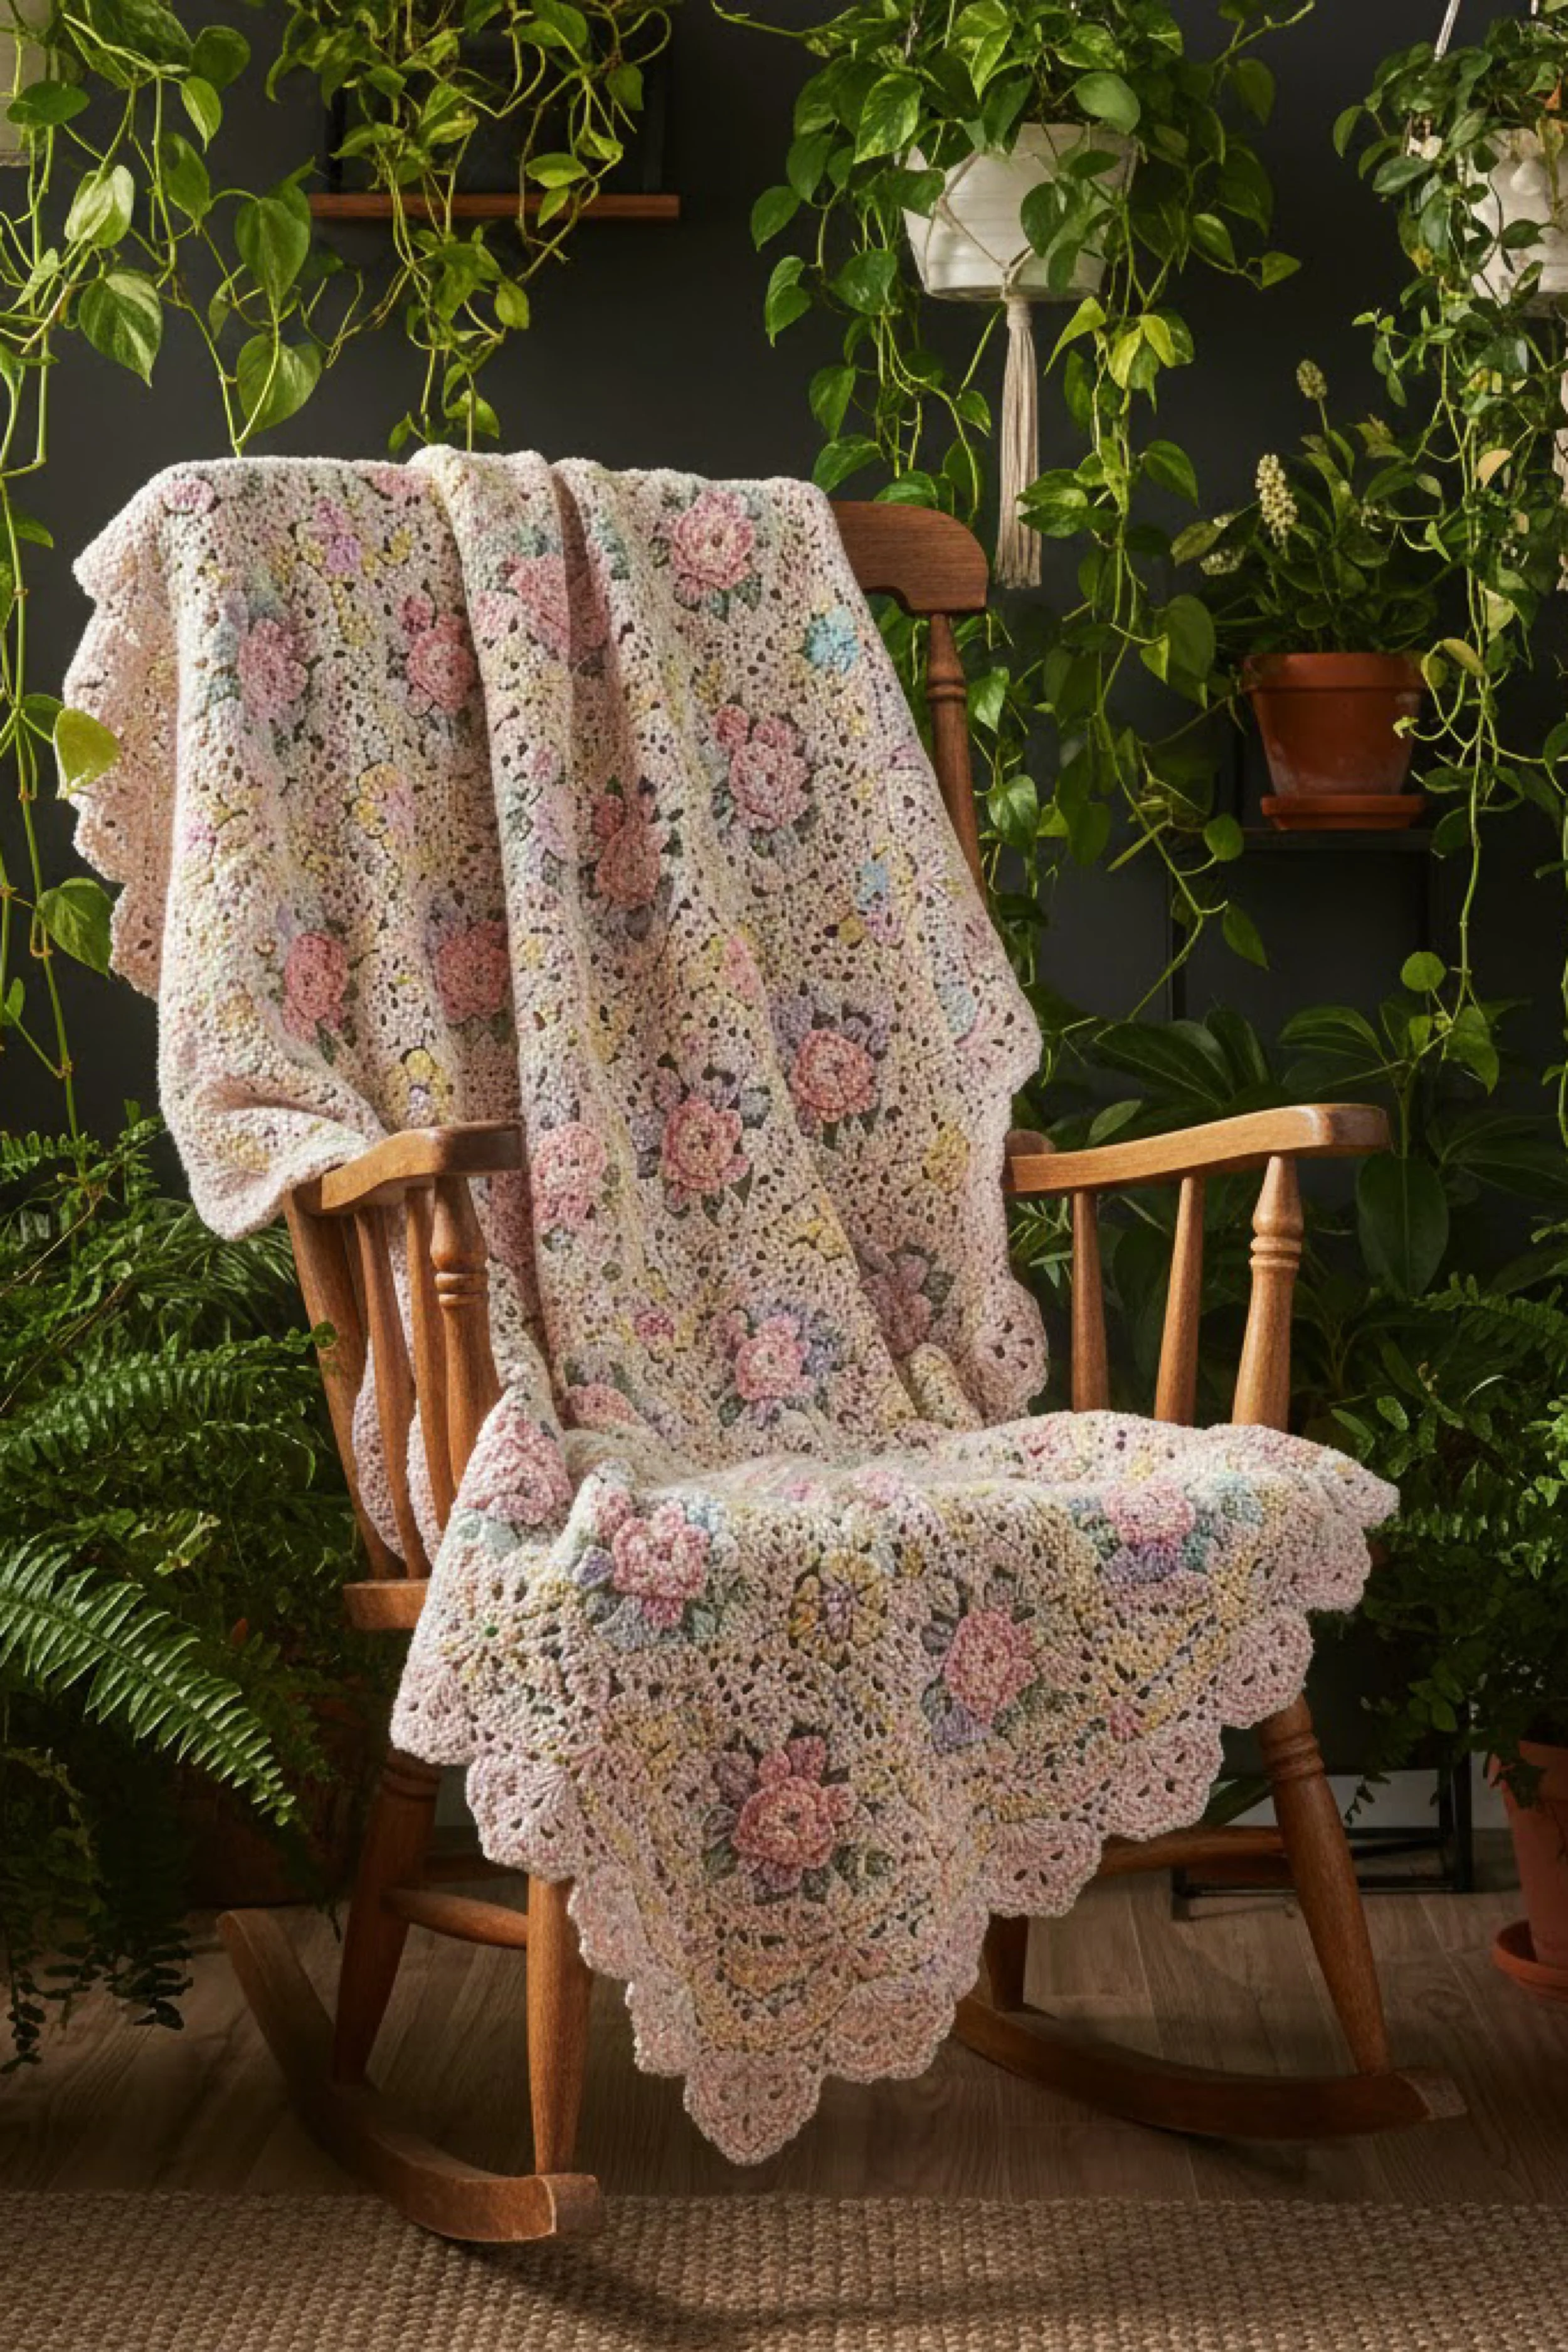
Pastel Patchwork Window Tablecloth DIY Guide — Crochet Squares With Scalloped Lace Border
What you’re making
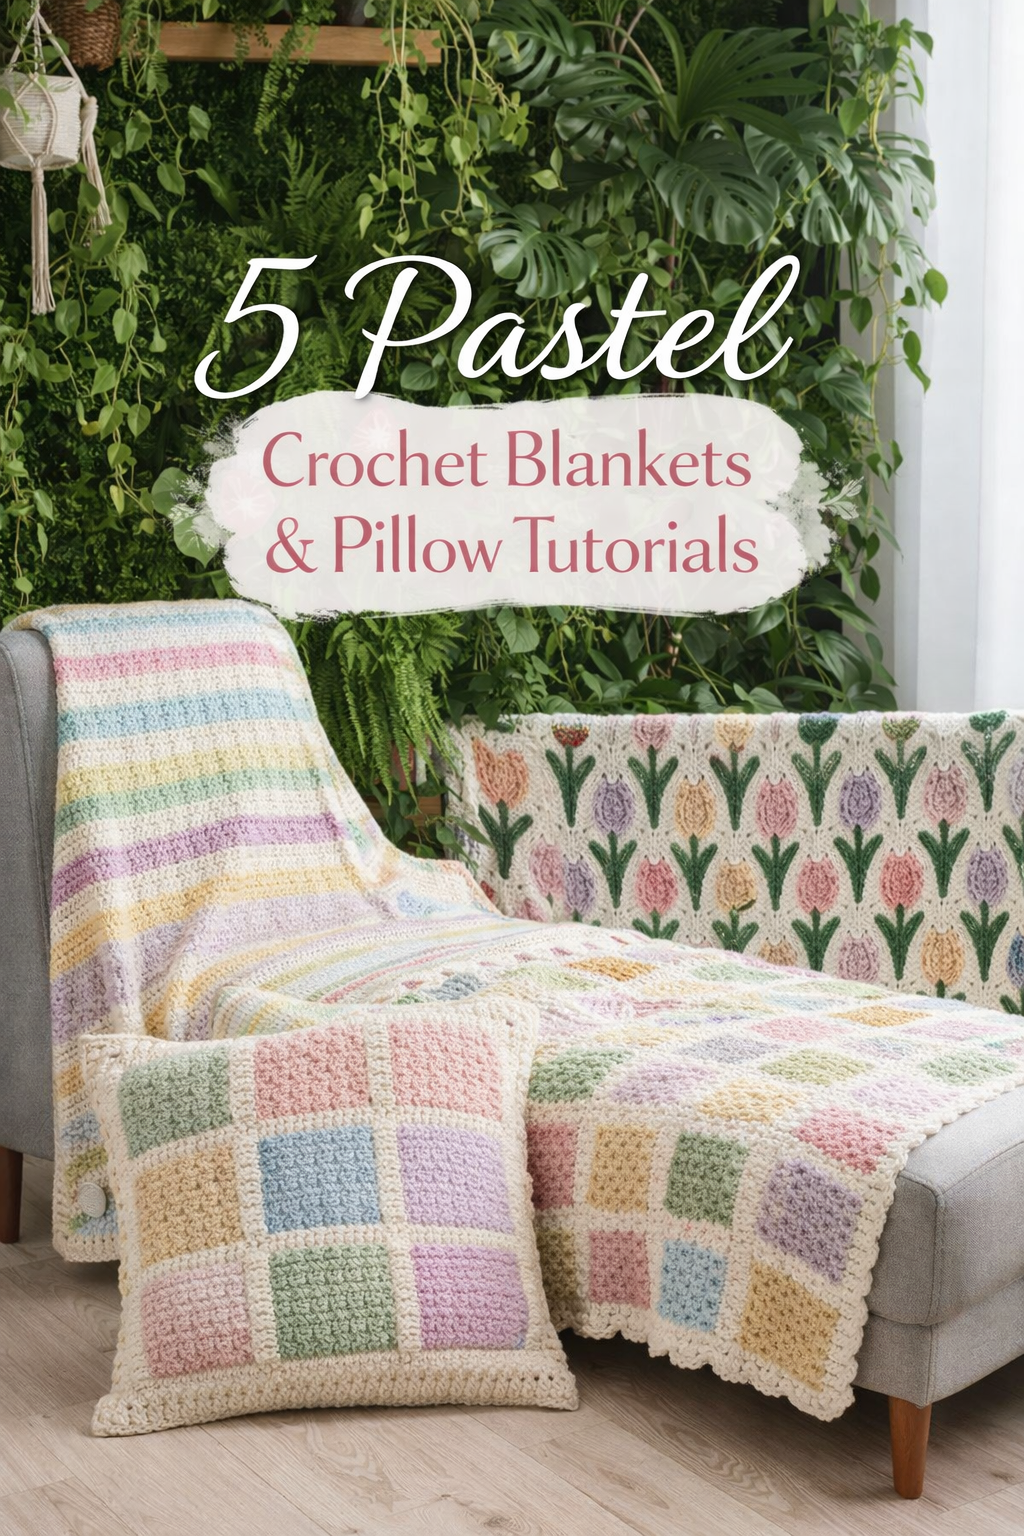
This tutorial recreates the sweet pastel patchwork tablecloth in the photo: a grid of soft colored squares with a raised circular center motif, finished with a delicate scalloped edge that feels vintage but fresh. It is the perfect make for a plant filled breakfast nook, sunny kitchen window, or side table styling moment. The construction is beginner friendly because it repeats the same square over and over, but it looks intricate thanks to the color layout and the lacy edging.
Materials + tools
- Worsted weight or aran weight yarn in multiple pastels (powder blue, mint, butter yellow, blush, lavender, soft peach)
- A creamy white or warm ivory yarn for the border and to unify the palette
- Crochet hook 5.0 mm to 6.0 mm (choose based on yarn label and desired drape)
- Stitch markers
- Measuring tape
- Yarn needle
- Scissors
- Blocking mats and pins
- Optional fabric liner if you want a more tablecloth like weight
- Optional non slip rug pad cut to size if using on a slick tabletop
Finished size + customization notes
The photo shows a tablecloth sized to cover a wide surface with a generous drop. You can scale this easily.
- Small side table topper: 4 squares by 4 squares
- Coffee table cloth: 5 squares by 7 squares
- Dining table runner: 3 squares wide by 9 squares long
- Full tablecloth: measure your table, then aim for a drop of 8 to 12 inches on each side
Square size depends on your motif rounds. Many textured squares land around 6 to 8 inches.
Color planning tip To match the calm, airy look, keep the pastels dusty and soft, and repeat colors evenly. Avoid putting the same color right beside itself too many times.
Step-by-step instructions
1. Measure your surface and choose a grid
Measure tabletop width and length. Decide how much overhang you want. Then divide by your expected square size.
Example If your squares are 7 inches and your table width is 28 inches, 4 squares across gives about 28 inches before border, which is perfect.
Checkpoint You should now have a simple plan like 4 by 6 squares and a small sketch of color placement.
2. Crochet the raised center circle motif
The squares in the photo have a rounded center that reads like a soft medallion. You can create this with a small circle and a texture round.
Round 1
- With pastel color A, make a magic ring.
- Chain 2, work 12 half double crochet into ring.
- Join and tighten ring.
Round 2 texture ridge
- Chain 2.
- Work front post half double crochet around each stitch for a raised ring effect.
- Join.
If you prefer more pop, you can use bobbles instead of front post stitches. Bobbles In the same stitch, yarn over, insert, pull up, yarn over, pull through 2, repeat 3 more times, yarn over and pull through all loops, chain 1 to lock.
Checkpoint You should see a small puck free circle that sits flat with a defined ring.
3. Square the circle with gentle corners
Round 3
- Chain 2.
- Work half double crochet in next stitches until you reach a point where you want a corner.
- To create corners evenly, place a corner group every 3 stitches: 2 half double crochet, chain 2, 2 half double crochet in the same stitch.
- Continue around until you have four corners, then join.
Round 4 and 5 build the square
- Work double crochet across sides.
- In each corner chain space, work 2 double crochet, chain 2, 2 double crochet.
If your circle feels tight, add one increase round before squaring.
Checkpoint Your square should now look like a rounded square with crisp corners. If yours is wavy, reduce stitches. If it cups, add stitches or use a larger hook.
4. Add a soft frame round to unify
To match the clean grid in the photo, add one round in ivory around every square.
- Join ivory yarn.
- Work double crochet around, placing corner groups in corner chain spaces.
This frame makes each pastel square look intentional and helps the patchwork feel balanced.
Checkpoint Stack a few squares. They should feel consistent in size and the ivory should create a calm outline.
5. Make enough squares
Make the number needed for your grid. As you finish each square, weave in ends neatly along the frame stitches.
Consistency tip Always start the same way and count corner spaces. If you sometimes add an extra chain between side clusters and sometimes not, your sizing will drift.
6. Block squares before joining
Even if you are in a hurry, blocking saves the final look.
- Pin each square to the same measurement.
- Lightly steam or mist and dry.
Checkpoint Squares should be crisp, edges straight, corners square.
7. Join squares for a tidy patchwork seam
The photo looks smooth, not bulky. A whip stitch join or mattress stitch join is perfect.
Whip stitch join
- Lay two squares flat.
- Stitch through the outer loops of both squares with ivory yarn.
Mattress stitch join
- Keep squares right side up.
- Stitch under the horizontal bars along the edge for an almost invisible seam.
Build rows first, then join rows together. This keeps alignment clean.
Checkpoint Your patchwork should lie flat. If seams pull, loosen. If gaps show, tighten or use mattress stitch.
8. Add a border foundation round around the whole cloth
Attach ivory yarn at an outer corner. Round 1 single crochet
- Work single crochet evenly around.
- Place 3 single crochet in each corner.
- Along the long edges, aim for one single crochet per stitch, adjusting slightly as needed.
Round 2 half double crochet
- Work half double crochet around for a soft frame.
Checkpoint Edges should look straight with no ruffling. If it ripples, you likely have too many stitches. Remove and redo with fewer.
9. Crochet the scalloped lace edge
The photo shows a gentle scallop that is not too deep.
Shell scallop
- Single crochet into next stitch.
- Skip one stitch.
- Work 5 double crochet into next stitch.
- Skip one stitch.
- Single crochet into next stitch. Repeat.
Corner handling At corners, place one extra single crochet between shells so the turn is smooth.
Checkpoint Scallops should sit neatly and look even. If shells flare out too much, reduce to 4 double crochet. If they look tiny, increase to 6.
10. Optional add a subtle picot for extra vintage charm
If you want a lace edge like heirloom linens:
- At the top of each shell, chain 3 and slip stitch into the first chain to create a tiny picot.
Use this sparingly if you want to keep the look clean.
11. Final blocking and drape test
Block the full cloth so it settles.
- Pin edges to measured size.
- Shape scallops evenly.
- Dry fully.
Checkpoint When you place it on the table, the grid should look straight, and the scallops should hang evenly.
Troubleshooting
- My squares are not the same size Block them and measure. If still off, redo the smallest ones or add a frame round to bring them up to size.
- My circle center puckers Your circle has too many stitches or your hook is too small. Try fewer stitches in round 1 or go up a hook size.
- The tablecloth edge ripples You added too many stitches in the border foundation. Pull back to border round and redo with fewer stitches.
- Seams look bulky Switch from slip stitch join to mattress stitch or whip stitch with a yarn needle.
Finishing details
- Weave in ends by running tails through multiple directions in the border frame.
- Optional upgrade 1 add a fabric liner. Cut a lightweight cotton to size, pin under cloth, hand stitch around the inner border round so stitches do not show.
- Optional upgrade 2 add corner tassels in ivory for a soft boho vibe.
- Optional upgrade 3 use a single unifying pastel for a thin final round before scallops, such as dusty lavender, to match the photo’s gentle color rhythm.
- Optional upgrade 4 add tiny embroidered dots in matching pastel across a few squares for a speckled sweetness.
Shop Similar
- Pastel yarn assortment in soft muted shades
- Creamy ivory yarn for borders and joins
- Blocking mats and rust proof pins for crochet
- Yarn needles set for joining squares
- Non slip pad for table topper
Style It With
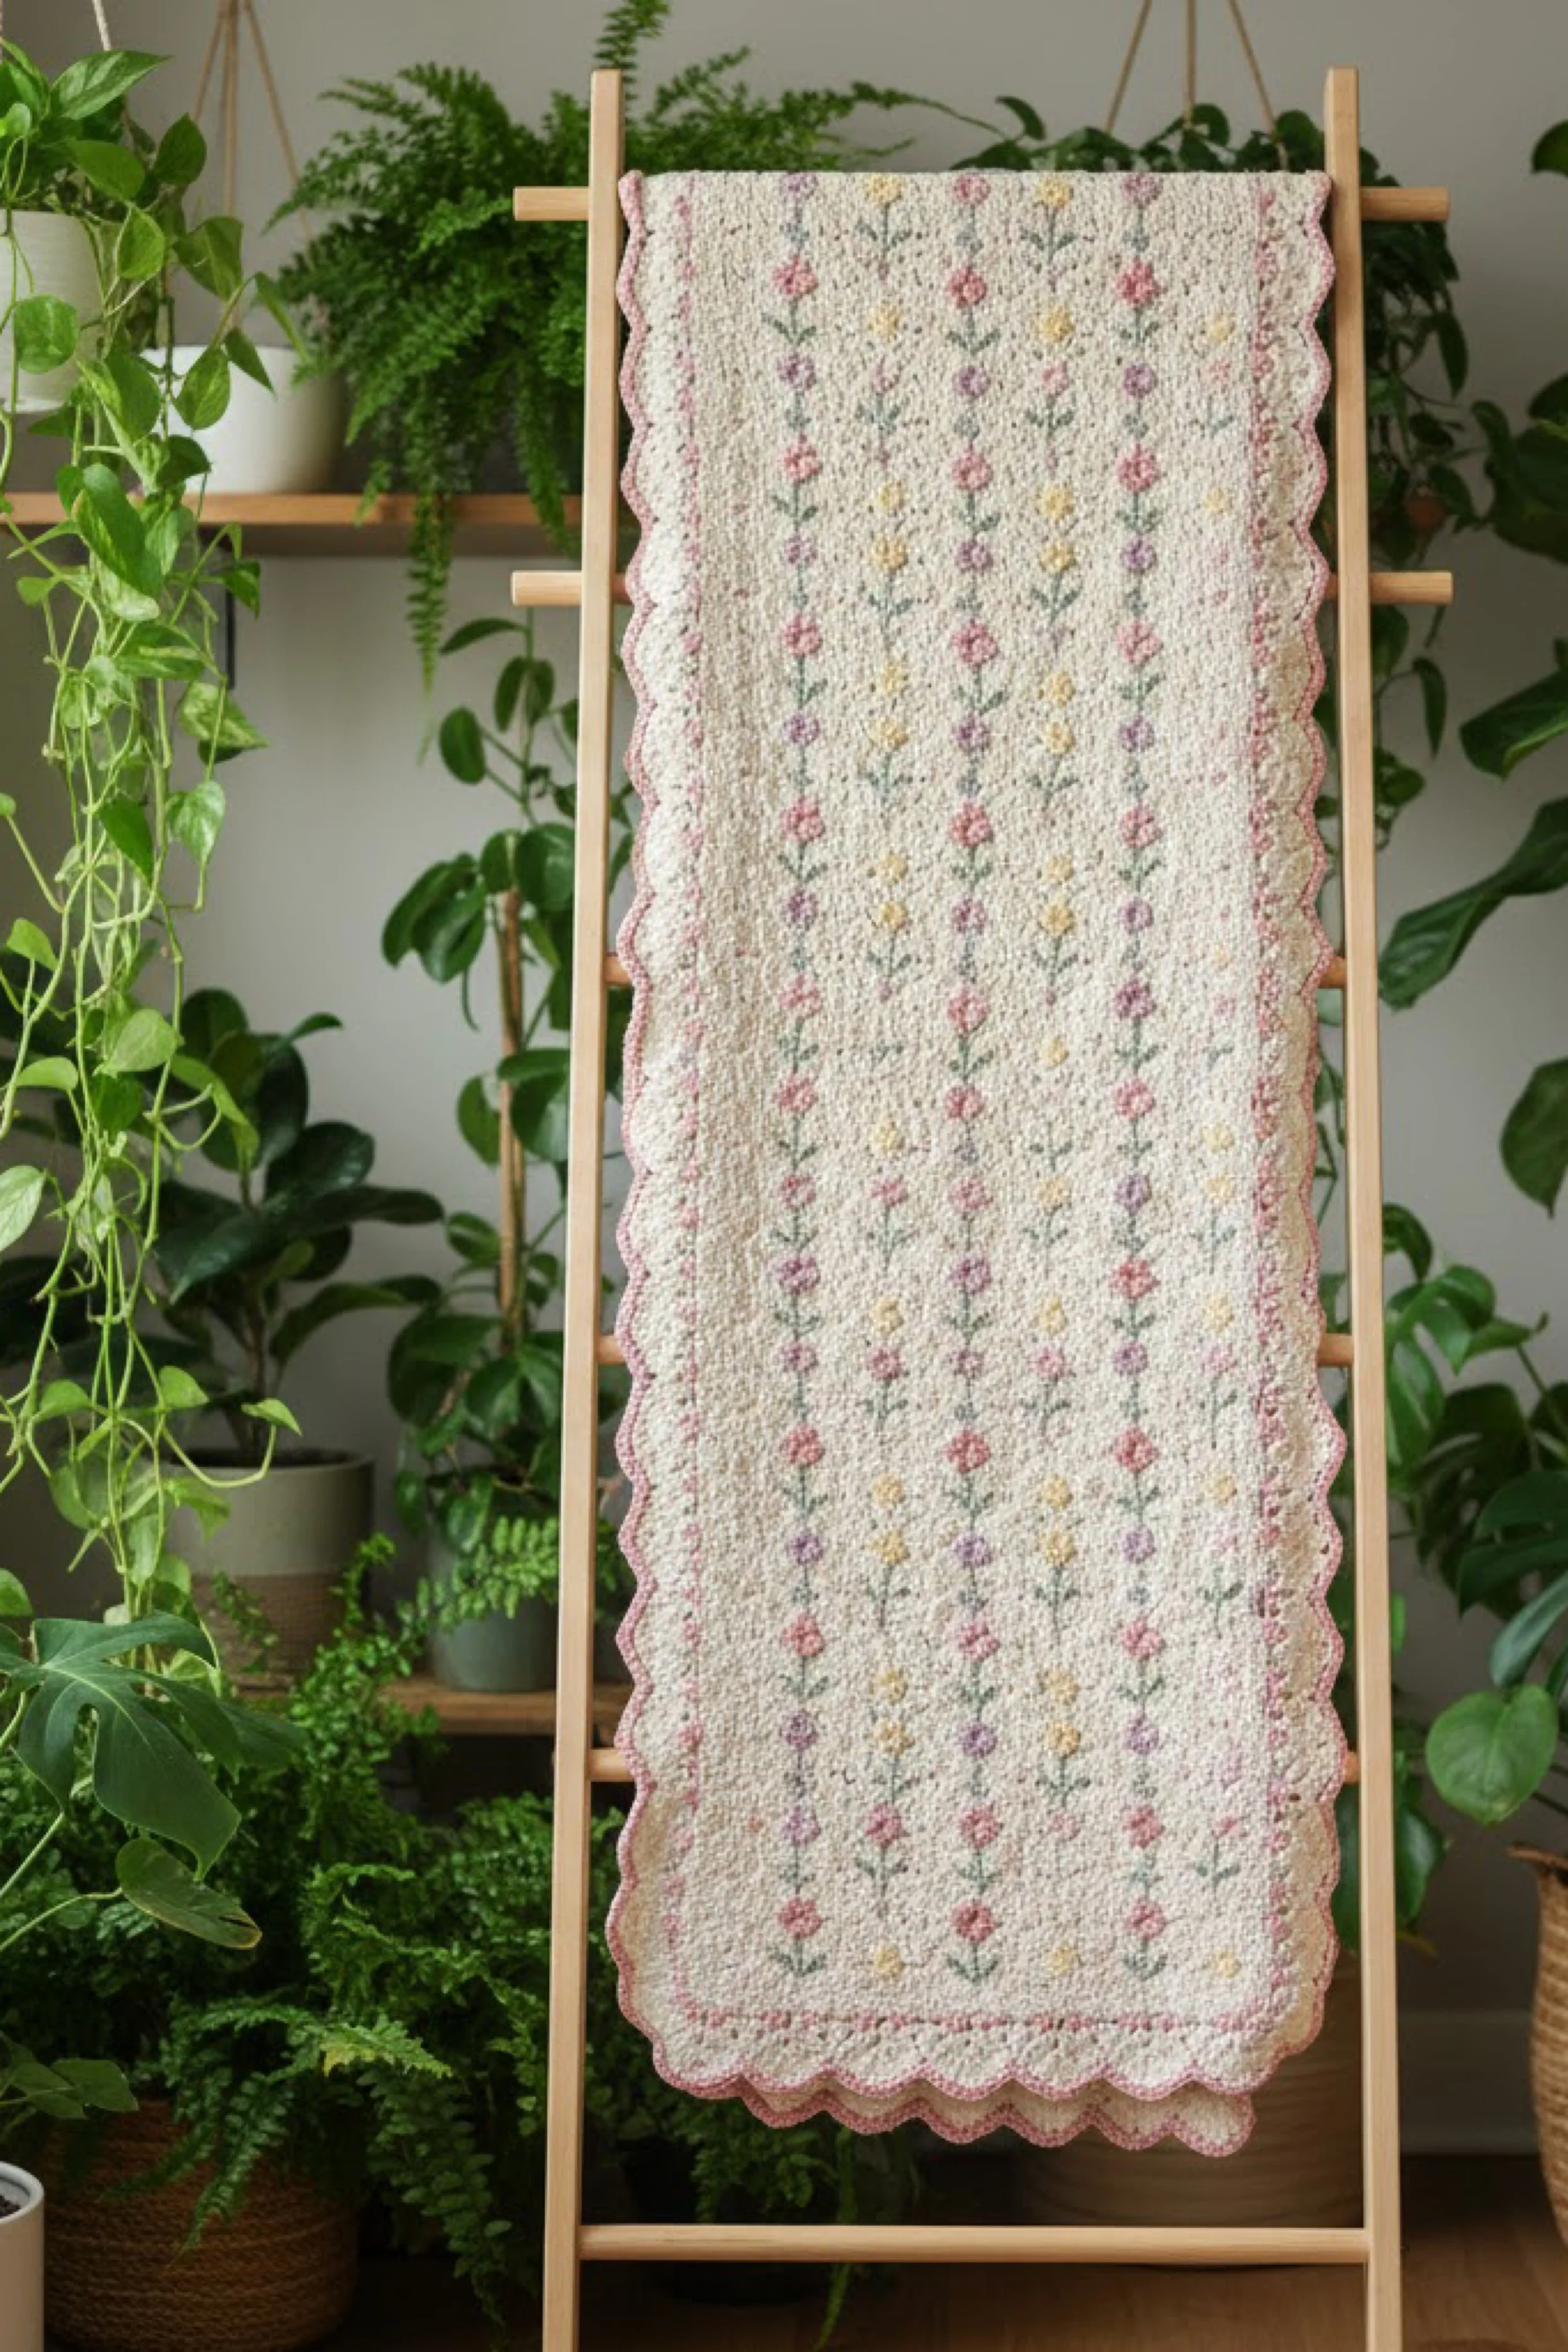
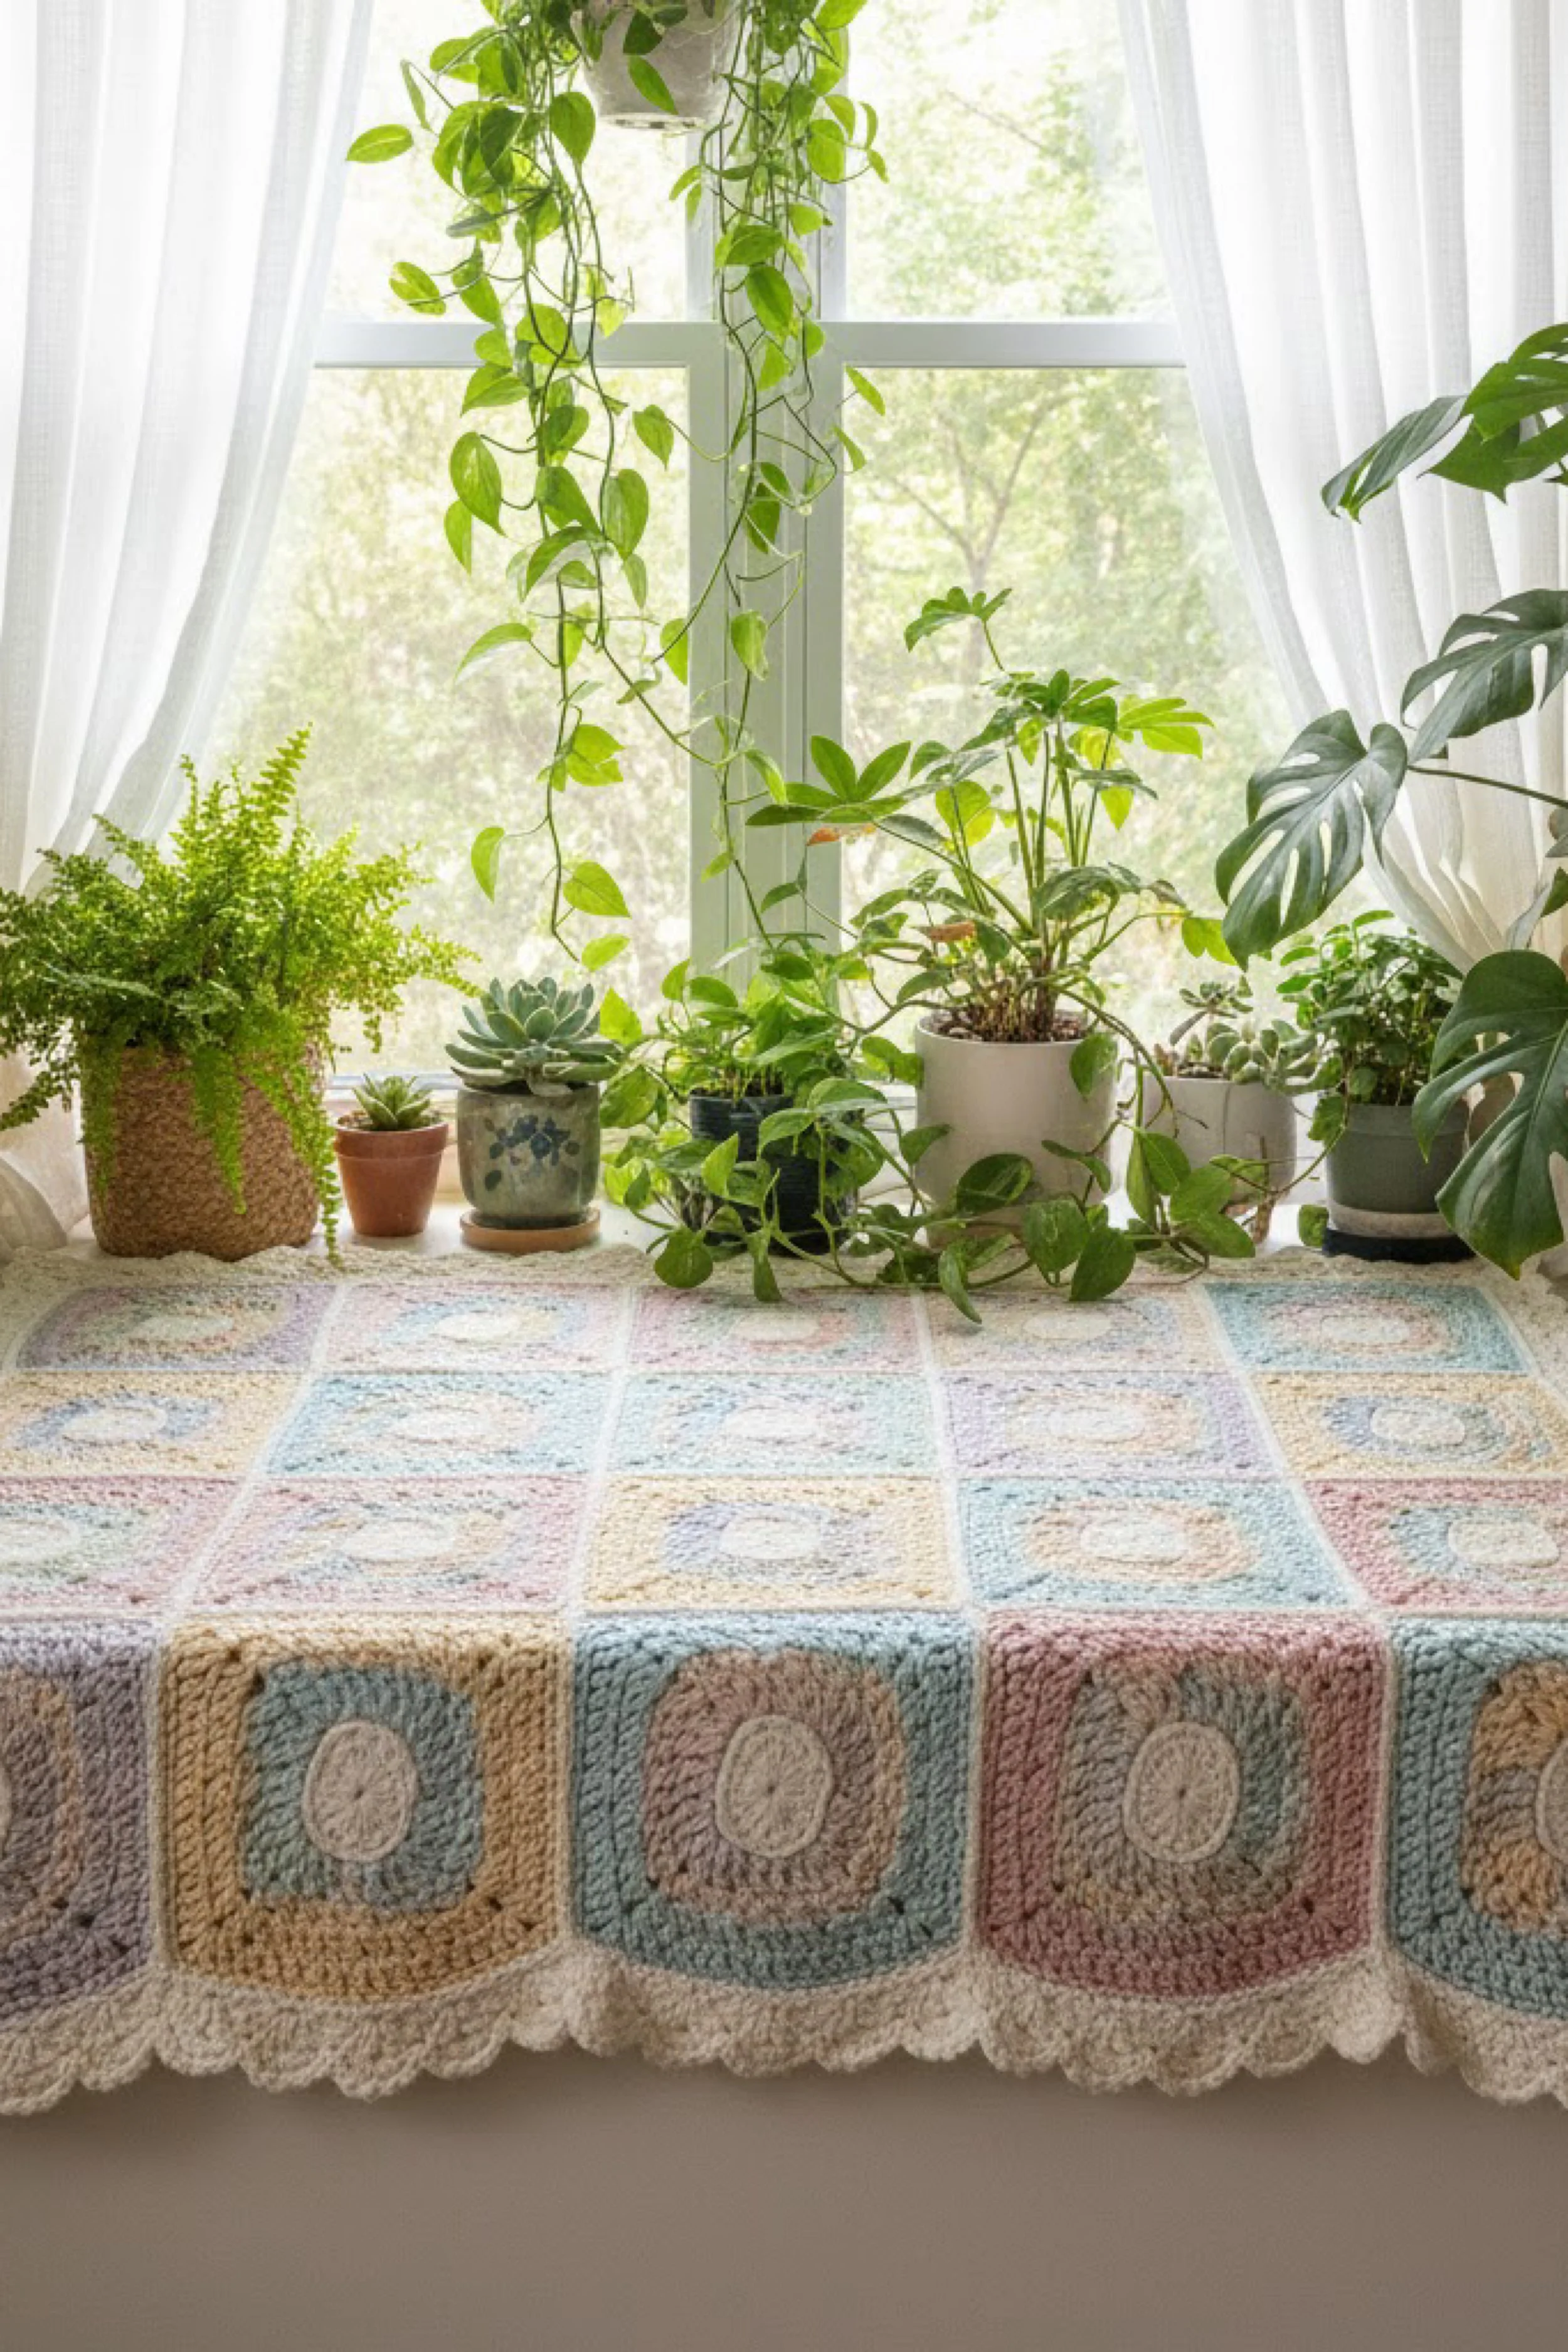
Wildflower Meadow Runner How-To Guide — Textured Floral Stripes With Pink Scalloped Border
What you’re making
This project recreates the long, delicate runner in the photo: a light neutral base sprinkled with tiny wildflowers arranged in vertical columns, finished with a scalloped border in dusty pink. It feels like a vintage heirloom blanket but scaled into a modern table runner or bed end throw. The key to the look is the gentle repetition of flowers, the quiet negative space between stems, and the crisp scallop edge that frames everything like a picture.
Materials + tools
- Worsted weight or light worsted yarn in warm cream for the base
- Pastel yarn scraps for flowers (soft pink, mauve, lilac, butter yellow)
- Green yarn for stems and leaves (sage, eucalyptus, soft olive)
- Dusty pink yarn for the scallop edging
- Crochet hook 5.0 mm to 6.0 mm for the base
- Smaller hook 4.0 mm to 4.5 mm for surface motifs (optional)
- Stitch markers
- Yarn needle
- Scissors
- Measuring tape
- Blocking mats and pins
- Optional lightweight cotton fabric for lining if using as a table runner
Finished size + customization notes
A typical runner is about 14 to 18 inches wide and 48 to 72 inches long. The photo shows a narrow, elegant shape, likely around 16 inches wide by 60 inches long. You can adjust width by changing your stitch count, and adjust length by adding rows.
Design note The flowers are arranged in columns, so it helps to choose a stitch count that divides evenly into your number of columns.
Step-by-step instructions
1. Choose your base fabric stitch for a clean, slightly textured surface
The photo’s base looks softly textured, not very holey. Two great crochet stitches for this are:
- Linen stitch (also called moss stitch), which creates a woven look
- Half double crochet back loop only, which creates gentle ridges
Option A linen stitch base This creates a fabric that is stable and perfect for surface embroidery.
- Chain an even number plus 1.
- Row 1 single crochet in second chain from hook, chain 1, skip one chain, single crochet in next. Repeat.
- Row 2 chain 2, single crochet into each chain 1 space across. Repeat row 2.
Option B half double crochet back loop only This creates tidy horizontal lines.
- Chain desired length of width.
- Half double crochet in each chain, chain 1 turn.
- Work half double crochet in back loop only across each row.
Checkpoint You should now see a flat, even fabric that does not curl at the edges. If it curls, add a border later or choose linen stitch for more stability.
2. Start with a foundation chain and set runner width
For a 16 inch width with worsted yarn, you may need around 40 to 50 stitches depending on stitch and hook.
Tip If you want the runner to sit flat under plants or dishes, choose a slightly tighter gauge by using a smaller hook.
3. Crochet the runner to length
Work your chosen stitch until you reach your desired length.
Visual checkpoint Drape it over a table edge. It should fall softly, not stand stiff. If it feels stiff, go up one hook size. If it feels floppy and loose, go down one hook size.
4. Add a simple border frame before decorating
A border makes edges clean and gives you a stable place to attach scallops later.
Round 1 single crochet border
- Work single crochet evenly around the whole runner.
- Place 3 single crochet in each corner.
- Along long edges, keep stitches even. If using linen stitch, place one single crochet in each edge space.
Round 2 half double crochet border
- Work half double crochet around.
- Again, 3 stitches in each corner.
Checkpoint Edges should look straight with no waves. If it ripples, remove and reduce stitches along long sides.
5. Plan the flower columns
To match the photo, place flowers in evenly spaced vertical stripes. A simple layout is 5 columns across the runner.
How to map columns
- Fold the runner lengthwise lightly to find center.
- Use stitch markers to mark column lines at equal distances.
- Along each column, place flowers every few inches, alternating heights so it looks natural.
Checkpoint You should now see a dotted plan down the runner, like a gentle garden path.
6. Create tiny flowers with simple crochet motifs
Small puff flowers read perfectly at this scale.
Tiny puff flower
- Make a magic ring.
- Chain 1.
- Work 5 puff stitches into ring, separating each with chain 1.
- Join and pull ring tight. Each puff can be a smaller version: yarn over, insert, pull up, yarn over pull through 2, repeat 2 more times, then yarn over pull through all loops, chain 1.
Alternate flower option For a flatter look, make a five petal flower with double crochet clusters.
Checkpoint Your flowers should be about the size of a coin or smaller. If they are too big, use a smaller hook or fewer loops in the puff.
7. Add stems and leaves with surface slip stitch embroidery
This is where the runner gets its illustrated look.
How to surface slip stitch stems
- With green yarn on a yarn needle or crochet hook, bring yarn up from the back.
- Insert hook in next spot, pull loop through and slip stitch across the surface to create a thin line.
- For a stem, work a vertical line down from the flower.
Leaves
- Make a small chain 4 or 5, then slip stitch back down to create a narrow leaf.
- Or embroider a leaf with two angled straight stitches forming a V shape.
Placement Stems should vary slightly. Some can be straight, some gently angled. Keep it subtle.
Visual checkpoint From a few feet away, the stems should read as a soft green sketch, not thick ropes. If too thick, use a thinner yarn or split plies.
8. Attach flowers securely
Sew each flower down through its center and a couple petal points. If you want dimension, keep petal edges free.
Tip Use matching yarn tail so stitches disappear.
9. Repeat the wildflower pattern across the runner
Work column by column, rotating colors so you get an even mix.
Color rhythm strategy
- Column 1 mostly pink with occasional yellow
- Column 2 mostly lilac with occasional pink
- Center column mixed
- Columns 4 and 5 mirror the balance
Checkpoint Step back and check overall distribution. If one color dominates, swap a few flowers before sewing them down.
10. Add the dusty pink scalloped edge
The photo’s scallop is tidy and classic.
Scallop round
- Join dusty pink yarn to any corner.
- Single crochet in next stitch.
- Skip one stitch.
- Work 5 double crochet in next stitch.
- Skip one stitch.
- Single crochet in next stitch. Repeat.
Corner adjustment At corners, place a single crochet, then work a shell into the corner stitch, then single crochet again before continuing.
Checkpoint Scallops should frame the runner evenly. If scallops bunch up at corners, add one extra single crochet between shells near the corners.
11. Block the runner for a crisp finish
Blocking makes a huge difference for runners.
- Pin to measurements on blocking mats.
- Shape scallops so they are consistent.
- Steam or mist and let dry.
Checkpoint The runner should look like a finished textile, with straight sides and balanced scallops.
Troubleshooting
- My runner is curling on the long edges This happens with tighter stitches. Add a wider border or switch to linen stitch for the base. Blocking also helps.
- My flower columns look crooked Use stitch markers and measure distances between flowers. It is easy to drift without a plan.
- My stems look too thick Use a thinner yarn, split the yarn into fewer plies, or embroider with a smaller needle and fewer strands.
- My scallops are uneven Your stitch count may not align with the shell repeat. Add or remove a stitch at the end of each side by placing two single crochet together or skipping one extra stitch, then continue.
Finishing details
- Weave in all ends by running tails through the back of the border rounds.
- Optional upgrade 1 line the runner with cotton fabric. This adds weight and prevents sliding. Hand stitch around the inner border so stitches stay hidden.
- Optional upgrade 2 add tiny French knot style dots in matching pastel between flowers to mimic meadow pollen.
- Optional upgrade 3 add a second thin border round in green just before the scallops for a framed garden effect.
- Optional upgrade 4 add a small loop on one end so you can hang it on a ladder or peg rail for display.
Shop Similar
- Warm cream yarn for runner base fabric
- Pastel yarn for small crochet flowers
- Sage green yarn for stems and leaves
- Blocking mats and pins for straight edges
- Fine yarn needles for embroidery and appliqué
Style It With
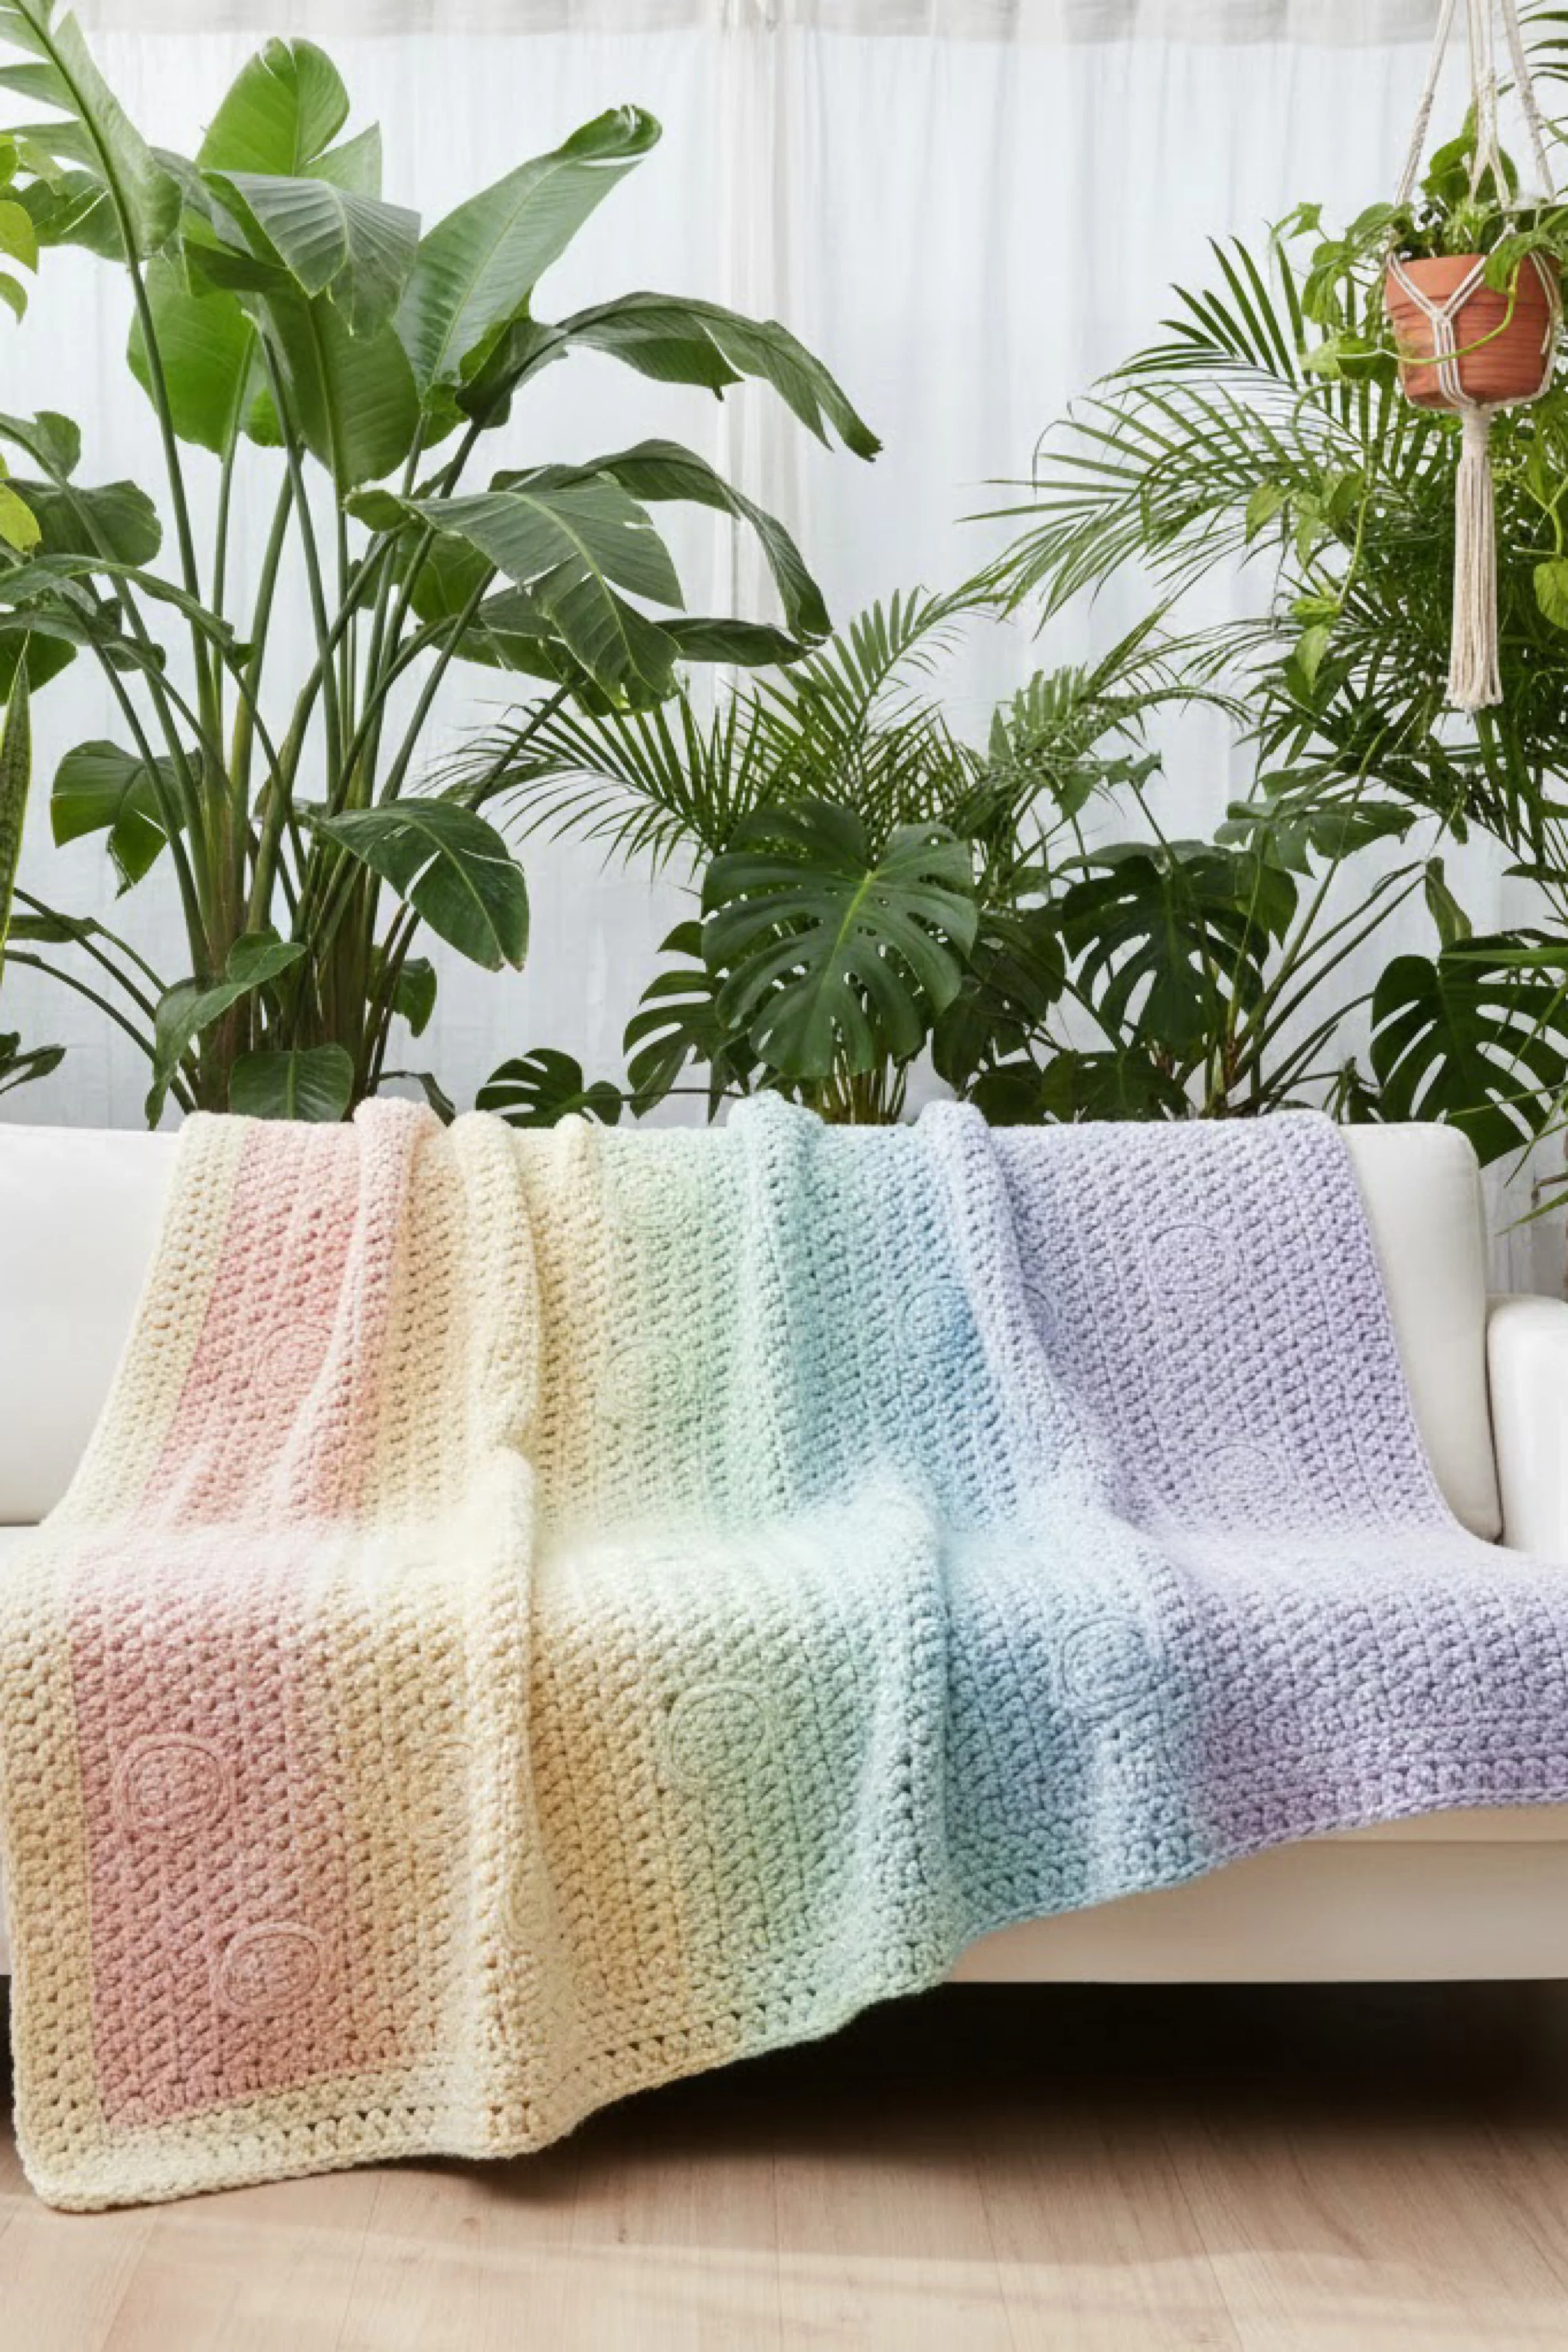
Pastel Rainbow Bubble Blanket Step-by-Step Tutorial — Gradient Stripes With Embossed Circle Texture
What you’re making
This tutorial recreates the dreamy pastel rainbow throw in the photo: wide gradient panels that fade from blush to butter to mint to sky to lavender, with a plush, pebbly stitch texture and subtle embossed circle motifs scattered across the blanket. It looks modern and calm, perfect for a bright plant filled living room, but it still has that handmade coziness you want in a throw. The magic here is the combination of a simple stripe plan and a texture stitch that makes the colors look extra soft.
Materials + tools
- Bulky weight yarn or thick worsted for a plush look (choose soft pastels)
- Colors: blush pink, soft peach, butter cream, pale yellow, mint, pale aqua, powder blue, lavender
- A creamy ivory for a border if you want a clean frame
- Crochet hook 6.0 mm to 8.0 mm depending on yarn thickness
- Stitch markers
- Measuring tape
- Yarn needle
- Scissors
- Optional blanket label tag
- Blocking mats and pins (optional for this texture, but helpful for edges)
Finished size + customization notes
A cozy couch throw is often about 50 by 60 inches. This design scales easily.
- Baby blanket: 30 by 36 inches with fewer stripes
- Lap throw: 40 by 50 inches
- Full throw: 50 by 60 inches or larger
Stripe sizing The photo shows wide color bands. Aim for stripes that are 8 to 12 rows each, depending on yarn thickness, so the gradient feels smooth and relaxed.
Embossed circles You can create the circles with surface crochet, or by working a subtle raised motif into the fabric. Both options are beginner friendly.
Step-by-step instructions
1. Pick your texture stitch to match the plush pebble surface
The blanket in the photo has a dense, bumpy texture that reads like a soft waffle pebble. Two excellent stitches for that look are:
- Suzette stitch (dense and nubby)
- Lemon peel stitch (simple texture, clean) If you want the bubbliest feel, choose Suzette.
Suzette stitch basics
- Work single crochet and double crochet into the same stitch, then skip one stitch, repeat.
Lemon peel stitch basics
- Alternate single crochet and double crochet across each row, and work stitches into the opposite stitch type on the next row.
Checkpoint Make a small swatch with your chosen hook. It should feel plush, not lacey. If it is too holey, go down a hook size. If it is stiff, go up a hook size.
2. Decide your width and chain your foundation
For a 50 inch throw in bulky yarn, you might chain around 90 to 110 depending on gauge. For thick worsted, maybe 130 to 160. The safest method is to chain until it measures your desired width.
Tip Add a few extra inches because textured stitches can tighten slightly.
Checkpoint Your foundation chain should not be tight. If it is tight, use a larger hook just for the chain, then switch back.
3. Start the first stripe in blush
Work your texture stitch across and back for your first stripe depth.
If using Suzette Row 1
- Single crochet and double crochet into the second chain from hook, skip one chain.
- Repeat across.
- End with a single crochet in last chain. Row 2
- Chain 1, turn.
- Work single crochet and double crochet into the first stitch, skip one stitch.
- Repeat across.
- End with a single crochet in last stitch.
Repeat rows for the stripe.
Checkpoint You should now see a tight, pebbly texture with tiny bumps. Edges should look fairly straight. If edges are wavy, check you are ending consistently.
4. Change colors cleanly for the gradient
To keep the gradient smooth, change colors at the end of a row.
- On the last stitch of the row, yarn over and pull through with the new color.
- Chain and turn with the new color.
Weave in ends as you go or knot lightly and weave later. For a blanket, weaving is better than tight knots.
Checkpoint Color transitions should look clean, not messy. If you see little dots of the old color in the new stripe, make sure the final pull through is done with the new yarn.
5. Build the pastel rainbow panels
Work through your colors in the order shown in the photo. Suggested flow Blush to peach, then butter, then pale yellow, then mint, then aqua, then powder blue, then lavender.
Make each stripe the same depth for a modern look, or gradually increase stripe depth to create a more natural fade.
Visual checkpoint Fold the blanket accordion style. You should see soft, even bands and no abrupt jumps.
6. Add embossed circles to match the subtle motif
The photo shows faint circles that look pressed into the texture. Here are two safe options.
Option A surface slip stitch circles After the blanket is complete, use matching yarn in a slightly darker or slightly lighter shade than the stripe.
- Use a yarn needle or crochet hook.
- Create a circle by making surface slip stitches in a round.
- Keep stitches loose so the fabric does not pucker.
How to size A circle about 3 to 4 inches wide reads well on a throw.
Option B raised circle made with front post stitches During a stripe, mark a square area and work front post double crochet in a ring shape for several rows. This creates a subtle raised outline.
Placement plan Add circles spaced widely. Think one circle every 10 to 14 inches, alternating positions so the blanket feels balanced.
Checkpoint From a distance, circles should feel like gentle texture, not loud patches. If they pop too much, use the same yarn color as the stripe rather than a contrast.
7. Add a simple border for a clean frame
The photo looks clean at the edges. A simple border will help.
Round 1 single crochet
- Join ivory or your preferred edge color.
- Work single crochet evenly around the whole blanket.
- Place 3 single crochet in corners.
Round 2 half double crochet
- Work half double crochet around.
Optional round 3 crab stitch for a polished edge Crab stitch is reverse single crochet. It creates a neat rope edge.
Checkpoint The border should smooth out edges and help the blanket lie flat. If it ripples, you have too many border stitches.
8. Finish and weave ends
Weave all ends through multiple texture bumps so they lock in.
Tip Do not weave ends in a straight line only. Change direction at least twice so ends stay secure through washing.
9. Light block if needed
Textured blankets often do not need intense blocking, but a gentle shape helps.
- Mist lightly with water.
- Smooth edges and corners.
- Let dry flat.
Checkpoint The blanket should look even, stripes aligned, border clean.
Troubleshooting
- My blanket edges are zigzagging This happens when your stitch count changes at row ends. Count stitches every few rows and make sure you start and end consistently.
- The gradient looks choppy Make stripes thinner or add transitional shades. You can blend by alternating two colors every other row for a few rows between stripes.
- Surface circles pucker the fabric Your surface stitches are too tight. Pull them out and redo looser, or use a larger hook for surface work.
- The blanket feels stiff Use a larger hook, a softer yarn, or switch from Suzette to lemon peel stitch for a slightly lighter fabric.
- Border waves You added too many stitches. Redo border with fewer stitches, skipping occasionally along long edges.
Finishing details
- Optional upgrade 1 add a soft label tag in one corner for a boutique finish.
- Optional upgrade 2 add tassels in matching pastel at two corners only, keeping it modern.
- Optional upgrade 3 add a second border round in a very pale pastel to echo the gradient.
- Optional upgrade 4 add a simple stitched monogram using matching yarn on a corner panel.
Care notes Use gentle wash, cool water, and lay flat to dry if yarn recommends. This keeps texture plush and prevents stretching.
Shop Similar
- Bulky pastel yarn set for gradient blankets
- Soft thick worsted yarn in blush mint lavender
- Large ergonomic crochet hooks 6mm to 8mm
- Yarn needle set for weaving bulky yarn ends
- Sew on clothing labels for handmade blankets
Style It With
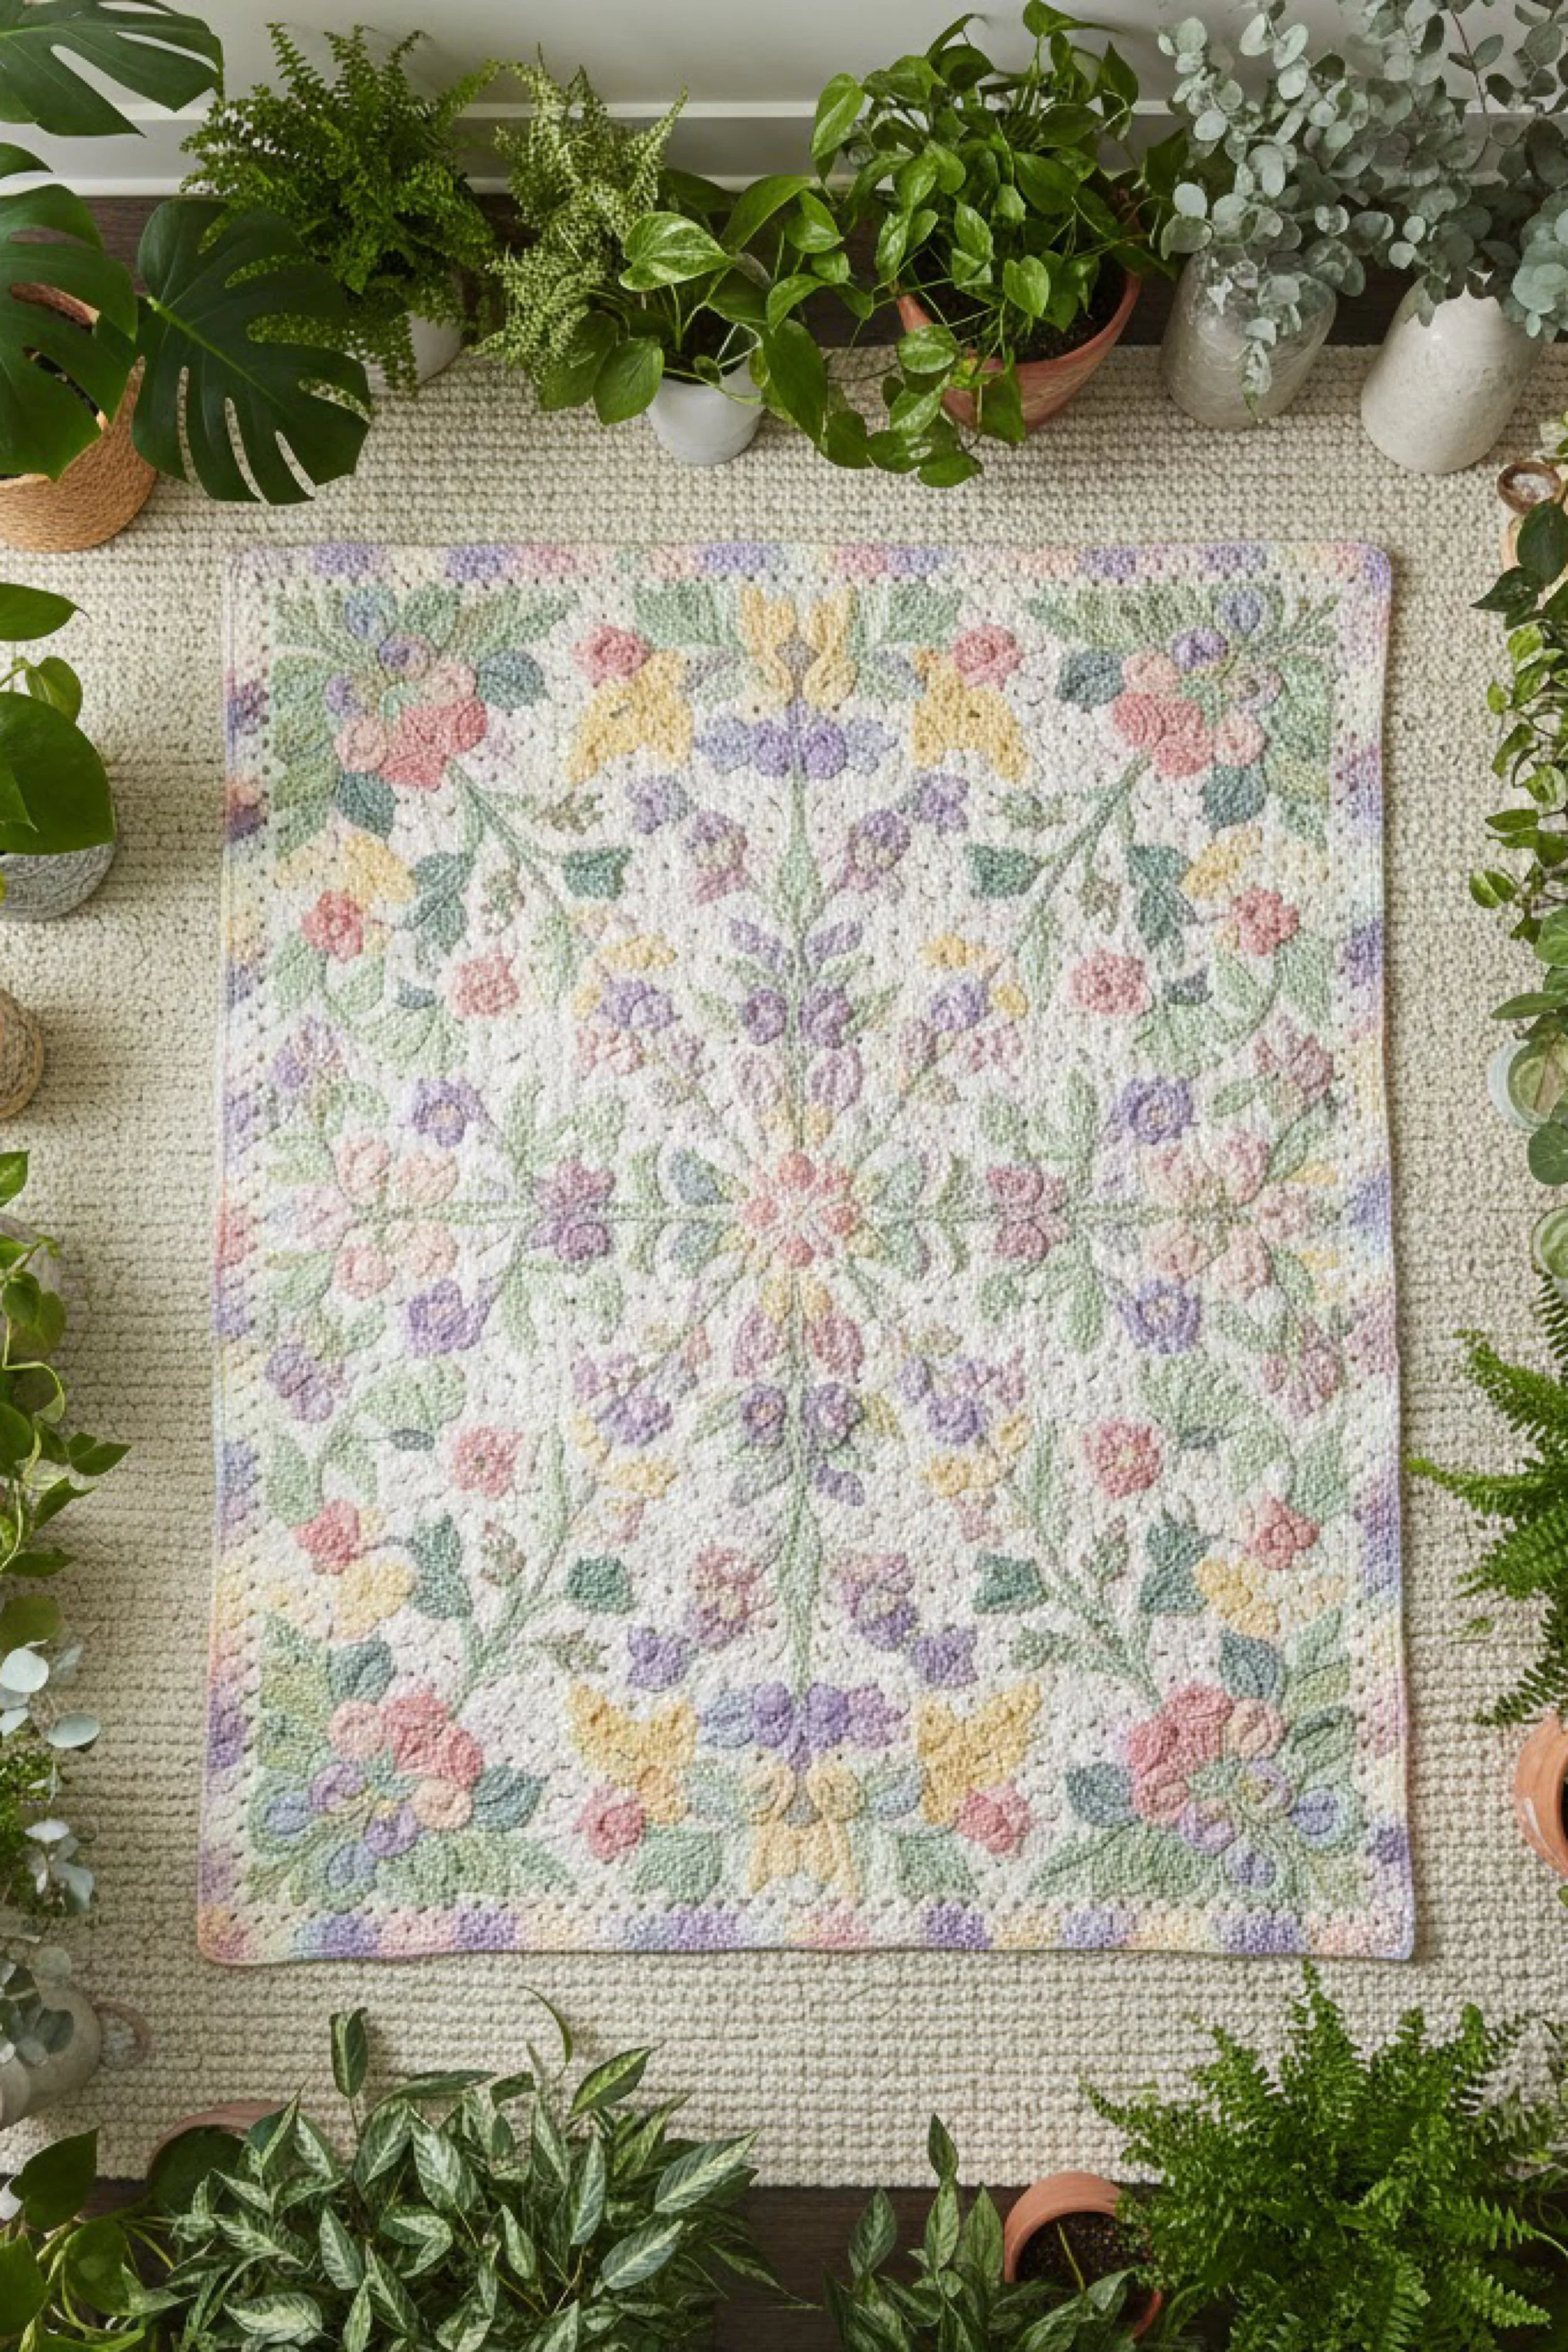
Botanical Pastel Medallion Rug Make-It-Yourself Tutorial — Punch Needle Floral Mat With Soft Spring Palette
What you’re making
This tutorial recreates the pastel floral floor piece in the photo: a soft square rug or mat with a symmetrical botanical medallion design, made in a gentle spring palette over a creamy base. The surface looks plush and painterly, like a garden illustration turned into texture. The best technique for this exact look is punch needle embroidery, which creates a dense looped pile that reads like a tufted rug without heavy equipment. You will transfer a floral design, punch it in sections by color, then finish the edges so it lies flat and feels durable.
Materials + tools
- Monk’s cloth or primary tufting cloth (for punch needle foundation)
- Gripper frame, stretcher bars, or embroidery frame large enough for your rug size
- Punch needle tool (adjustable depth is ideal)
- Rug wool yarn or bulky acrylic suitable for punch needle (pastels plus cream base)
- Colors to match the photo: cream, sage green, soft leaf green, blush, dusty rose, lavender, periwinkle, butter yellow, soft peach
- Fabric marker or projector for pattern transfer
- Scissors
- Strong craft glue or rug binding glue for backing
- Felt backing fabric or non slip backing fabric
- Hand sewing needle and strong thread (optional for edge finishing)
- Steam iron for finishing and shaping (optional)
- Clippers or small scissors for trimming the pile (optional)
Finished size + customization notes
The photo shows a square piece that could be used as a small rug, play mat, or large decorative floor mat. A great beginner size is about 24 by 24 inches. You can go larger, but you will want a sturdy frame and more yarn.
Pile height A medium loop pile looks closest to the photo. If your punch needle is adjustable, set it to a medium depth so loops are plush but not floppy.
Design planning The floral design is symmetrical. You can use a simple mirrored flower and leaf layout, or find a botanical medallion style template and adapt it.
Step-by-step instructions
1. Decide on size and build your frame setup
Punch needle work needs tight fabric tension. Choose a frame that holds monk’s cloth like a drum.
How to stretch monk’s cloth
- Cut monk’s cloth at least 3 to 4 inches larger than your finished rug size on all sides.
- Attach to gripper frame or staple tightly to stretcher bars.
- Pull evenly from all sides, tightening until the fabric feels firm.
Checkpoint Tap the fabric. It should sound tight and feel springy. If it is loose, the loops will not hold well.
2. Choose or sketch a botanical medallion pattern
To match the photo, keep it airy and balanced. Design features visible in the photo
- A central flower
- Four directional leafy sprays
- Small blossoms scattered in symmetrical placement
- Soft pastel shading and gentle outlines
If you are drawing your own
- Draw a center flower.
- Add four leaf branches radiating outward.
- Place matching clusters in each quadrant.
Tip Keep lines bold enough to see through the cloth. You will be working from the back side while punching.
3. Transfer the design onto the fabric
You have a few safe methods.
- Light box or window: tape the pattern under the cloth and trace.
- Projector: project onto stretched cloth and trace.
- Freehand: draw directly with a fabric marker.
Important Punch needle creates the finished design on the opposite side from where you punch. If your design includes directional elements or text, mirror it before tracing. For symmetrical florals, mirroring is not critical, but it is still a good habit.
Checkpoint You should now see a clear design outline on the punching side. Lines should be simple and not overly detailed.
4. Thread your punch needle and test loop height
Thread the punch needle according to your tool style.
- Make a small test area in the corner outside your rug boundary.
- Punch a few loops and check the front side.
Checkpoint On the front side, you should see consistent loops. If loops pull out easily, your fabric tension may be too loose or your needle depth is off.
5. Establish your background fill in cream
The rug in the photo has a creamy base that makes the pastels glow. Start by punching the background to build structure.
Punching technique basics
- Insert needle straight down until the handle touches the fabric.
- Lift slightly and move a small step, then punch again.
- Keep stitches close so the surface becomes dense and even.
Work in rows, filling around floral shapes but not covering them.
Checkpoint Your background should look like a consistent loop field with no thin spots. If you see fabric showing through, add more rows.
6. Punch the main stems and leaves in greens
To get that botanical illustration feel, use at least two greens.
- Outline stems in a medium sage.
- Fill leaf bodies in a lighter green.
- Add small shadow areas in a slightly darker green near the stem side.
Shading method Instead of blending perfectly, alternate short segments of two greens side by side. The loops will visually mix.
Checkpoint Leaves should read as soft shapes with gentle dimension. If your leaves look stripy, reduce the contrast between your two greens.
7. Punch the large flower shapes in blush and lavender
Work from the center outward. The photo has a watercolor like softness, so keep outlines gentle.
Petal shaping
- Punch an outline in a slightly deeper shade.
- Fill inside with a lighter shade.
- Add a small highlight area with cream or very pale pink.
Color placement tip Use blush and dusty rose for warmer areas, lavender and periwinkle for cooler areas. Balance the rug so each quadrant has both warm and cool florals.
Checkpoint Step back and check symmetry. The rug should feel balanced, with similar color weight in each corner.
8. Add small blossoms and dots for garden scatter
The rug has tiny floral moments that fill space.
- Punch small circles in butter yellow, soft pink, and lilac.
- Add tiny leaf dots in green near blossoms.
Keep these accents consistent and symmetrical, but not perfectly rigid.
Checkpoint The negative space should feel intentional, not empty. If it feels empty, add a few small buds. If it feels crowded, stop and let the design breathe.
9. Define edges and corners for a clean square
The photo shows a soft edge, not fringe. Mark your finished boundary.
- Punch tightly along the boundary line so the edge area is dense.
- Consider a subtle border line in a pale pastel like lavender or blush to frame the design.
Checkpoint Your boundary should look like a clear edge zone. This will help the rug hold shape after finishing.
10. Inspect the front and fix thin areas
Flip the frame and look at the loop side.
- Check for holes where fabric shows through.
- Add punches from the back where needed.
- Trim any stray loops that stick out significantly.
Tip Do not over trim. The photo looks plush and softly uneven in an organic way.
11. Secure the back so loops do not pull out
This is the key finishing step for durability.
Glue method
- Keep the rug on the frame.
- Apply a thin, even layer of rug backing glue or strong craft glue to the punched side.
- Work it into the stitches gently with a plastic scraper or old card.
- Let it dry fully before removing from the frame.
Checkpoint Once dry, the back should feel firm, not tacky. Loops should not pull out when you tug lightly on the front.
12. Cut the rug off the frame and finish the edges
Leave at least 1 to 2 inches of cloth margin beyond your punched boundary.
Edge finishing options Option A fold and glue
- Trim excess cloth to about 1 inch.
- Fold cloth to the back neatly, miter corners.
- Glue down firmly.
Option B whip stitch fold
- Fold edges to the back.
- Whip stitch around with strong thread for extra security.
Option C binding tape
- Apply rug binding tape around the edge for a polished look.
Checkpoint Edges should be smooth and corners should be crisp. If corners bulge, trim bulk and refold into a clean miter.
13. Add a felt or non slip backing
Cut backing fabric to match finished size.
- Glue backing on for a clean underside.
- If you want grip, choose a non slip rug backing fabric.
Checkpoint The rug should lie flat and feel stable on the floor.
14. Final shaping and optional steaming
If the rug has slight waves, you can shape it.
- Lightly steam from the back side.
- Press gently with hands to square corners.
- Let cool flat.
Checkpoint You should now have a square, plush rug with a soft botanical medallion and pastel garden palette like the photo.
Troubleshooting
- My loops are pulling out Fabric is not tight enough or glue is not applied yet. Tighten cloth, punch with consistent depth, and glue the back before removing from the frame.
- The design looks fuzzy and unclear Your stitches may be too long or too spaced. Reduce needle depth slightly and punch closer together, especially on outlines.
- My rug is warping Uneven tension while punching can cause distortion. Work evenly across the rug, rotating sections so you do not overfill one area without balancing others.
- Colors look too bright Choose dustier pastels, or add more cream background around shapes. You can also soften contrast by mixing two close shades in the same flower.
- Corners are bulky after folding Trim extra cloth at the corners and refold into a cleaner miter.
Finishing details
- Weave and tuck any yarn tails into the loop side with a needle.
- Optional upgrade 1 add a thin pastel border line around the outer edge for a framed look.
- Optional upgrade 2 carve details by carefully trimming around major flower shapes to make them pop slightly.
- Optional upgrade 3 add a hanging loop on the back so it can double as wall textile art.
- Optional upgrade 4 add a label tag to the back corner for a handmade signature.
Shop Similar
- Monk cloth for punch needle rug making
- Gripper frame for punch needle projects
- Adjustable punch needle tool set
- Pastel rug yarn for punch needle
- Rug backing glue and felt backing fabric
Style It With
You now have a full Pastel Garden crochet playbook: five soft, springy makes that can live on a sofa, drape over a rocking chair, brighten a window table, or style a shelf like a little textile bouquet. The best part is how flexible this look is. Keep it tonal and calm for an airy cottage vibe, or push the pastels brighter for a more playful, modern mood.
If you make one of these pieces, block it well, photograph it in natural light, and let the textures do the talking. Those scallops and florals are the kind of details that make handmade feel like heirloom. Save your scraps, keep your palette soft, and build your own pastel garden one stitch at a time.