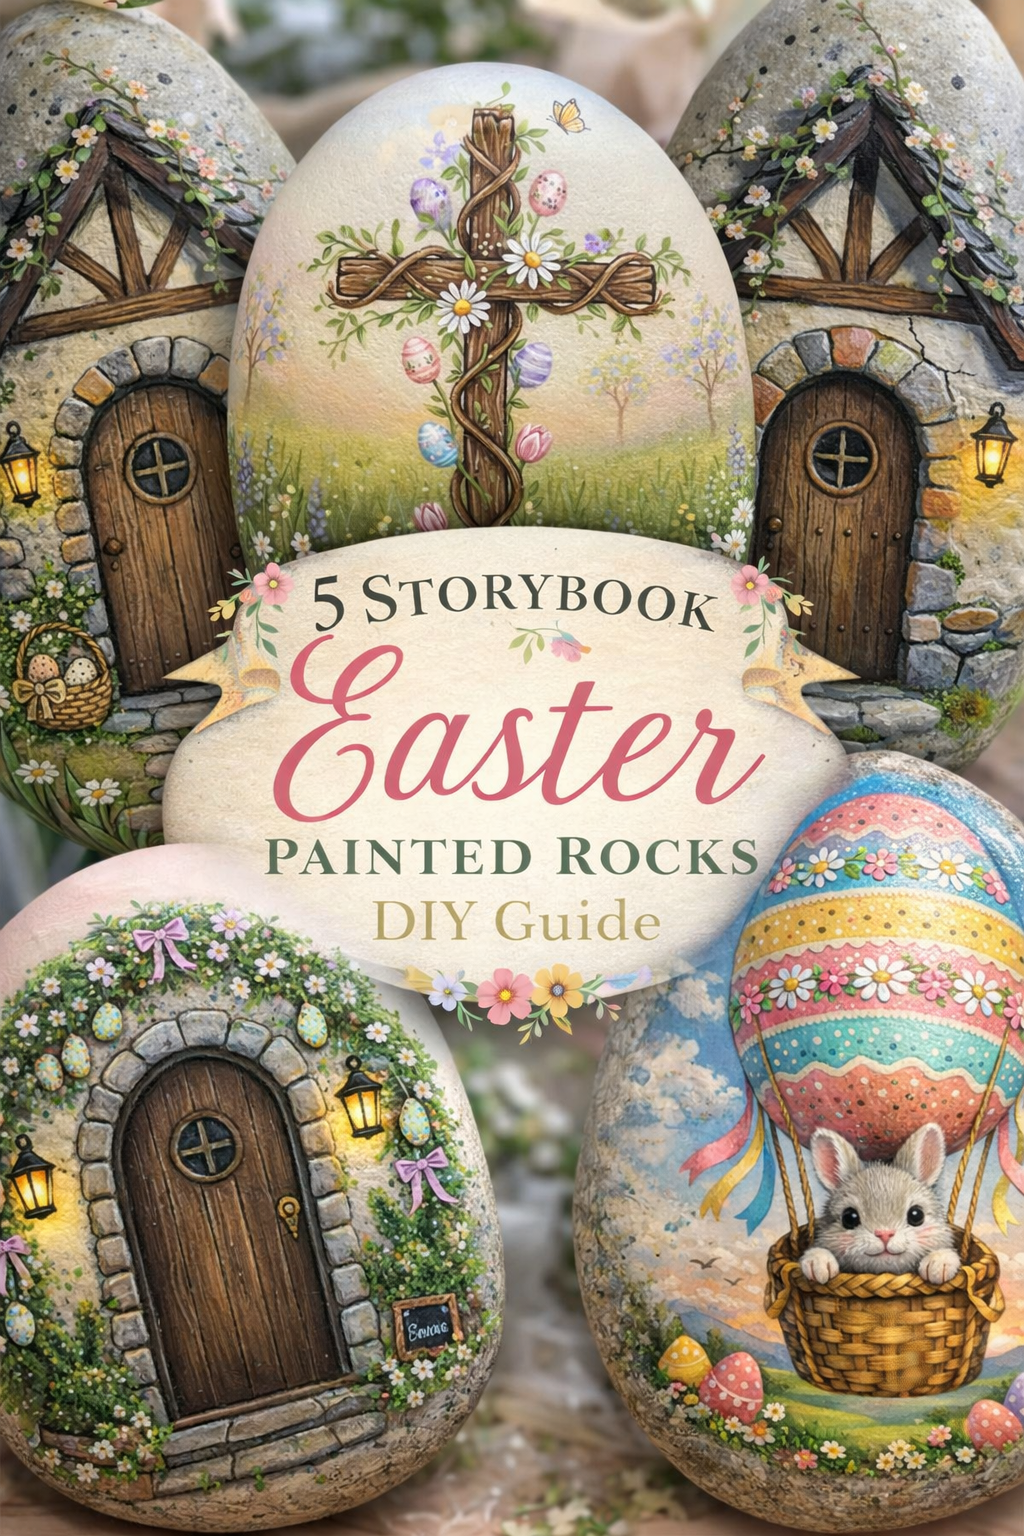
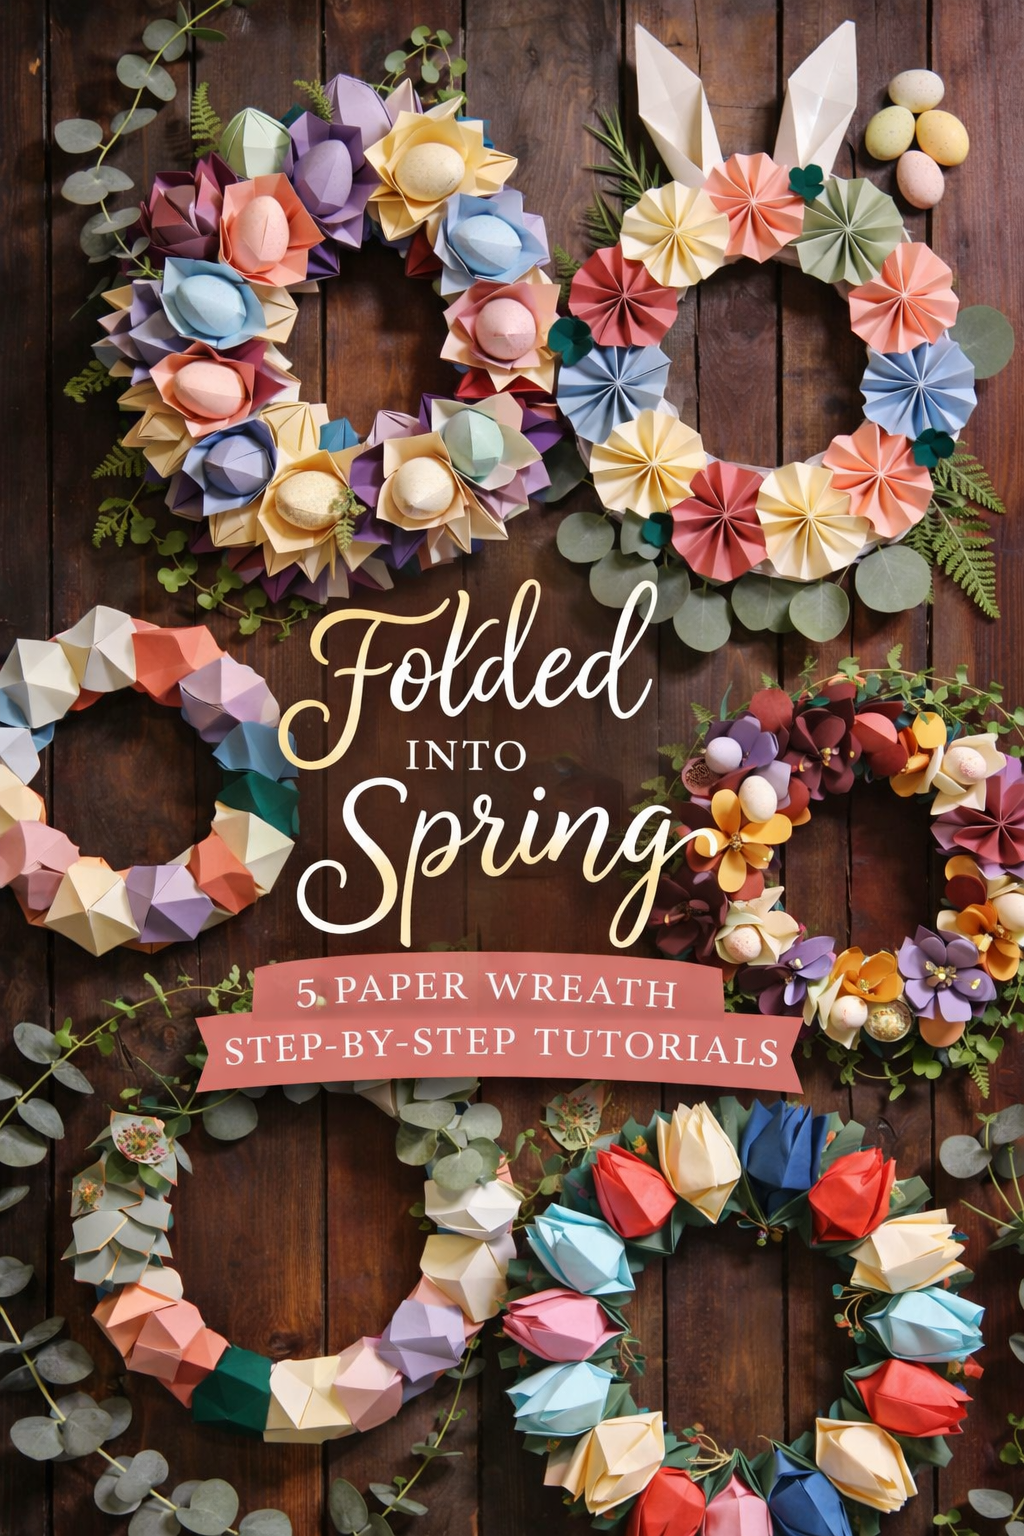
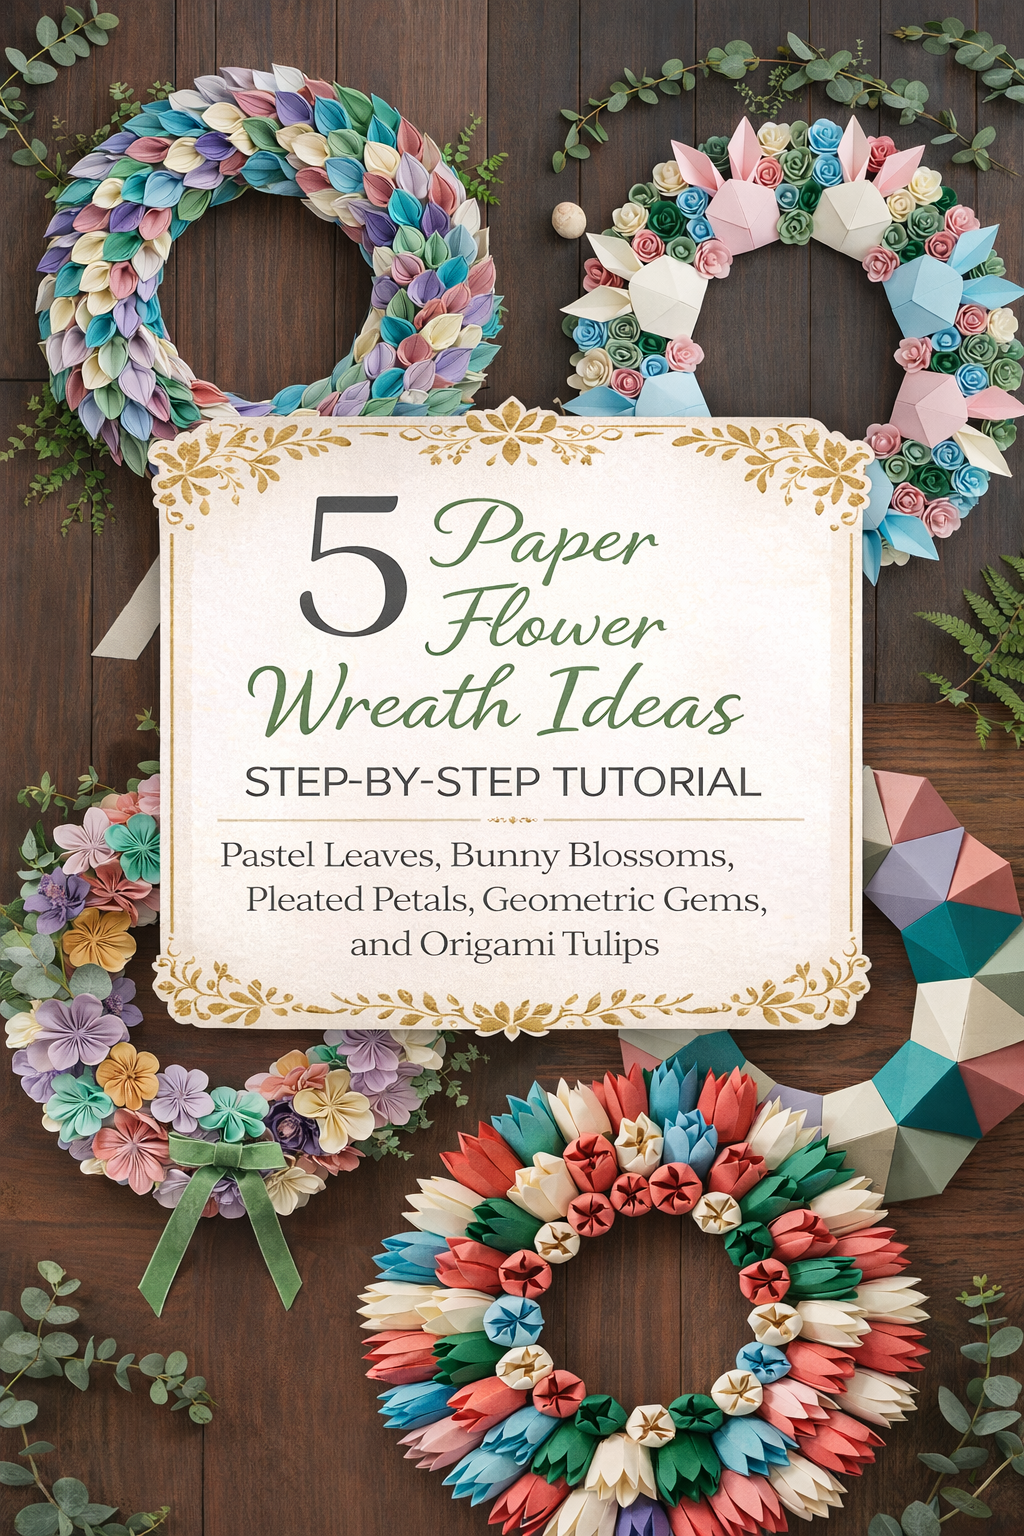
5 Paper Flower Wreath Ideas Step-by-Step Tutorial — Pastel Leaves, Bunny Blossoms, Pleated Petals, Geometric Gems, and Origami Tulips
More like this
Welcome to the happiest kind of paper project, the one that turns a stack of cardstock into a front door moment. These five wreath looks are all about clean folds, soft color, and that satisfying layered dimension that reads high end from across the room. You can go full pastel and airy, lean modern with crisp geometric facets, or make it playful with bunny faces and tiny rose blooms. Each style is designed to be beginner friendly, with simple repeatable shapes that build up into a wreath that looks like it came from a boutique craft market. Pick one design and commit, or mix techniques across the set for a custom ring that feels totally yours. Grab your favorite papers, warm up the glue gun, and let’s make something that instantly makes the space feel lighter, brighter, and more intentional.
💡 Pro Tip: Why I Link to Amazon Search Results and Not One Product
In the Shop the Look and Style it With sections under each bikini, I link to Amazon search results, not single products. Here’s why this matters:
Hot bikinis sell out fast. I don’t want you clicking on a dead link to a sold-out item. Search pages stay updated.
You get more options. Love the vibe but want a different color, cut, or price point? The search results give you everything that matches the look and energy.
I curate each search carefully. These aren’t generic. I spend hours crafting keywords that bring up exactly the kind of bikinis I’d wear—or recommend to my hottest friends.
Support with no pressure. If you click a link, browse, and buy something later, I may earn a small commission at no extra cost to you. That helps me keep bringing you curated collections like this one—powerful, seductive, and always fresh.
So dive in. Click through. Try something risky. These aren’t just bikinis—they’re commands, statements, and maybe even your new favorite weapon of choice.
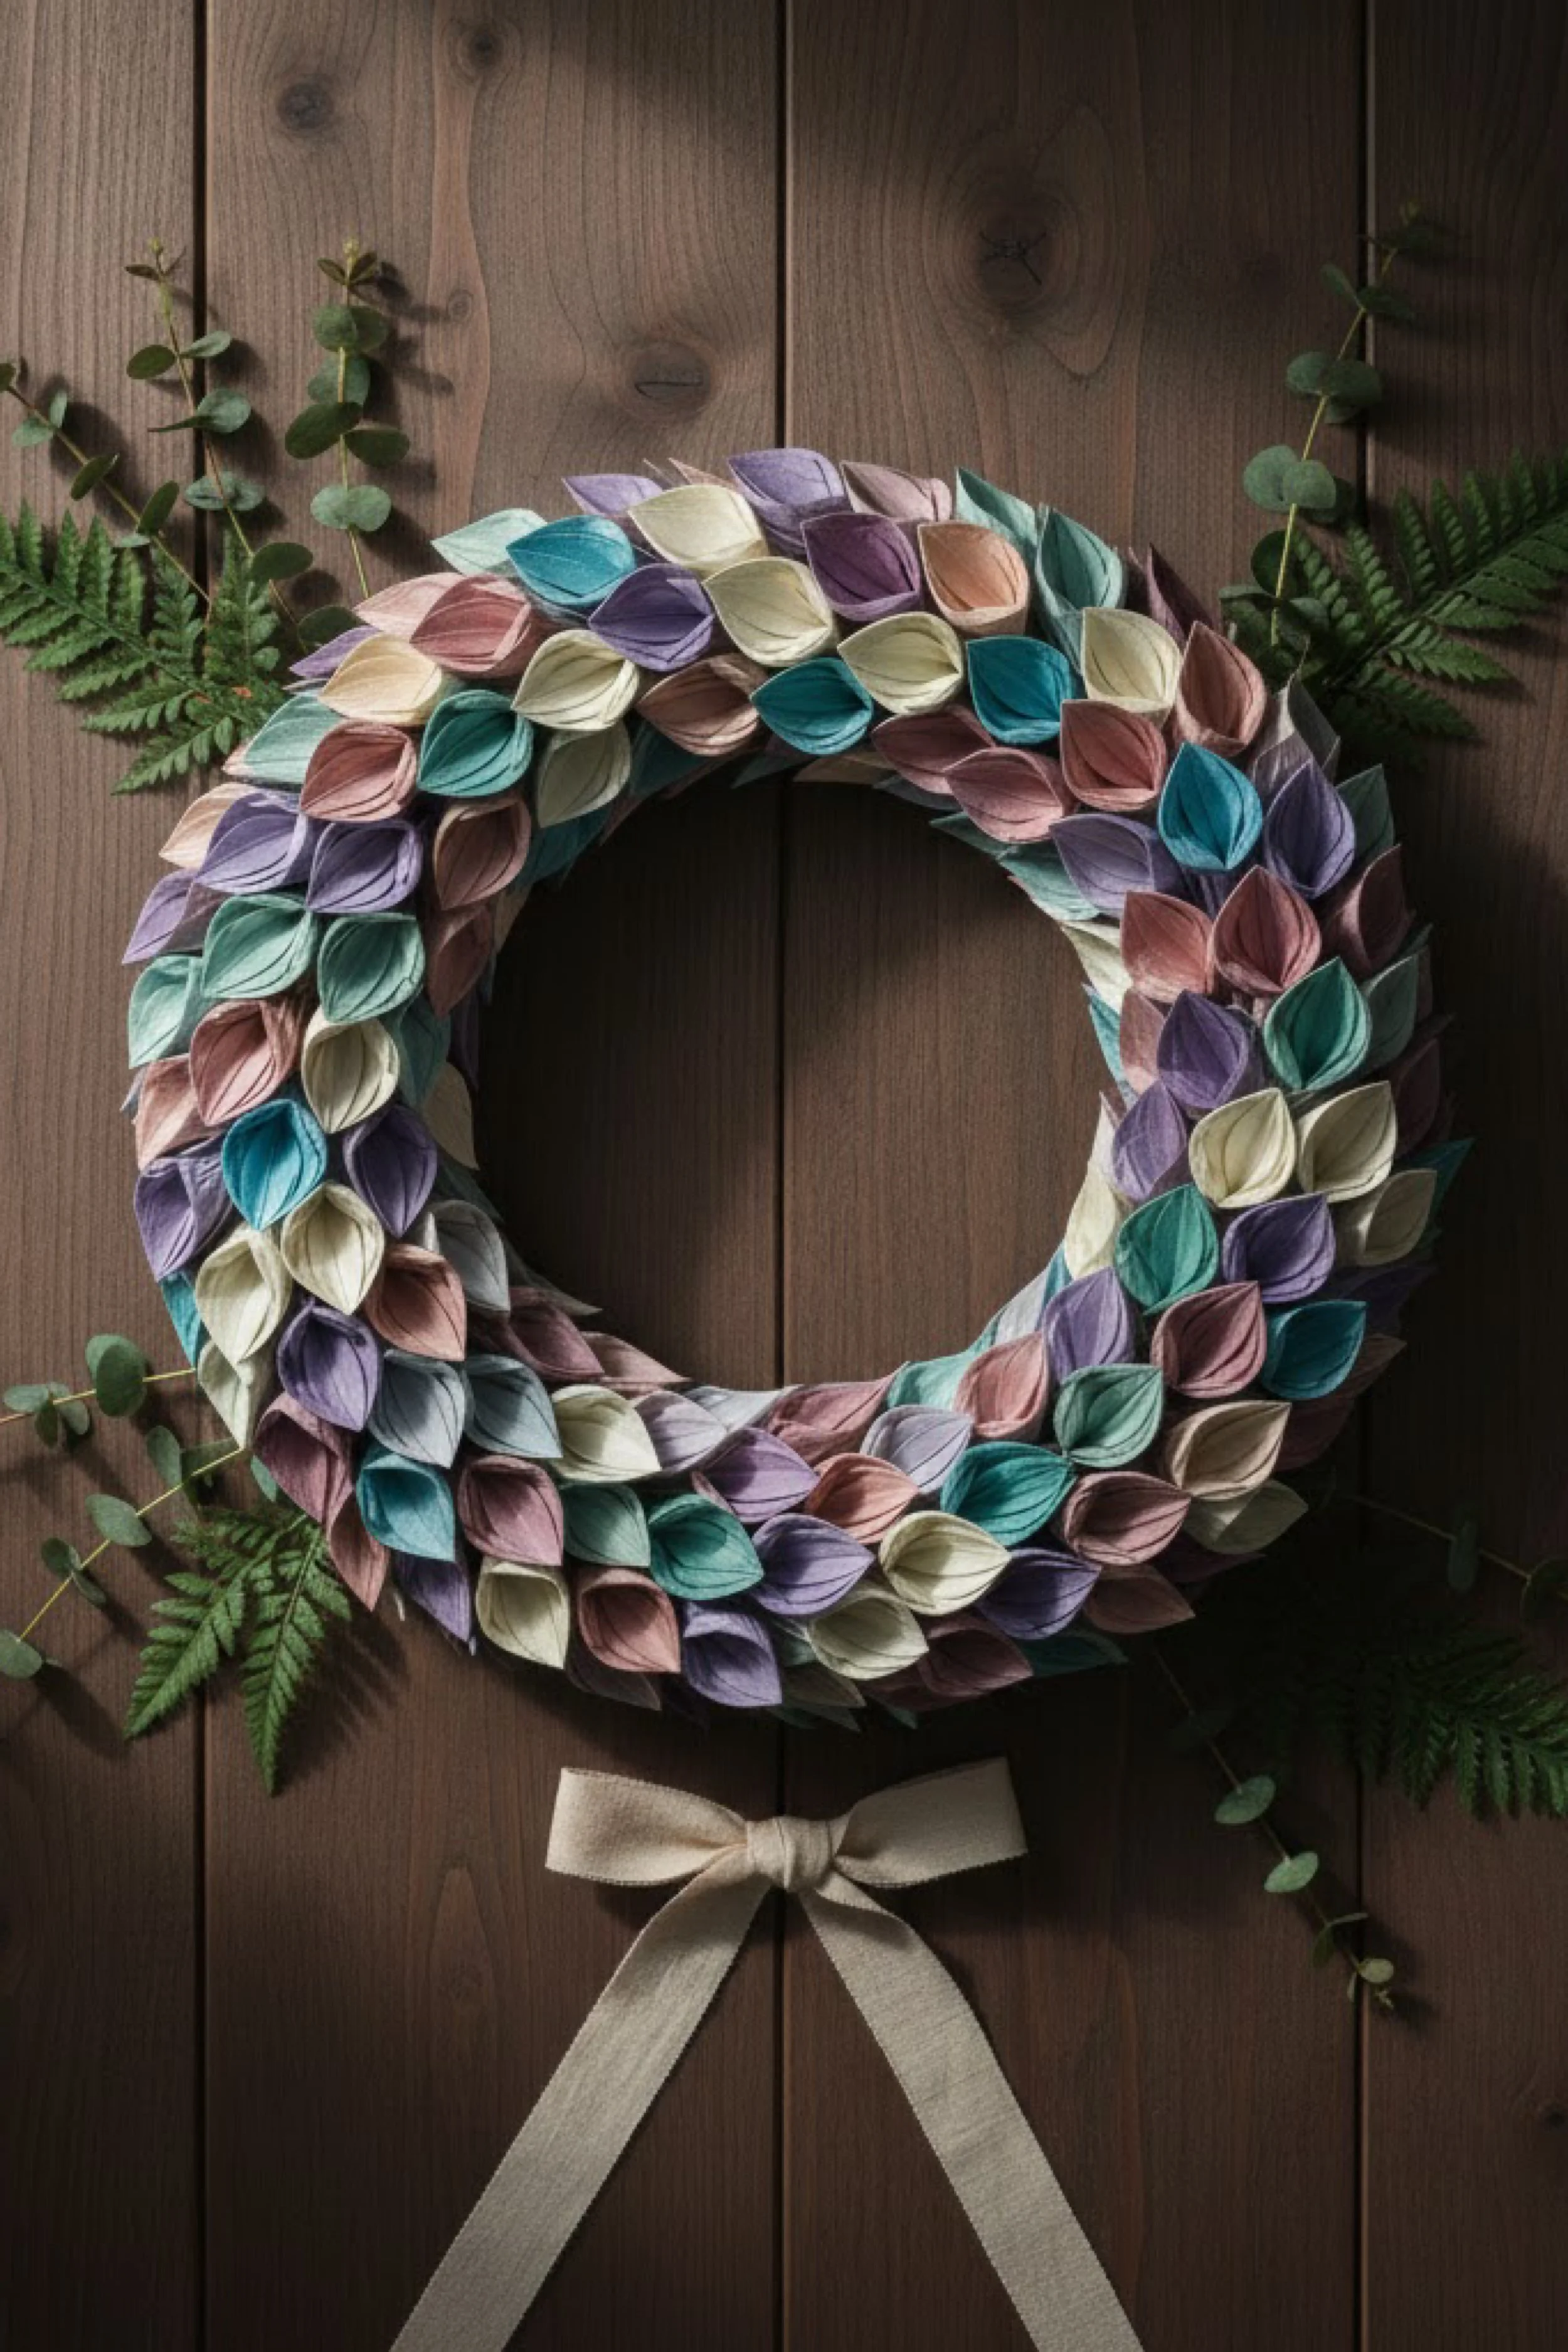
Pastel Paper Leaf Wreath Step-by-Step Tutorial — A Layered Folded Look With a Soft Linen Bow
What you’re making
This project recreates that lush, layered wreath made entirely of folded paper leaves in a calm pastel palette. The finished look is dimensional and botanical, with each little leaf standing up and catching light like real foliage. You will build a sturdy ring base, fold a simple leaf unit many times, then overlap and layer the leaves so the wreath looks full from every angle.
Materials + tools list
- Wreath ring base, 12 to 16 inch foam, straw, or sturdy cardboard ring
- Cardstock or heavy craft paper, assorted pastel colors like sage, mint, teal, lavender, blush, dusty rose, cream, and pale blue
- Paper trimmer or scissors
- Pencil and ruler
- Bone folder or the back of a spoon for crisp creases
- Hot glue gun and glue sticks
- Craft glue or tacky glue for optional reinforcement
- Optional double sided tape for clean folds
- Ribbon for the bow, linen look or cotton, 1.5 to 2.5 inches wide
- Floral wire or strong string for hanging
- Optional faux greenery sprigs, eucalyptus, fern, or ivy for styling accents
Finished size + customization notes
A 12 inch ring will read like a medium door wreath, while 14 to 16 inch feels more like a statement piece. You can keep the palette very soft and springlike as shown, or push it moodier with dusty jewel tones. The fullness depends on how many leaves you make and how tightly you overlap them. If you want a slimmer modern look, use fewer leaves and leave a little ring showing between clusters.
Step-by-step instructions
Choose your ring and plan your coverage
Decide whether you will cover the entire ring, including the inner edge, or only the front face. For the most finished look like the photo, aim to cover the front face and slightly wrap into the inner edge. Visual checkpoint: when you hold the ring at eye level, you should not see a bare strip of base from the front.Cut your paper into consistent rectangles
For a 12 to 14 inch wreath, cut rectangles about 2 inches by 3 inches. For a 16 inch wreath, 2.25 inches by 3.5 inches looks great. Consistency matters more than the exact size. Cut a small test stack first. Visual checkpoint: stack ten pieces and tap them on a table. Edges should align neatly.Fold one leaf unit and lock in the shape
Take one rectangle and fold it lengthwise, bringing the long edges together like closing a book. Crease firmly with a bone folder. Open it back up. Now fold the two long edges inward toward the center crease so they meet in the middle, forming a long narrow kite shape. Crease well. Finally, fold the piece back along the original center crease so the two folded flaps are inside. You now have a puffy leaf with a center ridge. Pinch the bottom end together to form a pointed base. Visual checkpoint: the leaf should have a raised center vein and two curved sides.Add a natural curve and volume
To mimic the photo’s dimensional leaf layers, gently curl the leaf outward by running your thumb along each side, or lightly shaping it over a marker barrel. Do not flatten the center ridge. Visual checkpoint: set the leaf on the table. It should sit with a slight arch rather than laying perfectly flat.Batch fold your leaves in color families
Make a pile in each color. A 12 inch wreath often needs 140 to 200 leaves depending on overlap and thickness. A 16 inch wreath can take 220 to 320. Work in batches of 20 to keep the rhythm. Visual checkpoint: when you hold a handful, they should look like a little bouquet of paper foliage.Mark the ring into sections for balanced color
Lightly pencil the ring into quarters. This helps you distribute colors evenly instead of accidentally clustering one shade. Think of the photo as a soft rainbow of pastels, with no harsh blocks. Visual checkpoint: each quarter should contain a mix of cool and warm shades.Start your first row along the outer edge
Plug in your hot glue gun. Apply a small bead of hot glue to the pointed base of one leaf. Press it onto the ring near the outer edge, angled slightly outward so the tip points away from the center opening. Hold for a few seconds. Place the next leaf overlapping the first by about one third. Continue around the ring. Visual checkpoint: you should see a scalloped, shingled edge forming around the outside.Build a second row to create the layered depth
Begin the next row slightly inward from the first. Angle these leaves so they sit between the gaps of the first row, like brickwork. Overlap generously. This is where the wreath becomes plush. Visual checkpoint: look from the side. You should see two visible layers, with the second layer peeking between the first.Fill the inner edge for that wrapped look
Once the front face is mostly covered, add a partial row that tucks into the inner edge of the ring. Angle these leaves slightly toward the center opening. If you are using a foam ring, you can press the glued base into the foam a little for extra hold. Visual checkpoint: looking straight on, the inner edge should read like a soft leaf border, not a sharp exposed ring.Adjust color placement as you go
Step back every 15 to 20 leaves. If one color is dominating, swap to a different shade for the next cluster. A pleasing approach is to repeat each color in small bursts around the wreath so the palette feels woven, not striped. Visual checkpoint: squint at the wreath. The colors should look evenly sprinkled.Create extra fullness where the wreath naturally looks thin
The top and bottom often look thinner because your eyes read the circle differently there. Add a few extra leaves at those points, layering three deep. Visual checkpoint: rotate the wreath in your hands. The thickness should feel consistent all the way around.Secure any loose tips and refine the silhouette
After the glue cools, lightly tap around the wreath and tug gently on a few leaves. If any pop loose, re glue with a slightly larger bead at the base. If some leaves stick out too far, you can tuck them inward and add a dot of glue where they touch a neighbor. Visual checkpoint: the outer edge should feel intentionally fluffy, not spiky.Make the soft linen bow
Cut a long length of ribbon, about 36 to 48 inches depending on how dramatic you want the tails. Form a classic bow with long tails, then tie tightly. If you want the bow to look extra polished, wrap a small center band around the knot and glue it in place on the back. Visual checkpoint: the bow should look relaxed and soft, with tails that hang straight.Attach the bow and hanger
Glue the bow to the bottom of the wreath where the photo places it. For extra security, add a small loop of floral wire through the ring and around the bow center, twisting it tight on the back. Add a hanging loop at the top using wire or strong string. Visual checkpoint: lift the wreath by the hanger. The bow should not shift.Optional styling greenery accents
If you love the styled look with eucalyptus and fern around the wreath, you can tuck a couple faux sprigs into the wreath itself, or simply style them in your photos. If inserting into the wreath, wire the stems and hide the wire under leaves. Visual checkpoint: greenery should look like it emerges naturally from under the paper, not perched on top.
Troubleshooting section
Too flat and not as dimensional as the photo
Use heavier cardstock and add more curl to each leaf. Also increase overlap so at least half of each leaf is covered by the next.
Leaves popping off the base
Hot glue needs a clean surface and enough contact area. Add a slightly longer glue bead at the base, and hold each leaf for a full count of five. If your base is slick, wrap it in a layer of masking tape first to give the glue something to grip.
Wreath looks patchy with visible base peeking through
You likely need one more row, especially along the inner edge. Add small filler leaves tucked in between existing ones. You can also angle leaves more toward the gaps rather than following a perfect circle.
Colors look clumpy
Pause and distribute each color more evenly. A quick fix is to add a few leaves of the missing colors on top in thin spots, tucking their bases under existing layers so it looks intentional.
Bow droops or twists
Use wired ribbon for more structure, or reinforce the center knot with a hidden piece of floral wire. If the bow still shifts, anchor it with two glue points, one under each side loop.
Finishing details section
Let the wreath cool fully before hanging so the glue sets hard. If you are gifting it or storing it, keep it in a shallow wreath box or a large garment bag to protect the paper from crushing. For extra durability in humid climates, lightly mist the finished wreath with a clear matte sealer, testing first on a scrap leaf to ensure it does not darken the paper. If your wreath will hang on a busy door, consider adding a soft felt backing to the ring to prevent scuffs and to help it sit flat.
Optional upgrades you can add Add a monogram in the center using a thin wooden letter painted white Tuck tiny faux berries in pale cream for a spring garden vibe Create an ombre gradient around the ring, moving from mint to lavender to blush Use pearl headed pins on a foam base to reinforce each leaf for long term hold
Shop Similar
- Pastel cardstock paper pack
- Foam wreath ring 14 inch
- Hot glue gun mini high temp
- Linen look ribbon wide
- Bone folder for paper creasing
Style It With
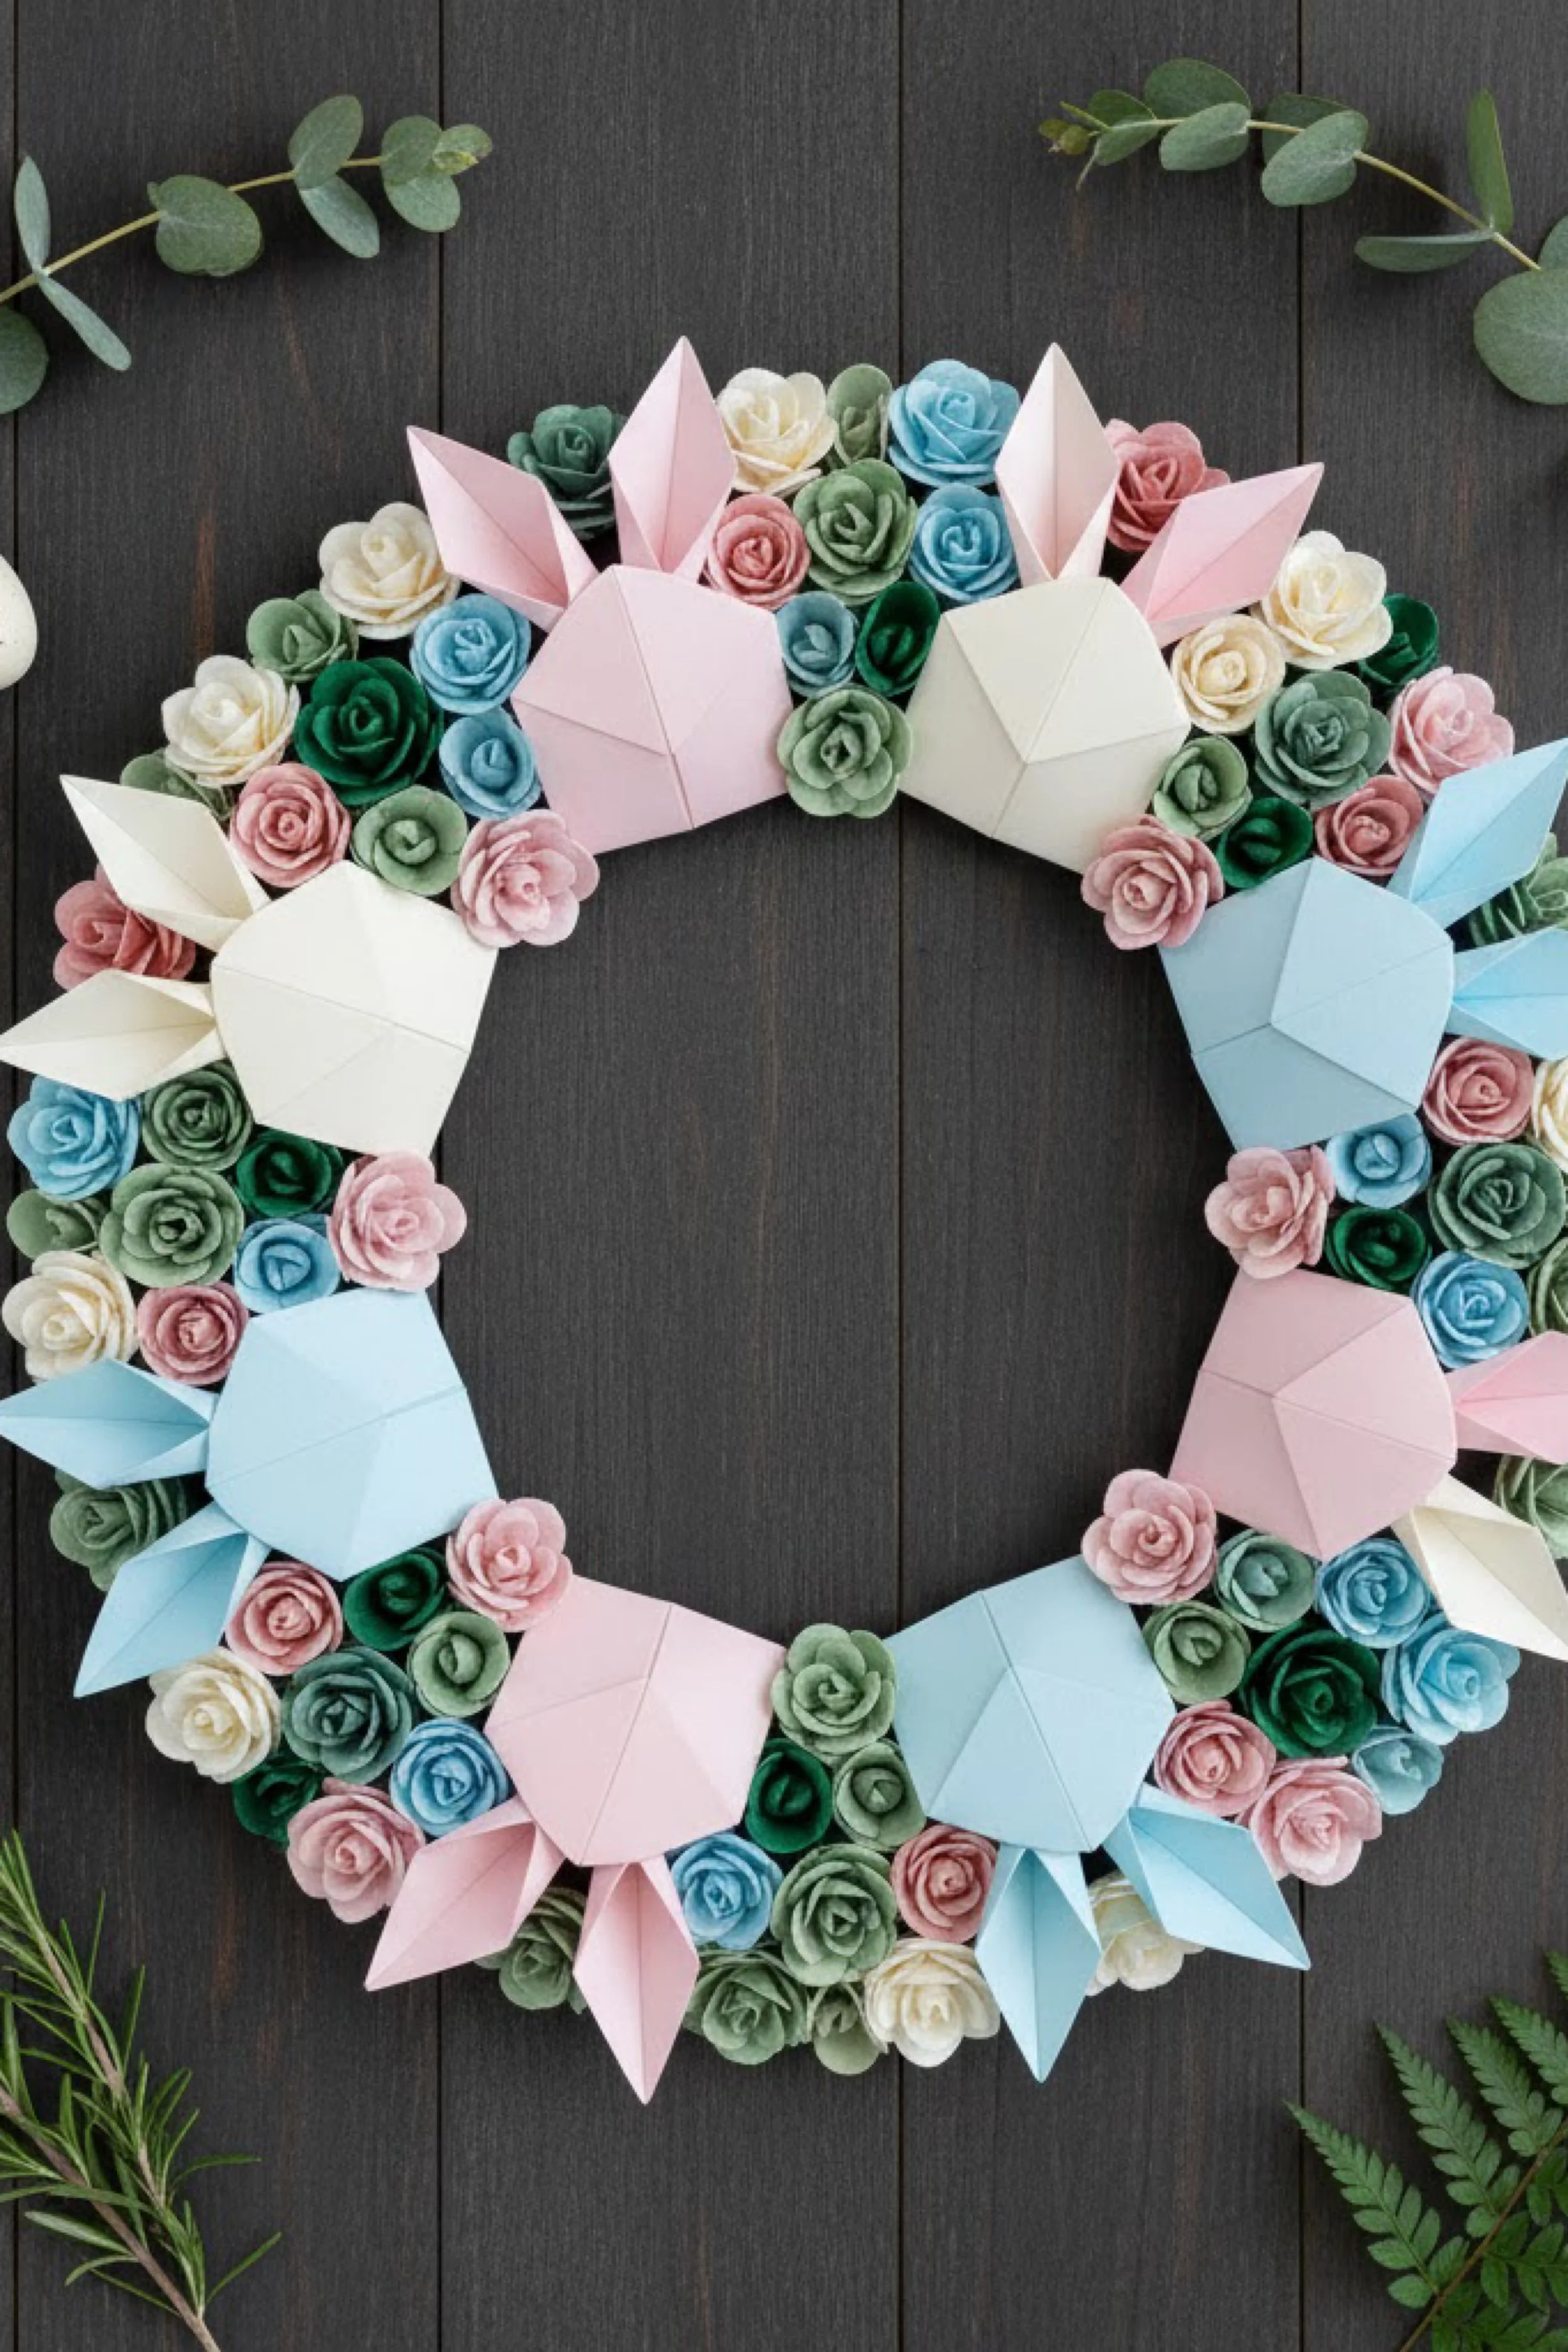
Bunny Blossom Paper Wreath DIY Guide — Geometric Bunny Faces and Rolled Rose Flowers
What you’re making
This tutorial recreates a whimsical spring wreath that mixes two paper techniques for maximum charm: chunky geometric bunny faces with folded ears, plus a dense bed of rolled paper roses in pastel and garden greens. The final look feels modern and sculptural but still sweet, with those bunny faces peeking out like hidden little surprises.
Materials + tools list
- Wreath ring base, 12 to 16 inch foam, straw, or sturdy cardboard
- Cardstock in pastel pink, pale blue, cream, soft sage, and deeper greens
- Green cardstock for foliage filler
- Paper for roses, assorted pastels and greens, medium weight works best
- Scissors and or a craft knife with cutting mat
- Ruler and pencil
- Bone folder for crisp folds
- Hot glue gun and glue sticks
- Tacky glue for rose centers if you prefer slower setting
- Optional quilling tool or skewer for rolling roses
- Optional circle punch for quick rose spirals
- Floral wire or strong string for hanging
- Optional foam dots for extra lift under bunny faces
Finished size + customization notes
A 14 inch wreath is the sweet spot for this design because the bunny faces need room to read clearly. You can make three bunnies like the photo, or use four smaller bunnies spaced evenly. If you want a softer look, keep the roses mostly pastel and use pale greens. If you want more contrast, add a few deep forest green roses scattered around.
Step-by-step instructions
Prep your ring and choose the bunny placement
Decide where your bunny faces will sit. The photo places three bunnies across the upper half and sides, leaving the center open. Lightly pencil three placement marks on the ring so spacing stays balanced. Visual checkpoint: when you hold the ring upright, the bunnies should feel evenly distributed, not clustered on one side.Build a rose spiral template
The easiest rose is a spiral cut. Draw a 3 to 3.5 inch circle on cardstock, then draw a spiral from the outside in, about a quarter inch wide. Cut along the spiral line. Make one test rose first. Visual checkpoint: your spiral strip should be consistent in width so the rose coils smoothly.Roll your first rose
Start at the outer end of the spiral and begin rolling tightly. Keep the top edge aligned so petals sit at the same height. When you reach the center, let the roll relax slightly so it blooms. The spiral end forms a little base tab. Glue the base tab to the bottom of the rose. Visual checkpoint: from the top, you should see a rosebud center and a gradual swirl of petals.Batch make roses in multiple sizes
Make a mix of 2.5 inch roses for filler and 3.5 inch roses for statement blooms. The photo uses many small roses packed tight, with occasional slightly larger ones. Aim for 60 to 120 roses depending on wreath size and how dense you pack. Visual checkpoint: when you line up ten roses, they should vary slightly, like a real garden cluster.Add leaf filler pieces for depth
Cut simple leaf shapes from green cardstock, about 1 to 1.5 inches long. Score a center vein and gently pinch to give a slight curve. These leaves will fill gaps between roses and help the wreath look lush. Visual checkpoint: the leaf should arch slightly and not lie flat.Create the geometric bunny face pattern
The bunny faces in the photo look like low poly paper heads. You can recreate this with a simplified faceted form. Cut a bunny face base shape like a rounded pentagon, about 4 to 5 inches wide. Then cut several triangle and trapezoid panels that will fold inward to create facets. Score fold lines before folding. If you prefer a simpler version, make a shallow box shape: a front face plus side panels that fold back. Visual checkpoint: the bunny face should read as dimensional with visible panel lines, not just a flat cutout.Fold and assemble the bunny ears
Cut two long ear shapes, about 4.5 to 6 inches tall depending on bunny size. Score a line down the center of each ear and pinch slightly so the ear forms a gentle V shape. Attach ears to the back of the bunny head with hot glue. Visual checkpoint: ears should stand upright and angle slightly outward, like the photo.Add subtle shading using paper choice
To mimic the photo’s faceted look, use two tones for each bunny: one main tone and one slightly darker or lighter tone for a couple panels. For example, a pale blue bunny can have two panels in slightly deeper blue. Visual checkpoint: you should see soft tonal shifts that emphasize the facets.Start building the rose bed on the wreath
Begin gluing roses along the outer edge of the ring. Place them tight, letting them touch, then fill the inner edge. Work in small sections so glue stays hot. Alternate colors and greens. Visual checkpoint: you should not see the base between roses.Create pockets for bunny faces
When you reach a bunny placement mark, leave a space the width of the bunny face. Build roses around that space like a frame. You want the bunny to nest into the flower bed. Visual checkpoint: the opening should look intentional and surrounded by roses like a wreath window.Attach the bunny faces with lift
Add a few foam dots or rolled cardstock spacers behind the bunny face to lift it slightly above the roses. Glue the bunny in place, pressing the bottom edge into the rose bed. Reinforce from the back if possible with a little glue where the bunny meets the ring. Visual checkpoint: the bunny should look like it is emerging from the flowers rather than sinking flat.Fill around the bunny edges
Add smaller roses and green leaves right around the bunny to hide any gaps. You can tuck leaves behind the ears too for extra depth. Visual checkpoint: there should be no visible base or awkward empty space at the bunny edges.Balance the color story
Step back and check for clumps. The photo has a balanced mix of pink, blue, cream, and greens. If you see a heavy patch of one color, add a few roses of other colors near it. Visual checkpoint: the wreath should feel evenly sprinkled with color.Add final detail roses and micro filler
For that packed, luxurious look, make a few mini roses from 2 inch circles and glue them into tiny gaps. Add a few single leaves where you want a little breathing space. Visual checkpoint: you should see a dense floral surface with no flat areas.Add hanging loop
Attach wire or strong string to the back of the ring. Make sure it is centered so the wreath hangs level. Visual checkpoint: hold the wreath by the loop and confirm the bunnies sit upright, not tilted.
Optional upgrades you can add Add tiny paper berries between roses for extra texture Add a ribbon bow at the bottom in a matching pastel Add a name tag or small greeting plaque that sits inside the center opening Add subtle glitter to a few rose edges using a glue pen and fine glitter for a sparkling spring finish
Troubleshooting section
Roses look messy or uneven
Your spiral width may be inconsistent. Cut slower and keep the spiral strip even. When rolling, keep tension steady and do not let the top edge slip downward.
Roses flatten over time
Use slightly heavier cardstock and glue the base tab firmly. You can also add a small cardstock circle under each rose as a base for stability.
Bunny faces collapse or bend
Score all fold lines cleanly and reinforce inside seams with an extra bead of glue. If using very light paper, switch to heavier cardstock.
Bunny faces do not stand out
Add more lift behind them using foam dots or thicker spacers. Also reduce roses right behind the bunny so the face is not buried.
Visible base peeking through
Add mini roses and small leaves. The key is to use smaller elements for tiny gaps instead of trying to force a large rose into a tight space.
Finishing details section
Let the wreath rest flat for 20 minutes so all glue fully sets. If you want the paper to resist humidity, lightly mist with clear matte sealer in very thin coats, testing first. Store the wreath in a box with tissue paper around the bunnies so ears do not bend. If traveling with it, place a sheet of bubble wrap loosely over the surface, not pressed tight.
Shop Similar
- Paper rose making kit supplies
- Pastel cardstock assortment
- Quilling tool slotted roller
- Foam wreath ring 14 inch
- Foam adhesive dots for crafts
Style It With
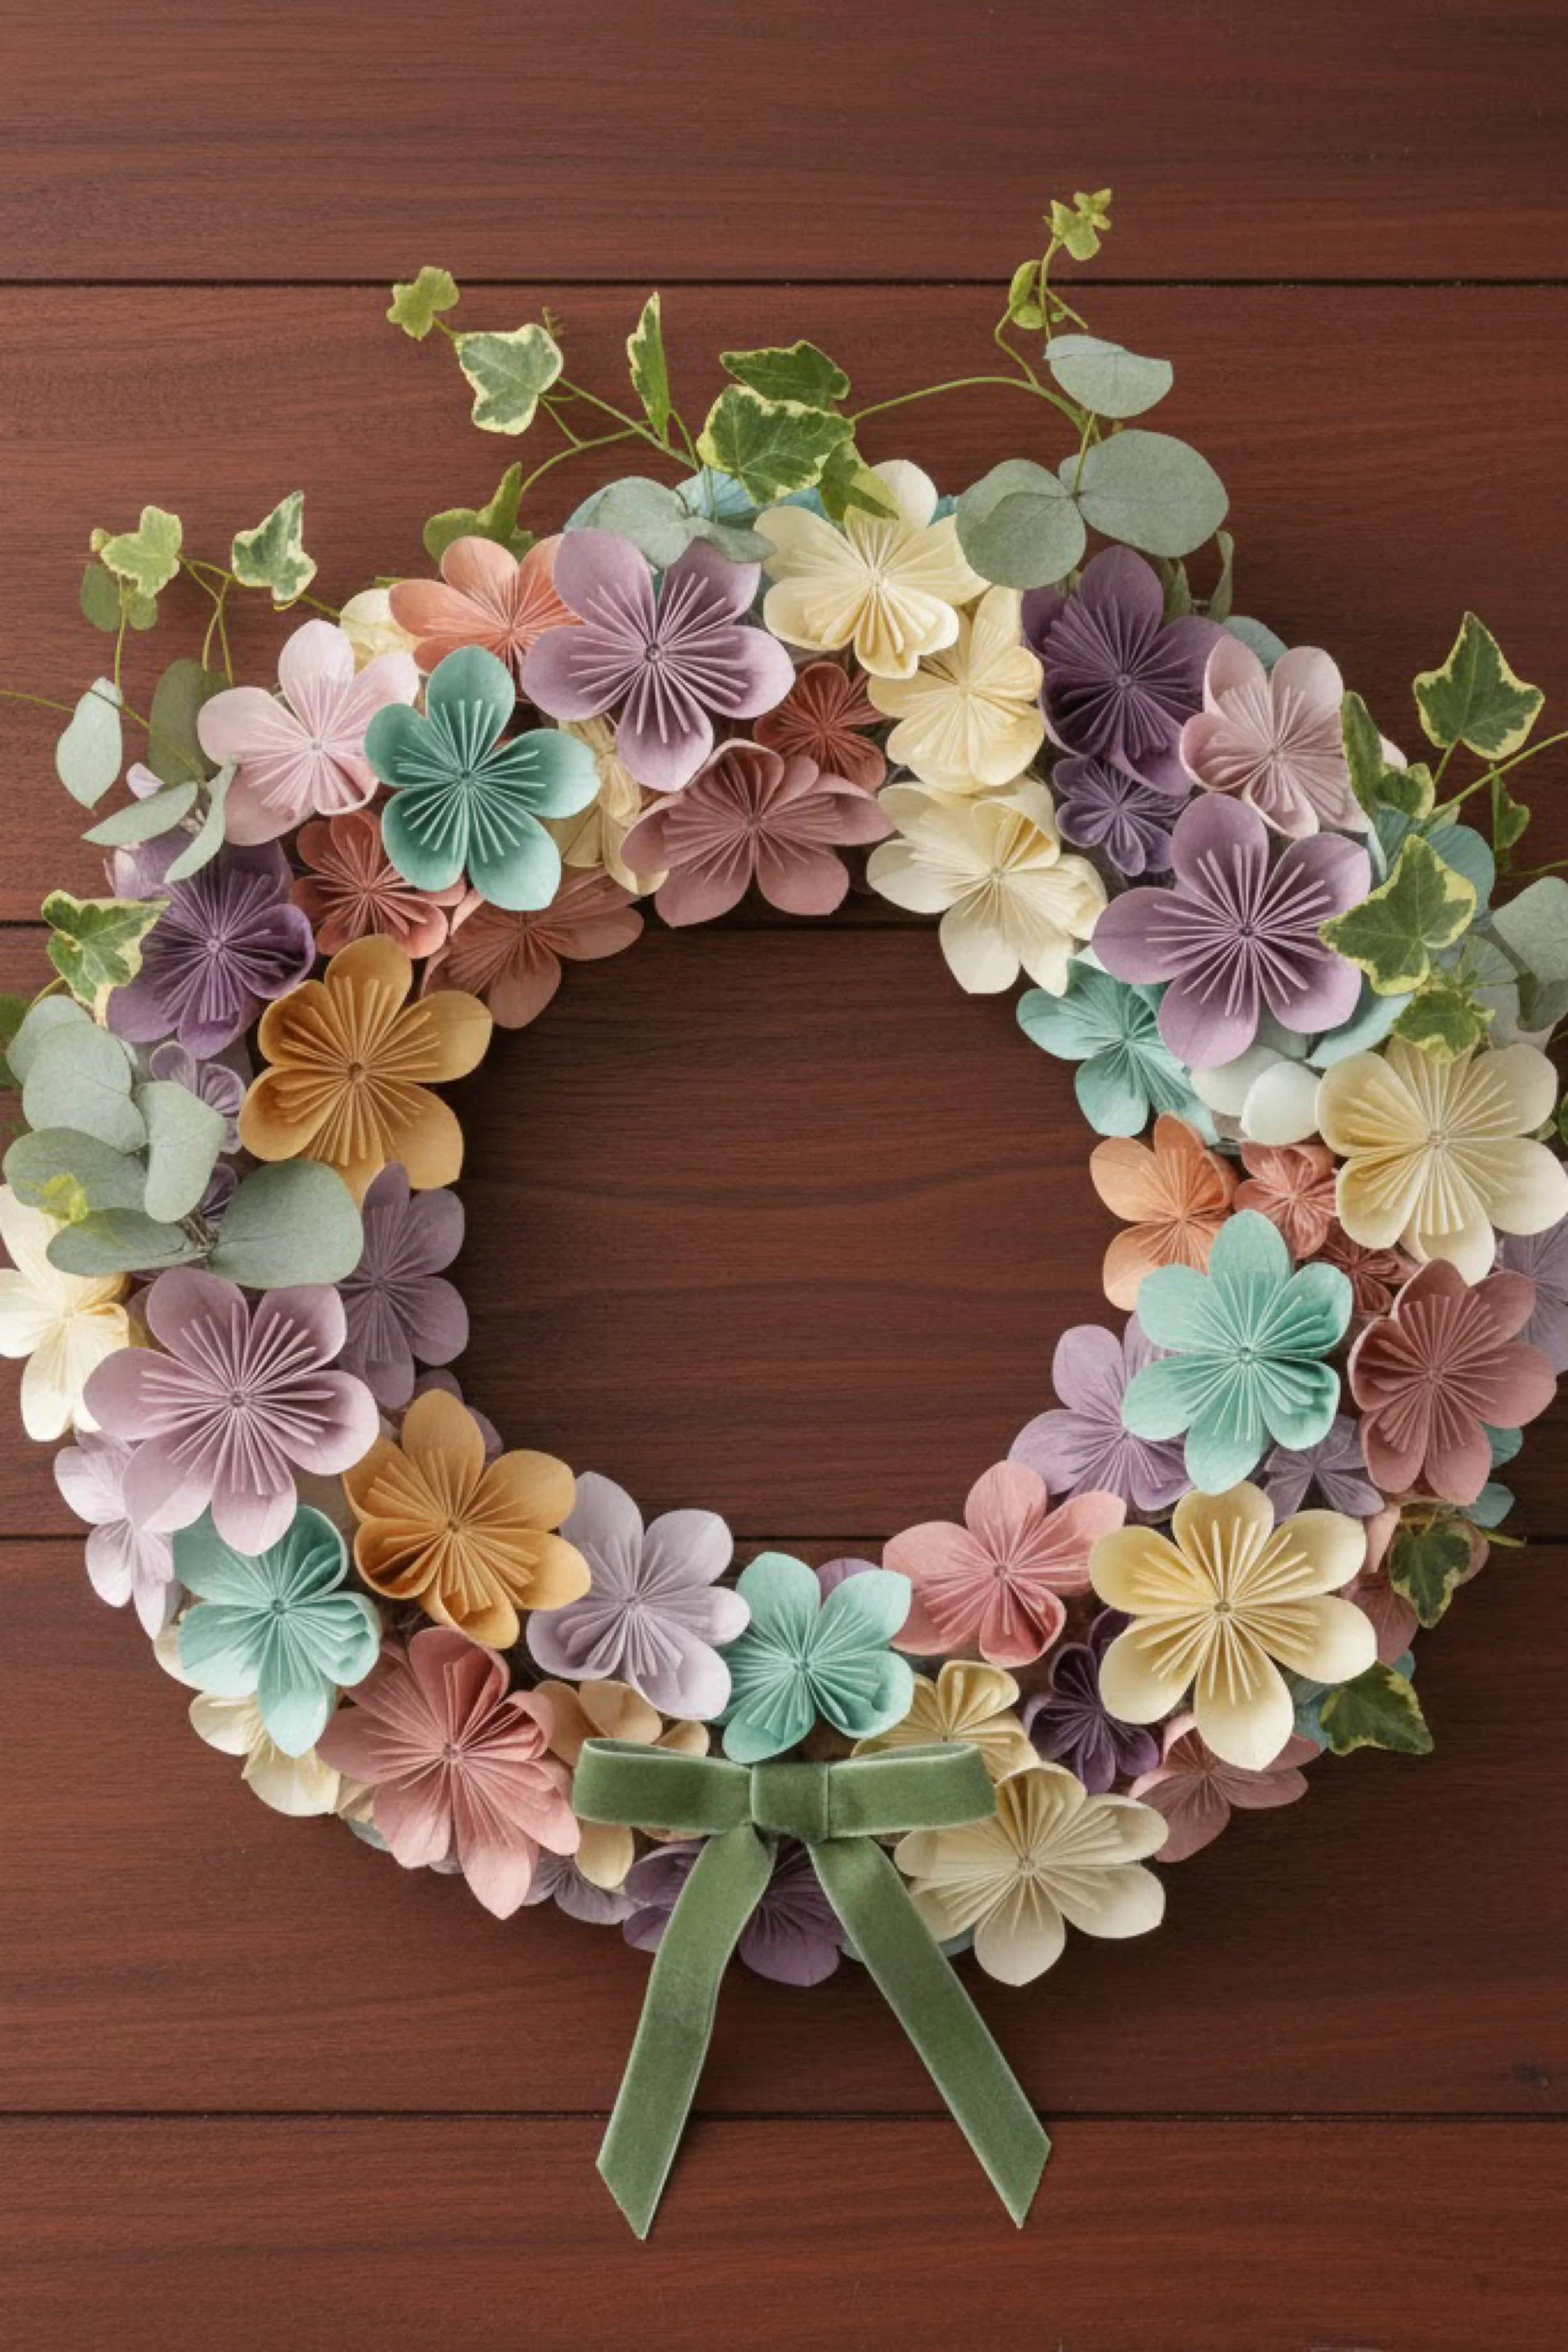
Pleated Petal Paper Flower Wreath How-To Guide — Soft Spring Blooms With Ivy and a Velvet Bow
What you’re making
This wreath recreates a sophisticated paper flower look made from pleated, fan folded petals that form full blossoms across the ring. The palette is gentle and spring ready, with layered flowers in blush, buttercream, lavender, sage, and soft teal, plus trailing ivy and eucalyptus for an airy garden finish. A velvet ribbon bow at the bottom gives it that boutique, styled look.
Materials + tools list
- Wreath ring base, 12 to 16 inch
- Cardstock or medium weight craft paper in assorted pastel colors
- Green paper for leaves, plus optional faux ivy and eucalyptus stems
- Scissors and or paper trimmer
- Ruler and pencil
- Bone folder for crisp folds
- Hot glue gun and glue sticks
- Tacky glue for slower assembly if preferred
- Small binder clips or clothespins to hold folds while glue sets
- Optional brad fasteners or small paper circles for flower centers
- Ribbon for bow, velvet or velvet look, 1.5 to 2.5 inches wide
- Floral wire or strong string for hanger
Finished size + customization notes
The photo reads like a 14 to 16 inch wreath with large flowers and plenty of negative space between greenery. For a fuller flower heavy wreath, add more blossoms and reduce greenery. For a cleaner modern style, limit to two or three flower colors and keep leaves minimal. Flower size is easy to adjust by changing the width of your folded strip.
Step-by-step instructions
Plan your flower sizes and count
You will create several large blossoms and a handful of medium ones. For a 14 inch wreath, aim for 10 to 14 flowers total. Visual checkpoint: lay paper circles on your table to represent flower placement. The ring should look balanced with flowers spaced like a garden cluster.Cut paper strips for pleated petals
Each flower is made from a strip that is accordion folded, then shaped into a circle. For a large flower, cut a strip about 2 inches wide and 18 to 22 inches long. For a medium flower, 1.5 inches wide and 14 to 18 inches long. Exact length depends on how full you want the bloom. Visual checkpoint: longer strips yield fuller flowers with more pleats.Accordion fold the strip
Fold the strip back and forth in even pleats, about half inch each. Use a ruler to guide the first few folds. Crease each fold sharply with a bone folder. Visual checkpoint: your folded strip should look like a neat paper fan with crisp edges.Secure the folded fan into a circle
Bring the two ends together to form a ring of pleats. Add hot glue to one end and press to the other end to close the circle. Hold until set. Visual checkpoint: you should have a pleated circle that wants to spring open like a rosette.Create the petal look by shaping the pleats
This wreath’s flowers look like four or five petaled blooms rather than simple rosettes. You can achieve this by gently pinching sections of the pleated circle outward into rounded petal lobes. Use your fingers to press the pleats into curved segments. If you want more defined petals, glue small clusters of pleats together at the outer edge to form petal groupings. Visual checkpoint: from above, the flower should read like a blossom with distinct petal zones.Add a center to lock the shape
Cut a small circle of paper, about 1 to 1.25 inches wide, and glue it to the center front to hold the pleats down. You can add a second circle on the back for strength. For a more detailed center, add a tiny rolled paper coil or a small folded fringe piece. Visual checkpoint: the center should look clean and hide the meeting point of pleats.Make a mix of colors and sizes
Repeat the folding and shaping process to create your full flower set. Mix soft lavender, blush, cream, sage, and teal like the photo. Make at least two flowers in each of the dominant tones so the palette feels repeated and intentional. Visual checkpoint: line your flowers up. You should see variety, but the palette should feel cohesive.Create simple leaves for under layers
Cut leaf shapes from pale green and deeper green paper. Score a center line and pinch slightly for dimension. Make some small leaves and some medium. Visual checkpoint: leaves should look slightly lifted, not flat.Prep your wreath ring surface
If your ring is foam, you are ready. If cardboard, wrap it in kraft paper or masking tape so glue adheres well. Visual checkpoint: glue should grab quickly and not peel away.Arrange flowers before gluing
Lay the flowers on the ring without glue first. Place larger flowers first, spacing them evenly. Then tuck medium flowers between. Leave some open areas where ivy and eucalyptus will weave through. Take a quick photo for reference before gluing. Visual checkpoint: the ring should feel balanced, with heavier flower clusters across the top and sides like the photo.Glue the largest flowers down
Add hot glue to the back center of a flower and press to the ring. Hold until set. Repeat for all large flowers. Visual checkpoint: flowers should sit slightly angled, not perfectly flat, so they catch light.Add leaves under and between flowers
Slide leaves under flower edges and glue at the base. This makes the arrangement feel layered. Place leaves so they point outward and inward, not all one direction. Visual checkpoint: leaves should peek out like real greenery support.Add ivy and eucalyptus accents
You can use faux stems or paper cut versions. If using faux, trim stems short and wire them to the ring, then hide the wire under flowers. If using paper, create small clusters and glue them around the top and sides. Visual checkpoint: greenery should look airy and trailing, not packed tight.Fill gaps with medium flowers and small leaves
Place medium flowers where the ring feels empty. Use small leaves to bridge between blossoms. Visual checkpoint: from three feet away, you should not see bare ring, but you should still see breathing space between clusters.Add the velvet bow
Cut ribbon about 36 to 44 inches. Tie a bow with medium loops and longer tails like the photo. Trim tails at a slight angle or straight across, whichever matches your style. Attach bow to the bottom of the ring with hot glue and optional wire reinforcement. Visual checkpoint: bow should hang centered and look soft, not stiff.Add a hanger loop
Attach wire or strong string to the back. Check that the wreath hangs level with the bow at the bottom. Visual checkpoint: hold it up and ensure the bow does not pull the wreath off center.
Optional upgrades you can add Add subtle gold or pearl centers to a few flowers for a boutique finish Add a layered double bow combining velvet and a sheer ribbon Create a few small bud flowers and tuck them near greenery Use a monogram charm hanging from the bow knot for personalization
Troubleshooting section
Pleats spring open and will not stay circular
Use a stronger center circle and glue it firmly. Add a back circle too. Clips help hold the circle closed while the glue cools.
Flowers look like flat rosettes instead of petaled blooms
Pinch sections into petal lobes and glue small pleat groups together at the outer edge to create distinct petals.
Wreath looks too crowded
Remove one or two flowers and replace with leaves and trailing ivy. The photo has a balanced airy feel.
Greenery looks stuck on top
Tuck stems under flowers and secure at the base. Greenery should look like it weaves through, not sits above.
Bow feels heavy and pulls the wreath down
Use lighter ribbon or anchor the hanger loop slightly higher so the wreath balances. You can also add a small counterweight at the top back.
Finishing details section
Let all glue fully cool before moving the wreath. If you want it to stay crisp, store it away from heat and humidity. A light matte sealer can protect paper flowers, but test first. For long term storage, place the wreath in a box with tissue paper supporting the flowers so pleats do not get crushed. If any pleats flatten over time, gently pinch them back into shape.
Shop Similar
- Velvet ribbon wide for bows
- Pastel cardstock for paper flowers
- Foam wreath ring 16 inch
- Faux ivy garland realistic
- Faux eucalyptus stems matte
Style It With
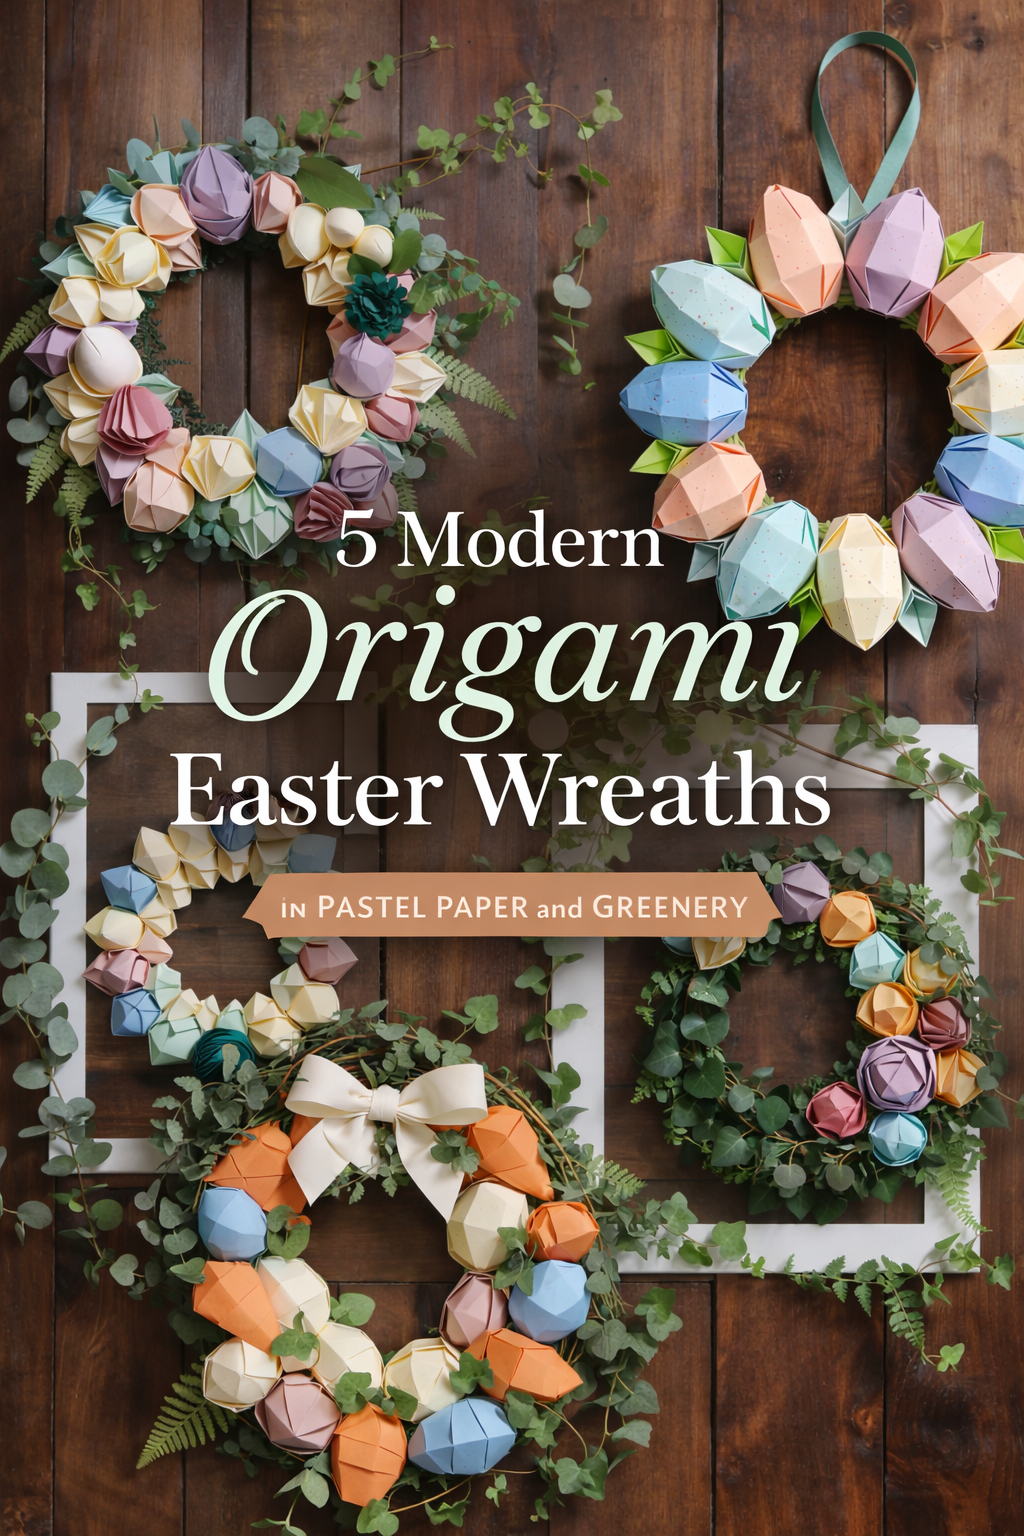
Modular Geometric Paper Wreath Make-It-Yourself Tutorial — Faceted Pastel Shapes on a Clean Modern Ring
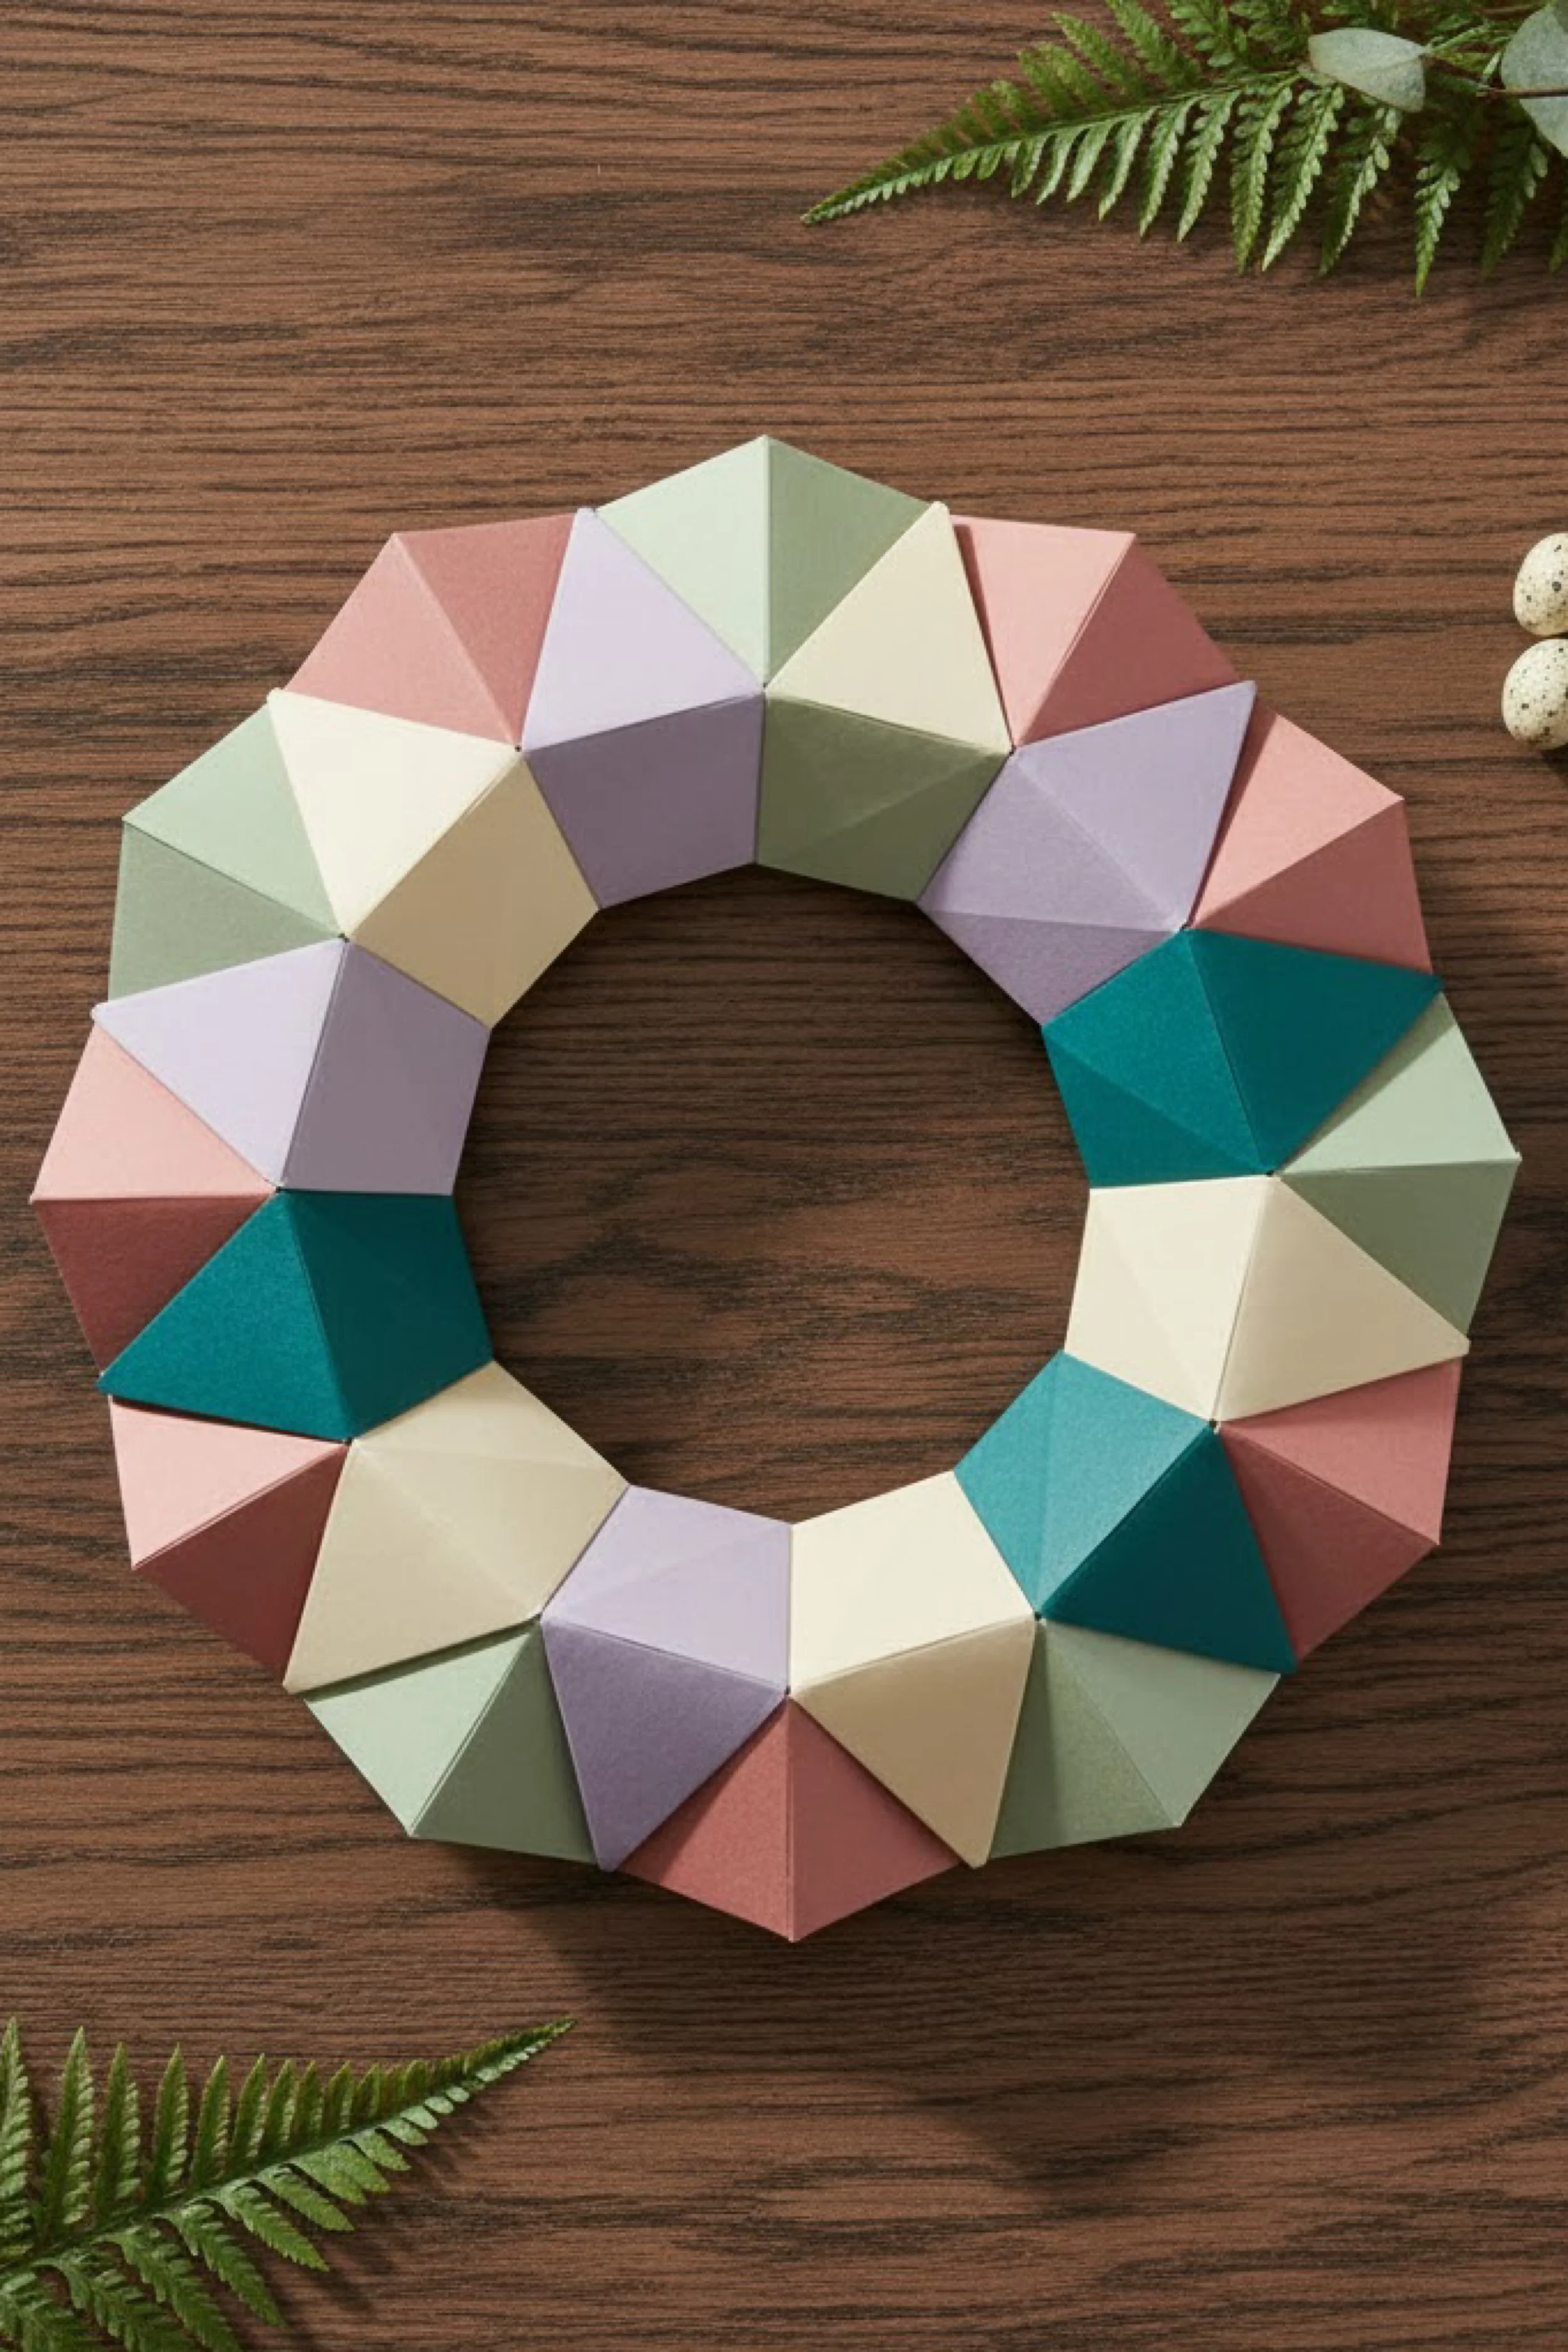
What you’re making
This tutorial recreates a modern geometric wreath made from repeated faceted paper modules, arranged like a ring of little gemstone shapes in soft pastels. The look is minimal and architectural, with crisp folds and clean color blocking. It is perfect if you want a wreath that feels contemporary and design forward while still seasonal.
Materials + tools list
- Wreath ring base, 12 to 16 inch, sturdy cardboard ring works great for this
- Cardstock, medium to heavy weight, in pastel shades like blush, cream, sage, mint, lavender, and teal
- Pencil and ruler
- Scoring tool or bone folder
- Scissors and or craft knife with cutting mat
- Glue, hot glue for fast assembly or tacky glue for more working time
- Double sided tape optional for crisp seams
- Clips or clothespins to hold modules while glue sets
- Strong string or floral wire for hanging
Finished size + customization notes
This design reads best when modules are medium sized and consistent. For a 14 inch wreath, modules around 3 to 3.5 inches wide look proportional. You can go smaller for a more delicate look, but you will need more units. Color placement can be random sprinkled like the photo or arranged into a repeating pattern.
Step-by-step instructions
Choose a module style
The photo modules look like simple faceted pyramids or truncated pyramids that sit on the ring like little peaks. A beginner friendly version is a pyramid with a square base. Another option is a low poly wedge made from triangles. Choose one style and repeat it for a cohesive look. Visual checkpoint: build one test unit and set it on the ring. It should look like a small geometric jewel.Create a simple pyramid template
Draw a square base with four triangles attached, one on each side. For a 3.25 inch wide module, make the square base about 2 inches, with triangles about 2 inches tall. Add small glue tabs on the sides of triangles. Cut out the template and trace it onto cardstock. Visual checkpoint: when folded, the triangles should meet cleanly at the top without gaps.Score all fold lines before folding
Use a ruler and scoring tool to score each fold line. This is key for crisp edges. Fold along scored lines to pre shape the module. Visual checkpoint: folds should be sharp and straight, and cardstock should not crack.Assemble the module
Bring two triangles together and glue along the tab. Hold until set. Continue closing the pyramid until all seams are glued. If you want a slightly flatter top like the photo, you can trim a tiny bit off the triangle tips before assembly to create a small flat peak. Visual checkpoint: the module should feel sturdy when you gently squeeze it.Batch make modules in your palette
Decide how many of each color you want. For a 14 inch wreath with modules around 3.25 inches wide, you will likely need 14 to 18 modules depending on overlap and ring thickness. Make one extra in each color so you have options while arranging. Visual checkpoint: lay modules in a circle on your table. They should nearly close into a ring with minimal gaps.Prepare your ring base
Cut a cardboard ring about 2.5 to 3 inches thick. If using foam, you can glue directly. If cardboard, wrap it in matching paper or masking tape for better grip. Visual checkpoint: the surface should feel slightly textured, not slick.Arrange modules before gluing
Place modules around the ring, edges touching. Rotate colors until the arrangement feels balanced. The photo uses a gentle mix rather than a strict pattern. Visual checkpoint: step back and look at the ring. No single color should dominate one side.Glue modules to the ring
Apply glue to the bottom edges of a module and press it onto the ring. Hold until set. Continue around. If using hot glue, work in small sections. Visual checkpoint: modules should sit evenly and form a smooth circular outline.Close gaps with slight angle adjustments
If you see gaps between modules, slightly angle a module inward or outward to close the space. You can also add a small cardstock spacer behind a module to change its tilt. Visual checkpoint: from above, the ring should look continuous and intentional, not like separate pieces that barely touch.Reinforce from the back
Flip the wreath and add a bead of glue where each module touches the ring on the back side. This greatly increases durability. Visual checkpoint: when you lift the wreath, modules should not wiggle.Clean up edges for a polished finish
If any glue strings show, remove them once cooled. If you see white cardstock edges that interrupt the color, touch them with a matching marker or chalk pastel. Visual checkpoint: the color surfaces should look seamless.Add a hanger
Attach a loop of string or wire to the back top. If using cardboard, poke two small holes and tie the string through. Visual checkpoint: hang the wreath and ensure it sits level.
Optional upgrades you can add Add a second row of smaller modules on the inner edge for a more sculptural look Add a subtle paper bow or fabric bow for softness contrast Add tiny metallic paper accents on a few peaks for a gemstone sparkle effect Create an ombre gradient around the ring moving from light to deep tones
Troubleshooting section
Modules collapse or cave in
Your cardstock may be too thin. Switch to heavier cardstock and reinforce inside seams with extra glue.
Edges look soft instead of crisp
Score your fold lines more cleanly and crease with a bone folder. Also cut with a sharp blade for clean edges.
Ring does not close evenly
Your module count or spacing may be off. Remove one module and re space, or make a slightly smaller final module to close the circle without forcing gaps.
Glue shows on the front
Use smaller glue amounts and apply to hidden edges. If glue shows, let it cool, peel it carefully, then re glue.
Colors look unevenly distributed
Before gluing, always do a full dry layout and take a photo. Adjust until the mix looks balanced.
Finishing details section
Because this wreath is made from crisp geometric forms, store it in a box that does not press on the peaks. If you want extra protection, cut a cardboard ring cover that sits above the modules like a dome. Keep away from direct sunlight to prevent paper fading. If a module dents, gently press it back into shape from the inside.
Shop Similar
- Cardstock paper pastel assortment
- Scoring board for paper crafts
- Craft knife set with blades
- Hot glue gun for crafts
- Self healing cutting mat
Style It With
Origami Tulip Wreath Step-by-Step Tutorial — Bright Folded Blooms With Star Rosettes and a Classic White Bow
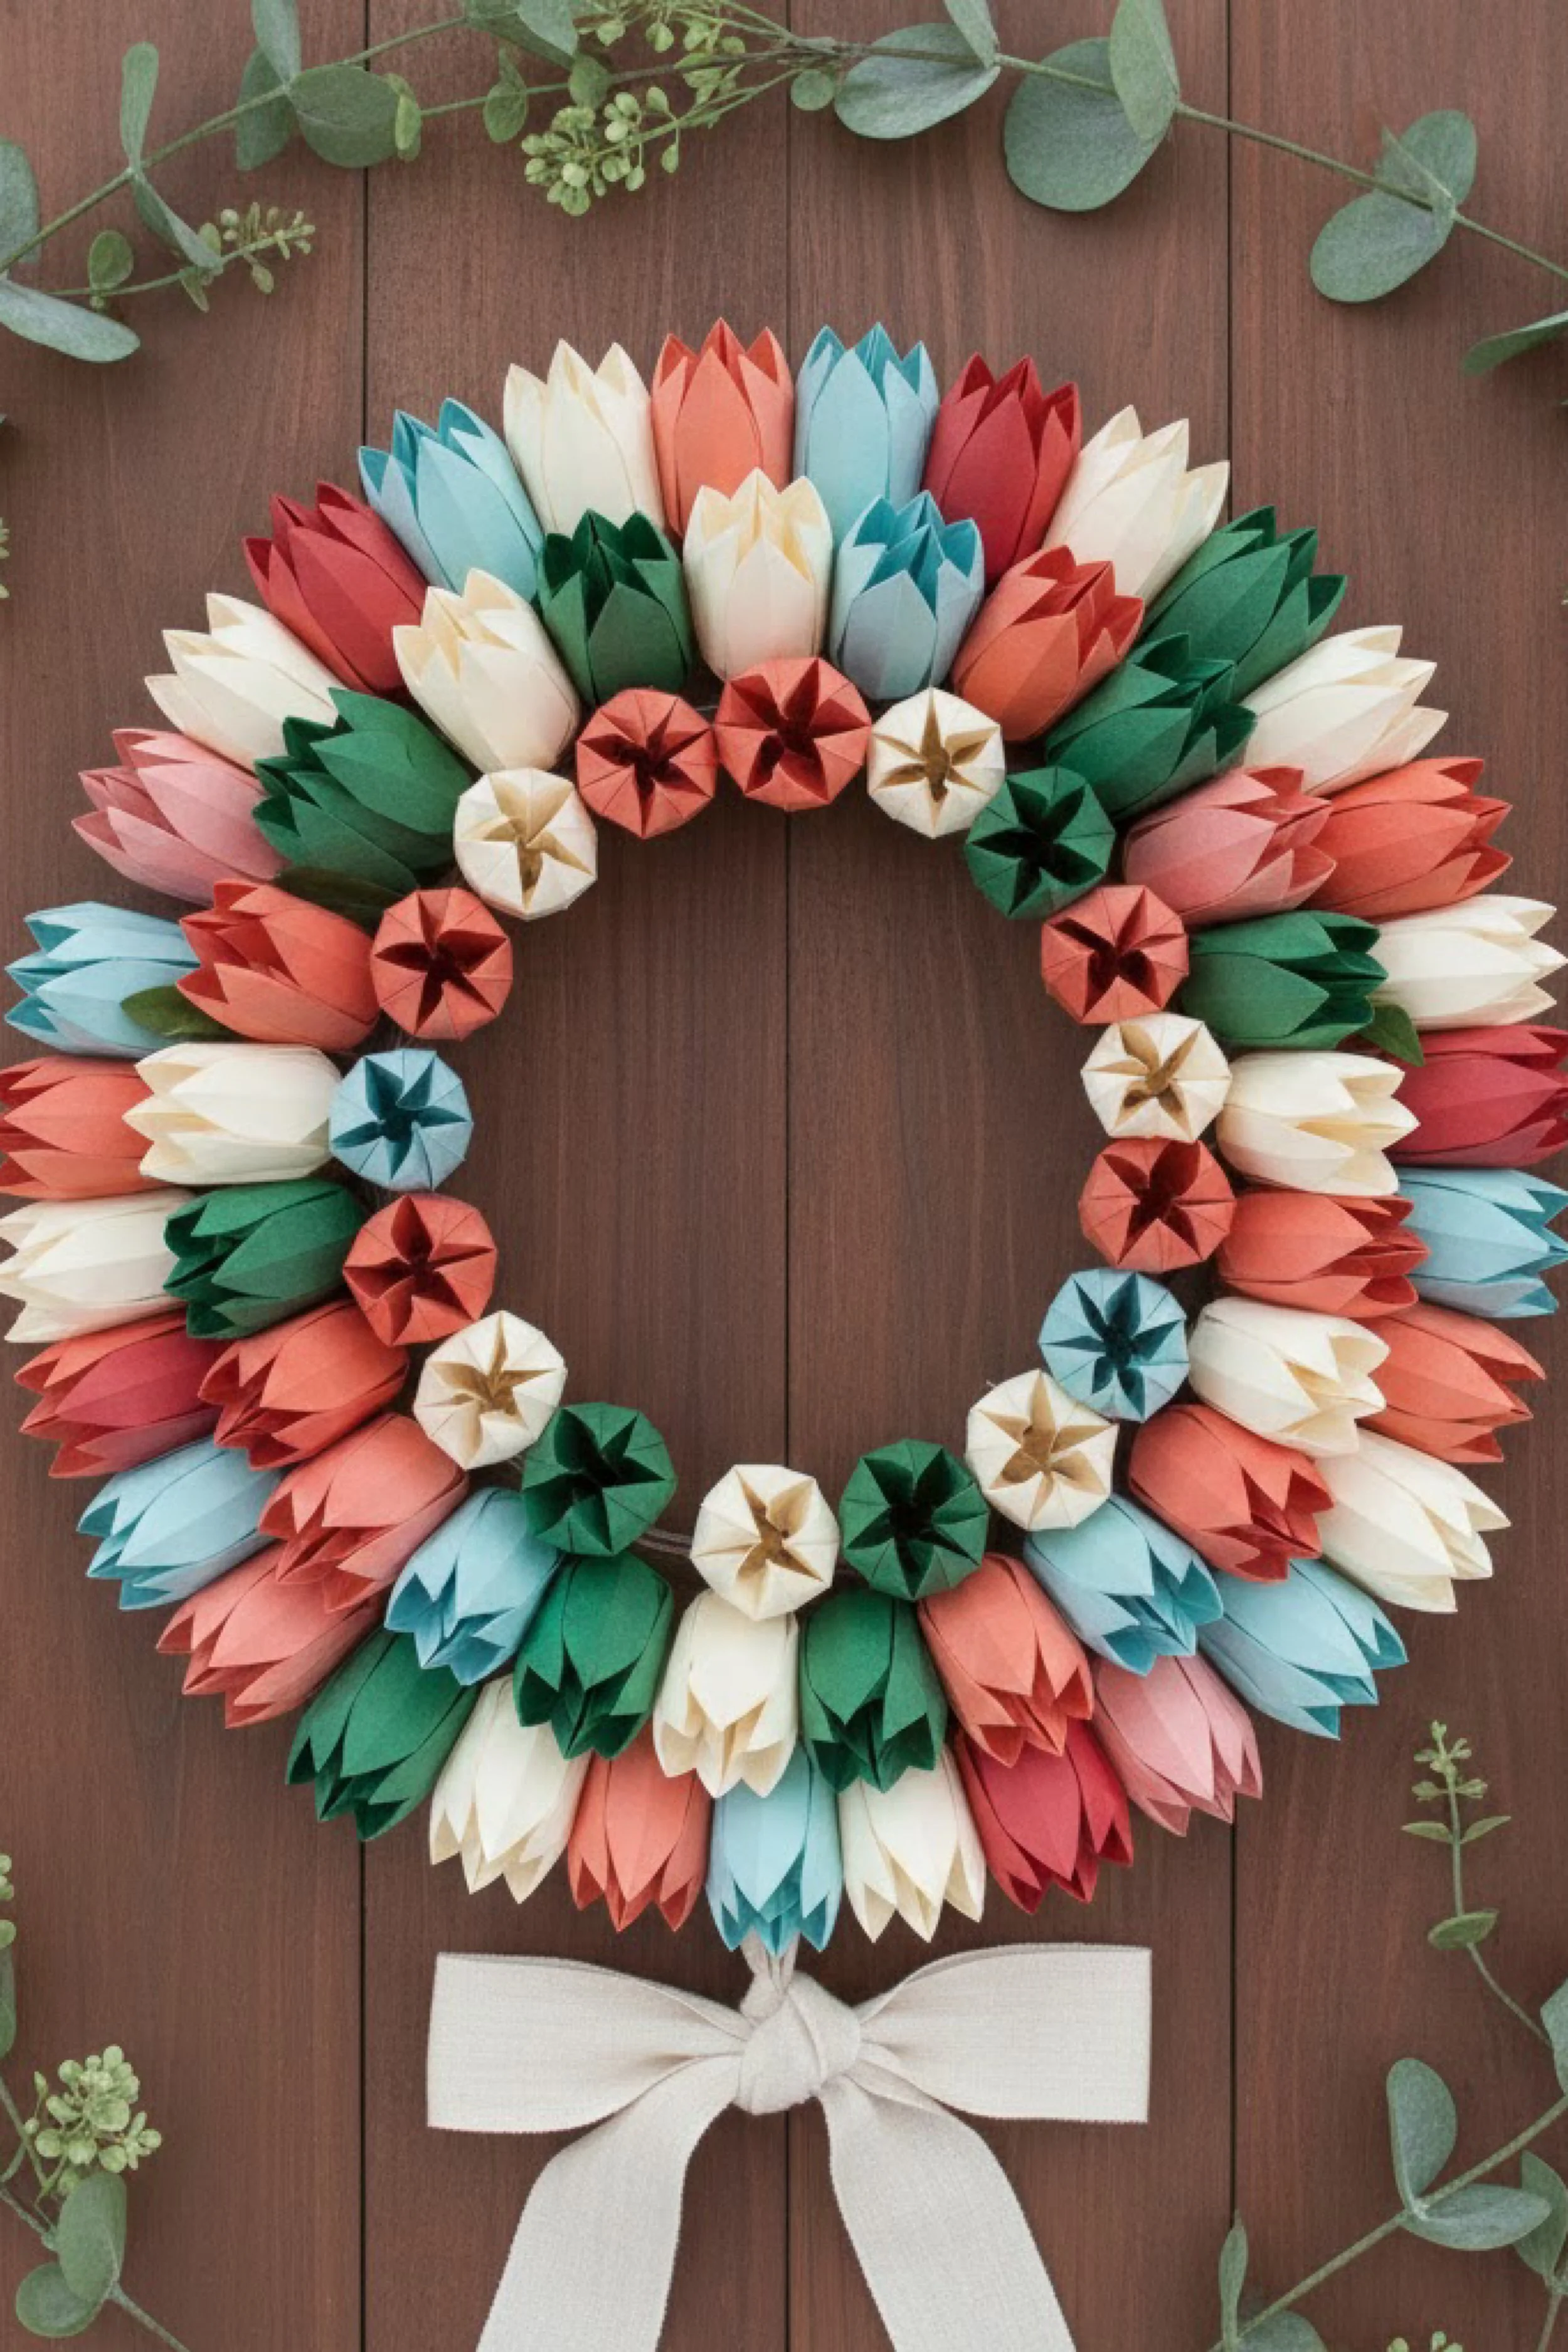
What you’re making
This project recreates a bold, joyful wreath built from folded paper tulip like blooms arranged densely around a ring. The colors are saturated but still clean and modern: coral, red, teal, forest green, and creamy white. Between the tulips you will add small star rosette accents that look like little pinwheel flowers, then finish with a crisp white bow for a polished door ready look.
Materials + tools list
- Wreath ring base, 12 to 16 inch
- Cardstock, medium weight, in red, coral, teal, green, and cream
- Additional cardstock in cream and gold tone for star rosettes if desired
- Scissors and or paper trimmer
- Ruler and pencil
- Bone folder for folding
- Hot glue gun and glue sticks
- Tacky glue optional
- Small paper circles for backing pieces
- Ribbon for bow, white cotton or grosgrain, 1.5 to 2.5 inches wide
- Floral wire or strong string for hanging
- Optional faux eucalyptus sprigs for styling
Finished size + customization notes
A 14 inch base gives you enough room for the tulips to read clearly without looking crowded. Tulip size can be adjusted by changing square size. Use 3.5 inch squares for medium tulips, 4 inch squares for larger. You can keep the palette exactly like the photo or swap to spring pastels for a softer version.
Step-by-step instructions
Decide tulip size and cut your squares
Cut cardstock into squares. For a 14 inch wreath, 3.5 inch squares create a nice tulip scale. Cut at least 40 to 70 squares depending on how full you want the wreath and how many colors you use. Visual checkpoint: stack your squares and confirm they are perfectly even, since uneven squares create uneven petals.Fold a basic tulip bloom unit
Start with one square. Fold it in half diagonally to make a triangle. Crease sharply. Fold the left corner up toward the top point, creating a kite shape. Repeat with the right corner. Flip the piece over and fold the side flaps inward slightly to refine the tulip shape. Then fold the bottom point up a little to create a base that will glue easily. You should end with a tulip like form with pointed petals at the top. Visual checkpoint: the top should show three points or a layered point shape, reading like a tulip bud.Add volume so the bloom pops
Gently open the center slightly by pressing from the back so the tulip is not flat. You want a subtle cup shape. Visual checkpoint: place it on the table. It should stand with a little dimension, not a pancake fold.Batch fold tulips by color
Make piles of each color. The photo uses heavy repetition of red, coral, teal, green, and cream. A good approach is to make 10 to 14 of each main color, then adjust based on your ring size. Visual checkpoint: lay tulips around your ring without glue. You should have enough to cover most of the ring with small gaps for rosettes.Create the star rosette accents
The small star flowers look like folded pinwheel rosettes. Cut strips about 0.5 inch wide and 8 to 10 inches long. Fold each strip into a tight accordion with small pleats. Wrap the pleated strip into a circle and glue the ends together. Press the circle flat so it forms a ridged rosette. Add a small circle at the center to lock it, then pinch the ridges into a star shape by pressing at evenly spaced points. Visual checkpoint: the rosette should show a starburst center with a crisp folded texture.Prepare your wreath base
If foam, you can glue directly. If straw or cardboard, wrap with paper or tape so glue grips well. Visual checkpoint: test glue on a small area. It should hold without peeling.Plan your color pattern
The photo has a lively alternating pattern, not strict stripes. Place colors so no two identical colors cluster heavily. A good method is to repeat a sequence like red, teal, cream, coral, green, then vary it. Visual checkpoint: step back and squint. The ring should look evenly distributed.Start gluing tulips along the outer edge
Apply a bead of hot glue to the base flap of a tulip and press it to the ring near the outer edge, angled slightly outward. Place the next tulip overlapping the previous by about one third. Continue around. Visual checkpoint: the outer edge should look like a continuous row of tulip tips.Build the inner edge row
After the outer edge is established, add a second row toward the inner edge. Angle these tulips slightly toward the center opening. Let them overlap into gaps between the outer row. Visual checkpoint: you should see depth, with tulips layered like shingles.Insert star rosettes between tulips
Place the rosettes in small gaps where you want contrast and sparkle. The photo uses them as accents rather than filling every gap. Glue rosettes slightly deeper between tulips so they look tucked in. Visual checkpoint: rosettes should peek through like little surprises, not sit awkwardly on top.Add extra tulips where the wreath looks thin
The top and bottom can look thinner. Add a few extra tulips layered on top at those points, slightly overlapping existing ones. Visual checkpoint: rotate the wreath. The fullness should feel consistent.Reinforce from the back
Flip the wreath and add a bead of glue where tulip bases meet the ring. This helps with door movement and long term hold. Visual checkpoint: gently wiggle a tulip. It should feel anchored.Make the classic white bow
Cut ribbon about 36 to 48 inches. Tie a bow with full loops and long tails. If you want the photo look, keep it clean and structured. You can add a small center wrap for a finished knot. Visual checkpoint: the bow should feel crisp and centered.Attach bow and hanger
Glue the bow to the bottom center. Reinforce with wire through the ring if needed. Add a hanger loop at the top back. Visual checkpoint: hang the wreath and confirm it sits level and the bow hangs straight.
Optional upgrades you can add Add folded paper leaves tucked behind tulips for extra greenery Add tiny paper eggs or mini tags for a spring holiday twist Create an inner mini ring of rosettes for extra detail Add a second smaller bow layered behind the white bow for dimension
Troubleshooting section
Tulips look flat
Open the folds slightly to create a cup shape, and overlap more so layers create depth. Heavier cardstock also helps.
Tulips fall off when the wreath moves
Use more glue on the base flap and reinforce from the back. If using straw, wrap the base with tape first.
Colors feel too intense
Add more cream tulips to soften. You can also introduce one muted tone like dusty teal instead of bright teal.
Rosettes lose their star shape
Pinch the star points again after glue sets. Use a slightly tighter pleat for more structure.
Ring shows through
Add a few more tulips or tuck small rosettes into the exposed spots. Smaller elements are the best gap fillers.
Finishing details section
Allow the wreath to cool fully before hanging. Store it in a box that does not crush the tulip tips. If you need to reshape a tulip, gently press from behind to restore the cup. Keep away from moisture and direct rain since paper can warp. If you want a more durable finish, a very light matte sealer mist can help, but test on a scrap first to ensure the color does not shift.
Shop Similar
- Origami paper cardstock squares
- White grosgrain ribbon wide
- Foam wreath ring 14 inch
- Paper scoring tool and bone folder
- Hot glue gun craft kit
Style It With
If you made one of these wreaths, take a second to fluff the layers, step back, and enjoy how much texture you created with nothing but paper and patience. These are the kind of projects that look even better the next day once everything settles and you can tweak a few petals or leaves into the exact shape you want. Hang it on your front door, style it above a console, or gift it with a simple note and a soft ribbon tie. And if you want to keep the momentum going, save your leftover paper for mini matching accents, like a small garland, gift tags, or a coordinating table centerpiece. Your door just got a serious upgrade, and you did it one fold at a time.