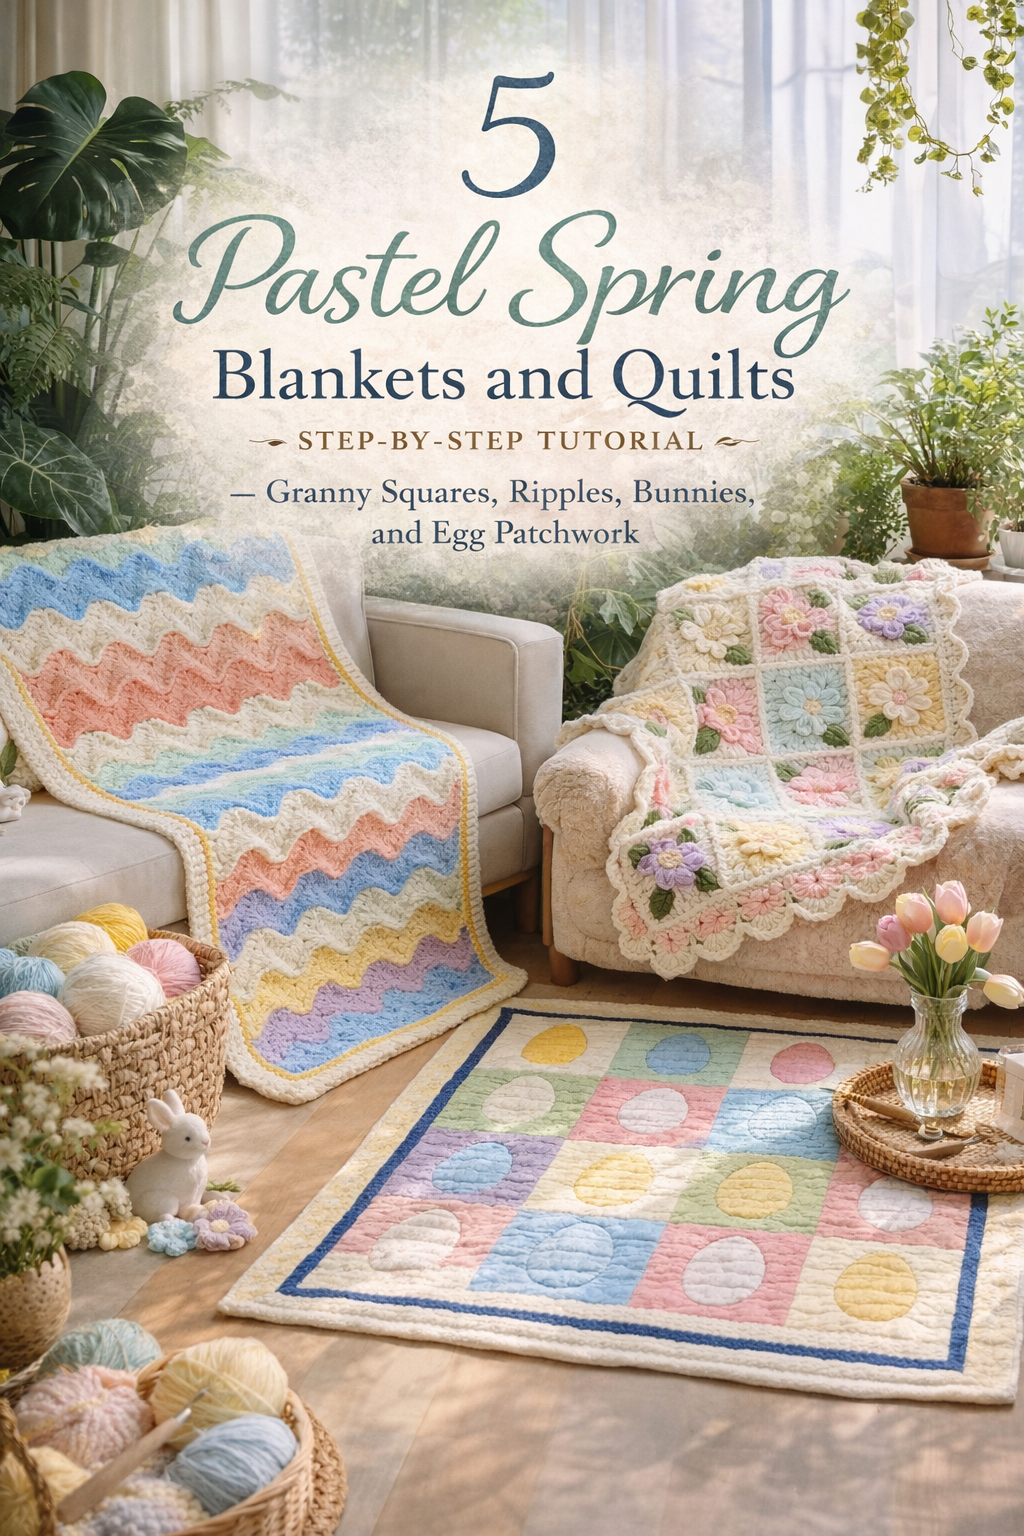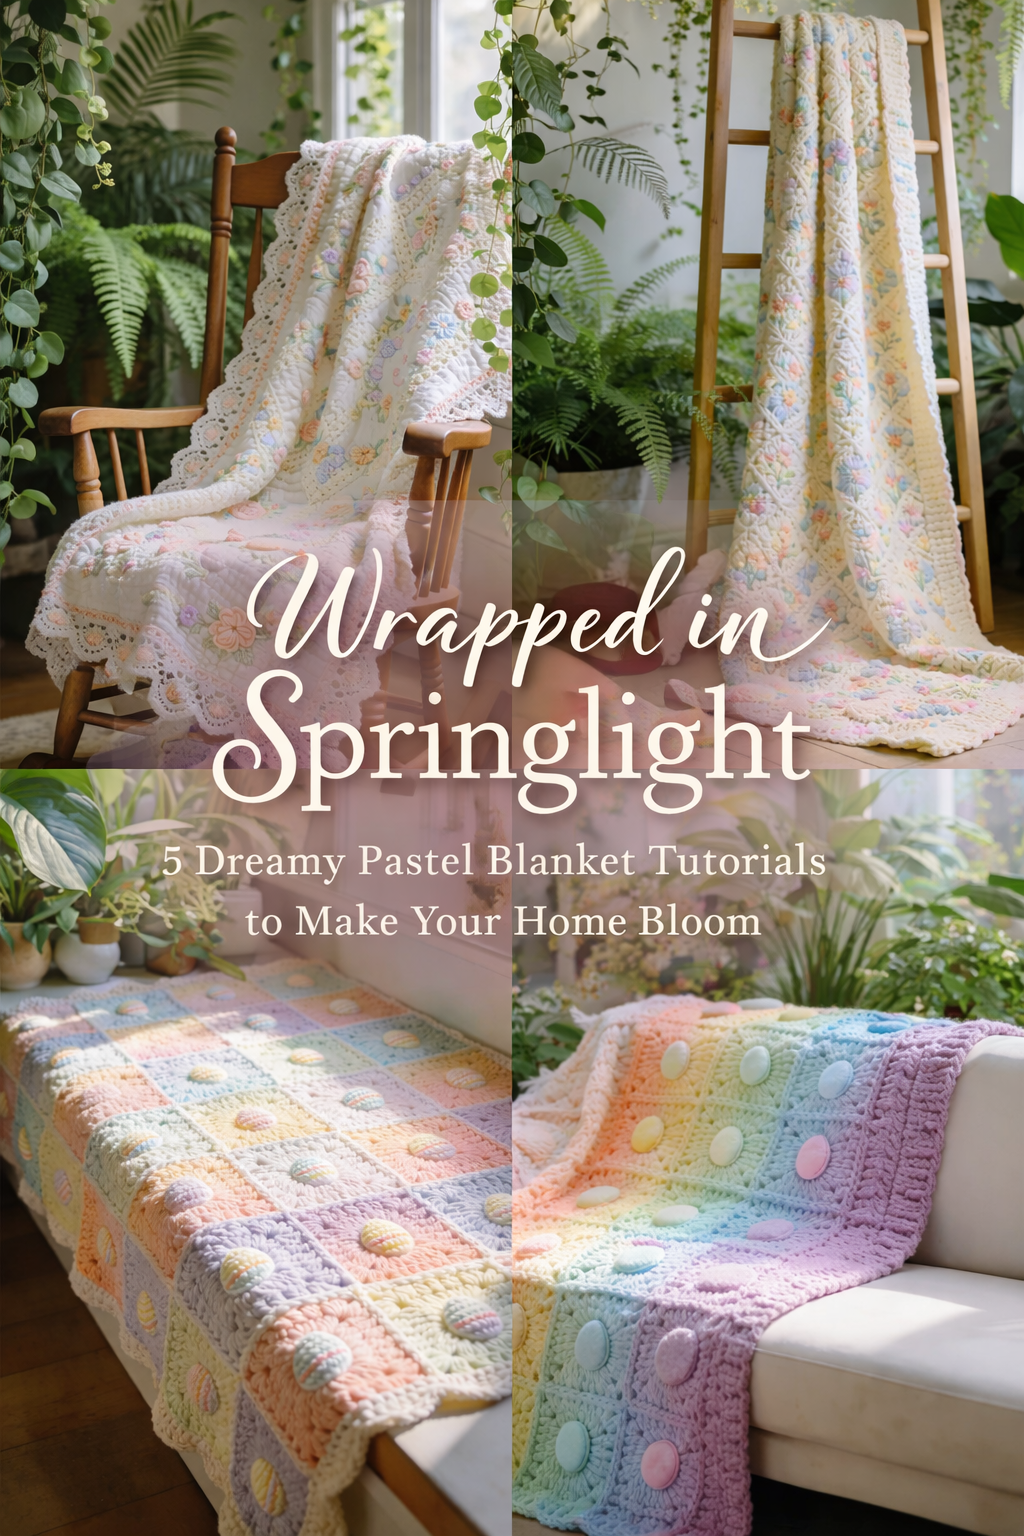
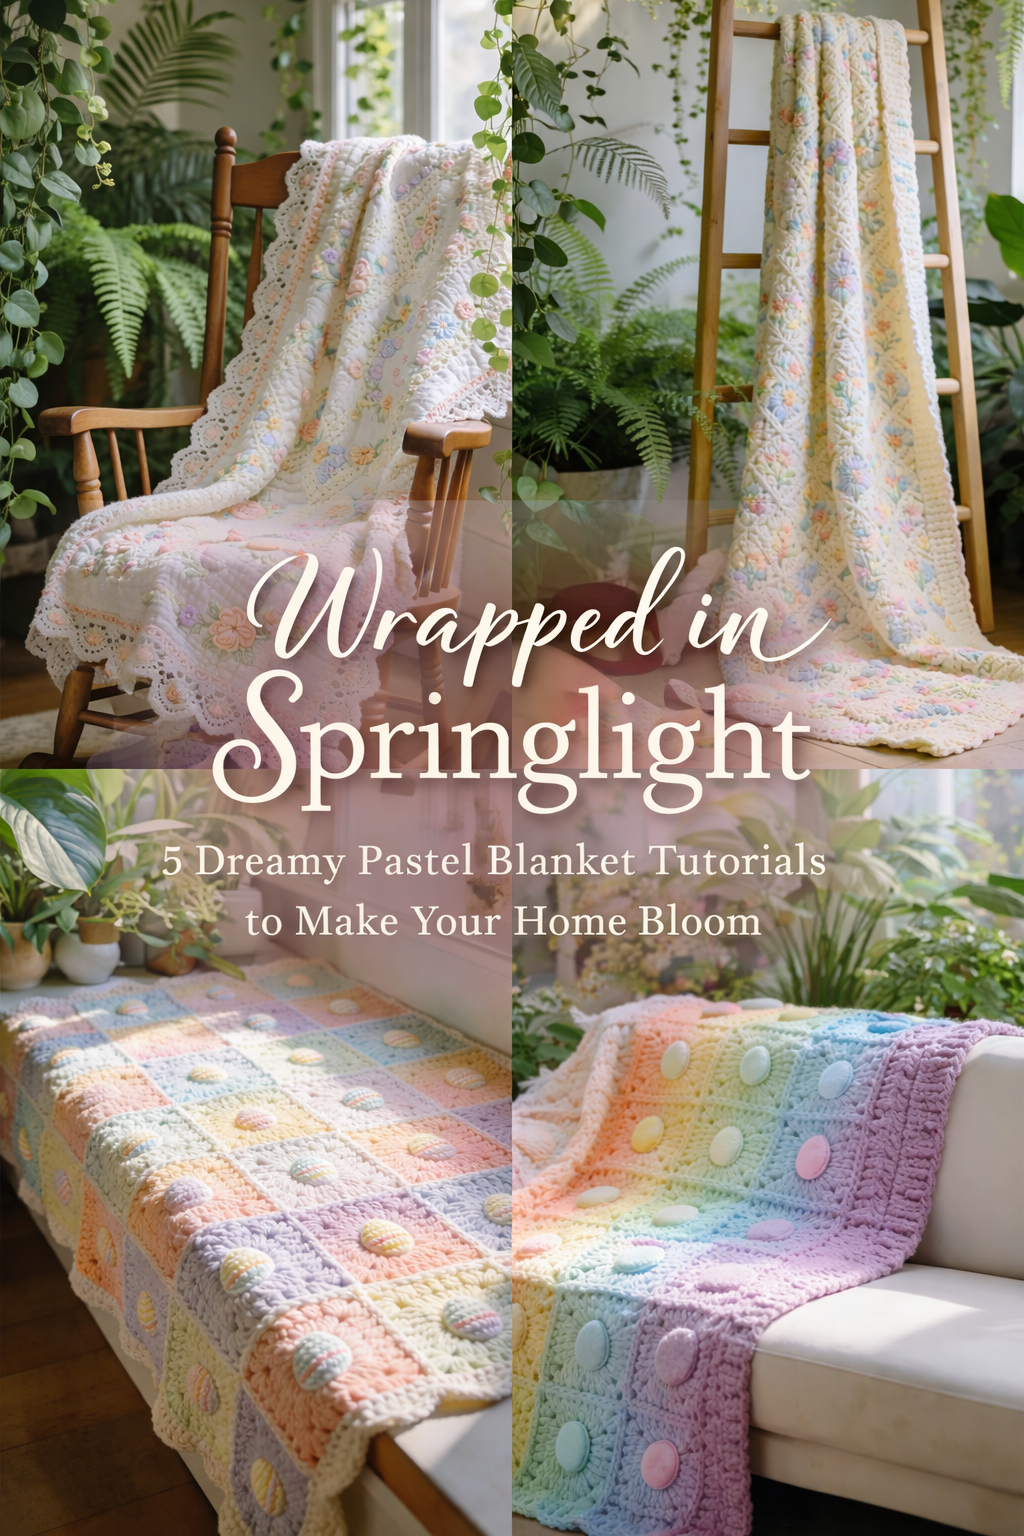
Wrapped in Springlight 5 Dreamy Pastel Blanket Tutorials to Make Your Home Bloom
More like this
There is something irresistibly tender about spring blankets that feel handmade, pastel washed, and meant to be lived with for years. This collection brings together five different interpretations of that soft seasonal magic, from heirloom floral quilted throws and lace edged cottage style pieces to cheerful Easter egg crochet blankets and plush garden inspired mats. Each one captures that light, romantic feeling of early spring, where sunlight pours through the windows, the house feels full of plants and fresh air, and every handmade detail looks just a little sweeter in the morning glow.
What makes these projects especially lovely is the range of textures and techniques woven through the group. Some lean vintage and delicate with embroidery, appliqué, and scalloped trims, while others feel playful and modern with granny squares, puffed motifs, and rainbow pastel color stories. Together, they create a beautiful mix of cozy function and decorative charm, giving you plenty of options whether you want to make a nursery throw, a seasonal sofa blanket, a rocker drape, or a soft quilted floor piece for a bright corner of the house. If you love projects that feel feminine, cottage inspired, and full of handmade personality, this roundup is pure spring comfort.

Heirloom Floral Spring Quilt Throw — Step by Step Tutorial
What you’re making
You are making a soft heirloom style spring throw that looks part vintage quilt and part hand crocheted lace treasure. The look in the photo combines creamy quilted fabric, pastel floral embroidery or appliqué, a sweet central motif, and a scalloped crocheted trim that frames the whole piece like a delicate doily. The finished result feels romantic, cottage inspired, and especially beautiful draped over a rocker, crib rail, or guest bed in a plant filled sunroom.
Materials + tools list
- Cream or soft ivory quilted cotton, pre quilted cotton, or a lightweight cotton quilt sandwich
- Matching cotton backing fabric
- Thin cotton batting if your top is not already quilted
- Embroidery floss in blush, pale pink, butter yellow, soft lavender, baby blue, mint, and sage
- Embroidery needle
- Optional printed fabric transfer pen or water soluble marker
- Crochet cotton thread or lightweight cotton yarn in ivory
- Crochet hook sized to your thread or yarn, usually 2.75 mm to 3.5 mm for thread and 3.5 mm to 4.5 mm for fine yarn
- Sewing machine
- Hand sewing needle
- Fabric scissors
- Small sharp embroidery scissors
- Pins or clips
- Measuring tape or quilting ruler
- Iron and pressing cloth
- Optional lace trim or picot braid for an inner accent line
- Optional appliqué fabric scraps for birds, petals, or leaves
- Optional fabric glue pen or fusible web for holding tiny shapes in place
Finished size + customization notes
A lovely rocker throw size is about 36 x 48 inches. For a crib style accent blanket, aim for about 40 x 50 inches. To recreate the visual feel of the photo, keep the proportions slightly longer than wide so it cascades down a chair gracefully. You can simplify the central panel, increase the floral border width, or enlarge the crochet edging by one more round if you want a more dramatic antique look.
Step by step instructions
Plan the layout before cutting anything
Start by studying the overall composition. This piece looks best when it has a calm cream base, a defined central framed area, and repeated floral accents around the outer panels. Sketch a simple rectangle with a center panel and at least two decorative border bands around it. You should now see a layout that feels balanced and old fashioned without becoming busy. If yours looks crowded already on paper, reduce the number of floral sprays and leave more plain quilted space.Prepare the quilt top base
Cut your front panel from quilted cotton or build one by layering top fabric, batting, and backing basting them together. If using a plain top with separate batting, stitch simple vertical or grid quilting lines first. The photo shows soft channels and gentle structure rather than dramatic geometric quilting. Keep your stitching even and not too dense so the blanket stays drapey. Press everything lightly so the surface is smooth but still lofty.Mark your central feature area
Measure inward from all sides and mark a central rectangle or square. In the photo, the center feels framed like a keepsake medallion. Use a water soluble marker and a ruler to lightly draw the shape. Around it, mark a soft floral garland path or spaced flower clusters. If you want a tiny bird pair in the center like the inspiration, sketch two simple rounded bird shapes facing each other on a small branch or above a tulip stem.Add appliqué if using it
For dimensional petals, birds, or leaves, cut tiny shapes from pastel cotton scraps. Use fusible web or a glue pen to hold them in place. Stitch around each piece with a narrow zigzag, blanket stitch, or hand whip stitch. Keep the shapes slightly puffy looking and charming instead of overly crisp. The prettiest heirloom pieces have a gentle handmade softness. If your appliqué edges feel stiff, shorten the stitch density or switch to hand stitching.Embroider the floral details
Thread your needle with two or three strands of floss. Use lazy daisy stitches for petals, French knots for flower centers, stem stitch for vines, and satin stitch for tiny leaves or buds. Work in pastel pink, peach, buttercream yellow, pale blue, mint, and lavender. Space your colors so no one shade clusters too heavily in one corner. You should now see the quilt start to bloom. If yours looks flatter than the photo, add a few raised knots and layered petals on top of the original embroidery.Create the framed border around the center
The photo has the feeling of one framed decorative path leading the eye around the middle. You can stitch a wreath like border of tiny blossoms around your center panel using alternating flower heads and leaves. Another easy option is to couch down a narrow pastel cord or stitch a braided line with backstitch, then embellish it with little flowers. Keep the line loose and organic rather than perfectly formal.Quilt the remaining sections if needed
Once embroidery and appliqué are in place, add final quilting lines in the plain areas. Hand tied quilting or machine stitched channels both work. Quilt around major motifs rather than across them. This keeps the flowers and birds standing proud from the surface. If your quilt bubbles around the embroidered sections, press from the back with a pressing cloth and flatten gently with your palms rather than ironing aggressively.Square and bind the raw edge temporarily
Trim the whole piece so it is neat and square. Stay stitch close to the outer edge to stabilize everything before adding trim. You can use a very narrow fabric binding in blush or ivory first, especially if your crochet trim will be sewn on afterward. This gives the edge strength and keeps the quilt layers from shifting.Crochet the inner decorative edge
To mimic the delicate edging from the photo, work into a foundation that matches the blanket perimeter. You can either crochet directly into blanket stitch holes at the edge or make the trim separately and sew it on. A simple inner round might be single crochet all around, then one round of chain spaces, then a round with tiny pastel puff stitches or embroidered rosebud accents added afterward. This inner line gives a graceful transition from quilt to lace.Crochet the scalloped outer lace
For the heirloom border, work repeating shells and arches. One good repeat is: skip 2, 5 double crochet in next stitch, skip 2, single crochet, chain 3, single crochet in next stitch, skip 2, repeat. On the next round, build larger shells over each shell and lace arches between. Add picots on the final round for that old fashioned scalloped finish. You should now see the edge ripple softly like antique baby blanket lace. If yours is ruffling hard, reduce stitches per shell. If it looks tight and pulling inward, add one or two chain stitches between motifs.Add tiny pastel accents to the crochet edge
The photo includes little pastel details tucked into the lace. You can embroider French knots, sew on tiny crocheted rosettes, or work one popcorn stitch in pale pink every few scallops. Do not overdo this. The goal is a whisper of color, not a polka dotted border. Repeat the accent at regular intervals so the finish feels intentional.Join the trim neatly at corners
Corners can become bulky on a decorative blanket. Work a larger shell or fan at each corner and let the curve turn naturally rather than forcing a sharp angle. If sewing trim on later, ease it around the corner and hand tack the center of each fan so it lies flat. A visual checkpoint here is that the blanket should drape from the rocker without the corners flipping up awkwardly.Back the piece cleanly
If your blanket needs a full back, place the finished top right sides together with the backing, sew around leaving an opening, turn, press, and close by hand. Another option is a traditional quilt binding finished first, with the crocheted lace stitched on top. Choose the method that suits your skill level. For the most vintage appearance, a finished quilt edge plus hand sewn crochet trim is the safest route.Add the final floral clusters
After the border is attached, step back and look for blank areas that need a little life. Add one or two extra flower clusters at the lower corners or near the center frame. The blanket in the photo feels richly decorated but still airy because the motifs are spaced with restraint. If yours looks wider or plainer than the photo, add detail near the edge rather than filling the middle.Press and soften the finished throw
Steam lightly from the back. Use your fingers to open the lace scallops and shape them as they cool. Let the throw rest flat overnight so the edge settles. Drape it over a rocker or ladder to check the fall. You want a soft cascade with visible lace points and embroidered florals appearing at different folds.Optional upgrades
Add a monogram in one corner for a true heirloom finish. Stitch a narrow ribbon through the lace round for a sweeter nursery version. Make matching pillow sham panels from leftover motifs. Or sew a lightweight cotton lining behind the embroidery if you want the piece to stand up to regular use while protecting the stitches.
Troubleshooting
If the quilt puckers around embroidery, your thread tension may be too tight or your fabric was not stabilized well enough. Press from the back and add more quilting in nearby plain areas to distribute tension.
If the crochet edging flares too much, reduce shell size or block the trim before attaching it. Thread crochet often blooms after washing, so do not panic at a little softness.
If the trim pulls the quilt inward, you likely need more stitches along the edge foundation. Add an increase every few inches on the next attempt.
If the blanket feels too modern instead of heirloom, soften your color palette. Use ivory instead of bright white and dusty pastels rather than candy brights.
If your floral motifs disappear visually, deepen the centers with a touch of buttery yellow or sage so each bloom reads from a distance.
Finishing details
Wash only gently by hand or on delicate in a mesh bag if your materials allow it. Reshape the lace while damp and dry flat or draped. Weave in all crochet ends twice because decorative borders are handled often. If the quilt will be displayed more than used, tuck acid free tissue beneath folds when storing. A few hand tacks between the crochet edge and quilt top can also keep the trim from twisting over time. For an especially polished look, add a tiny whipped blush line where fabric meets lace so the transition feels intentional and couture.
Shop Similar
- Ivory quilted cotton and heirloom blanket fabric
- Pastel embroidery floss set for floral stitching
- Crochet cotton thread in cream for lace edging
- Embroidery transfer pens and water soluble markers
- Small crochet hooks for thread lace borders
- Vintage inspired floral appliqué supplies
Style It With
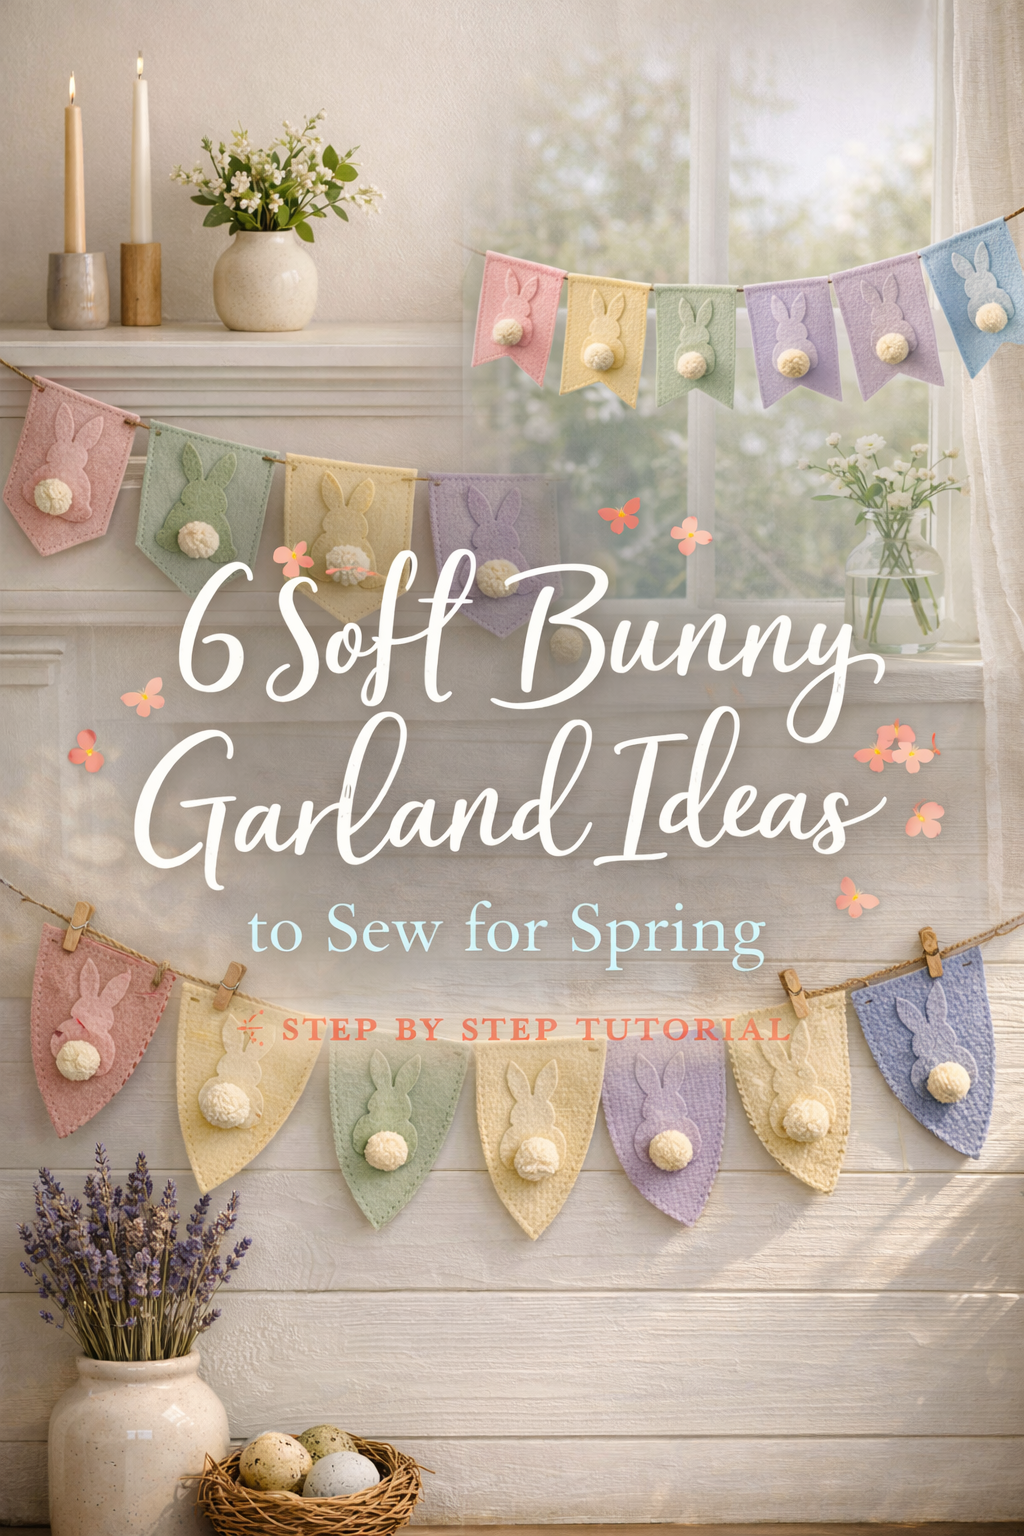
Pastel Easter Egg Granny Square Blanket — DIY Guide
What you’re making
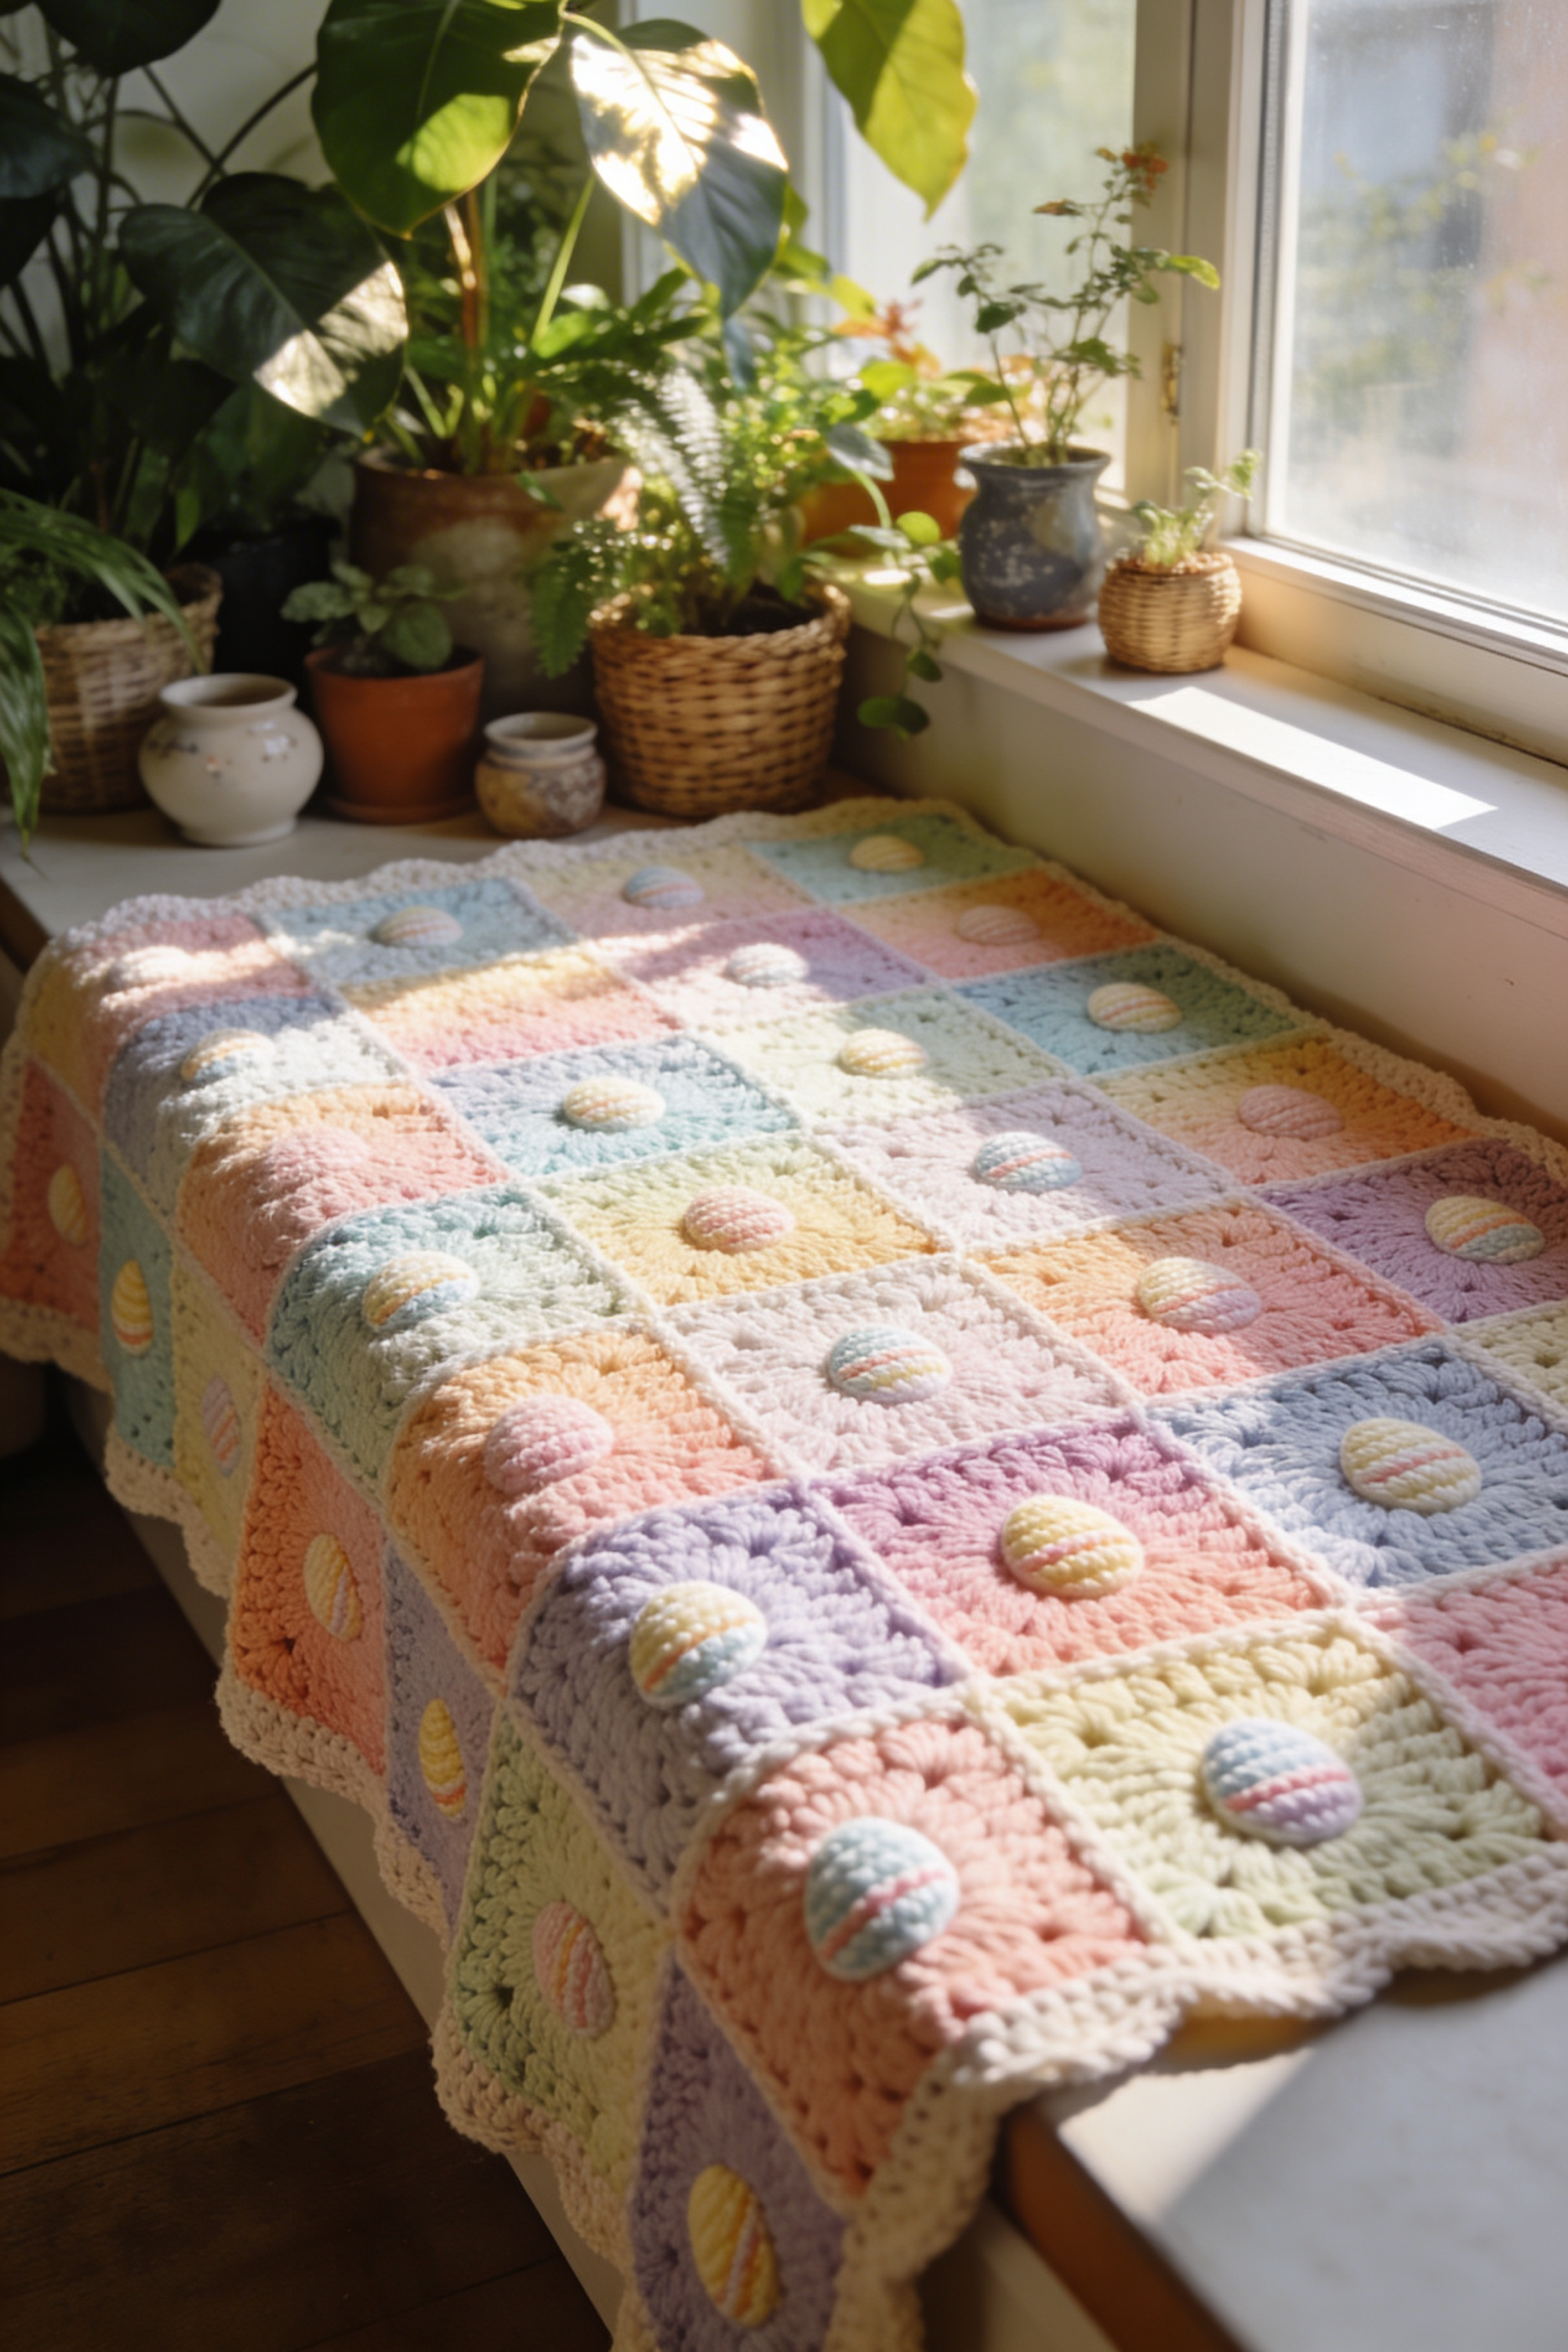
You are making a cheerful pastel crochet blanket built from soft granny style squares, each centered with a raised Easter egg motif. The finished look is playful but still refined because the palette stays airy and powdery instead of loud. It is the kind of seasonal throw that brightens a window seat, bench, child’s room, or spring entry without feeling temporary or costume like.
Materials + tools list
- Worsted weight or light bulky yarn in cream, blush, pale peach, baby blue, mint, butter yellow, lavender, and soft apricot
- A little extra yarn in striped pastel shades for the egg motifs if you want the marbled look
- Crochet hook, usually 5 mm to 6 mm depending on yarn
- Yarn needle
- Scissors
- Stitch markers
- Measuring tape
- Blocking mats or thick towels
- T pins or rustproof pins
- Optional fabric backing if you want a sturdier lap throw
- Optional pom pom maker if you want corner embellishments
- Optional spray starch for more structure
Finished size + customization notes
A 5 by 6 square layout makes a throw around 35 x 42 inches if each square is about 7 inches finished. For a fuller blanket like the photo, you can make 6 by 7 squares or enlarge each block to about 8 inches. Keep the border narrow and cream colored so the egg motifs stay the focus. To make the piece more elegant, repeat only four pastel shades. To make it more whimsical, use one different egg color combination in every block.
Step by step instructions
Choose the palette first
Lay out your yarns before crocheting. This blanket works because the pastels are soft and slightly dusty. Avoid neon or overly saturated tones. A good mix is blush, peach, butter yellow, mint, pale aqua, lavender, and cream. The raised eggs can be striped in two or three nearby shades. You should now see a palette that feels like sugared candy and spring sunrise light rather than bright toy colors.Make a sample egg motif
Start with the egg because it determines the personality of the square. Chain 6, join to form a ring. Work a small oval using single crochet, half double crochet, and double crochet so the center widens then narrows. Another easy option is to crochet a tiny egg appliqué separately in rows. For the striped look, switch colors every one or two rows. Finish the egg around 2 to 2.5 inches tall. If yours looks too round, add one extra row in the middle. If it looks too tall and narrow, increase more at the center of the oval.Build the first square around the egg
With a background color such as blush or pale blue, begin the square and attach the egg as you go or sew it on afterward. One reliable method is to crochet a round base circle or soft square, then place the egg on top with whip stitches. Another method is tapestry style crochet around the appliqué. For beginners, sewing the egg onto a completed square gives the cleanest control. Make the square about 7 to 8 inches finished.Use a textured granny inspired square
The photo suggests soft, plush, lightly ridged squares rather than lacy open granny blocks. Try this structure: start with a magic ring, work 12 double crochet, then build corners in the next round using double crochet clusters with chain 2 spaces. Continue for 4 or 5 rounds until the block reaches the right size. Keep stitches relaxed so the square feels puffy and cushioned. If your square curls, your hook may be too small.Attach the egg securely
Center the egg on the square. Use matching or invisible stitches through the back loops only of the egg edge so the motif remains slightly raised. Stuffing is not necessary, but you can place a tiny felt oval beneath it for extra dimension. The photo has a lovely soft bump on each egg, so a little lift helps. You should now see the egg sit proudly above the square surface without wobbling.Decide on your color layout before mass production
Make at least six finished squares in different shades and lay them out in a grid. Alternate warm and cool tones so the blanket looks balanced. Avoid putting too many lavender or yellow squares next to each other unless you are deliberately creating a gradient. The photo reads as softly mixed, not striped. Take a quick phone photo in black and white to check whether the tones distribute evenly.Crochet the remaining squares assembly line style
Once your first square is working, batch your process. Crochet all eggs first, then all square centers, then all final rounds. This keeps tension more consistent. Keep your count identical on every block. If one square comes out larger, block it before joining or redo the last round with tighter tension. A visual checkpoint is that all finished squares should stack neatly with only tiny size variation.Join the squares
You can join as you go, use whip stitch, or use slip stitch through back loops for a tidy ridge. The photo looks soft and unified, so a flat or nearly flat join is best. Use cream or ivory yarn for the join to create a gentle frame between squares. Lay out the whole blanket before seaming. Join rows first, then join the rows together. If your blanket starts to skew, count the seam points and make sure you are not skipping a stitch at the corners.Add side motifs if desired
The inspiration image hints at egg motifs appearing even along side facing squares. To mimic that charming detail, make sure your egg appliqués are centered on every square, including edge squares, so they show clearly from any angle. If your blanket will be used over a bench or ledge, this matters visually.Add the border foundation
Once all squares are joined, work one full round of single crochet in cream all around the blanket, placing three stitches in each corner. This evens out the perimeter and prepares it for the final border. Steam lightly if needed so the blanket lies flat before you continue.Crochet the outer border
A simple scalloped or shell border keeps the look sweet. Work one round of half double crochet, then one round of shells using 5 double crochet in every fourth or fifth stitch. If you want a cleaner modern finish, do two rounds of half double crochet only. In the photo, the edge is soft and subtle rather than dramatic, so do not overbuild the border. You should now see a tidy cream frame that makes the pastel blocks glow.Block the blanket properly
Soak or steam block depending on your yarn. Acrylic benefits from gentle steam and shaping, while cotton or wool blends can be wet blocked. Pin each corner and adjust the lines between squares until they are straight. Open the stitches slightly, but keep the blanket plush. Let it dry fully. If yours still waves after blocking, the border may have too many stitches. Remove one round and redo with less fullness.Optional upgrades
Sew a soft cotton backing on the reverse for extra coziness. Add corner tassels in mixed pastel shades. Edge each square with cream before joining for a more defined patchwork look. Or make each egg slightly different with stripes, speckles, or tiny embroidered seed stitch details.Make the blanket more luxurious
If you want the look to feel less seasonal and more heirloom, use a muted palette and high quality cotton blend yarn. Keep egg stripes tone on tone rather than multicolor. Another upgrade is to lightly embroider tiny accent dashes on each egg with surface slip stitch to mimic hand decorated Easter eggs.Check the drape
Drape the blanket over a bench, window seat, or crib side. The finished fabric should bend easily at each square join and not feel board stiff. If yours stands up too much, your yarn may be too bulky or your tension too tight. Going up a hook size on the next version makes a big difference.Photograph friendly finishing
Trim every tail carefully because pale yarn shows shadows from loose ends. Rotate the blanket so the prettiest balance of colors lands in the center when styled. This pattern is especially photogenic in natural light, so the softer and neater the joins, the more polished it will read.
Troubleshooting
If the squares buckle after joining, they are not all the same size or your join is too tight. Block individual squares first and loosen your seaming tension.
If the eggs tilt or sag, sew them down with more anchor points especially at the narrow top and wider middle.
If the blanket looks too busy, simplify the egg stripes and limit your square colors.
If the outer border flares, there are too many stitches. Rework it with fewer shells or a plain round.
If the blanket feels too thin, use a light bulky chenille style yarn or add a fabric backing.
Finishing details
Weave in ends in at least two directions because the blanket will be folded and tugged. Mist and shape the border so corners sit flat. For a more finished reverse side, sew on a muslin or cotton gauze backing by hand around the edge after blocking. Store folded with tissue if it is a seasonal spring throw, or keep it on display over a bench where the eggs can show off in daylight. Wash gently and dry flat or according to your yarn type. If the eggs lose shape after use, lightly steam and finger press them back into an oval.
Shop Similar
- Pastel worsted weight yarn for granny square blankets
- Cream crochet yarn for joining and borders
- Crochet hook set for blanket projects
- Blocking mats and knit blocking pins
- Pastel baby yarn for soft seasonal throws
- Yarn needles and stitch markers for crochet
Style It With
Lattice Floral Heirloom Afghan — Make It Yourself Tutorial
What you’re making
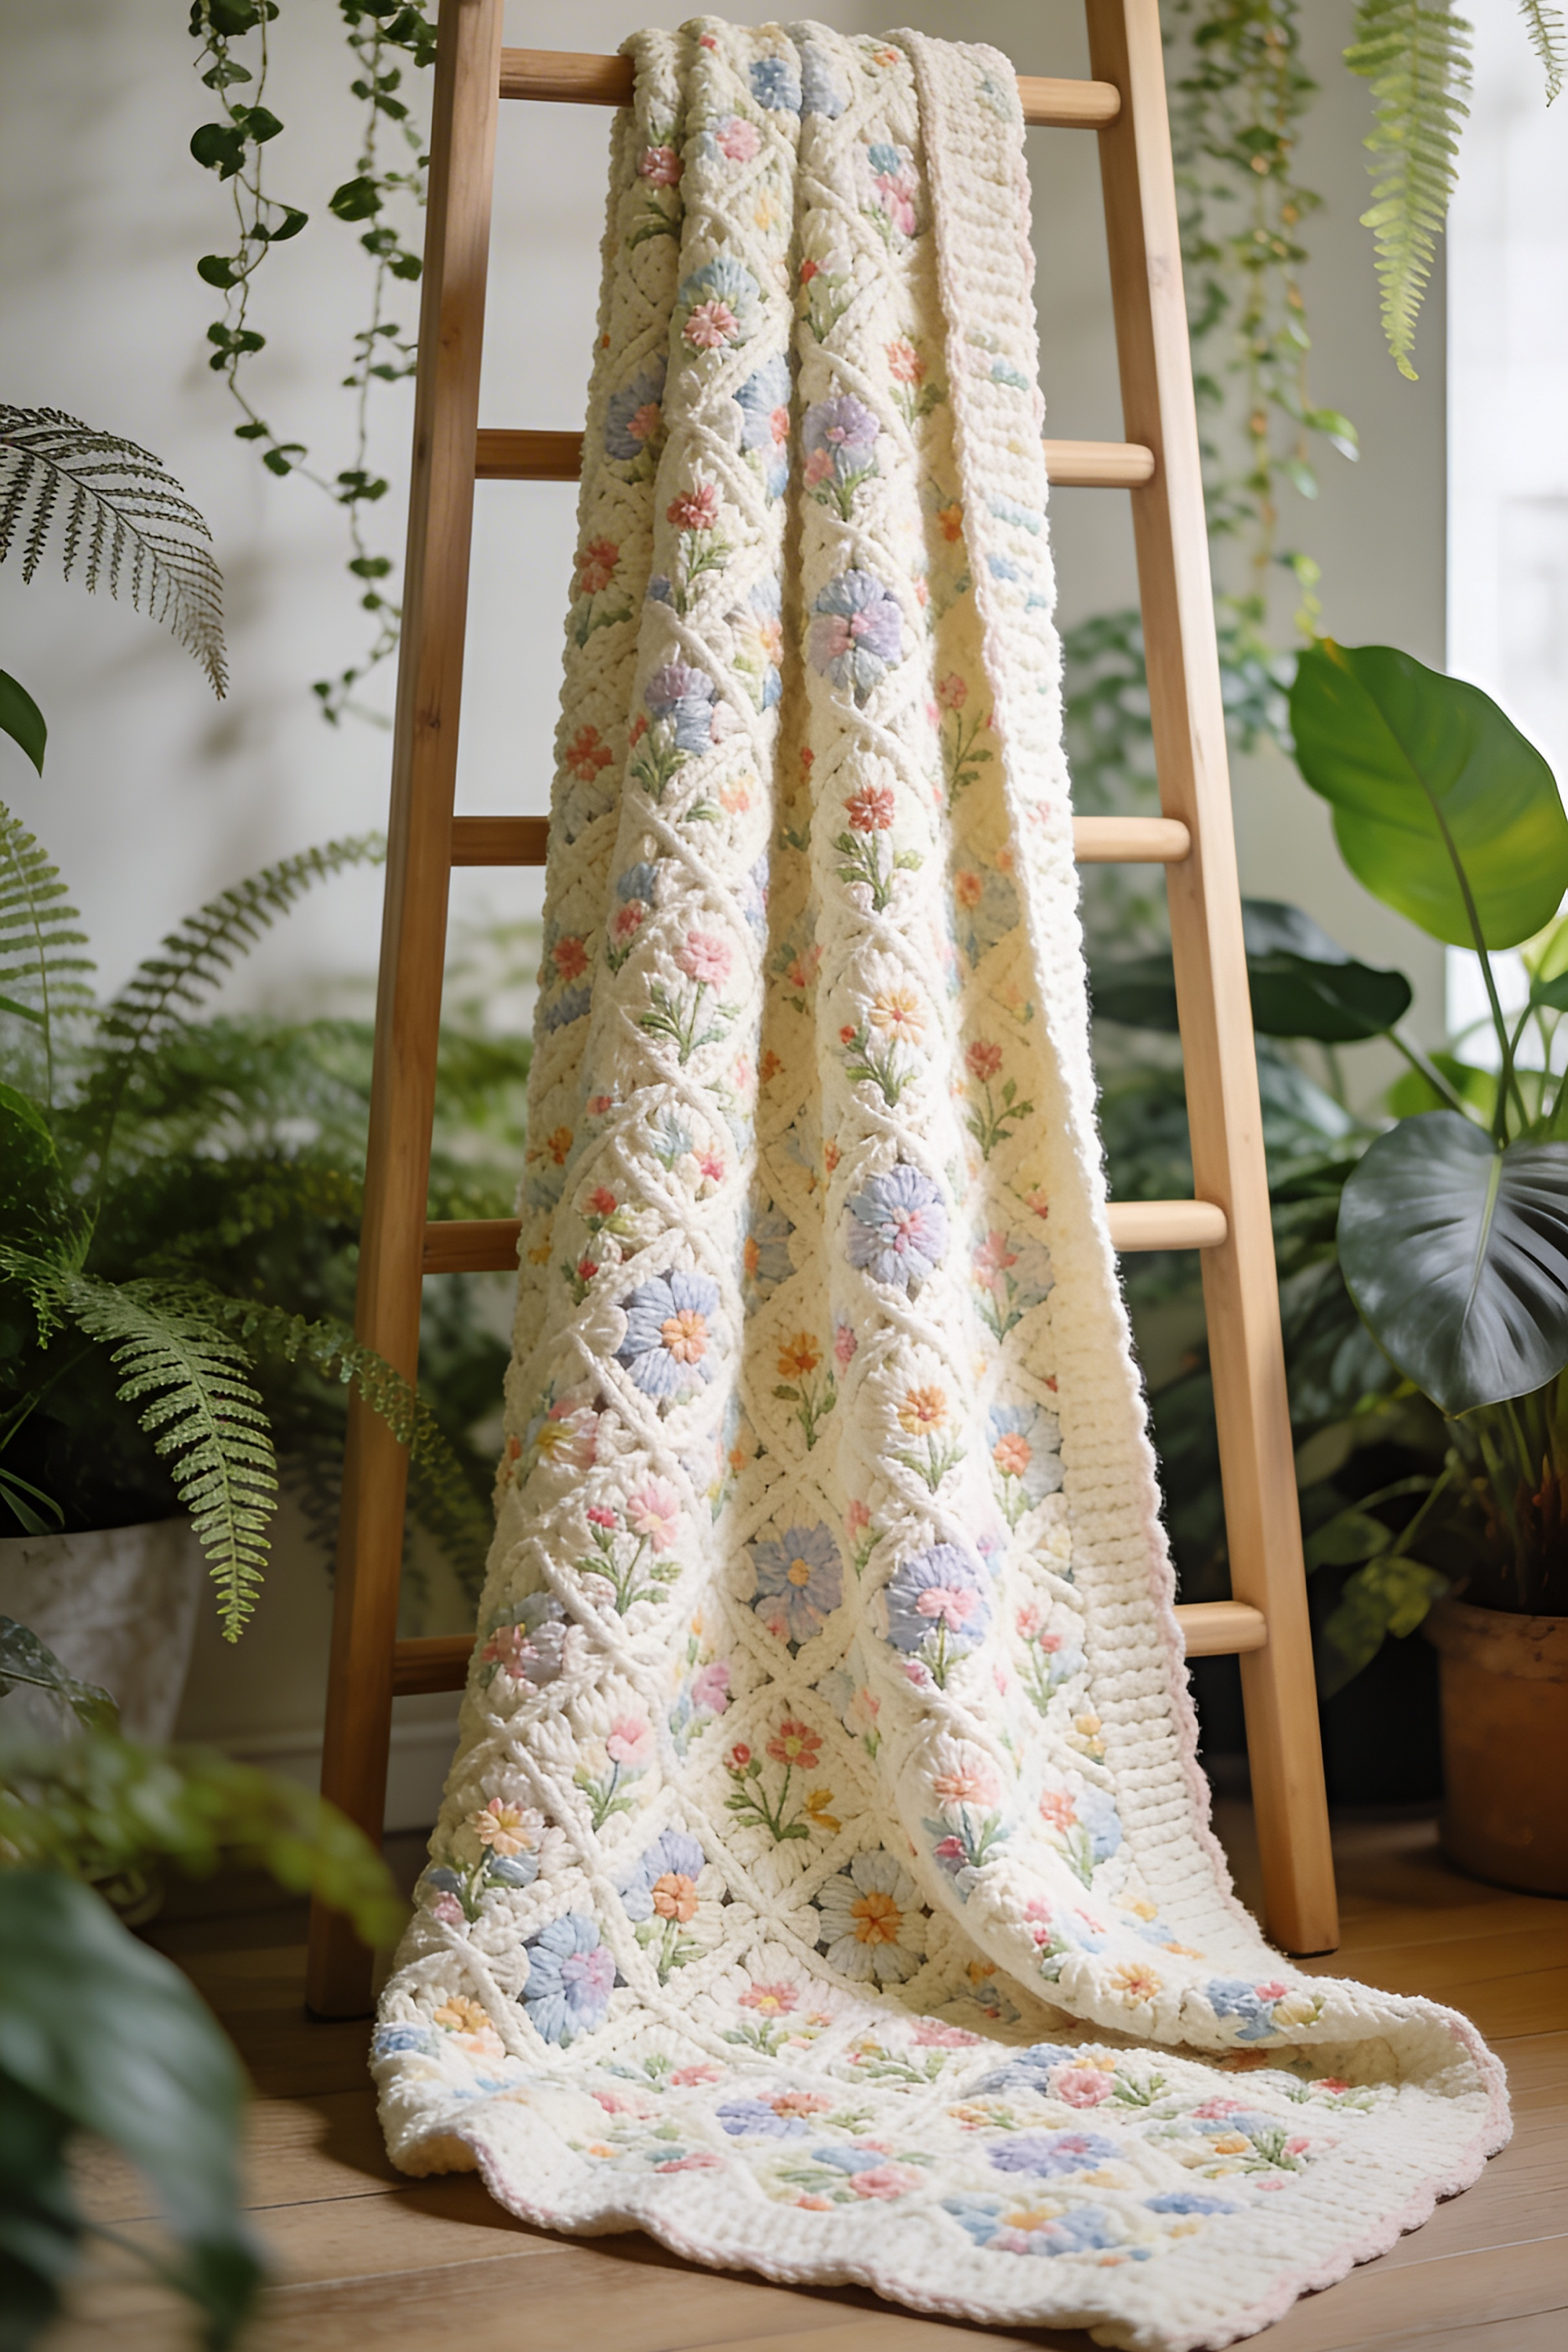
This project recreates a long, elegant afghan with a creamy lattice structure and delicate pastel floral medallions nestled inside the openings. It looks like a fusion of classic crochet lace and cottage garden embroidery, but it can be made fully in crochet with layered motifs and surface details. Draped over a ladder, it reads airy, romantic, and far more expensive than the materials required.
Materials + tools list
- Soft cotton or cotton blend yarn in ivory or warm cream
- Accent yarn in pale blue, dusty pink, peach, butter yellow, sage, and lavender
- Crochet hook, usually 4 mm to 5 mm for a light blanket drape
- Yarn needle
- Scissors
- Stitch markers
- Measuring tape
- Blocking mats and pins
- Optional sewing needle and thread for invisible anchoring of motifs
- Optional pearl cotton or embroidery floss for extra floral detail
- Optional lightweight backing or lining fabric if using as a decorative throw only
Finished size + customization notes
Aim for around 40 x 56 inches for the elegant vertical drape shown in the photo. This afghan looks best when it is longer than it is wide and made of repeating medallion units arranged in columns. You can widen it by adding another motif column, or shorten it to a lap blanket by removing one row of motifs. Keep the border understated and creamy so the lattice remains the star.
Step by step instructions
Understand the structure
This blanket has three visual layers. First is the base blanket or joined motif field. Second is the cream lattice that runs diagonally and creates diamond framing. Third is the pastel flower detail inside selected openings. Thinking in layers makes the pattern much easier to recreate. You are not trying to invent an impossible one piece masterpiece from the first stitch. You are building texture deliberately.Pick your motif system
The easiest route is to crochet square or hexagon motifs with floral centers, join them into a blanket, then add a raised lattice overlay using surface crochet or appliquéd cords. Another route is to make long panel strips and cross them visually with chain work. For most crocheters, joined square motifs are the most forgiving. A 4 inch to 5 inch motif size gives enough space for floral detail without becoming bulky.Crochet the floral center motifs
Start each motif with a pastel flower center. Use a magic ring and form petals with puff stitches, popcorn stitches, or clusters. Try six or eight petals in pink, blue, peach, or lavender with a tiny yellow center. Surround each flower with cream rounds so the blossom sits inside a soft medallion. You should now see little garden tiles forming. If a flower disappears into the cream, deepen the center or add one round of pale green around the petals to separate it visually.Expand motifs into openwork shapes
Once the floral center is complete, build out into a square with chain spaces and corner shaping. Keep some openness because the final blanket in the photo feels breathable and lace forward. Work carefully so every motif ends with the same stitch count. Make a few plain cream motifs too if you want the flowers spaced more sparsely.Lay out the full blanket arrangement
Arrange your motifs in columns on the floor. Alternate floral colors so the eye travels naturally. Keep the distribution of blue, pink, peach, and lavender balanced. Since the finished throw hangs vertically in the image, plan it so the motif colors look beautiful from top to bottom, not just left to right. Take a quick photo once you like the arrangement.Join the motifs
Use slip stitch or mattress stitch in cream to keep the seams tidy. Join into long strips first, then join the strips together. Stretch the work out after each seam to make sure the blanket remains straight. If the blanket starts to torque, you may be joining too tightly on one side. Ease each motif as you seam instead of forcing the corners.Create the lattice overlay
This is the part that gives the afghan its signature look. Using cream yarn, work surface slip stitches diagonally across the motif joins to create large diamonds over the floral field. Another option is to crochet narrow cords or Romanian style crochet braid strips and hand sew them diagonally over the blanket. The overlay should sit raised from the base. You should now see a trellis effect where flowers peek through the windows. If your lattice lies flat and disappears, use a slightly thicker yarn or a more dimensional stitch such as front post slip stitch or padded cord.Anchor the crossings neatly
Where two diagonal lattice lines cross, tack them down invisibly with a few stitches from the back. This prevents shifting when the blanket is handled. Keep the crossings centered over motif join points whenever possible. In the photo, the trellis looks intentional and orderly, not improvised. Precision here makes the whole blanket look professionally designed.Add small floral fillers between major motifs
The throw in the image is sprinkled with tiny extra blossoms and leafy touches. Use embroidery floss or lightweight yarn to add miniature flowers in the open areas between the main floral medallions. Lazy daisy petals, French knots, and small stitched stems are perfect. This little extra detail gives the piece that heirloom mixed media magic.Add outer side panels if desired
If you want the same layered richness seen near the edges of the photo, create narrow side strips in cream with occasional pastel flowers and attach them to the main field before the border. This helps the blanket look framed and polished. A simple ribbed or half double crochet side band works beautifully.Work the border
Crochet one or two rounds of single crochet around the perimeter to stabilize the shape. Follow with a wider textured border such as half double crochet worked in the back loop only for a soft rib, or a shell pattern if you want a romantic edge. The inspiration shows a substantial but not fussy outer frame. Keep it creamy and calm.Refine the drape
This blanket needs elegance more than stiffness. If your yarn is heavy, use fewer border rounds. If it is too loose and floppy, add a narrow lining or one more stabilizing round around the edge. Drape it over a chair or ladder to test how the diamonds fall. You want the lattice to remain readable even when the throw folds.Block aggressively but gently
Pin the blanket to shape so the diamonds sit evenly and the edges are straight. Steam or wet block according to your fiber. Open the lace sections and smooth each diagonal overlay band with your fingers. Let it dry fully. Blocking transforms this project from pretty to breathtaking.Optional upgrades
Add tiny crocheted roses at a few lattice intersections. Stitch in pale green leaf veins for more botanical realism. Make the center motifs in one floral palette for a softer refined look, or mix all pastel shades evenly for a more cheerful garden blanket. You can also attach a soft cotton backing if the throw is mostly decorative and you want extra body.Keep the floral dimension balanced
The photo blends dimensional flowers with elegant structure. If all your flowers are large popcorn blooms, the blanket may become bulky. Mix raised motifs with flatter embroidered blossoms so the texture stays refined. A visual checkpoint is that your flowers should catch the light but the blanket should still fold easily over a ladder rung.Final grooming
Trim every yarn end close and securely. Check the back for loose overlay anchoring. Give the blanket a final steam from several inches away so the surface relaxes without crushing the texture. When draped, the flowers should peek through the lattice like pressed blooms behind garden trellis.
Troubleshooting
If the lattice lines wobble, your motif joins may not be aligned. Mark diagonal paths with removable stitch markers before stitching them down.
If the blanket bows inward at the edges, your border is too tight. Redo with a larger hook.
If the flowers are too subtle, add one round of contrast or embroider tiny centers in warm yellow.
If the blanket feels heavy, choose cotton blend yarn rather than dense acrylic and keep the border restrained.
If your motifs vary in size, block them individually before joining.
Finishing details
Weave in ends deeply through neighboring stitches because an openwork throw reveals loose tails easily. After blocking, store rolled rather than tightly folded to protect the raised lattice. For display, drape it on a blanket ladder where the center column of flowers remains visible. If washing, do so gently and reshape every lattice diamond while damp. You can also lightly stitch the lower corners to help the border maintain a graceful line over time. The more carefully you finish, the more convincing that heirloom boutique feel becomes.
Shop Similar
- Cream cotton blend yarn for heirloom crochet blankets
- Pastel crochet yarn for floral motif afghans
- Crochet blocking mats for lace blankets
- Yarn needles for motif joining and finishing
- Embroidery floss for mixed media floral crochet
- Light wood blanket ladder for throw display
Style It With
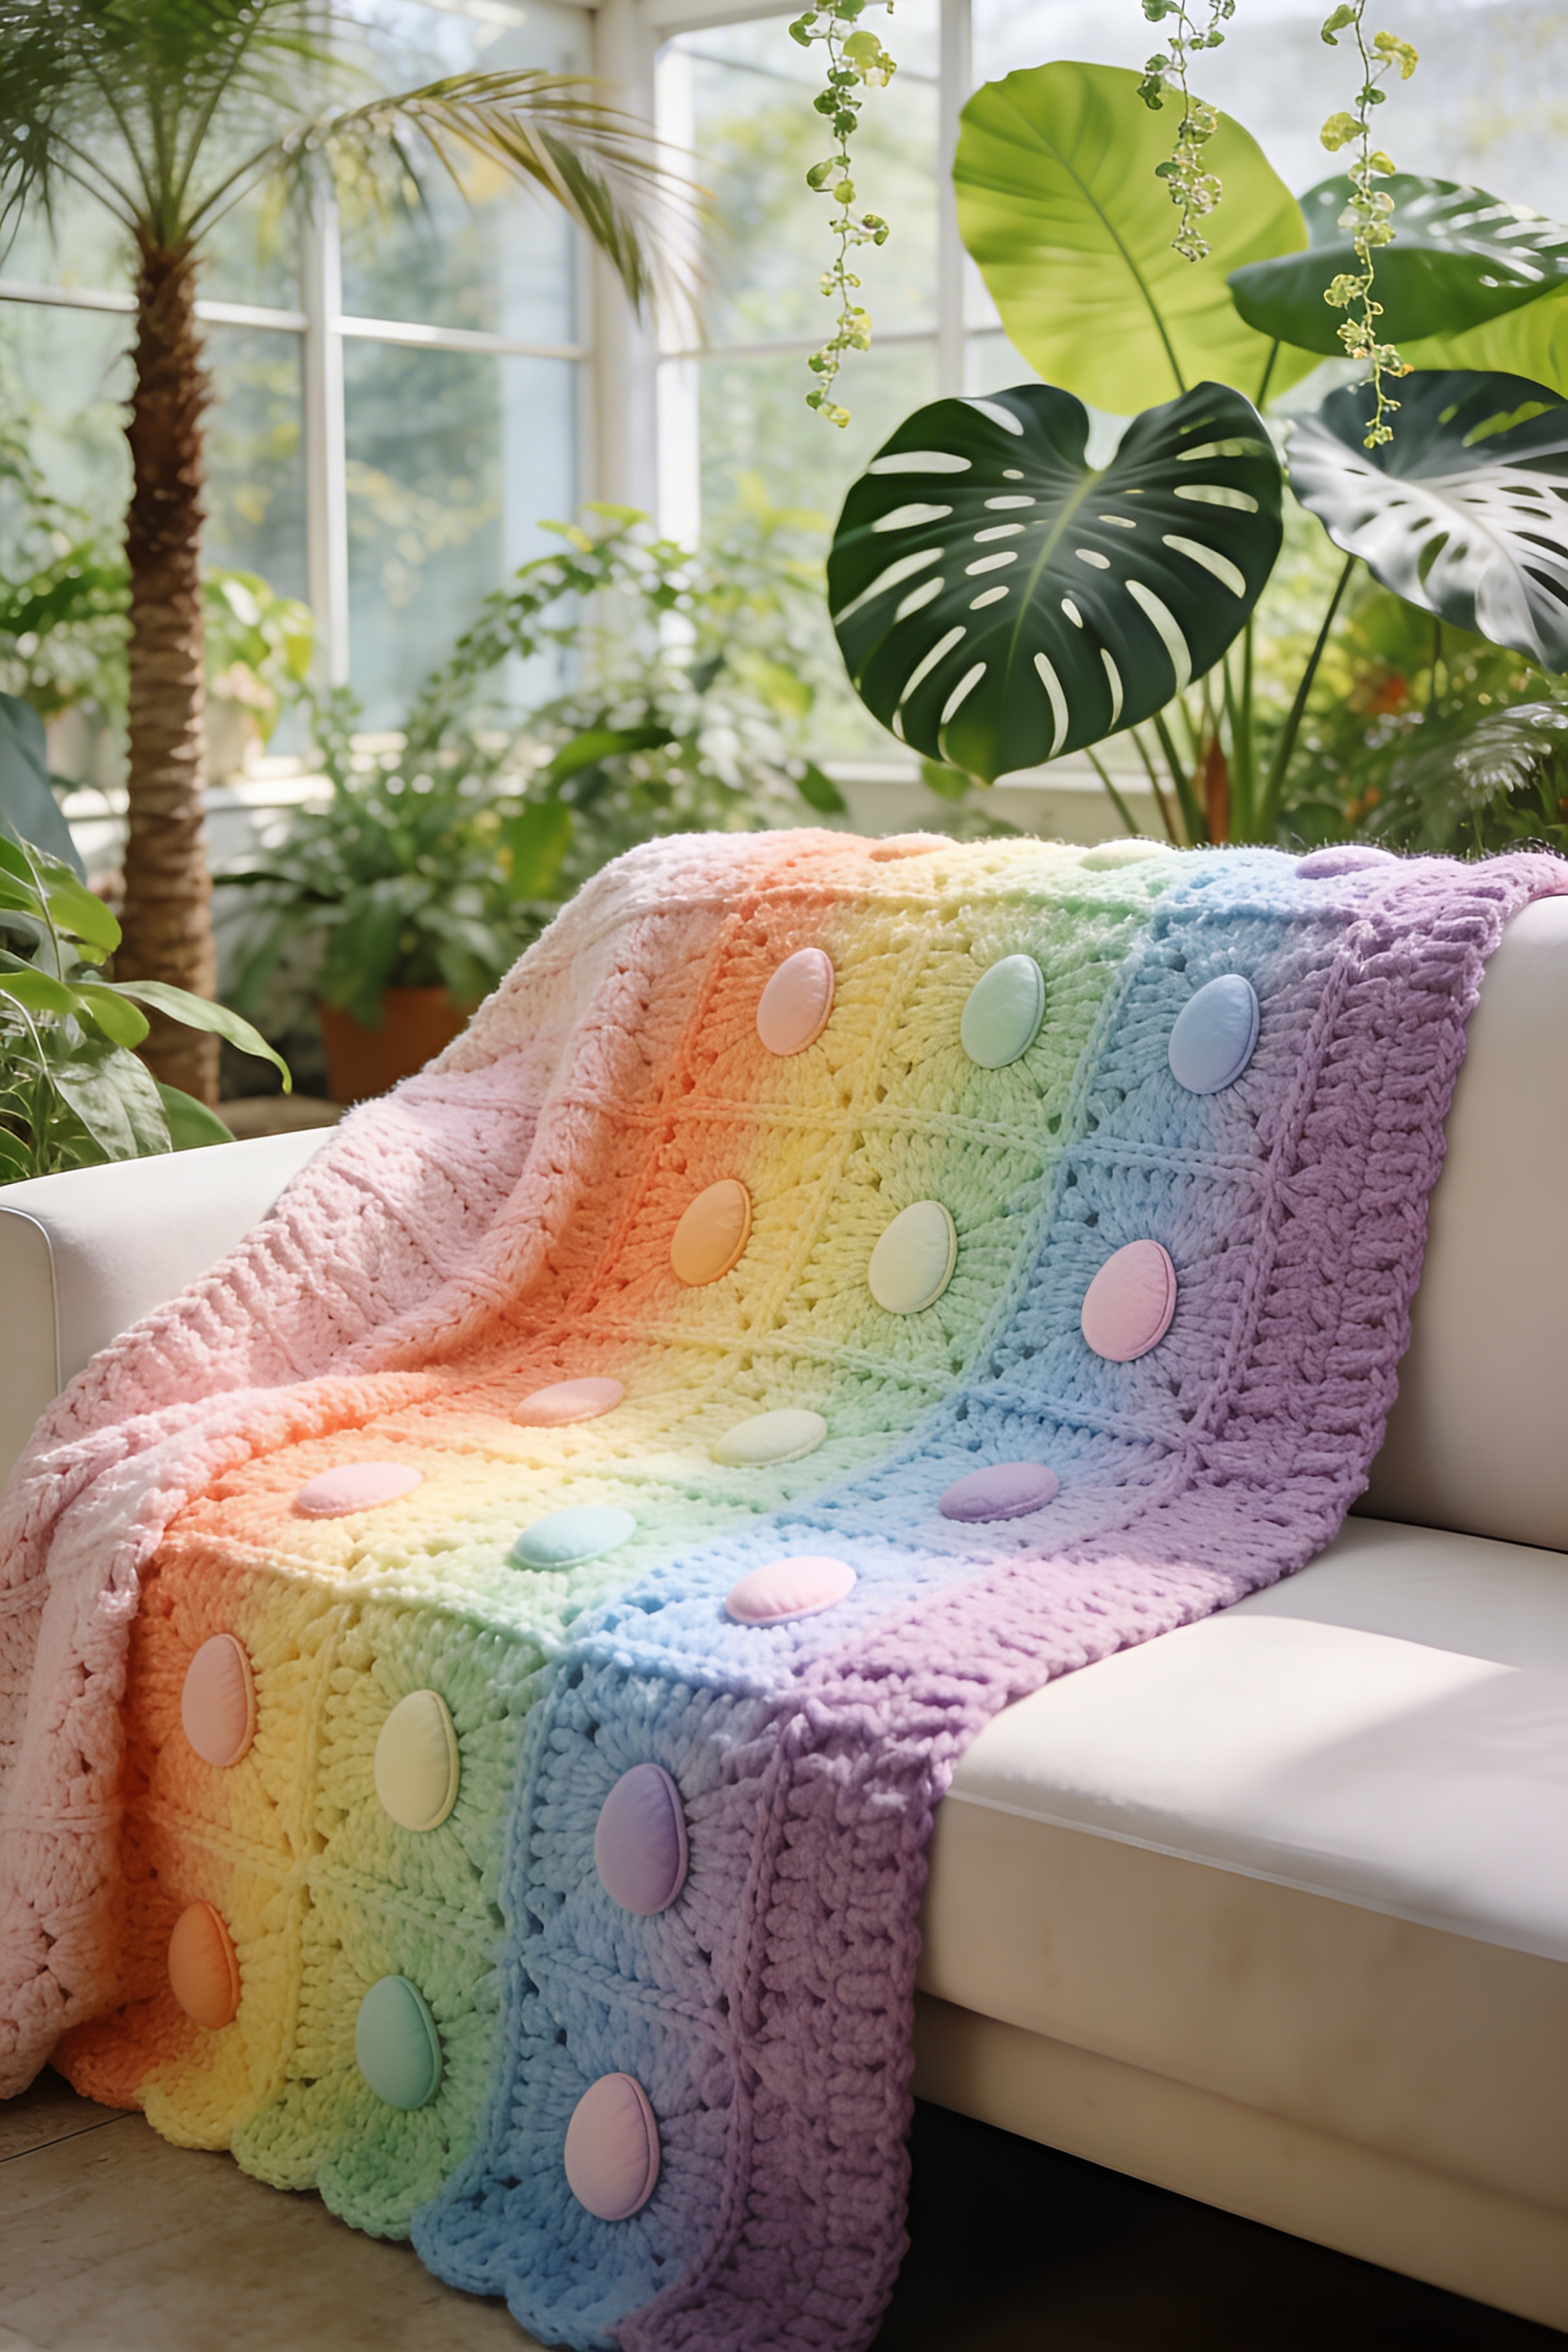
Rainbow Pastel Puff Dot Throw — How To Guide
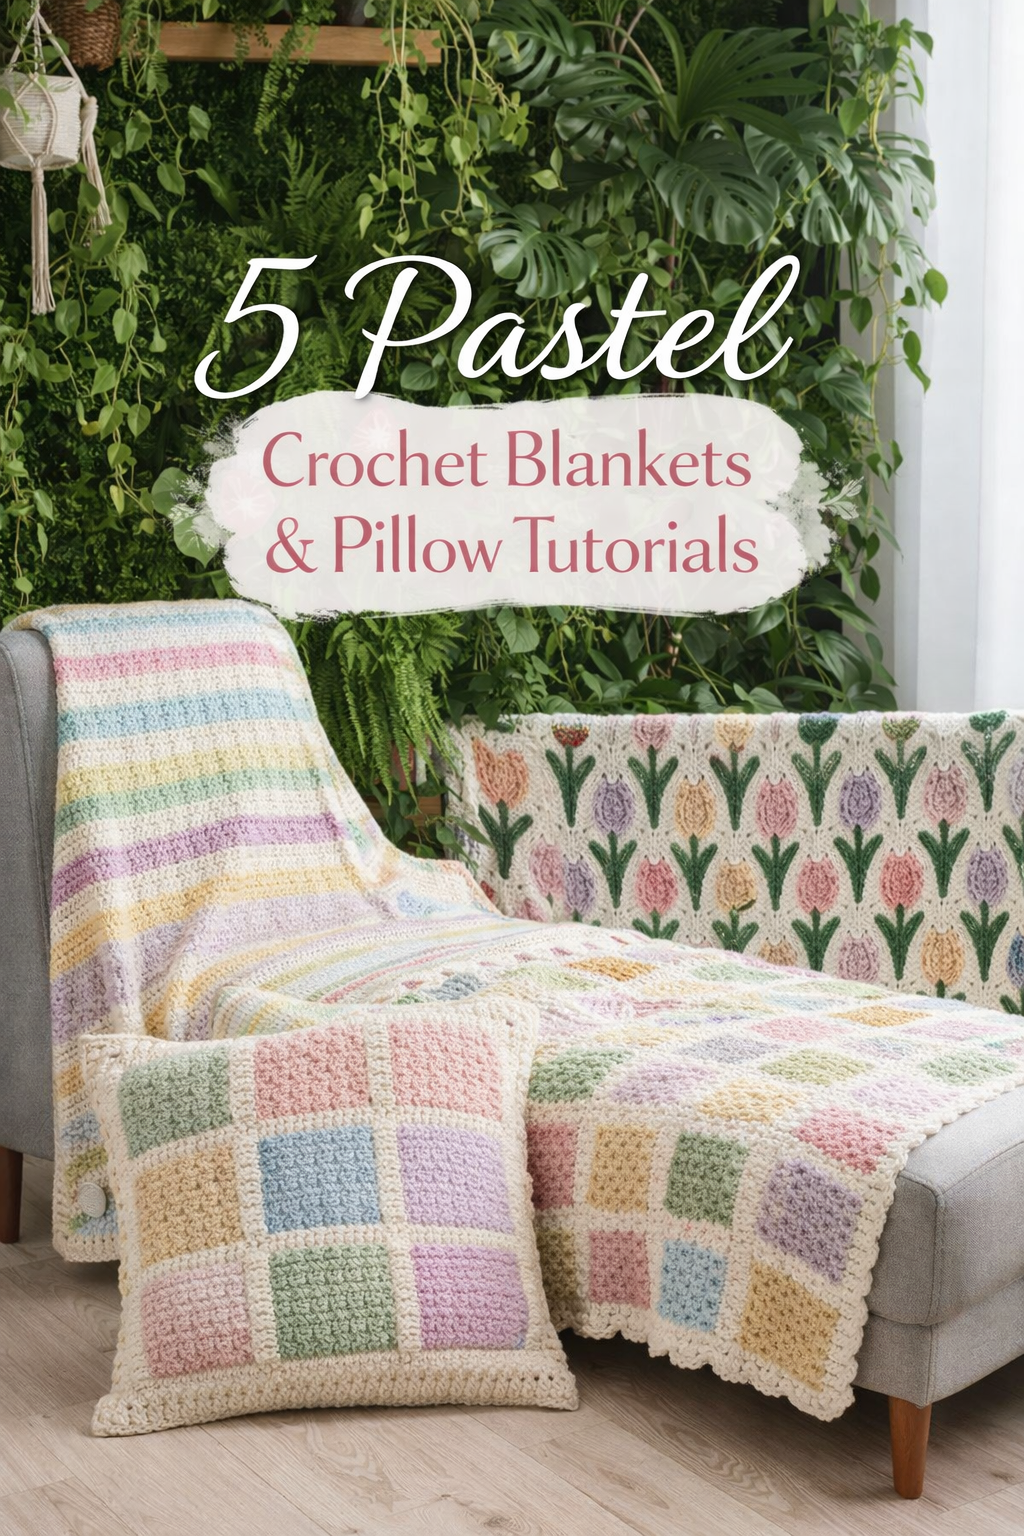
What you’re making
This project is a dreamy rainbow pastel throw made from plush crochet squares and topped with smooth raised oval motifs that look like candy eggs or little macarons. The blanket reads modern and playful at the same time because the gradient color flow is soft and the embellishments are neatly spaced. It is perfect for a sofa corner, nursery chair, or springtime reading nook where you want something bright, tactile, and cozy.
Materials + tools list
- Plush or chenille style yarn in pastel pink, peach, yellow, mint, aqua, sky blue, and lavender
- Matching yarn for square joining
- Smooth yarn or velvet yarn in coordinating pastel shades for the raised oval dots
- Crochet hook suited to your yarn, often 6 mm to 8 mm for chenille
- Yarn needle
- Scissors
- Stitch markers
- Measuring tape
- Blocking boards or thick towels
- Optional oval templates cut from cardstock for sizing your dots
- Optional fabric backing for durability
- Optional poly fill if you want lightly padded dots
Finished size + customization notes
A throw like the one shown can be made from 20 to 30 large squares, depending on the finished block size. Aim for squares around 7 to 8 inches. The final blanket should be wide enough to cover a sofa arm and pool across the seat, roughly 40 x 55 inches or a bit larger. The look depends on a soft rainbow fade from one end to the other, so plan the color order before you begin.
Step by step instructions
Build your pastel rainbow map
Lay all yarn colors in order from pink through peach, yellow, mint, aqua, blue, and lavender. The image works because the transition is soft rather than striped harshly. You can let colors overlap a little by repeating one shade in two neighboring columns. Draw a simple grid and label each square color before crocheting. You should now see the gradient move smoothly across the blanket.Decide on square texture
The blanket appears plush with gently ridged square surfaces. A solid granny square, corner to corner block, or puff stitch square all work. For beginners, a classic solid square in double crochet gives structure without being stiff. For more luxury, use linked double crochet or mini bean stitch for a denser feel. Make a test square and drape it over your arm. If it feels too holey, choose a denser stitch.Crochet the first square
Start with a magic ring or chain 4 joined into a ring. Work a solid granny square with standard corners. Continue until the square reaches your desired size. Keep the stitch count identical for all squares. With plush yarn, count carefully because stitches can hide. Place stitch markers in corners if needed. A visual checkpoint here is that the square should lie flat and feel cushiony, not thin.Repeat in all rainbow shades
Make enough squares to complete your throw. Group them by color family and keep labels if necessary so the final layout remains balanced. If you are using chenille yarn, leave longer tails because it can slip more easily when woven in. This is one of those projects where organization saves hours later.Make the oval puff dots
The raised ovals are the signature feature. Crochet each dot separately in a matching or slightly contrasting pastel. You can make them as flat appliqués using an oval start: chain 6, work around both sides with increases at the ends, then a second round to smooth the shape. For a more padded look, make two ovals, seam them together with a tiny bit of stuffing, and close. Keep each oval roughly the same size, around 2.25 to 2.75 inches tall. If yours looks too much like a circle, lengthen the foundation chain by one or two stitches.Lay out the placement
Arrange the squares in the planned rainbow order. Center one oval dot on each square. Step back from a distance to make sure the colors of the dots do not disappear into the background. The photo has tone on tone softness, but there is still enough contrast to read every oval clearly. If your lavender ovals vanish on lavender squares, shift them to mint or pale pink instead.Attach the dots securely
Sew the oval appliqués onto the center of each square with invisible whip stitches or ladder stitches. Catch only the back loops at the edge of the appliqué when possible so the shape remains puffy. If using padded dots, stitch around twice for security. You should now see little candy like capsules floating over each square.Join the squares in rows
Use a flat slip stitch join, mattress stitch, or join as you go. Since chenille can get bulky, a flat sewn seam often works best. Join squares into horizontal rows first, then join rows together. Keep the gradient order consistent. The left side of the blanket should melt into the center and then into the cooler hues on the right. If you accidentally scramble the color order, the blanket will still be pretty, but you will lose the striking rainbow sweep from the photo.Add the border
Work at least one round of single crochet around the entire blanket to stabilize the edges. Then add a wider textured border in a coordinating pastel, such as soft lavender, to frame the throw. Half double crochet in the back loop or a simple ribbed border looks beautiful here. The border should feel substantial enough to finish the piece, but not so wide that it competes with the color field.Correct bulk at the corners
Plush yarn can create chunky corners. Use fewer stitches than you think you need in each corner, then test the lay. Usually two stitches, chain 1, two stitches works better than dramatic increases. Steam gently if your fiber allows, and finger press the corners into shape.Add subtle texture between squares if desired
If you want extra definition, surface slip stitch along the seams in a matching pastel or cream. This creates a paneled look and helps each square read clearly. The photo already has visible square structure, so this is optional. Use restraint because too much extra trim can make the blanket heavy.Backing option for durability
Chenille and plush yarn feel amazing but can stretch over time. If the blanket is for frequent use, add a fleece or cotton gauze backing. Lay the blanket over the fabric, trim to size, fold the fabric edge under, and hand stitch around the border. This also protects the backs of your appliqué dots and gives the throw a polished finish.Block lightly
Do not aggressively wet block chenille unless the yarn label supports it. Instead, lightly steam from a distance or simply shape the blanket flat while spritzed. Smooth each square with your hands and check that the dots remain centered. Let the blanket rest until fully dry.Optional upgrades
Use ombré yarn for some of the squares to make the rainbow even softer. Make the dots look more egg like by adding one line of surface embroidery across the middle. Add giant tassels in the four corner colors. Or scale the project down into a baby blanket by making just 12 larger squares.Styling the finished throw
This throw shines when draped over white upholstery or pale wood. Fold it so multiple dots are visible. The more evenly you space your ovals and maintain the gradient, the more designer the final result will look. If yours feels too playful and you want it calmer, narrow the palette to pink, butter yellow, mint, and lavender only.Care notes while you work
Plush yarn sheds less frustration when handled gently. Avoid ripping out repeatedly if possible because chenille can fray. Test your stitch count often by measuring rather than depending only on visible stitches. A softer hand and slightly larger hook usually produce the best drape.
Troubleshooting
If your squares differ in size, chenille tension is the likely culprit. Measure after each finished square and adjust hook size if needed.
If the appliqué dots flip upward at the edges, you need more anchoring stitches or your appliqué is slightly too large for the square center.
If the blanket feels too heavy, reduce square size or switch from plush yarn to a lighter baby yarn.
If the gradient looks abrupt, redistribute colors before final joining and overlap neighboring shades.
If corners wave, reduce border stitches.
Finishing details
Weave in chenille ends by splitting the yarn path through several stitches and knotting discreetly if needed because the pile can loosen. Brush the surface lightly with your hands, not a comb, to keep it neat. If you add a backing, make sure the blanket is fully shaped first so the fabric does not tug the crochet. Store flat or loosely folded to preserve the roundness of the padded dots. The finished throw should feel almost marshmallow soft while still reading clean and intentional.
Shop Similar
- Pastel chenille yarn for crochet throw blankets
- Large crochet hooks for plush yarn projects
- Velvet yarn in pastel shades for appliqué dots
- Blocking boards for crochet blankets
- Fleece backing fabric for throws
- Yarn needle set for bulky crochet finishing
Style It With
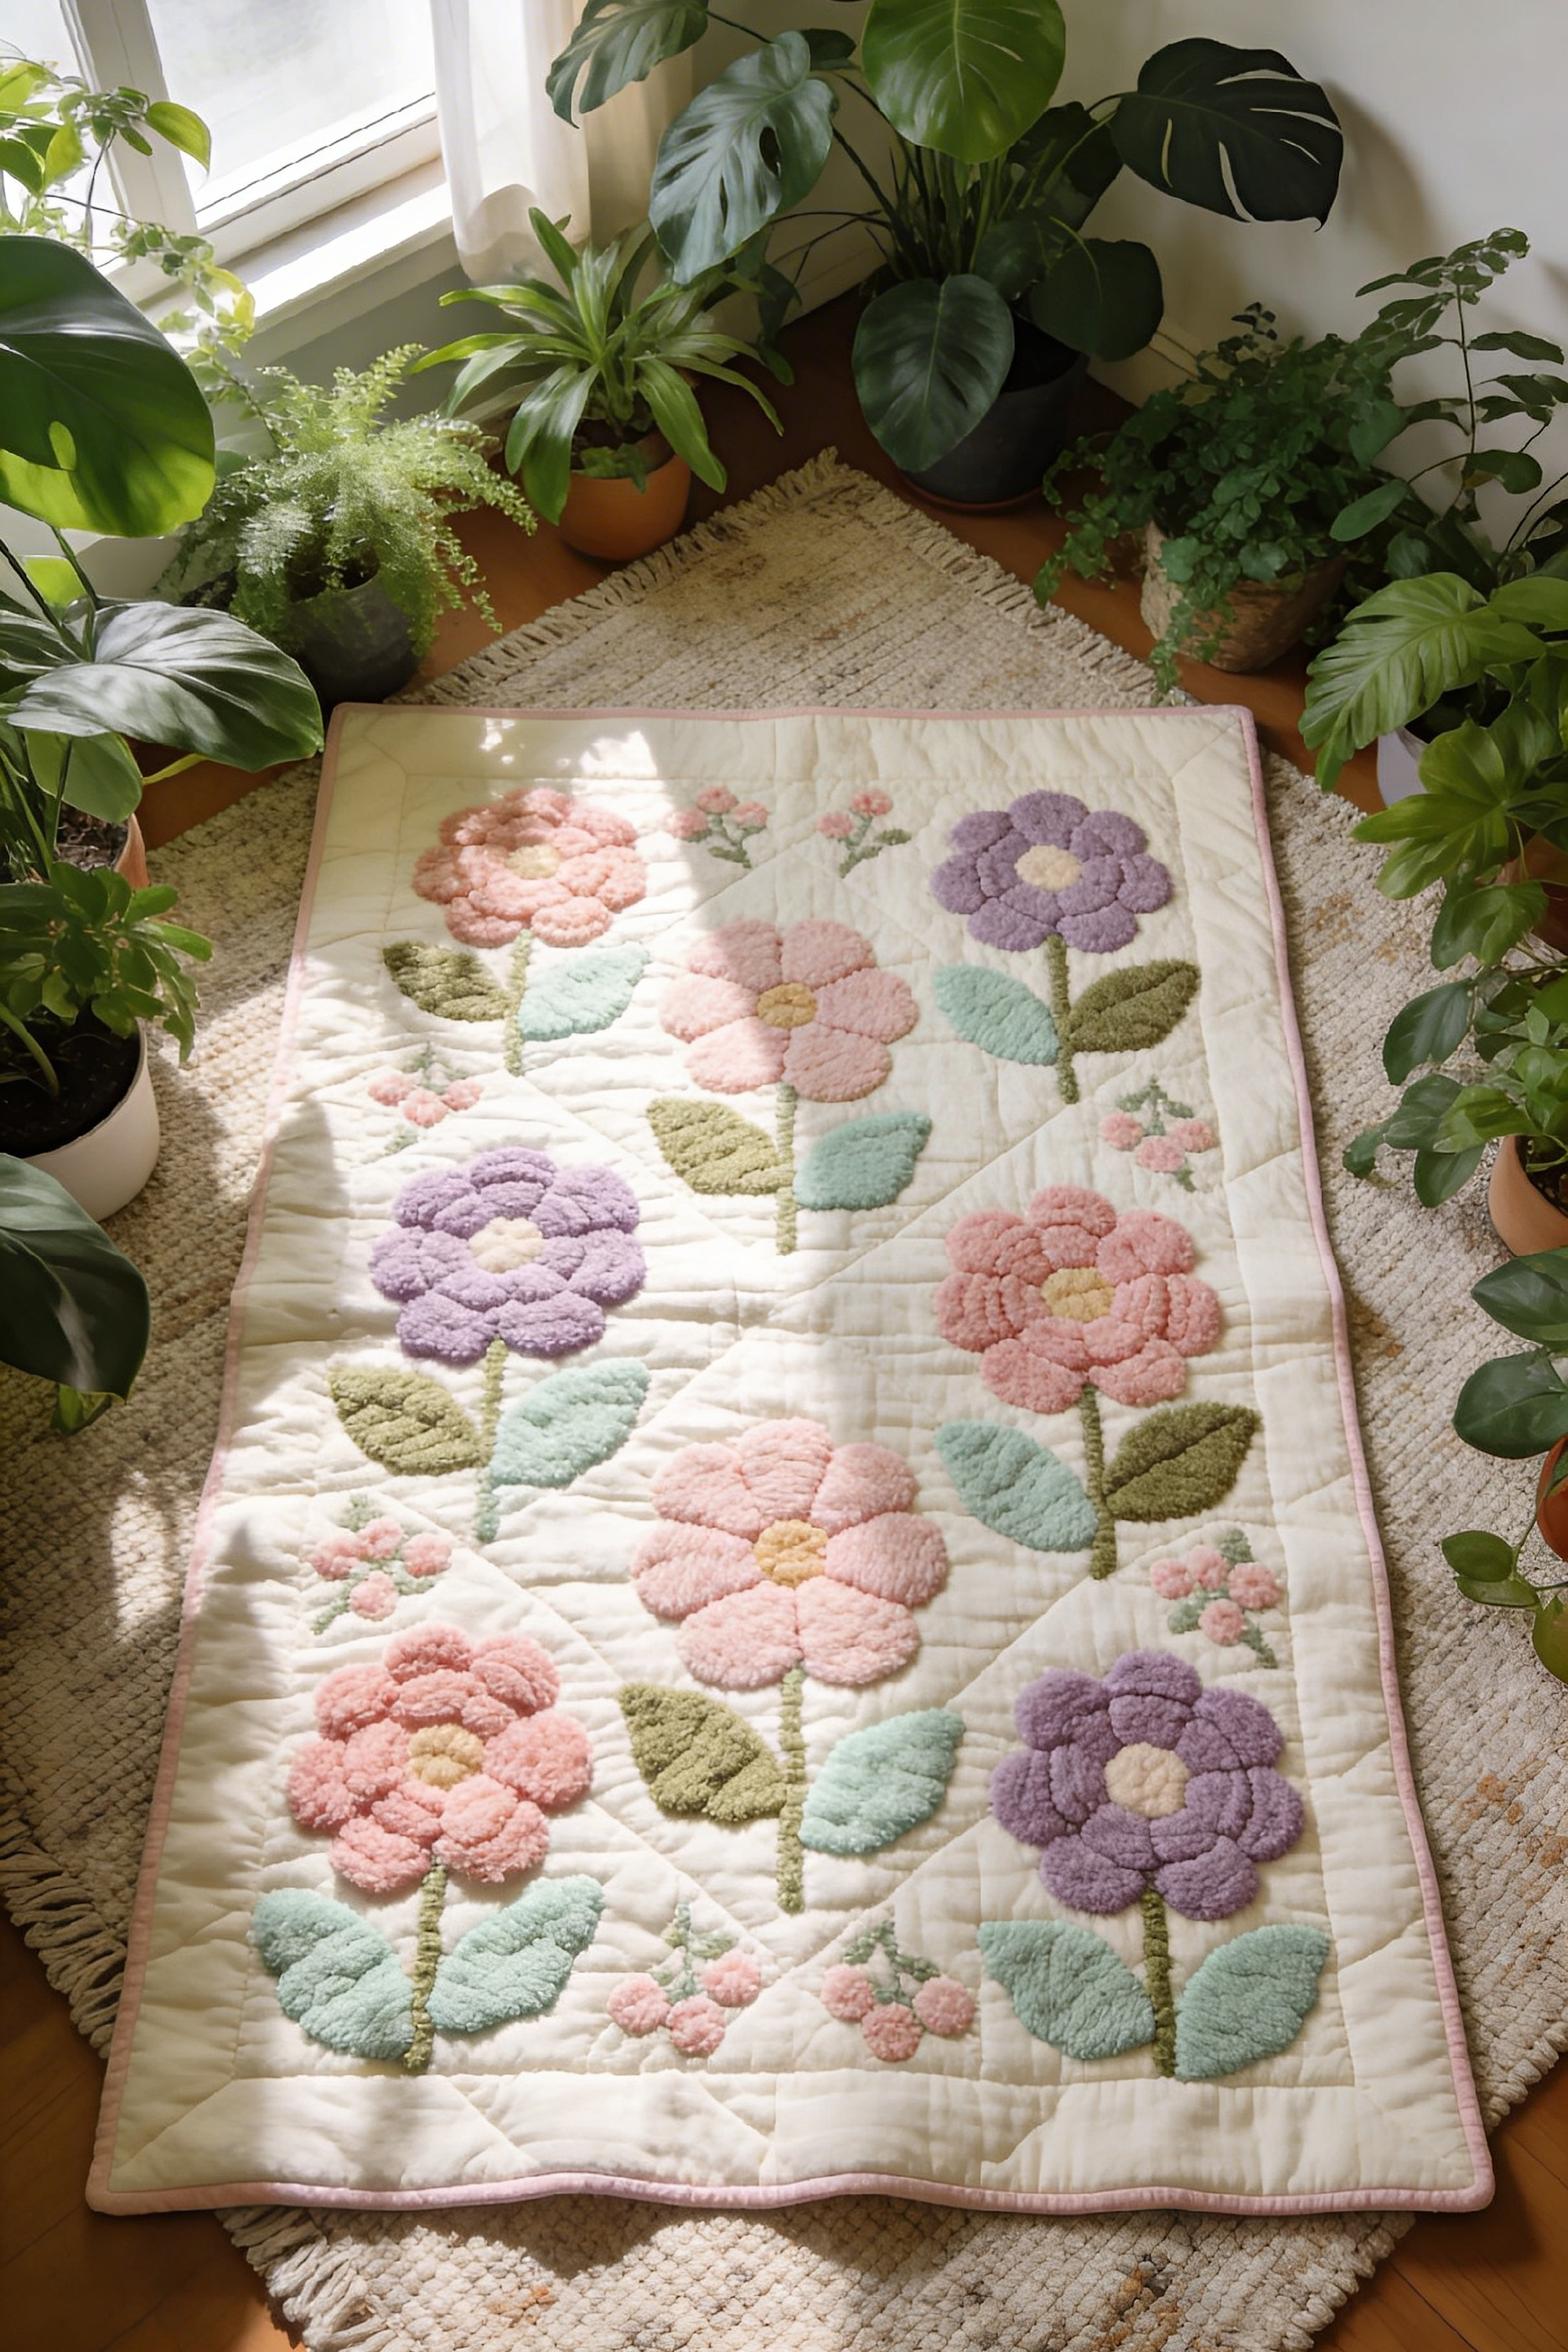
Tufted Flower Garden Play Mat Quilt — Step by Step Tutorial
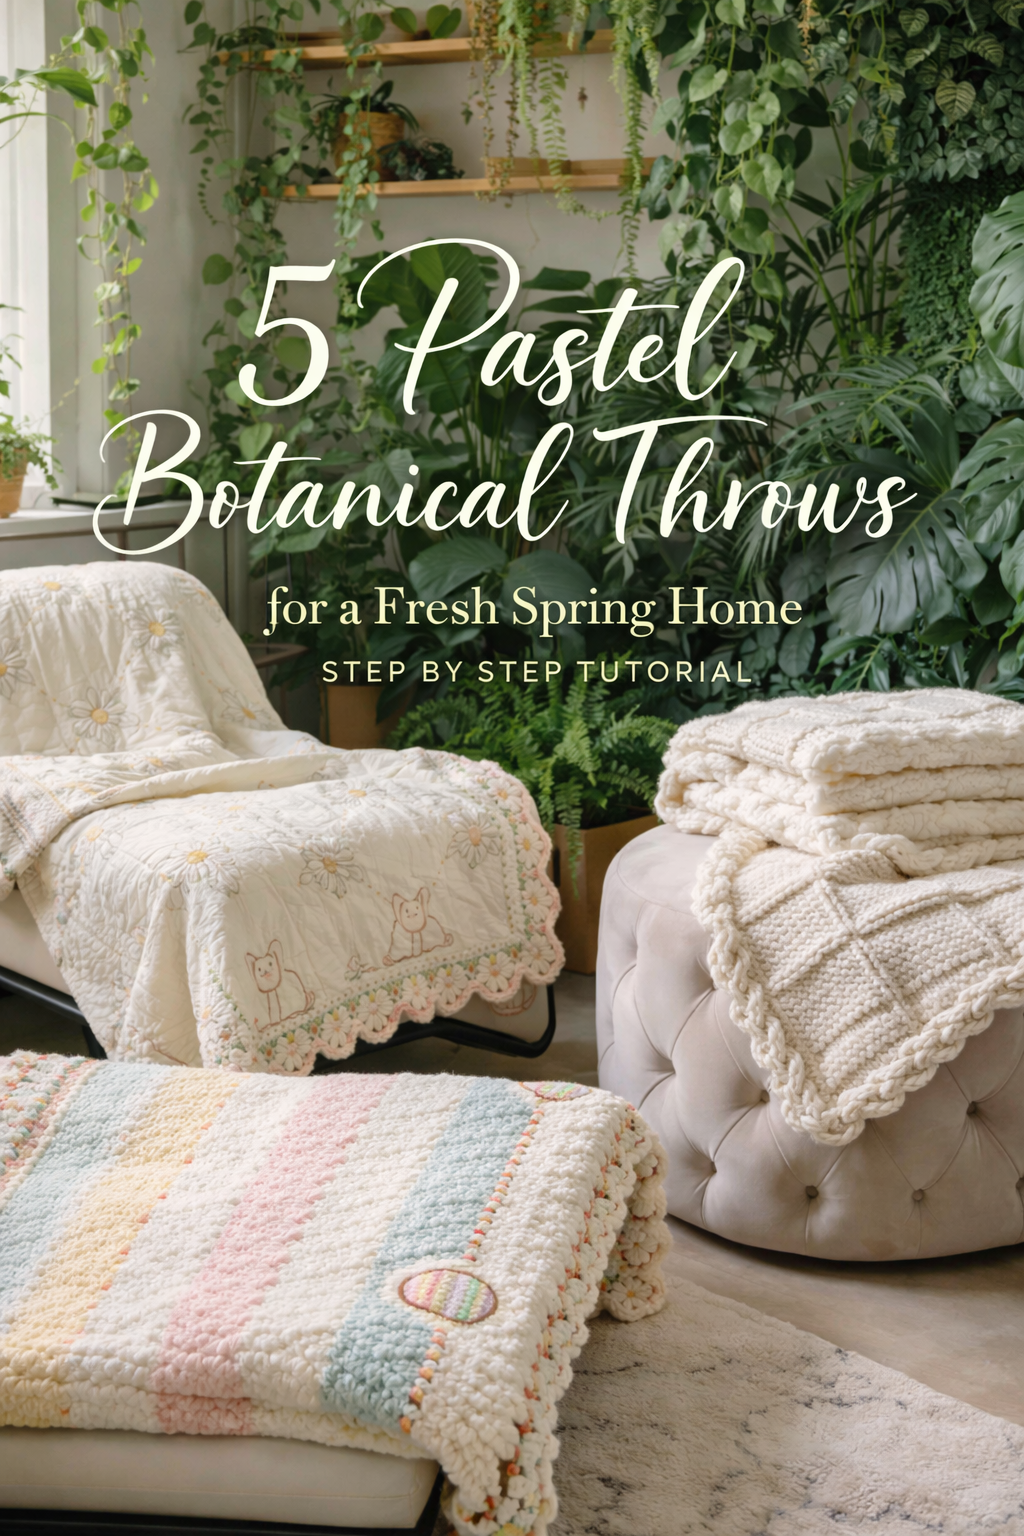
What you’re making
You are making a soft quilted floor mat or baby sized blanket with oversized pastel flowers that look gently tufted or chenille textured against a creamy background. The design in the photo feels sweet and graphic at the same time, with simple floral shapes arranged in neat rows and framed by a pale pink binding. It is perfect as a nursery play mat, spring nap blanket, or decorative floor quilt in a bright plant filled room.
Materials + tools list
- Cream cotton quilt top fabric
- Cream backing fabric
- Low loft cotton batting
- Tufted fabric, chenille stems, terry appliqué fabric, or soft minky scraps in pastel pink, lavender, mint, and sage
- Yellow or buttercream fabric for flower centers
- Green fabric for stems and leaves
- Fusible web
- Sewing machine
- Walking foot if available
- Fabric scissors
- Embroidery scissors
- Pins or clips
- Iron and pressing cloth
- Quilting ruler and measuring tape
- Pale pink binding fabric or ready made binding
- Optional embroidery floss for tiny accent blossoms
- Optional hand quilting thread
Finished size + customization notes
A floor mat size of 36 x 50 inches works beautifully, but you can scale this project larger for a toddler quilt or smaller for a changing mat. The floral motifs should be large enough to read instantly from above, so aim for flowers between 5 and 7 inches across. Keep the composition roomy with negative space around each flower. That space is what makes the blanket feel calm and elevated.
Step by step instructions
Plan the floral composition
Draw a simple rectangle and divide it loosely into three columns and three or four horizontal zones. Place seven to nine large flowers across the field with a few tiny blossom accents in the gaps. Alternate colors so pink and lavender are balanced. Leaves should angle outward to make each flower feel open and cheerful. You should now see a layout that feels charming and organized without looking stiff.Build the quilt sandwich base
Cut your top, batting, and backing. Baste them together with pins, spray basting, or hand tacking. Since you will appliqué large shapes on top, it helps if the base is already secure. A low loft batting works best because the tufted flowers already add dimension. If the base is too puffy, the motifs may distort when sewn down.Create flower templates
Make paper templates for petals, centers, stems, and leaves. A five petal daisy shape or rounded scalloped flower works beautifully. Keep the shapes slightly chunky and childlike because that is part of the look. Transfer the templates to fusible web and then to your tufted or soft appliqué fabric. Cut carefully so edges remain smooth.Fuse the main stems and leaves first
Arrange the stems and leaves on the quilt top. Fuse them lightly in place according to your layout. Stitch around them with a narrow zigzag, blanket stitch, or straight stitch close to the edge, depending on your fabric type. The stems create the structure, so get these positioned well before adding the flower heads. If your layout feels too tight, remove one flower rather than shrinking all of them.Add the flower heads
Place each large flower head at the top of its stem. Layer the center circle last. Use fusible web to secure, then stitch carefully around the petals. If you are using plush or chenille fabric, a slightly wider zigzag helps control fraying. Work slowly around curves. You should now see the blanket bloom into a graphic garden. If a flower feels too flat, add a second layer of smaller petals underneath or stitch the center more tightly so the petals puff.Stitch the tiny accent blossoms
The photo includes little companion blooms scattered between the large flowers. Add these with tiny fabric circles, French knots, or miniature lazy daisy stitches. These fillers keep the design from feeling empty and tie the larger flowers together.Quilt the background
Once all appliqué is in place, quilt the cream background in soft geometric channels, diagonal lines, or gentle crosshatch. Avoid stitching heavily over the plush flower parts. Quilt around the motifs instead to help them stand out. The background quilting should stabilize the mat without overwhelming the floral design. A visual checkpoint is that the cream sections should have enough stitching to lie smooth on the floor.Add subtle shaping to the flowers
If you want a more boutique heirloom look, hand tack a few petal centers to the batting very lightly so the petals contour. Do not flatten them. You just want enough control that the blanket looks finished rather than floppy. Another option is to use a tiny bit of trapunto style stuffing under a few petals before closing, but keep it gentle.Square the quilt
Trim the edges so the quilt is perfectly rectangular. Because this piece may live on a floor or under a baby, a neat edge matters. Measure both diagonals to ensure the shape is not skewed.Attach the binding
Use a pale pink binding for the soft frame seen in the inspiration. Sew the binding to the front, wrap to the back, and hand stitch or machine finish it. The pink edge should read as a whisper of color, not a bright outline. If your pink feels too strong, wash it once before use or choose a dusty blush.Add hand finished detail if desired
A line of embroidery around the flower centers or tiny stitched veins on the leaves can make the blanket feel custom. Keep these details light. The big shapes are the star. One or two small enhancements per flower are enough.Optional upgrade for a play mat
For a dedicated floor mat, add a nonslip backing panel or quilted canvas reverse. Another good upgrade is to bind the edges twice for extra durability. If using for a nursery wall or display piece, keep it softer and lighter.Test the look from above
Lay the finished quilt on the floor and stand over it. The flowers should read instantly, and the rows should feel balanced. If yours looks more crowded on one side, add a couple of tiny blossom fillers to the emptier zones rather than moving large flowers late in the project.Soften and shape
Give the quilt a light steam and press only around the motifs, not directly crushing plush petals. Let it relax flat under sunlight for a few hours. This helps the quilted base settle and the appliqué soften into the surface. The finished piece should feel cozy and hand made, not stiff like a wall hanging.Adaptation ideas
Turn the same design into a crib quilt with smaller flowers and closer spacing. Make a runner by using one central column of flowers only. Or create a reversible mat with a plain cream back and a coordinating floral pillow from leftover scraps. You can also swap the flower palette for blue and butter yellow if you want a less spring specific version.Keep it practical
Because it is likely to be handled a lot, reinforce the start and stop points of every appliqué seam. Trim any backing threads close. If your plush fabric sheds, use pinking shears on the internal seam allowance of layered appliqué pieces before fusing. A sturdy finish turns a pretty mat into a usable one.
Troubleshooting
If the flowers ripple at the edges, too much fabric bulk or too little stabilization is the culprit. Trim bulky seam allowance and add more background quilting nearby.
If your quilt top puckers, baste more thoroughly next time and reduce iron movement during fusing.
If the motifs look childish rather than charming, space them farther apart and keep your palette soft and sophisticated.
If the binding waves, the quilt edge was stretched while sewing. Repress and ease the binding back into shape.
If the leaves disappear, use one sage and one darker olive leaf on each stem for contrast.
Finishing details
Wash gently and dry flat or tumble on low depending on your fabrics. Finger fluff the flower petals after laundering. Hand stitch the back of the binding if you want the nicest finish for gift giving. For nursery use, add a fabric label with the date. To preserve the plush texture, store flat or rolled. This design also looks beautiful propped over a crib rail, folded at the foot of a toddler bed, or layered on top of a neutral rug in a bright plant filled corner.
Shop Similar
- Cream quilt fabric and low loft batting
- Pastel chenille appliqué fabric for flower quilts
- Fusible web for quilt appliqué projects
- Quilting rulers and rotary cutting tools
- Dusty pink quilt binding supplies
- Embroidery floss for floral quilt accents
Style It With
The beauty of this collection is that every blanket carries its own mood while still belonging to the same dreamy spring world. Some feel like treasured heirlooms you might pass down, others feel whimsical and fresh, and a few strike that perfect balance between playful seasonal décor and everyday cozy living. Whether you are drawn to floral quilting, soft crochet texture, pastel patchwork, or dimensional appliqué, these designs prove that a blanket can be both practical and deeply decorative.
Styled over a rocker, folded on a bench, draped across a sofa, or spread out in a sunlit nursery, these pieces bring warmth, softness, and a sense of handmade calm to a room. They are the kind of projects that make a space feel cared for. They invite you to slow down, choose beautiful colors, and create something that looks lovely long after the season has passed. If you have been wanting a spring project that feels comforting, photogenic, and genuinely special, these blanket ideas are the perfect place to begin.