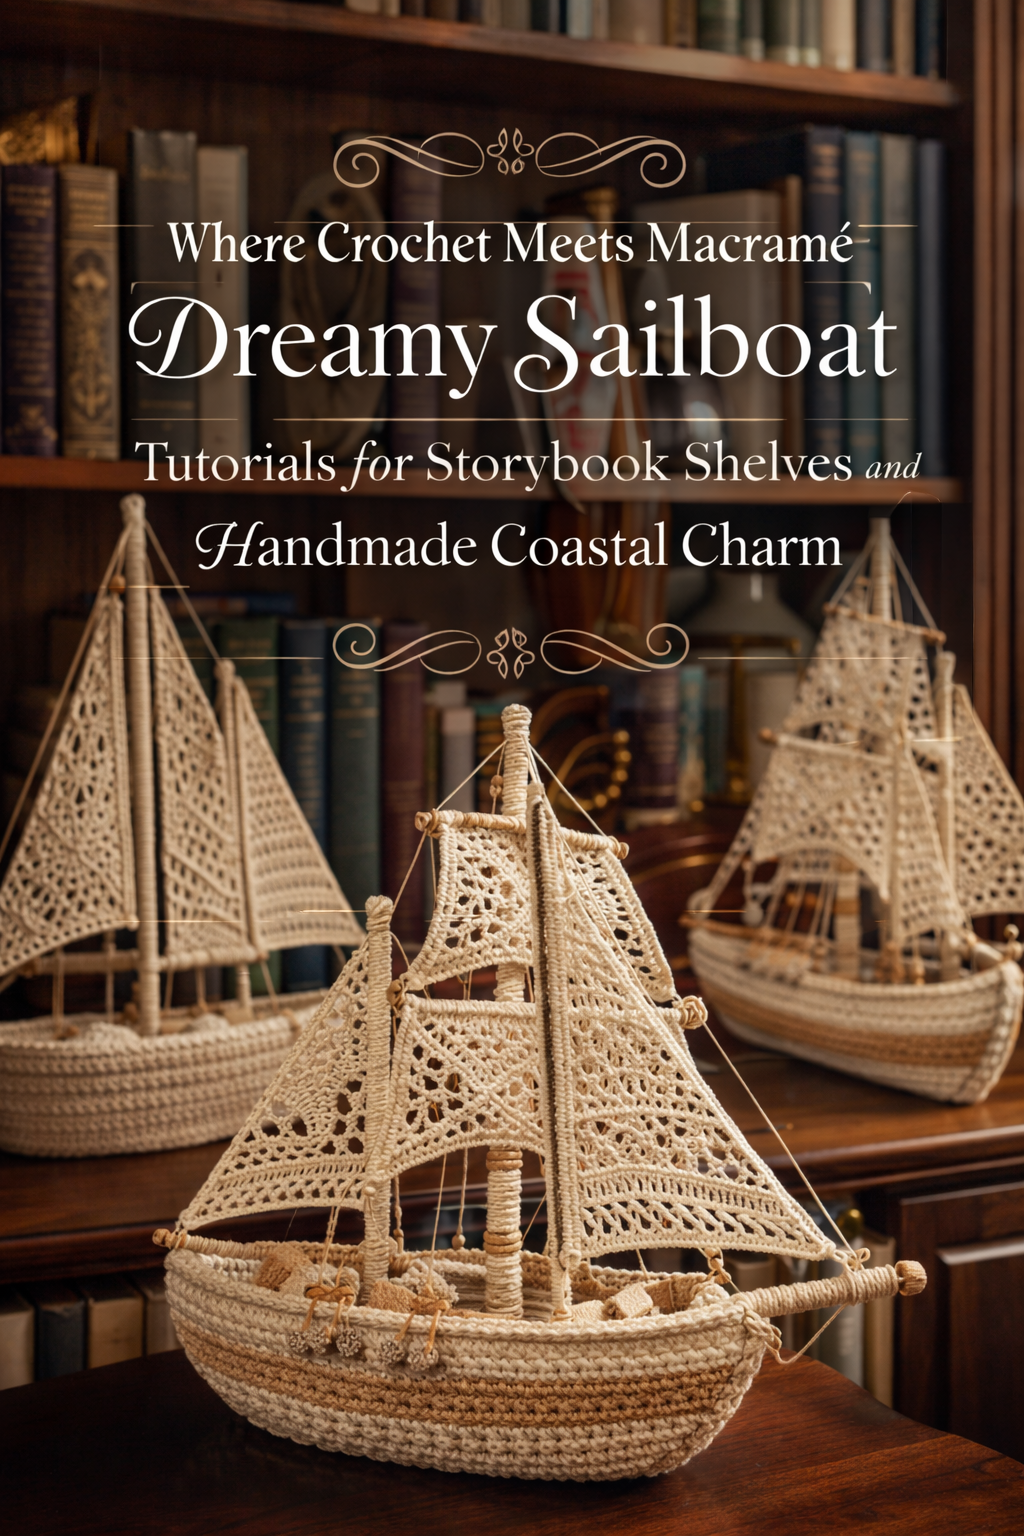
Where Crochet Meets Macramé: Dreamy Sailboat Tutorials for Storybook Shelves and Handmade Coastal Charm

More like this
💡 Pro Tip: Why I Link to Amazon Search Results and Not One Product
In the Shop the Look and Style it With sections under each bikini, I link to Amazon search results, not single products. Here’s why this matters:
Hot bikinis sell out fast. I don’t want you clicking on a dead link to a sold-out item. Search pages stay updated.
You get more options. Love the vibe but want a different color, cut, or price point? The search results give you everything that matches the look and energy.
I curate each search carefully. These aren’t generic. I spend hours crafting keywords that bring up exactly the kind of bikinis I’d wear—or recommend to my hottest friends.
Support with no pressure. If you click a link, browse, and buy something later, I may earn a small commission at no extra cost to you. That helps me keep bringing you curated collections like this one—powerful, seductive, and always fresh.
So dive in. Click through. Try something risky. These aren’t just bikinis—they’re commands, statements, and maybe even your new favorite weapon of choice.
There is something quietly magical about a sailboat tucked into a bookshelf. It feels like a story waiting to begin. These crochet and macramé sailboats are not just crafts. They are soft sculptures that bring warmth, texture, and a sense of coastal calm into your space. Whether styled among weathered novels, layered ceramics, or sunlit wood shelves, each piece carries that handmade presence that makes a room feel lived in and loved.
In this collection, you will learn how to create a range of sailboat styles from minimalist and modern to richly detailed heirloom designs. Each tutorial is designed to help you recreate the exact look and mood of the inspiration pieces while giving you the flexibility to adjust size, texture, and detail to suit your own space. Take your time with these. The beauty of these boats is not just in how they look, but in how they are made.
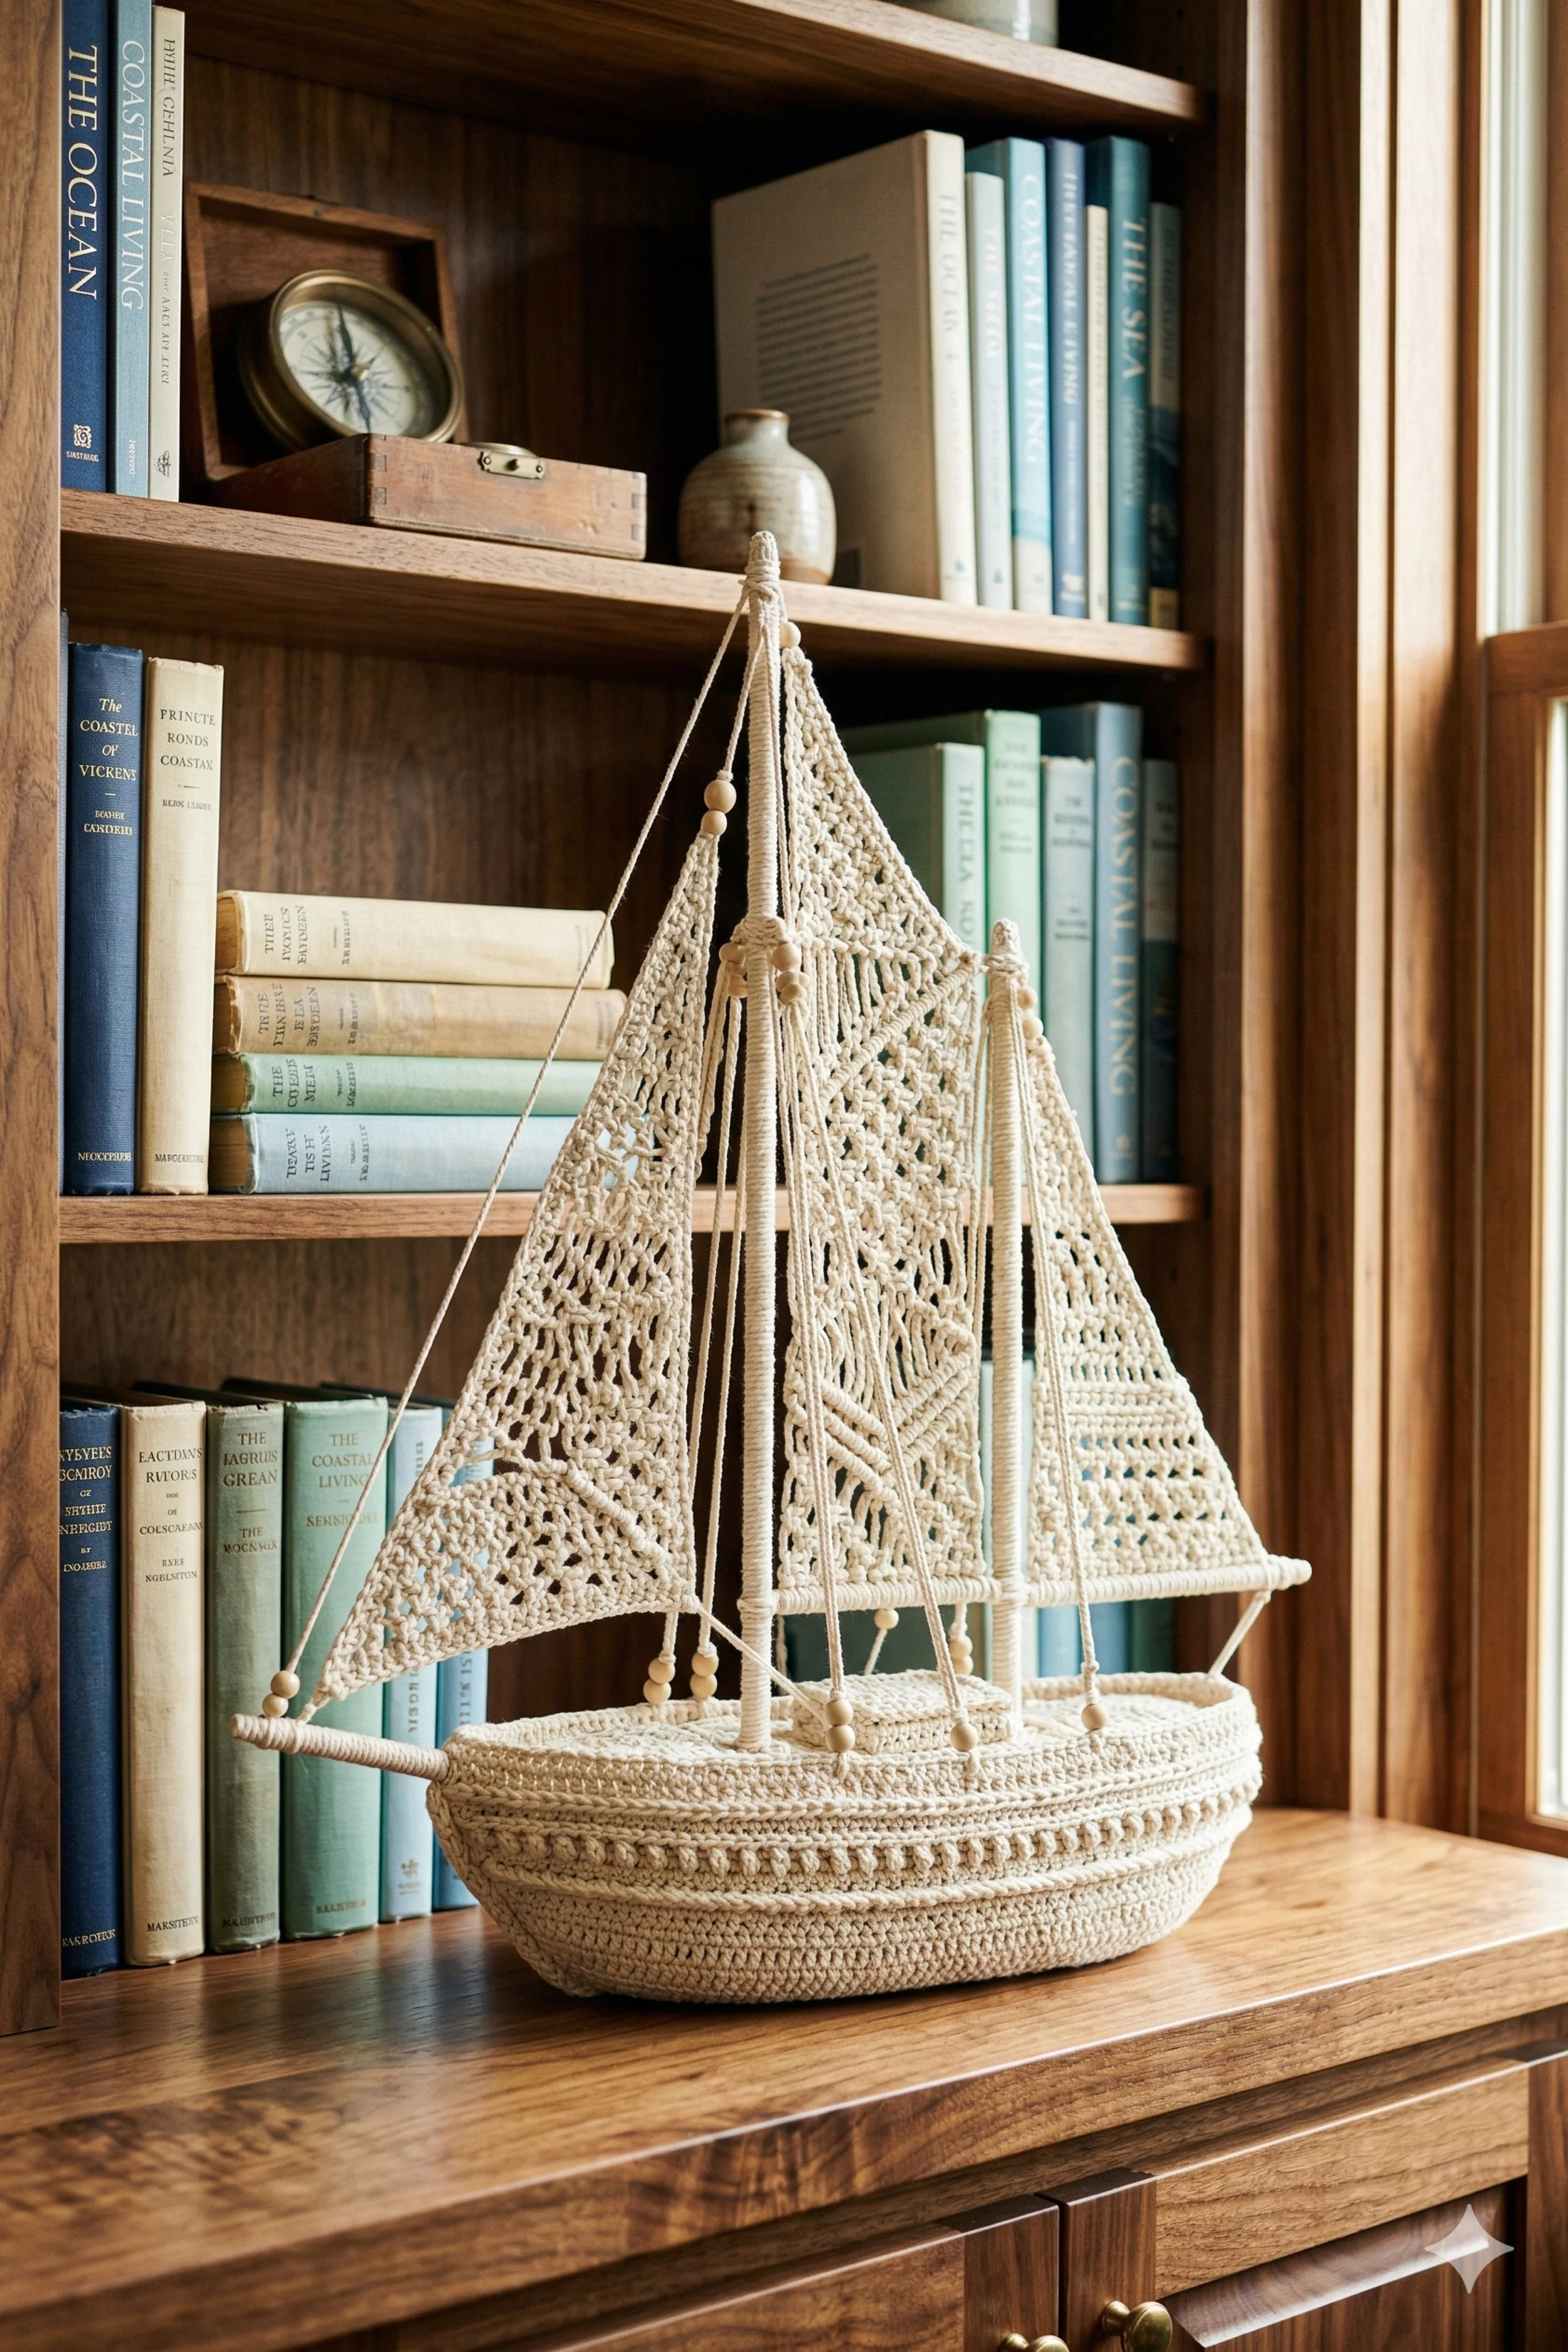
Heirloom Macramé Sailboat Shelf Décor Step by Step Tutorial
What you’re making
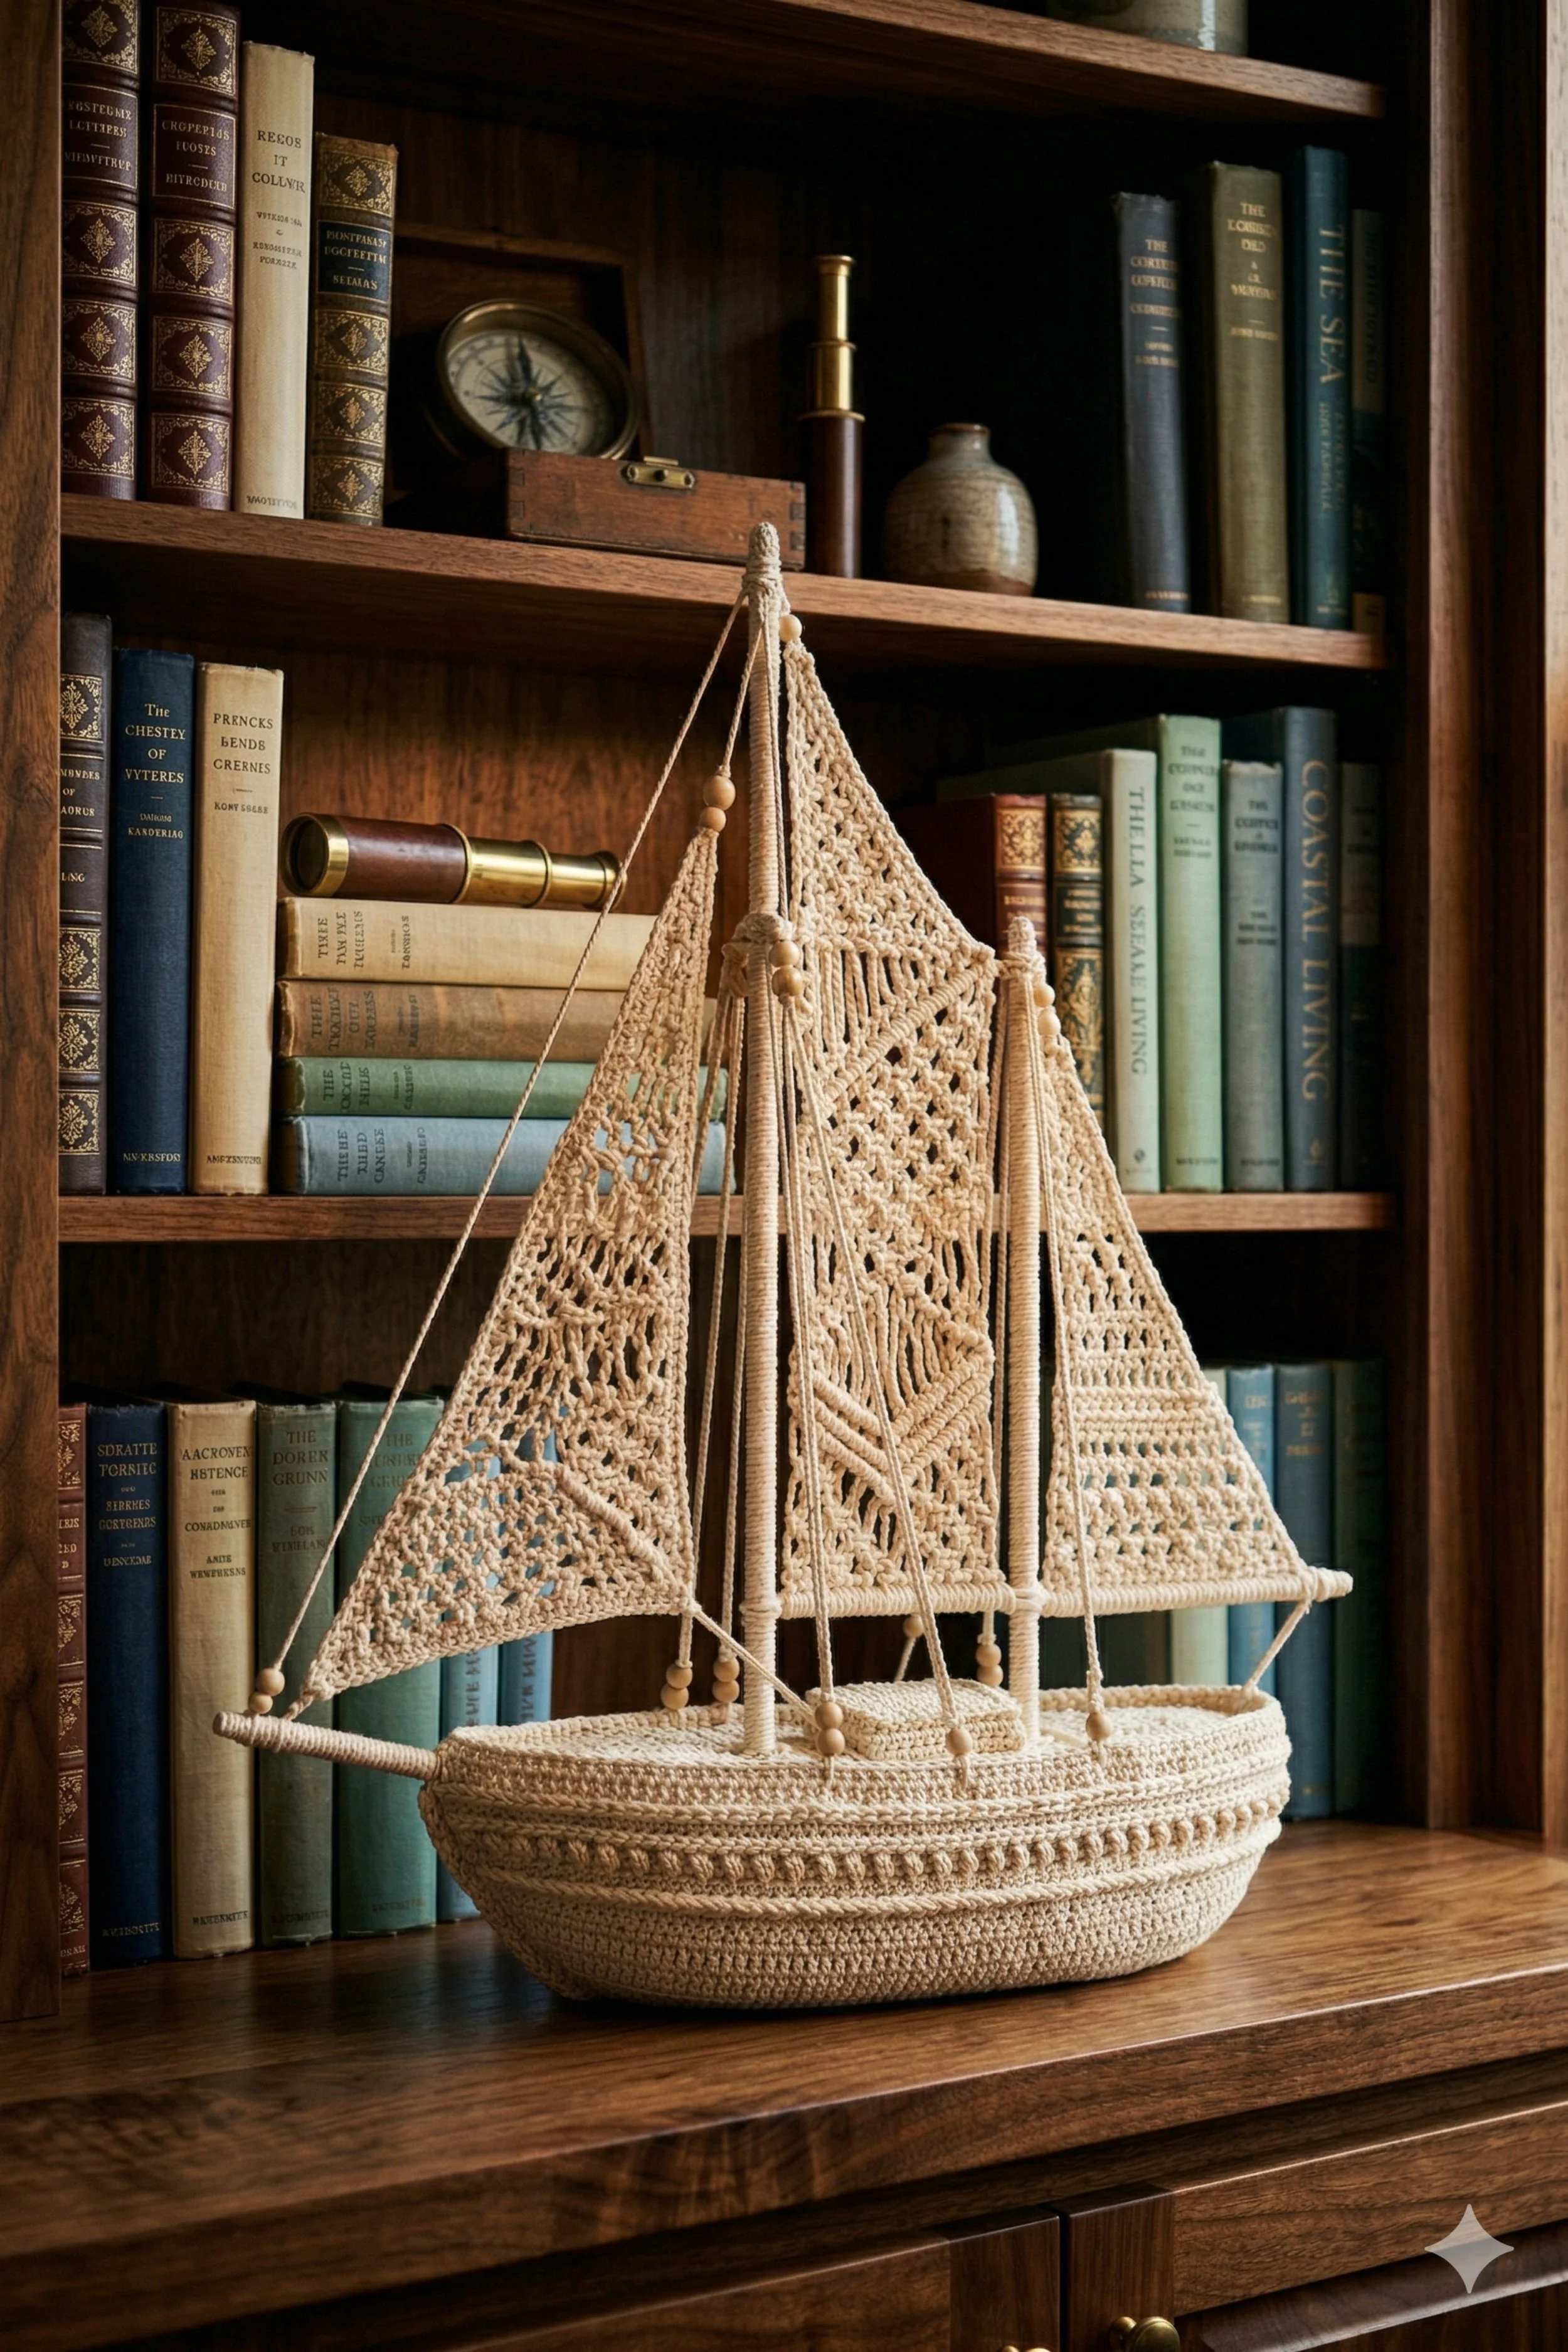
You’re making a sculptural macramé and crochet inspired sailboat that looks like it belongs on a warm wood bookshelf in a coastal study. This version has a generously rounded oval hull, a tall wrapped mast, multiple lace style sails, and delicate rigging finished with small wooden beads for that collected, artisan feel. The finished piece reads as soft, handmade nautical décor rather than a toy, which is exactly why it feels so elevated.
This look is best for a confident beginner or patient intermediate maker because the structure is simple but the finish depends on neat wrapping, balanced tension, and thoughtful assembly. The beauty is in the proportions. A softly textured hull plus airy patterned sails is what creates that heirloom shelf presence.
Materials + tools
- Cotton macramé cord in natural cream, 3 millimeter
- Cotton crochet yarn or crochet thread in natural cream, sport weight to DK weight
- Crochet hook, 3.5 millimeter to 4.5 millimeter
- Thick floral wire, armature wire, or pliable aluminum craft wire
- One wooden dowel for the main mast
- Two or three thinner dowels for yardarms and support spars
- Additional short dowels or bamboo skewers for side posts if desired
- Small unfinished wooden beads
- Tapestry needle
- Sharp scissors
- Strong craft glue or hot glue with care
- Measuring tape
- Stitch markers
- Optional fabric stiffener or diluted white glue
- Optional pliers for shaping wire
- Optional felt for lining the underside of the hull
Finished size + customization notes
A beautiful size for this style is about 12 to 16 inches wide and 14 to 20 inches tall. If you want a larger statement piece, use thicker cord, a larger hook, and slightly longer dowels. If you want a neater, more delicate look like the photo, use tighter tension and a finer cotton yarn for the sails.
You can customize the look by changing the number of sails, adding more beads, creating a slightly flatter or deeper hull, or inserting a hidden weight in the base so the boat feels especially stable on a shelf. If yours starts looking wider than the photo, reduce the final increase rounds in the hull and keep the side walls more upright.
Step by step instructions
1. Plan the silhouette first
Before you make anything, sketch the boat in the simplest possible shapes. You need an oval or rounded boat base, one central mast, two outer support posts, and three triangular sail panels. One sail sits to the left, one to the right, and one tall decorative sail panel fills the center. The photograph works because the mast is tall and slim while the hull is broad and low.
Lay your dowels on the table and test proportions. A good starting point is a main mast about 1.5 times the width of the boat. Side posts can be shorter and sit near the front and back edges of the hull. You should now see the overall silhouette before you ever pick up the hook.
2. Crochet the hull base
Using your cotton yarn, chain enough to create a narrow oval center. For example, chain 16 to 22 depending on your yarn and desired size. Work single crochet around the chain in an oval, placing 3 stitches in each end so it curves naturally. Continue spiraling or joining rounds, increasing at the ends to keep a smooth boat shaped oval.
Keep the base flat for several rounds. Once the bottom width looks right, stop increasing so aggressively and begin building the walls upward with fewer increases. The hull in the image has a softly rounded, basket like body with horizontal texture lines. To get that look, alternate standard single crochet rounds with back loop only rounds every few rows. Those ridges create the handsome banded texture you see in the photo.
Visual checkpoint: the base should sit flat on a table with no rippling. If it ruffles, you added too many increases. If it cups too early, add one more increase round.
3. Shape the upper rim
When the hull is deep enough, work one round in the back loop only to form a crisp turning ridge, then continue upward for a short section to make a thick upper edge. You want the boat to feel substantial, not flimsy. Work tightly. If needed, hold two strands together for the last few rounds to make the rim firmer.
Slip a piece of shaped wire inside the top rim on the final round or just under it. Crochet over the wire or stitch the rim closed around it. This hidden armature helps the opening hold its elegant long oval shape. In the photo, the rim is smooth and controlled, not floppy.
4. Build the internal support system
Cut your main mast dowel and wrap it fully in matching cotton cord. Use glue only at the starting and ending points. The wrapped finish is what makes the mast blend beautifully with the crocheted parts. Wrap two shorter side posts the same way. If you want a bowsprit at the front, wrap one thin dowel for that too.
Now create a support plate inside the hull. The easiest method is a piece of sturdy cardboard, thin wood, or thick felt cut to fit the bottom interior. Poke holes for the mast and side posts. Insert the wrapped dowels through this base and glue them securely. Then place the support plate inside the crocheted hull and anchor it with stitching through the crochet fabric or with glue hidden low inside the base.
Check from all angles. The mast must stand straight. A leaning mast will make every sail look wrong later.
5. Add top bars and side structure
Attach thin wrapped dowels horizontally where your triangular sails will connect. One can extend from the mast toward the left side, another toward the right, and one lower front bar can act like a bowsprit or sail boom. These do not need to be historically exact. They just need to create the same airy geometry as the inspiration images.
Tie each bar with matching cord first, then reinforce with a tiny dot of glue. In handmade décor, wrapped lashings look much nicer than visible glue blobs. You should now see a skeletal sailboat framework.
6. Crochet the sail panels
This is where the look comes alive. Each sail is essentially a triangle worked from one point upward or downward depending on the motif. Use lightweight cotton so the lace shows clearly. For the left and right sails, make openwork triangles with sections of chain spaces, double crochet, and decorative motifs like diamonds, fans, or intersecting bars. For the center panel, create a taller rectangular or tapered panel with a more intricate pattern to echo the photo.
A simple triangle formula is to begin with a small ring or short chain, then increase one stitch group at each edge every row. Add chain spaces in the center for an airy pattern. Another option is to crochet a lacy square motif first and then build triangular edges around it.
Visual checkpoint: your sails should look delicate but not saggy. If the yarn feels limp, go down one hook size.
7. Block and stiffen the sails
Wet block each sail on a towel or foam board. Pin the edges straight so the triangles become crisp. Let them dry fully. If you want that sculptural shelf look, lightly stiffen them with fabric stiffener or a mixture of white glue and water brushed on sparingly. You want shape, not cardboard.
If your sail edges curl inward, block them harder or add a final edging round of single crochet. The photo shows very tidy edges, which makes the whole project look more expensive.
8. Attach the sails to the frame
Sew or tie each sail to its dowel supports with matching thread or fine cord. Begin at the top points, then attach the lower corners, then adjust the side tension. Do not pull too tight. Slight softness looks more natural than drum tight fabric.
Add a central decorative panel between the posts if your boat has one. This panel helps replicate the layered complexity in the first image. You should now see the sails forming a balanced composition rather than three isolated pieces.
9. Add rigging lines and beads
Cut several lengths of cotton cord for the rigging. Tie from mast top to hull edges, from side posts to the rim, and from sail corners to support bars. Slide small wooden beads onto selected cords and knot them in place. The beads are subtle but they do a lot of visual work. They make the piece feel intentionally styled and echo the inspiration image beautifully.
Keep the rigging symmetrical enough to look polished, but not so mathematically perfect that it feels stiff. If one side droops lower than the other, shorten it before trimming ends.
10. Finish the deck area
The photographed piece has a clean, minimal deck space. You can leave the interior open, or add a flat crocheted oval insert to sit just inside the rim as a deck. If you do, keep it slightly recessed. A raised deck can make the hull feel too shallow.
Optional upgrades here include a tiny coiled rope, mini wrapped posts, a little hatch shape, or a stitched insert that hides the structural plate. Keep embellishment restrained. This style is elegant because it is not overcrowded.
11. Refine the lines and proportions
Set the boat on the shelf and step back. This is the best moment to correct scale. If the mast seems too tall, trim it. If the sails feel too narrow, add one more edging round. If the hull seems too chunky, gently steam and shape it with your hands.
Visual checkpoint: the hull should feel grounded, the mast vertical, and the sails tall and graceful. The boat should read clearly from several feet away, even on a busy bookshelf.
12. Secure everything for display
Once you love the arrangement, secure knots with tiny dots of glue on the hidden sides. Weave in all yarn ends neatly. Add felt to the underside so the boat glides across wood shelves without scratching them.
For a very polished result, place a little weight in the base before fully closing the interior. A few washers wrapped in felt or tucked under a deck insert work well. That extra stability makes the décor feel solid and shelf ready.
Troubleshooting
My hull keeps collapsing
Your yarn may be too soft or your tension too loose. Add a hidden wire rim, use a smaller hook, or stiffen the inside lightly with diluted glue.
My sails curl and look messy
Block them more firmly. Most lace panels only look magical after blocking. Add a neat single crochet border if the edges still misbehave.
The mast leans
Remove and reset it before finishing. A crooked mast throws off the whole project. Reinforce the base inside the hull with a firmer support plate.
My boat looks too much like a toy
Use natural cream cotton, keep embellishments minimal, and refine your edges. This look depends on restraint, texture, and proportion more than novelty details.
The rigging makes it look cluttered
Use fewer lines. The photo feels airy. You only need enough cord to suggest structure and movement.
Finishing details
After assembly, steam lightly from a distance or mist gently and reshape by hand. Touch up any areas where the wrapping shifted. Trim every tail cleanly. If desired, brush a small amount of stiffener along the lower hull walls and the base of the mast for added crispness.
A lining is optional, but if you want the underside to look especially neat, cut a felt oval and glue it inside or underneath the base. If you plan to style the boat near a window, choose colorfast cotton so sunlight does not yellow it unevenly over time. For the most heirloom finish, keep the palette monochrome and matte.
Shop Similar
- Natural cotton macramé cord in 3 mm for wrapped masts and rigging
- Cream cotton yarn for crochet hulls and lace sail panels
- Unfinished wooden beads for decorative nautical rigging details
- Wood dowels for miniature boat masts and support spars
- Fabric stiffener for shaping crochet and macram%C3%A9 sails
Style It With
Lace Panel Crochet Sailboat DIY Guide
What you’re making
You’re making a softly sculpted crochet sailboat with two large lace sails and a rounded open hull that feels cozy, coastal, and handmade in the best possible way. This version is slightly simpler than the first design because the structure is cleaner, the rigging is lighter, and the emphasis is on the paired triangular sails with pretty openwork motifs.
The overall effect is that perfect bookshelf accent that looks collected over time. It is not overly nautical or kitschy. It feels warm, textural, and calm, especially in natural cotton against rich wood tones and stacked books.
Materials + tools
- Natural cotton yarn, DK weight or light worsted
- Smaller amount of crochet thread for finer details if desired
- Crochet hook, 3.5 millimeter to 4 millimeter
- One main wooden dowel for the mast
- One thin dowel or bamboo skewer for the lower front spar
- Thin craft wire for shaping the hull rim
- Tapestry needle
- Stitch markers
- Scissors
- Strong glue
- Cardboard or thin wood insert for internal support
- Fabric stiffener, optional
- Small shells, mini wood pieces, or rope coil for deck styling, optional
- Felt for underside, optional
Finished size + customization notes
A finished size around 10 to 13 inches wide and 12 to 15 inches tall suits this design well. This sailboat looks best when the hull is compact and the sails take up most of the visual height.
To customize, make the hull deeper for a basket look or shallower for a cleaner display silhouette. You can also switch from fine lace to a more solid crochet sail if you want a sturdier beginner friendly version. If yours looks too heavy at the bottom, shorten the wall height of the hull and keep the base slightly flatter.
Step by step instructions
1. Start with the hull shape
Chain 14 to 18 and work an oval in single crochet. Increase at both ends each round while keeping the sides fairly straight. This boat is not sharply pointed. It has a soft oval footprint with a rounded, basket style profile.
After several increase rounds, stop increasing along the long sides and only increase minimally at the ends as needed. Once the base is the right width, work upward without much shaping. This gives you those smooth walls seen in the image.
To mimic the texture in the inspiration photo, try working waistcoat stitch for a more knit like look or standard single crochet with very even tension. A simple stitch can look luxurious when done cleanly.
2. Build a stable rim
The open hull needs structure, so work one back loop only round to establish the upper edge and then add 2 to 3 rounds to form a slightly thicker rim. Slip a thin wire inside the final round or stitch one just underneath it. This step matters because the clean boat opening helps the piece feel architectural.
Visual checkpoint: you should be able to set the hull down and see a long even oval opening, not a collapsed basket.
3. Prepare the mast
Wrap the main dowel tightly in natural cotton yarn or cord. Keep the wrapping even. A messy wrap will stand out immediately because the mast is central and very visible. Secure both ends neatly.
Insert the mast through a small reinforced opening in a support insert that fits inside the hull. Glue the insert low in the hull. Check that the mast stands completely straight from the front and side views.
4. Create the sail triangles
Make two mirrored triangle sails. Begin each triangle from the lower edge or upper point, whichever method you prefer. The left triangle in the photo has more flowing, curving openwork. The right triangle has a more dotted, clustered lace feel. You can recreate this by using two different but coordinating lace charts.
For the first sail, combine open chain arches with curved lines of double crochet. For the second sail, use repeated chain spaces and clustered shell like motifs. Both should finish in crisp triangles with a small border round.
If lace patterns intimidate you, create a simple triangle in double crochet mesh first. Then embroider curving cords or surface crochet over the top to fake a more intricate motif.
5. Block the sails carefully
Soak or mist the sails and pin them flat into identical triangular shapes. Match the angles as closely as possible. Let them dry fully. Stiffening is optional, but a light coat helps them stand beautifully once mounted.
You should now see a delicate matched pair that already looks elegant even before assembly.
6. Attach the sails to the mast and front spar
Tie or sew the inner edges of each sail to the mast. Then secure the lower outer corners to the front and back edges of the hull or to a thin lower spar depending on your chosen structure. The inspiration image keeps the structure simple and clean, so avoid adding too many extra bars.
Use taut but gentle lines from the mast top to the outer sail corners. The sails should rise in clean planes, not sag heavily inward.
7. Add subtle rigging
Add only a few support cords. One line from mast top to the bow area, one to the stern area, and perhaps one small stabilizing tie on each side. This design looks calmer and less beaded than the first boat, so keep embellishment restrained.
If you want to echo the styled shelf scene, place a tiny coiled rope or a few miniature wood pieces inside the hull. This fills the deck visually without making the project busy.
8. Refine the hull edge
If the hull opening stretches after assembly, add a surface slip stitch or a sewn cord edging around the top rim. This makes the edge look more intentional and helps it read like a finished decorative object rather than soft storage.
Visual checkpoint: the boat should now have a grounded bowl like base with airy upward movement from the sails.
9. Add deck styling
The second image includes a few subtle natural objects inside the hull. You can mimic that with a small rope coil, a bead cluster, mini driftwood pieces, or a crocheted disc tucked inside. Think of it as styling, not clutter. Keep the color palette tonal.
10. Balance the composition on the shelf
Place the finished boat on a shelf and check its profile. The sails should frame the mast evenly. If one side appears fuller, adjust the ties rather than remaking the sail. Small tension changes can dramatically improve the silhouette.
If the boat tips visually forward, add a hidden bit of weight in the back of the base. This is especially helpful if you use lightweight yarn and tall sails.
11. Finish every visible seam
Weave in ends meticulously. On décor pieces, loose tails are much more obvious than on garments or blankets because the object sits still and gets viewed up close. Use matching thread if you need invisible reinforcement along the sail edges or mast joins.
12. Final shaping
Mist lightly and hand shape the hull opening one last time. Straighten the mast. Smooth the sails. Trim every cord end cleanly. When you step back, the boat should feel calm, collected, and sculptural.
Troubleshooting
My sails look too limp
Use smaller thread, block more firmly, or add light stiffener. Soft yarn can make lace look blurred.
The hull twists
Your rounds may have shifted or your increases were uneven. Steam and reshape, then reinforce the rim with wire.
The mast wobbles
Your internal support insert is too soft. Replace with firmer cardboard, wood, or doubled felt.
The project looks rustic instead of refined
Tighten your wrapping, simplify the deck embellishments, and keep everything in one clean cream tone.
My lace patterns do not match
That is okay if the overall size matches. This design actually benefits from slightly different sail motifs as long as they feel coordinated.
Finishing details
Light blocking after full assembly helps everything settle together. If you want an especially polished finish, brush the very edges of the sails with diluted stiffener so they hold crisp lines without becoming rigid all over. Add felt under the hull to protect furniture and hide any structural stitches.
For styling, this boat looks best near stacked books, shells, and warm ceramics. It also works beautifully in a nursery, reading nook, or coastal office where you want texture without bright color.
Shop Similar
- Natural cream cotton yarn for decorative crochet home accents
- Mini wood dowels for craft sailboat masts and spars
- Thin armature wire for shaping crochet basket rims
- Blocking mats and rust proof pins for crochet lace shaping
- Fabric stiffener for lace crochet décor projects
Style It With
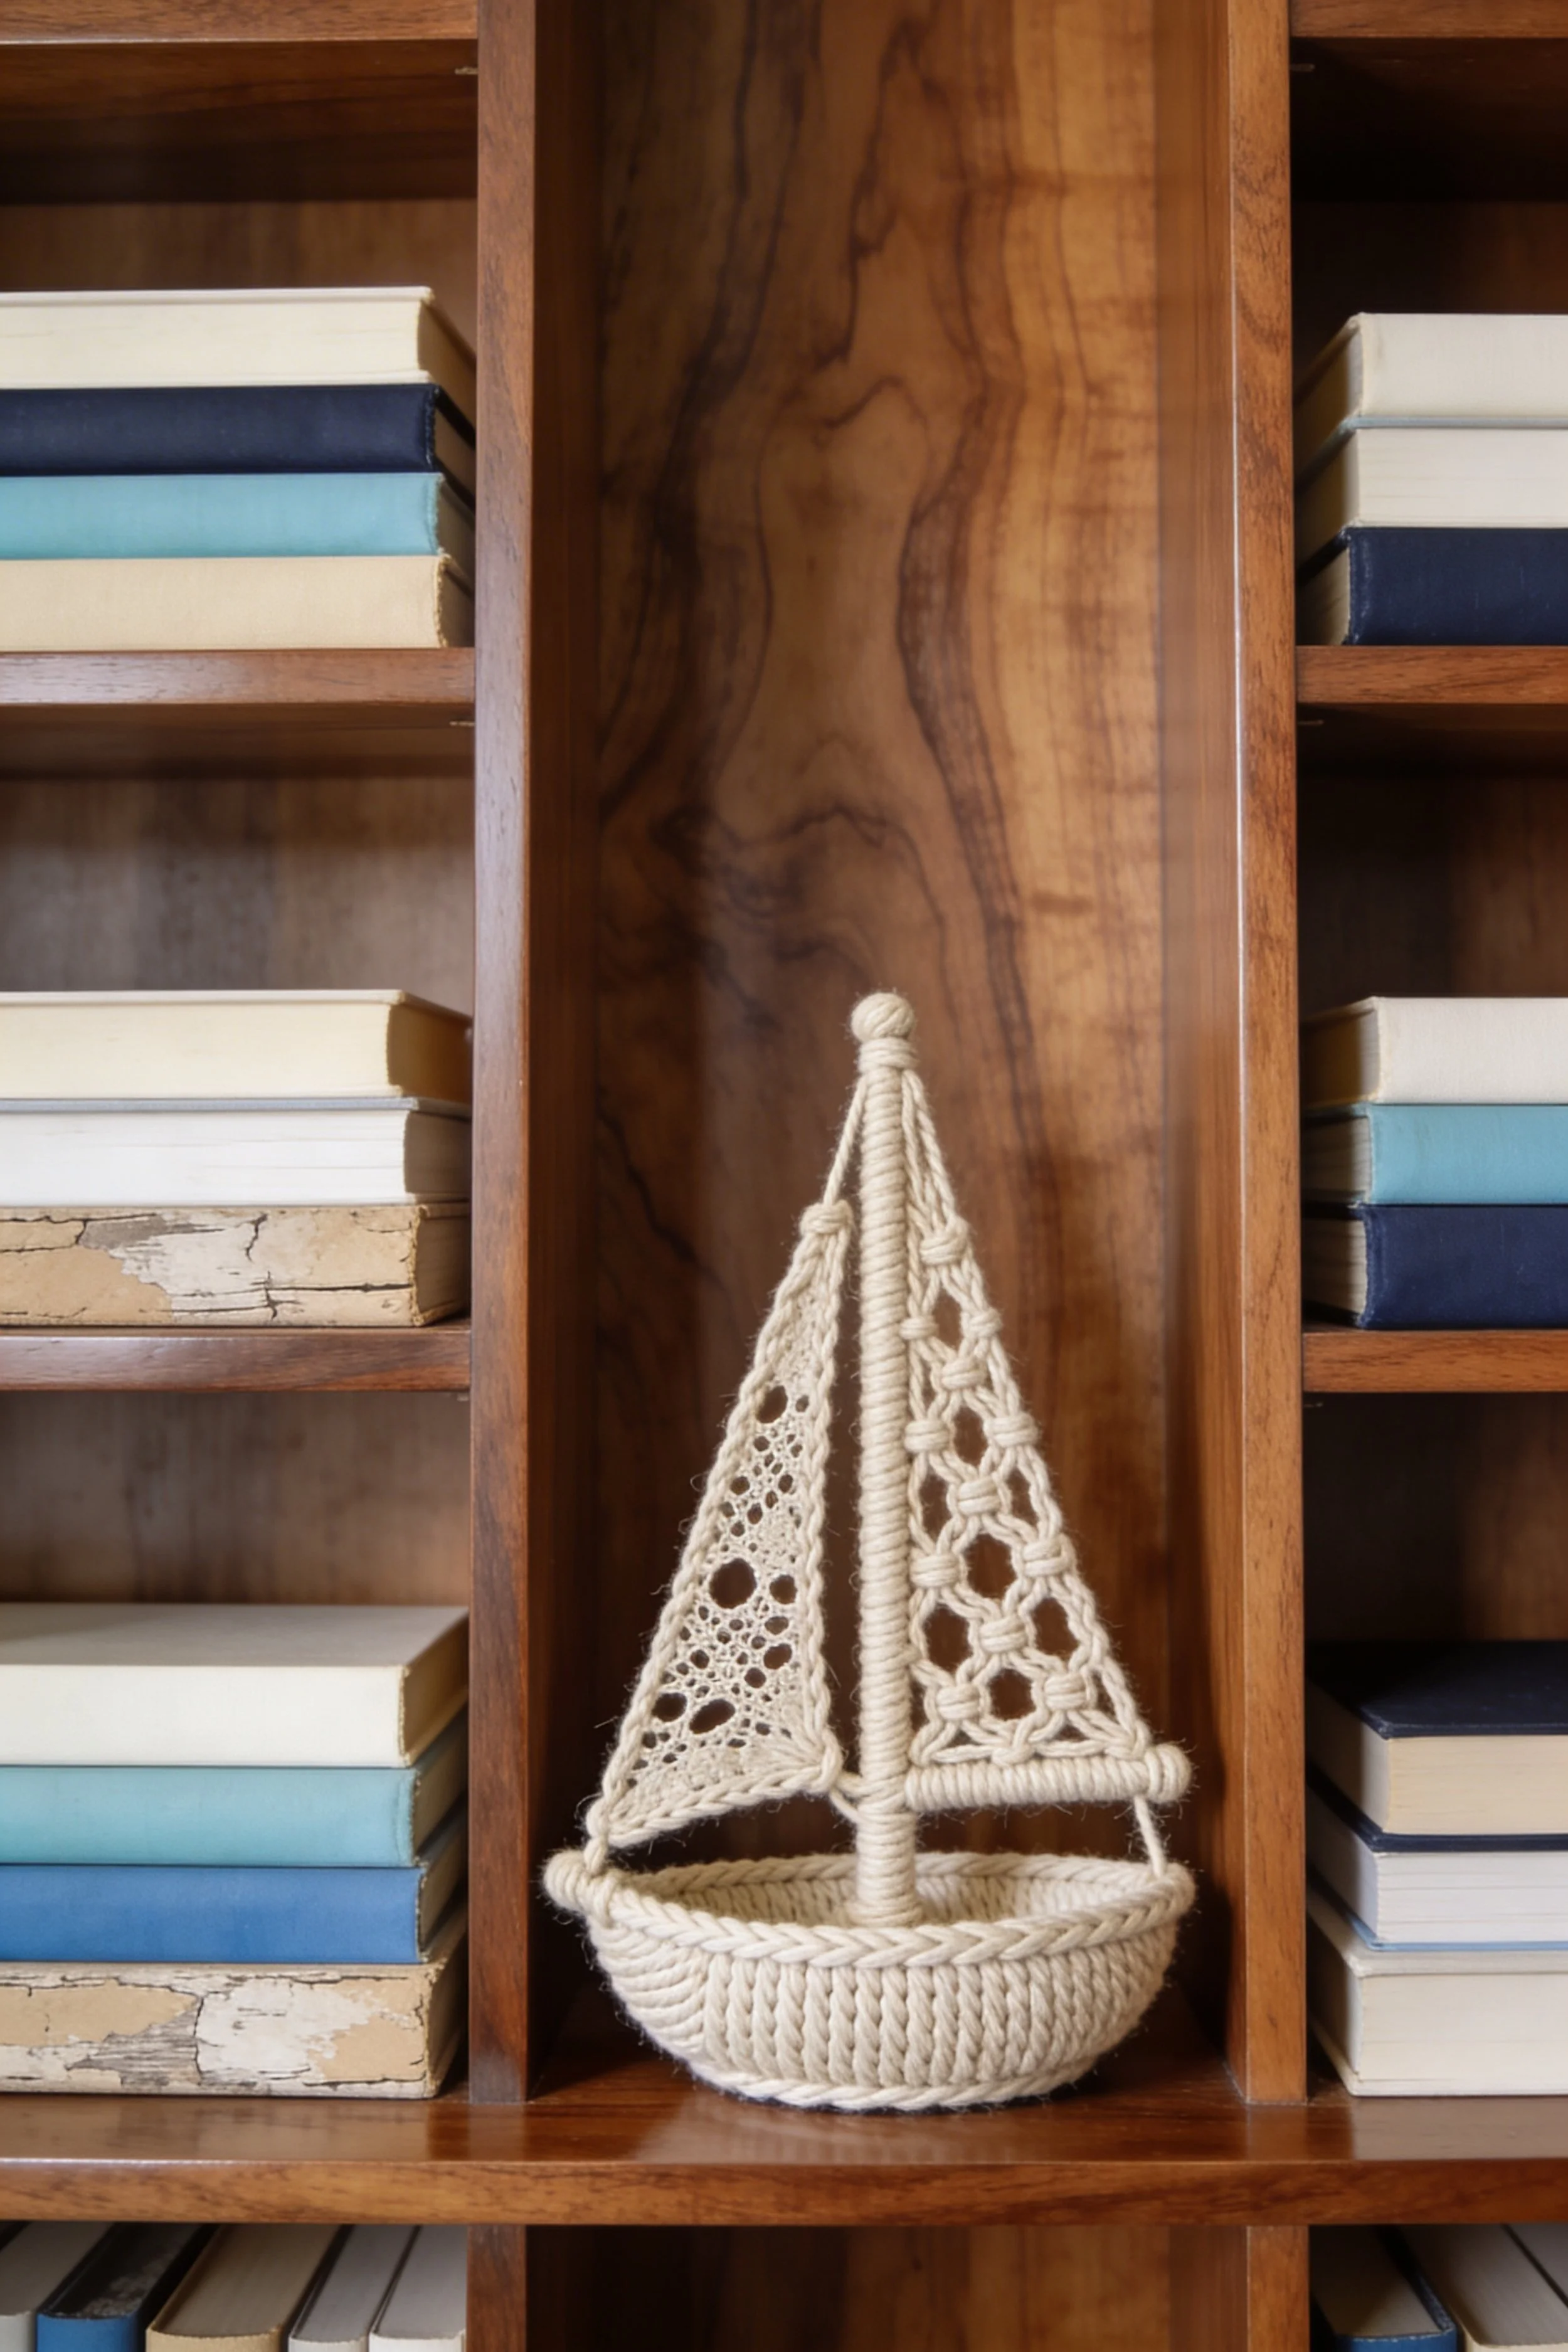
Minimalist Shelf Sailboat Make It Yourself Tutorial
What you’re making
You’re making a pared back crochet sailboat with a simpler, more graphic silhouette than the earlier versions. This one has a shallow bowl like hull, a central wrapped mast, and two openwork sails that feel slightly more primitive and modern. The overall mood is clean, handmade, and Scandinavian coastal rather than ornate.
Because the structure is simpler, this is an excellent version for beginners who want the look of the larger heirloom boats without quite as much rigging and lace complexity. The charm comes from contrast between the sturdy stitched hull and the airy geometric sails.
Materials + tools
- Chunky cotton cord or thick cotton yarn for the hull
- Medium cotton yarn or crochet thread for the sails
- Crochet hook sized to match both yarns
- Small wooden dowel for mast
- Thin dowel or skewer for lower sail support
- Craft wire for rim support, optional
- Yarn needle
- Scissors
- Strong glue
- Cardboard template or insert for base stability
- Blocking supplies
- Optional stiffener
- Optional felt pad for the underside
Finished size + customization notes
A finished size around 7 to 10 inches wide and 10 to 14 inches tall suits this little shelf boat beautifully. It should feel petite and vertical, especially when placed in a bookshelf cubby.
Use thicker yarn for the hull if you want that bold braided basket look. Use finer thread for the sails if you want the openwork to feel lacey and delicate. If the boat starts looking too bulky, reduce the number of hull rounds and avoid a very deep wall height.
Step by step instructions
1. Make the bowl shaped hull
This version begins like a tiny basket. Work a magic ring and crochet evenly in rounds, increasing until you get a flat circle or slightly oval base depending on your preference. Then stop increasing and work upward to create a shallow bowl.
The inspiration image has distinct vertical texture on the hull, almost like thick knit ribs. You can mimic that by using front post stitches, waistcoat stitch, or working into a combination of loops that creates elongated columns. Even plain single crochet with chunky yarn can work if your tension is clean.
Visual checkpoint: your hull should look like a little display bowl, not a deep basket.
2. Strengthen the rim
Work one firmer top round and if necessary insert a hidden wire just under the last round. This piece depends on a crisp opening because the mast rises directly from the center and the sails are very visible against the wood shelf background.
3. Prepare the mast and spar
Wrap one dowel tightly in matching cord for the mast. If you want the exact clean look of the photo, keep the wrapping smooth and do not over decorate it. Wrap one short dowel for the lower support bar if you plan to stretch the sail corners more visibly.
Anchor the mast into a small insert inside the hull. A circle or oval of stiff card works well here. Glue or stitch it securely.
4. Crochet the first sail
Create a triangular sail using mesh crochet. Start from the bottom edge and decrease toward the point, or start at the top and increase outward. Add a few larger eyelets for visual interest. The sail in the image has pronounced open circles and ladder like spaces, so do not make the lace too dense.
A very simple formula is to alternate double crochet groups with chain spaces while increasing at the edges. Finish with a narrow border to keep the shape crisp.
5. Crochet the second sail
Make a second triangle, slightly different from the first. This one can have more knotted or lattice inspired openings. You want the two sails to feel related but not identical. That slight asymmetry is what gives handmade shelf décor character.
6. Block the sails
Pin both triangles into clean, even shapes. Since this design is minimal, crooked edges will stand out more than on a busier design. Let them dry completely. Add very light stiffener if needed.
7. Assemble the sail structure
Tie or sew the inner edges of the sails to the mast. Then secure the outer corners to the hull rim or to the lower spar. Keep the angles slightly steep so the boat looks tall and elegant in its narrow cubby like setting.
You should now see the basic silhouette clearly. If it looks too squat, lift the sail attachment points slightly higher on the mast. If it looks too spindly, widen the lower corner placement a bit.
8. Add minimal rigging
This version only needs a few cords. Tie one line from mast top to the left rim and one to the right rim. You can add a small front line as well. Keep everything simple. The beauty here is restraint.
9. Refine the bowl edge and mast join
Because the hull is small, every detail matters. Use your needle to tighten any loose stitches around the mast opening. Add an extra stitched ring around the mast base if you want a more finished transition.
10. Shape for display
Set the boat in a bookshelf and step back. This particular design benefits from being viewed straight on, so adjust the sails until the silhouette feels balanced from the front. That front view is what makes it feel like a little art object nestled between books.
11. Optional upgrades
You can add a tiny rope coil inside the hull, a single bead at the mast top, or a narrow contrasting stripe around the hull if you want a slightly more graphic look. Keep it restrained. Too much detail will overpower the simplicity that makes this version special.
12. Final clean up
Trim all cords, weave in ends, and gently steam or mist to settle the whole piece. Add a felt pad underneath if it will sit on polished wood.
Troubleshooting
My hull flares too much
You increased for too long before building upward. Rip back one or two rounds and begin the sides sooner.
My sails overpower the hull
Use slightly smaller triangles or deepen the hull by one round so the proportions feel grounded.
My openwork looks messy
Switch to a smaller hook and block the pieces harder. Mesh looks neater when the stitches are compact and the spaces are intentional.
The mast seems too thick
Use a thinner dowel or wrap with finer yarn. This design wants a clean central line.
It does not look enough like the photo
Focus on the front facing silhouette. The photo reads as a very centered, symmetrical object against books. Adjust the display angle and tension before changing the actual construction.
Finishing details
This design does not need much finishing to shine. A clean matte cream yarn, tidy wrapped mast, and sharply blocked sails do most of the work. If you prefer a more sculptural result, lightly stiffen the sails only. Leave the hull soft enough to retain that hand stitched warmth.
This piece is lovely styled with pale blue books, white ceramics, or weathered wood. It also makes a thoughtful handmade gift for a nursery, reading room, or lake house shelf.
Shop Similar
- Chunky cream cotton yarn for sculptural crochet décor
- Natural crochet thread for openwork lace motifs
- Small craft dowels for miniature sailboat projects
- Blocking boards for lace and motif shaping
- Wool felt pads for shelf safe handmade décor
Style It With

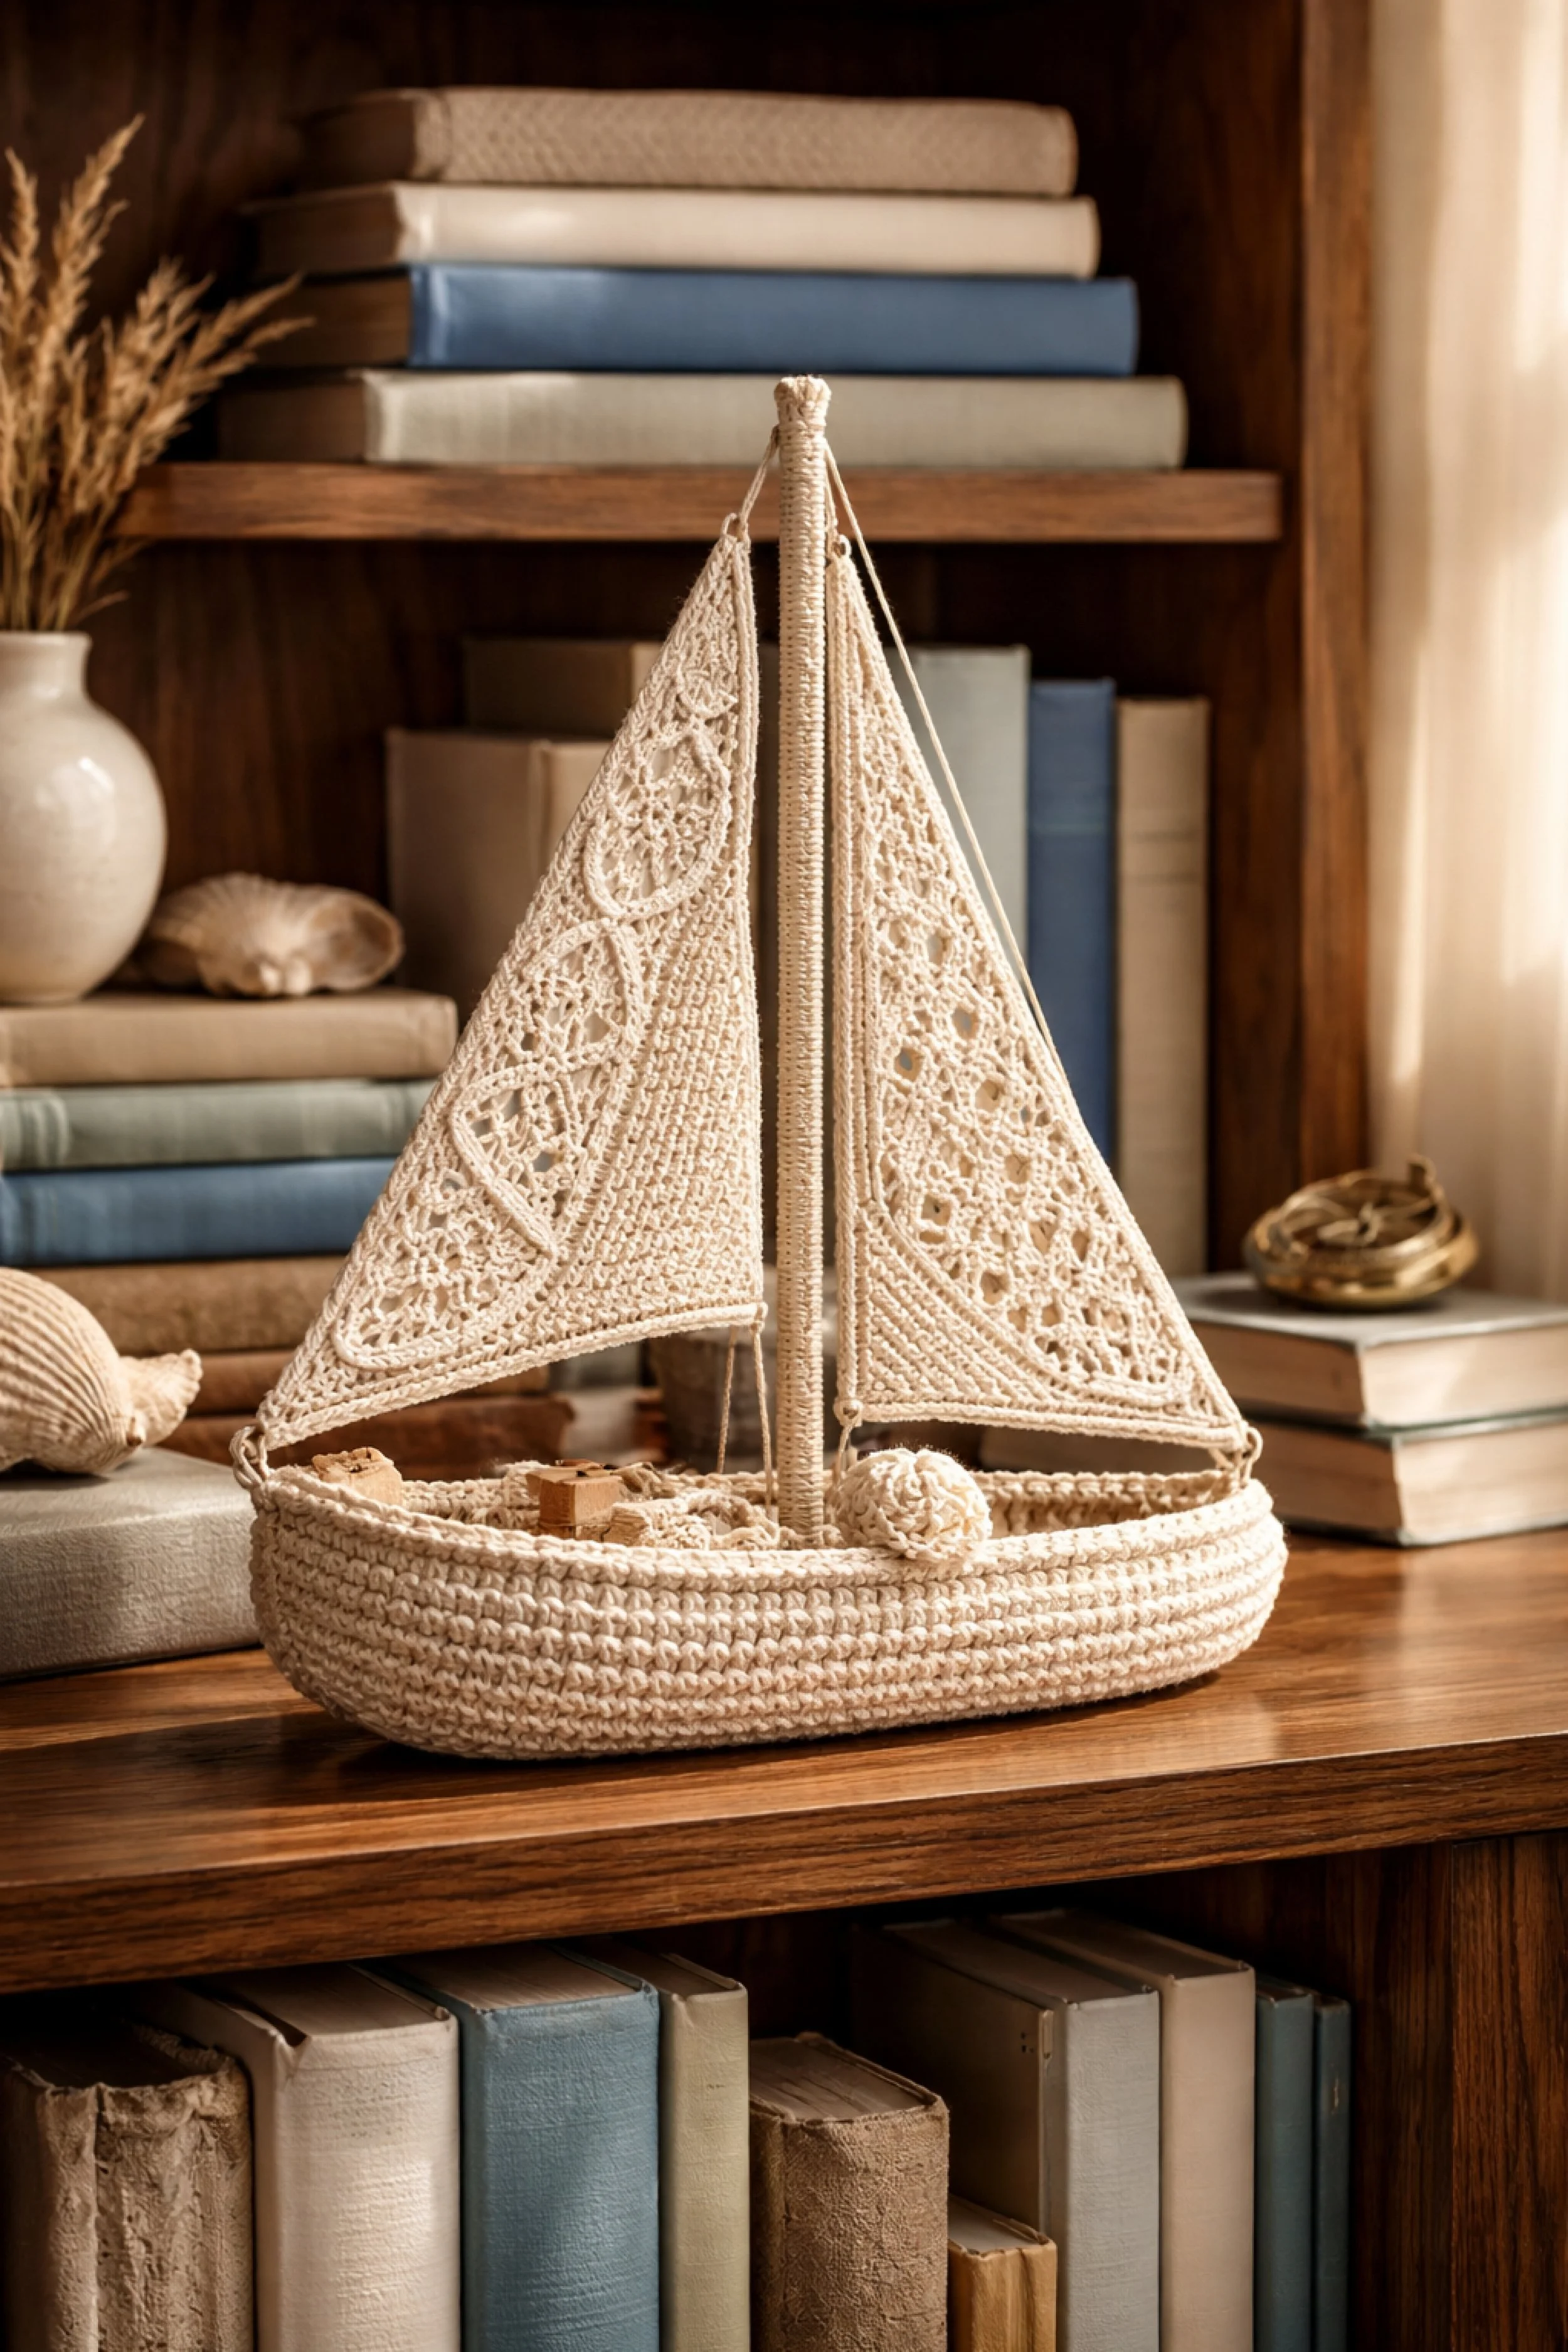
Vintage Library Crochet Sailboat How To Guide
What you’re making
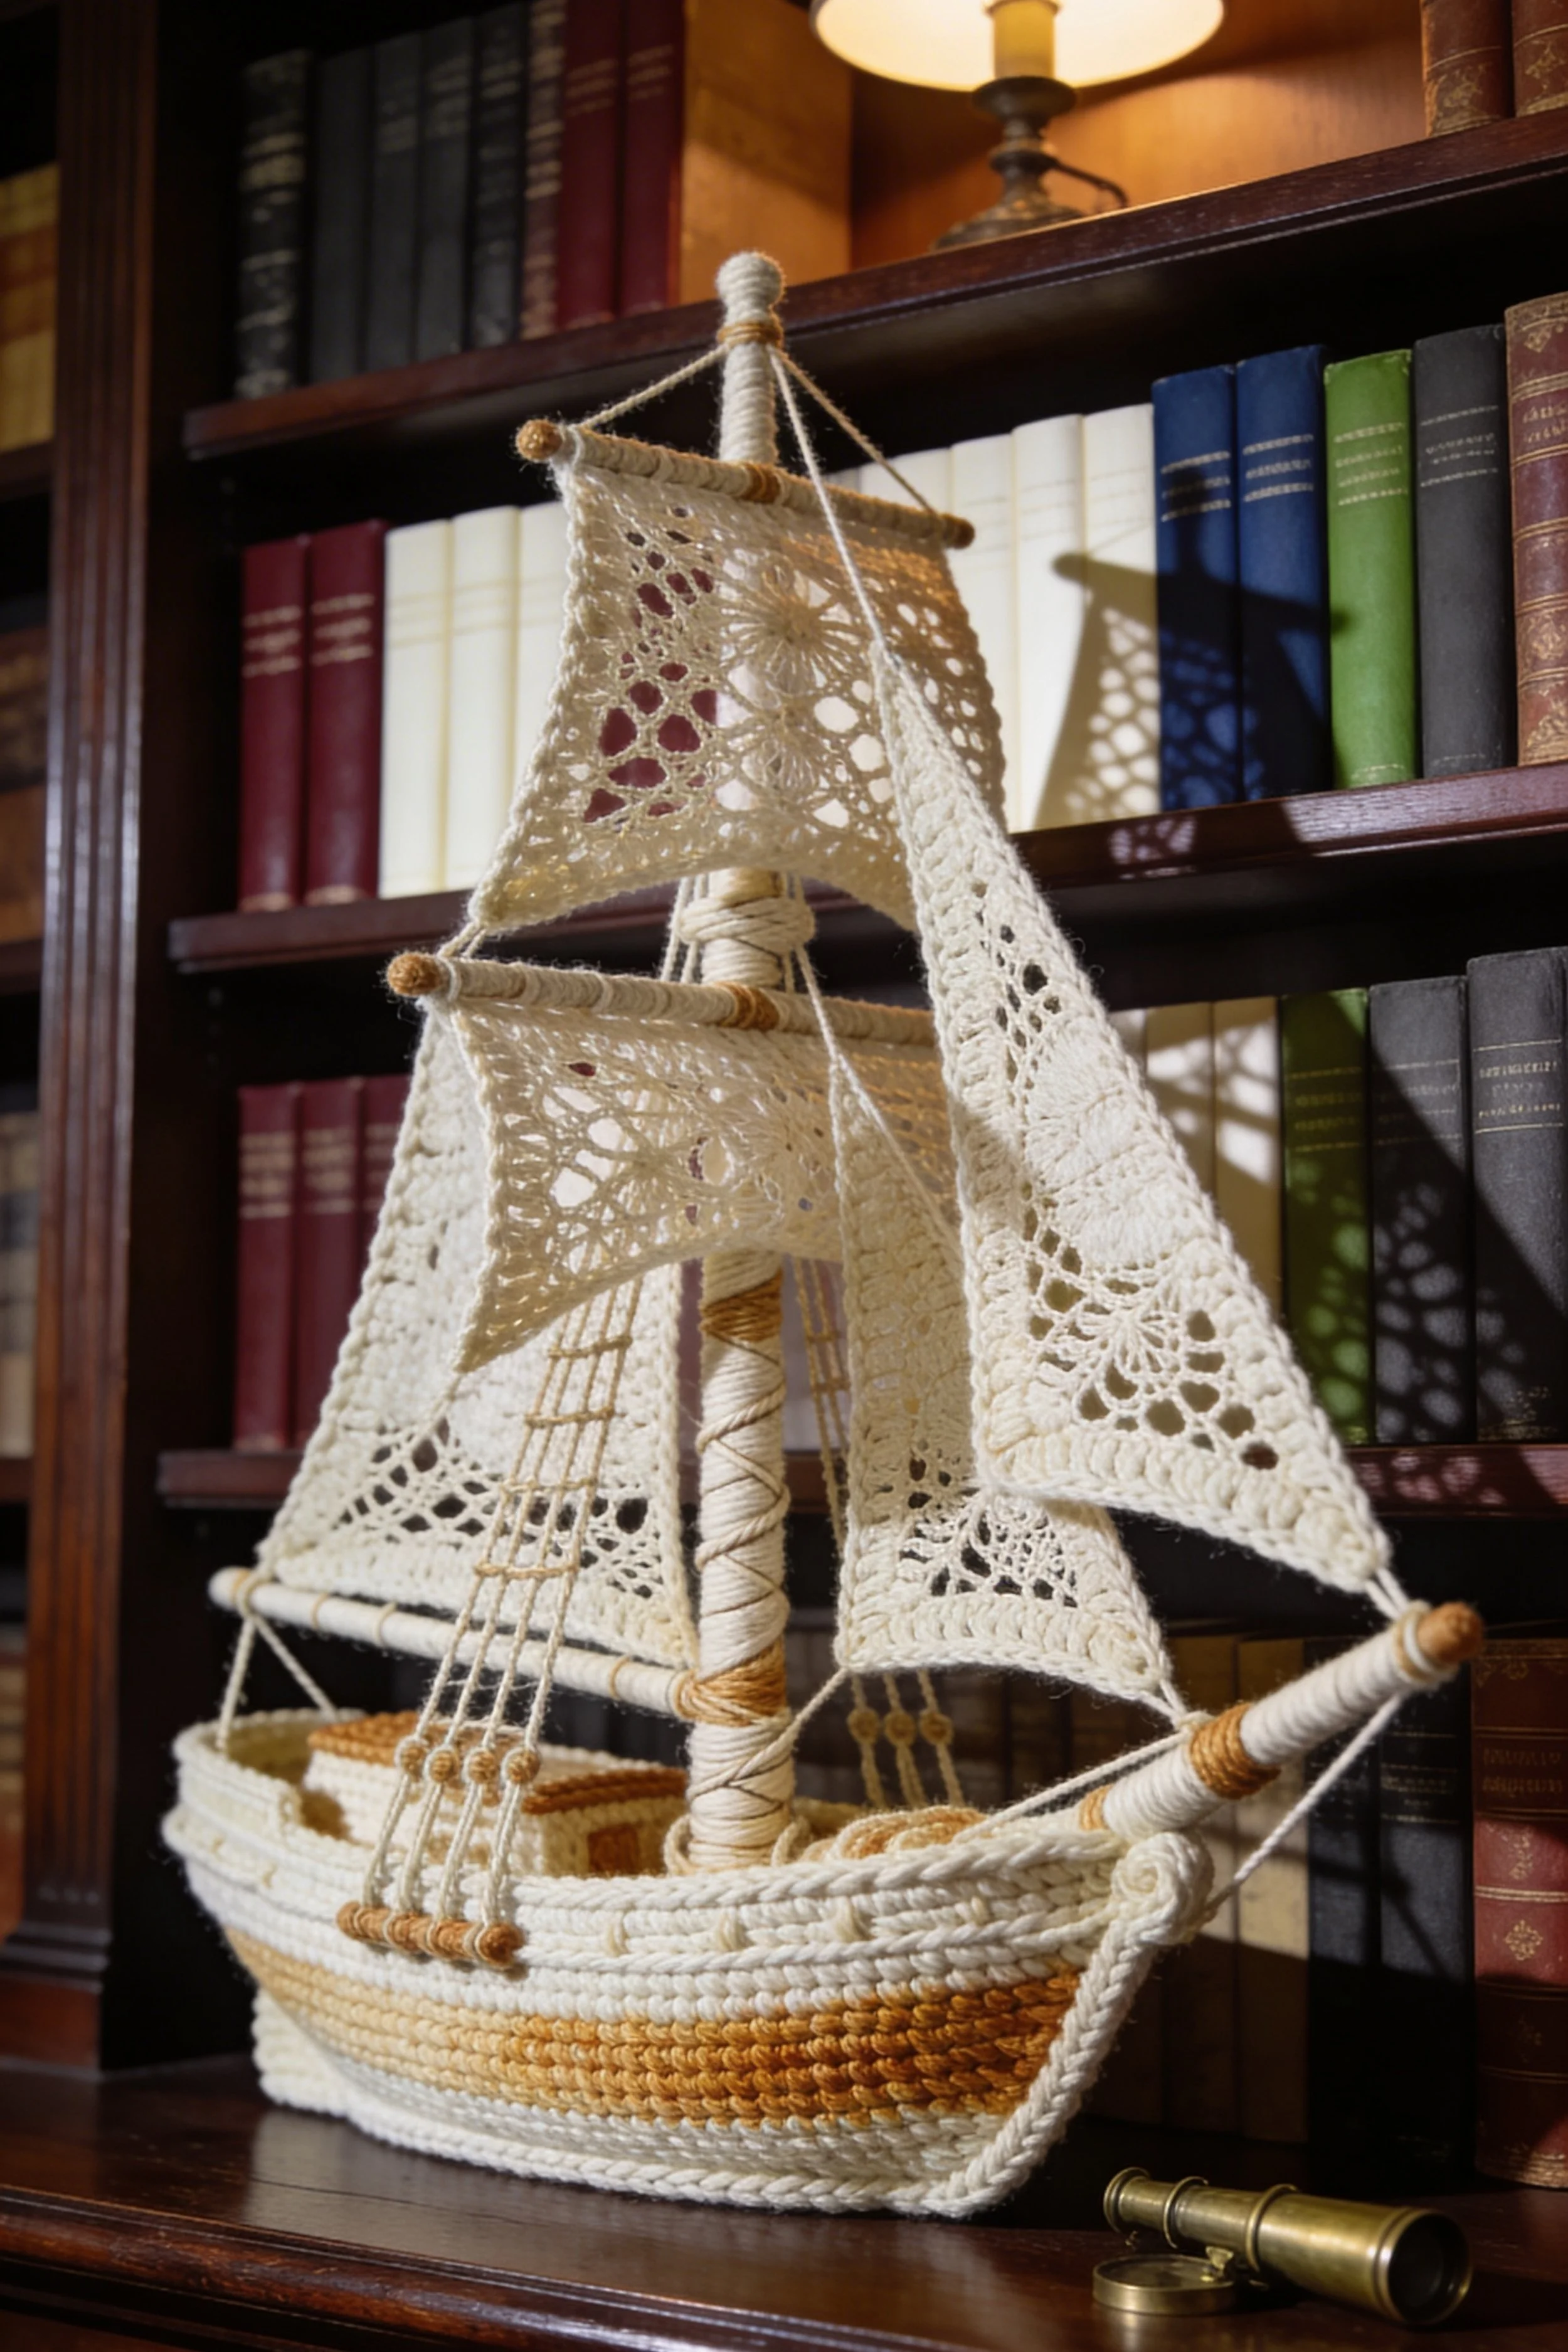
You’re making a romantic crochet sailboat designed to feel at home in a dark wood library with old books and warm light. This version has a rounded stitched hull and two beautifully detailed triangle sails with curling lace motifs that feel almost antique. Compared with the simpler shelf boat, this one leans more vintage and collected.
The magic of this design is the contrast between soft cream fiber and the moody backdrop it belongs in. It is nautical, yes, but in a literary and heirloom way rather than a beachy one. Think old charts, brass instruments, and a quiet study.
Materials + tools
- Natural cotton yarn, DK or light worsted
- Fine crochet cotton for detailed sail motifs
- Crochet hooks in two sizes
- Main mast dowel
- Optional lower spar
- Thin armature wire
- Tapestry needle
- Stitch markers
- Scissors
- Strong glue
- Support insert for inside the hull
- Blocking supplies
- Optional decorative filler for the boat interior
- Optional brass toned bead accents
Finished size + customization notes
Aim for about 11 to 14 inches wide and 12 to 16 inches tall. Keep the hull slightly more elongated than round so it resembles a small library display piece rather than a toy boat.
You can customize the mood by making the sails denser for a more antique lace effect or more open for a lighter coastal feel. For a darker vintage study vibe, add a few tiny brass toned beads or style it with richer wood accessories rather than changing the boat itself.
Step by step instructions
1. Crochet a refined oval hull
Chain 16 to 20. Work single crochet around both sides of the chain, increasing at each end to form an oval. Continue in rounds until the base reaches the size you want. The photo shows a smooth, low, polished hull with fine even stitching.
To recreate that, use consistent tension and avoid overly chunky yarn. This boat looks best when the stitches feel small, compact, and luxurious. Add side wall rounds with minimal increases so the hull lifts gently rather than standing straight up like a basket.
2. Create horizontal texture bands
Work a few rounds in back loop only or add one subtle round of half double crochet between single crochet rounds. This gives the hull the layered, banded look seen in the inspiration image without making it feel busy.
Visual checkpoint: the hull should have quiet texture and an elegant oval rim.
3. Reinforce the opening
Insert thin wire around the upper rim or stitch an extra cord under the edge. The boat in the photo sits confidently and keeps its shape. Without reinforcement, cotton can relax over time and lose that graceful line.
4. Make a wrapped mast
Wrap the main dowel very evenly in matching yarn or cord. Keep the wrapping close and smooth. Insert it through the center of a hidden internal support insert. Secure firmly so it stays vertical.
If you want a more finished library look, you can wrap the top and bottom ends a second time for slightly thicker banded sections.
5. Crochet ornate sails
This design lives or dies by the sails. Create two large triangles with curving, vine like motifs and open circular sections. One easy way is to work a mesh triangle first, then use surface crochet to create the scrolling lines. Another way is to follow a lace motif chart and build triangular shaping around it.
The sails should feel almost like lace doilies cut into triangles. Add a narrow border round to sharpen each edge. This is the stage where patience pays off.
6. Block until crisp
Wet block the sails firmly. Pin each point. Straighten every edge. Define the curves in the lace motifs so they are readable from a distance. Let dry completely before moving on.
7. Attach the sails with balance in mind
Sew the inner sail edges to the mast and secure the outer lower points to the hull or spar. The two sails should sit like open wings. Leave just enough slack for softness but not enough to droop.
You should now see that graceful literary sailboat shape. If the sails tip inward too much, lengthen the corner ties. If they spread too wide, tighten them.
8. Style the interior deck
The photo shows subtle little objects tucked inside the boat. You can add a small crocheted ball, a rope coil, or a few miniature wood blocks. These details make the piece look styled and photographed rather than unfinished.
9. Add a hint of rigging
Use thin matching cord for a few gentle support lines. This is not the heavily rigged macramé boat. Keep the lines light. They should suggest structure without obscuring the lace work.
10. Adjust the silhouette
Set the boat against a bookcase or dark background and look at it from eye level. The sails should read clearly, and the hull should feel settled. If the mast appears too short, add a small wrapped cap at the top. If the hull feels too deep, fold a bit of the interior support up and reshape it.
11. Hide all construction work
Use matching thread to tack down any visible joins. Glue should stay hidden. Trim every stray fiber. A vintage inspired piece needs refinement or it will slip into craft fair territory.
12. Final display preparation
Add felt underneath, smooth the hull with your hands, and mist lightly if needed. This sailboat is especially beautiful on deep walnut shelves with antique books and low warm lamplight.
Troubleshooting
My lace sails do not look ornate enough
Add surface crochet swirls or embroidered lines after the main triangle is done. This is the fastest way to create that richer antique look.
The hull looks too casual
Use smaller yarn, tighter tension, and fewer chunky texture stitches. Fine stitching reads more elegant.
My boat feels top heavy
Widen the hull slightly, shorten the mast by a small amount, or add hidden weight to the bottom.
The cream yarn shows every mistake
That is normal. Work in good light and block thoroughly. Light colors reward neatness.
It feels more beach house than library
Pair it with darker styling and keep the palette muted. The same cream boat can feel totally different depending on its shelf companions.
Finishing details
Steam very lightly, especially around the hull rim. Avoid over steaming the sails if you already stiffened them. Touch up the wrapped mast where needed. If you want a truly display ready object, stitch a fitted base lining inside the hull to hide the support insert and any knots.
The final mood should be soft, vintage, and quietly sophisticated. This is the kind of handmade piece that looks discovered rather than freshly made.
Shop Similar
- Fine cotton crochet thread for heirloom style lace sails
- Natural DK cotton yarn for smooth decorative crochet hulls
- Craft dowels for miniature decorative ship masts
- Blocking mats and pins for lace crochet finishing
- Decorative brass beads and findings for subtle nautical accents
Style It With
Beaded Macramé Sailboat Shelf Art Step by Step Tutorial
What you’re making
You’re making an intricate macramé sailboat with a broad basket style hull, a tall central mast, side posts, and richly patterned sail panels finished with bead details. This is the most elaborate version in the set, with more structure, more layered rigging, and a stronger architectural presence. It feels like textile sculpture.
What makes this design special is the balance of softness and precision. The hull is rounded and tactile, but the sails rise in disciplined lines. The bead accents and multiple support cords make it feel styled, finished, and luxurious on a bookshelf.
Materials + tools
- Natural macramé cord, 3 millimeter
- Finer cotton yarn for detailed crocheted sail motifs
- Crochet hook, 3.5 millimeter to 4 millimeter
- One main mast dowel
- Two slim side post dowels
- Two to four thin dowels for support bars and front spar
- Unfinished round wooden beads
- Thin craft wire
- Tapestry needle
- Scissors
- Strong glue
- Internal base insert
- Fabric stiffener
- Blocking board and pins
- Optional pliers
- Optional felt base
Finished size + customization notes
This style looks best at about 13 to 17 inches wide and 16 to 22 inches tall. The taller you go, the more important a weighted base becomes. The image has an elegant vertical feel, so avoid making the hull too huge relative to the sails.
Customize by using different lace motifs in each sail panel, adding or removing beads, or making the central decorative panel more geometric or more organic. If the design starts feeling cluttered, reduce the number of rigging lines before simplifying the sail patterns.
Step by step instructions
1. Make a sturdy oval hull
Work the hull in tight single crochet using cotton yarn or thinner macramé cord. Start with an oval base and increase until it reaches the desired width. Then work upward to create a rounded basket body. Add ridge rounds using back loop only stitches to mimic the layered horizontal bands seen in the photo.
This hull should feel substantial. If it feels floppy in your hands, either use a smaller hook or double strand the yarn for the final few rounds. You want the base to support several upright posts without sagging.
2. Reinforce the hull and add shape
Insert a hidden wire around the top rim. If needed, also line the very bottom with a piece of stiff felt or cardboard covered in fabric. This makes the boat sit flat and helps prevent twisting once the mast and side posts are inserted.
Visual checkpoint: from above, the opening should look like a clean elongated oval.
3. Wrap the mast and side posts
Cover each dowel fully in matching macramé cord. Smooth, close wrapping matters more than speed here. Leave no wood peeking through. The wrapped posts are a major part of the finished aesthetic.
Prepare one tall central mast and two shorter side posts. The photo suggests a three post arrangement across the deck, creating that layered cathedral of vertical lines.
4. Build the hidden internal support
Use a strong base insert cut to fit inside the hull. Mark and pierce holes for the mast and side posts. Insert the wrapped dowels, secure them firmly, and place the whole structure into the hull. Stitch or glue it in place. Test by gently rocking each post. They should feel solid.
5. Add upper horizontal bars
Tie or glue thin wrapped dowels across the structure where the sails will attach. One lower front bar can extend like a bowsprit. Additional slim bars can connect the mast to the side posts. Use cord lashings first, then minimal glue.
At this point you should clearly see the skeletal architecture of the boat.
6. Crochet or knot the sails
Create three primary sail elements. The left and right sails can be large triangles. The center can be a tall decorative panel that reads as a narrow sail or textile banner. Use openwork motifs such as diamonds, crisscross bars, small windows, fans, or leafy lines.
This design thrives on variety. Make each panel different but harmonious. A useful approach is to choose one common border and let the interior motifs vary. That way the boat feels complex without chaotic randomness.
7. Block every panel
Pin each sail into shape and let it dry fully. Add stiffener if you want especially crisp geometry. The first image in particular shows beautifully controlled sail edges, and blocking is how you get there.
8. Mount the sails
Begin with the center panel, then attach the large side triangles. Sew the top points first, then the lower corners, then adjust the outer tension cords. Make sure the panels do not overlap too awkwardly. Layering is good. Tangling is not.
Visual checkpoint: the sails should create a full, sculptural center mass while still allowing light through the lace.
9. Add rigging and beads
Now add the decorative cords that make this piece feel special. Run fine lengths of matching cord from mast top to outer hull points, from side posts downward, and from selected sail corners to the spar ends. Thread small wooden beads onto some lines before knotting them. Space them irregularly but intentionally.
The beads are not just decoration. They visually slow the eye and make the vertical cords feel finished. Use them sparingly enough that they stay elegant.
10. Create the deck insert
Crochet an oval or slightly raised insert to sit inside the hull opening. This can hide the support structure and make the deck look intentional. Add two or three tiny tied cords or loops if you want the appearance of tied down nautical details.
11. Perfect the proportions
Step back and check the boat from both straight on and three quarter angles. The most common issue in elaborate versions is visual heaviness. If the center panel dominates too much, trim or narrow it. If the side sails feel weak, pull their corners wider. If the mast looks too short, add a wrapped cap or bead to the top.
12. Secure and polish
Glue hidden knots, weave in ends, and trim every fiber cleanly. Add felt underneath the hull. Mist and reshape the hull opening one last time. Once finished, the sailboat should feel like handmade art rather than a casual craft.
Troubleshooting
The structure wiggles
Your internal support insert is too soft or too small. Use firmer material and anchor it to the hull more securely.
The beads make it look crafty
Use fewer of them. One of the easiest ways to keep this design elevated is restraint.
My sails seem too busy
Simplify one panel, especially the center. Complex pieces still need visual rest.
The hull looks squat
Raise the mast slightly taller or reduce the width of the hull with fewer increase rounds.
The sails pull the posts inward
Your cords are too tight. Loosen and rebalance. Tension should support the shape, not distort it.
Finishing details
This piece benefits from meticulous finishing. Rewrap any mast section that looks uneven. Touch up the stiffened sails if edges softened during assembly. A deck insert and felt base make a huge difference in how professionally the boat presents on a shelf.
Display it with antique books, a brass spyglass, or a small ceramic vessel. The neutral cream fiber against dark wood is what gives it that collected, old world coastal library charm.
Shop Similar
- Natural macramé cord for sculptural wrapped décor projects
- Cream cotton yarn for crochet sail panels and hull accents
- Unfinished wooden beads for refined cord detailing
- Wood dowels in assorted sizes for miniature masts and spars
- Fabric stiffener for macramé and crochet sculpture
Style It With
Crochet Tall Ship Bookshelf Decor DIY Guide
What you’re making
You’re making a more traditional tall ship inspired crochet sailboat with layered sails, a longer hull profile, visible rigging, and a subtle two tone body. This is the version that reads most like a classic sailing vessel while still staying soft, handmade, and decorative. It has more movement and storytelling than the simpler shelf boats.
This piece is ideal if you want a statement boat with old world charm. The layered masts, multiple sail tiers, and little ladder style rigging details give it a real ship silhouette, but everything is still stylized enough to feel like elegant fiber art.
Materials + tools
- Cream cotton yarn for most of the project
- Small amount of tan or caramel cotton yarn for stripe accents
- Crochet thread for finer sail motifs
- Crochet hook in matching sizes
- One tall mast dowel
- One secondary mast or upper support dowel
- Thin dowels for yardarms and bowsprit
- Cotton cord for wrapping mast sections
- Thin craft wire for hull support
- Tapestry needle
- Scissors
- Strong glue
- Support insert for inside hull
- Blocking tools
- Optional fabric stiffener
- Optional tiny wooden beads
Finished size + customization notes
Plan for roughly 12 to 16 inches tall and 10 to 13 inches long. This design looks best when the mast height really stretches upward. The hull should feel elegant and slightly narrower than the large basket like versions.
Customize by using one, two, or three sail layers. You can add a warm tan stripe around the hull like the photo, create a little cabin box on the deck, or make the rigging more elaborate. If you prefer a cleaner modern version, omit the extra upper sail and keep just the main body sails.
Step by step instructions
1. Crochet the hull with a classic ship profile
Start with an elongated oval base. Work in single crochet rounds, increasing at the ends until you get a slim boat shape. Build upward with minimal increases. For this tall ship version, the side walls can be slightly more upright than the rounded shelf boats.
Add a contrasting stripe in tan or caramel yarn across one or two middle rounds to mimic the warm wood toned band visible in the inspiration. Then return to cream. This small color shift gives the hull depth and a traditional nautical feel.
2. Shape the bow and stern
To get more of a ship like profile, you can add short rows at the front and back edges to lift them slightly. Another simple method is to crochet the final upper rounds with a few extra stitches at the front and back so those ends rise gently. This makes the hull feel less like a bowl and more like a vessel.
Visual checkpoint: from the side, the boat should have a soft upward lift at both ends.
3. Reinforce the upper edge
Insert wire under the rim or sew a firm cord around the top opening. Because this design has more sails and more visible rigging, a stable hull matters even more.
4. Build and wrap the mast system
Wrap the main central mast in cream cord, adding a few tan accent bands for visual interest if you like. Prepare at least one upper yardarm and one lower yardarm. Add a bowsprit at the front. You can also create a small upper mast extension for the tiny top sail visible in the photo.
Anchor all mast elements into a strong internal support insert in the hull. Test carefully before moving on.
5. Add a small deck cabin, optional
The photo suggests a little structure on the deck. You can crochet a tiny rectangle and fold it into a mini cabin box, or simply create a raised block wrapped in yarn. This detail makes the boat feel more ship like without adding much work.
6. Crochet the sails
This boat uses multiple sail shapes. Make one larger rear triangle, one front triangle, and one smaller upper sail. Use lacy but not overly delicate motifs. Fans, radiating circles, open windows, and simple mesh all work well.
Keep the sails in the same cream family. You can edge them in a slightly tighter stitch so they hold shape. Because there are more sail pieces here, harmony matters. Use one recurring motif or edging style across all of them.
7. Block and shape each sail
Block them hard enough to make the edges crisp. The layered sails should look intentional and architectural. A top sail that droops will make the whole boat look tired.
8. Attach the sails to yardarms
Unlike the simpler boats, this version benefits from visible horizontal bars. Sew the upper edges of the sails to the yardarms, then tie the lower corners down with rigging cords. Attach the upper small sail above the main pair for that tall ship silhouette.
You should now see a real sense of layered movement.
9. Add ladder style rigging
One of the details that makes the final image feel special is the extra rope work. Use thin cord to create simple ladder rigging on one side by tying several evenly spaced horizontal rungs between two vertical cords. Add a few supporting lines from mast to bowsprit and from mast to hull edges.
This is a perfect example of detail that looks advanced but is actually very manageable if you go slowly.
10. Finish the hull edge and bow
Wrap the bowsprit neatly and add a final support line from the mast top to the bow. If you want an extra polished look, sew a cord edging around the upper hull rim. This ties the ship together visually.
11. Balance the display angle
This version looks gorgeous at a slight angle instead of perfectly head on. Set it on a shelf and turn it until the sails overlap just enough to show depth. If one side dominates too much, adjust the rigging tension.
12. Final polish
Add a bead or wrapped knot at the mast top. Hide knots inside the hull where possible. Weave in ends, add felt underneath, and lightly steam the hull into its final shape.
Troubleshooting
My ship looks too flat
You need more mast height or a little upper sail. Vertical layering is what makes this one read as a tall ship.
The extra rigging overwhelms the design
Keep only the most visible lines and the ladder detail. Too many cords can muddy the silhouette.
My two tone hull looks awkward
Use just one or two rounds of contrast color. A subtle stripe works better than a large block.
The sails twist off center
Recheck the yardarm balance and attachment points. A tiny shift at the top creates a big visual tilt below.
It looks more like a toy pirate ship
Simplify the cabin, keep the color palette neutral, and style it with grown up shelf pieces like books and brass.
Finishing details
Because this design has more components, finishing is especially important. Check every wrapped dowel for evenness. Reblock any sail that softened during assembly. Trim all threads with precision. Add a hidden weight inside the hull if needed so the ship feels stable and substantial.
Displayed against dark books and warm light, this boat has a gorgeous old sea journal mood. It is a little more narrative than the other versions, which makes it perfect as a focal point on a styled shelf.
Shop Similar
- Cream cotton yarn for heirloom crochet ship décor
- Tan cotton yarn for subtle nautical stripe accents
- Mini craft dowels for ship masts yardarms and bowsprits
- Crochet blocking tools for shaped lace sails
- Natural cotton cord for miniature rigging details
Style It With
Once your sailboat is complete and resting on the shelf, step back and take it in from a distance. What you have created is more than a decorative object. It is a quiet focal point that softens the room, adds depth, and invites a closer look. The interplay of fiber, light, and structure gives each piece a presence that feels both relaxed and intentional.
As you continue exploring crochet and macramé, these sailboats are a perfect reminder that simple materials can create something unexpectedly beautiful. Try different scales, experiment with new lace patterns, or build an entire shelf story around your finished pieces. The more you refine your touch, the more these projects begin to feel like personal heirlooms rather than just crafts.