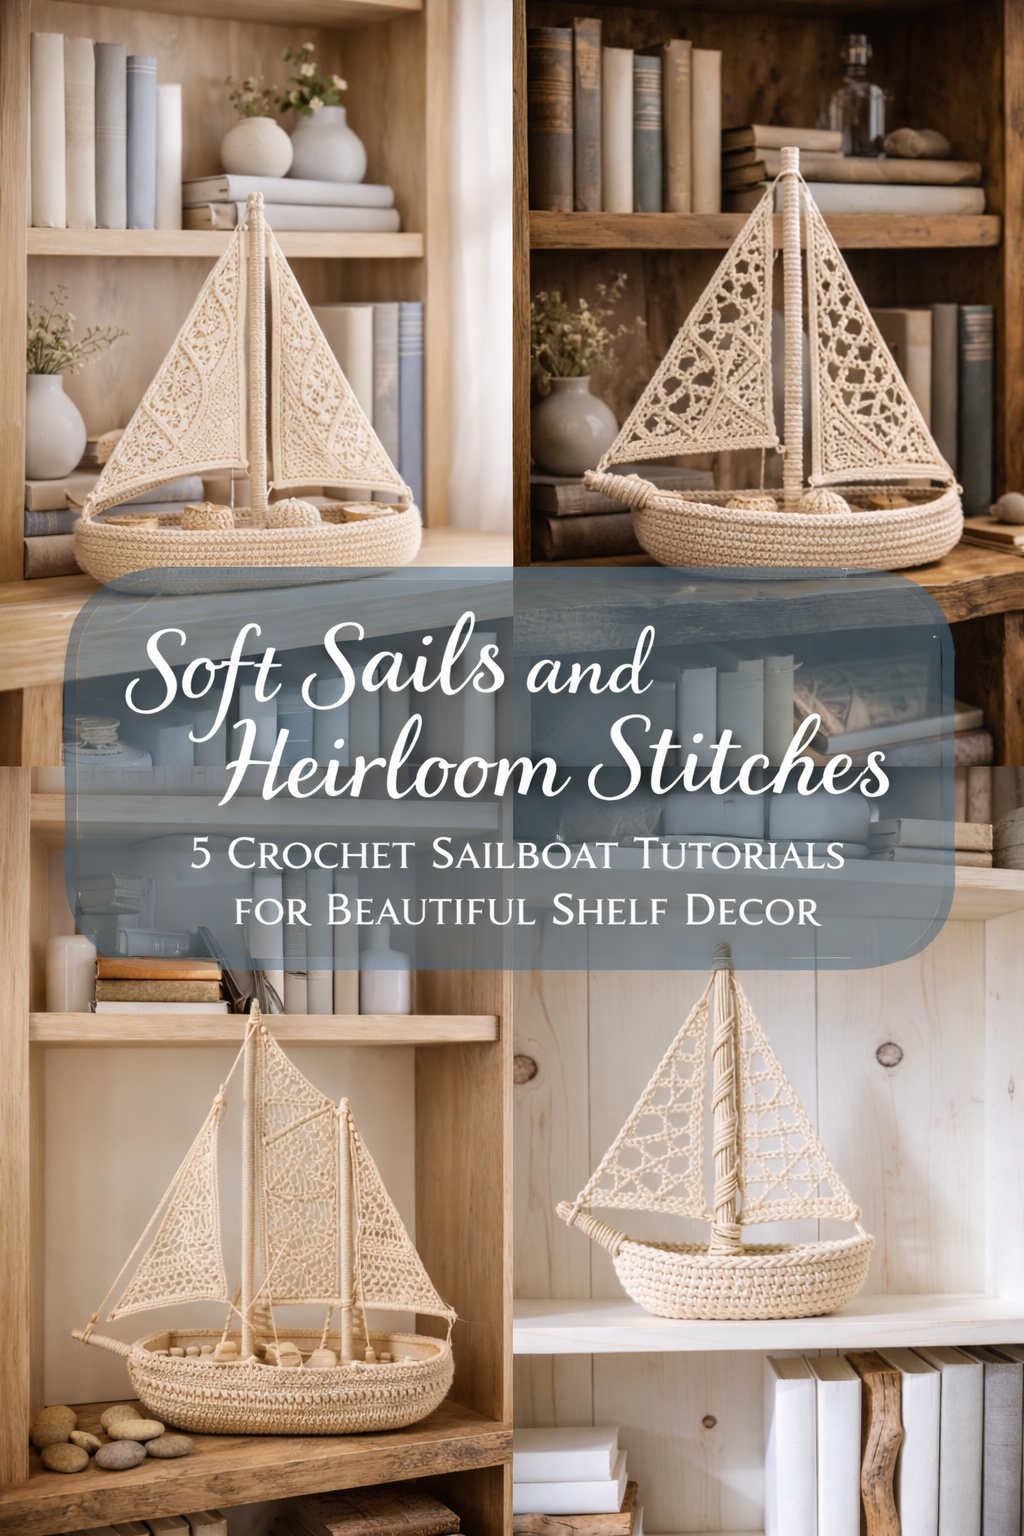
Soft Sails and Heirloom Stitches: 5 Crochet Sailboat Tutorials for Beautiful Shelf Decor

More like this

💡 Pro Tip: Why I Link to Amazon Search Results and Not One Product
In the Shop the Look and Style it With sections under each bikini, I link to Amazon search results, not single products. Here’s why this matters:
Hot bikinis sell out fast. I don’t want you clicking on a dead link to a sold-out item. Search pages stay updated.
You get more options. Love the vibe but want a different color, cut, or price point? The search results give you everything that matches the look and energy.
I curate each search carefully. These aren’t generic. I spend hours crafting keywords that bring up exactly the kind of bikinis I’d wear—or recommend to my hottest friends.
Support with no pressure. If you click a link, browse, and buy something later, I may earn a small commission at no extra cost to you. That helps me keep bringing you curated collections like this one—powerful, seductive, and always fresh.
So dive in. Click through. Try something risky. These aren’t just bikinis—they’re commands, statements, and maybe even your new favorite weapon of choice.
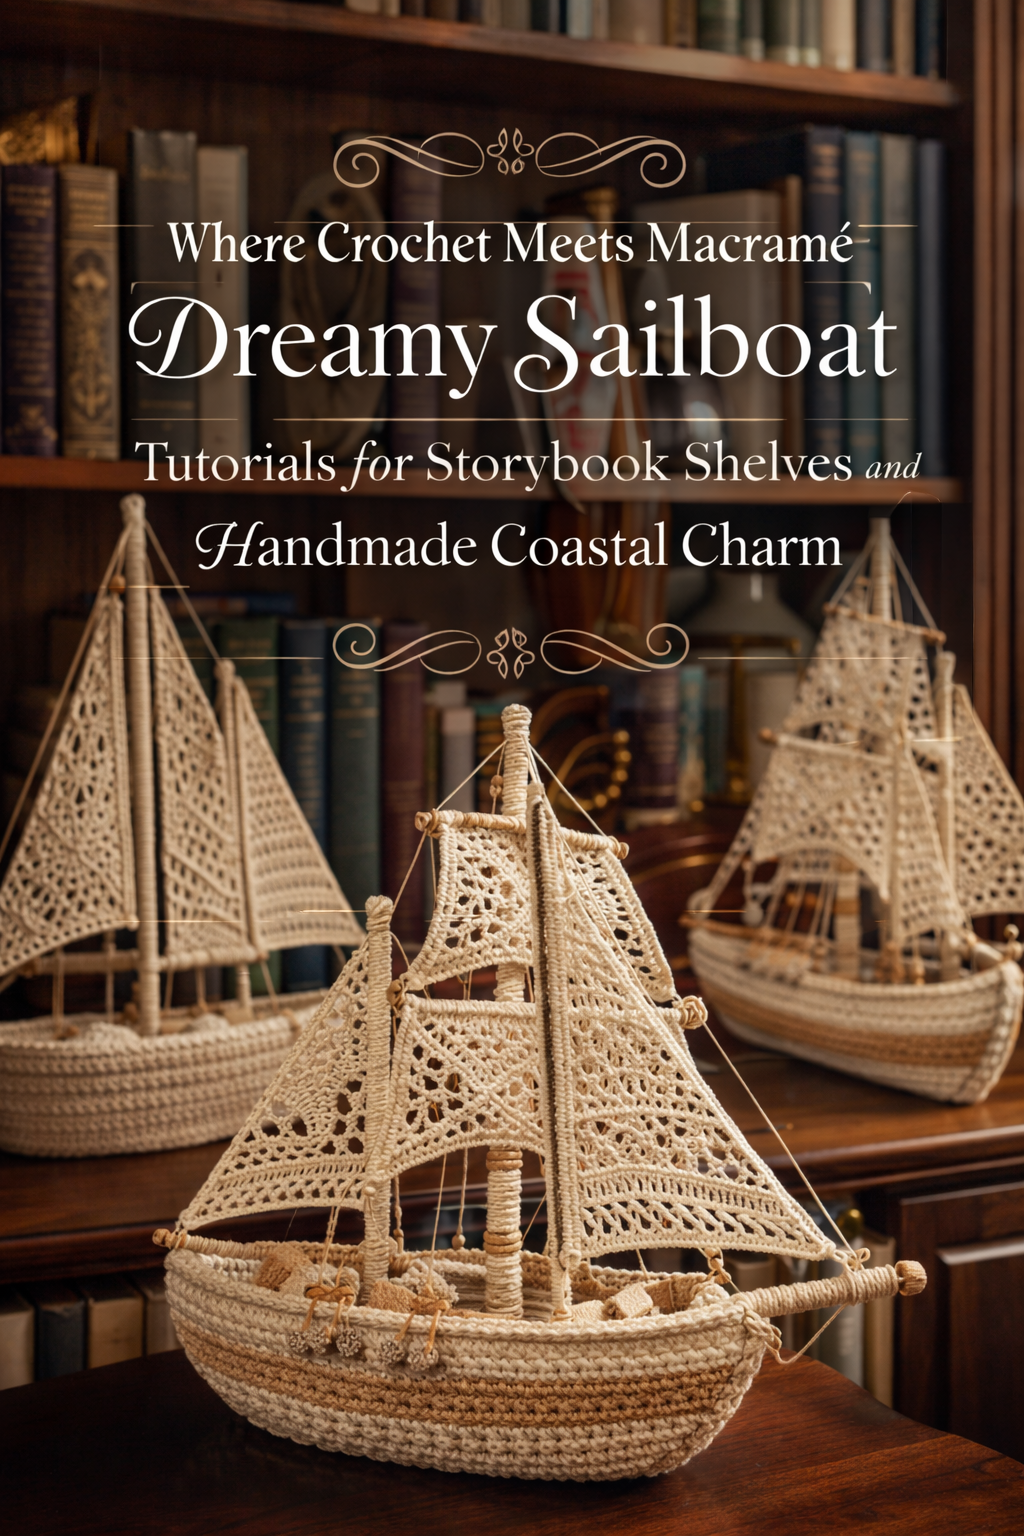
Welcome to a softer kind of coastal crafting. In this post, we are diving into five beautiful crochet sailboat designs that turn simple yarn, cord, and a few structural details into shelf worthy decor with real presence. From airy minimalist boats to heirloom lace versions and rustic library inspired schooners, each project offers its own mood while keeping that calm handmade nautical charm front and center.
These sailboats are especially lovely for styling bookcases, entry tables, nursery shelves, reading nooks, and seasonal summer displays. What makes this collection feel special is the way crochet becomes sculptural here. The hulls read like little woven vessels, the sails add delicate architectural shape, and the finished pieces feel thoughtful, decorative, and surprisingly elevated. Whether you want something bright and Scandinavian, warm and vintage, or textured and coastal, you will find a version that fits your space and your crafting style.
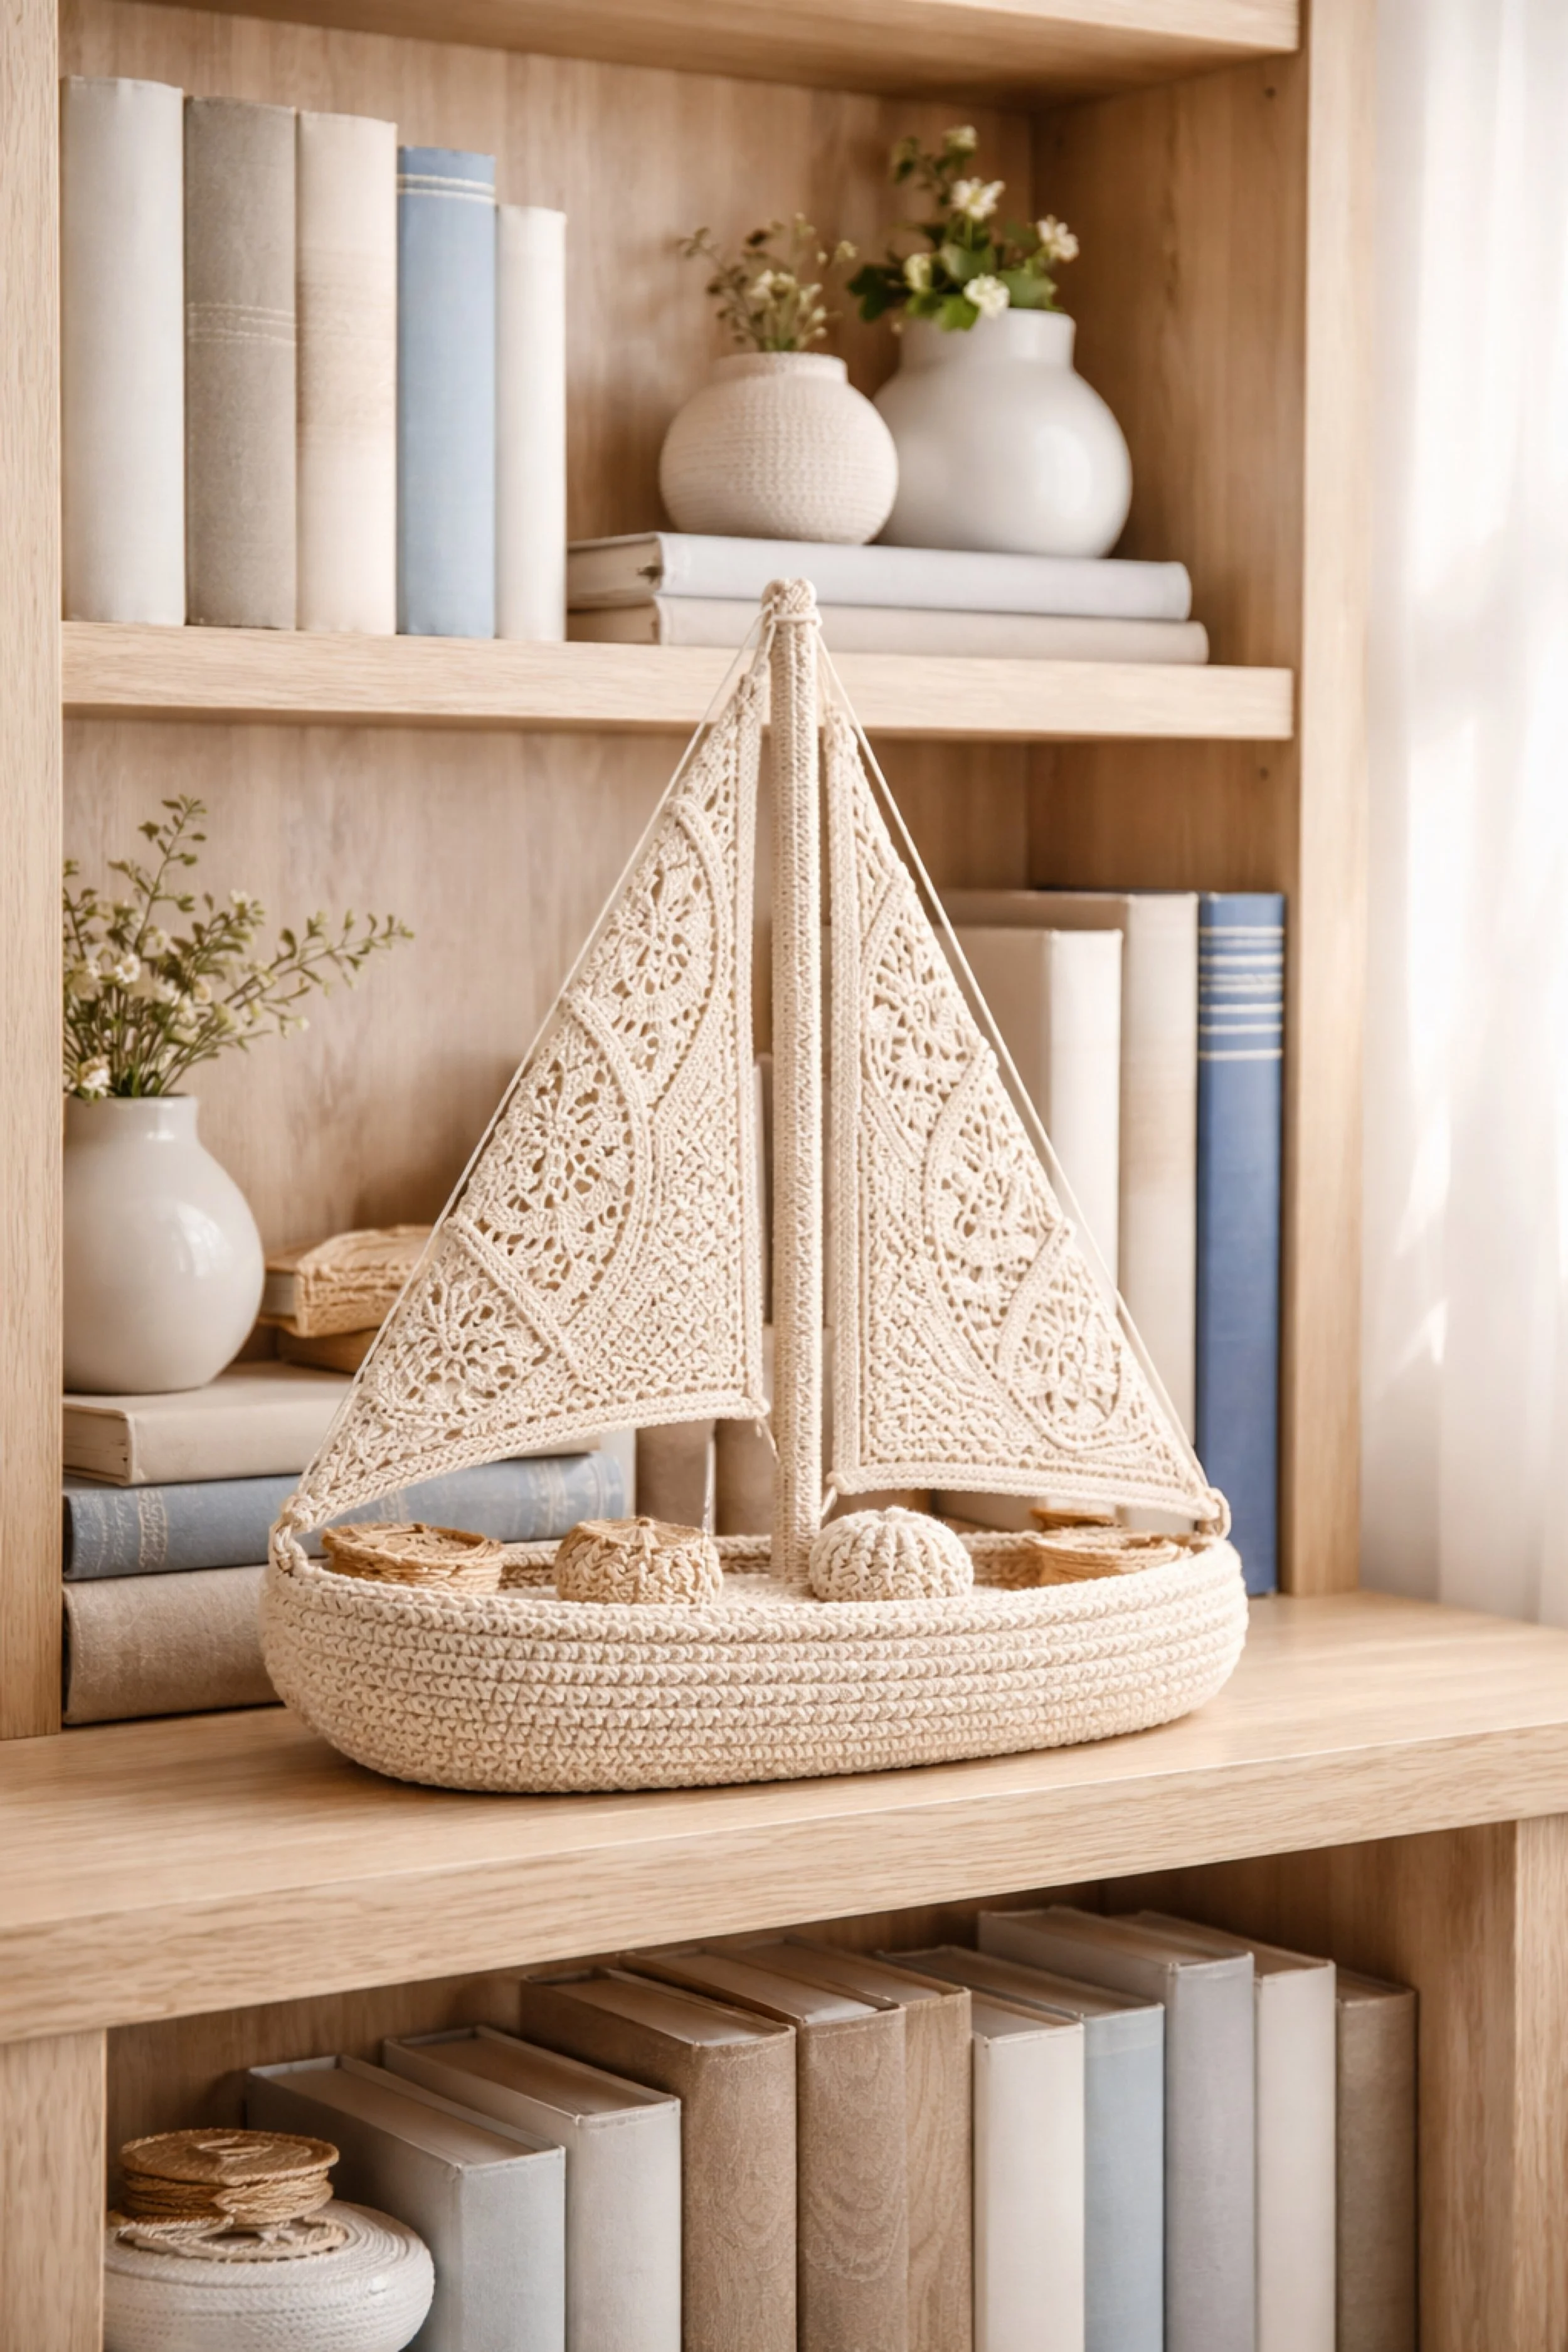
Heirloom Lace Sailboat Shelf Accent Step by Step Tutorial
What you’re making
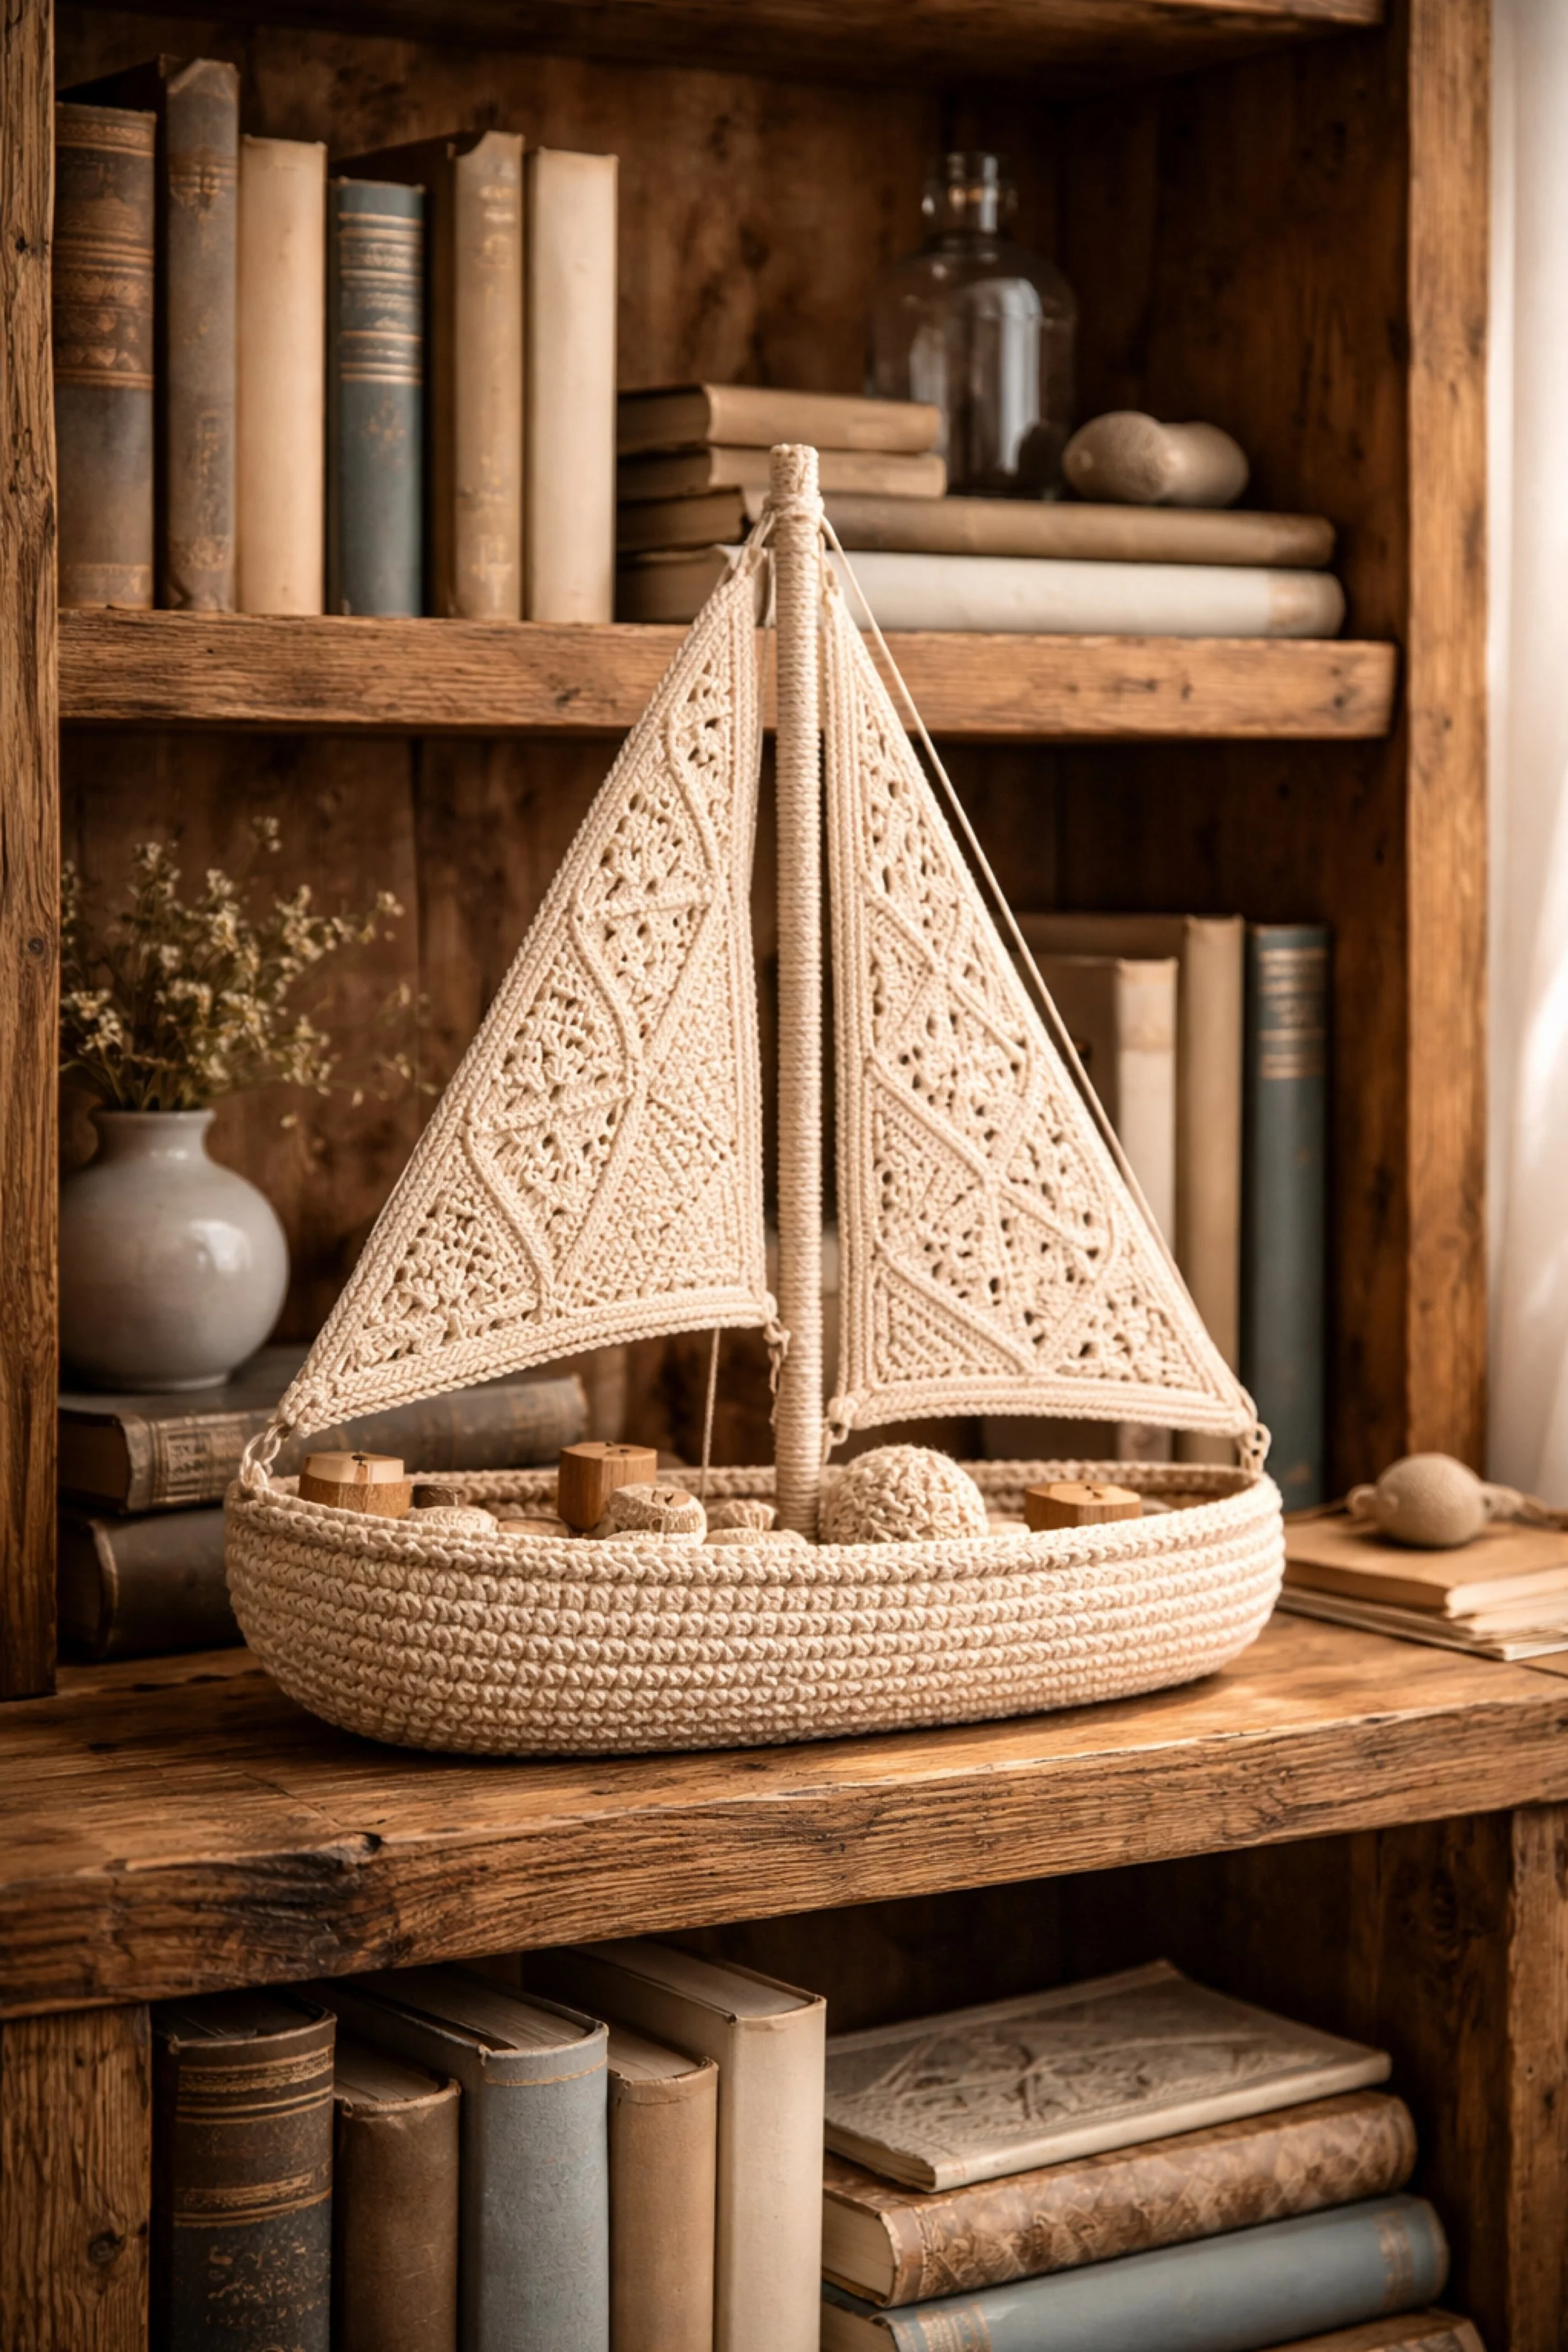
You’re making a softly sculptural crochet sailboat that looks like it belongs on a light oak bookshelf beside pale blue linen books and creamy ceramic vases. The overall shape is simple and calm, but the lace sails give it that elevated heirloom feel that makes the piece look decorative rather than toy like. This version is ideal for readers who want a clean, Nordic inspired boat with a rounded oval hull, one tall center mast, and two matching triangular sails with delicate panel work.
The finished look in the photo feels refined, neutral, and textural. The hull is dense and sturdy, the masts are neatly wrapped, and the sails have a graceful, lightly architectural drape. You are essentially combining three techniques here: sturdy basket style crochet for the hull, structural wrapping for the mast, and fine lace crochet for the sails.
Materials + tools
- Sturdy cotton rope yarn or chunky macramé cotton cord in warm ivory, about 3 mm to 5 mm thick for the hull
- Light cotton yarn or crochet thread in matching ivory for the sails
- Crochet hook for the hull, usually 5 mm to 6.5 mm depending on cord thickness
- Smaller crochet hook for the sails, usually 2.75 mm to 4 mm depending on yarn weight
- One wooden dowel for the main mast
- Two thinner dowels or sturdy floral wire supports for side sail edges if you want crisp shaping
- Tapestry needle
- Sharp scissors
- Fabric glue or craft glue for securing wrapped cord ends on dowels
- Stitch markers
- Measuring tape
- Optional cardboard or plastic canvas insert for the base
- Optional spray starch or diluted craft stiffener for the sails
- Optional wooden beads or small crocheted domes for deck details
Finished size + customization notes
Aim for a finished boat about 12 to 16 inches wide and 12 to 18 inches tall for a bookshelf styling piece like the one shown. If you want a larger statement version, increase the oval base rounds first, then lengthen the mast in proportion. If yours looks too narrow compared with the photo, add one or two more increase rounds to the hull before building the sides. If you want a more substantial decorative look, use slightly thicker cord for the hull and keep the sail yarn fine so the contrast in texture stays elegant.
You can also customize the vibe very easily. Use pale sand instead of ivory for a warmer rustic version. Add tiny wood slice details for a coastal cottage feel. Line the inside of the hull with linen if you want it to double as a catchall tray for shells, tags, or wrapped treats.
Step by step instructions
Plan your proportions before you crochet.
The boat in the photo has a wide, low, softly rounded hull with sails that rise in a gentle tall triangle. Sketch three measurements first: hull width, hull depth, and mast height. A good starting proportion is a hull that is roughly as wide as the combined width of the two sails at their base, with the mast rising about the same height as the hull width. This quick planning step keeps the finished silhouette elegant instead of squat or overly tall.Crochet the base of the hull as a firm oval.
Start with a foundation chain that matches the inner length you want for your boat. Work single crochet around both sides of the chain to create an oval, increasing evenly at both curved ends. Keep the stitches tight. You should now see a flat oval disc forming. If the disc starts rippling, you have too many increases. If it curls into a bowl too early, add a few more increases on the next round. The photo shows a very smooth base, so aim for flat and even before moving up.Build the hull walls upward.
Once the base is the width you want, stop increasing for one round, then work a turning round in the back loop only. This creates a defined edge where the bottom becomes the side wall. Continue in even rounds of single crochet or waistcoat stitch for a polished woven look. The hull in the image has a clean stacked texture, so consistency matters more than fancy stitch work. Check after every two rounds that the sides are rising straight and not flaring too much.Shape the upper rim subtly.
When the hull reaches the desired height, add one gentle shaping round. Work one decrease near each short end if you want the boat to taper slightly. Then work one or two final plain rounds for a finished rim. If yours looks wider than the photo, a final decrease round can refine it. If it looks too tight and bowl like, add a plain round instead. The rim should read as calm and oval, not dramatically pinched.Add structure inside the hull.
Decorative boats like this look best when they do not sag in the middle. Cut an oval insert from cardboard, heavy felt, or plastic canvas to fit the base, then place it inside. Cover the insert with matching fabric or crochet over it if you want a fully handmade finish. This step is optional, but it helps the boat sit beautifully on a shelf and makes the piece feel intentionally crafted rather than floppy.Prepare and wrap the mast.
Cut your central mast dowel to size. Wrap it tightly with matching cotton cord or yarn from bottom to top, securing the beginning and end with glue on the back side. The mast in the photo is fully wrapped, which softens the wood and blends it into the textile look. Take your time here. A neat wrap makes the whole piece look more expensive.Install the mast securely.
Decide where the mast will sit, usually slightly forward of center or centered depending on your preferred look. For the first image, center placement works best. Push the dowel through a snug hole in the base insert or stitch it firmly to the base with strong yarn. Reinforce with extra wraps at the bottom. You should now see the classic sailboat shape beginning to appear. Tug gently. If the mast wobbles, add more anchoring stitches or a hidden glue point beneath the insert.Crochet the first lace sail.
Make a triangular sail from fine cotton yarn. Begin at the top point or along the lower edge depending on the lace motif you prefer. A simple method is to create a triangle with double crochet mesh, then work decorative shells, arches, or clustered motifs inside the frame. In the photo, the sails look like panelled lace, almost like sections of doily work fitted into a triangle. You can mimic that by dividing the triangle into curved panels with chains and filling each panel with a different openwork stitch.Create a clean outer border on the sail.
Once the lace interior is complete, add a firm border in single crochet or slip stitch around the triangle. This is important because it prevents the lace from looking too loose. If you want extra crisp edges, crochet over a thin wire or hold a second yarn strand around the border. The sail should feel delicate but not limp. If it collapses too much, you can block it harder later or use stiffener.Make the second sail to match.
The front and back sails in the reference image are very similar in height and overall feel. Match the size closely, but do not panic if the lace motifs differ slightly. Handmade variation actually adds charm. Lay both sails flat side by side before attaching them. You should now see whether one is significantly taller or wider. Adjust with an extra border round if needed.Block the sails before assembly.
Wet block or steam block the sails into sharp triangles. Pin the corners carefully. If you want the heirloom crispness of the photo, apply a light spray starch or diluted stiffener and let the sails dry completely. This checkpoint matters. The photo’s sails are smooth and intentional, not crumpled. If your sail edges wobble, re block before attaching.Create the yard and lower attachment points.
The lower edge of each sail needs support. You can use a slim wrapped dowel, a firm crocheted cord, or tensioned thread lines. For the first look, a simple invisible tension system works beautifully. Stitch the front lower corner of each sail to the rim of the boat and the top point to the mast. Then pull a fine line from the outer lower corner to the top mast point so the sail holds its triangular shape.Attach the sails carefully.
Begin with the top point of the left sail. Stitch or tie it near the mast top. Then secure the inner side of the sail to the mast with a few discreet stitches. Finally anchor the lower outer corner to the hull rim. Repeat for the right sail. Stand back often while attaching. You should now see a balanced V shape. If one sail droops lower, remove the bottom stitch and re tension it slightly higher.Add deck texture and soft sculptural details.
The first photo includes rounded decorative elements inside the hull that resemble small crocheted domes or bundled rope forms. Make two or three little half sphere accents by crocheting small cups and stuffing lightly, or coil mini circles from leftover cord and stitch them down. These details make the boat feel styled and finished.Refine the outline.
At this stage, check every line. The mast should be straight. The sails should mirror each other. The hull should sit flat on the shelf. If yours leans, add weight inside the base or reinforce the mast from beneath. If the sails puff out too much, lightly press them inward with a hidden stitch to the mast.Finish all ends invisibly.
Weave in ends along existing stitch paths and secure them well. Decorative shelf pieces get moved more than you think. A loose end near a sail corner can quickly show. Snip only after tug testing.Style the boat so it matches the photo mood.
Place it on a pale wood shelf with a little breathing room around it. Pair it with matte vases, white books, and a restrained palette of oatmeal, ivory, and dusty blue. That styling is part of why the project feels so elevated.
Troubleshooting
My hull won’t stay oval.
You are either increasing too much at the short ends or your tension is inconsistent. Flatten the base often while working. The correct oval should rest smoothly on the table.
My mast leans.
The mast usually leans because it is not anchored through something firm. Add a base insert or stitch it down through several layers of crochet.
My sails look floppy.
Use a smaller hook for the sail yarn, add a stronger border, and block with starch. Lace needs shaping to look intentional.
The boat looks too bulky.
Switch to finer cord for the hull or reduce the wall height by one or two rounds. The photo’s hull is substantial but still sleek.
The whole piece looks homemade in the wrong way.
That usually means the lines need refining. Straighten the mast, even out the sail tension, and clean up the borders. Small edits make a big visual difference.
Finishing details
Give the hull a light steam from a distance if the stitches need settling, but do not flatten the texture. Block the sails thoroughly and let them dry fully before final assembly. If you want the boat to be more rigid for long term shelf styling, brush the inside of the hull with diluted fabric stiffener and let it dry over a bowl or oval mold. You can also line the inside with natural linen or cotton for a softer luxury finish. For an even more heirloom look, add tiny wrapped cord details at the mast base, or stitch a narrow edging around the rim to sharpen the silhouette.
Optional upgrades for this version include adding miniature crochet pillows or rope coils inside the hull, sewing a discreet monogram tag onto the inner rim, replacing one sail panel with filet crochet initials, or adding a hidden weight in the base so the piece feels satisfyingly substantial when lifted.
Shop Similar
- Ivory cotton rope yarn for sturdy crochet baskets and boat hulls
- Fine ivory crochet thread for lace sail panels
- Wood dowels for craft masts and wrapped fiber details
- Fabric stiffener spray for crochet lace shaping
- Natural wood beads for coastal boat embellishments
Style it with
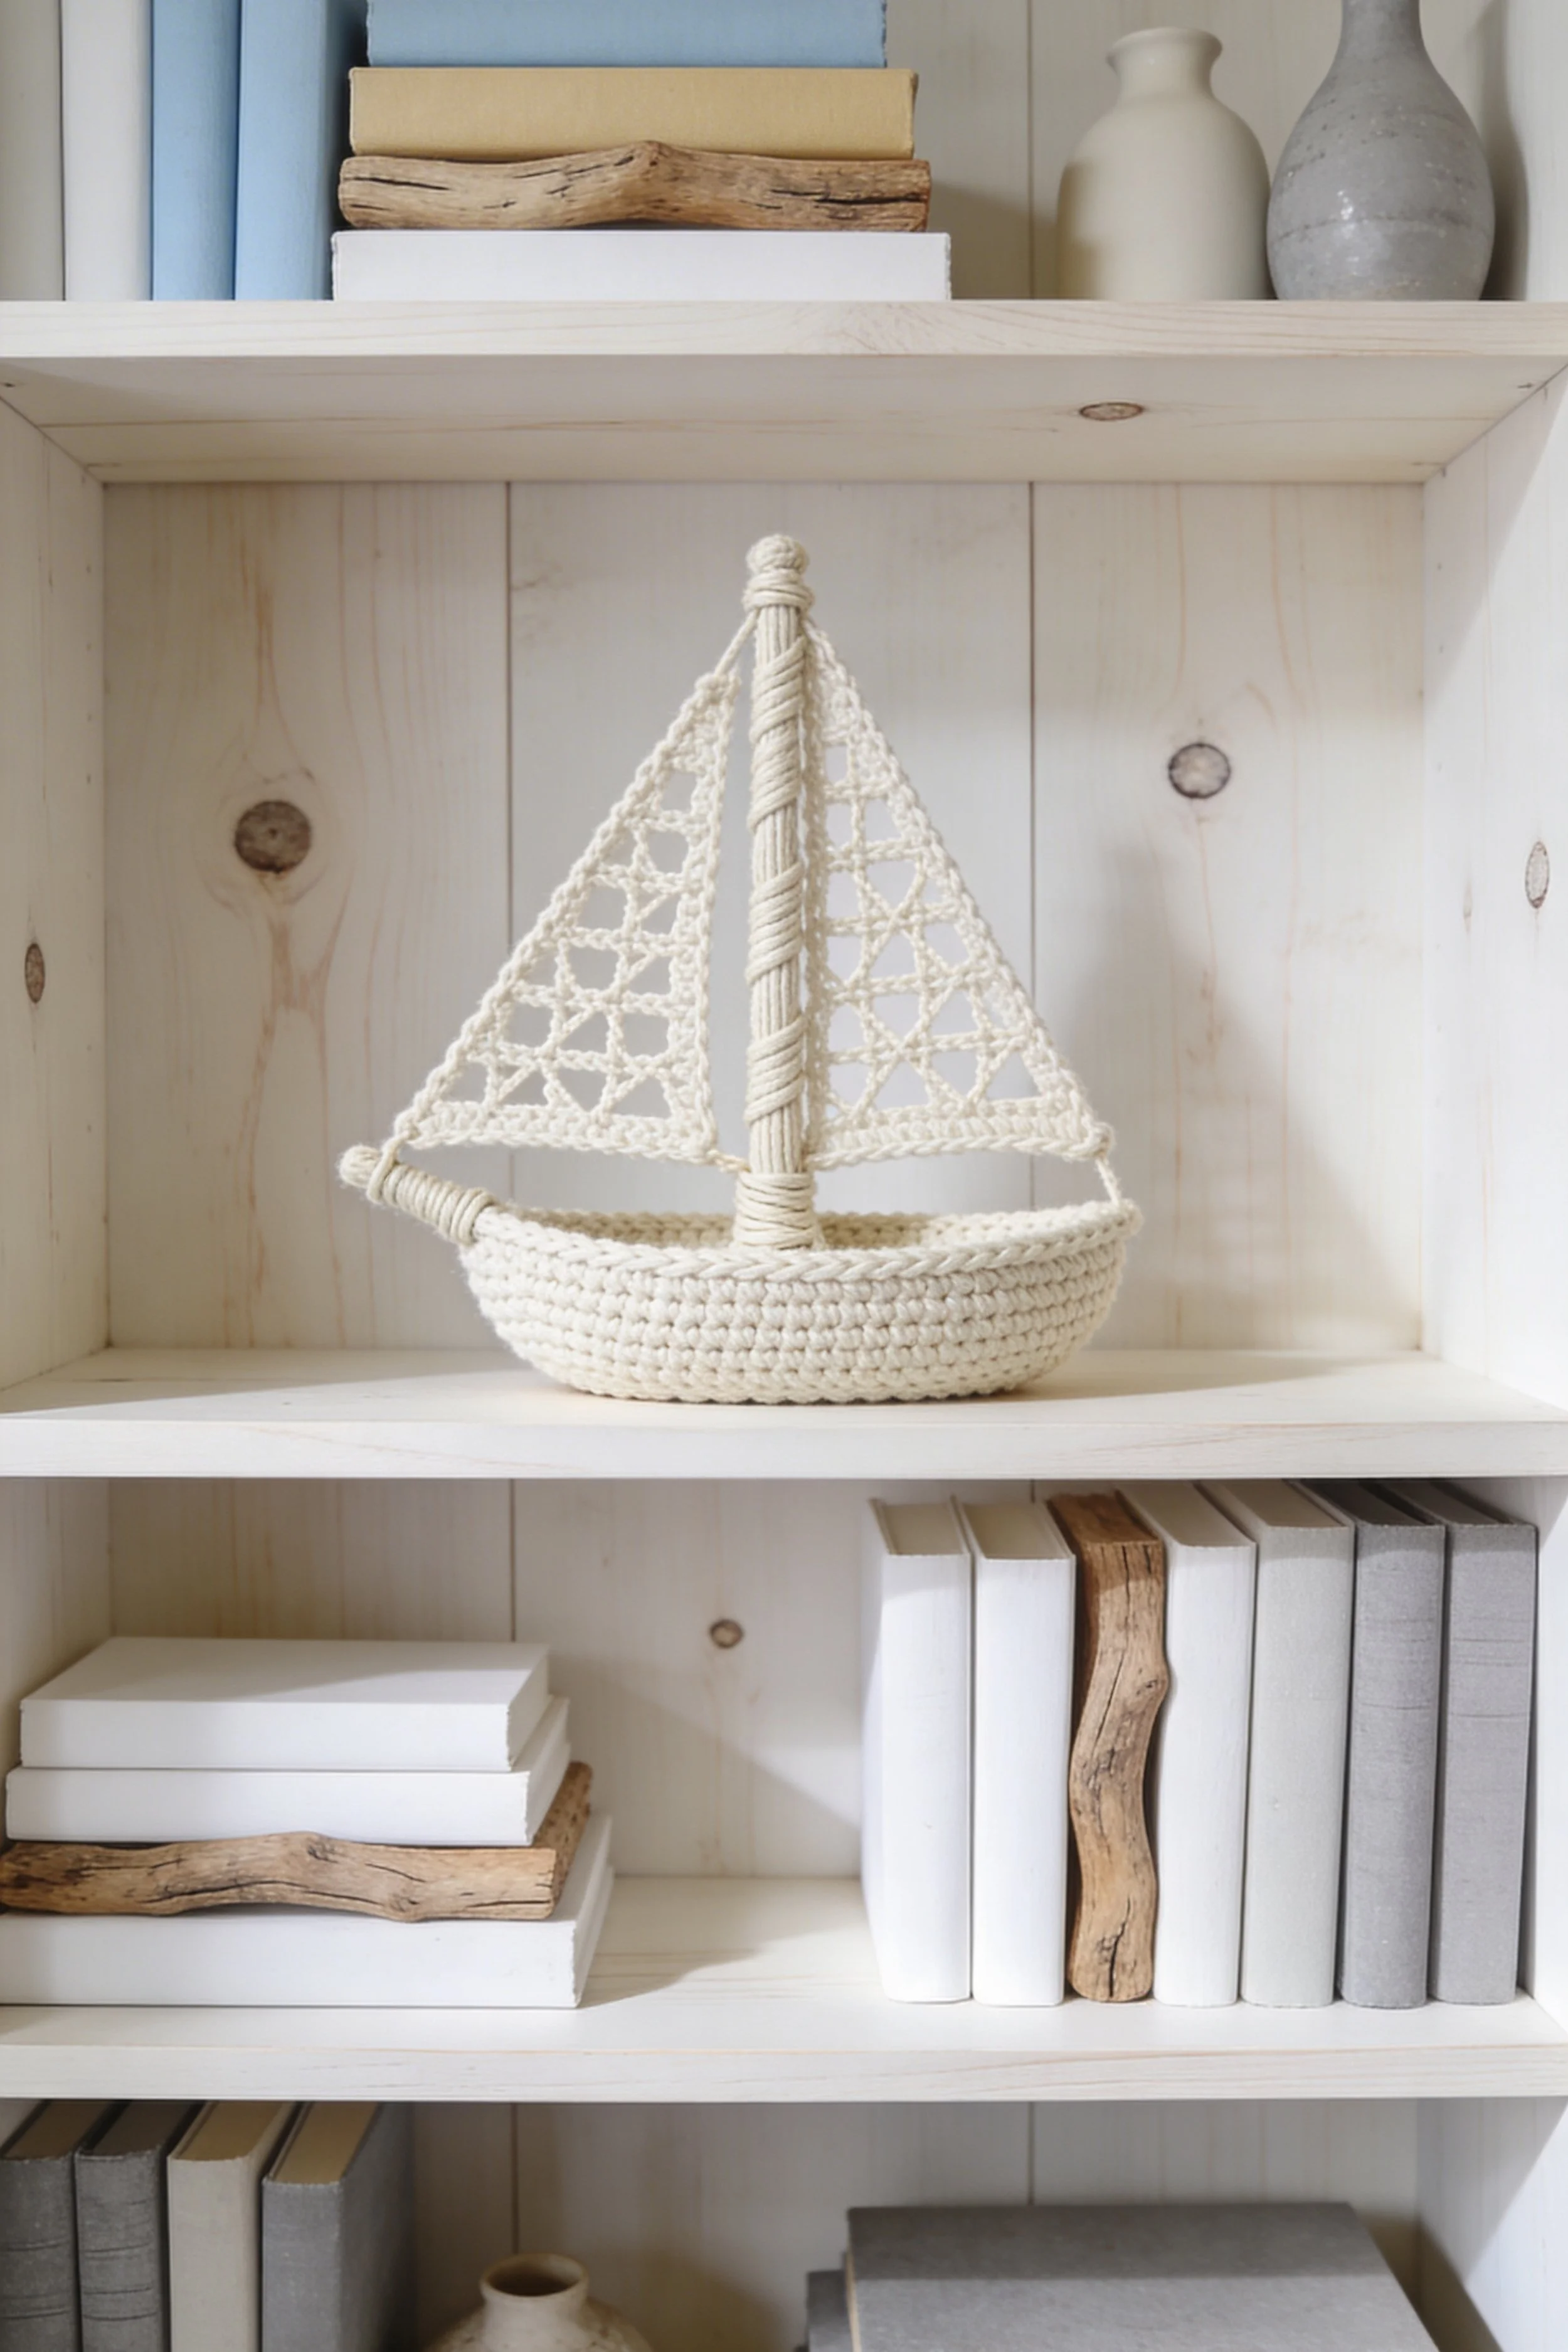
Minimal Crochet Shelf Sailboat DIY Guide
What you’re making
You’re making a pared back crochet sailboat with a whitewashed, Scandinavian look and very open, airy sails. Compared with the first design, this one is simpler and more graphic. The hull is compact and softly rounded, the mast is wrapped in thick cord, and the sails are made with open lattice work instead of dense lace motifs.
This is a great version for beginners who want the photo’s calm handmade charm without tackling intricate doily style crochet. The beauty of this design comes from clean proportions, tight stitching in the hull, and neat tension in the netted sails.
Materials + tools
- Soft cotton cord or T shirt yarn in ivory or natural white for the hull
- Medium weight cotton yarn in matching shade for the sails
- Crochet hook for hull, usually 5 mm to 6 mm
- Crochet hook for sails, usually 3.5 mm to 4.5 mm
- One sturdy dowel for the mast
- Thin craft dowel or wrapped wire for the sail cross support if desired
- Strong sewing thread or matching crochet cotton for rigging
- Tapestry needle
- Stitch markers
- Scissors
- Craft glue
- Measuring tape
- Optional plastic canvas insert for hull support
- Optional clear fabric stiffener for sails
Finished size + customization notes
A finished size around 8 to 12 inches wide and 10 to 14 inches tall suits the shelf scale in the photo. The hull here is smaller and more compact than the first image, so keep the base modest. If you want to enlarge it, add extra rounds to the oval base and one or two more rows to each sail triangle. For a more graphic modern version, make the hull in soft white and the sails in pale flax. For a child’s room, keep the same shape but add a tiny pennant at the mast top.
Step by step instructions
Study the silhouette first.
This second boat is all about restraint. The hull is small, the mast is centered, and the sails are open and geometric. Before starting, choose the overall width and height so everything stays balanced. If the mast gets too tall for the hull, the piece can look spindly. If the hull gets too deep, it loses the light decorative look of the image.Make a compact oval base.
Chain a short foundation and work around it in single crochet to build an oval. Use stitch markers at each curved end so you always know where increases belong. The key here is firmness. You should now see a neat shallow oval, not a floppy pouch. If your base ruffles, undo one round and reduce the increase count.Turn upward for the sides.
Work one round in the back loop only to create the bend, then continue in even rounds of single crochet. The hull in the reference photo sits like a little basket. Keep the wall height fairly low. A shallow hull helps the sails feel more prominent.Create a smooth rim.
Finish the last round with slip stitches or a tidy single crochet round so the rim appears clean. You can also insert a hidden round of floral wire under the final stitches if you want the rim to hold a perfect curve. This is optional, but it helps create the polished silhouette visible in the image.Prepare the mast.
Wrap the wooden dowel with thick cotton cord from bottom to top. In the photo, the mast wrapping is visible and decorative, almost like rope spiraling around a post. You can recreate that exact look by wrapping diagonally rather than straight around. Secure neatly at both ends with glue on the back.Anchor the mast in the hull.
The easiest method is to pierce a small reinforced opening in the base, pass the dowel through, and secure it to a base insert. Another method is to stitch the mast to the base and rim at several points using strong yarn. Tug it gently before moving on. If it wiggles now, it will only wiggle more later.Crochet the left sail as a triangle frame.
Begin with a small chain and increase each row to form a triangle, or start from a long base chain and decrease upward. Use chain spaces to form open netting. For example, work a row pattern of single crochet, chain three, skip stitches, then offset the openings on the next row. The photo shows an irregular open lattice, so perfection is not required. The main goal is lightness.Build structure into the sail border.
Once the inner lattice triangle is large enough, work a firm border around it. Add one extra row along the two slanted sides if needed so the sail holds shape. If your yarn is soft, use a tighter hook for the border. You should now see a crisp little triangle with open windows.Make the right sail.
Repeat the same triangle, mirroring the shape if needed. Lay both sails on a flat surface. If one edge bows outward, dampen and pin it into place. These sails are simple enough that minor differences are easy to correct during blocking.Block both sails thoroughly.
Pin each triangle to exact size. Because the design is open, blocking makes a huge difference. The chain spaces will straighten, the points will sharpen, and the sail will look much more intentional. Use spray starch if you want extra hold.Attach the sails at the top.
Tie or stitch the top point of each sail near the mast top, leaving a tiny bit of space between the two sails if you want them to read separately. The photo shows clean open space around the mast, which keeps the design airy.Secure the inner sail edges to the mast.
Use a few discreet matching stitches along the mast side so the sails stay aligned. Do not over stitch. You want the sails to look suspended, not plastered flat.Anchor the lower corners to the rim.
Pull each sail down gently and stitch the lower outer corner to the hull rim. The tension line creates the classic sailboat shape. If the sail collapses inward too much, move the lower corner outward along the rim. If it looks too stretched, move it inward. This is your major visual checkpoint. You should now see a simple symmetric boat profile.Add the horizontal front detail if desired.
The photo hints at a small wrapped support near the front edge. You can create this by wrapping a short slim dowel and stitching it to the rim, or by crocheting a firm rope cord and attaching it across the bow area. This small detail strengthens the silhouette without making the design busy.Refine the hull.
If the hull top edge seems soft, slip a row of cord just under the rim stitches. If the base rocks on the shelf, stitch in a thin insert or steam the hull lightly over a mold so it sits flatter.Finish with restrained details.
This minimalist boat does not need much ornament. One or two tiny wrapped rope coils or a simple crocheted knot at the mast top are enough. Avoid over decorating. The photo’s charm comes from clean negative space.Style it on a pale shelf.
Place it between stacked books, raw wood accents, and matte pottery. The piece looks best when it has breathing room around it. A white or pale pine backdrop helps the creamy yarn stand out softly.
Troubleshooting
My sail netting looks messy.
Use markers at the beginning and end of each row and count chain spaces. Blocking will improve the look more than you think.
My boat tips forward.
The mast may be too heavy for the hull. Add a weighted insert or stitch a bit of felt covered cardboard into the base.
The sails look too loose.
Tighten the border with a smaller hook and use starch. Open crochet needs finishing support.
The hull looks chunky instead of sleek.
Reduce the number of side rounds. This design works best with a low, modest basket shape.
The mast wrap keeps slipping.
Add a tiny line of craft glue along the dowel before wrapping, then smooth the cord in place as you go.
Finishing details
To preserve the clean modern look, finish every edge with care. Weave ends into the bulk of the stitches so they vanish. If you use stiffener on the sails, apply it evenly with a small brush and reshape the points while damp. For a museum neat result, wrap the mast twice at the top and bottom with a few extra turns of cord so those transition points look polished. You can also wax the dowel lightly before wrapping if the wood is rough and catching fibers.
Optional upgrades for this version include a tiny braided hanging loop at the top so it can double as wall decor, a linen base insert inside the hull for a tray effect, subtle driftwood beads at the sail corners, or a soft blue stripe worked into the hull rim for a faint nautical note.
Shop Similar
- Ivory cotton T shirt yarn for crochet basket style hulls
- Natural cotton yarn for openwork crochet sails
- Craft wood dowels for small decorative boats
- Spray starch and stiffener for lace crochet shaping
- Plastic canvas sheets for basket base support
Style it with
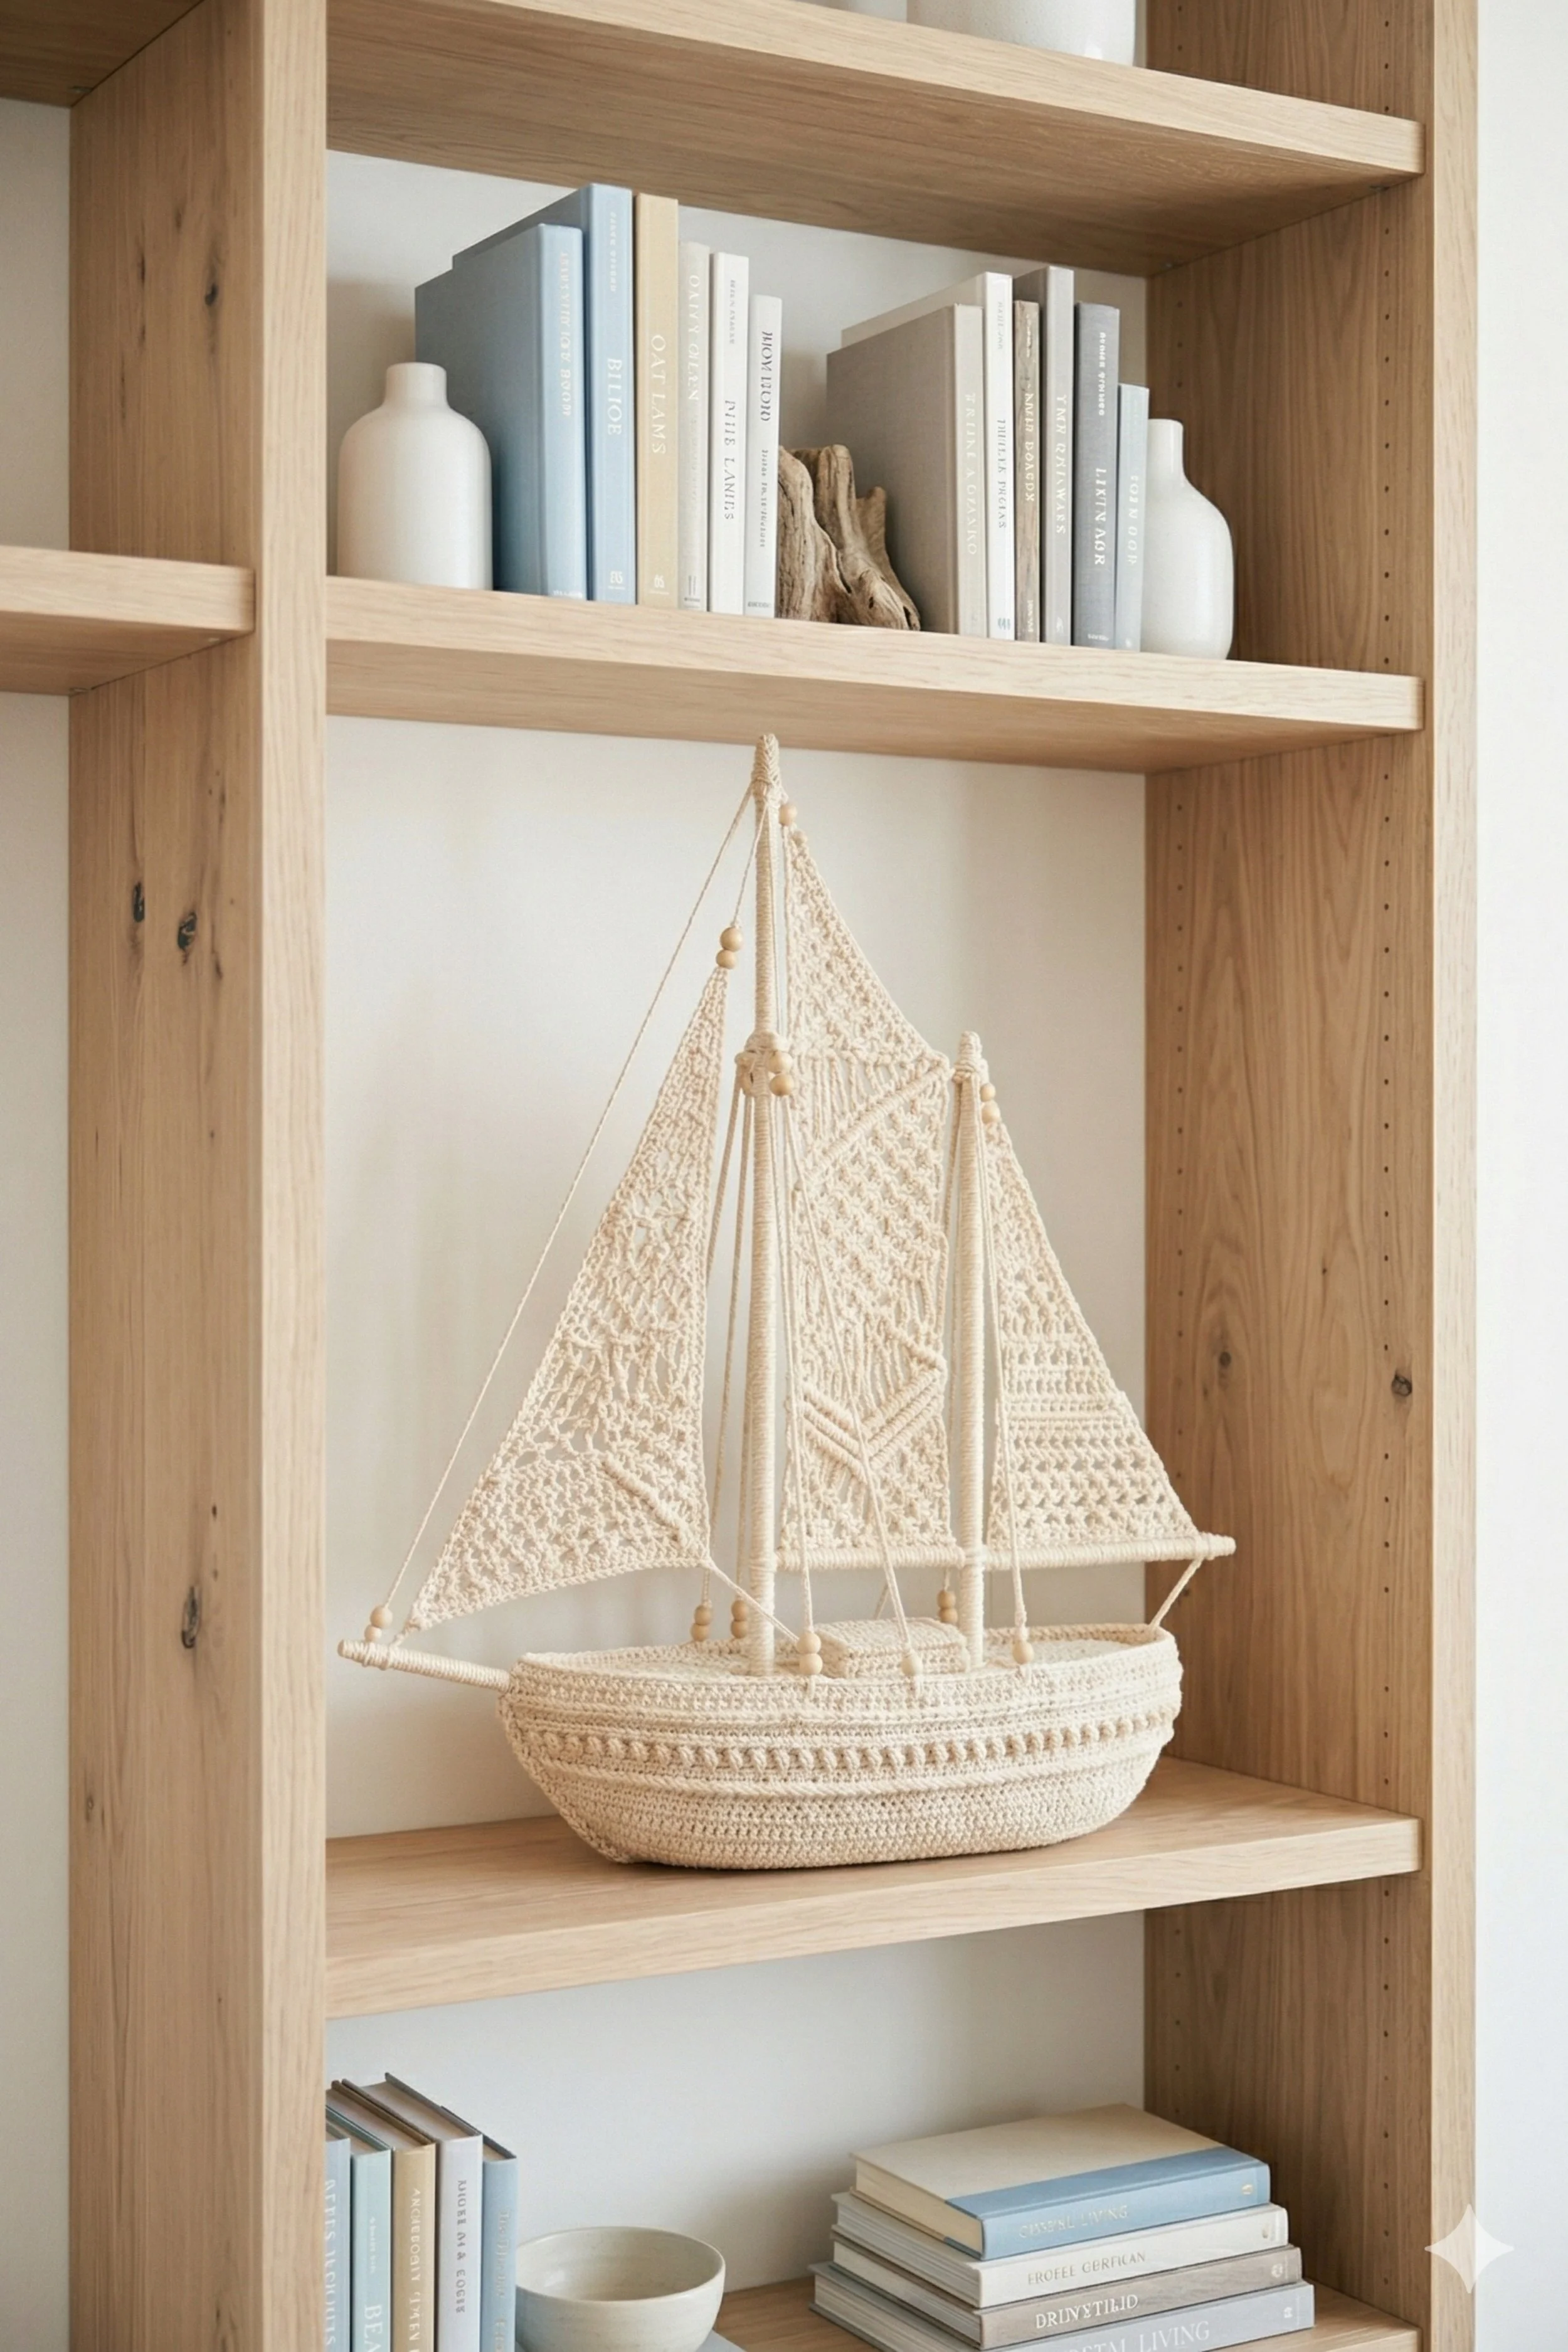
Textured Coastal Crochet Schooner Make It Yourself Tutorial
What you’re making
You’re making a more elaborate crochet sailboat with layered masts, delicate rigging lines, and textured sails that feel somewhere between crochet and fine macramé. This version has the prettiest silhouette of the group for a coastal modern shelf. The hull is softly rounded but more detailed, the sails feel panelled and hand formed, and the little wood bead details give the whole piece a quietly artisanal finish.
The photo reads airy, elegant, and refined. This is not a child’s toy boat. It is a decorative schooner style accent meant to sit on a bookshelf and add handmade warmth to a neutral room. If you enjoy detailed finishing, this is a lovely project.
Materials + tools
- Cotton rope yarn or macramé cord in warm cream for the hull
- Medium to light cotton yarn in matching tone for the sails
- Crochet hook for the hull, usually 4.5 mm to 6 mm
- Crochet hook for the sails, usually 3 mm to 4 mm
- Two wooden dowels for masts
- One slim dowel for the bowsprit if desired
- Fine strong thread or waxed cotton cord for rigging lines
- Small unfinished wood beads
- Tapestry needle
- Scissors
- Stitch markers
- Measuring tape
- Fabric glue
- Optional clear drying stiffener
- Optional floral wire for hidden support in sail edges
Finished size + customization notes
This design looks best at about 12 to 18 inches wide and 14 to 20 inches tall because the extra mast and rigging need a bit of scale to show well. If you want the exact airy bookshelf effect of the image, keep the yarn pale and the wood details natural. For a softer minimalist version, omit the beads. For a more cottage coastal look, add a braided rope coil inside the hull or a tiny pennant at the rear mast.
Step by step instructions
Map the boat layout before beginning.
Because this version has multiple vertical elements, draw a quick side profile. Mark the hull length, front mast height, rear mast height, and approximate sail positions. The front mast in the image appears slightly taller, while the second mast adds depth and complexity. Planning these lines early prevents the finished boat from looking crowded.Crochet the hull base as a long oval.
Start with a chain long enough for a graceful elongated base. Work around it in single crochet, increasing at both ends to maintain an oval. Keep the tension firm and even. Compared with the first two boats, this hull is slightly more elongated, which helps the multi mast structure look believable.Raise the hull walls.
Work a back loop round to turn upward, then build the sides in even rounds. You can alternate plain single crochet with one round of half double crochet to create subtle horizontal ridges like the boat in the photo. Those ridges add depth without distracting from the overall neutral palette. Check that the hull remains symmetrical as you work. If one side pulls inward, loosen your tension slightly on the next round.Shape the rim with a decorative band.
The rim area in the image has a refined banded look. You can mimic this by working one round of front loop only half double crochet, followed by one plain round. This creates a subtle shadow line. If yours looks too bold, keep it all in single crochet. The goal is texture, not chunky contrast.Reinforce the base.
Since this boat has more height and more rigging, a stable base matters. Add a plastic canvas or thick felt insert inside the hull. If you want extra weight, sandwich a small flat washer or two between layers beneath the insert. Hidden weight helps decorative pieces sit securely on shelves.Prepare both masts and the bowsprit.
Cut one taller mast and one shorter mast from dowels. Wrap each tightly in matching cord or yarn. Also prepare a slim front bowsprit if you want the elegant prow line visible in the photo. The wrapping should be smooth and close, with no wood peeking through unless you intentionally like that contrast.Install the masts.
Stitch or anchor the front mast slightly forward of center and the second mast somewhat behind it. The spacing matters. Too close and the sails overlap awkwardly. Too far apart and the boat looks sparse. You should now see the classic schooner framework. Add the bowsprit extending forward if using one.Crochet the large front sail.
Create a tall triangle using textured stitches such as mesh, crossed double crochet, or light relief patterning. The sail in the image looks intricate but not lace heavy, so a mix of open and solid rows works beautifully. Keep the border neat and slightly firm. Block the triangle as soon as it is finished so you can judge the final scale.Crochet the rear sail.
Make a second sail that is slightly smaller or differently proportioned. This creates depth. You can repeat the stitch pattern from the first sail or change it slightly to make the design feel artisan made. Add a matching border.Make any supporting smaller panels.
If you want to echo the layered feeling of the photo, create a narrow third panel or small jib style triangle for the front. This is optional but very effective. Even a small openwork triangle near the bowsprit can make the boat feel much more complete.Block every sail and panel carefully.
This is one of the most important steps. Pin each piece to shape. Spray lightly with water or starch and let dry flat. The photo’s sails have crisp edges and graceful tension. Blocking is what gives you that clean showroom finish.Attach the front large sail.
Secure the top point near the front mast top. Stitch the inner vertical edge to the mast or wrap it around a slim support cord. Attach the bottom outer corner to the hull or bowsprit line. Adjust until the triangle sits clean and taut. You should now see the boat start to feel real.Attach the rear sail.
Secure the second sail to the rear mast in the same way. Stand back and compare the angles. The two sails should relate to each other, not compete. If one seems too wide, ease the lower corner inward along the rim before fastening permanently.Add rigging lines.
Use fine strong thread or waxed cotton to run clean lines from mast tops to sail corners and hull anchor points. These lines are a big part of the third image’s elegance. Keep them taut but not overly tight. They should look like delicate drawn lines in space.Add wood bead details.
Small unfinished wood beads near line ends or mast intersections can mimic the charming accents in the photo. Thread them onto rigging before tying knots, or stitch them at strategic points where lines meet. Use restraint. A few beads are lovely. Too many will look crafty instead of refined.Create deck details inside the hull.
You can add a small coiled rope bundle, a tiny crocheted cushion shape, or a wrapped cord ring inside the hull. These details fill the base visually without overwhelming it. If you like the clean minimal feel of the image, keep them tone on tone.Fine tune the stance.
Set the boat on a shelf and look at it straight on. Are the masts vertical. Are the sails balanced. Does the bowsprit point slightly upward or drag visually. Make small corrections now. This stage is where an okay project becomes a beautiful one.Secure and hide all ends.
Weave in yarn ends deeply into dense stitches. For rigging tails, trim after knotting and add a tiny dot of clear glue if needed. Decorative work benefits from invisible finishing.Style the boat in an airy setting.
The photo pairs this design with pale wood, muted books, and simple matte vases. That restrained styling lets the craftsmanship speak. Let your sailboat be the focal point on the shelf.
Troubleshooting
My multi mast layout looks crowded.
Space the masts farther apart and reduce sail size slightly. Negative space is part of the design.
The rigging tangles or sags.
Work one line at a time and tighten gently before knotting. Waxed cotton or stronger thread behaves better than fuzzy yarn.
My hull bends under the mast weight.
Add a firmer insert or shorten the masts slightly. Decorative boats need hidden structure.
The sails do not hold crisp triangles.
Use a tighter border, block harder, or brush on diluted stiffener.
The wood beads slide out of place.
Secure them with tiny knots on either side or tack them in place with a discreet stitch.
Finishing details
Once assembled, lightly steam the hull from a distance to settle the stitches, but avoid dampening the wrapped masts too much. If you want a sharper sculptural look, run a hidden fine wire inside the sail borders before the final border round. That lets you pose the sails subtly. You can also brush a thin layer of clear matte stiffener onto the back of the sails only, which keeps the front looking natural. For a luxurious finish, add a linen oval inside the hull or stitch a narrow cord edge around the rim. Optional upgrades include a tiny name banner at the stern, a coiled anchor rope made from braided yarn, a miniature natural wood block at the mast base, or a faint stripe of soft blue worked into one hull band for a barely there maritime note.
Shop Similar
- Cream cotton rope yarn for crochet decorative vessels
- Light cotton yarn for textured crochet sail panels
- Small unfinished wood beads for coastal craft details
- Wood dowels in assorted sizes for masts and bowsprits
- Clear fabric stiffener for lace and crochet decor
Style it with
Vintage Library Crochet Sailboat How To Guide
What you’re making
You’re making a richly textured crochet sailboat styled for a darker, old world shelf. This version has an oval rope like hull, two grand lace sails, and a deeper, warmer visual mood that works beautifully with antique books, weathered wood, and aged glass. The construction is similar to the first design, but the styling and finishing choices make it feel more substantial and storied.
If the first boat felt airy and Nordic, this one feels like an heirloom tucked into a library. The hull is generous, the sails are decorative and lace filled, and the overall finish should feel warm, tactile, and slightly nostalgic.
Materials + tools
- Natural cotton rope cord or sturdy cotton yarn in warm oatmeal or ivory
- Fine to medium cotton yarn for lace sails
- Crochet hook for hull, usually 5 mm to 6.5 mm
- Crochet hook for sails, usually 2.75 mm to 4 mm
- Wooden dowel for central mast
- Optional slim support rods for sail edges
- Tapestry needle
- Scissors
- Stitch markers
- Measuring tape
- Craft glue
- Optional diluted tea stain or fabric tint for an aged effect
- Optional stiffener spray
- Optional small wood slices, corks, or wrapped buttons for deck detail
Finished size + customization notes
This design suits a finished width of roughly 13 to 18 inches and a height of 14 to 20 inches. Because the photo shows a generous shelf presence, do not make the hull too tiny. If you want the vintage library feel, work in warmer ivory rather than bright white. For a more rustic farmhouse interpretation, add tiny wood rounds inside the hull. For a cleaner classic version, omit extra deck embellishments and focus on the lace.
Step by step instructions
Choose the mood before you choose the yarn.
The biggest difference in this boat is not the basic pattern but the atmosphere. Select yarn in a warm parchment or aged ivory shade rather than a stark cool white. Even a subtle creamy tone will help the finished piece blend into a vintage shelf. If you want an antique feel, you can lightly tint finished pieces later, but start with a warm base color if possible.Crochet a broad oval base.
Chain the center length and work around it in single crochet, increasing evenly at both ends. Keep the stitches firm and close. The hull here should feel a little grander than the simpler shelf boats. You should now see a tidy flat oval that sits well on the table.Turn the oval into a hull.
Work one back loop turning round, then continue upward in even rounds. Use single crochet for a neat rope like texture, or alternate with one row of half double crochet to create subtle shadow lines. The photo shows visible horizontal bands, so slight variation in stitch depth can look lovely.Refine the hull profile.
After several rounds, check the shape from the side. The hull should be low and long, not tall like a basket. Add a decrease round at the short ends if needed to tighten the silhouette. If yours looks wider than the photo, a final shaping round will help pull it into a graceful boat form.Stabilize the hull.
Decorative pieces last longer when the base is supported. Add an insert from felt covered cardboard, plastic canvas, or a stitched second inner base. Because this version may include heavier decorative details, stability matters.Wrap the mast.
Cut the mast dowel to height and wrap it carefully in matching yarn or cord. The wrapped mast blends beautifully into the textile look and softens any harsh wood tone. Secure neatly at the bottom where it will be least visible.Anchor the mast firmly.
Install the mast through the base or stitch it securely to the hull floor and rim. Pull gently to test. The mast should stand upright without twisting.Design the lace sails.
The sails in this image are filled with decorative motifs that feel almost like fragmentary doilies fitted into triangles. You can recreate this look by making a triangular frame first, then filling sections with open fans, shells, chain arches, and mesh. Another simple option is to repurpose sections of lace doily patterns and adapt them into triangular wedges. The key is that the sails look ornate and handmade rather than plain.Work a firm border around the sails.
Use a denser stitch such as single crochet or slip stitch around the finished sail. This border defines the silhouette and helps the lace panels read clearly from a distance. If you want extra control, hold a fine wire or extra yarn strand under the border.Block the sails into sharp shapes.
Pin the sails into matching triangles and block thoroughly. This is especially important with ornate lace because the motifs need space to open. You should now see the decorative patterns clearly. If the inner motifs seem muddled, block more firmly and smooth them by hand.Attach the top sail points first.
Secure each sail near the mast top. Decide how much overlap you want. In the photo, the two sails sit like mirrored wings on either side of the mast, with the inner edges close to vertical. That symmetry is part of the elegance.Anchor the inner sail edges to the mast.
Stitch discreetly down the mast line so the sails hold their upright shape. Avoid visible bulky stitches on the front. Use matching thread if needed.Secure the lower outer corners to the hull.
Pull each sail outward and downward to create tension. Stitch the corners to the hull rim at balanced points. This is your main proportion checkpoint. You should now see a stately, centered sailboat. If one sail appears flatter than the other, loosen and re place the lower corner until the angles match.Add subtle deck elements.
The photo includes rounded and wood like objects inside the hull. You can add tiny cork slices, wrapped cord circles, or little stuffed crochet domes in neutral shades. These details deepen the old world nautical feel. Keep the palette muted.Check the front view and the side view.
A decorative sailboat needs to read beautifully from both angles. From the front, look for symmetry. From the side, look for a gently rising mast and balanced sails. If the hull curves unevenly, steam and reshape lightly.Optional vintage finish.
If you want a softly aged look, brush a very diluted tea solution onto the sails after blocking, or use a fabric tint made for crafts. Test first on scraps. The goal is just a whisper of age, not obvious staining.Secure everything for display.
Reinforce the mast base with extra stitches or glue underneath the insert. Add tiny hidden stitches wherever the sails need support. Decorative shelf pieces can loosen over time if not reinforced.Style the boat in a darker warm setting.
Place it among antique toned books, warm wood, and a few weathered objects. The contrast between soft crochet and old timber is what makes this version feel special.
Troubleshooting
My ornate sail motifs look crowded.
You may be trying to fit too many lace elements into a small triangle. Simplify the pattern or enlarge the sail slightly.
The boat feels too pale for a vintage look.
Use warmer yarn, darker surrounding decor, or a gentle tint on the sails.
My hull sags under the mast.
Add a firmer insert and reinforce the mast base from beneath.
The sail borders ripple.
Too many stitches in the border cause waviness. Undo and reduce the stitch count slightly.
The decorative deck pieces look random.
Repeat the same shape two or three times for cohesion rather than adding many different mini objects.
Finishing details
Steam the hull lightly to settle the stitches and block the sails until every point looks deliberate. If you choose to tint the piece for a vintage effect, do it slowly and sparingly. Too much color will overpower the handmade texture. A beautiful finishing option for this version is a narrow braided cord stitched along the rim of the hull, which adds a tailored edge. Another lovely upgrade is a hidden weight at the base so the boat feels solid when moved. For a true heirloom library mood, add miniature wood slice details, a tiny wrapped cord anchor coil, or a stitched linen insert inside the hull. You can also swap the standard mast wrap for a crisscross wrap near the bottom to mimic old rope work.
Shop Similar
- Warm ivory cotton rope yarn for crochet decorative bowls and boats
- Fine crochet cotton for ornate lace sail motifs
- Wooden dowels for nautical craft mast projects
- Craft stiffener for doily and lace display projects
- Mini unfinished wood slices for rustic embellishments
Style it with
Rustic Maritime Crochet Schooner Step by Step Tutorial
What you’re making
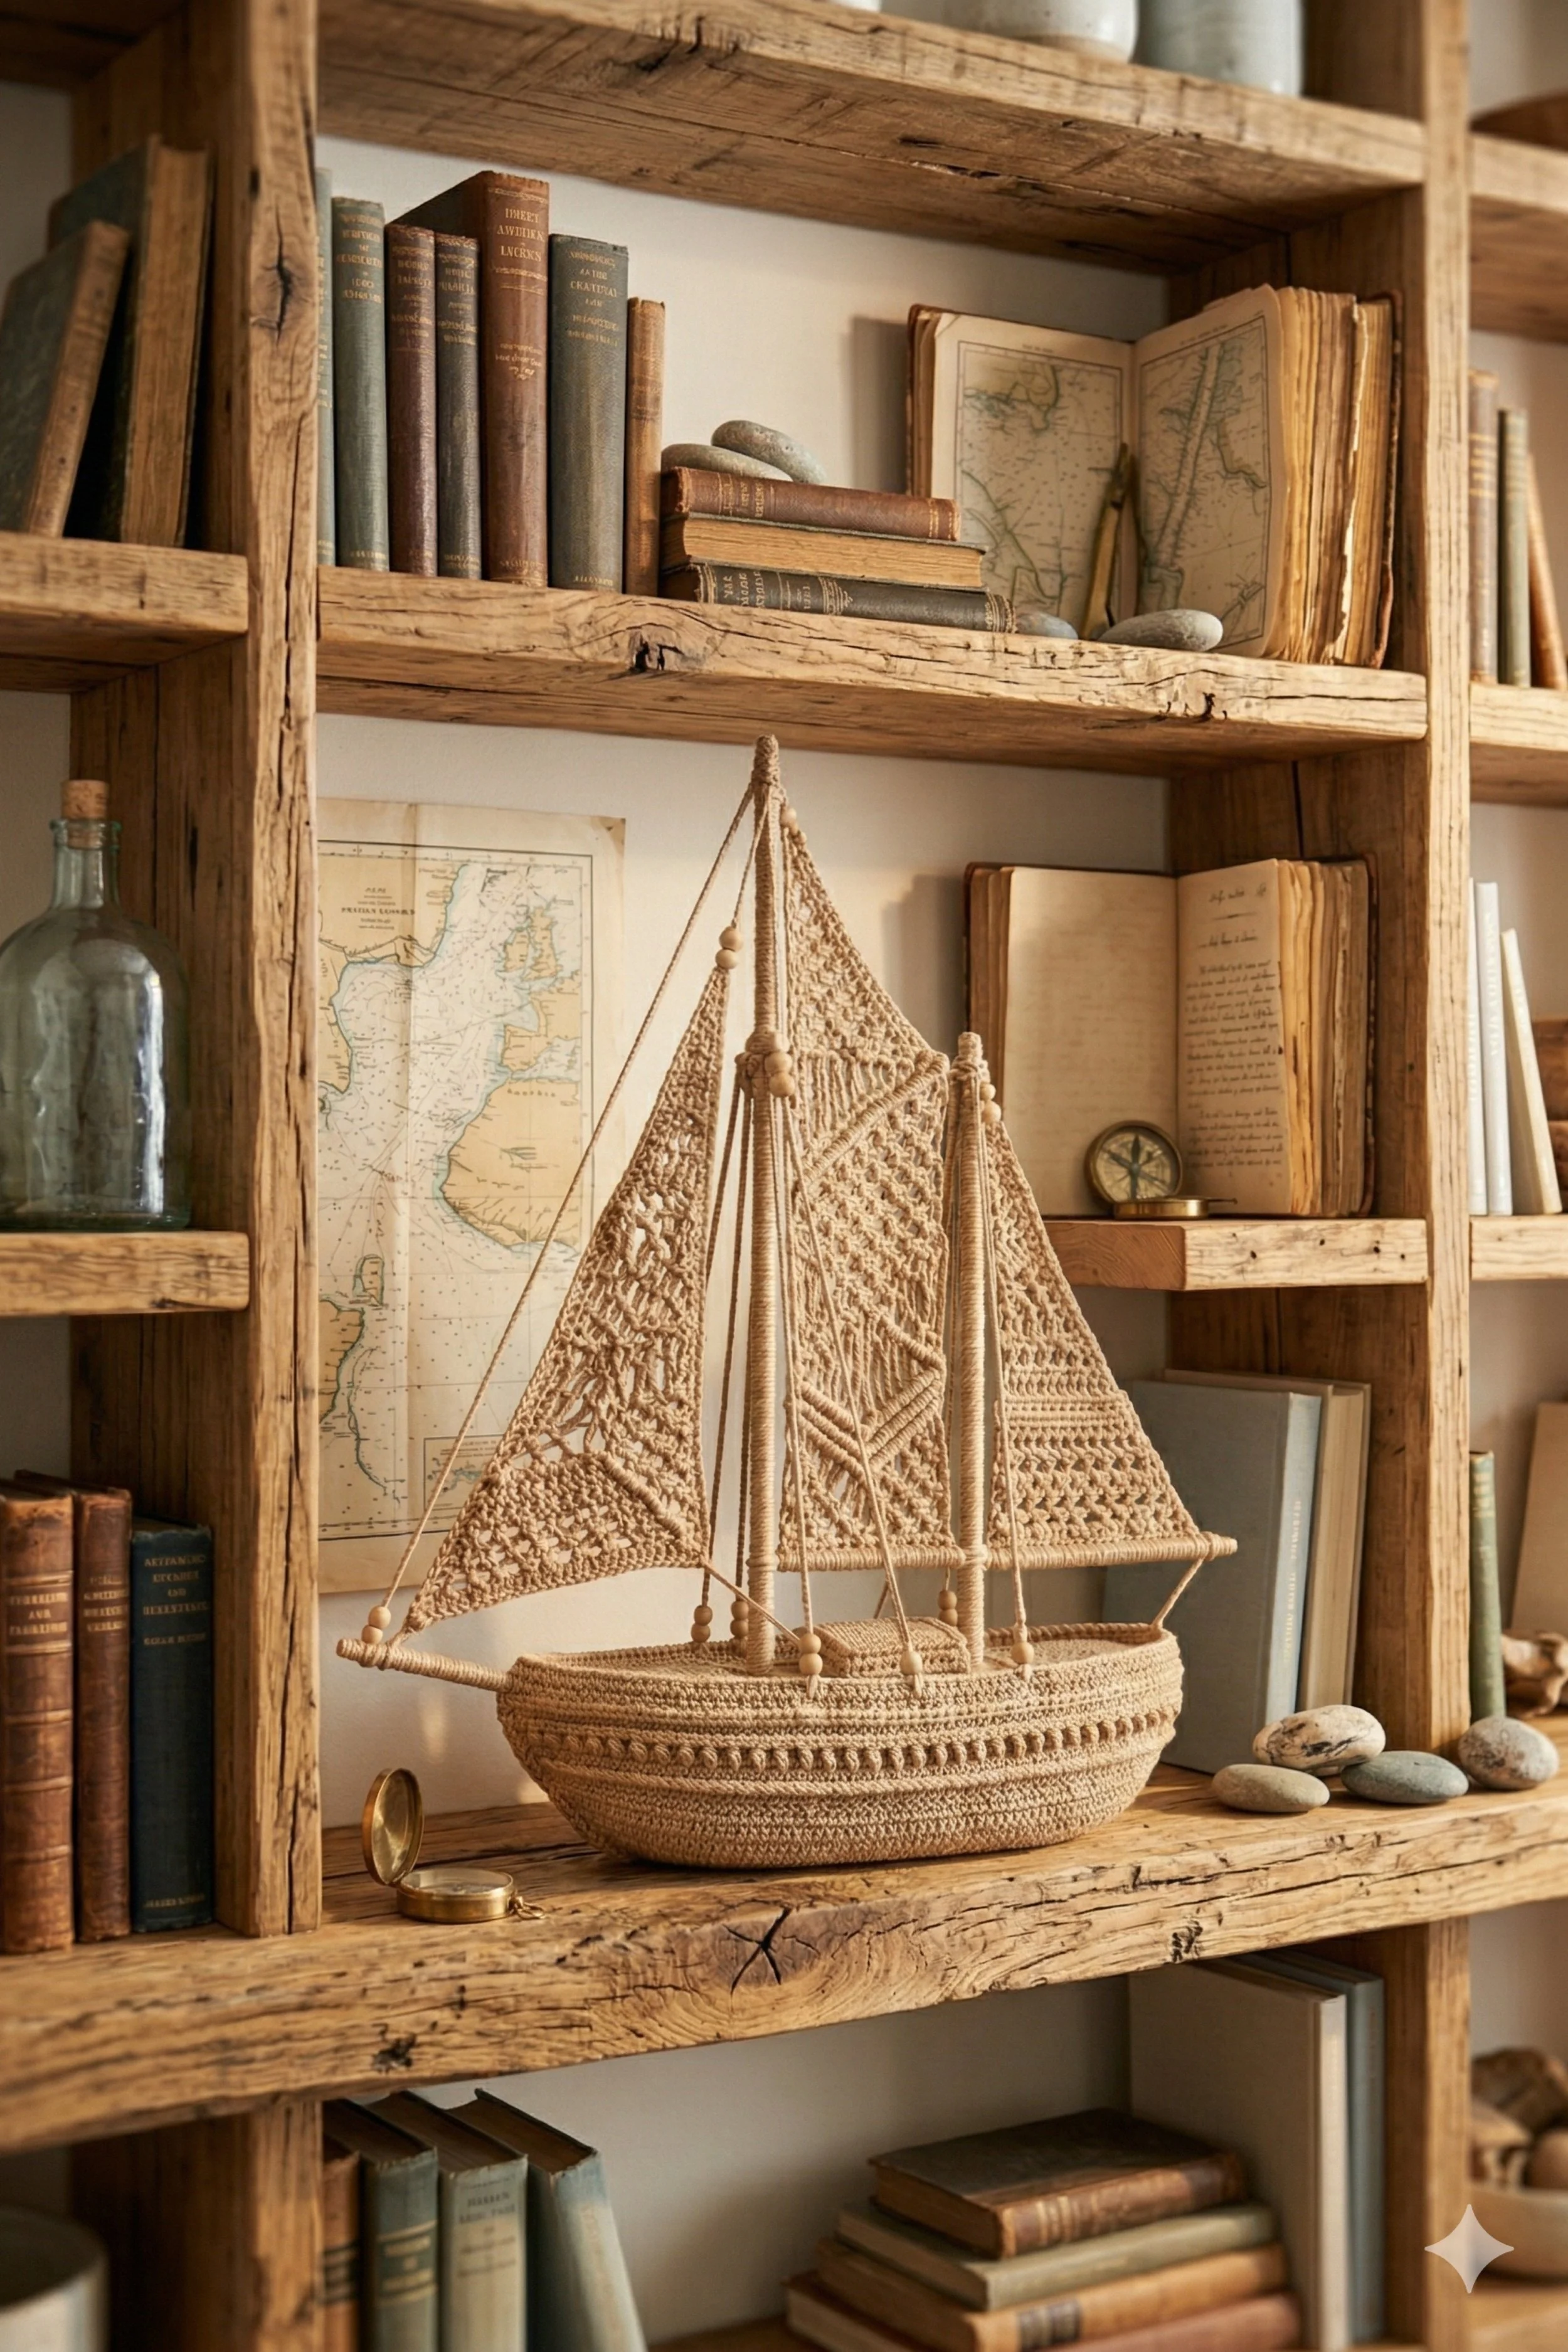
You’re making a rustic crochet schooner with two masts, layered sails, and an old navigator mood that feels perfectly at home on reclaimed wood shelves beside maps, stones, and worn books. This final version has the richest maritime personality of the set. The hull is gently elongated, the sail panels are varied and textured, and the styling leans expedition inspired rather than minimal coastal.
Even though the finished piece looks intricate, the build breaks down into manageable parts: a sturdy oval hull, wrapped dowel masts, textured triangular sails, and delicate rigging lines. The charm comes from thoughtful proportion and well finished details.
Materials + tools
- Cotton rope yarn or braided cotton cord in sandy beige or warm natural
- Medium and fine cotton yarn in matching tone for the sails
- Crochet hook for the hull, usually 5 mm to 6 mm
- Smaller crochet hook for the sails, usually 3 mm to 4 mm
- Two wooden dowels for masts
- One slim dowel for the bowsprit
- Fine strong thread, crochet cotton, or waxed cord for rigging
- Small unfinished wood beads
- Tapestry needle
- Scissors
- Craft glue
- Measuring tape
- Stitch markers
- Optional hidden floral wire for sail shaping
- Optional base insert from plastic canvas or sturdy felt
Finished size + customization notes
Plan for a finished boat around 14 to 20 inches wide and 16 to 22 inches tall if you want the same full shelf presence as the photo. This version can handle a little more embellishment than the others, so it is a good choice if you love detail. Make it simpler by omitting beads and extra rigging. Make it more adventurous by adding a small rolled map, tiny cord coil, or miniature pebbles around the display setting instead of on the boat itself.
Step by step instructions
Establish the schooner proportions.
This boat has more visual complexity than the others, so start with a plan. Draw the hull, front mast, rear mast, and bowsprit in profile. The front mast should be a little taller, with the second mast slightly shorter and set behind it. This staggered arrangement creates the layered historic ship feeling you see in the photo.Crochet a long oval hull base.
Begin with a chain to match your desired center length. Work single crochet around both sides, increasing evenly at the ends. Use markers so your increases stay balanced. The hull should be long enough to support two masts comfortably with room between them.Turn the sides upward.
Work one round in the back loop only, then continue in even rounds. You can combine single crochet and half double crochet for subtle banding. The hull in the photo has lovely definition along the upper section, so you may want one decorative ridge near the top third.Shape the rim and upper hull.
Add a round with small decreases at the ends to refine the boat shape. Then finish with one or two plain rounds for a steady rim. If yours still reads like a basket more than a boat, shorten the walls slightly or taper the ends more.Strengthen the base.
Multi mast decorative boats need support. Insert a fitted piece of plastic canvas, covered cardboard, or double crochet fabric into the base. Stitch it down invisibly if possible. Add a little hidden weight if your masts are tall.Prepare both masts and the bowsprit.
Wrap the dowels tightly with matching yarn or cord. On this rustic version, slightly visible wrap texture is a good thing. It adds handmade rope character. Prepare the bowsprit as a slim wrapped dowel that extends forward from the bow.Install the mast framework.
Attach the front mast first, then the rear mast. Angle the bowsprit slightly upward from the front of the hull. Check from the side that the lines feel graceful. You should now see the old sailing vessel profile take shape.Crochet the main front sail.
Make a tall triangle using mixed texture stitches. Combine mesh, crossed stitches, and small solid sections to mimic the patterned sail in the photo. Keep the border neat and slightly firm. The sail should feel handcrafted and rich, not too delicate.Crochet the rear sail.
Make a second sail with a different but related stitch pattern. The photo shows variation between panels, which makes the boat feel layered and artisanal. Try a denser center band or a slightly different mesh repeat.Crochet the small front sail or jib.
A smaller triangular panel near the bowsprit or front mast adds depth and realism. Keep it simpler than the main sails so it does not compete. Even a modest little triangle helps complete the schooner silhouette.Block all sail pieces.
Dampen and pin them into clean triangles. If you want sculptural crispness, add a little stiffener. Blocking is especially important when multiple sails must relate to each other visually.Attach the main front sail.
Stitch the top point to the front mast, secure the inner edge along the mast, then tension the lower outer corner toward the hull or bowsprit. Keep checking from the front. You should now see the first dramatic sail plane.Attach the rear sail.
Secure it to the rear mast in the same way. Compare the angle of the lower edge to the first sail. The two should feel coordinated but not identical.Attach the small front panel.
Place the smaller sail so it fills the front area without crowding the larger pieces. This step brings the layered nautical feeling visible in the image.Add rigging lines.
Run fine lines from mast tops to sail corners and hull anchor points. Knot neatly and hide ends. These lines are visually powerful. They frame the sails and make the boat feel architectural. If a line sags, retie it before trimming.Thread on wood beads where helpful.
Small beads at strategic connection points echo the photo’s charming handcrafted details. Use them sparingly at sail corners or rigging intersections.Add subtle deck and hull accents.
Consider a tiny rope coil, a stitched raised band along the hull, or a miniature wrapped detail between the masts. Because the photo setting includes maps and stones, this boat suits slightly more narrative detail than the other versions.Check balance from every angle.
Place the boat on a shelf and look at it from the front, side, and slightly below. Is one mast leaning. Does one sail jut farther forward. Does the bowsprit feel centered. Make corrections while the piece is still easy to handle.Secure everything for long term display.
Add reinforcing stitches under tension points, especially where the sail corners meet the hull and where rigging lines tie off. Decorative pieces loosen over time if these joins are weak.Style it like a collected maritime object.
Set it among old books, a small brass compass, maps, smooth stones, and warm wood shelving. The softer the surrounding palette, the more the crochet texture stands out.
Troubleshooting
My two mast layout feels messy.
Simplify the rigging and reduce sail overlap. The easiest fix is more space between the masts.
My bowsprit droops.
Use a stronger dowel or anchor it more firmly into the hull front with extra stitches and glue.
The sails do not match the rustic photo mood.
Choose warmer yarn and slightly denser texture stitches rather than very airy lace.
My hull twists when I add the second mast.
The base likely needs more reinforcement. Add a firmer insert and restitch the mast base.
The wood beads make it look too crafty.
Use fewer of them and keep them all the same size and natural tone.
Finishing details
Steam the hull lightly once the structure is complete so the stitches settle into smooth bands. If the sail edges need sharper definition, work one final border round with a smaller hook or insert a hidden fine wire inside the edge. Brush diluted stiffener onto the backs of the sails if needed, then reshape them while damp. For a premium finish, line the inside of the hull with natural linen or a tightly fitted crochet insert in a slightly darker neutral for depth. Optional upgrades include a tiny anchor made from wrapped wire, a coiled rope detail near the stern, a stitched name pennant, or a few miniature knots at the rigging ends for authentic seafaring charm.
Shop Similar
- Natural cotton rope cord for crochet boat hull projects
- Beige cotton yarn for textured nautical crochet sails
- Wood dowels and slim rods for model sailboat masts
- Natural unfinished wood beads for handmade boat details
- Craft stiffener and shaping spray for crochet decor
Style it with
Each of these crochet sailboats proves that handmade decor can be both charming and beautifully refined. With the right yarn, careful shaping, and a little patience in the finishing, you can create pieces that look just as lovely styled on a shelf as they do in the making process itself. Some lean light and minimal, some feel heirloom and lace rich, and some bring in a more rustic maritime story, but all of them offer that same quiet handcrafted beauty.
Use these tutorials as a starting point, then make them your own with different sail textures, hull proportions, subtle color changes, or decorative details that suit your home. Styled with books, pottery, driftwood, or vintage finds, these boats become more than simple crochet projects. They become display pieces with personality. Soft, textural, and endlessly giftable, they are the kind of craft that keeps earning a place in your home long after the final end is woven in.